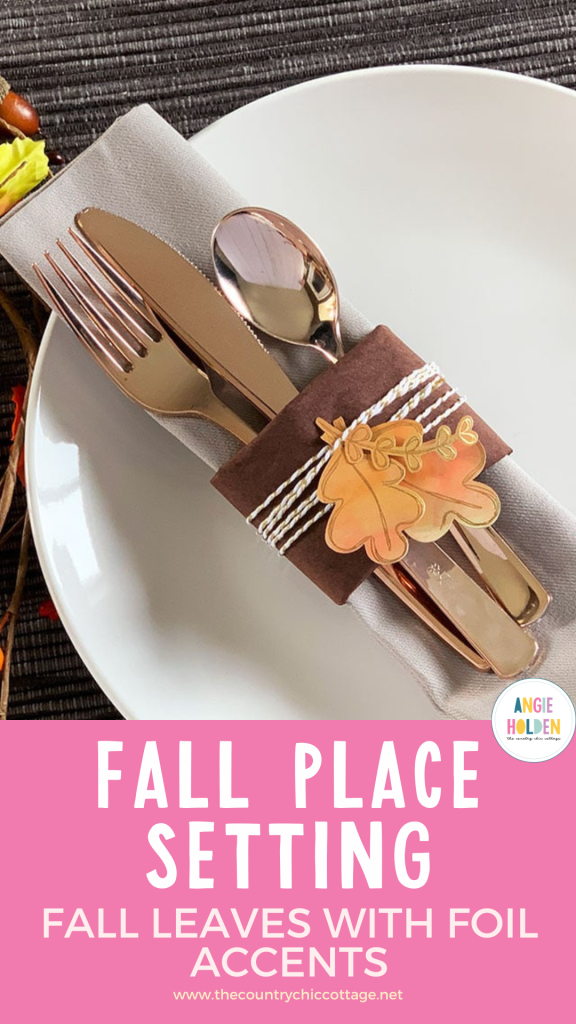
Are you getting your Thanksgiving table ready? Here's a quick and easy way to create beautiful fall leaves using your Cricut machine. These foiled leaves make for a lovely place setting and are perfect for all your fall gatherings. This quick place setting from Jen Goode is perfect for all your fall events.
How To Cut Out Fall Leaves
Decorate your fall table with pretty gold foil accent leaves you can make yourself! In just minutes, your Cricut machine can cut and draw fall leaves. Use your leaves to decorate each fall place setting and add a little sparkle to your festivities.
So, grab your Cricut machine and let's get crafting! We'll cut leaves and add foil to create decorative napkin rings for a pretty place setting. In no time, your fall table will be beautiful!
Supplies Needed To Cut Out Fall Leaves
- Cricut Machine and Cricut Design Space
- Fall Leaves SVG cut file by Jen Goode – Download here
- Cricut Foil Transfer tool
- Gold foil sheets
- Cardstock
- Extra paper and twine
NOTE: This fall project features the Cricut foil transfer tool. However, you can get a similar look using a glitter gold Cricut pen if you don't have the foil tool yet. Simply switch the setting to ‘draw' instead of ‘foil' in Cricut Design Space.
Step 1: Upload SVG To Cricut Design Space
Upload the leaf SVG cut file to Cricut Design Space. Separate the layers; each leaf consists of three layers. Hide the middle layer for each leaf and set the layers to cut the leaf shape and foil the line art. Resize the leaves to the size you prefer. I set mine to about 2″ tall.
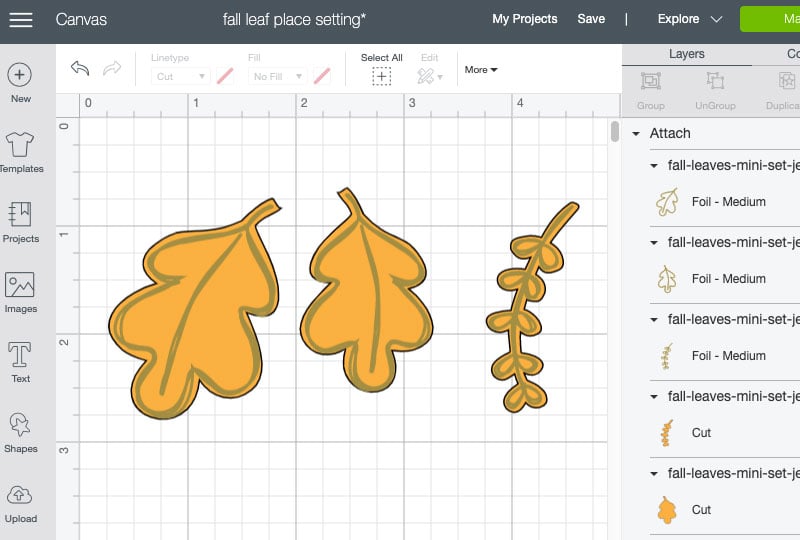
Step 2: Attach Each Line Accent To Its Leaf Shape
Ensure that each line accent is attached to its corresponding leaf shape. I just set all the leaves and draw lines to attach them as one image. Either way works.
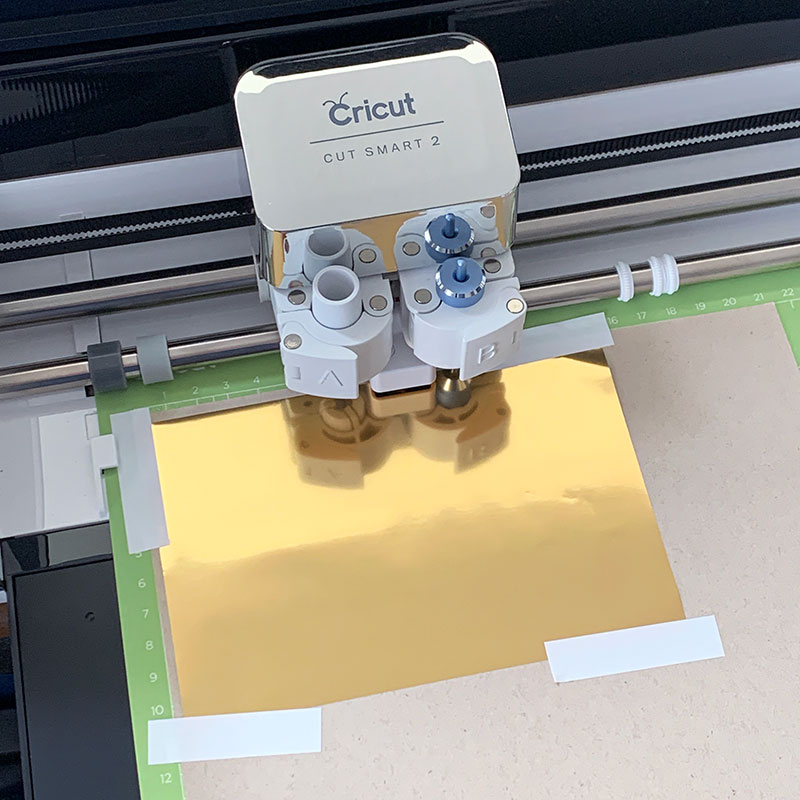
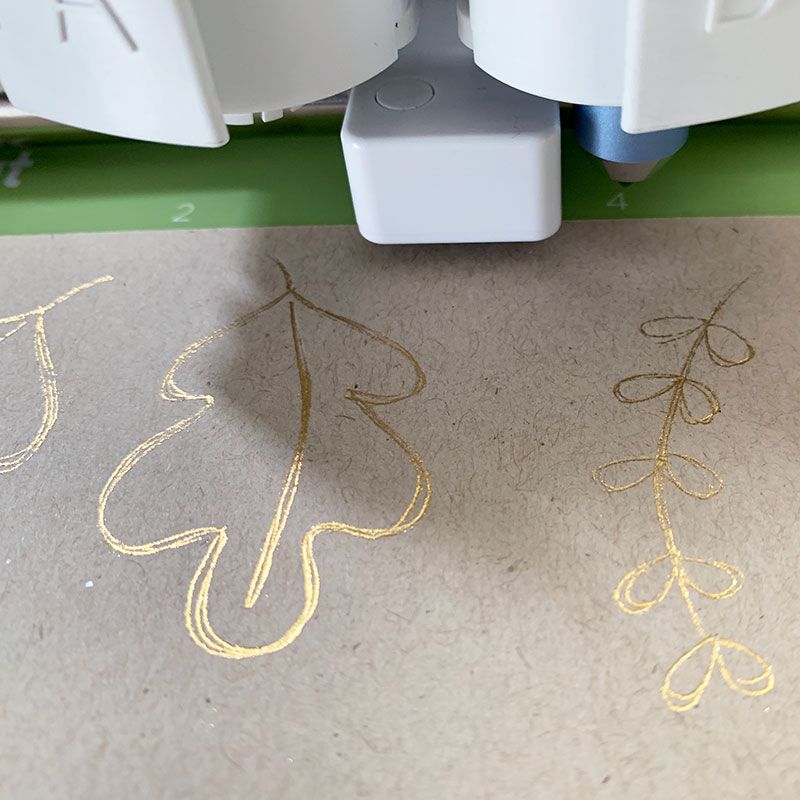
Step 3: Foil & Cut Out Fall Leaves
Follow the on-screen instructions to foil and cut out the leaves.
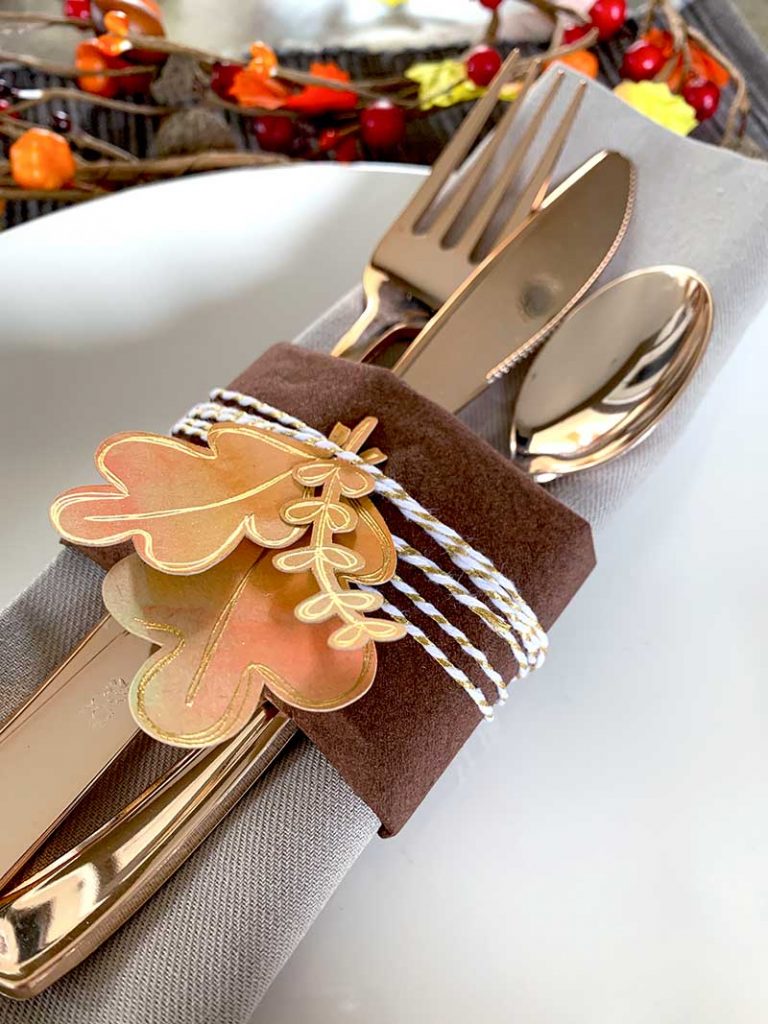
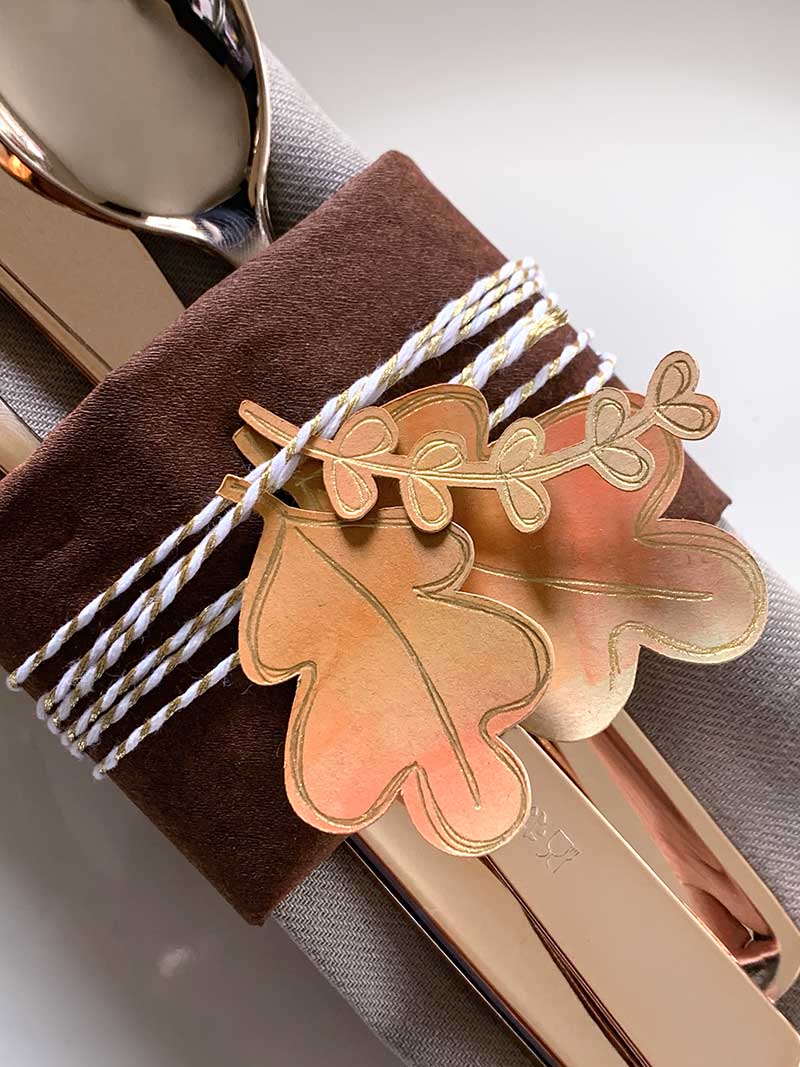
Step 4: Create Napkin Rings
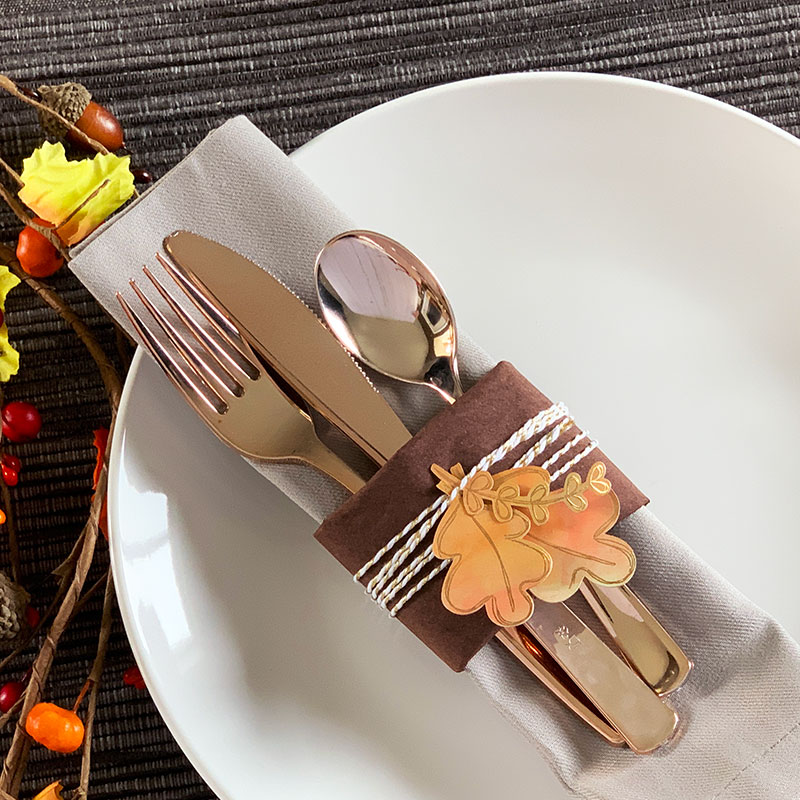
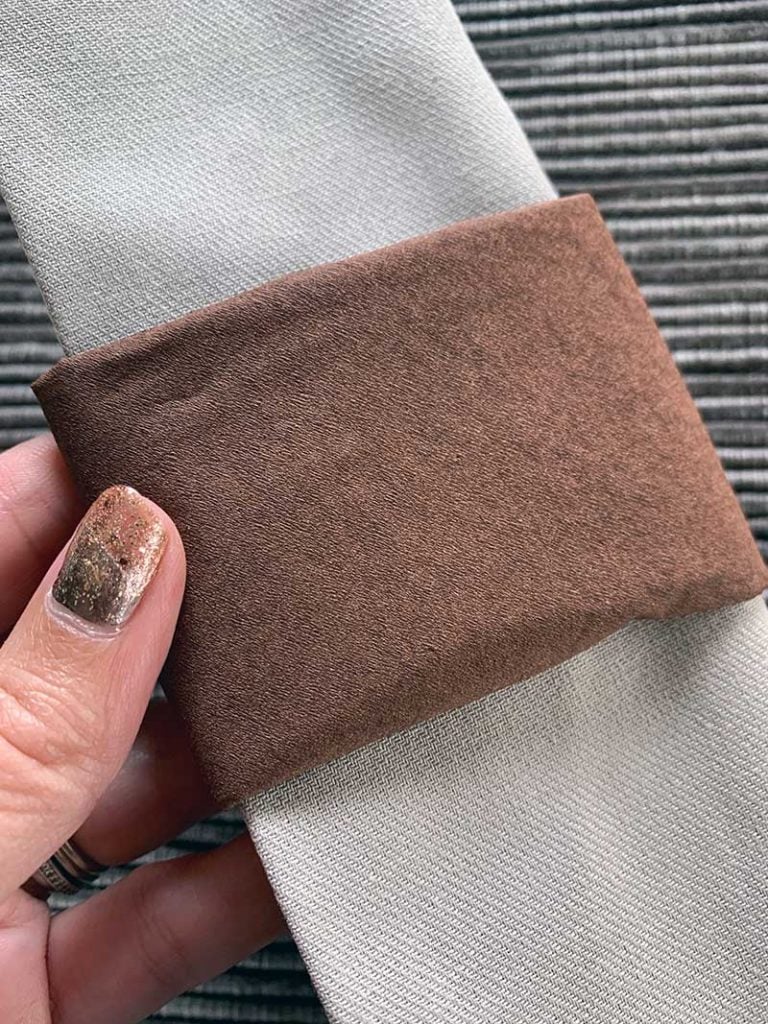
To make the napkin rings, wrap a napkin with a band of paper or fabric. I used a brown paper napkin for my band.
Next, wrap with twine and tie in place. Finally, add the foil-accented leaves you've created. You can tuck them into the twine or glue them in place.
NOTE: You can add more interest to your fall place setting by using different paper colors, too. I used watercolor paints to add a splash of color to my cardstock before cutting. You can also print a printable background paper on plain cardstock for extra interest. Here's a similar leaf place setting with Fall background papers you can download.

I finished off the look with rose gold plastic flatware from Party City. I think it added just the right look for a fabulous fall setup!
This project is really a quick and easy craft that adds a punch of sparkle. Perfect for dressing up the table, no matter the occasion!
Also, even though we are talking about Thanksgiving, this idea is perfect for any fall dinner party or event. Small touches like this will really make your holiday feel extra special!
FAQs About How To Cut Out Fall Leaves
Here are a few common questions that I often see readers asking about how to cut out fall leaves.
If your question isn’t listed, feel free to drop it in the comments and I’ll be happy to help!
Where Do I Get The Free Fall Leaves SVG Cut File?
You can get the free fall leaves SVG cut file by clicking here!
What Cricut Machine Can I Use For This Project?
If you are going to use foil in this project, you need to use the Cricut Joy series either a Cricut Maker series or Cricut Explore series, or Ventrure models. If you want to use a glitter gold pen as well Cricut Joy.
I Have Never Use The Foil Transfer Tool. Do You Have Any Resources To Help Me?
Absolutely! If you can see more about using the foil transfer tool here!
What Type Of Paper Did You Use For This Project?
I used brown kraft cardstock.
5 More Fall Crafts
Did you love learning how to cut out fall leaves and want more fall crafts? Then check out the projects below!