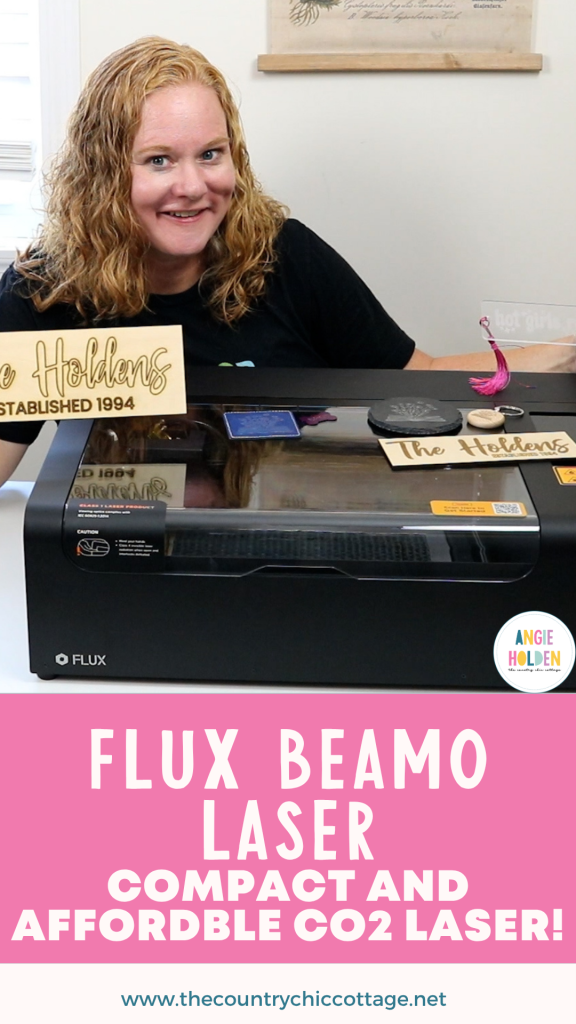
If you've been looking for a compact laser that can cut clear acrylic, you need to check out the FLUX beamo. This is a compact laser, but it's a C02 laser and it can cut all the materials a traditional C02 laser can cut, including clear acrylic.
This is the perfect laser for beginners, people who own a diode laser and want to use more materials, and people who are limited on space.
If you're trying to figure out which laser is right for you, my Laser Ready course is sure to help.
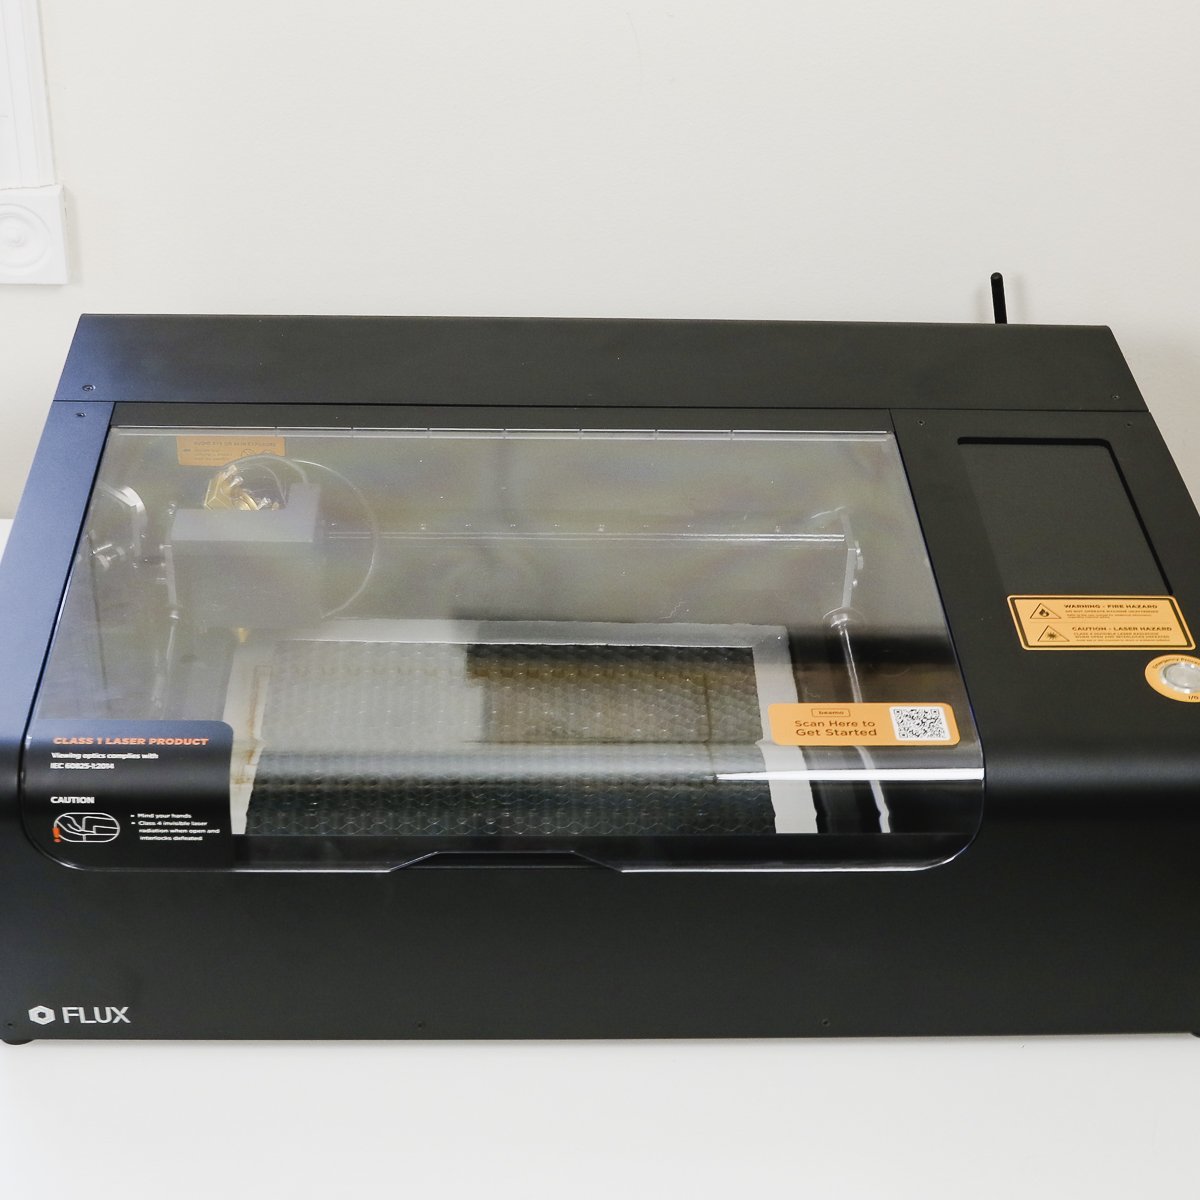
FLUX beamo is a 30-watt C02 laser. With this laser, you can cut and engrave wood, acrylic, and many other materials. Today I'm also going to engrave slate, leather, and coated metal.
You can watch me set up the laser and test these blanks by pressing play on the video below.
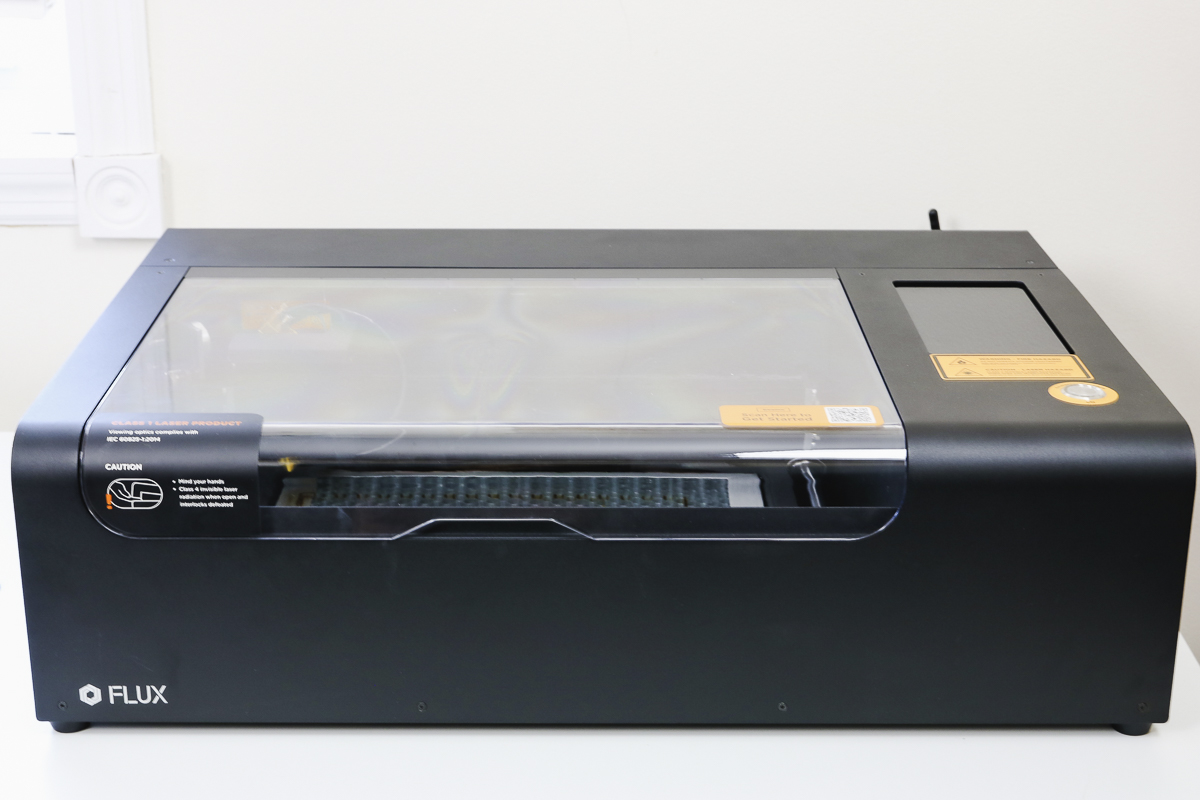
FLUX beamo C02 Laser
First, I want to show you a bit more about the laser itself then I will put it to the test on a few projects.
What Comes with the FLUX beamo?
When you unbox the beamo, you'll want to open the top of the laser and remove everything from inside. You'll find the following included:
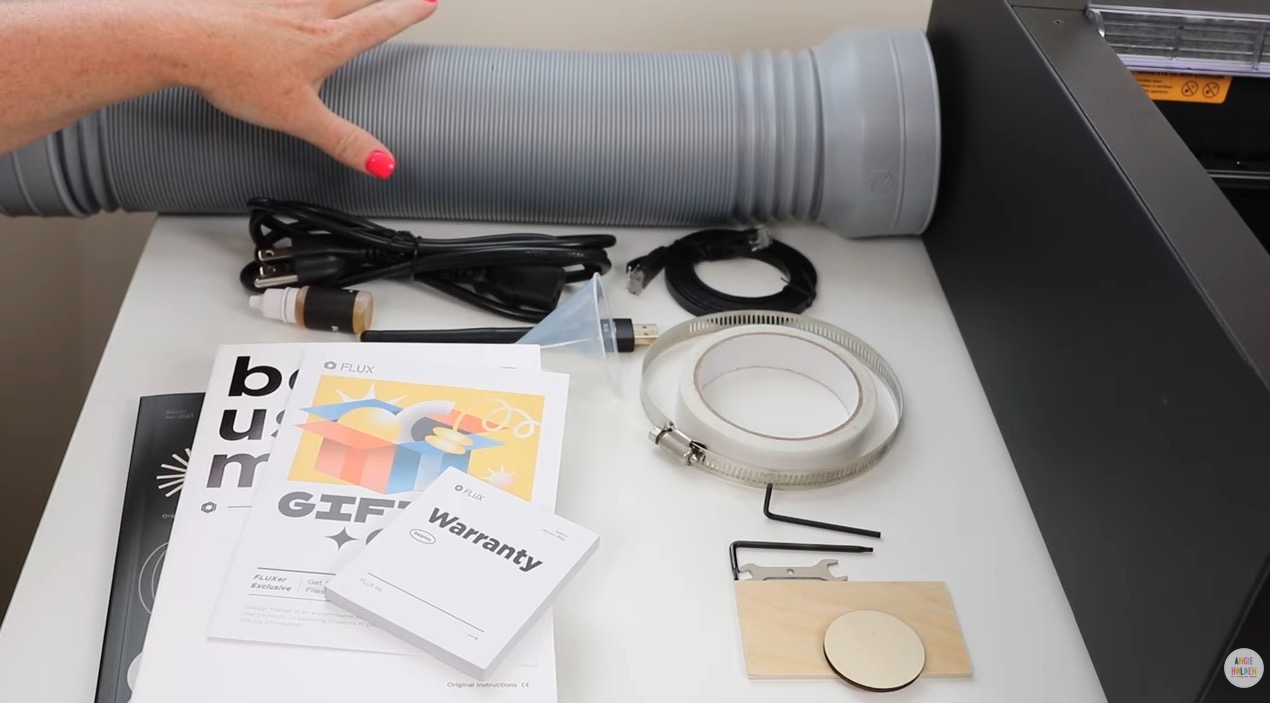
- Vent Hose
- Power Cord
- Additional Cord
- WiFi Antenna
- Clamp for Vent Hose
- Double-sided Tape
- Various Tools
- Funnel
- Lubricating Oil
- Quick Start Guide
- Warranty Info
- Instruction Book
- Gift Card for Use on the FLUX Site
- 2 Pieces of Wood to Use for Your First Projects
Additional Accessories
In this post, I am going to show you the FLUX beamo laser itself. The only accessory I'm going to show you is the auto-focus. I do want to say that the manual focus is so easy to use, you may not choose to get the auto-focus.
Additional accessories you can purchase include:
- rotary tool for engraving on tumblers
- air filter accessory that allows you to use the laser without venting it out a window
- diode laser head that can be used in this laser if you would like
What Size Materials Can You Use in FLUX beamo?
The working area in the FLUX beamo is 11.8 inches by 8.2 inches. I was able to use 12-inch by 12-inch material in the bed, but you cannot cut the full 12 inches.
The maximum cut depth is about 5mm, but that will vary by material type.
There is a honeycomb tray installed at the bottom of the laser bed. If you remove the tray, you can engrave materials up to 45mm thick.
Set Up the FLUX beamo Laser
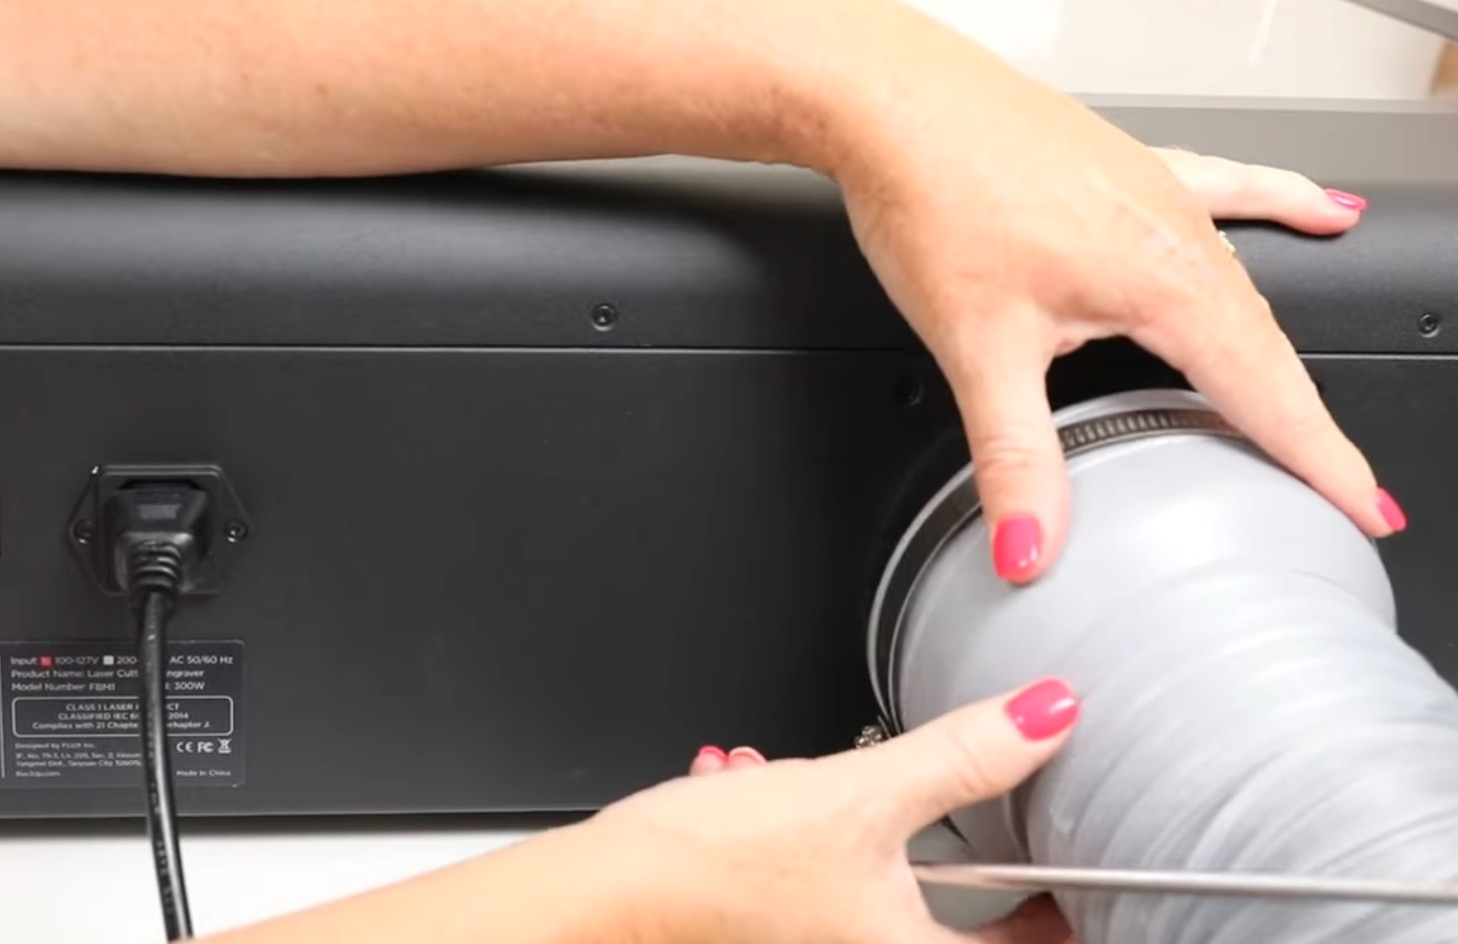
Now that we have everything out of the laser, we can get it set up. Make sure the honeycomb tray is in the bed of the laser, and add the power cord to the back of the laser.
Insert the WiFi antenna and remove the foam from the end of the vent hose, and attach it to the back of the laser with the included clamp. Tighten the clamp so the hose stays attached to the laser.
Plug in the laser and then power it on. The screen will light up, and you can follow the instructions on the screen to set up the laser.
The screen is a touchscreen, and you'll see it has you select your language and walk you through the safety warnings.
Next is the Start Up Test. If this is your first time using the laser, do not skip this step. Follow the step-by-step instructions on the screen. This will test your laser and make sure it is functioning properly. If you have any issues refer to your manual.
During this test, you'll be prompted to place a piece of double-sided tape on the laser head, and when you remove it, you should see a burn hole in the middle of the tape. You'll be prompted to do this twice.
If you have any issues during this step, refer to your user manual for how to troubleshoot the problem.
Use the screen to connect the laser to your WiFi.
Check the Coolant Level in the FLUX beamo
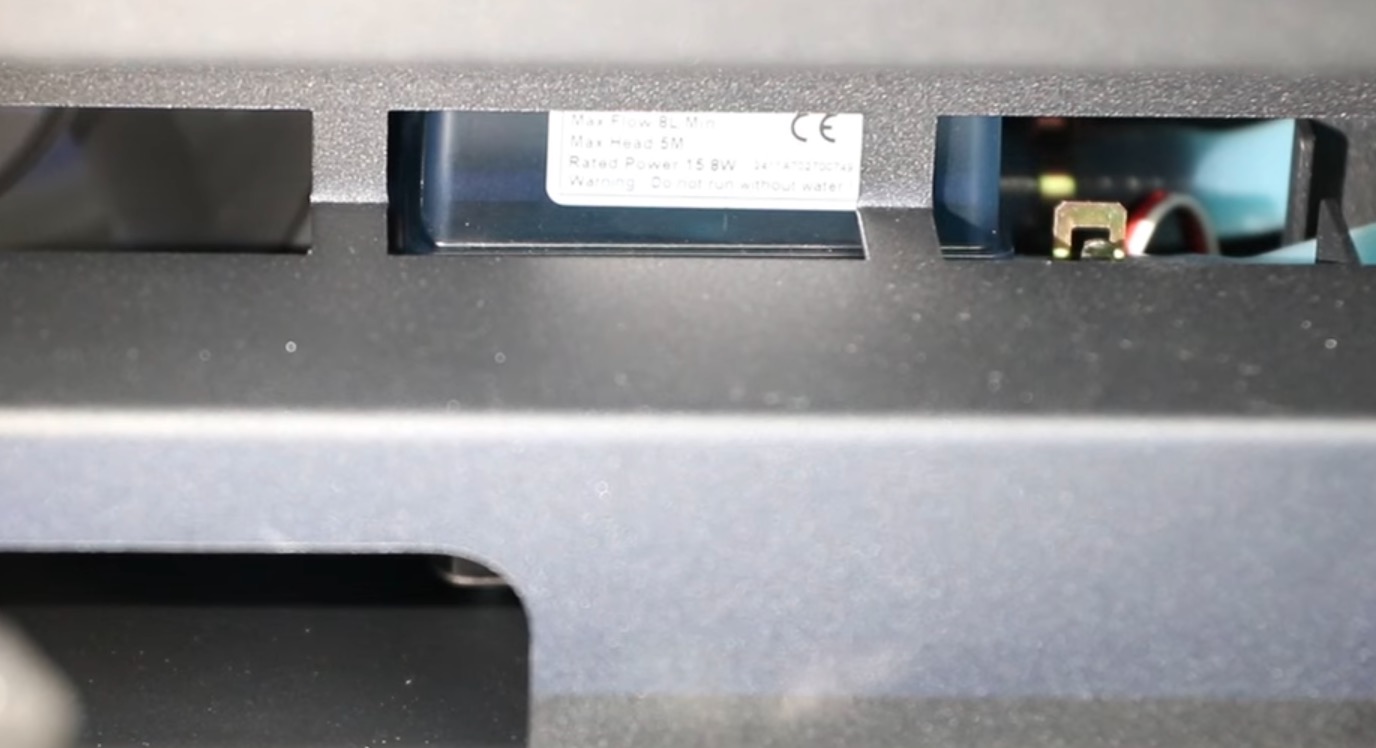
You need to check the coolant level in your laser before using it for the first time.
Open the top of the laser and look at the back of the laser. You'll see a tank that has a label on it, and you want the fluid level to be at approximately 80%. This is about even with the top of the laser.
My fluid is low, so I'm going to open the laser and add more
Before you remove any of the cover, make sure the laser is turned off and unplugged. Remove the screws from the back cover. There are 2 screws on the top and 4 on the back.
Lift the cover off and you'll see some hoses.
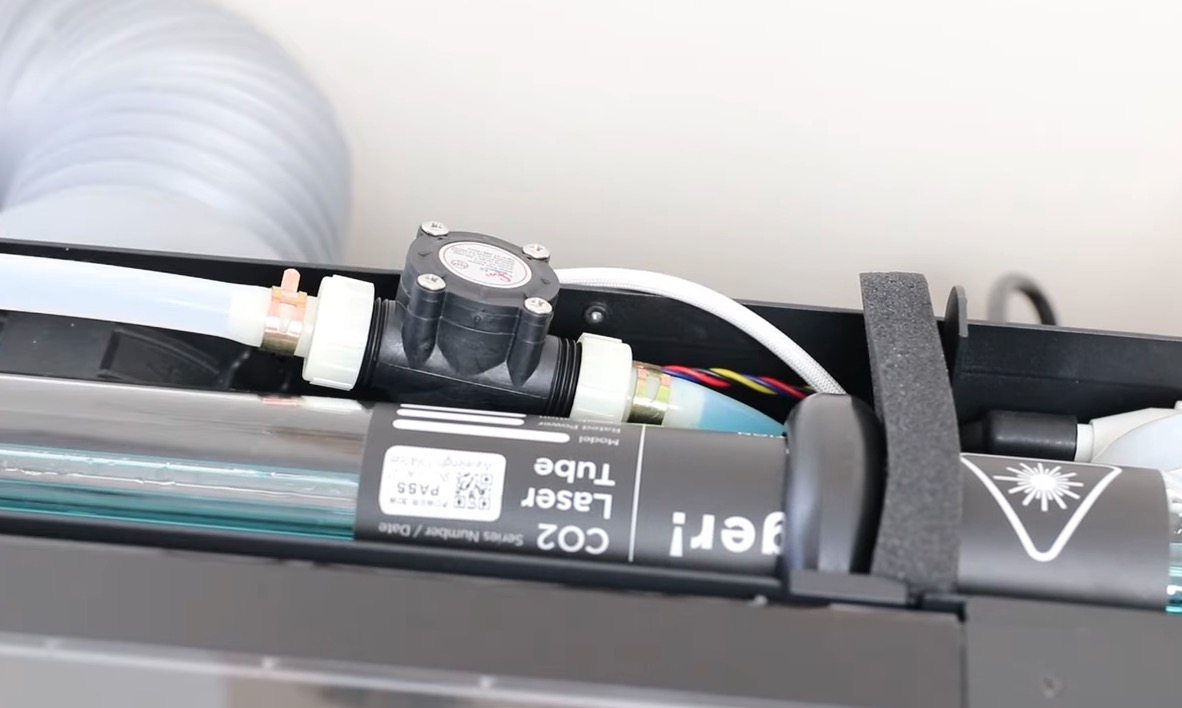
Under the hoses is a tank, and there is a plug on the top. Move the hoses to the side and use a flathead screwdriver to unscrew the plug.
Add the funnel to the tank and make sure it's down in there so it doesn't spill into the laser. Add distilled water to the tank, filling it up to about 80%.
Note – Only fill the tank with distilled water and fill it slowly. Add a little at a time and keep checking the tank so you don't overfill it.
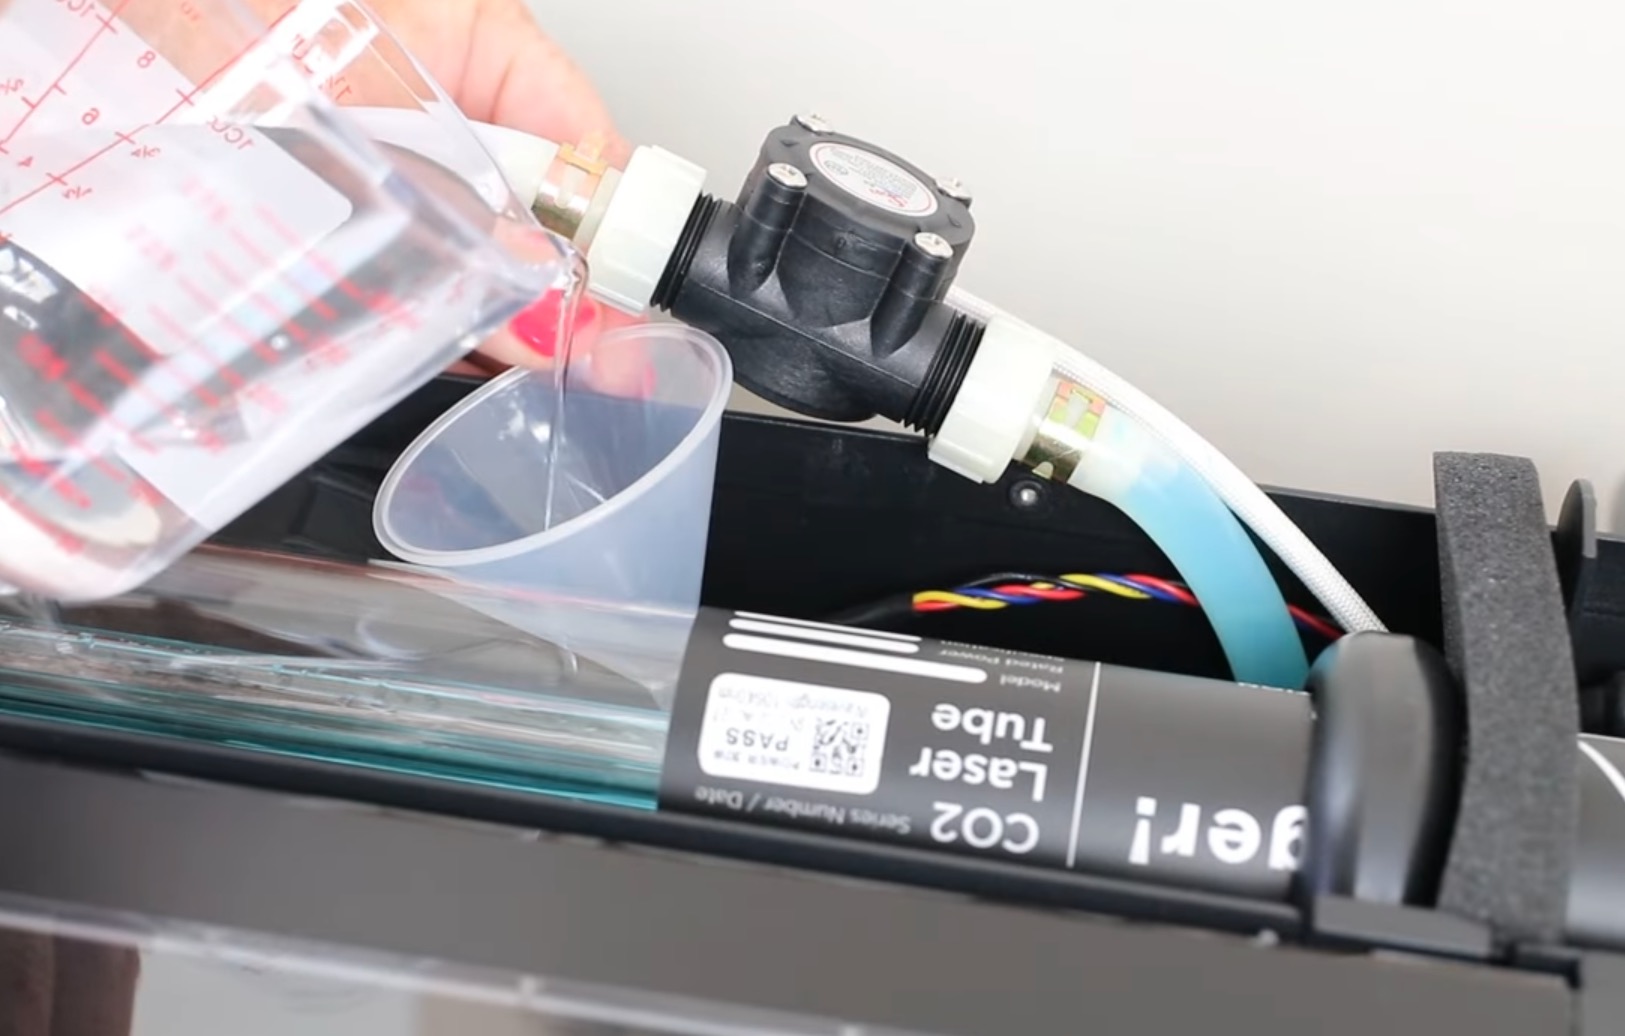
When the tank is filled, remove the funnel and replace the plug using a flathead screwdriver.
Put everything back in place and replace the back cover using all 6 screws.
Laser Safety
With the laser set up, let's talk about laser safety before we make our first project.
- Always vent your laser. You can vent it out a window or use the optional air accessory.
- The top of this laser is clear. If you want to look at the laser while it's operating, make sure you're wearing protective eyewear that is approved for use with a laser.
- Never leave the laser unattended while in use, and make sure you have a fire extinguisher and/or fire blanket nearby in case of a fire.
- Another thing you need to be aware of is the materials you're using in your laser. Always ensure you're using laser-safe materials. Some materials can be hazardous when cut or engraved with a laser.
Install FLUX Beam Studio
FLUX Beam Studio is the software you'll use with FLUX lasers. There is a learning curve with Beam Studio. I have another FLUX laser, so I've used Beam Studio before. I recommend taking some time to get to know the software.
Download the software and then connect the software to your laser.
I love the touchscreen on the FLUX lasers; there are a lot of things you can do with the laser right on the touchscreen.
How to Make a Project with the FLUX beamo Laser
It is time to make a project with this machine and see how easy it is! I am starting by cutting and engraving wood but I made a few other example projects below!
Supplies Used
- Book with Flowers File
- Bookmark File
- FLUX beamo Laser
- Laser Safety Glasses
- Leather Patch
- Slate Coaster
- Acrylic Sheets
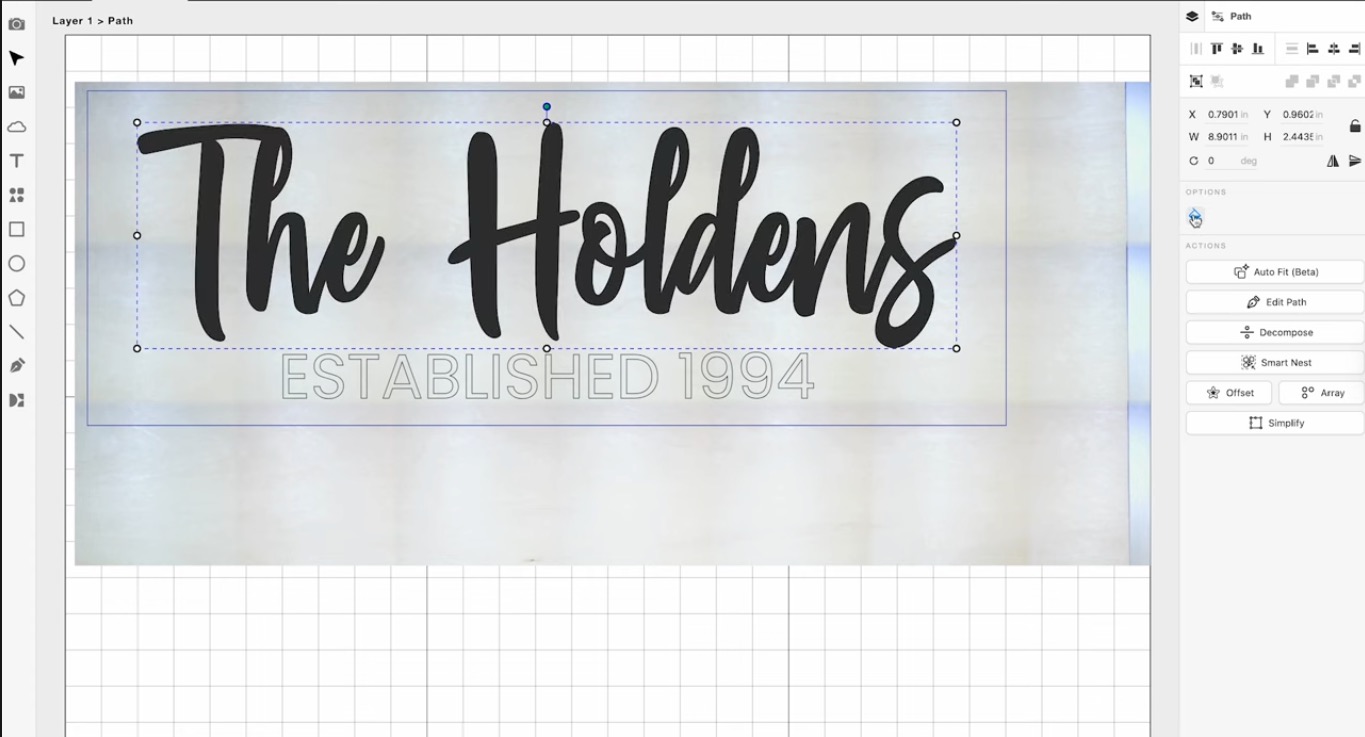
Step 1. Create Design in Beam Studio
Place a piece of plywood in the bed of the laser and then design an image in Beam Studio.
I used the text feature to add 2 lines of text to be engraved, and then added a rectangle layer around the text to be cut.
Step 2. Decide on Outline Engrave vs Filled Engrave
I have my design set up to do an outline engrave. If you want to engrave the whole design, select the fill option.
With the fill option selected, you'll see the design filled in. You can choose between these options.
Step 3. Locate Design
I moved the design up to the corner to try not to waste material. Avoid the blind area, and then click the camera on the left toolbar, and then drag the cursor over the design.
This will prompt the laser to take photos of the bed, and on the screen, you'll be able to see the material, and you can make sure your design is on the material.
My design is completely on the material, so I can move on to the next step.
Step 4. Manually Focus the Laser
Now that we have our design set up and the material in the machine, we need to focus the laser. If you don't have the Auto Focus accessory, you can easily manually focus the laser.
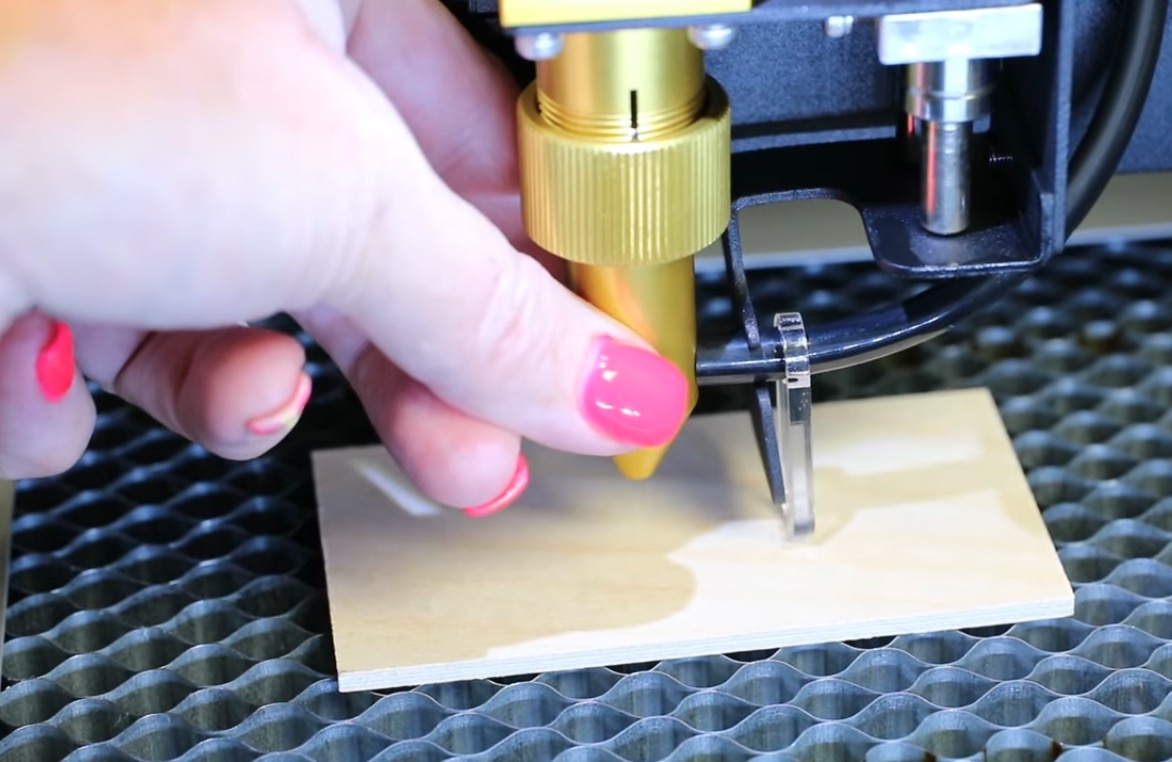
Flip the clear tab down and then loosen the laser head, and you can slide it up or down until the tab touches the material. When it touches, tighten the laser head, and then flip the clear tab back up.
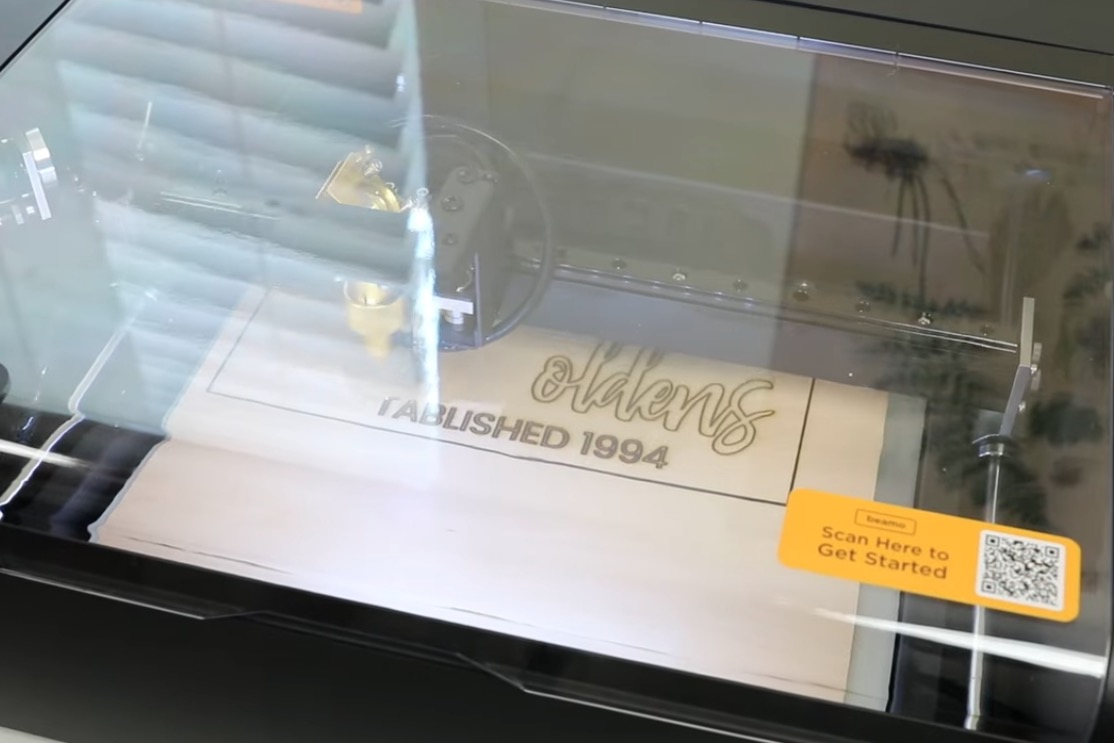
Step 5. Cut and Engrave
Press start to begin the process, and you'll see a box pop up with the estimated time. You can also watch the display screen to see where the laser is in the process.
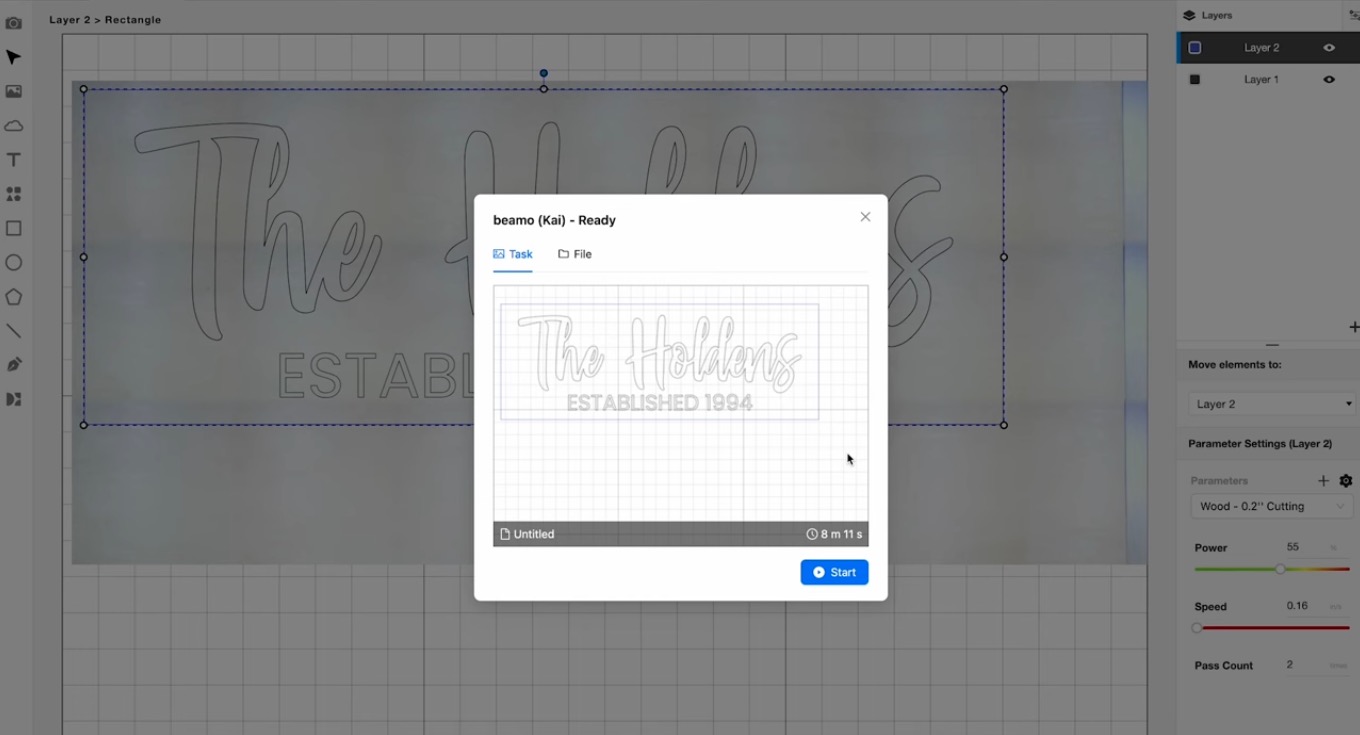
Make sure you're wearing protective eyewear if you want to watch the laser.
Step 6. Remove Completed Project
When the laser is done, we can open the top of the laser and remove the project from the bed.
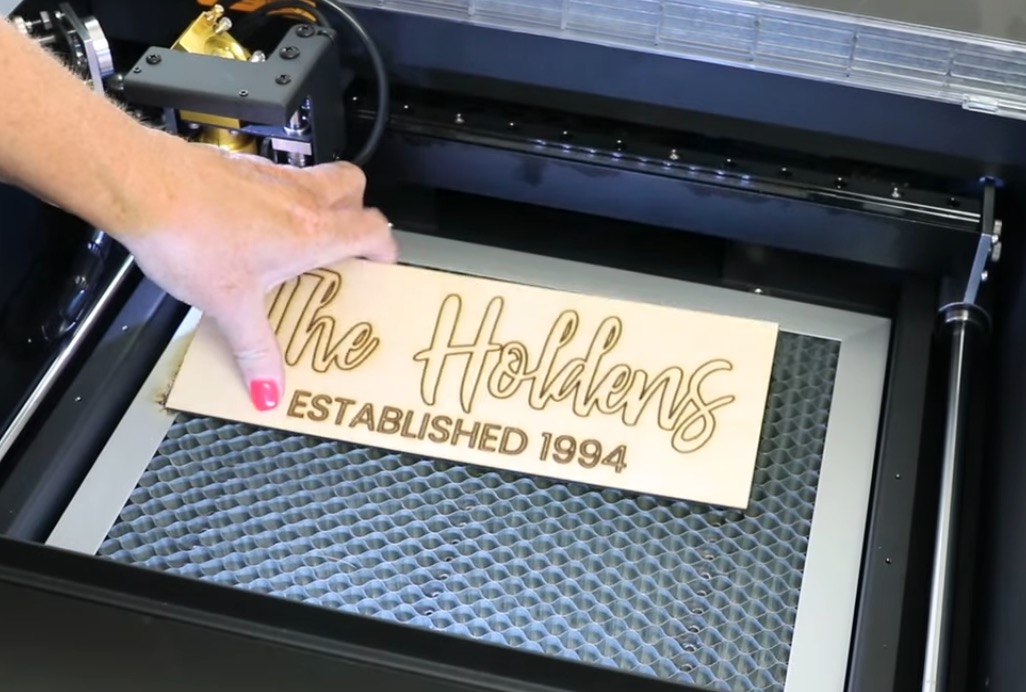
I ended up creating two signs with the cut and engrave feature. In the top project, I used the outline engrave, and in the bottom project, I used the fill engrave and outline engrave.
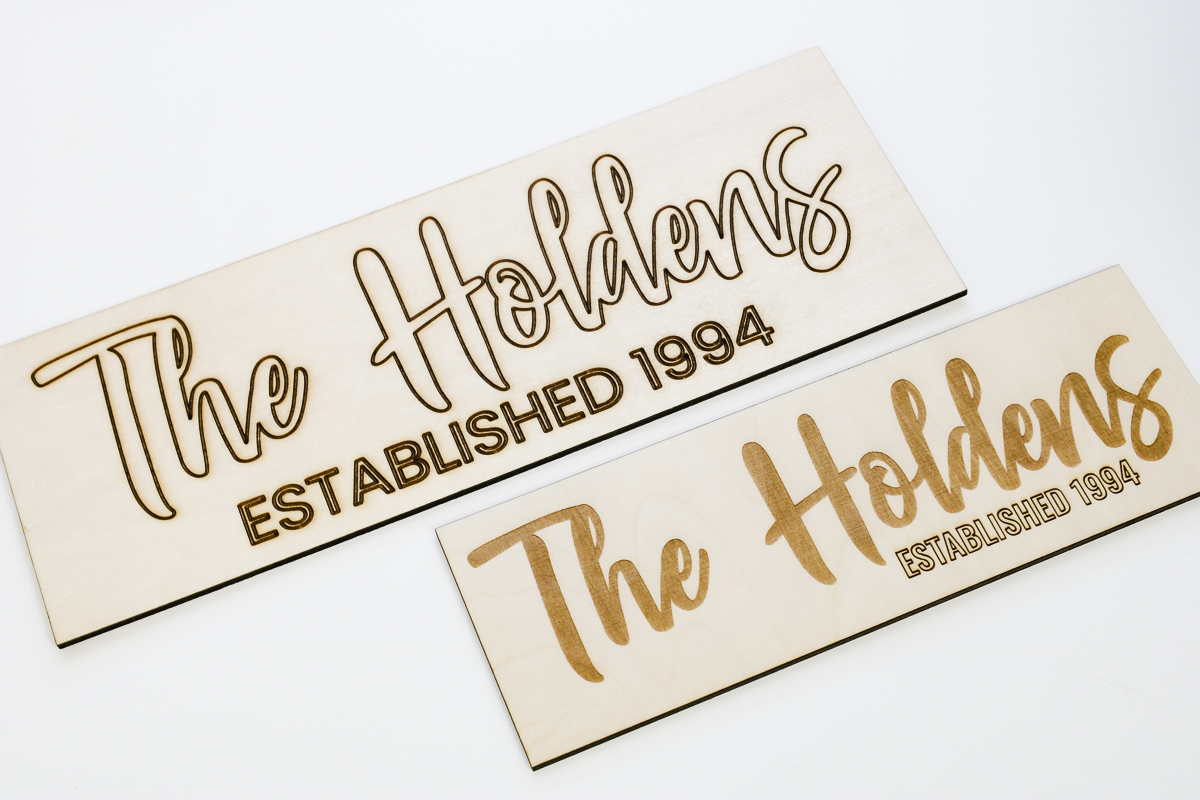
I wanted to note that in the top project, I did not have my focus set correctly. There are char marks around the engraving. In the bottom project, I had the settings correct, and you can see that both the fill and outline engraving look really good.
If you feel like your projects aren't looking great, double-check the focus and make sure you have it set correctly.
How to Install the Auto Focus Module on the FLUX beamo
To install the Auto Focus module, you want to follow the steps below. I do recommend watching the video if you have any questions. In the video, you'll see each step.
- Cut the ziptie at the top of the laser module.
- Loosen the ring around the laser head and pull the laser head all the way out. (You may need to remove the honeycomb tray for this step.)
- Loosen the four screws on the back of the laser head, and when they're loosened, you can remove the entire module.
- Unplug the camera cable and the LED wire cable from the board.
- Unscrew the three silver screws to remove the reflection mirror.
- Take the panel off the back of the auto focus module.
- Inside, you'll see the slots to attach the camera cable and the LED wire cable.
- Put the module back in place and tighten the four screws with the Allen key.
- Reinstall the reflection mirror with the three screws.
- Reinstall the laser head by sliding it all the way to the top of the module and tightening the screw on the left to lock it in place.
- Check to see if the optical path is aligned. I followed the instructions in this video for this step.
- When you have the optical path aligned, you can reinstall the panel on the auto focus module.
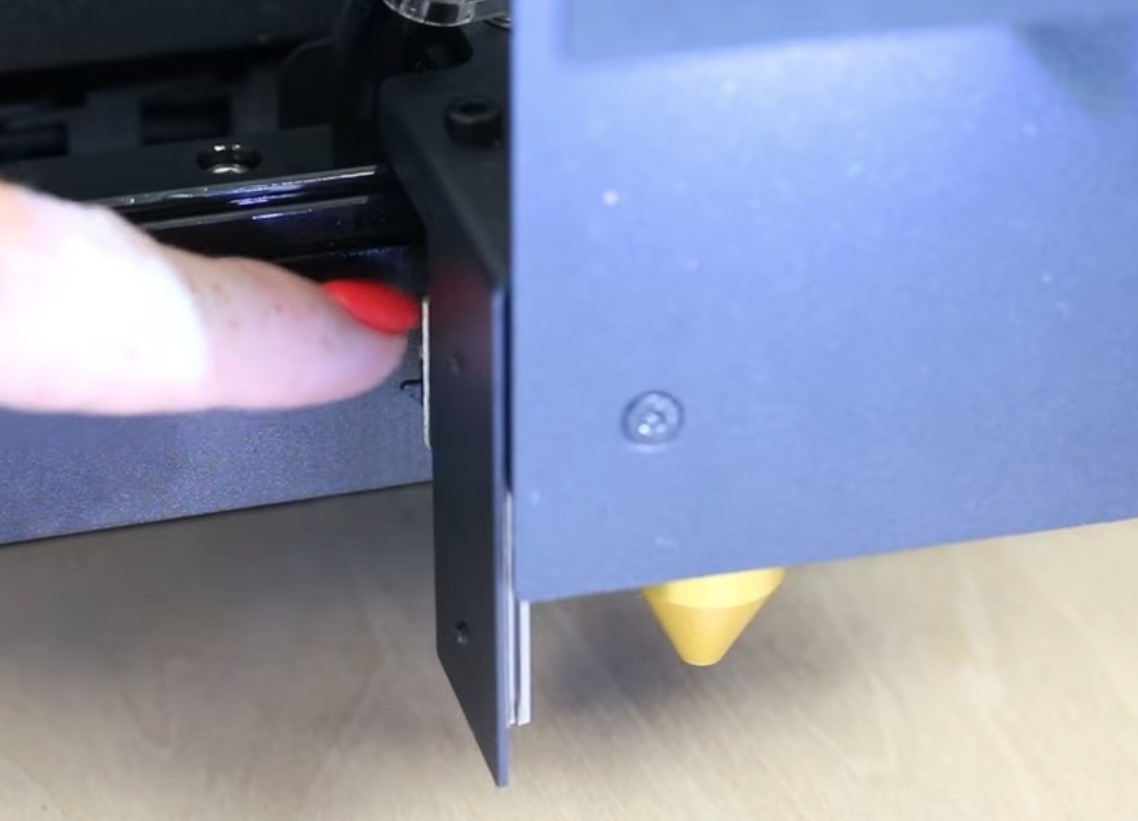
To use the Auto Focus module, you can do two different things. Place the material in your laser and move the laser head over the material.
On the back of the left side of the module, there is a little probe, and you can click it twice, and it will auto-focus the laser head.
You can also go to Document Settings on the right-hand side and click the auto focus tab to on.
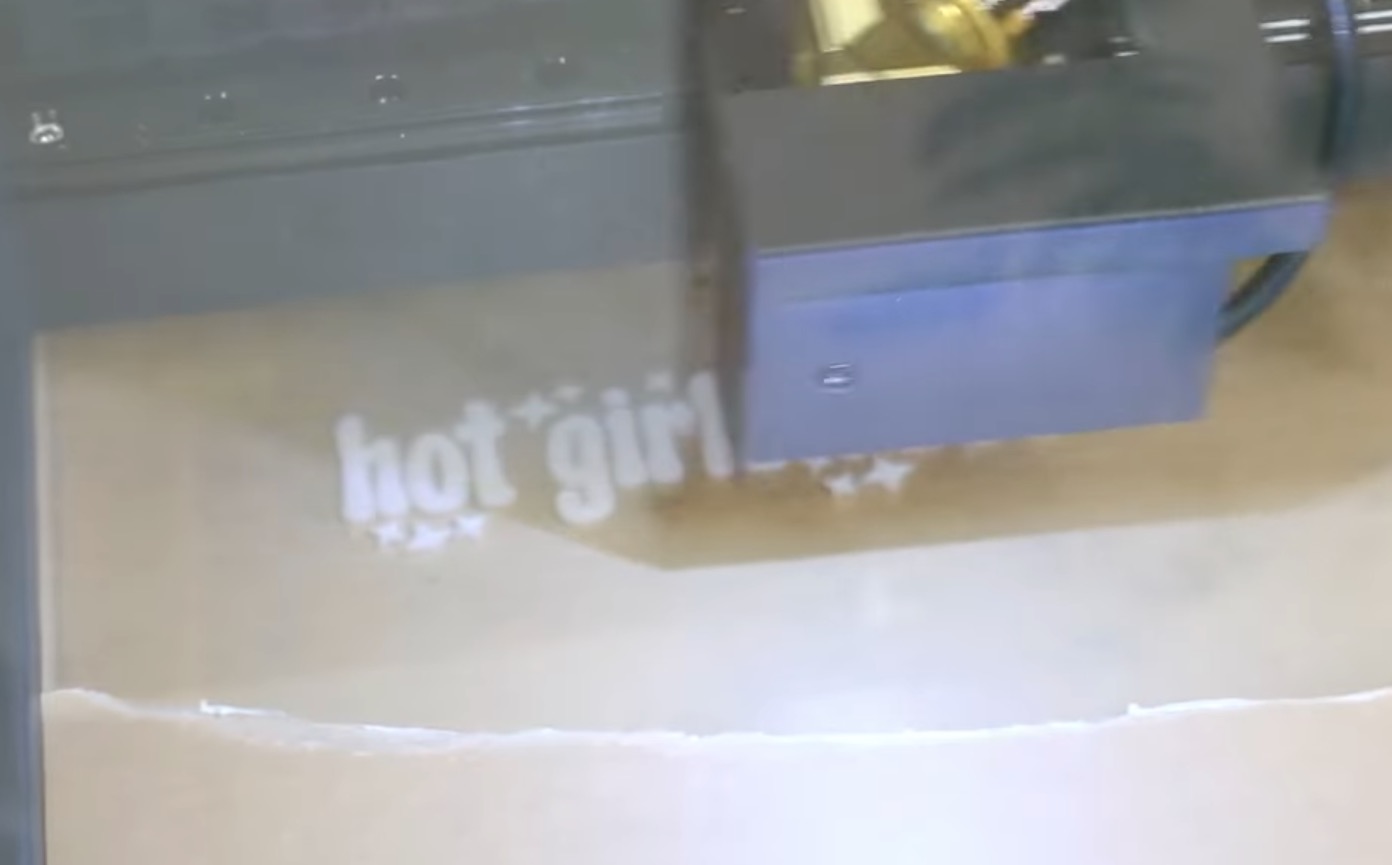
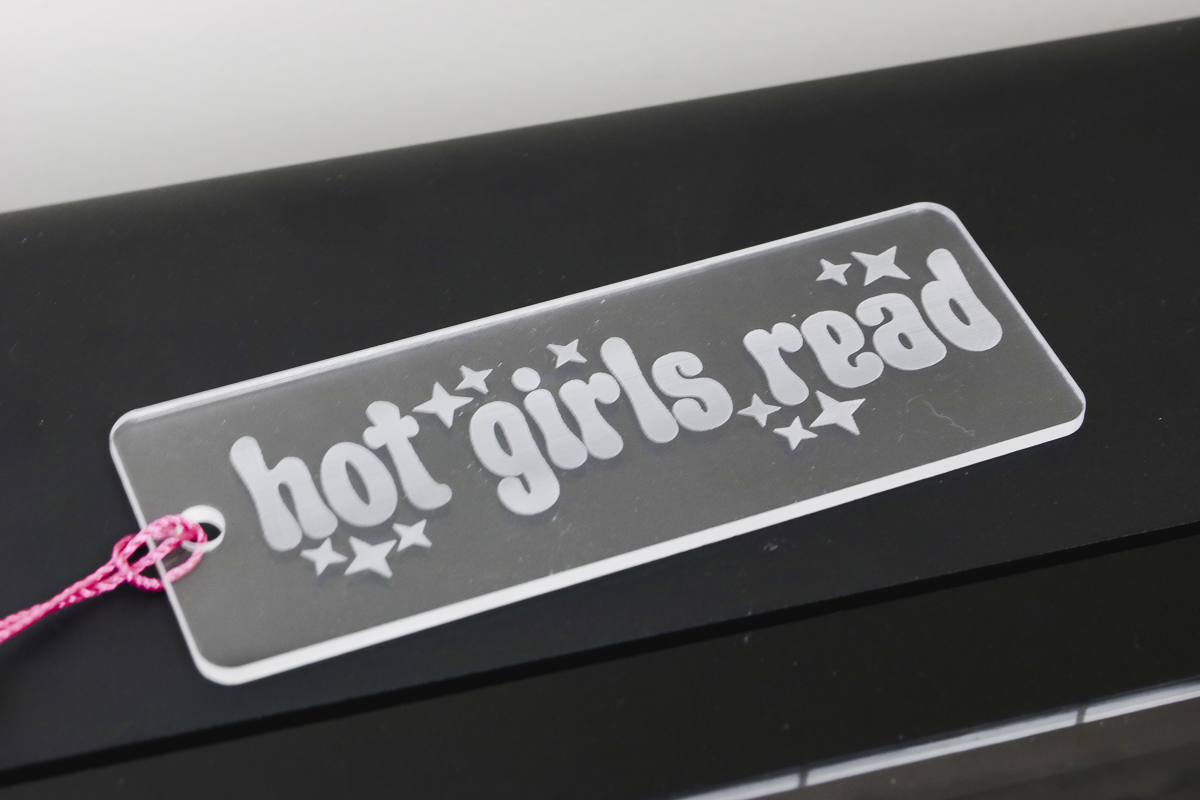
How to Make a Clear Acrylic Bookmark
Since the main benefit of this machine is that you can do clear acrylic, I wanted to make a project with this material.
Step 1. Add Material and Focus Laser
I added a sheet of clear acrylic to the laser bed and double-clicked the probe to auto-focus the laser head.
Step 2. Design Bookmark
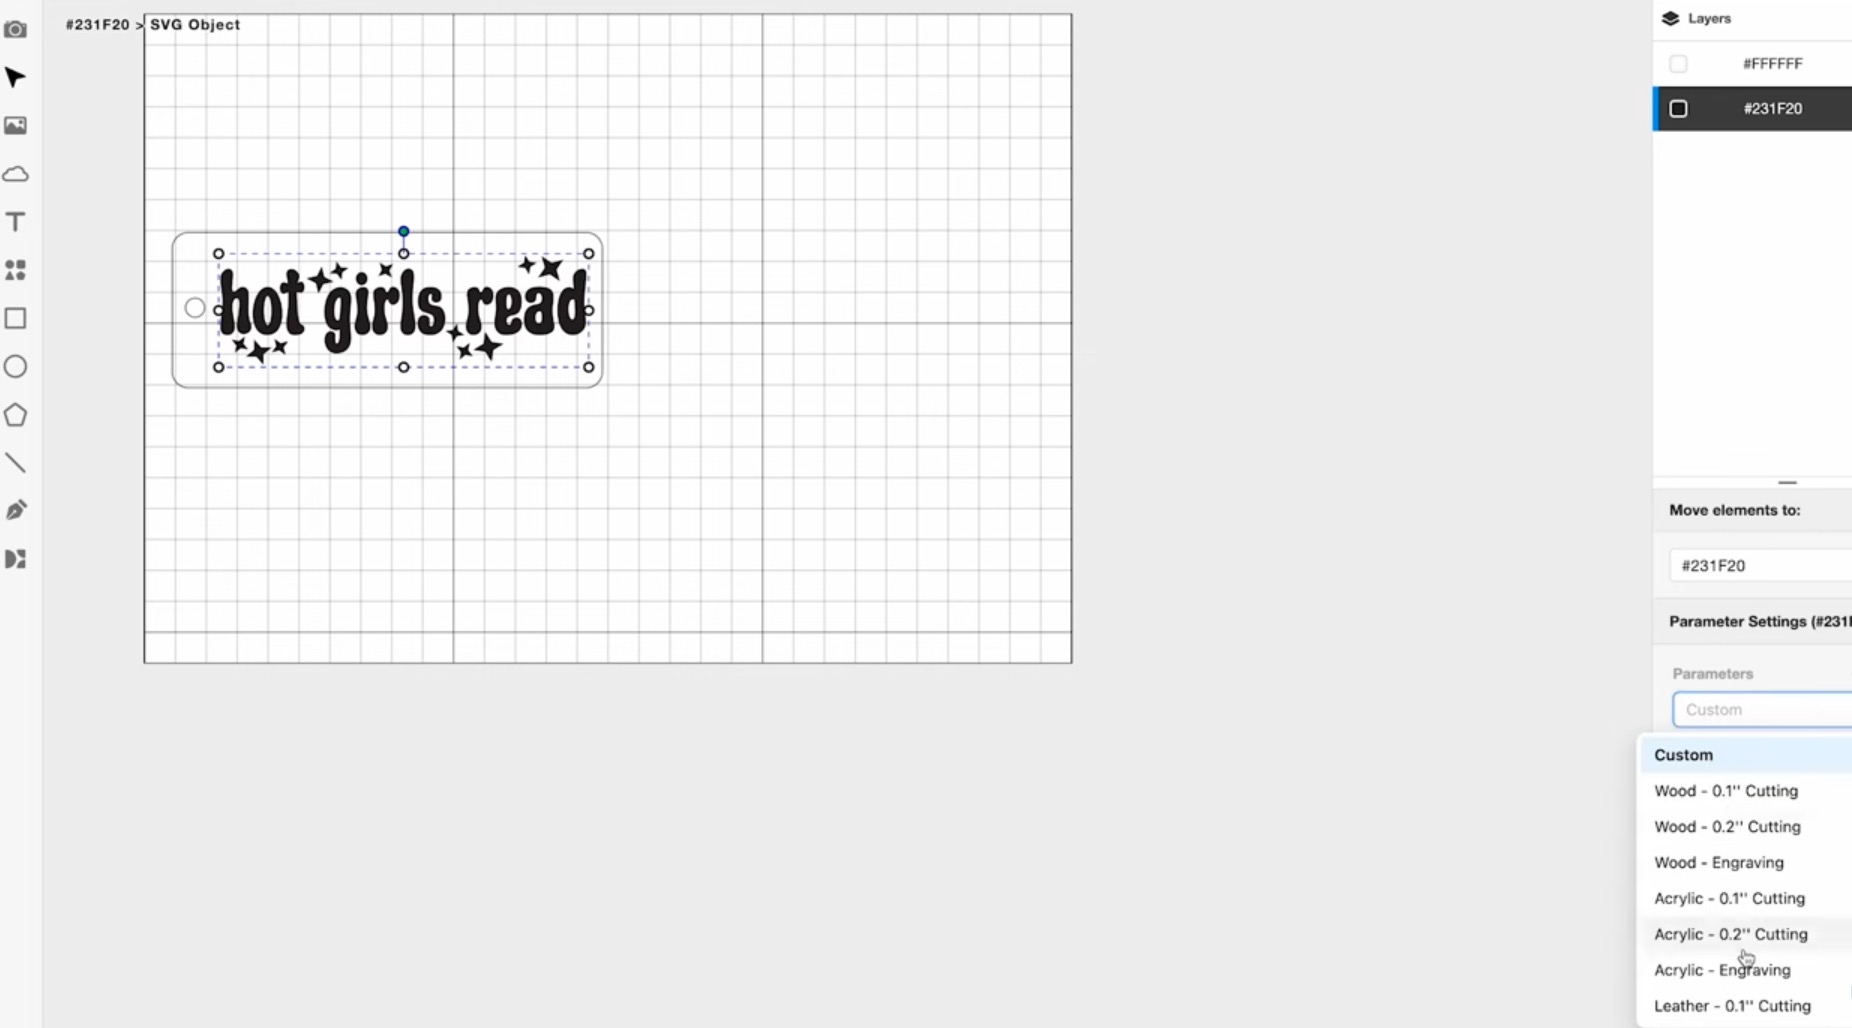
For this project, I uploaded a bookmark design. Upload an SVG file, and to get it loaded correctly, I chose the Color option.
For the text on the bookmark, I chose the Acrylic Engraving setting, and for the outside, I chose the Acrylic – 0.2″ Cutting setting.
Step 3. Preview the Design and Send to Laser
Preview the area to make sure the design is completely on the material.
Close the lid of the laser and press go to cut. I did need to remove the protective film on the top of the acrylic to get the process to work.
Step 4. Remove Completed Bookmark
When it's done, remove it from the laser bed and peel the protective film off the back of the acrylic.
You can see this turned out great, and the FLUX beamo can cut and engrave clear acrylic.
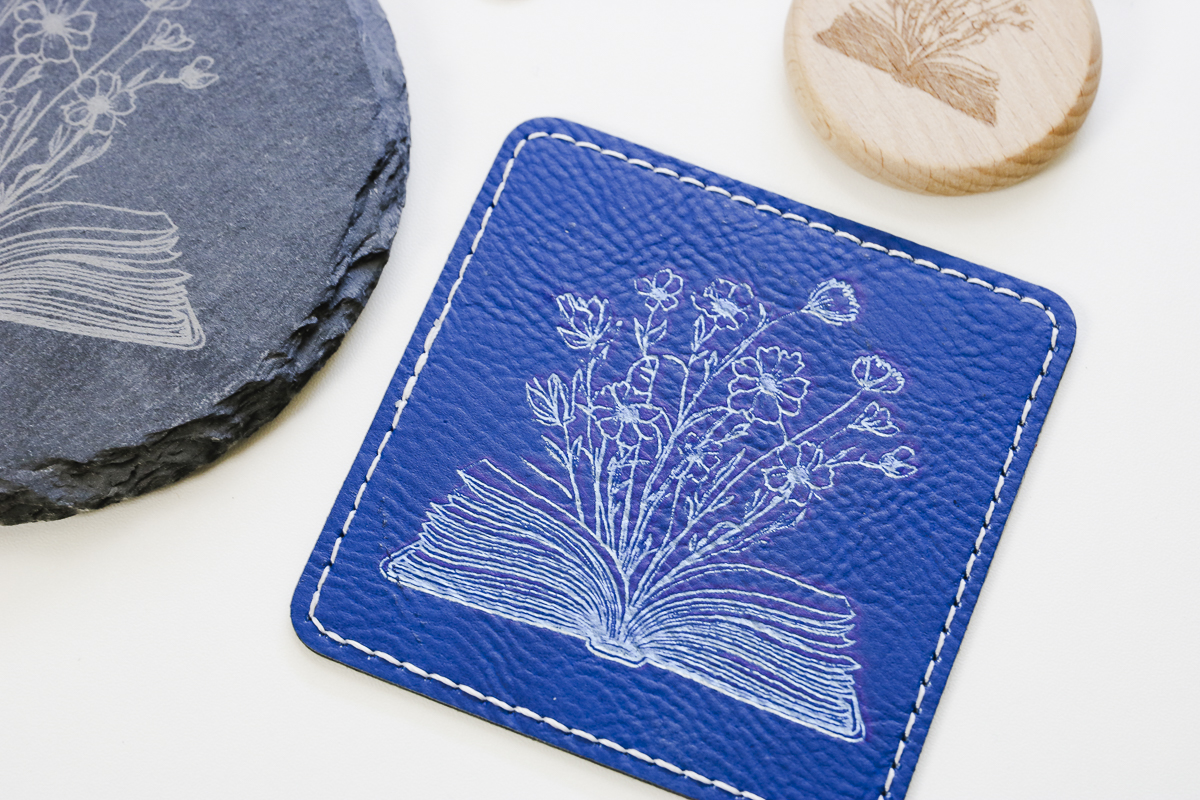
More Projects Tests with the FLUX beamo CO2 Laser
I wanted to test the beamo to see what else it could do, so I engraved a wooden keychain, a coated metal dog tag, a slate coaster, and a leather patch.
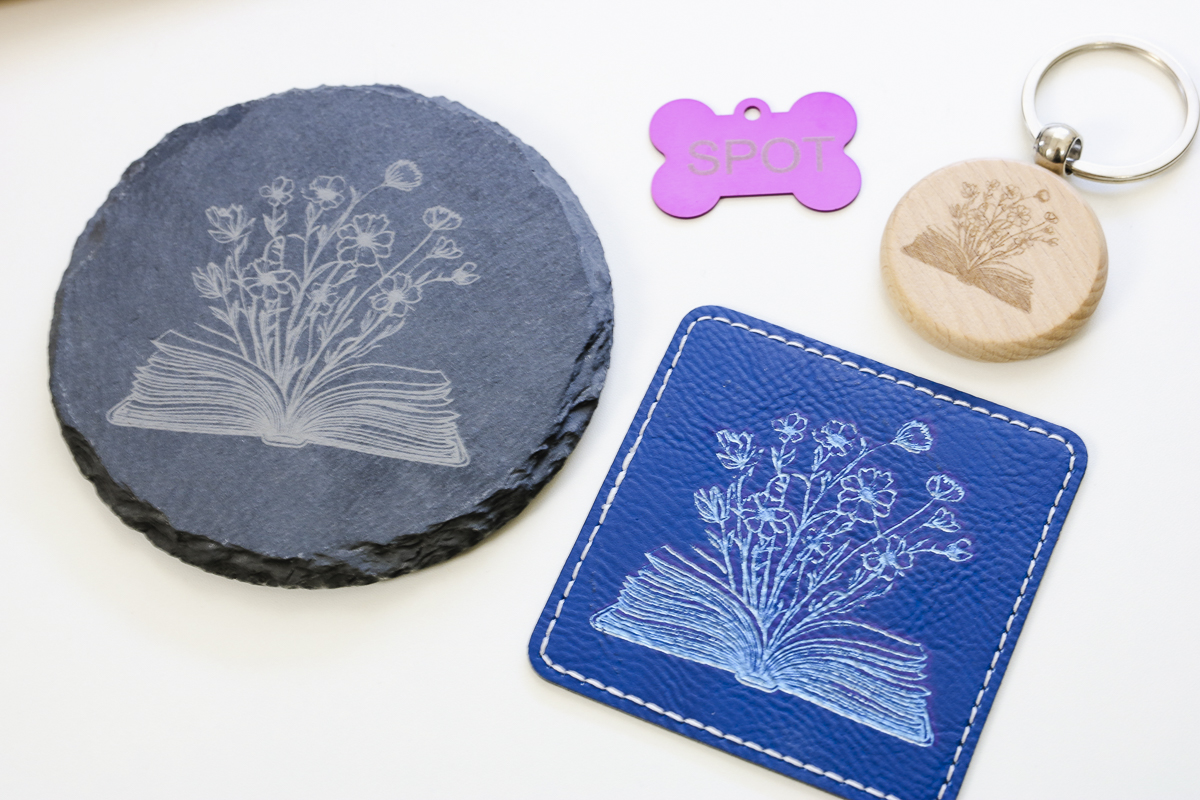
As you can see, I got better at locating my designs the more projects I did. I noticed that my camera was a little off, and it was more noticeable on smaller projects. I was able to adjust the location on the dog tag, and it looks really good.

The engraving is really good on all of these projects, and by the 3rd and 4th projects, the location is great.
FLUX beamo CO2 Laser Pros and Cons
Now that I've tested the laser with a few different projects, let's talk about the pros and cons.
beamo Pros
- The biggest pro is that this is a CO2 laser at an affordable price. I also love the size. If you want a C02 laser but you're limited on space, this is a great option because other C02 lasers are much larger.
- At 30 watts, this is a powerful laser, and I had great luck with both the manual and Auto Focus modules. This means you don't need to purchase the Auto Focus module to get good results.
- This laser can cut and engrave a wide variety of materials, including clear acrylic. You can also add on accessories like the rotary accessory that will allow you to engrave tumblers.
- I love the touchscreen, and that it allows you to see what is going on right on the laser itself.
- I am a big fan of lasers with a honeycomb tray. I think they work better than other items, like triangular prisms.
beamo Cons
- One con is the size of the projects you can make with this laser. Because it is small, you will be limited in the projects you can make.
- Another con could be the software. There is a learning curve for the software. I think it is good software, but you do need to spend some time learning the software.
- I found filling the coolant tank to be a bit difficult. Take your time with this step so you don't spill in the laser and hopefully that isn't something that needs to be done often.
- I think the hose that comes with this laser is pretty flimsy. You may need to replace the hose sooner or later, but if you take care of it, it may last a while.
Should You Buy the FLUX beamo CO2 Laser?
I am a big fan of this laser. You've been asking for a laser that can cut and engrave clear acrylic that is more affordable and small enough to fit in even smaller craft spaces. The FLUX beamo may be the right laser for you.
I was impressed with how it cut and engraved the different materials, and it is really easy to use with the materials that come with it.
I hope I've answered any questions you have about the FLUX beamo. If you have any additional questions, leave them in the comments, and I'll be happy to answer them for you.