
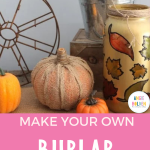
This fall you can make your own burlap pumpkins with this super simple craft tutorial. Take a dollar store pumpkin and make it something special in a few minutes and with a few supplies. You will love the rustic touch this brings to your fall home decor. Break out those $1 pumpkins y'all then use this burlap pumpkin tutorial to make your own.

Supplies needed to make easy DIY burlap pumpkins:
- Dollar Tree pumpkins
- Burlap ribbon
- Jute twine
- buttons
- hot glue + hot glue gun
I like using the ribbon because it is finished on two of the edges and that is really what this project needs. You will also need some jute twine, buttons, and hot glue. Ignore that baker's twine in the picture below (that was plan A and plan A did not work).

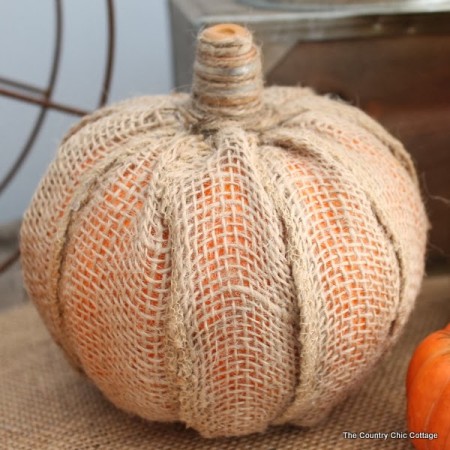
Burlap Pumpkin Tutorial
Make these DIY rustic pumpkins with a few supplies then add them to your decor this season. You are going to love the way they look in your farmhouse-style home.
Step 1: Wrap the pumpkin in burlap ribbon.
I put hot glue down each “section” of the pumpkin and glued the ribbon into place. So basically the ribbon fits across one section almost perfectly. I forced the ribbon to fit so it is slightly gathered especially at the top and bottom.

See the top below. Make the ribbon fit into each section. Use hot glue at the top and the bottom as well to secure.

When you are done with the burlap ribbon your pumpkin will be looking a little like the below. WOW! What a hot mess!

Step 2: Wrap the pumpkin step with jute twine.
Never fear! Jute twine is here! Use hot glue and just twine wrapped in circles to cover up around your stem area. Looking better already!

Step 3: Create a button stem for your burlap pumpkin.
I then grabbed some brown and white buttons to make a stem. The stem on these little pumpkins is just not substantial enough for me and most of it was covered by the burlap. I just stacked up the buttons on top (alternating colors) and used hot glue to secure.

Then wrap the jute twine up where it rests in between the buttons but does not cover them completely. It makes for a cute little stem don't ya think?

You are left with a burlap pumpkin that is still slightly orange (but not the day glow effect of the original). Plus you can do all of this in just a few minutes. I call that a win-win.

Print out the card below for the step-by-step instructions to make this adorable rustic burlap pumpkin!
Supplies
- Dollar Tree pumpkins
- Burlap ribbon
- Jute twine
- buttons
- hot glue + hot glue gun
Instructions
- Hot glue down each “section” of the pumpkin and glued the ribbon into place.
- Bunch the ribbon to fit so it is slightly gathered, especially at the top and bottom.
- Use hot glue at the top and the bottom of the pumpkin to secure the ribbon.
- Use hot glue and just twine wrapped in circles to cover up around your stem area.
- Then, use buttons to make a more substantial stem. Stack the buttons and use hot glue to secure.
- Then wrap the jute twine up where it rests in between the buttons but does not cover them completely.
My burlap pumpkin ended up on my mantle with my fall jar luminary and sweater pumpkins. You can also cover your dollar store pumpkins with fabric if you don't have any burlap ribbon. Make your own burlap pumpkin today y'all….you will love it!

Will you add some DIY burlap pumpkins to your home this fall? I know you will love the addition of these cute pumpkins on your mantel or even to use as a Thanksgiving centerpiece.
Want more fall craft ideas? Try the links below as well.


Super Cute!
Super Cute!
Is the pumpkin you have used is fresh or hve u used a shell ? Wht wll happen to pumpkin after a few days ?
It is a plastic pumpkin from a store.