

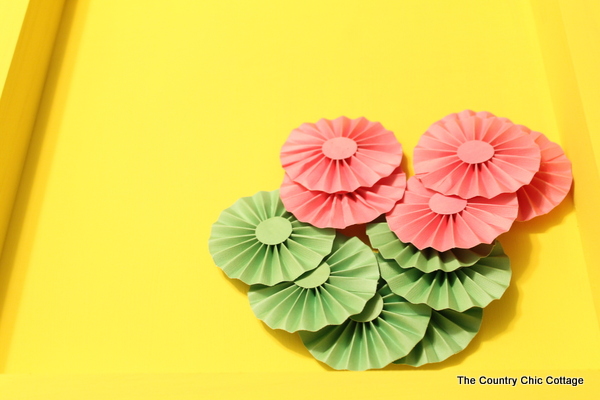
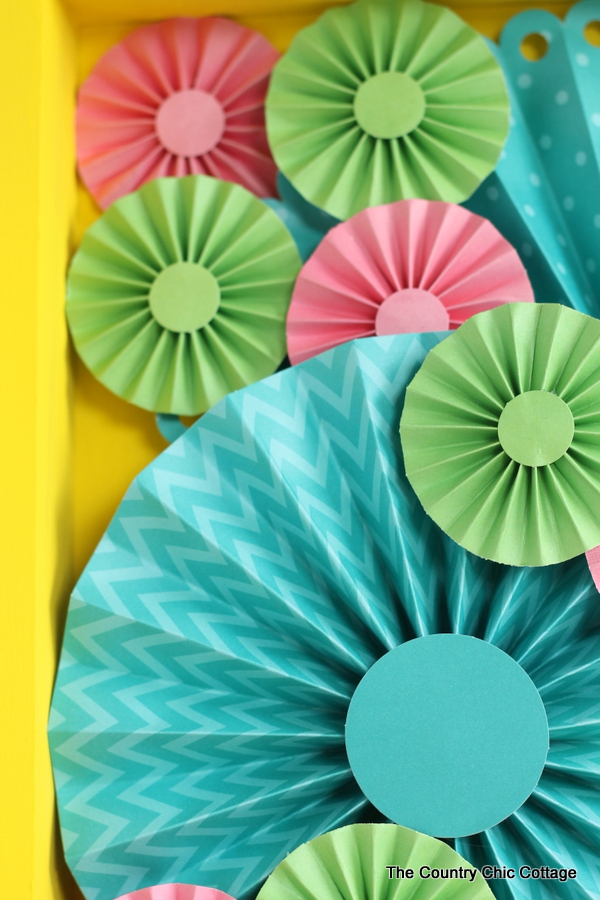
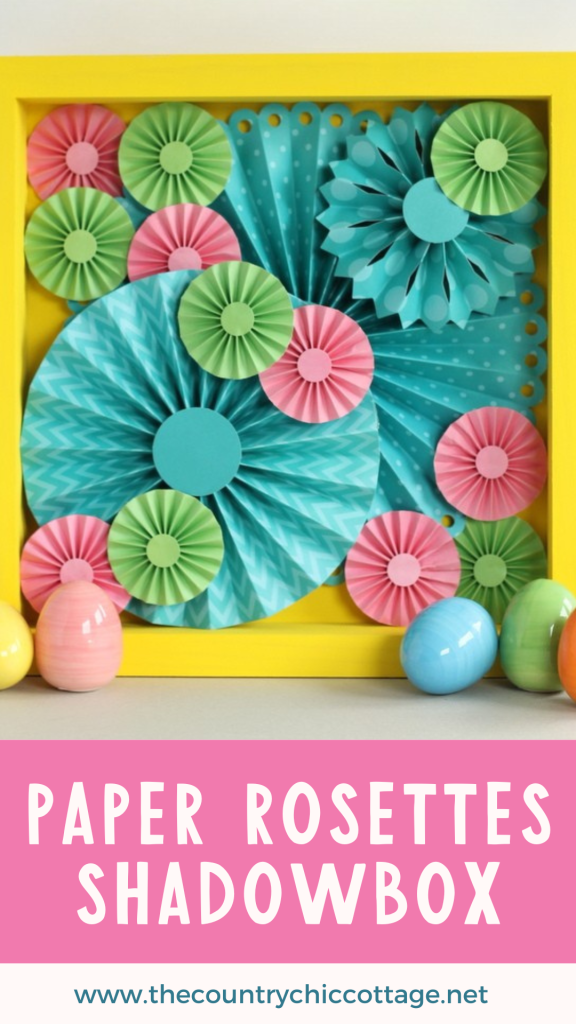
This shadowbox with paper rosettes is a great addition to your home decor. Change the colors to match any space in your home, or change them seasonally. I made this bright, colorful version for a teen bedroom. I must say I love it! This is a super quick and easy project (I promise y'all!!).

How to make a shadowbox with paper rosettes
When I originally made this (way back in 2015!), I bought premade paper rosettes (which you can totally do too!). I have updated this with instructions for making your own rosettes with your cutting machine.
Supplies needed
- Unfinished Wood 12 x 12″ Shadowbox
- Craft Paint in the Color of your Choice (I used sun yellow)
- Cricut Machine
- Scoring wheel (for Cricut Maker) or scoring stylus
- Cardstock (in your choice of colors)
- Cricut Design #M3C899 (rosette)
- Hot Glue and Glue Gun
- Optional – premade paper rosette kit
Step 1 – Make paper rosettes
The part that makes this project so simple is the paper rosettes! You can make your own, or they are available in kits that make everything come together in just minutes.
To make your own paper rosettes, start by opening Cricut Design Space and searching for “rosettes”. I used design #M3C899 for the image below. (I also found this super cute Halloween rosette to make a fun Halloween shadow box.) You can size and change the colors as you wish.
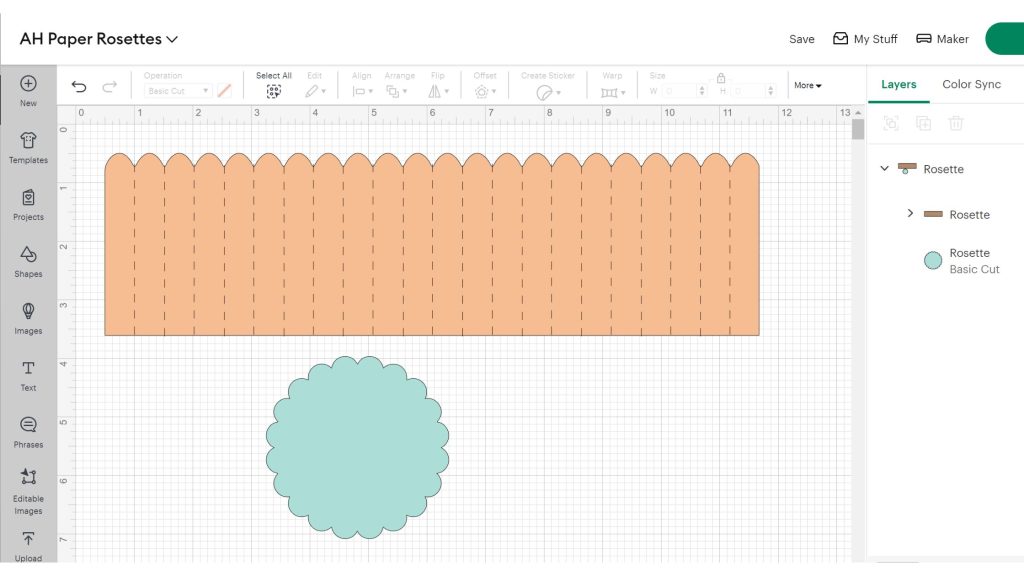
When you have the rosettes sized as you'd like them, click “Make”. You can adjust the number of items you'd like to cut. Remember, we are filling a shadow box, so a variety of paper rosette colors and sizes will look great. Add your scoring stylus or scoring wheel as prompted.
If you are looking for detailed instructions to make paper rosettes, check out this tutorial about making rosettes with your Cricut Maker using the scoring wheel.
Step 2 – Assemble rosettes
If you have purchased premade paper rosettes, you may need to put them together according to the included instructions. To make the rosettes, you cut them with your cutting machine, fold the scored piece like a fan, and then glue it to form a circle. Then glue the center piece to it. I love making these myself because I can change up the colors that I use for the fan and center parts.
Step 3 – Paint shadowbox
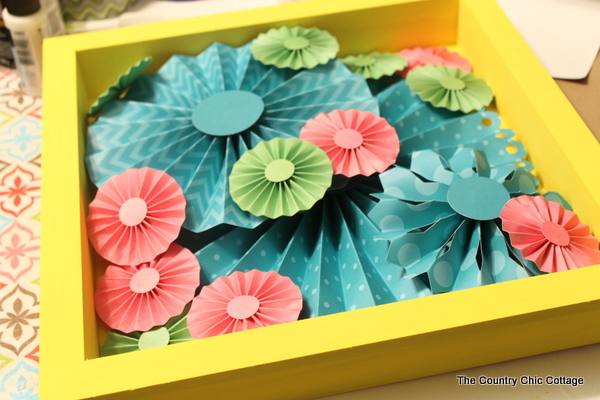
Start by giving your shadowbox a few coats of paint. Paint inside and out and allow to dry completely before continuing. Layer in your rosettes, but DO NOT glue anything yet. Play with the placement until you love the look.
Step 4 – Add and arrange paper rosettes
Then just use your trusty hot glue gun to put everything into place. A dot will do on these, as they are not heavy.
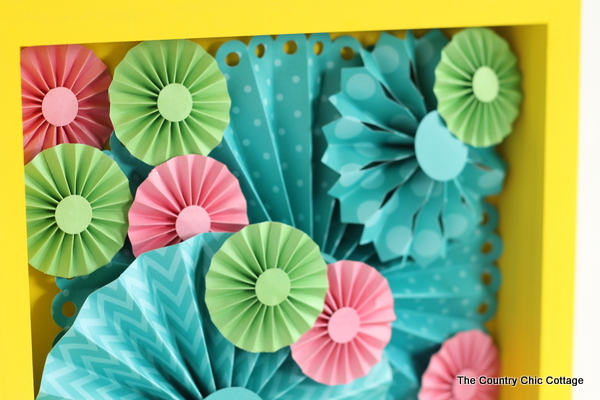
Be sure to layer those rosettes and really make this shadowbox three-dimensional. Are you just loving this craft project yet?
Step 5 – Enjoy your new shadowbox
I must say this is one quick and easy project that is a showstopper. Grab your supplies and make your own version of this paper rosette shadowbox today. This paper craft will make a BOLD statement in your home.

Other Projects
If you are looking for other paper and shadowbox crafts, check out these posts below:


How can I get a bag or bags of these rosettes. I Amy an artist and I want to make my own pictue
It looks like that brand is currently available. If you own a Cricut you can definitely make your own. You can also try searching for paper flowers or paper fans in whatever colors you want. I know there are a lot of options on Amazon 🙂