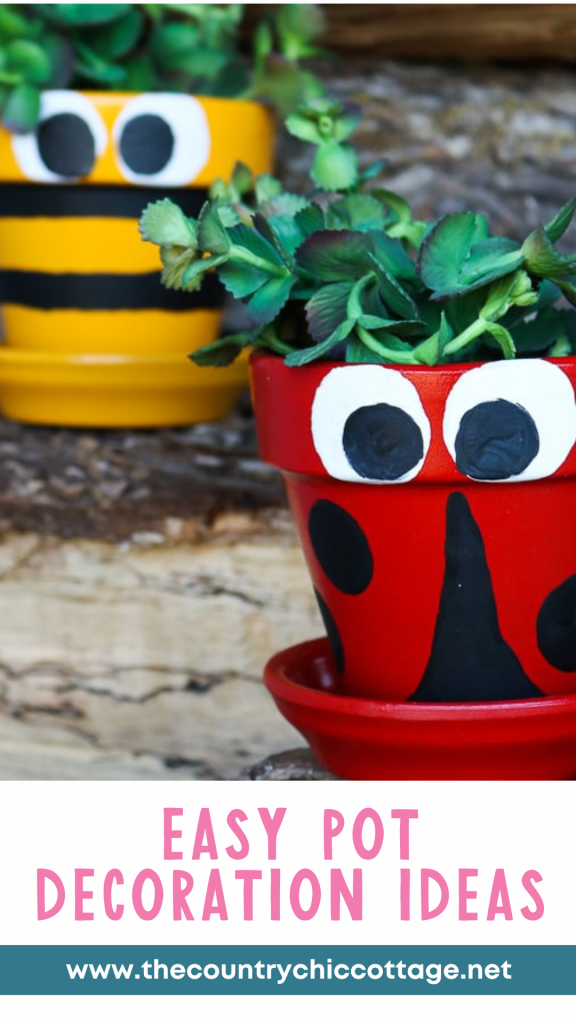
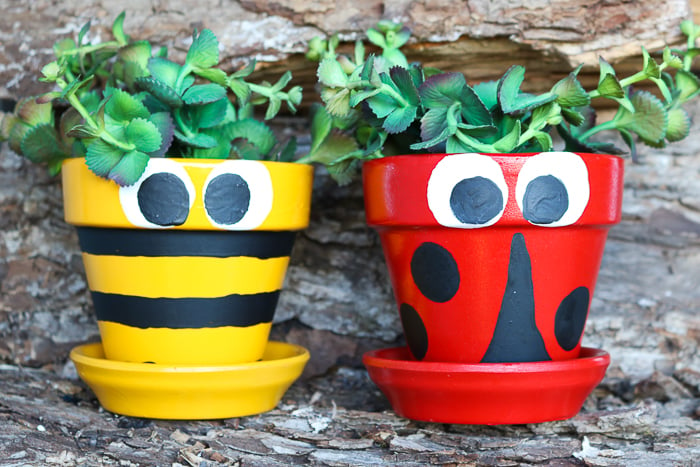
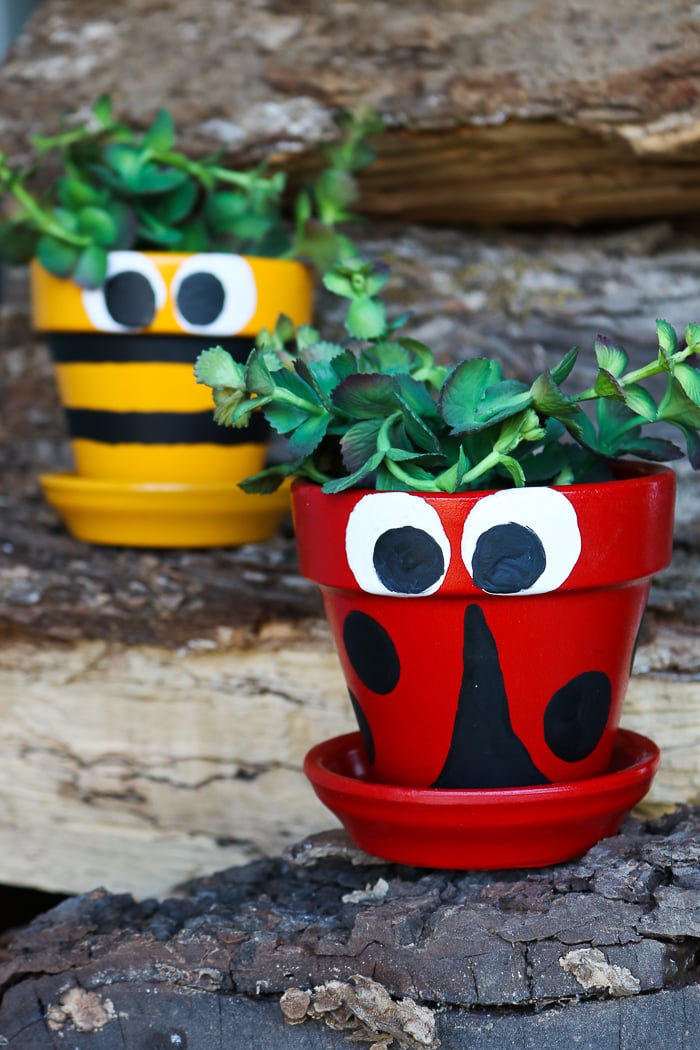
Are you looking for some creative clay pot decoration ideas? Discover how to create these charming bee and ladybug designs! Upcycling flower pots has never been easier. Testors Crafternoons has excellent paint options for all of your flower pot decorating ideas. These adorable decorations will brighten up your outdoor space and have you ready for spring in no time.
Pot Decoration Ideas Video Tutorial
Sometimes, following a video is much easier, so I thought I would quickly create one for you.
Can't watch the video or missed some of the steps? Just keep reading!
How To Make Pot Decoration Ideas
Can't wait for spring to plant some beautiful flowers? Why not plan a Testors Crafternoon while you are waiting for those first few days of warm weather?
If you’ve been around here long, you know I love a good terra cotta pot project. They are super easy to work with and can be made into inexpensive, functional, fun projects.
There are plenty of terra cotta painting projects on this website. You can create your own marbled design, make terra cotta gingerbread men, tiered planter pots…really, there’s no limit to what you can do with terra cotta.
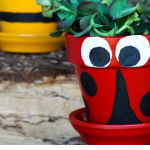
Today, I am sharing all about Testors Crafternoons as well as showing you how to paint a ladybug and bee planter for your home. Use these flower pot decoration ideas anywhere around your home this spring!
This post is sponsored by Testors; however, all projects and opinions are my own.
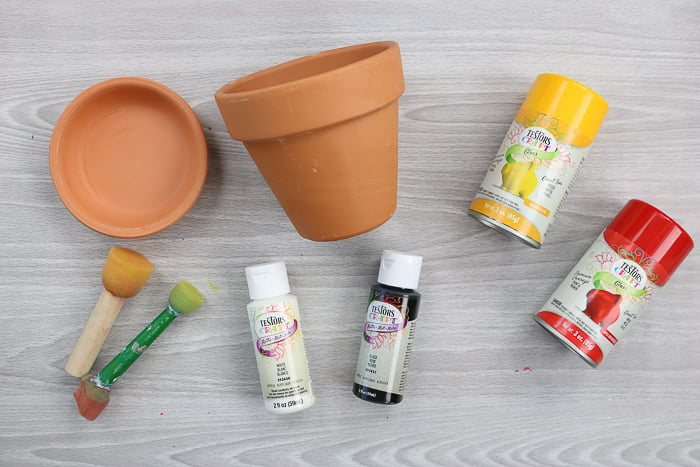
Supplies Needed For These Pot Decoration Ideas
- Clay pots
- Clay saucers
- Testors Craft aerosol spray paint in yellow and red
- Testors Craft acrylic paint in white and black
- Round sponge brushes
- Paintbrushes
Prep The Pots
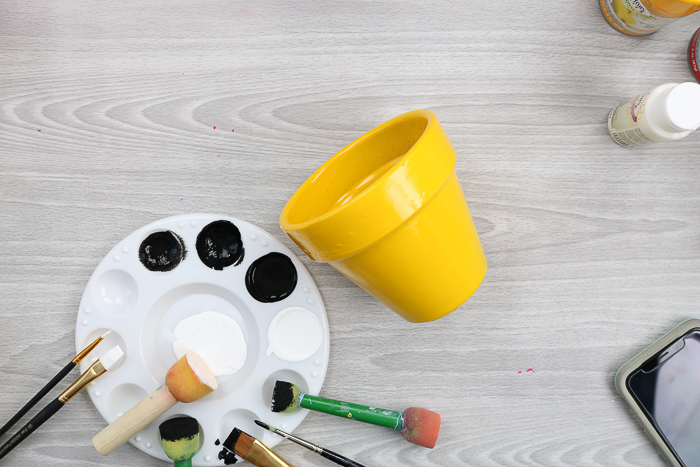
Step 1: Paint Clay Pots & Saucers Red Or Yellow
Start by spray painting your clay pots and saucers with the Testors Craft aerosol paints. I painted both the outside as well as most of the inside for a finished look. Allow these to dry completely before continuing.
Then break out your acrylic paint to add some accents and turn these cute pots into a ladybug and a bee!
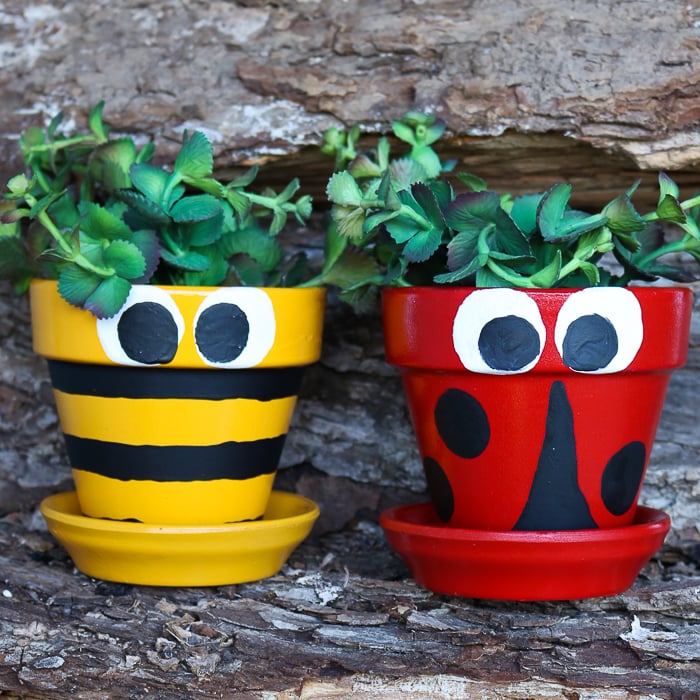
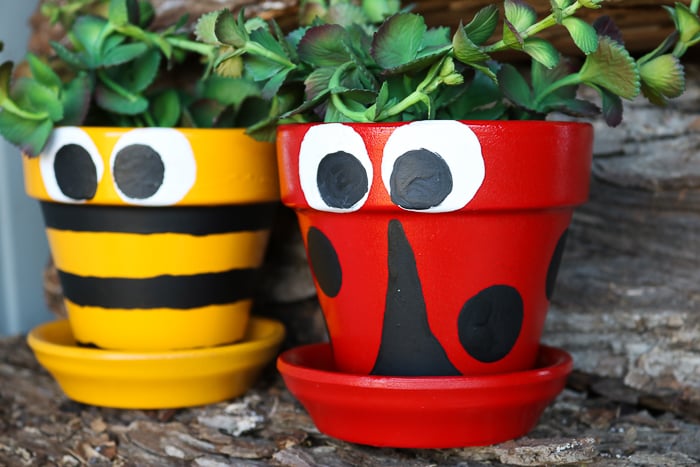
How To Paint Ladybug Clay Pot
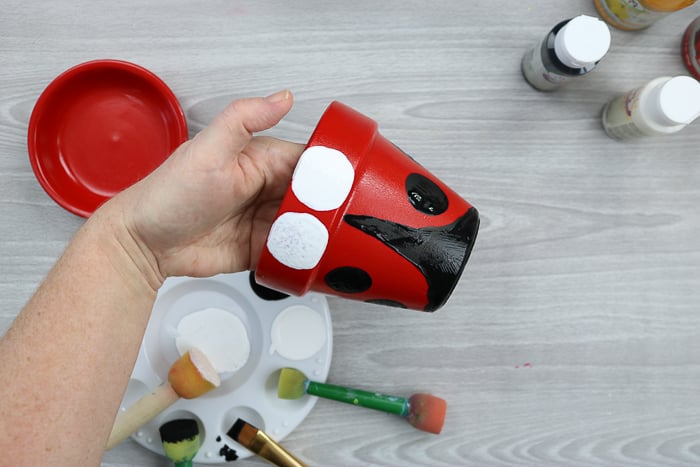
Step 1: Add White Portion Of Eyes
Use a white round sponge brush to add the white portion of the eyes.
Step 2: Add Black Accents
Then use a paintbrush to start adding the black accent down the middle, as well as all the way around the bottom. Be sure to paint around the bottom with the black line to give your pot a finished appearance.
Then use a smaller round sponge brush to add the dots on the ladybug. Again, be sure to go all the way around the pot.
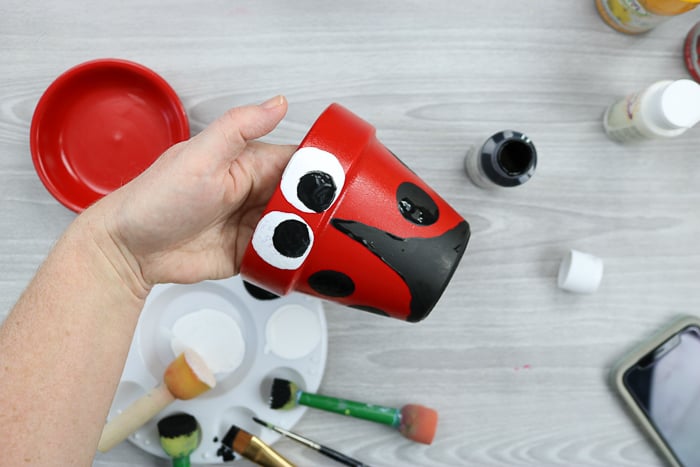
Step 3: Add Black Dots To The White Portion Of Eyes
Once the white portion of the eyes is dry, you can add the black portion with a small round sponge brush. Then allow your entire clay pot to dry before using.
Pot decoration ideas like these are so easy and oh so cute, y'all!
How To Paint Bee Clay Pot
Next, we will move on to more ideas for flower pot decorations. Our next clay pot is bee-inspired!
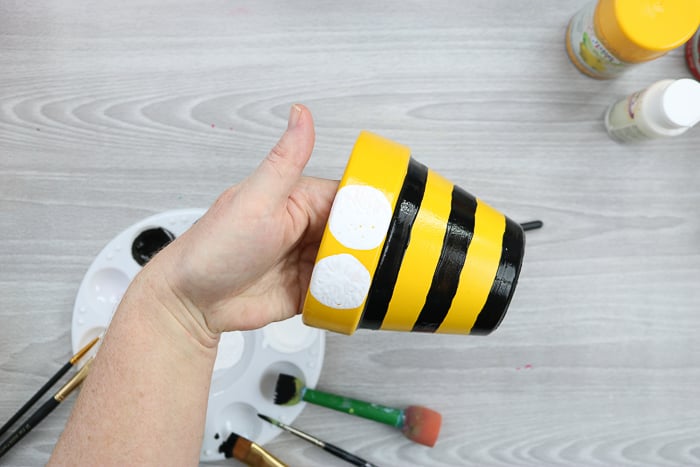
Step 1: Add White Portion Of Eyes
Use a white round sponge brush to add the white portion of the eyes.
Step 2: Add Black Stripes To Pot
Use a paintbrush to paint on black stripes around the body of the pot. Make the lines the width of your paintbrush. To help you with your lines, below is how they should be on your pot.
- The first line should be right under the lip of the pot.
- The second should be around the bottom.
- The third line should be right in the middle.
Painting in this order helps keep the space between the lines even, like a bumblebee! The lines should be the width of your paintbrush.
Step 3: Add Black Dots To The White Portion Of Eyes
Finally, once the whites of the eyes are dry, add a second black dot with a smaller sponge brush. You have just made two of these adorable flower pot decoration ideas in no time at all.
So, get your family and friends together for an amazing Testors Crafternoon making these clay pot decoration ideas. They will love taking home a pot or two for spring! Crafting is so much better when it is done with the ones you love!
You might even think of some more ideas for flower pot decoration to add to this duo. Plus, I will have another great spring craft for your Testors Crafternoon next Wednesday, so y'all stay tuned!
I would love to know which of these clay flower pot decoration ideas you love best. The bee or the ladybug? I think I love them both equally! Another great thing about these painted pots is that the kids can help paint them, too. So, you can invite the little ones to your Testors Crafternoon as well!
FAQs About Pot Decoration Ideas
Here are a few common questions that I often see readers asking about these pot decorating ideas. If you have a question, please check if I’ve already addressed it below. If you don’t see your question listed, please leave it in the comments
Can I Adjust The Size Of These Clay Pots?
Yes, any size of terracotta pot will work with this tutorial!
Do I Need To Use A Round Brush For This Project?
Technically, no; however, using a round brush makes painting the circles much easier.
Did You Add A Sealer To These Pots?
No, I did not add a sealer to these pots. However, you can add a sealer to your pots if you want to.
5 More Flower Pot Crafts
Did you love these pot decoration ideas and want more flower pot crafts? Then check out the projects below!
- Flower Pot People: Create These for Your Garden
- Fingerprint Flower Pot
- Create Custom Flower Pots with a Cricut Machine
- Painted Flower Pot
- Flower Pot Frog Craft