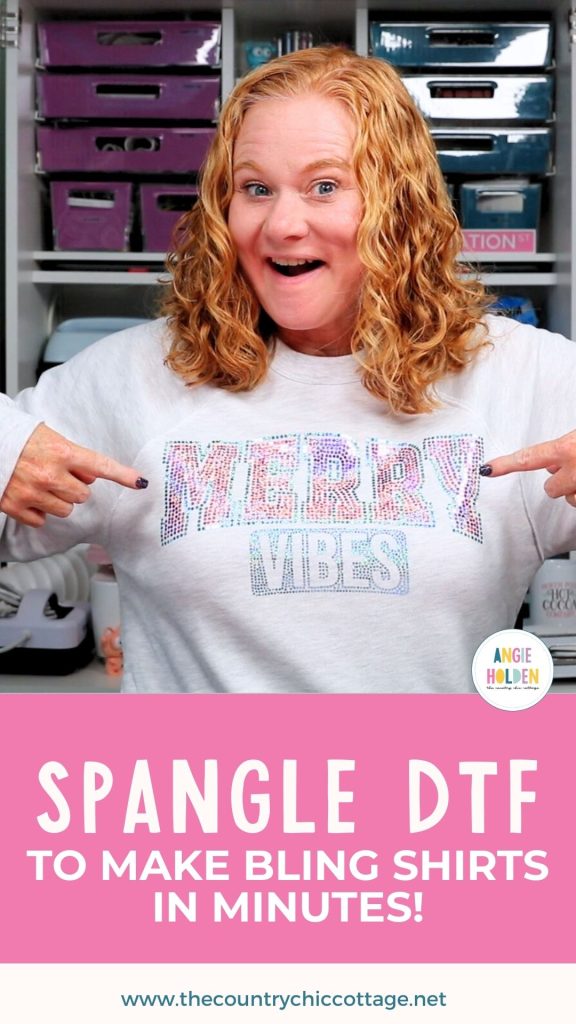
If you love the look of bling but don't have the time to mess with rhinestones, you're going to love Spangle DTF. This material has the sparkle of rhinestones without the scratchy feel, and the ease of DTF transfers.
This project turned out so cute, and you're going to love how easy it is to do. Just order, press, and done!
If you're new to DTF printing, my What is DTF Printing tutorial is a great place to start.

I ordered my DTF prints from Ninja Transfers. They have the Spangle DTF, and you can upload any design you want, and they will convert it to the small circle design for you. I love that I don't have to do that process myself.
You can watch me use these prints to make fun shirts by pressing play on the video below.
How to Make Spangle DTF Shirts
To make our shirts, we need to order the prints. I am ordering mine from Ninja Transfers. If you wanted to make your own, this process is possible with HTV, but you would need to find a program to convert your image to one that has all the little circles.
If you own your own DTF printer, you would also need a program to change your design to one with circles to get this rhinestone look.
Supplies Used:
- Spangle DTF Transfers
- Merry Vibes Design
- Heat Press
- DTF Cooling Block
- White Sweatshirt
- Grey Kids Shirt
Step 1. Order Prints
Head to Ninja Transfers and select Specialty DTF. Here you'll see a wide variety of options. Click Spangle Transfers, and that will open the next screen where you can upload your design.
Upload the design you want to use, and then select the colors you want to use. You can select up to 3 different colors in the drop-down boxes.
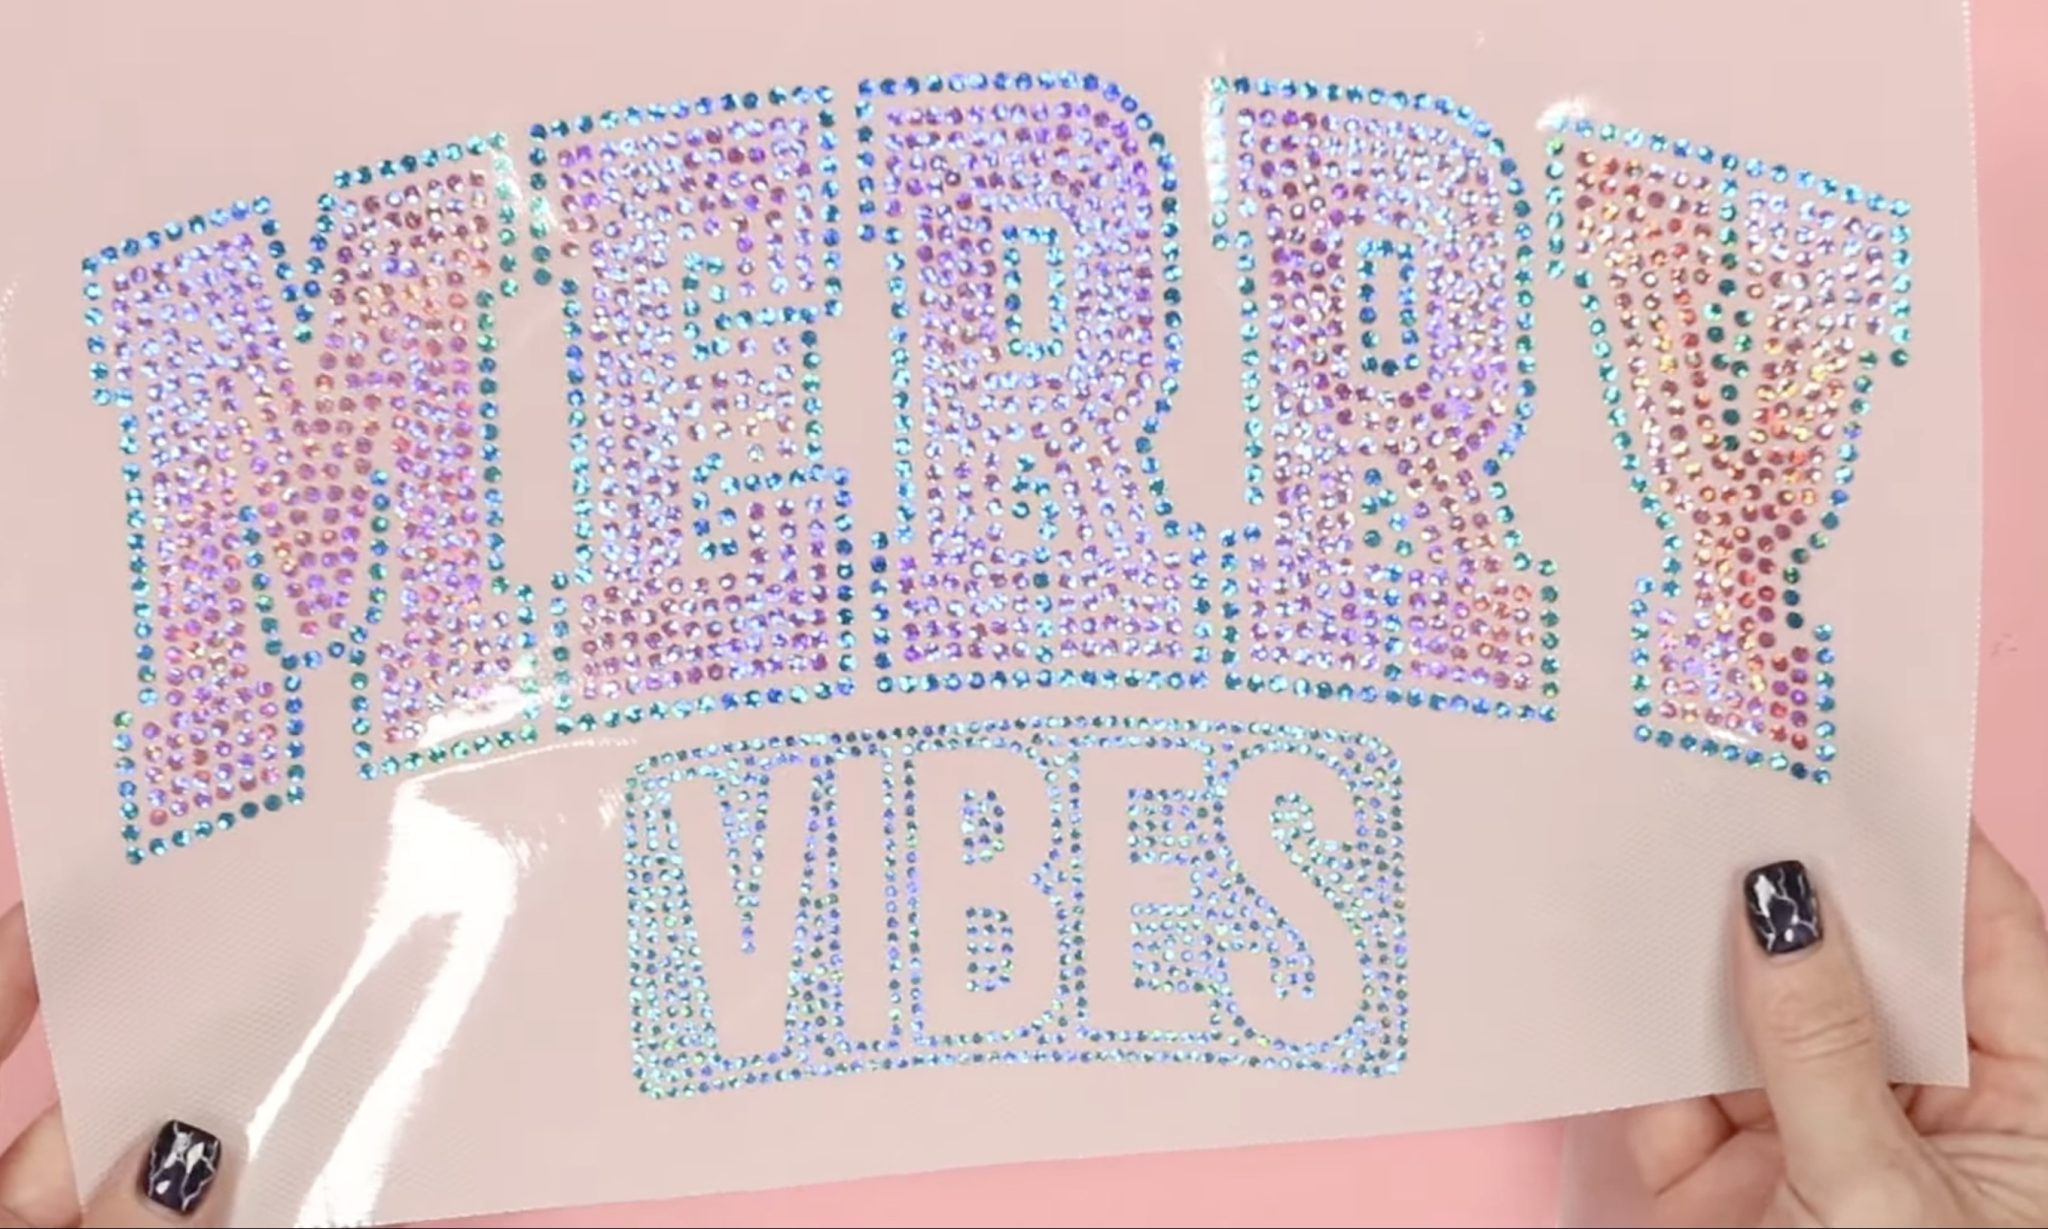
My Merry Vibes design only has 2 colors, so for my Spangle DTF transfer, I chose Fuschia and Sea Blue.

Below the boxes where you choose your colors, there is a box where you can give instructions for which part of the design should be which color.
NOTE: Ninja Transfers will send you a proof before printing to make sure everything looks like you want.
Next, enter the size you want your finished transfer to be. I ordered my design in two different sizes to show you how the design changes depending on your project.
I also want to note that there is a 10-transfer minimum with these designs. That makes these a great option for team gear, parent merch, gifts, and more. The 10-transfer minimum applies to each design. That means, if you want the same image in different sizes, you have to order 10 of each size.
Once you have everything uploaded, go ahead and pay for and place the order, and your transfers will be delivered right to your mailbox.
Step 2. Receive Spangle DTF Transfers
First, let's look at how the Spangle DTF transfers turned out.
I ordered the Merry Vibes design in 2 different sizes to see how it turned out in both sizes.
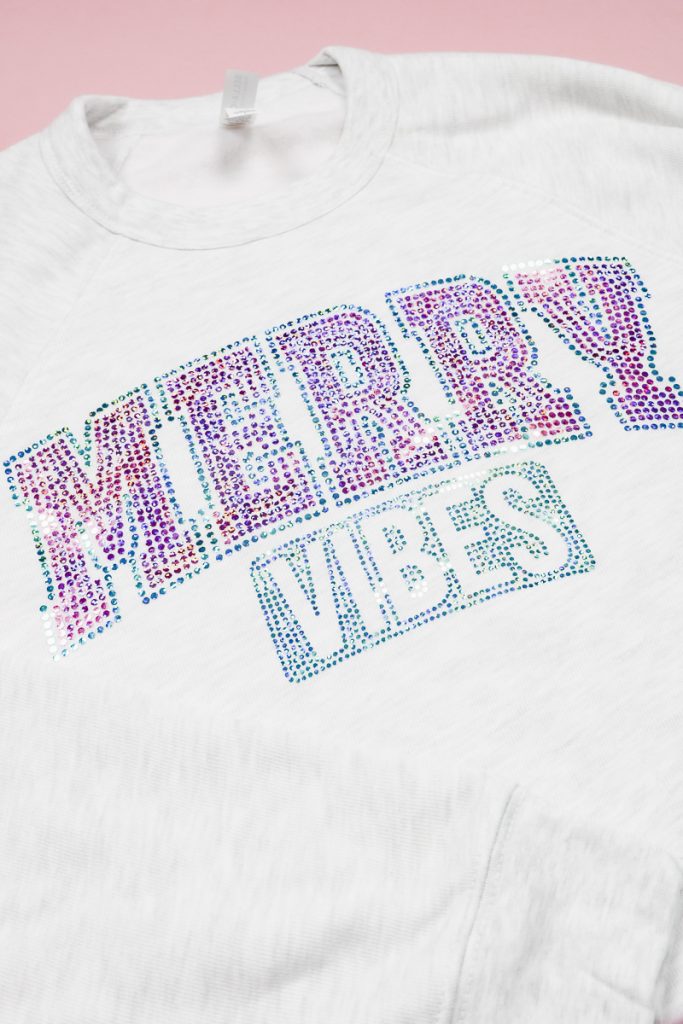
The large design looks amazing. The more I look at it, the happier I am that I didn't have to try to convert this image myself. Ninja Transfers took the solid design and turned it into the circle rhinestone look, and I love it.
I also ordered the design in a smaller size to see if there was any difference.
If you look closely, you can see that all the circles are smaller and that some of the detail is lost. I can still tell that it says Merry Vibes, but it's harder to read. Especially the V. At a glance, it can look like an M.

If you compare the two images, you can see that there are fewer circles on both sides of the V in the smaller design.
This is a good reminder to look closely at the Proof images they send and to keep your project size in mind when selecting your design.
Now that my transfers are here, I can get crafting.
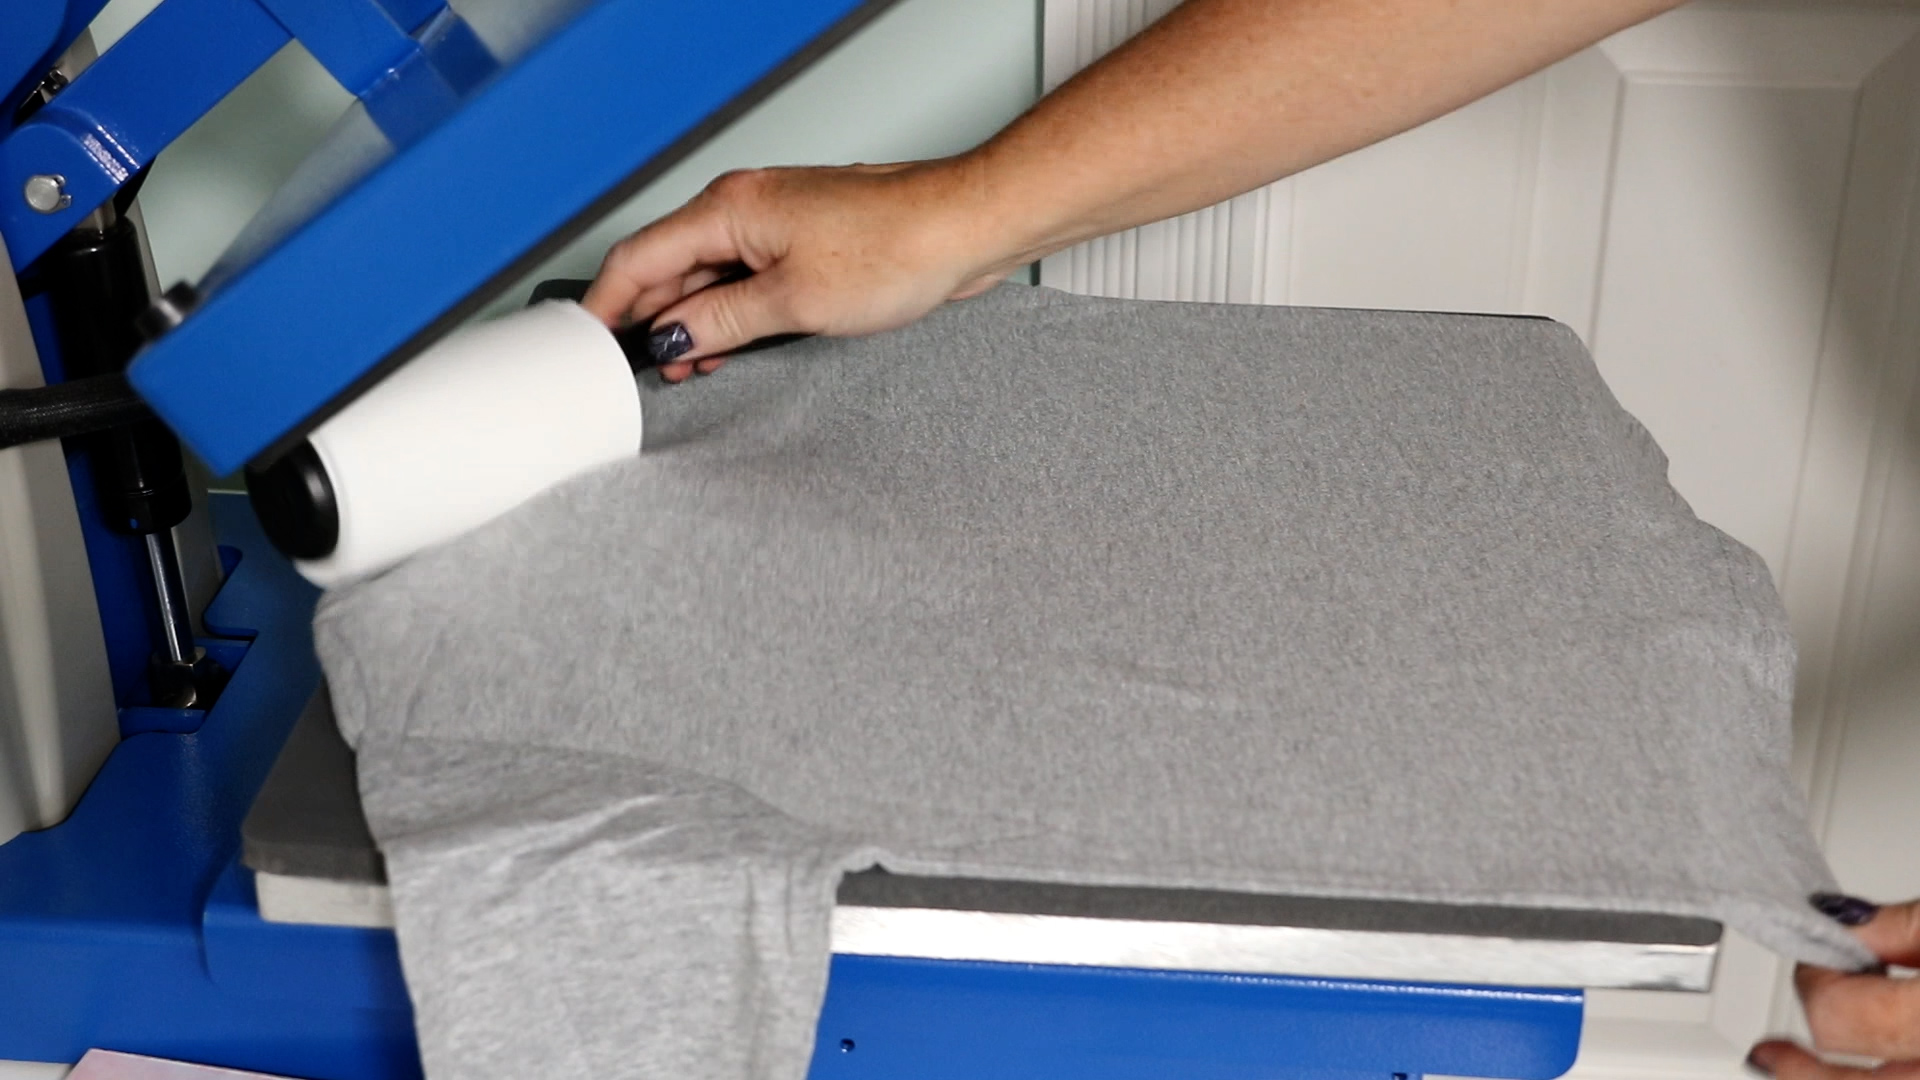
Step 3. Prepare Blanks and Heat Press
The best thing about ordering DTF prints is how quickly you can make a project. No weeding, no getting out machines, no dealing with tiny little rhinestones. Just press, and you're done.
Preheat your heat press to 315 degrees and set the timer for 15 seconds.
We also want to pre-press our shirts. While we're pre-pressing, we can adjust the pressure on the press. This material calls for a medium to firm pressure, so adjust the press as needed.
Ninja Transfer transfers all come with the settings for different pressing options. Make sure you follow the instructions for the process you're using. I am using a traditional heat press, and those are the settings recommended.
After pre-pressing your blank lint roll the surface to remove any dust or other debris, and then smooth the surface to ensure there are no wrinkles.
Step 4. Locate Designs on Shirts
For my first shirt, I am going to add one large design to the back and a small design to the front in the left chest pocket area. I am going to press the back design first.
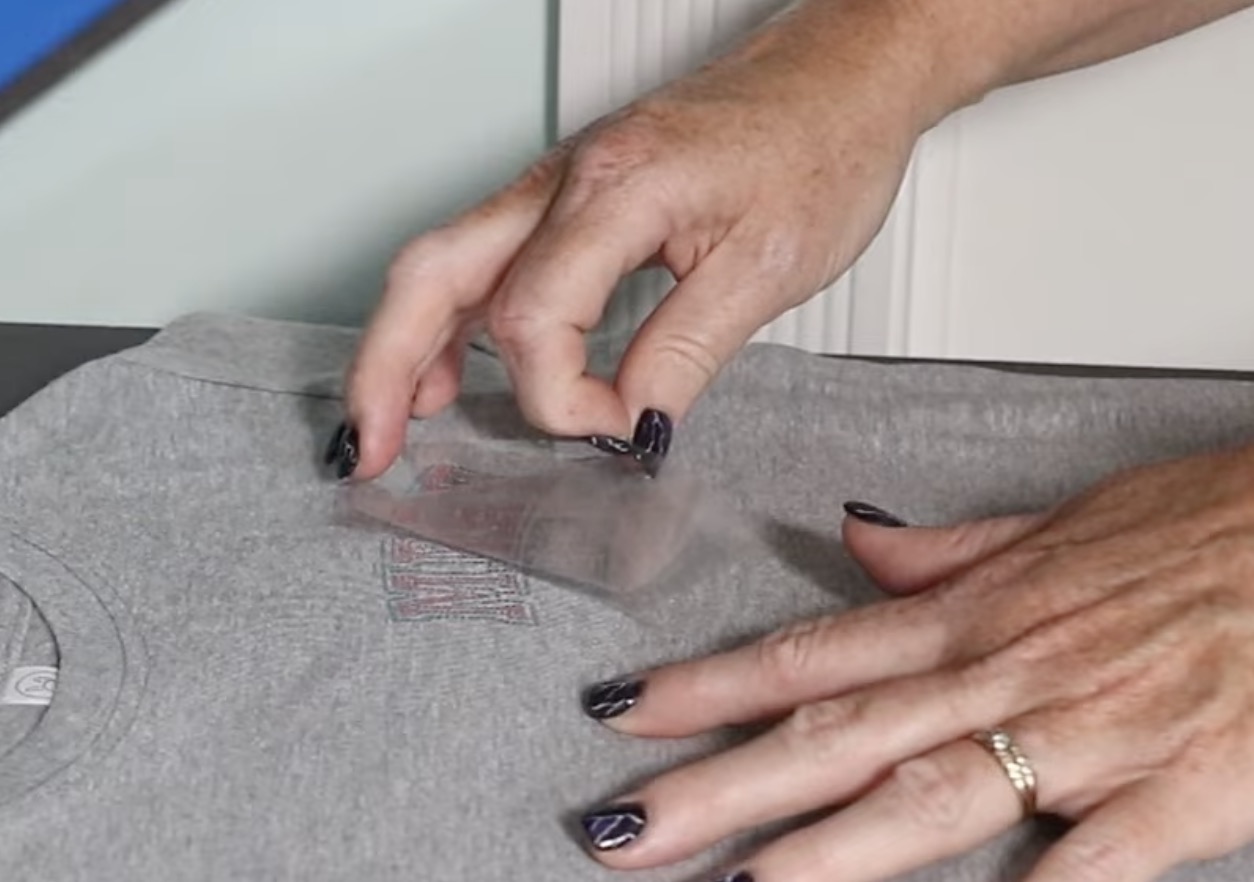
Remove the backer from the Spangle DTF transfer. Take your time making sure all the dots stick to the carrier sheet. I didn't have a problem with this. If your dots aren't sticking, use a scraper and burnish the front and back, and see if that helps.
The carrier sheet has a good amount of stickiness to it, so I didn't need heat-resistant tape to hold my design in place. If your carrier sheet is less sticky and you're worried about it moving during the pressing, add a few pieces of tape to prevent that.
The back of the actual design is not sticky until after heat is applied. You can move it around as needed to get it located correctly without impacting how it adheres.
Step 5. Press Design On the Shirt
With everything located how you want cover the whole design and shirt with protective paper and press with medium to firm pressure for 15 seconds at 315 degrees.
When the time is up, remove the protective paper and allow the transfer to cool until it is warm but no longer hot. You do not want these transfers to cool completely.
Use a DTF cooling block to help speed up the cooling process.

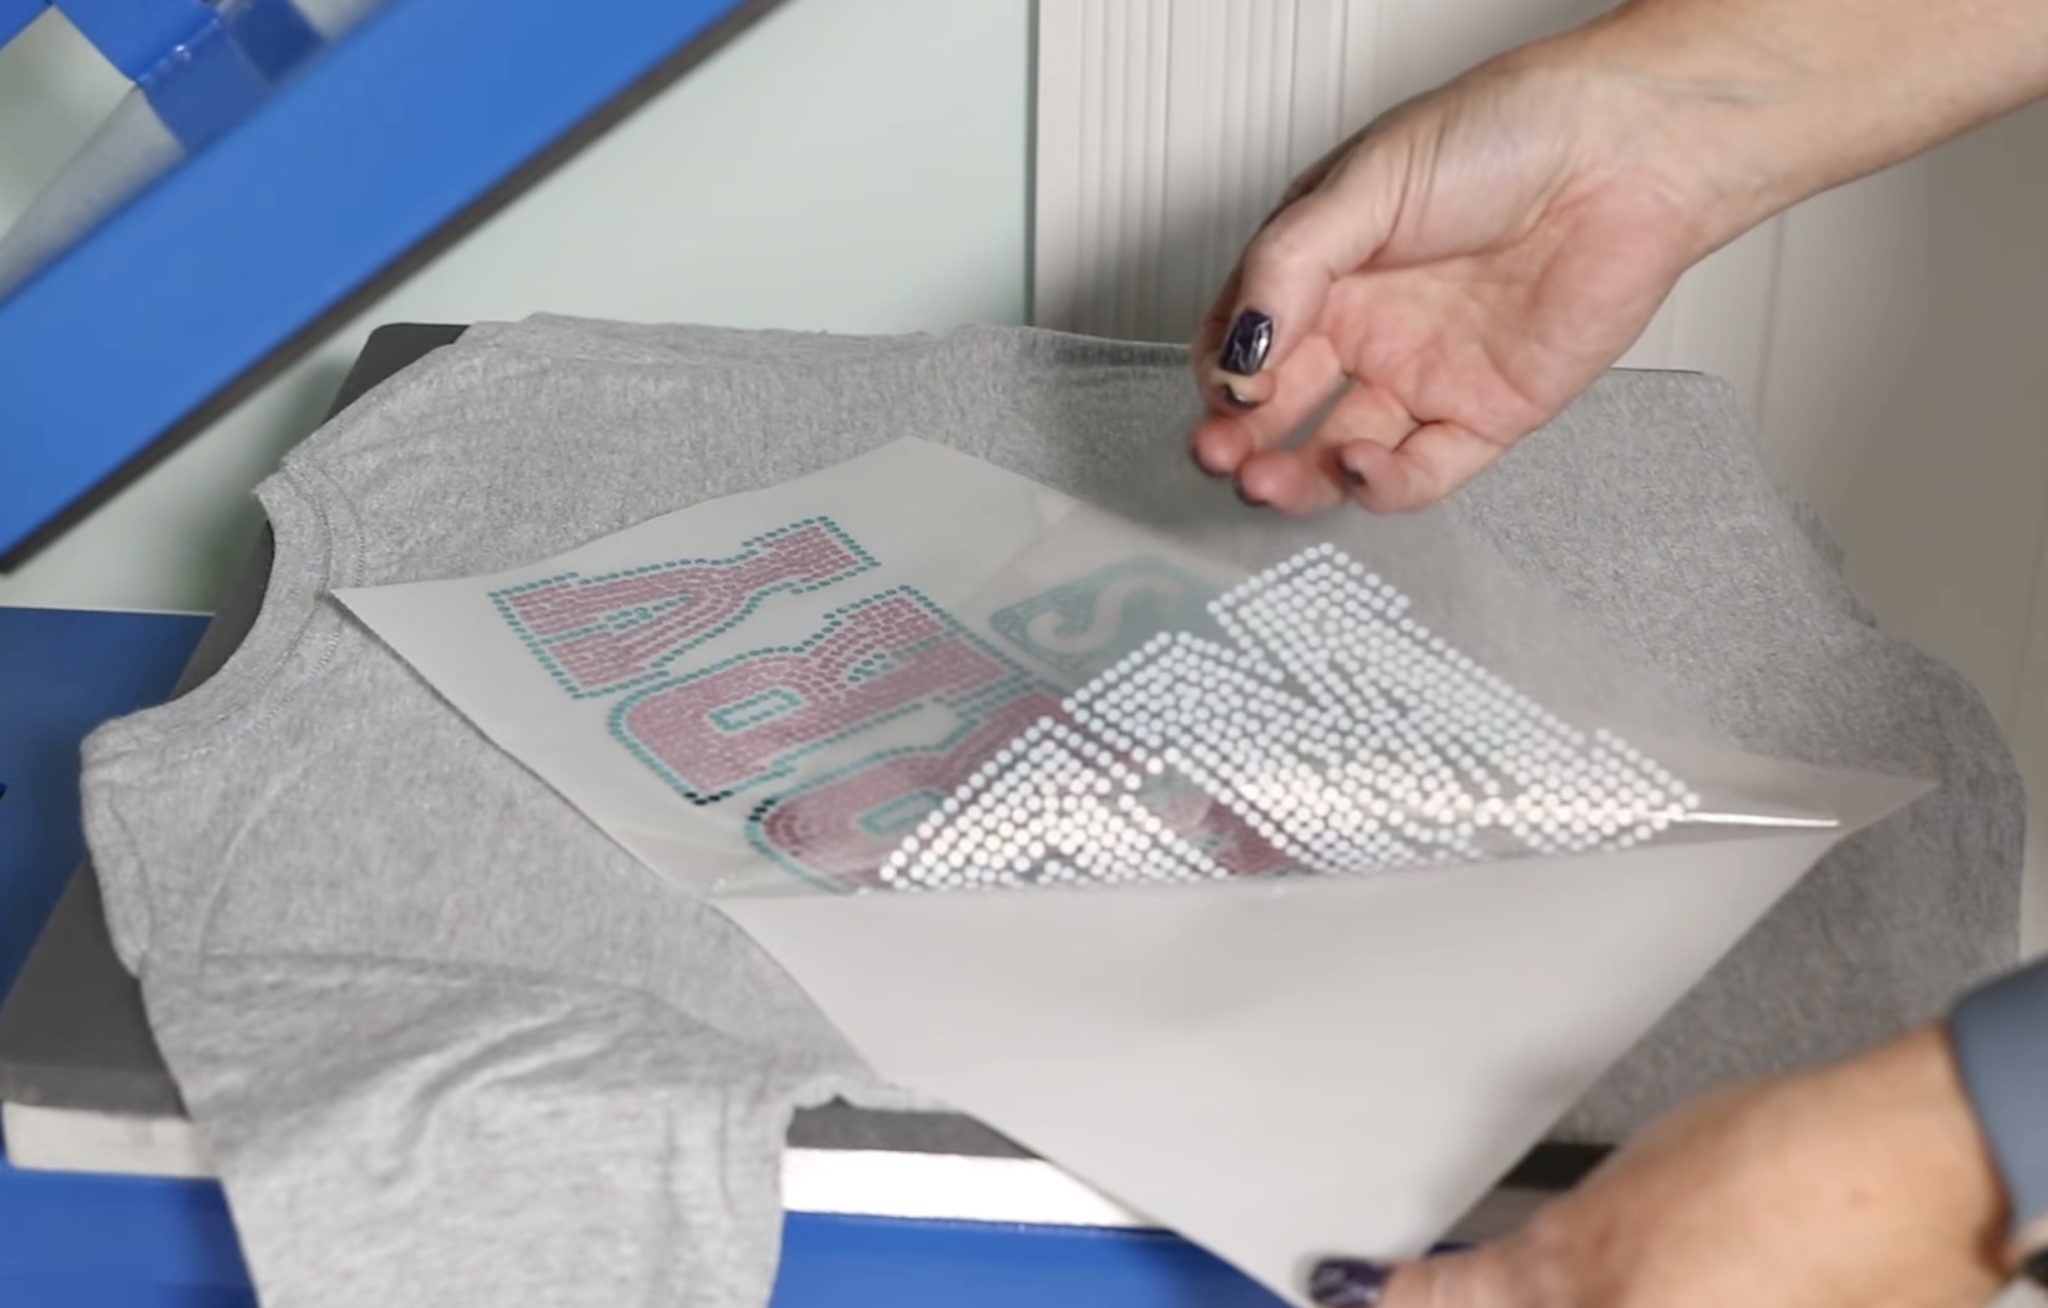
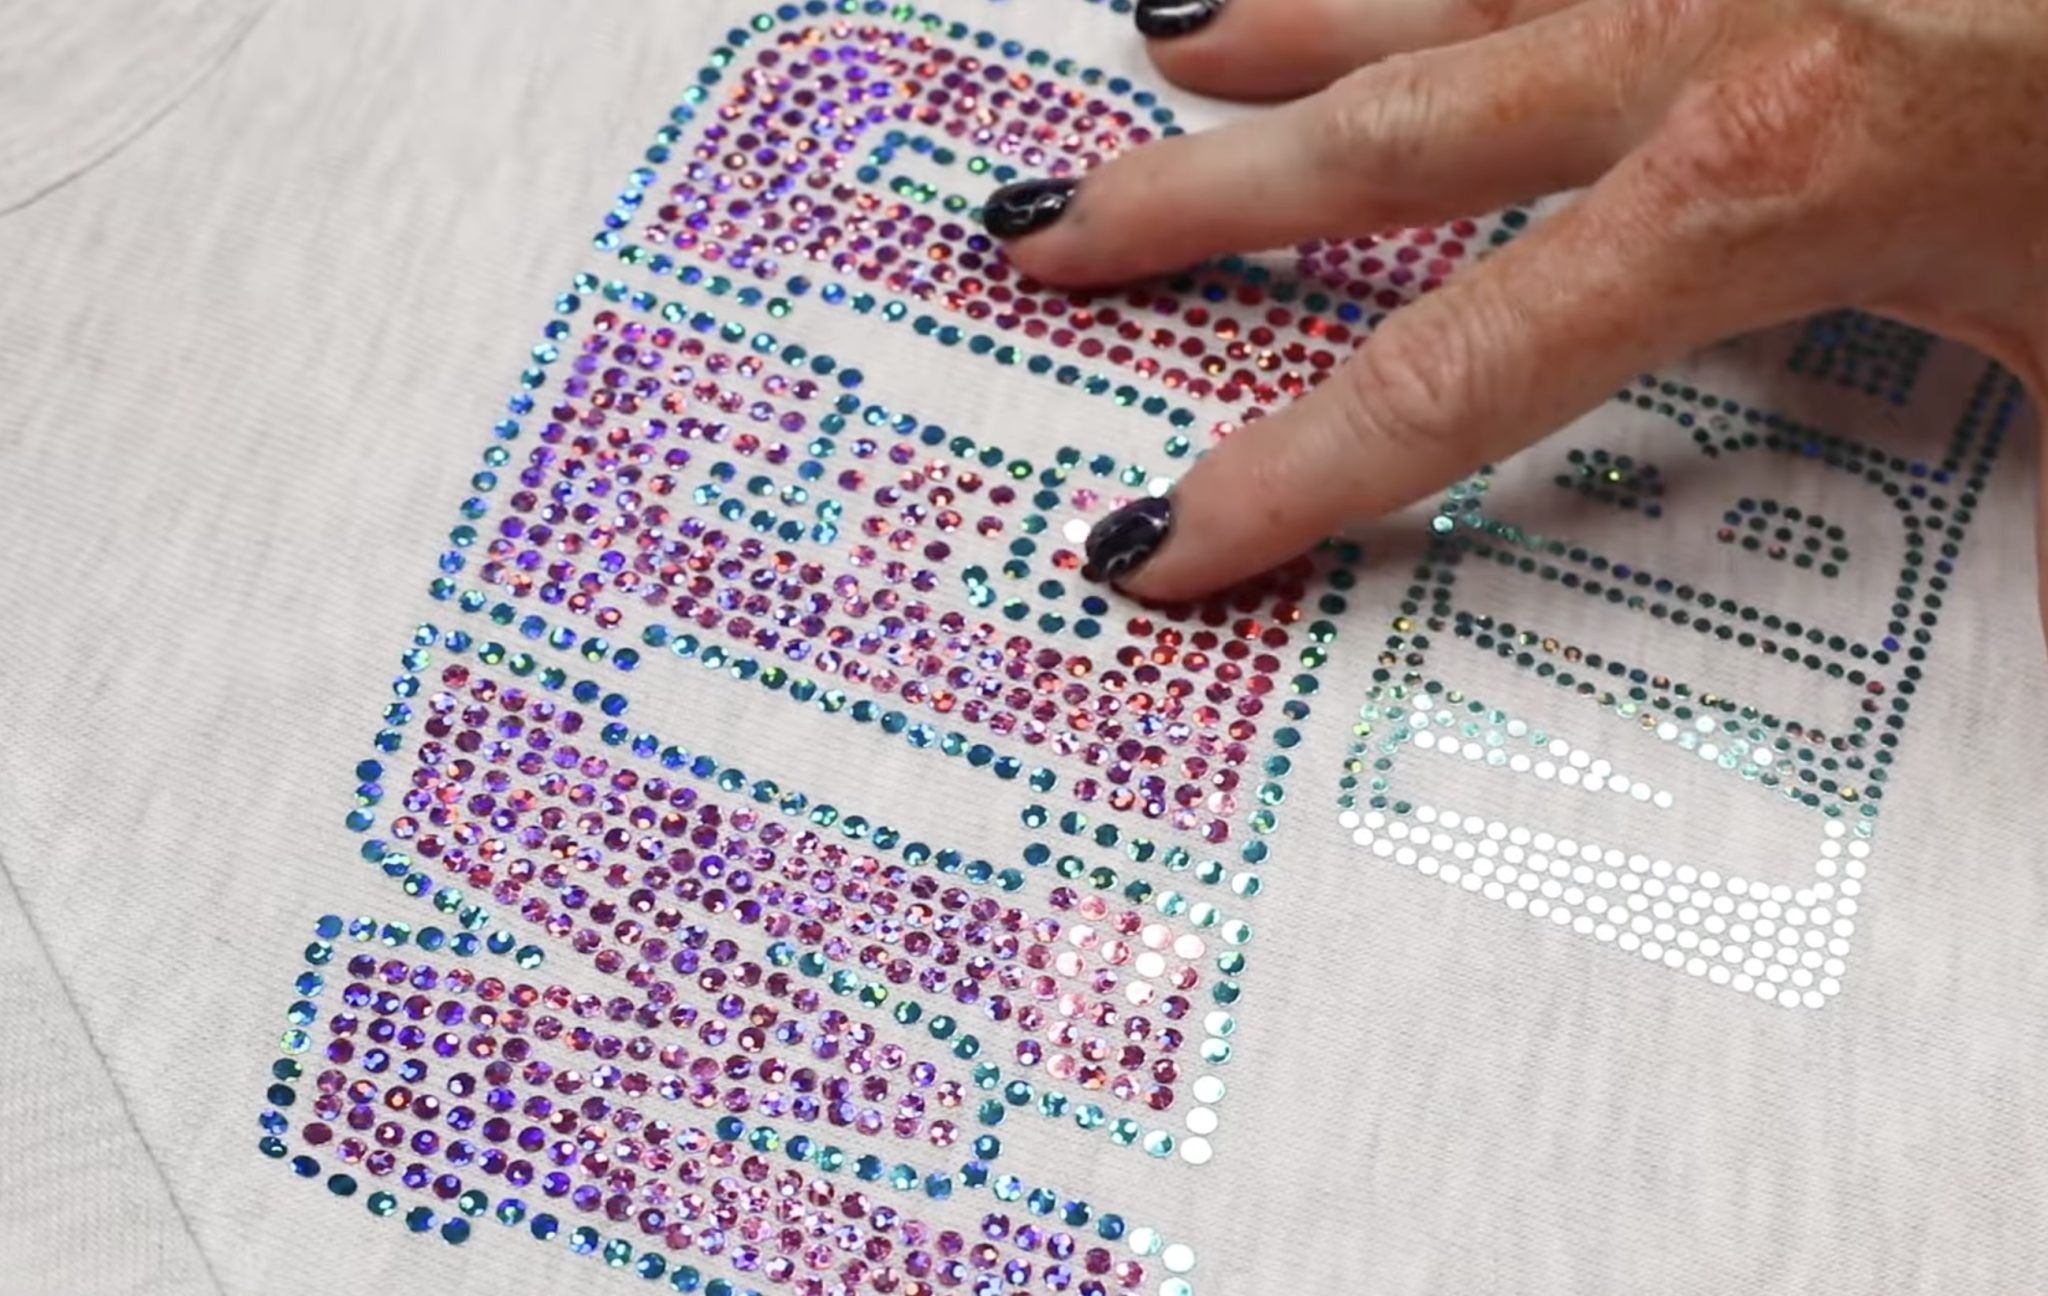
Step 6. Remove Carrier Sheet and Post Press
When the design is warm but not hot or cold, peel back the carrier sheet. Start at one corner, go slowly, and take your time making sure all the dots are stuck to the shirt.
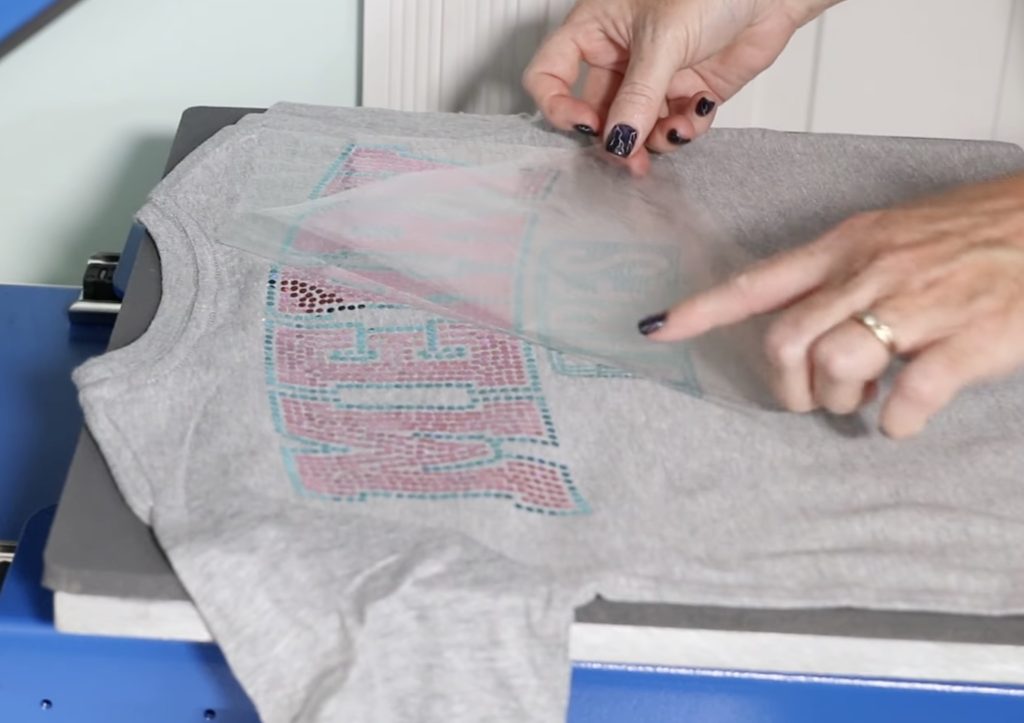
All of my dots stuck perfectly the first time.
With the carrier sheet removed, place a sheet of protective paper over the top of the design and press again at 315 degrees for about 4 seconds.
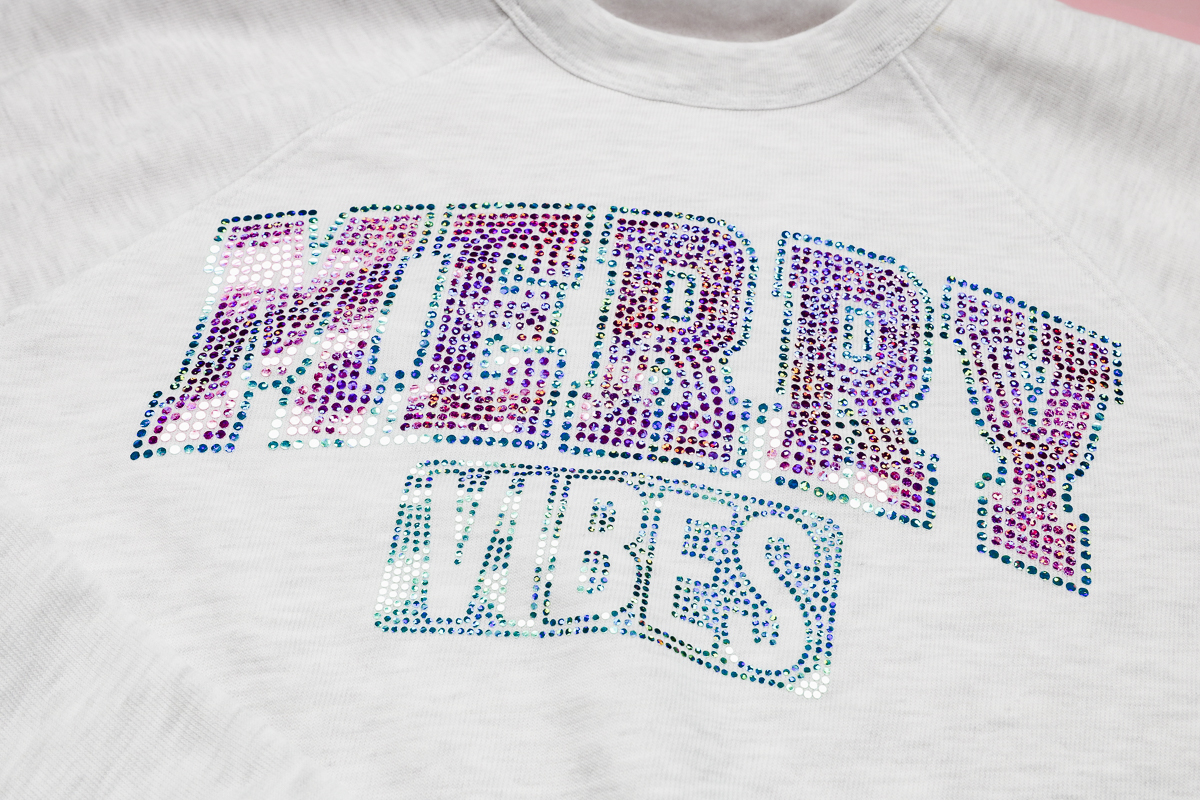
After the post-press, that design is done and ready to wear.
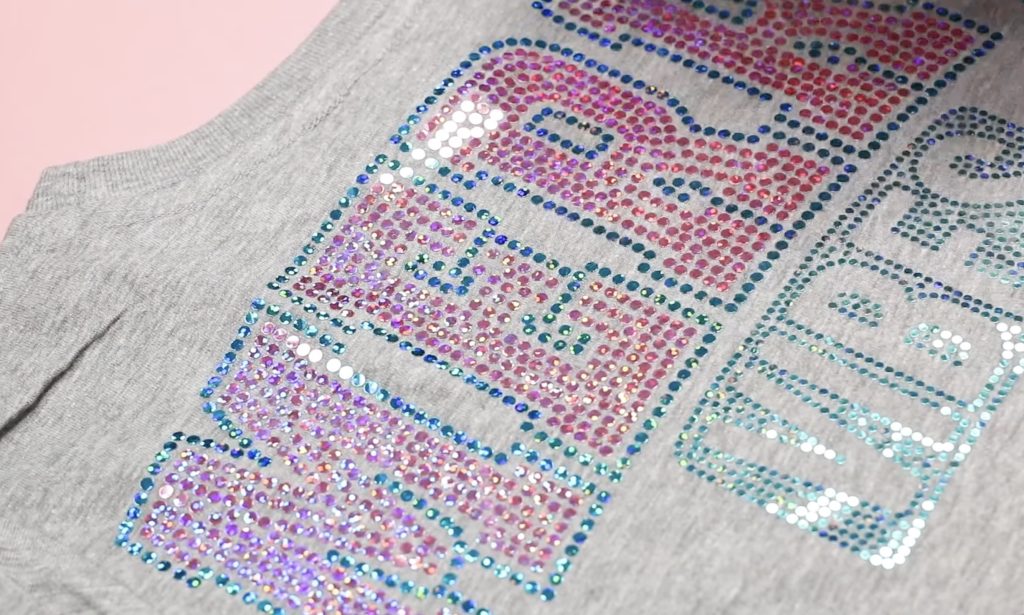
I cannot get over how amazing and sparkly the Spangle DTF looks. It feels fantastic too.
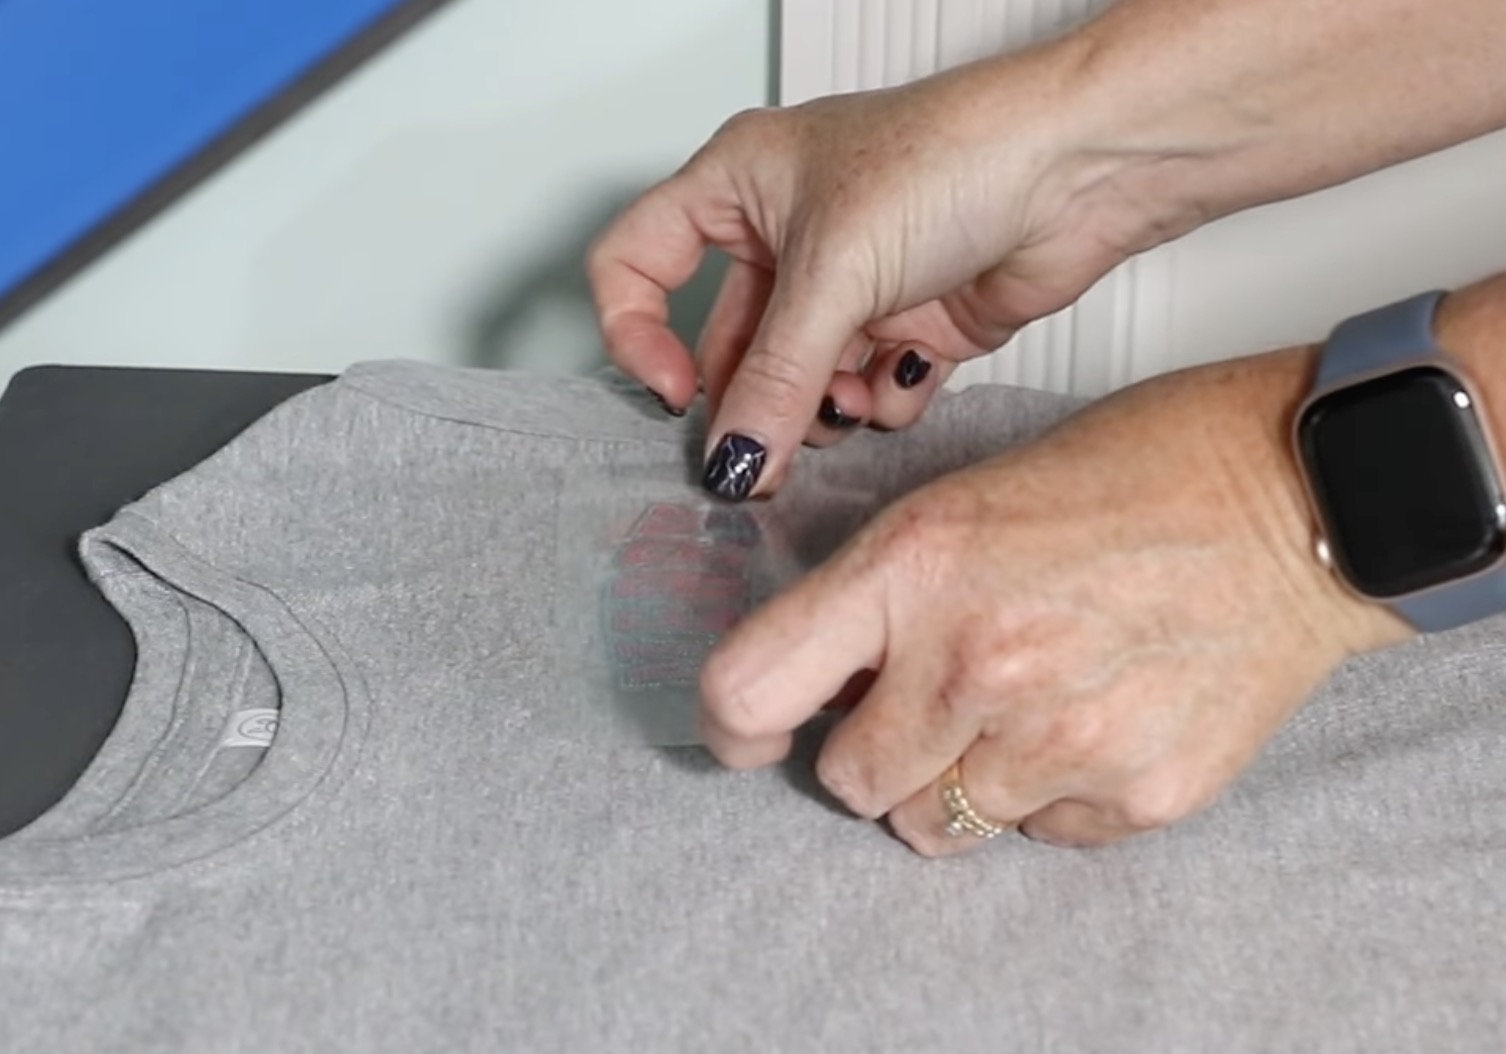
Step 7. Add a Small Design to the Front of the Shirt
For this shirt, I want to add one of the smaller designs to the front in the left chest pocket area. The process is the exact same as it was for the back.
- Lint roll the surface to remove any dust or debris.
- Remove the backer from the design.
- Locate the design and secure it in place with heat-resistant tape if needed.
- Cover the design with protective paper and press for 15 seconds at 315 degrees.
- Allow the transfer to cool until it is warm and remove the carrier sheet.
- Cover design with protective paper and post-press for 4 seconds at 315 degrees.
The smaller design is a little harder to read than the design on the back, but the sparkle is beautiful, and it transferred exactly how it should.
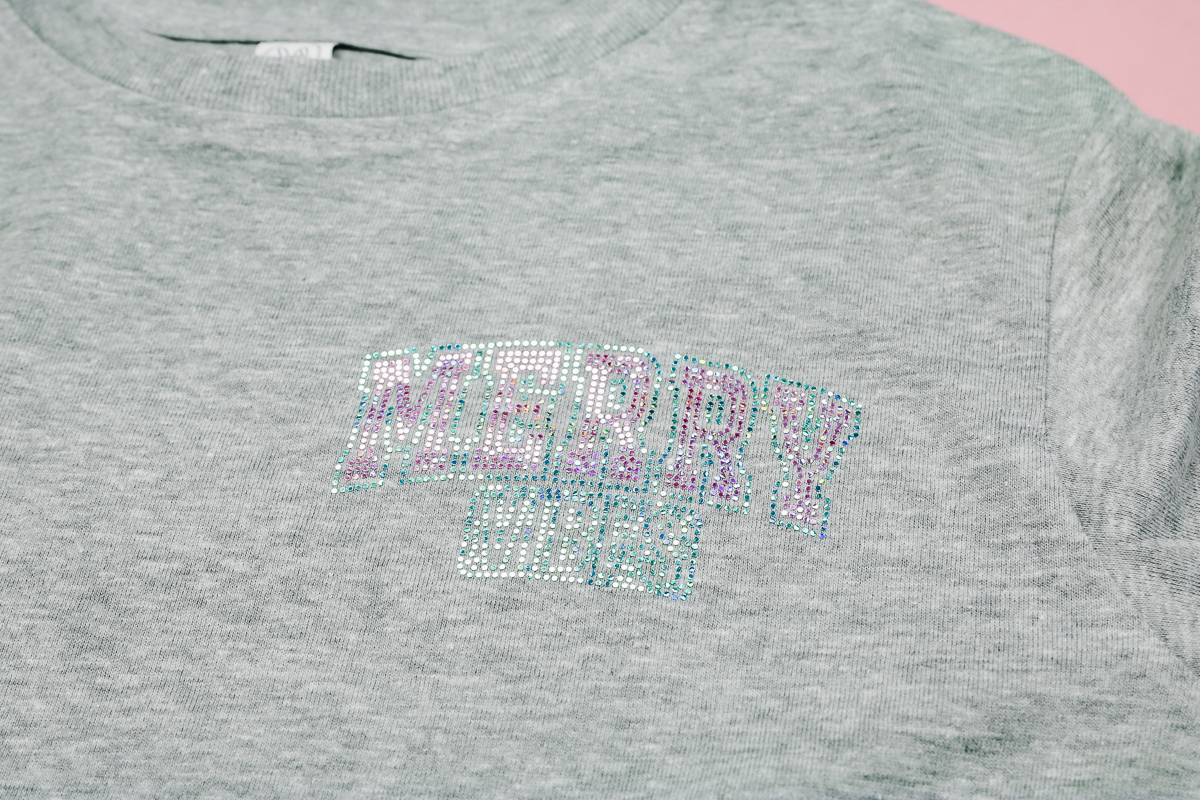
Lighter vs. Darker Shirt Colors
Since I have 10 of these Merry Vibes Spangle DTF transfers, I wanted to see how it would look on a different color.
If I am forced to pick, I have to say I prefer the design on the lighter colored sweatshirt. It looks really good on both, but I think the colors I chose pop off more on the lighter color.
Are You Ready to Make Custom Shirts with Spangle DTF Transfers?
Have I said yet that I am absolutely in love with how these shirts turned out? If not, let me say it again. I love these transfers. They have all the shimmer of a rhinestone without the work, hair pulling, or rough texture.
I want to remind you that you need to keep your design detail and project size in mind when ordering these prints. You may also want to think about what color blank you want to use to ensure you pick the right colors for your blank.
As you saw, the large design looks amazing, and it's really easy to read exactly what my shirt says. The smaller design did lose some detail, making the word VIBES a little harder to read. For smaller projects, I would stick to designs that have less detail.
I know that the 10 transfer minimum seems like a lot if you're not selling the projects you make. If you want to try Spangle DTF, gather some friends and find a design you all want to use, and split the cost. There are definitely designs out there that are multipurpose, so people could choose if they wanted it on a shirt, tote bag, banner, etc.
Spangle DTF transfers are also perfect for cheerleader teams, parent team merch, and other clubs like book clubs, craft clubs, gardening clubs, etc. If you really think about it, I bet you could easily use 10 transfers, especially around the holidays when you're making teacher gifts, neighbor gifts, and co-worker gifts.
I love this project enough to encourage you to look for designs you could use in multiple places, so you can give it a try, too.
I hope I've answered any questions you have about Spangle DTF transfers. If you have any additional questions, leave them in the comments, and I'll be happy to answer them for you.