
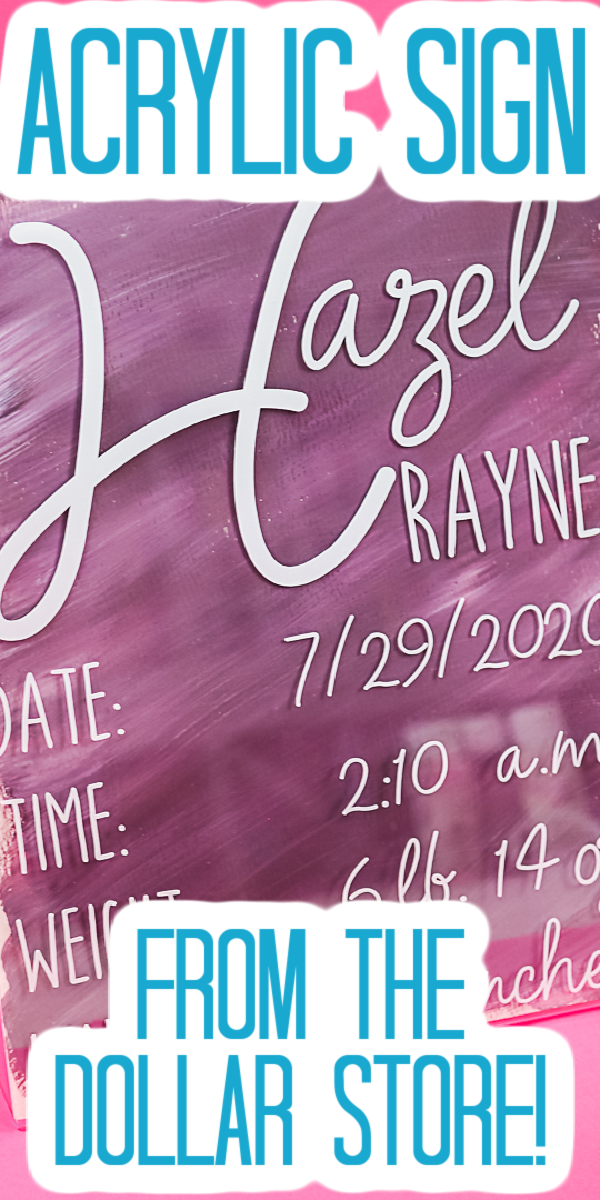
I have been seeing tutorials for a painted acrylic sign several places. Most of those, however, are for weddings. I thought I would put my own spin on the trend and do one for a newborn baby out of dollar store supplies. This project is super inexpensive and a great baby shower gift! You will also want to scroll down to the bottom of this post and see the other Cricut dollar store crafts I have for you today. I see a trip to the dollar store in your future.
Supplies needed:
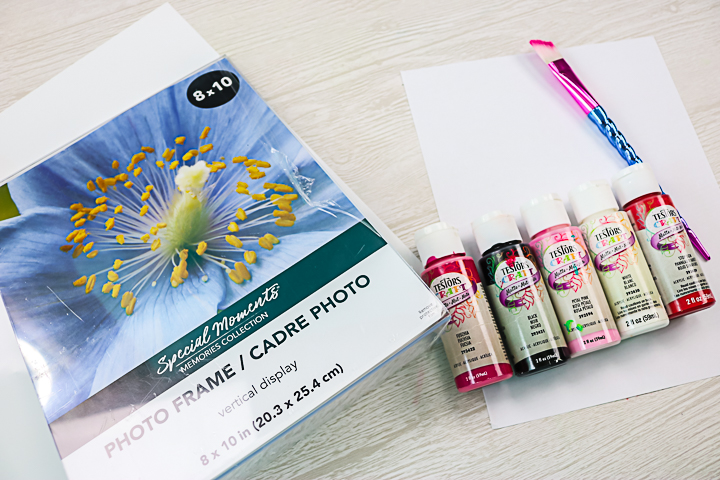
- Acrylic sign (from the dollar store)
- Heavyweight White Card Stock
- Paint (in a few colors)
- Paintbrush
- White vinyl
- Transfer tape
- Weeding tools
- Cricut machine
How to Make a Painted Acrylic Sign
Now that you have your supplies, you can create your own sign for the baby's stats in just a few steps. Follow the directions in the card below or print and use them to make this sign later.

Supplies
- Acrylic sign from the dollar store
- Heavyweight White Card Stock
- Paint in a few colors
- Paintbrush
- White vinyl
- Transfer tape
- Weeding tools
- Cricut machine
Instructions
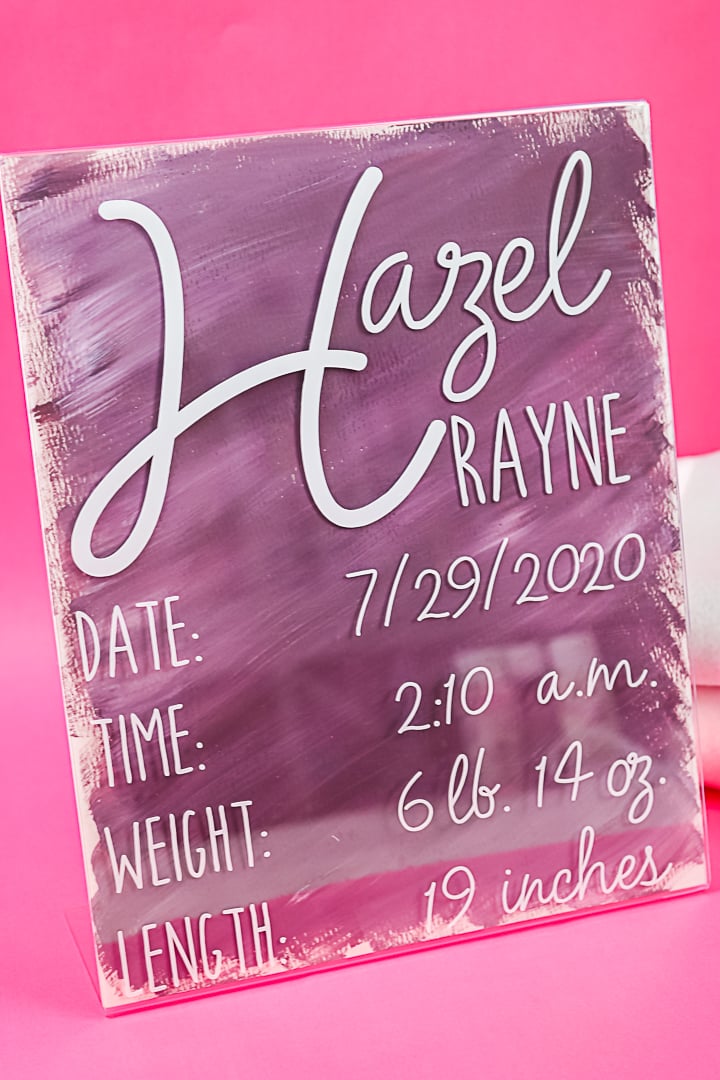
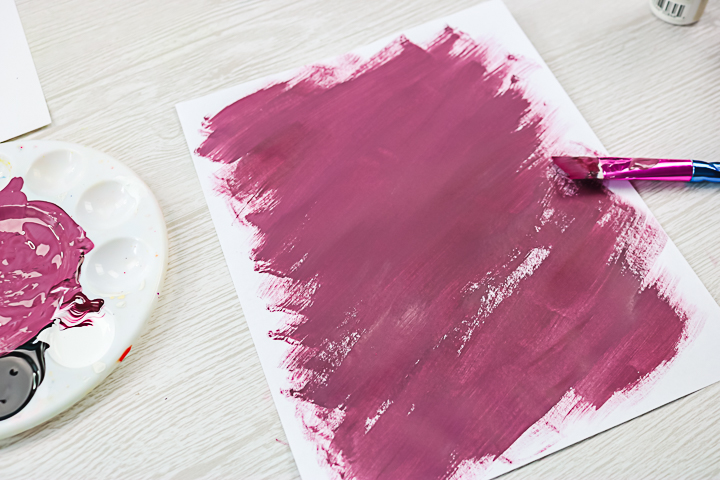
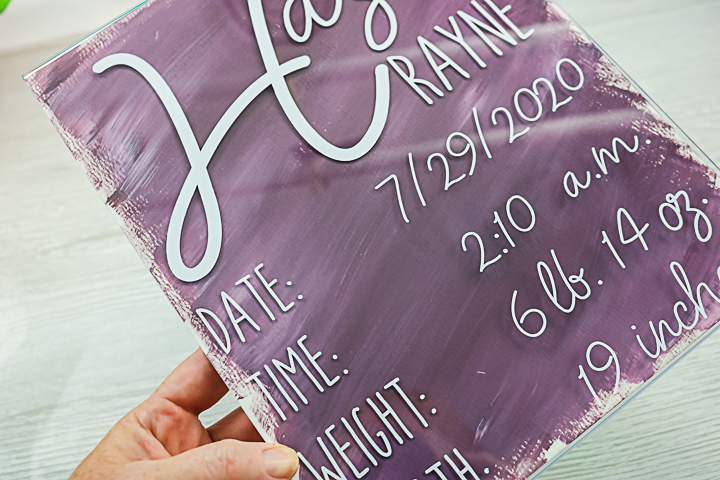
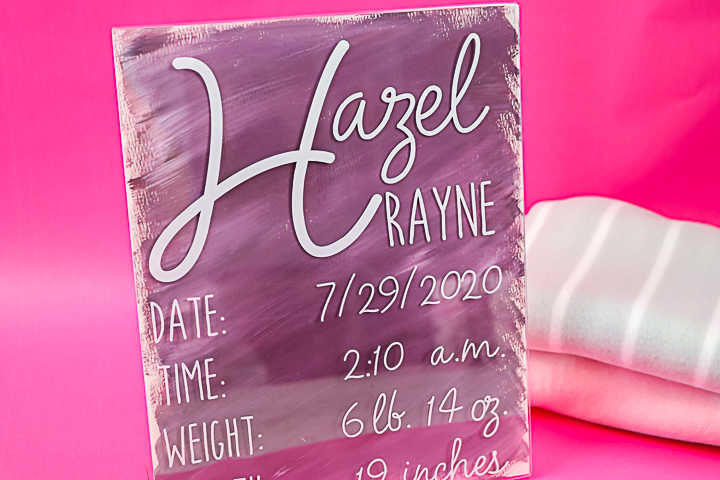
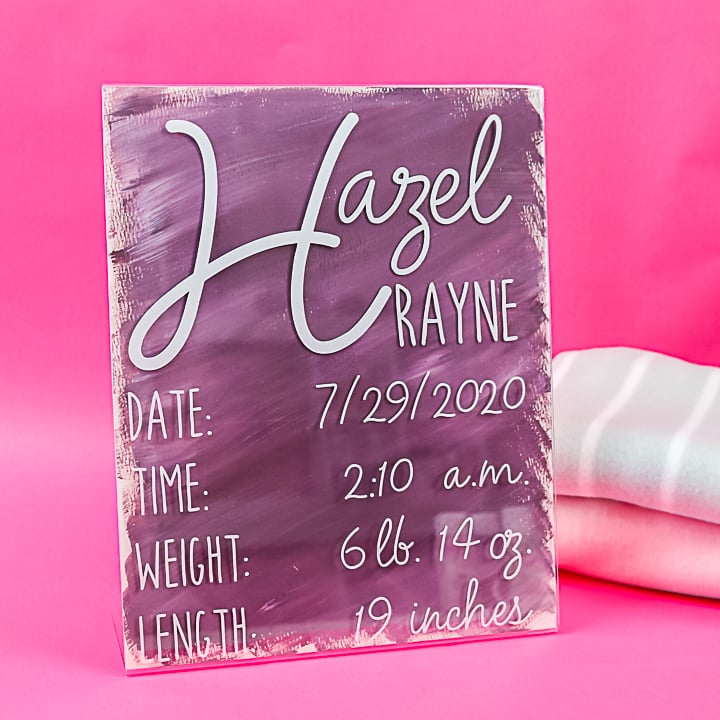
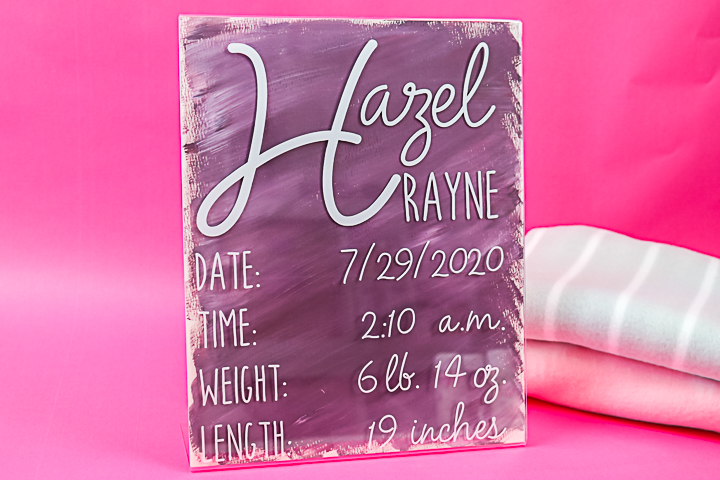
- Add paint to cardstock. Use a variety of shades and mix the paint to create different layers. The paint should go almost to the edge of the paper on all sides. Heavyweight cardstock is best here so that your paper lies flat. Set aside and allow to dry.

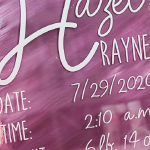
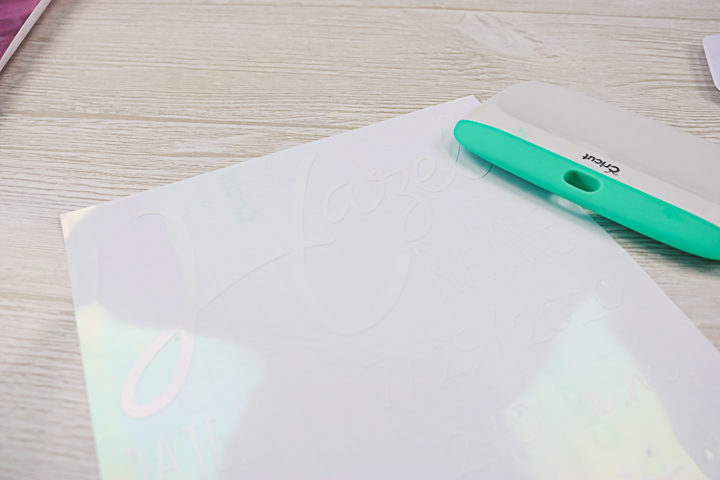
- Cut the vinyl with the sign details. I created my version right in Cricut Design Space or you can search for "birth announcement" for some premade options. If giving as a gift before the baby is born, leave off the stats and put a note with the gift that you will personalize later.
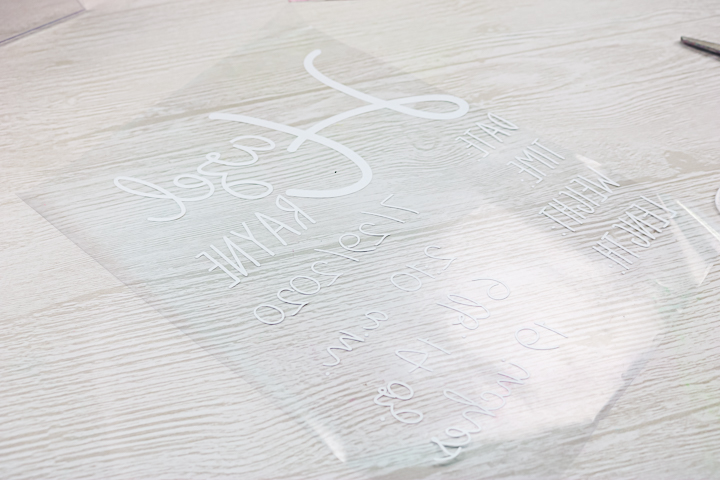
- After the vinyl is cut, you will want to weed away all of the excess around the outside as well as the centers of the letters. Then add the vinyl to transfer tape for application. You can see the basics of working with Cricut vinyl here.
- Use the transfer tape to add the vinyl to the front of the sign. Burnish it down well then remove the transfer tape.
- Assemble the project by adding the painted cardstock to the acrylic frame. If your cardstock is not flat, you may have to tape at the bottom. Otherwise, this gift is complete and ready to give to anyone that has had a baby!

Customize the colors on this one to match baby's nursery. Since I used an acrylic photo stand, this one stands up on it's own. Want to make one that hangs on the wall instead? Try a piece of acrylic out of a dollar store picture frame and just paint the back instead of using the paper.
You could also give this one without the information and the parents could write it in later with a permanent marker. I love the look of the vinyl more. So, if you want to give this for a baby shower, just be sure to let them know that you will cut vinyl for the details after the birth.
I think everyone will love this cute sign and you don't even have to tell them how little money it actually costs.
If you have wondered how to make a painted acrylic sign, now you have the instructions and how to make it even cheaper with dollar store supplies.
More Cricut Dollar Store Crafts:
I promised you that I had some more crafts that you didn't want to miss. Well, these ladies did not disappoint! Check out all of the things you can make with your Cricut and dollar store supplies.
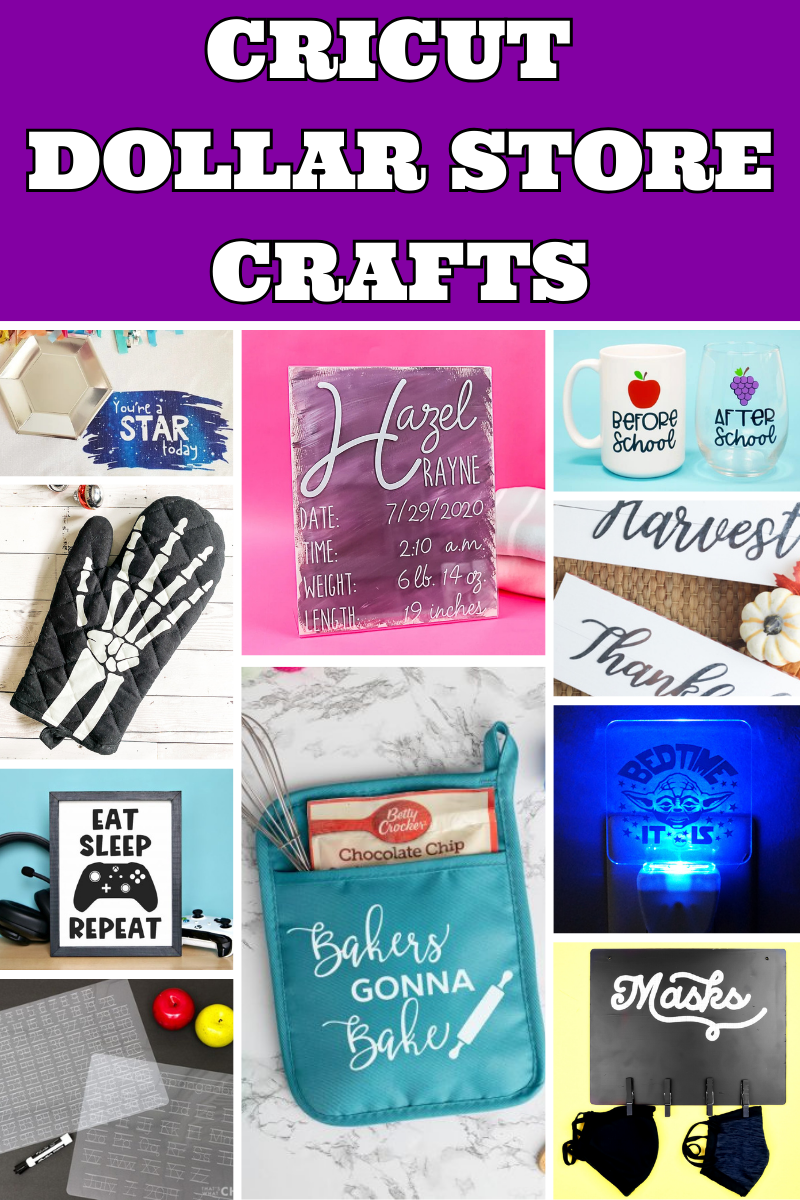
- Reverse Canvas from Happy Go Lucky
- Dollar Store Fall Sign from Hello Creative Family
- Yoda Night Light from Artsy Fartsy Mama
- Before/After School Mug and Wine Glass from Happiness is Homemade
- Infusible Ink Placemat from Crafting in the Rain
- Skeleton Hand Oven Mitt from Everyday Party Magazine
- Painted Acrylic Sign from The Country Chic Cottage (you are here!)
- Penmanship Tracing Mats from That's What Che Said
- Potholder Baking Mix Gift Set from Brooklyn Berry Designs
- DIY Mask Hanger from Mad in Crafts
So, make this painted acrylic sign or any one of these other dollar store crafts. I think you will be amazed at what you can make for very little money.


