
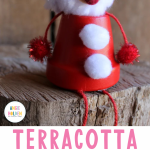
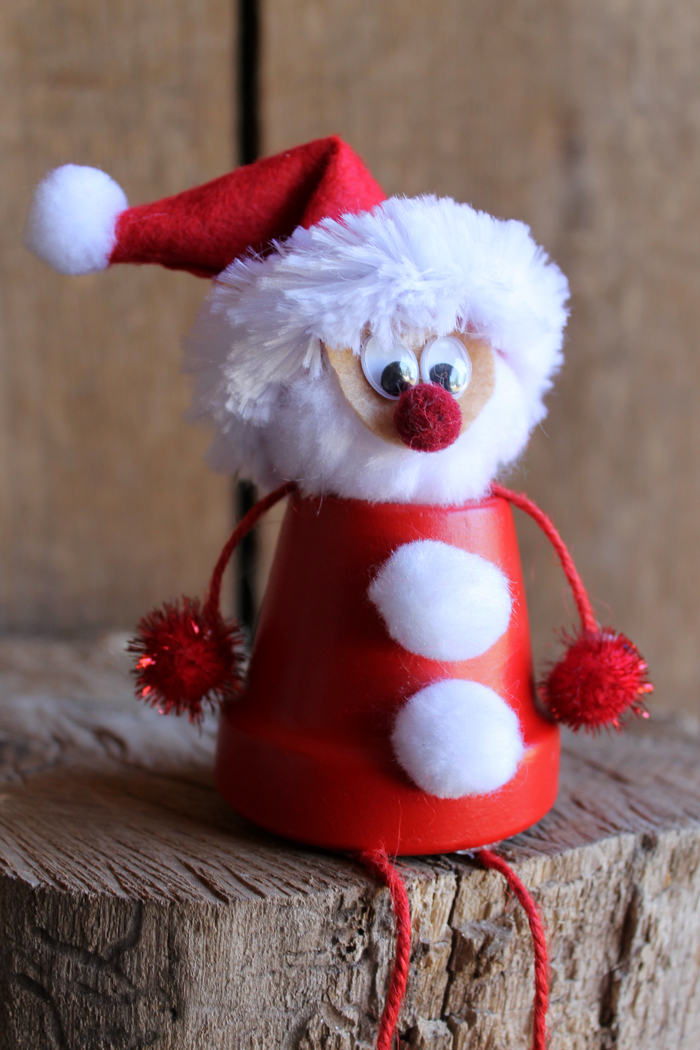
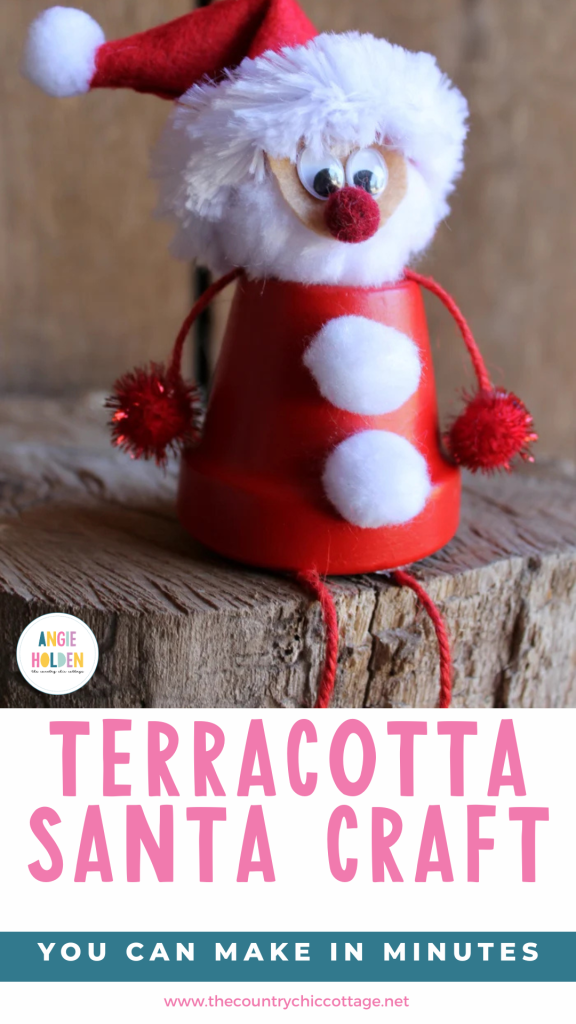
Make this terracotta Santa craft for your Christmas decor! This is the perfect craft for kids to help make with an inexpensive clay pot.
How To Make Terracotta Santa
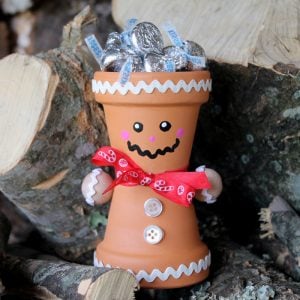
Terra cotta clay pots are inexpensive and perfect for crafting. You can turn them into just about anything! For example, in the past, I have made Christmas Bell Ornaments, Thumbprint Christmas Tree Ornaments, and even a Gingerbread Man. I knew I wanted to add to my collection, so I used a terracotta pot to create this fun Santa that is perfect for your Christmas decor.
Plus, the best part is that kids can easily make this project with you! So, grab a terra cotta pot, paint, and pom poms, and let's make this adorable terracotta Santa!
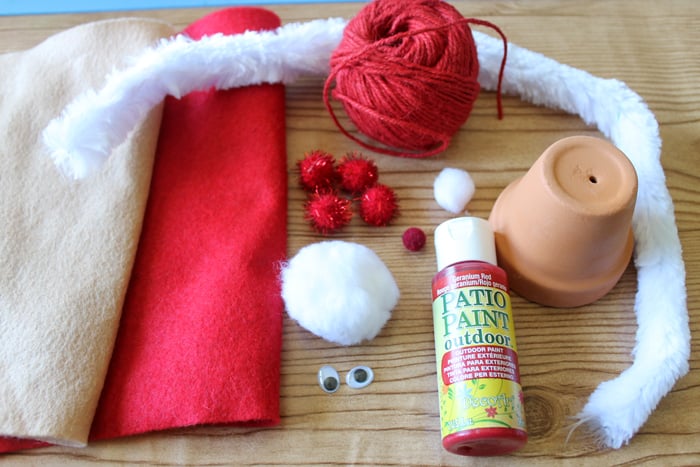
Supplies Needed To Make Terracotta Santa
- Terra cotta pot
- Red paint (Patio Paint works best with terra cotta)
- Large white pom pom
- Red felt
- Skin tone felt
- Red twine
- Medium white pom poms (2)
- Small white pom pom
- Medium red pom poms (4)
- Small red pom pom
- Large white pipe cleaner
- Google eyes
- Hot glue and a glue gun
- Scissors
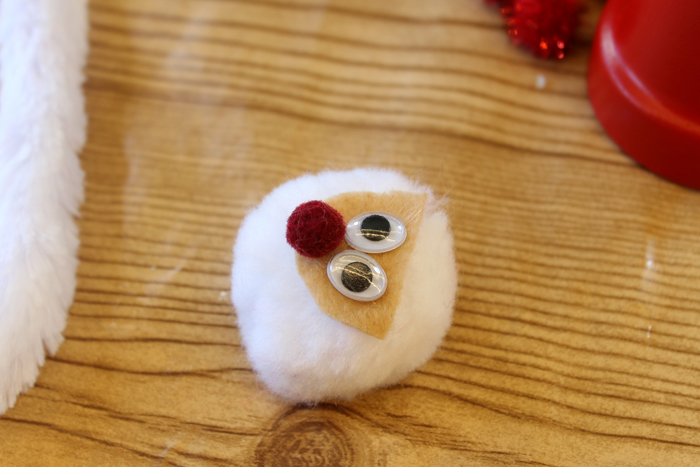
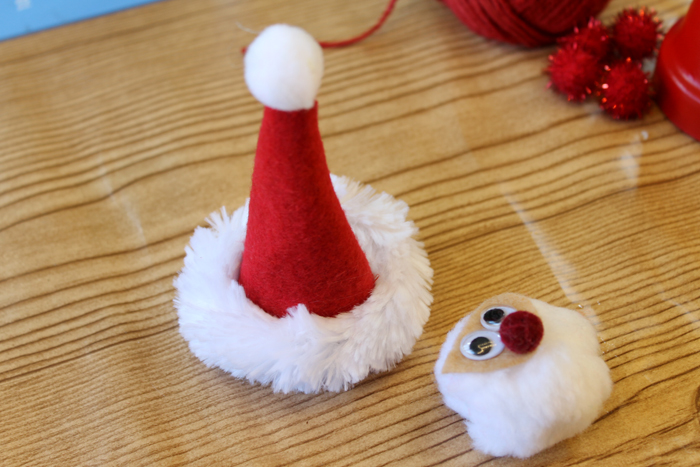
Step 1: Cut Santa's Face Shape
Start by making Santa's head with the large white pom pom. Cut out a face shape from the skin tone felt (as shown below).

Step 2: Glue Santa's Face Shape To White Pom Pom
Make the face on the pom pom using hot glue to secure.
Step 3: Gather Supplies For Santa's Hat
Make Santa's hat with a piece of red felt, a white pom pom, and a large white pipe cleaner.

Step 4: Roll Red Felt & Glue White Pom Pom To The Top
Roll the felt into a hat shape and trim with scissors. Secure with hot glue and put the white pom pom on top.
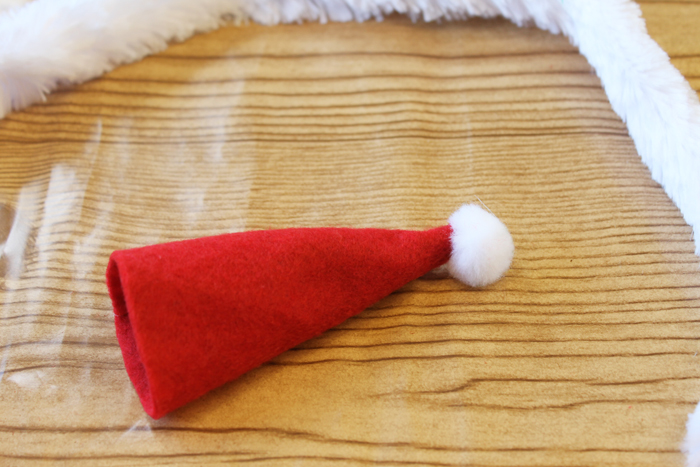
Step 5: Glue Pipe Cleaner To Santa's Hat
Add the white fur trim with your pipe cleaner. Secure with hot glue.
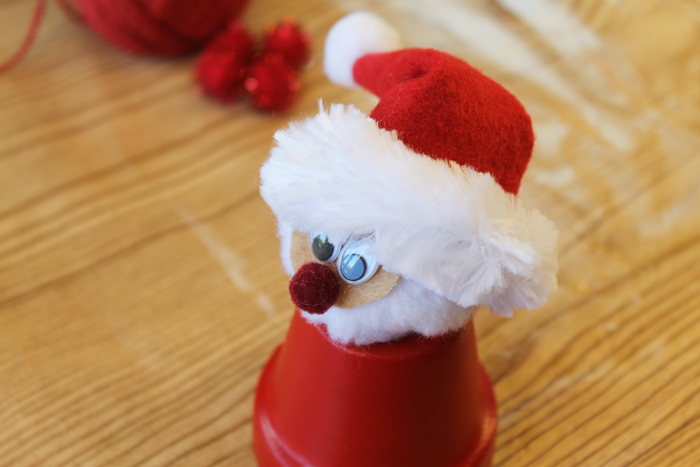
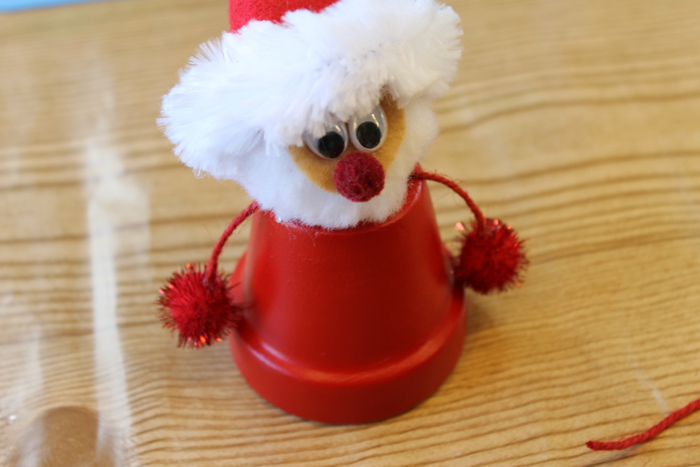
Step 6: Paint The Terracotta Pot & Glue Santa's Head & Hat To The Terracotta Pot
In the meantime, paint your terra cotta pot with red paint. Patio Paint makes quick work of this, and often one coat is all that is needed. Once dry, add on your Santa head and hat with hot glue.
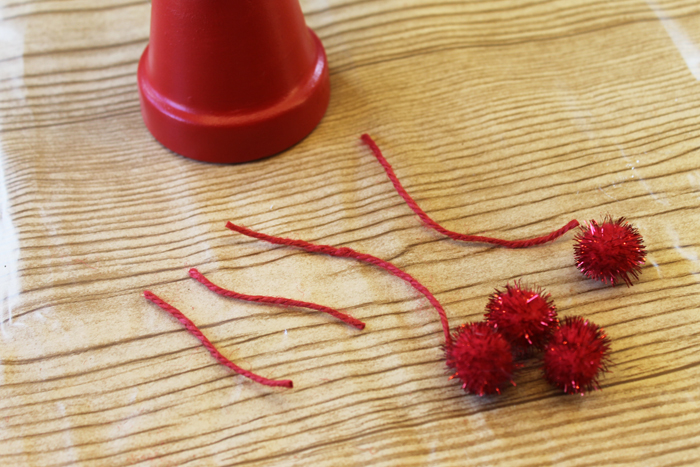
Step 7: Cut Arms & Legs From Red Twine
Cut arms and legs for your creation from the red twine. The legs should be longer than the arms.
Step 8: Glue Arms To The Outside Of The Terracotta Pot
Add the arms to the clay pot as shown below. Add red pom poms as hands.
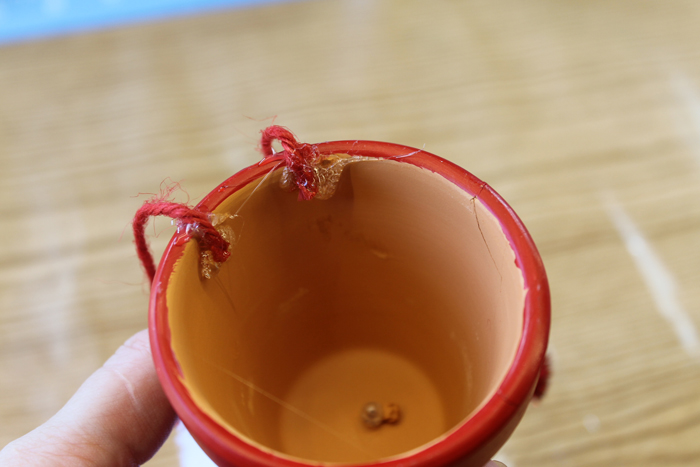
Step 9: Glue Legs To The Inside Of The Terracotta Pot
The legs secure to the inside of the pot as shown below.
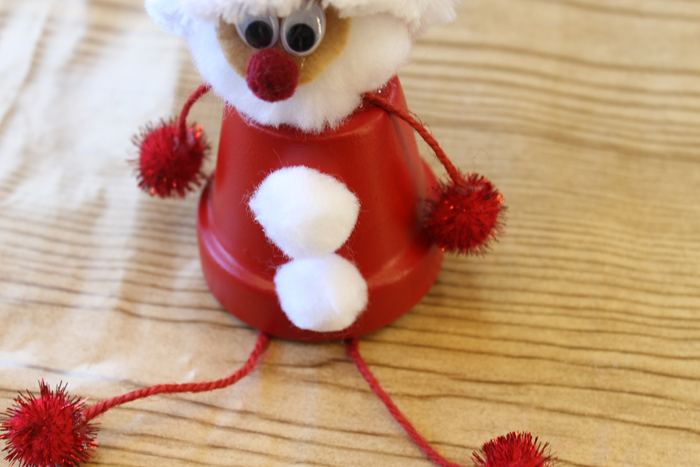
Step 10: Glue On Pom Poms To Legs & Terracotta Pot
Add feet to the ends of your red twine legs. I also added a couple of medium-sized white pom poms to the front as buttons.
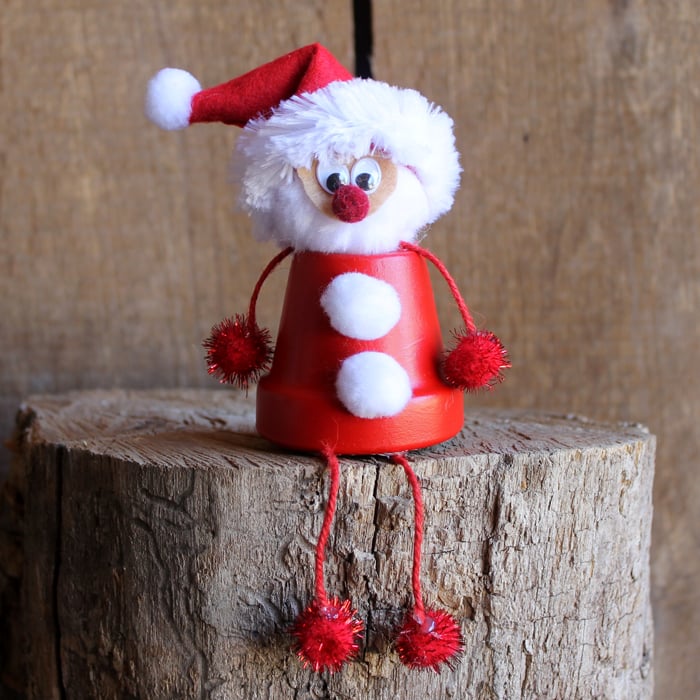
This terra cotta Santa craft is ready for your Christmas decor.
I think he is just adorable, and I can't wait to add him to my Christmas mantel. He would also look great on a shelf with those little legs dangling.

Your kids will love to help with this fun Christmas craft idea.
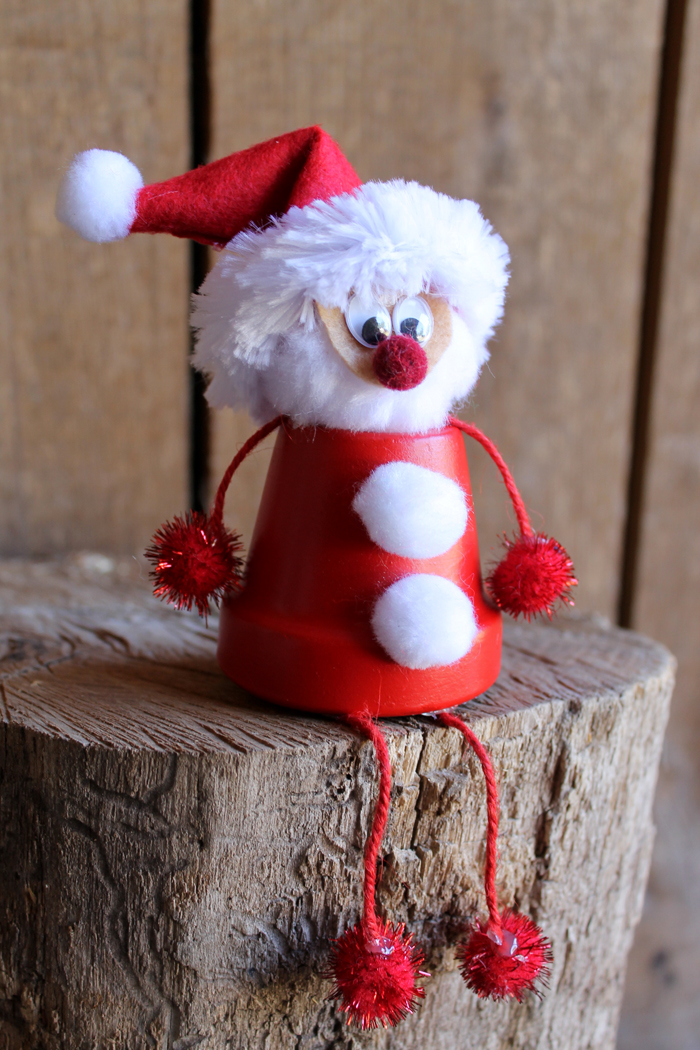
Add this clay pot Santa craft to your must-make list this holiday season. You might also want to make this clay pot chimney craft to go along with it.
Tips and Tricks for Terracotta Santa
Now that you’ve seen how to make this terracotta Santa, are you ready to make your own? Here are a few tips and tricks to ensure your project goes as smoothly as possible!
- Adjust The Size Of The Terracotta Pot – I used a standard terracotta pot for this project, but you can make yours bigger or smaller. The only thing to keep in mind is that if you adjust the size of the terracotta pot, you will need to adjust the size of your pom poms and googly eyes accordingly.
- Change Up The Color – For my terracotta Santa, I chose to go with a traditional Christmas red. However, depending on your Christmas decor style (peppermint, woodland, bright, pastel, etc.), you can change up the color to match your theme!
- Use Hot Glue – I highly recommend that you use hot glue for this project because it will allow you to make the project faster. With that being said, if you do use regular adhesive or super glue, just be aware that you will have to wait for things to dry before you move on to the next step.
5 More Christmas Crafts
Did you love learning how to make this terracotta Santa, and are looking for even more Christmas crafts? Then check out the projects below!


Oh my gosh! He is so cute <3
if you used a red solo cup, he could be an awesome classroom activity and then be light enough to be a tree topper! A lot of possibilities here!
I pinned him for later 🙂
This is such a cute decoration!
Oh my. HOW cute is he? I’m going to be pinning this one for sure!! Sue via #CreateLinkInspire
That is SO sweet! You could make other characters in the same way I guess – maybe and elf on the shelf if you painted the pot green.
He is so cute, what a lovely festive idea. Pom pom all the things!
Oh I just LOVE this!!
I would love for you to share this with my Facebook Group for recipes, crafts, tips, and tricks: https://www.facebook.com/groups/pluckyrecipescraftstips/
Thanks for joining Cooking and Crafting with J & J!
Well he is adorable!Thanks for linking up to Merry Monday! Sharing on G+! Have a great week!
Kim
Hi Angie, I just wanted to let you know that your little Santa Craft is super adorable and I’m featuring it over at the Friday Favorites linka party: http://be-alice.blogspot.com/2016/12/friday-favorites-week-350.html
Hope you’re having a great weekend!
*Maisy