
I thought I’d put my own spin on a hoop Christmas wreath today by creating a farmhouse-style version using buttons and ribbon. Wait—buttons? Oh yes! And trust me, you’re going to love how it turns out. Follow along below to see how to make this simple embroidery hoop Christmas art for your home this holiday season.
Hoop Christmas Wreath Video Tutorial
If you want to watch me make this embroidery hoop wreath, just follow along with our video below.
Can't watch the video or missed some of the steps? You can also find step-by-step instructions below.
How To Make Hoop Christmas Wreath
I love using embroidery hoops for crafts and decorating. They are so handy and come in all shapes and sizes. You can frame fabric like this tutorial, decoupage paper cutouts, wrap twine around the outside as with this Rudolph ornament… the sky is the limit!
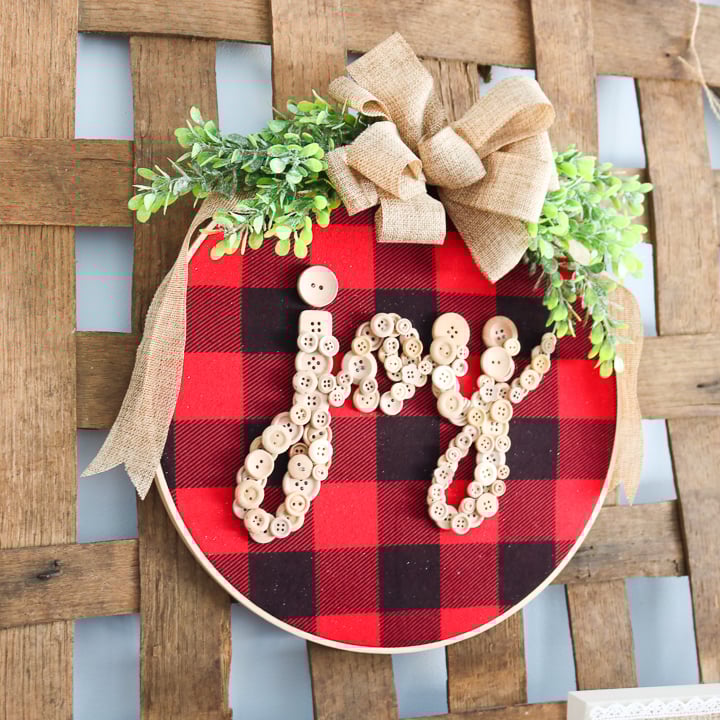
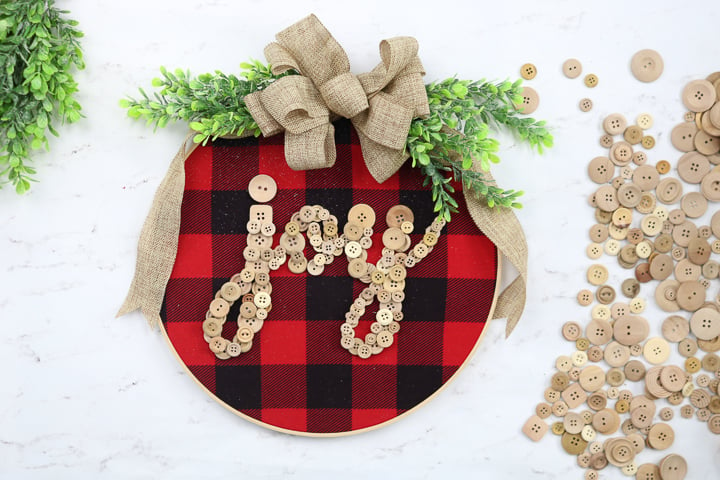
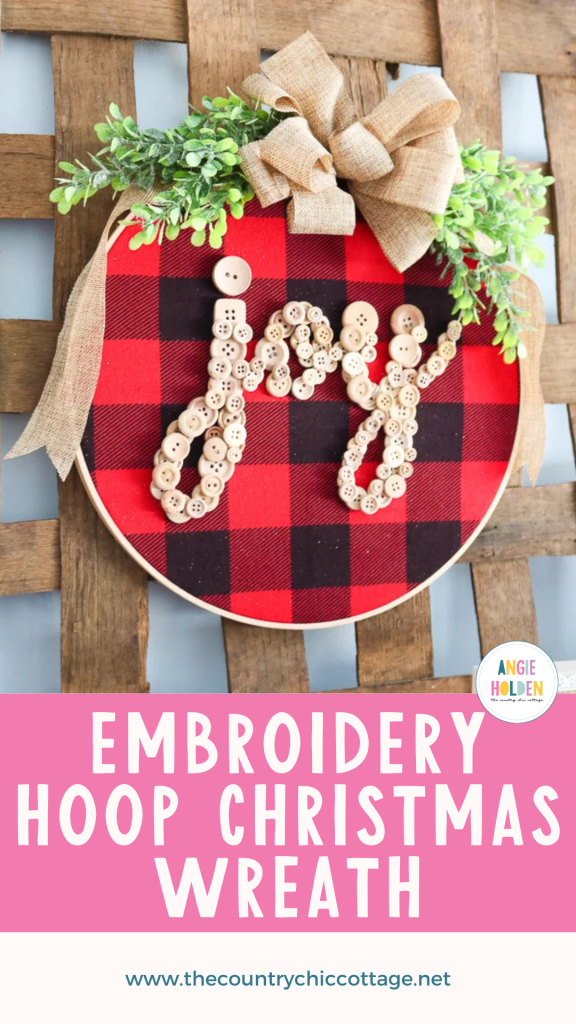
I love the way this Christmas wreath turned out! This is a simple DIY project you can customize to your style. Use patterned fabrics, colored buttons, and quotes to add a touch of festive holiday spirit to your front door!
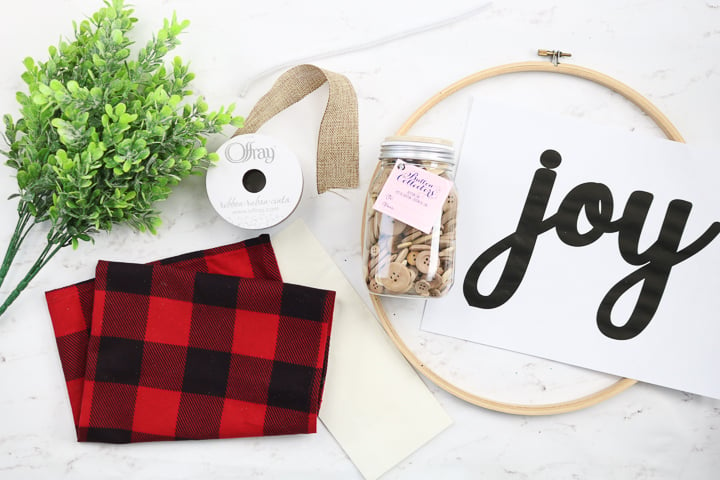
Supplies Needed To Make A Hoop Christmas Wreath
- Embroidery hoop
- Buttons (natural color)
- Ribbon (natural color)
- JOY printable (click here to download)
- Tracing paper (in white)
- Buffalo plaid fabric
- Greenery
- Pipe cleaner
- Hot glue and a glue gun
- Scissors
- Craft knife
- Pen
- Printer
- Printer paper
How To Make The Bow
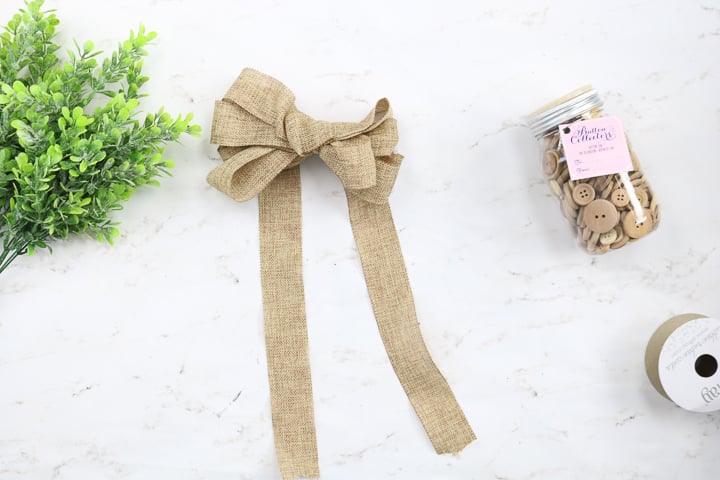
Before we break out the buttons, we're going to make our bow first!
Step 1: Create Loops
Use your ribbon roll to make a bow for your wreath. Start with a small loop in the ribbon and hold that with your thumb. Then add five loops on each side of that. These should all be approximately equal in size. Finally, make a large loop with the rest of the roll of ribbon and hold the end of the roll with your hand.
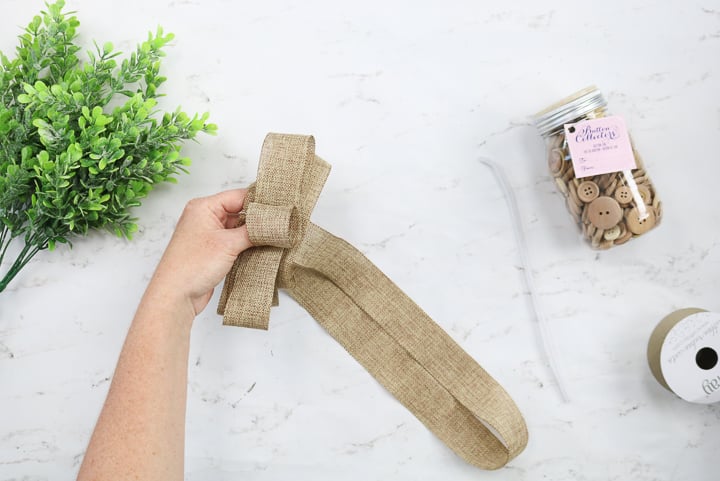
Step 2: Feed Pipe Cleaner Through Loops
Use the pipe cleaner to go through the small loop and all the way around the burlap ribbon. Be sure to catch all of the loops, including the end of your ribbon. Twist and pull the pipe cleaner tightly and twist it a few times. Then trim any excess from the end of your ribbon with scissors.
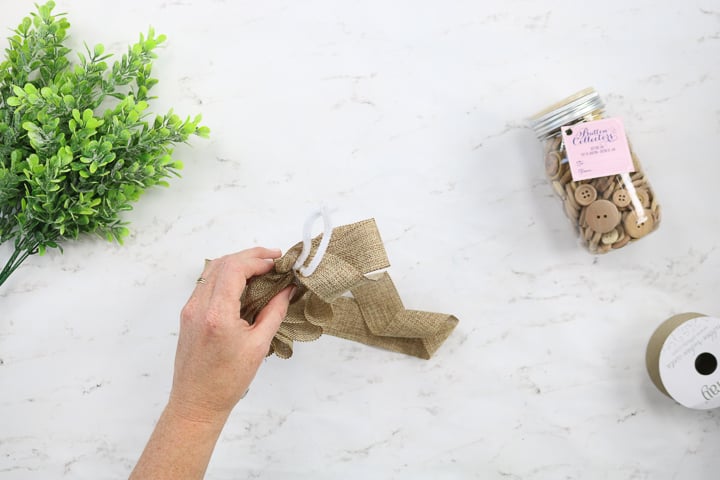
Step 3: Fluff Bow
You can now fluff your bow and cut the large loop in half. Set this aside for now. You can do more fluffing and trim your ends once the bow is on your embroidery hoop wreath.
How To Make The Wreath
Now, let's make our hoop Christmas wreath!
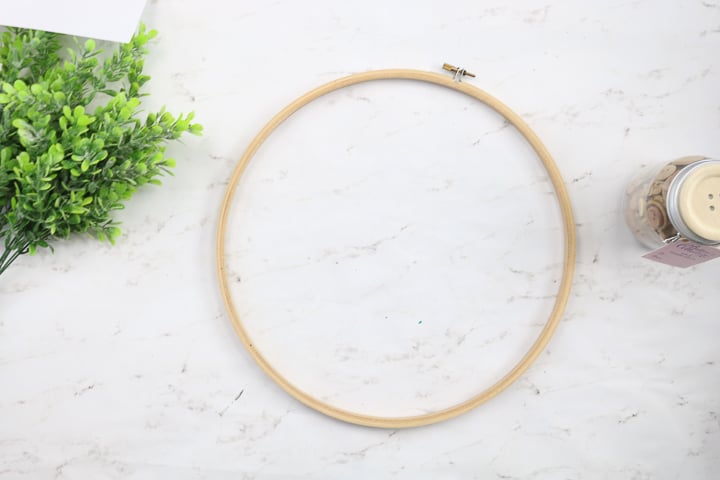
Step 1: Separate Embroidery Hoop
Start with your embroidery hoop. Separate the two pieces.
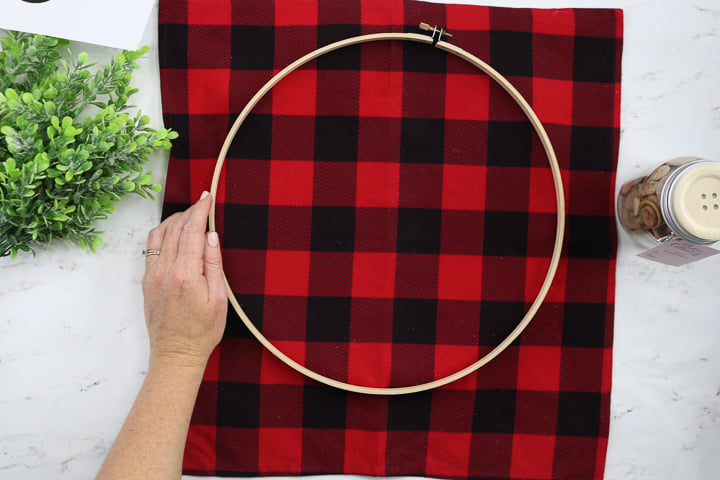
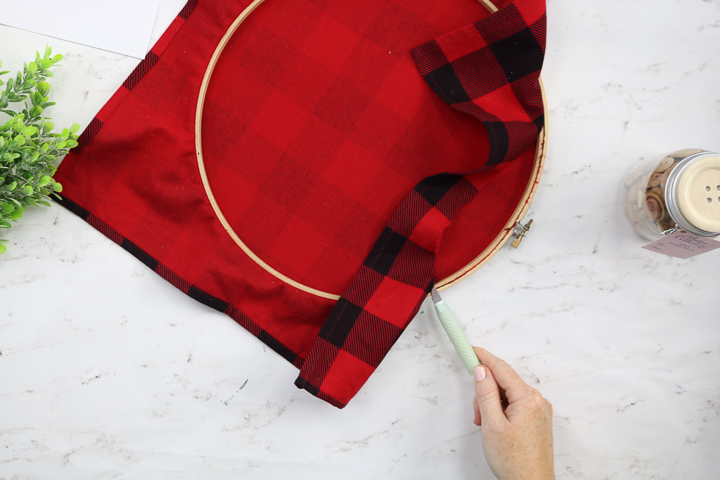
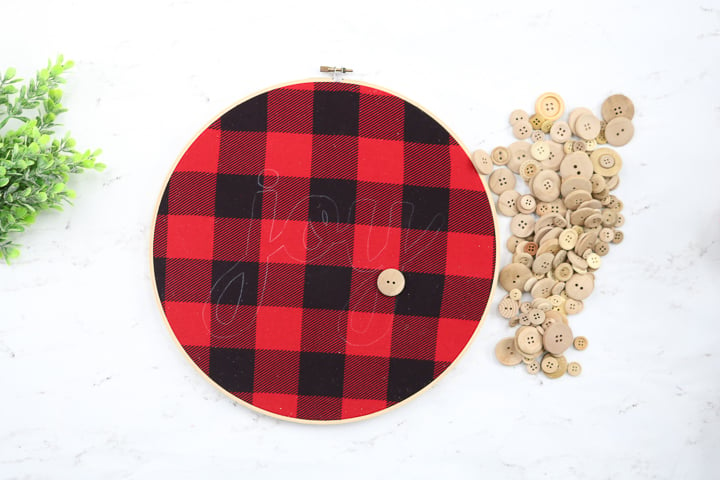
Step 2: Place Fabric In The Hoop
Put the fabric between the two pieces and tighten the hoop. Then pull the fabric until it is really tight.
Step 3: Trim Excess Fabric
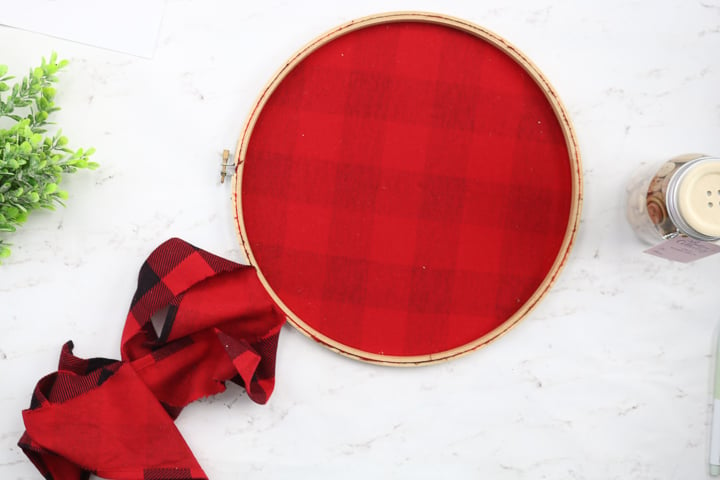
Then flip the hoop over and start trimming away the excess fabric. I find it is easiest to do this with a craft knife. Just run it close to the wood and cut the fabric away.
Continue all the way around the hoop.
Step 4: Trace Word Onto Fabric
Put something to write on under your fabric, like a book. Then add a piece of white tracing paper to your embroidery hoop, shiny side down. Print the word joy onto regular copy paper. Lay this on top of the tracing paper. Use a pen to trace around the outer edges.
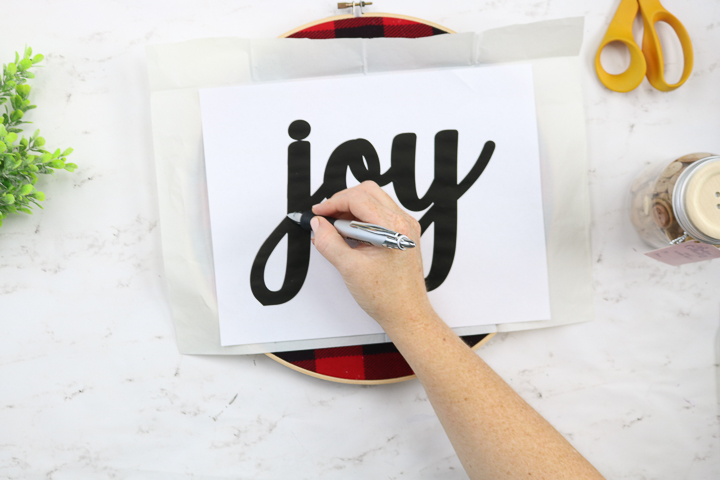
Then remove the paper pieces, leaving a white outline on your fabric.
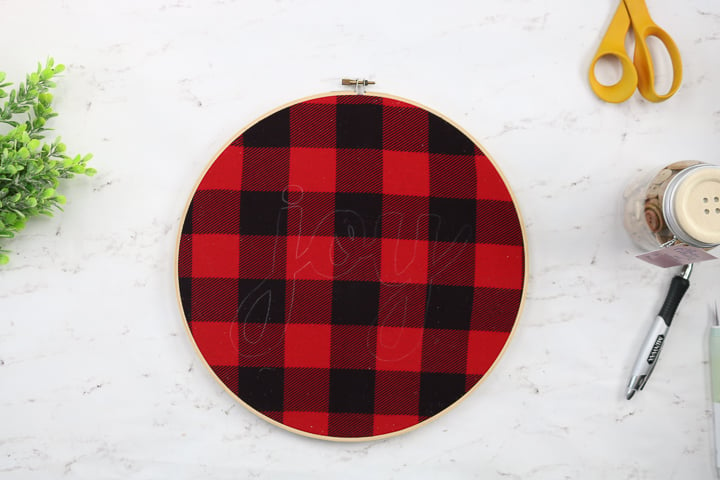
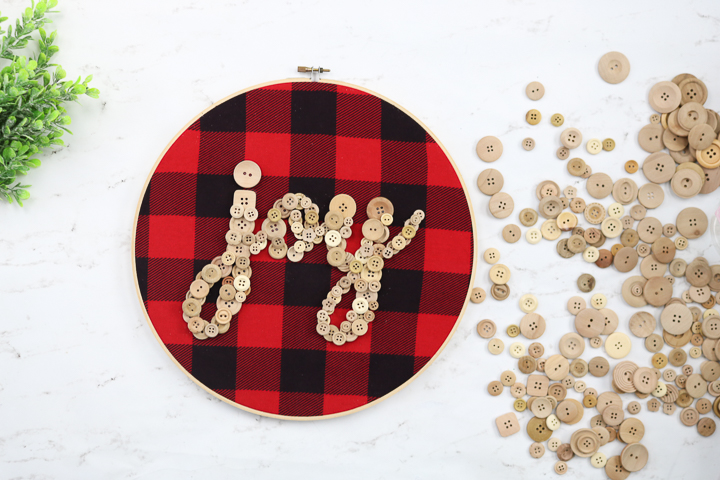
Step 5: Glue Buttons To Wreath
You will be using buttons to fill in the word. Some of the buttons may be too large for the outline. Set those to the side.
Use the wide variety of buttons in the jar to fill in your word. Secure them in place with hot glue. Use two layers of buttons to really make the word pop off the fabric.

Continue in this same manner until the entire word is filled.
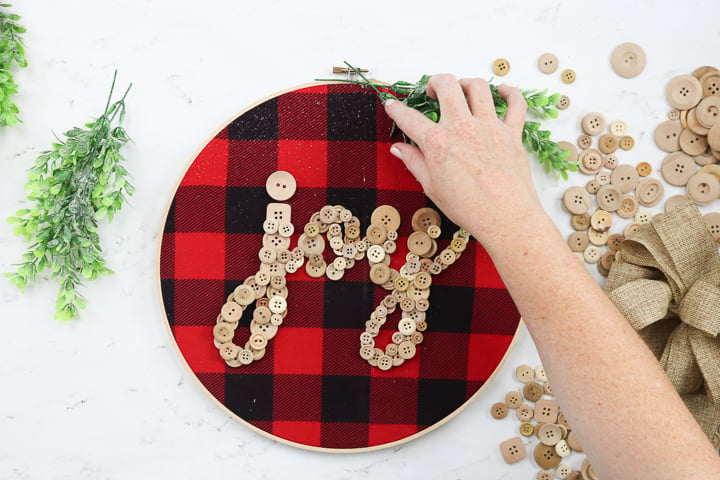
Step 6: Glue Greenery To Wreath
Then, secure some greenery to the top with some hot glue. I used two sprigs on each side.
Step 7: Glue Bow To Hoop Christmas Wreath
Trim the pipe cleaner ends from the bow, then hot glue it to the center. You can now fluff the bow however you would like.
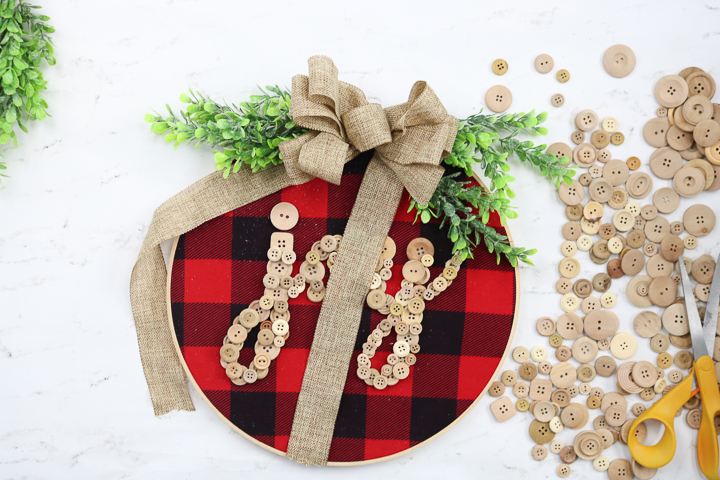
You can trim the ends of your ribbon short or long. I chose to trim mine long with a “V” cut. I then used hot glue to secure the ends under the greenery so that they hang down the sides of my embroidery hoop wreath.
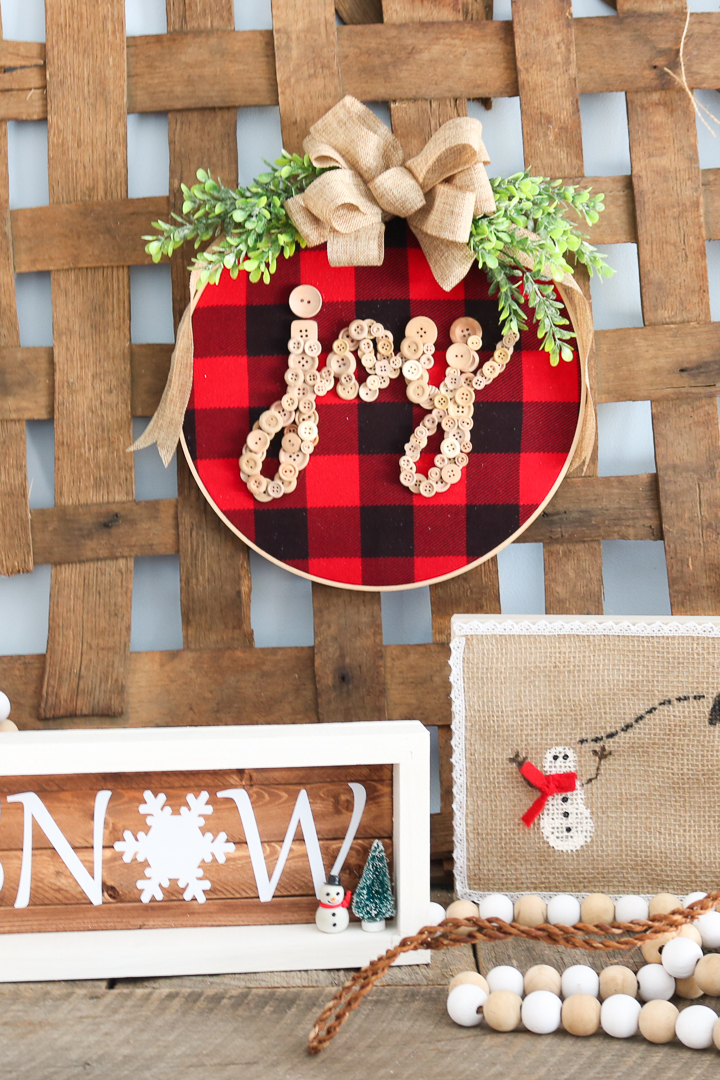
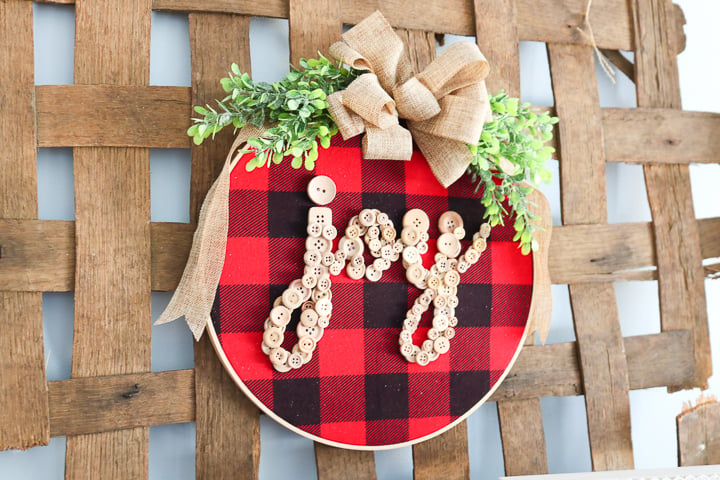
Your embroidery hoop art is now complete and ready to hang for your Christmas decor.
If you love all things rustic and farmhouse, this embroidery hoop wall art is the perfect project.
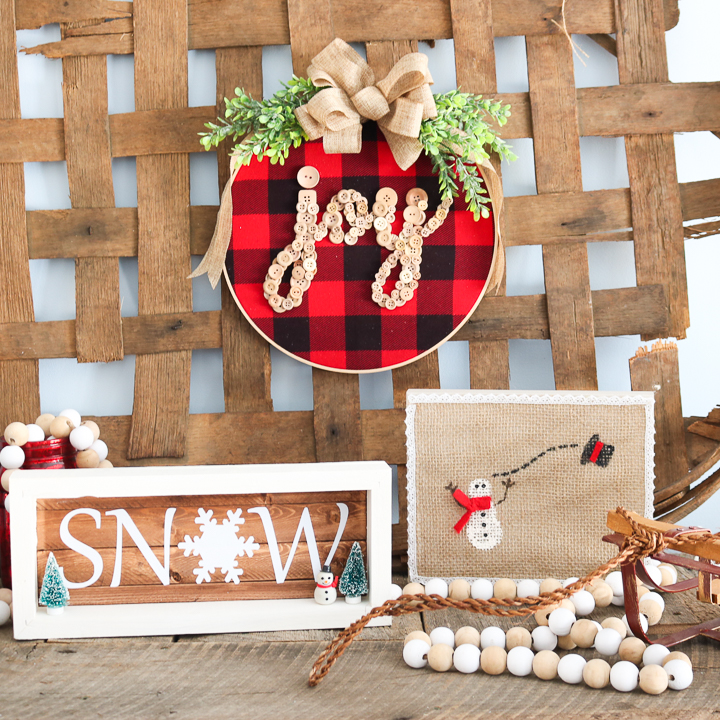
So, grab your buttons and ribbon and get started on this holiday craft idea today. Hang it on your door or above your mantel.
So, tell me, who needs a Christmas wreath like this one this year?
FAQs About Hoop Christmas Wreath
Here are answers to some of the most frequently asked questions I receive about making this hoop Christmas wreath. If your question isn’t listed, feel free to drop it in the comments, and I’ll be happy to help!
Can I Adjust The Size Of This Hoop Christmas Wreath?
Absolutely! You can make this wreath any size that you like. However, the only thing to keep in mind is that if you make your wreath bigger, you will need more fabric, buttons, etc.
Can I Use A Different Type Of Glue?
Personally, I like using hot glue for this project because it dries quickly, allowing me to finish faster. However, if you don't have a hot glue gun, you can use a strong-hold craft glue instead.
How Can I Personalize This Hoop Christmas Wreath?
You can customize this hoop Christmas wreath in a variety of ways! Below are just a few ideas, but the possibilities are endless!
- Change the color of the fabric
- Change the color of the buttons
- Change the color/texture of the ribbon
- Change the word on the hoop wreath
5 More Christmas Embroidery Hoop Crafts
Do you love this hoop Christmas wreath and want more Christmas embroidery hoop crafts? Check out the projects below!
- DIY Rudolph Ornament (With An Embroidery Hoop)
- Embroidery Hoop Snowman Craft with Doilies
- 8 Embroidery Hoop Christmas Ornaments
- Farmhouse-Style Embroidery Hoop Christmas Wreath
- Button Ornaments: Button Wreath Ornament


Love it! Had to order some red buffalo plaid because all I have is black-n-white! ….which might be alright with RED buttons! HAH! Great idea! Thanks!
It would look great with red buttons!
What size hoop did you use.
I think a 12 inch but you can pick any size you like.