
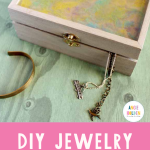
Create a DIY jewelry box for yourself or as a thoughtful gift! Learn how to make a stunning, glossy marbled top with an easy process that will leave you loving the final look in your home. This project was originally posted on Resin Crafts, but I'm sharing it here to make sure you don't miss out. miss out on it.
How To Make A DIY Jewelry Box
A jewelry box is perfect for keeping your jewelry organized! I have created several jewelry boxes on my site, but never one with resin. So, I thought it would be fun to combine that popular marbled look with resin to create a unique DIY jewelry box.
Now, if you have never used resin before, this project is perfect for beginners! I will walk you through all the steps, but if you need more help, be sure to check out our ‘How to Use Resin' section (at the bottom of this post) for additional information.
NOTE: After making this jewelry box, you may also consider creating some fun earrings, necklaces, or bracelets to put inside it!
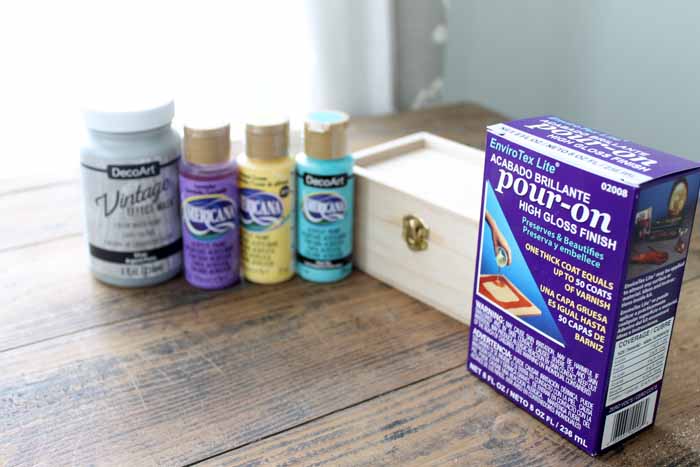
Supplies Needed To Make DIY Jewelry Box
- Unfinished wood jewelry box with recessed top
- EnviroTex Lite Pour On High Gloss Finish
- Craft paint (in any colors of your choice)
- Vintage Wash in two different colors
- Clear adhesive
- Paintbrushes
- Measuring cups
- Mixing cups
- Stir sticks
Step 1: Paint Jewelry Box
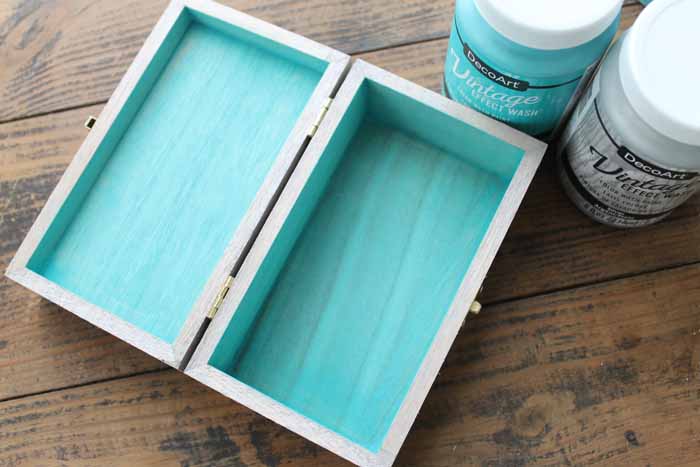
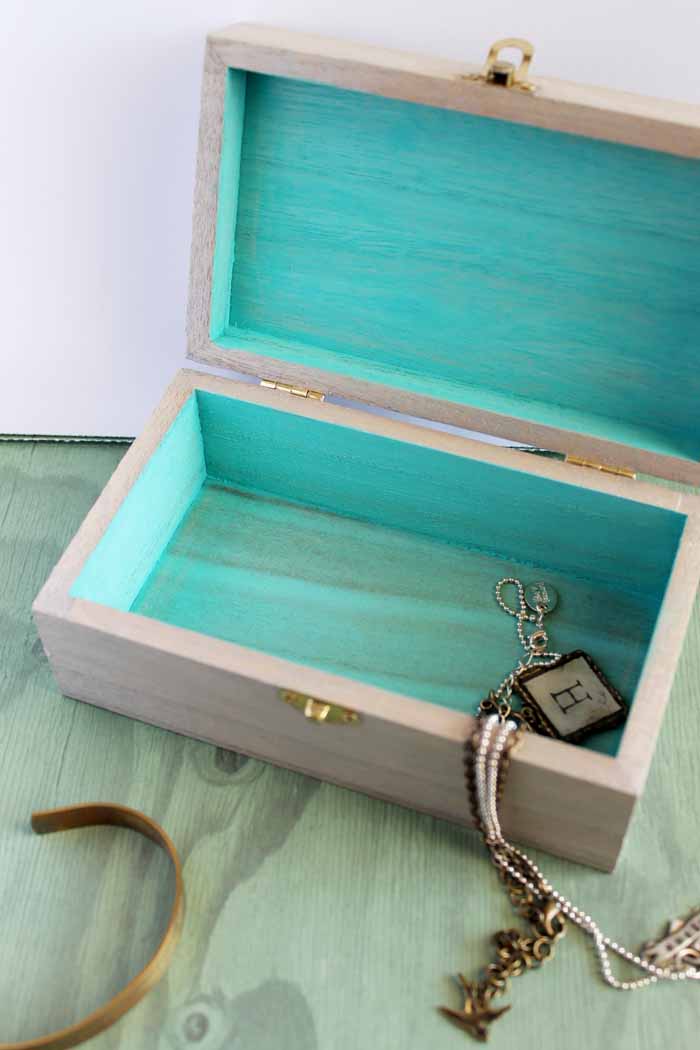
Start by painting your jewelry box to add color and seal the surface. I used the Vintage Wash from DecoArt for this task. I love the way the wood grain shows through this finish. Brush the surface, allow it to sit for about a minute, then wipe it off with a rag. This is similar to applying a stain.
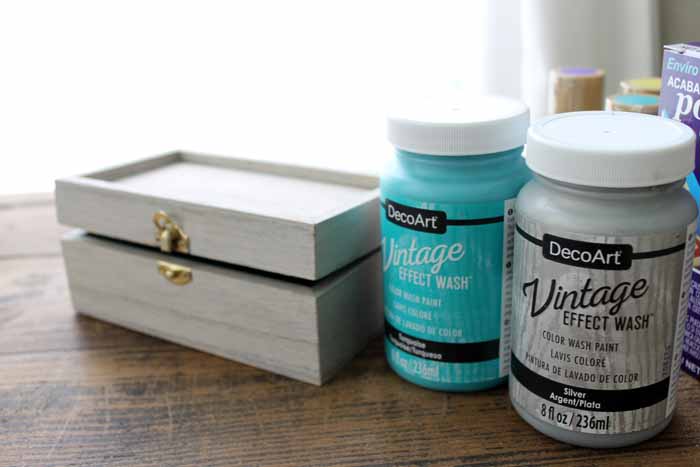
I used two different colors to give a pop on the inside. I went with silver and aquamarine, but you can choose any colors that you love. Paint every surface and then allow it to dry completely.
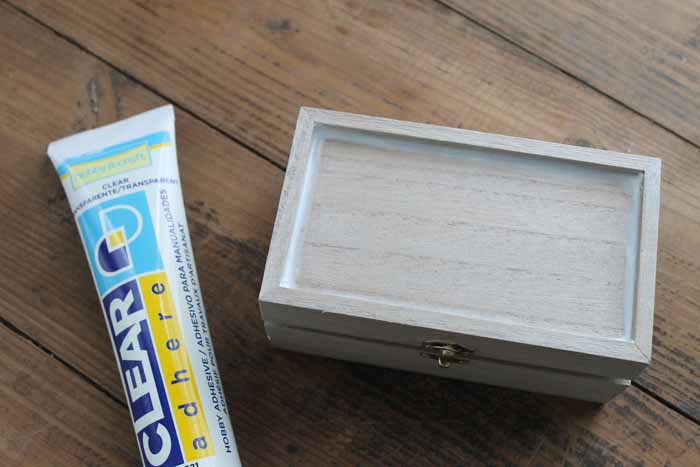
Step 2: Seal Recessed Portions Of Jewelry Box
The recessed portion of the jewelry box needs to be completely sealed. I used a clear adhesive along the outer edges and let it dry.
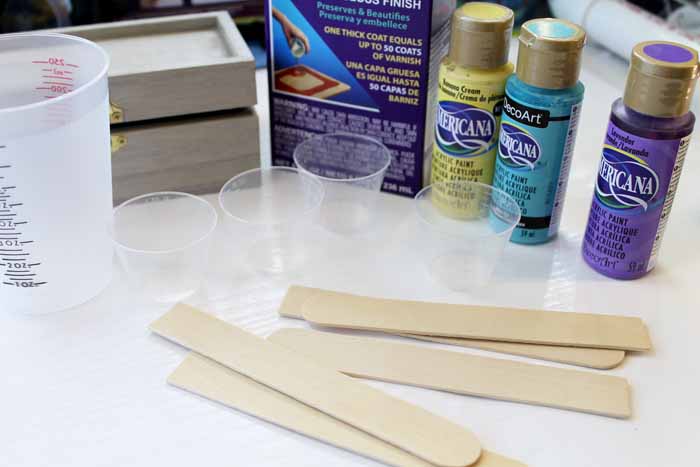
Step 3: Mix Up Resin
Now for the fun part! Yes, using resin can be a fun experience. Don't be intimidated by this product. It is super easy to use, and I'll walk you through it step by step.
Start by mixing about 6 tablespoons total in a measuring cup. Just add equal parts A and B to the cup and then stir well. You are going to need to mix really well and follow all of the instructions that come with the package.
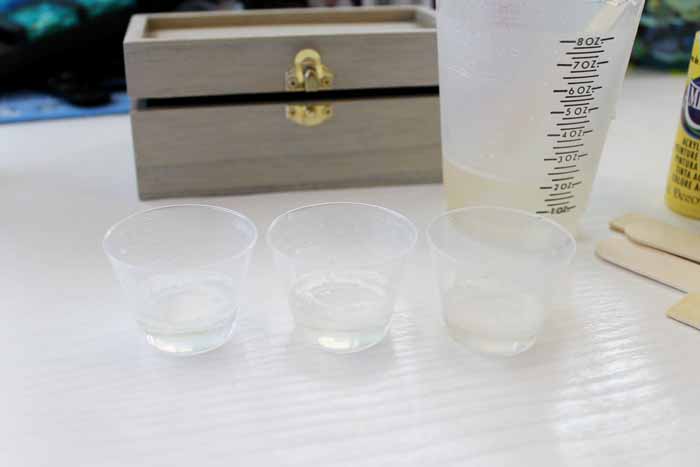
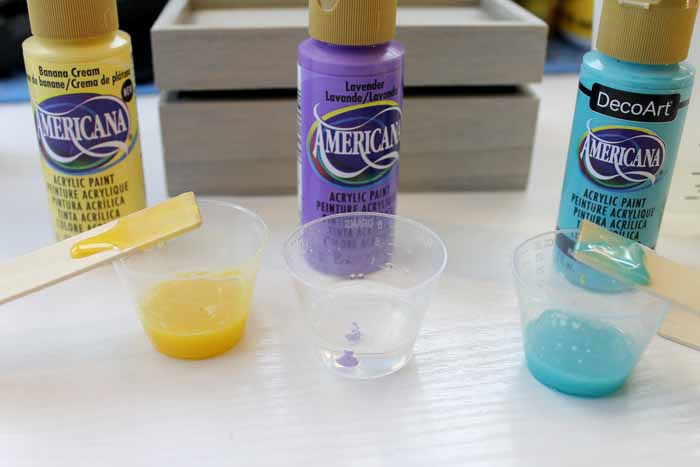
Step 4: Add Half A Tablespoon Of Resin Into 3 Separate Cups
Once mixed, add about half a tablespoon of mixed resin to three separate cups as shown below.
Step 5: Add Paint To Resin
Next, add about 1 drop of each of 3 different craft paint colors to the resin. Then use stir sticks to mix really well.
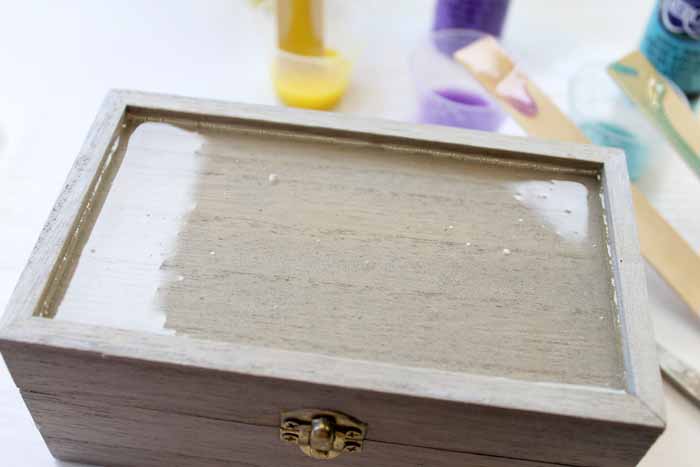
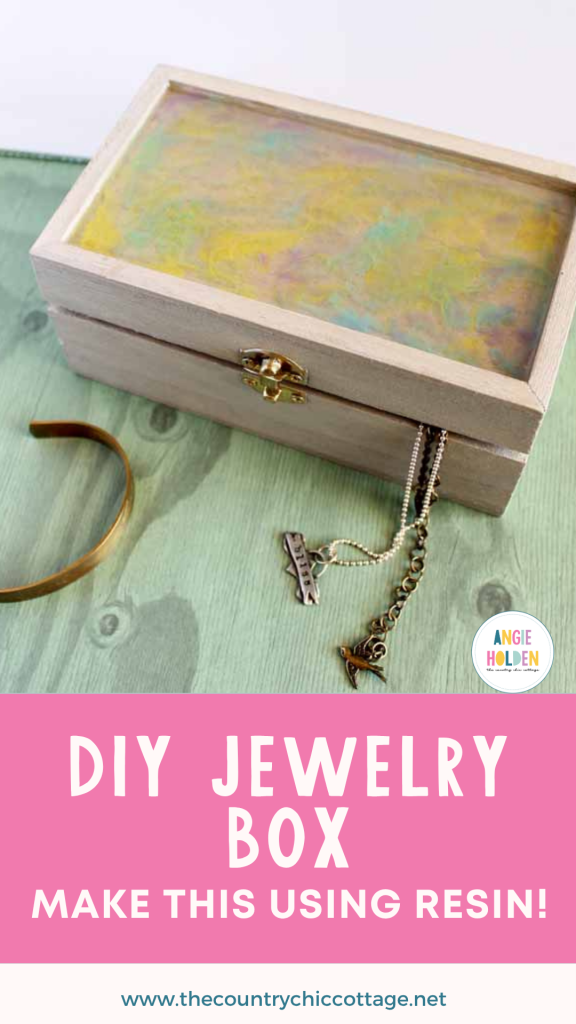
Step 6: Pour Clear Resin Onto Jewelry Box
Pour the clear resin you have left into the recess of the jewelry box. Then use your stir stick to ensure that it goes all the way to the edges and into each corner.
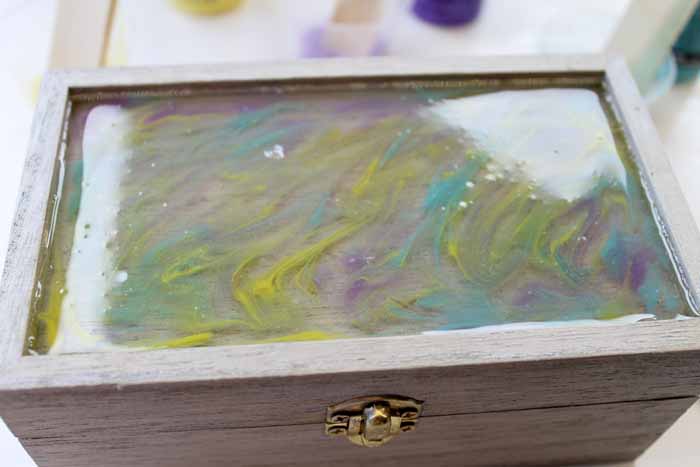
Step 7: Drizzle Resin Colors Onto Jewelry Box
Then start drizzling in your colors randomly.

Add as much of each of the colors to achieve your desired look.

Step 8: Create Marble Affect With Stir Stick
Then use a clean stir stick to run it through the resin, creating a marbled appearance. Add more color if desired. This is where you can get artistic with the finish.
Step 9: Remove Air Bubbles From Resin
Remove any bubbles from your resin using the methods discussed in the instructions in your package. Then you will want to set the product aside to cure completely. Be sure to set it where it will not be touched and where no dust or debris can get into the resin. You will also want to make sure it is on a flat surface.
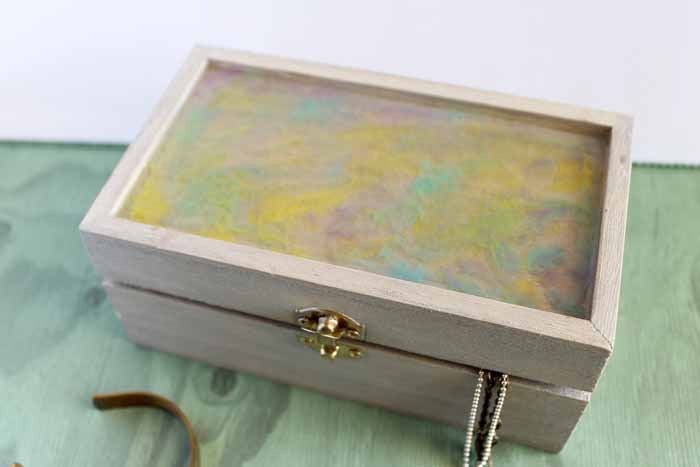
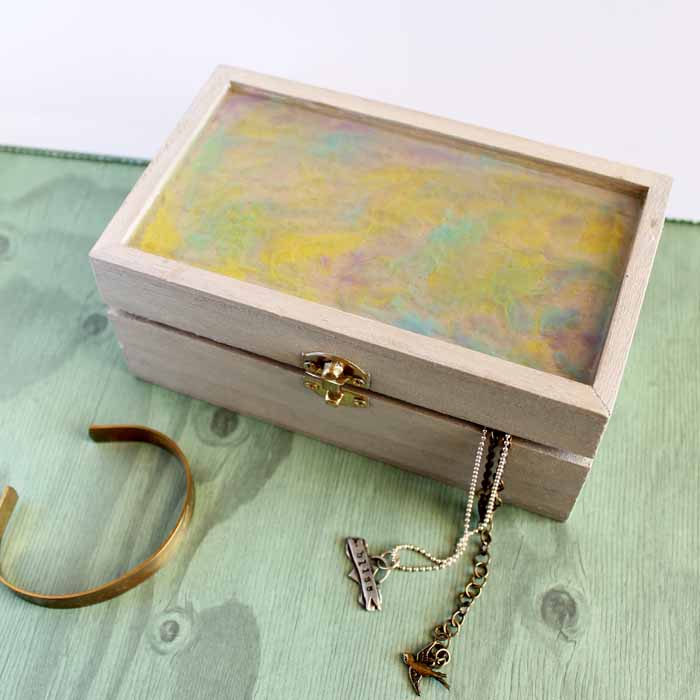
Allow to cure at least overnight, then your handmade jewelry box is ready for use!
You will love the hidden pop of color on the inside and the gorgeous marbled surface on the outside! Give this as a gift or keep it for yourself. You may even find you need to make more than one!
So, when will you start on your own DIY jewelry box?
Tips and Tricks for DIY Jewelry Box
Now that you’ve seen this fun DIY jewelry box, are you ready to make your own? Here are a few tips and tricks to help!
- Adjust The Size Of Jewelry Box – For this project, I decided to make a small jewelry box. However, you can adjust the size of your jewelry box to be bigger or smaller!
- Skip The Vintage Wash – If you don't have Vintage Wash on hand, you can use regular stained or watered-down paint instead!
- Protect Your Resin While It Drying – Use an empty cardboard box and turn it upside down on your project while the resin dries! Doing this will prevent debris or dust from getting into your resin.
Struggling with resin and need help?
I know that a ton of you are intimidated by resin. Don't be! You just need to know the basics and gain some experience with the medium. I have a course that will help you master epoxy resin and give you the confidence you need to tackle this project and so much more.
With unique insights drawn from more than a decade of creating and selling resin jewelry worldwide, this course is from an Amazon best-selling author on the topic. This class goes beyond making a few projects. You get thirty video lessons to give you clear directions on how to make resin jewelry you can confidently share and sell. Want to see more?
5 More Jewelry Crafts
Did you love this DIY jewelry box and are looking for more jewelry crafts? Then check out the projects below!
- Make a Jewelry Organizer in Minutes
- Recycled T-Shirt Bracelets
- DIY Necklace with a Cricut with Birthstones
- Easy Jewelry Holder Last Minute Gift
- How to Make Sublimation Jewelry with Photos


Will try again to leave comment. If there’s one cloud in sky computer gets so slow, won’t do anything. Very frustrating to live out here if person needs internet. But we still have to pay thru the nose.
Love your jewelry box, so pretty. The marbling is wonderful extra touch. Seems like everyday there are new products out. Just got email about a new Cricut Maker. Will look for the new Vintage Effect Wash by DecoArt, they’ve got several new products.
Will make one of these boxes for youngest granddaughter, she’s more box.open to accepting new things from me. Have to get box, other supplies first next time we go to town. Will save this for when I am making
Great ideas for making over jewelry box…Thanks for sharing!!!
Perfect box for jewelry and it is so easy for making
Thanks for sharing great information