
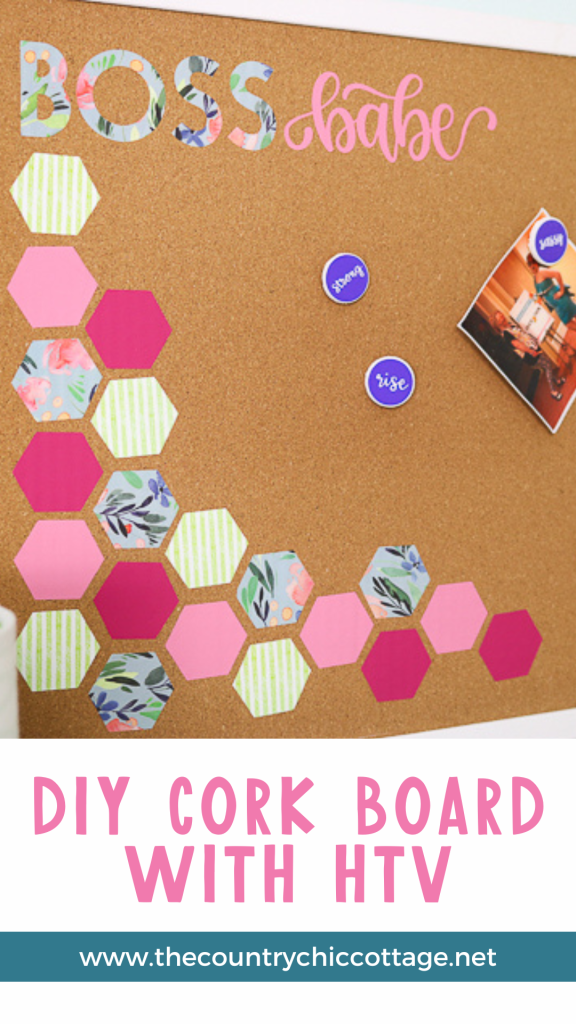
Personalizing a DIY cork board has never been easier! Did you know that Cricut iron-on works great on cork? You can customize your own DIY framed cork board in minutes with this technique.
I find that a cork board is a great way to organize my workspace. In fact, I am putting this project together with a few others I made to both organize and decorate my craft room. Are you ready to create your own DIY cork board organizer? Read on for all of the details.
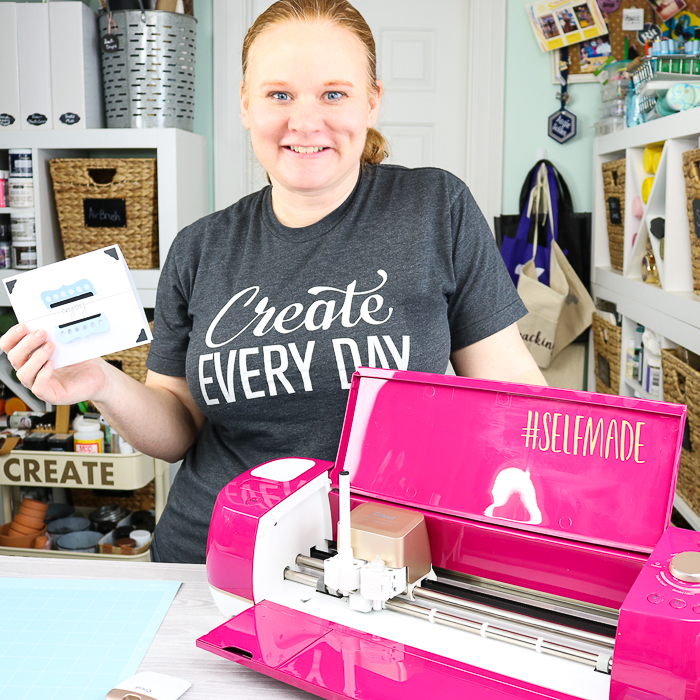
This is a sponsored conversation written by me on behalf of Cricut. The opinions and text are all mine.
Cork boards and Cricut machines are two of my favorite craft tools! They are perfect for creating spaces that are organized, stylish, and functional. You can use a Cricut for labeling, making decorative letter boards, and more. Check out the Cricut archives for tool comparisons, tutorials, and general information.
There is so much you can do with a cork board: it can help you stay organized in your home office, dorm room, or command center. Wherever you need a bit of organization, cork boards come to the rescue!
How To Decorate A Cork Board
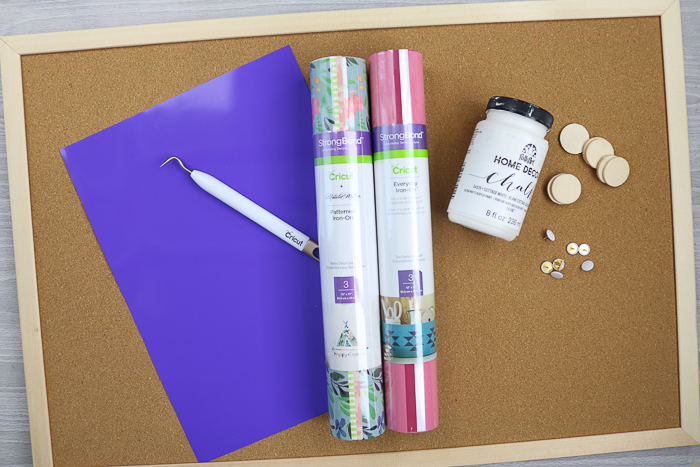
Supplies needed to make this DIY framed cork board:
- Cricut Machine (not sure which one to buy, I have a post for that!)
- Cork board
- Cricut EasyPress
- Patterned Iron-on
- White paint
- Paintbrush
- Cricut vinyl (in two colors)
- Cricut Iron-on (in the color of your choice)
- Transfer tape
- Cricut scraper
- Weeding tools
- Small wood discs
- Thumbtacks
- Hot glue and a glue gun
- Cricut Iron-on Protective Sheet or parchment paper
- Cricut cut file – Boss Babe Cork Board project in Cricut Design Space
- Scissors
Cork Board DIY Decorating Video
Want to see just how to make this DIY cork board on video? Click below to watch!
Can't watch the video or missed some of the steps? Then follow along with our tutorial below!
Instructions For DIY Cork Board
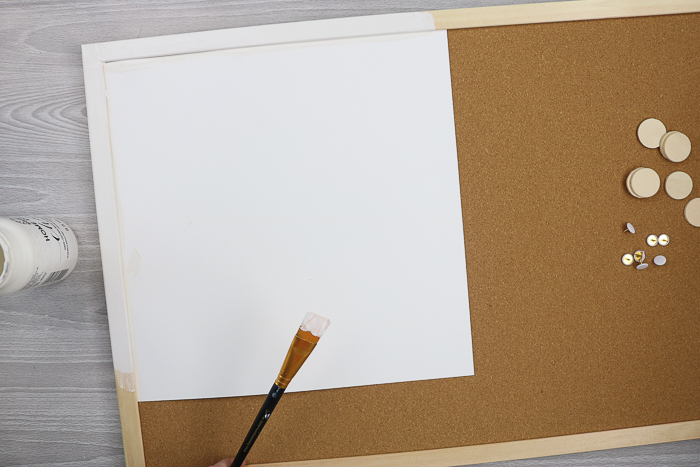
Step 1: Paint Your Pieces
Start by painting the frame of your cork board. This is optional, but I think it makes it look more finished. You can use a scrap piece of paper to mask off the cork while painting.
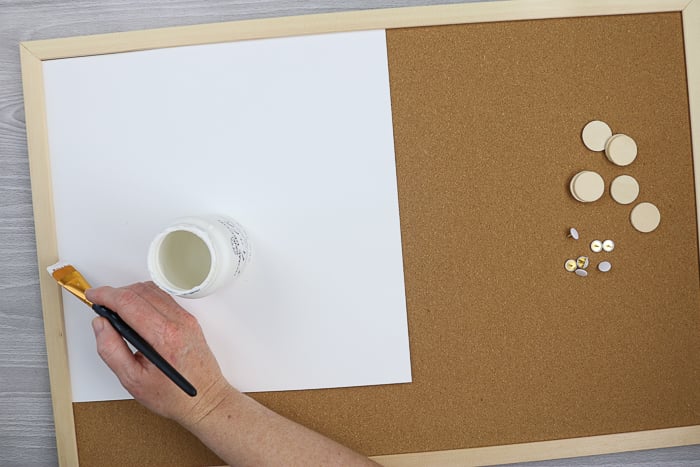
Paint all the way around the outside. You may need a couple of coats of paint. Just be sure to allow it to dry in between coats and completely before continuing with your DIY cork board.
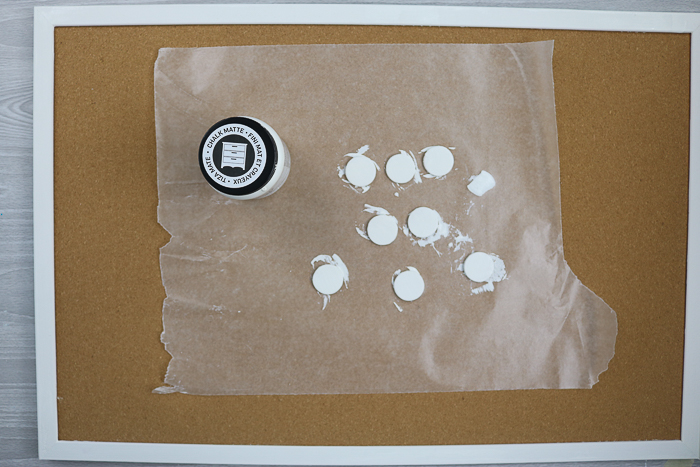
You will also need to paint the wood discs that you will use for your custom thumbtacks. Paint both the top and sides. I did not paint the back as it will be against the cork board when in use.
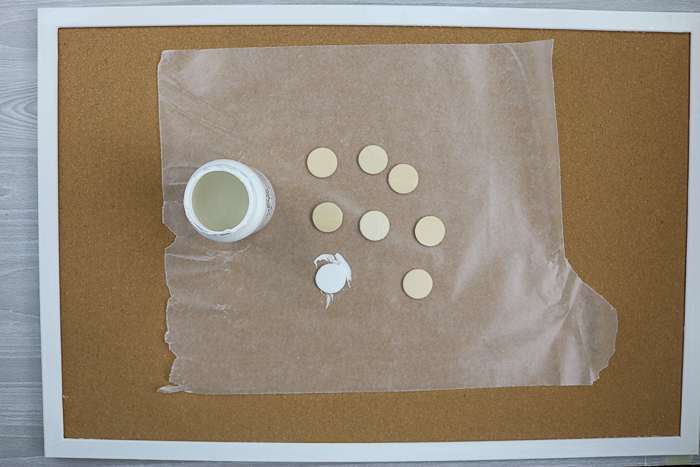
Again, these may require two coats of paint, so be sure to allow them to dry in between coats. You will want to ensure these dry completely before adding any vinyl.
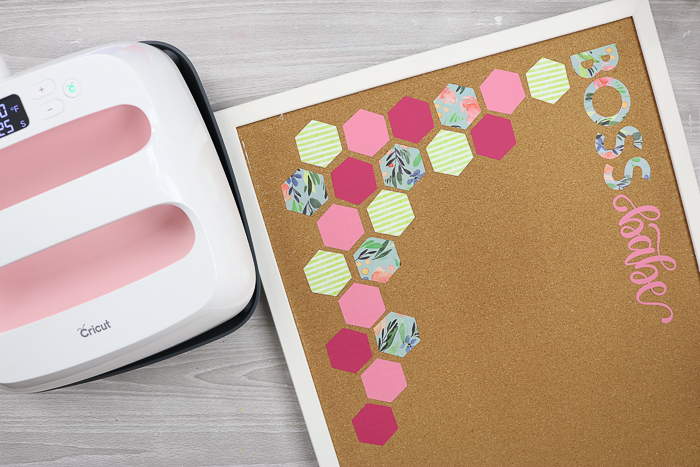
Step 2: Cut the Vinyl and Iron-on with Your Cricut
You will then need to cut your pieces on your Cricut machine. You can find the cut file by navigating to my profile in Cricut Design Space and scrolling to the “Boss Babe Cork Board” project.
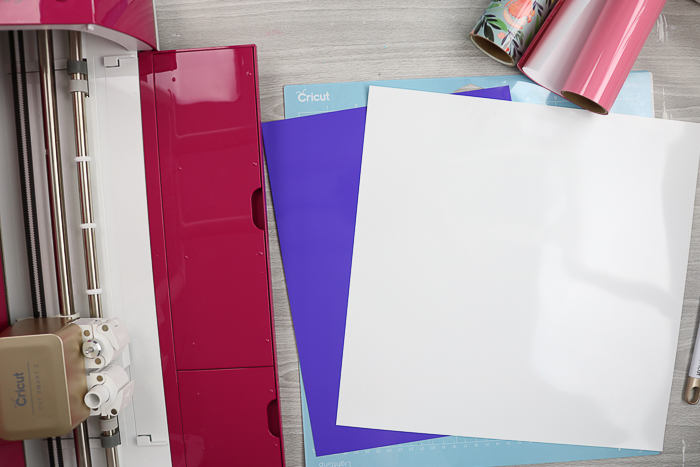
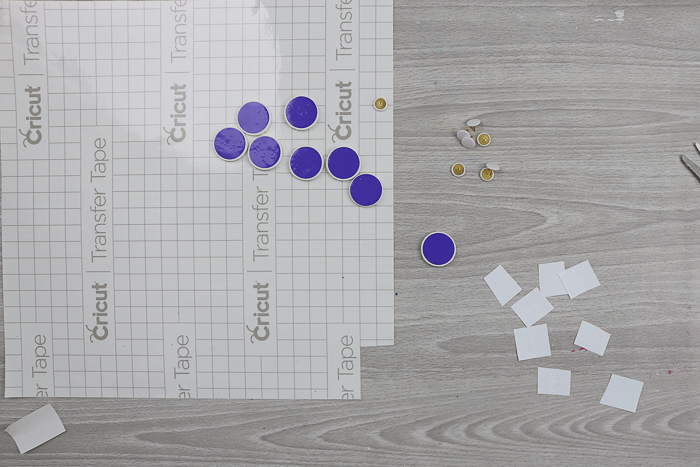
Cut the thumbtack pieces from vinyl in two colors. You will want to ensure that these pieces are resized to fit the wood discs you are using before cutting.
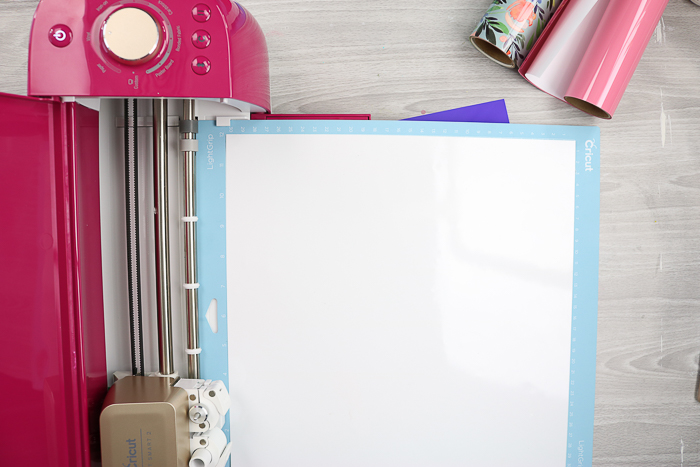
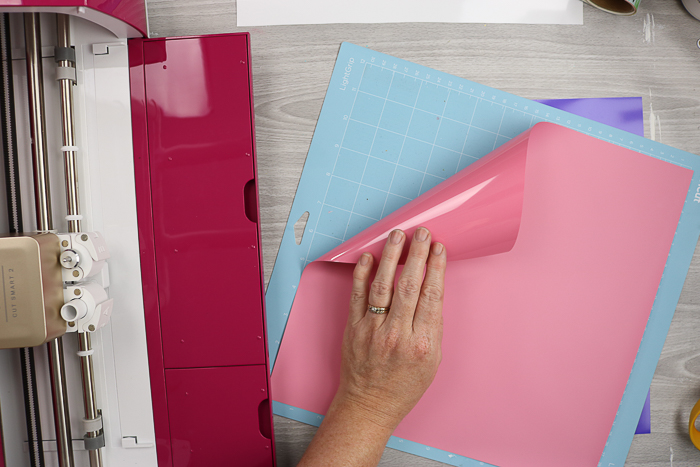
Then, cut the pieces for the DIY cork board from heat transfer vinyl. Remember to mirror these before cutting, and then place the iron-on, shiny side down, on your mat.
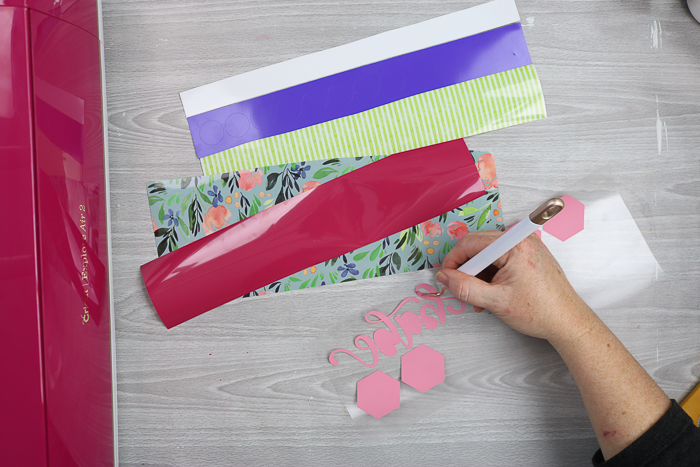
Step 3: Clean up the excess
Once everything has been cut, use weeding tools to remove all excess material.
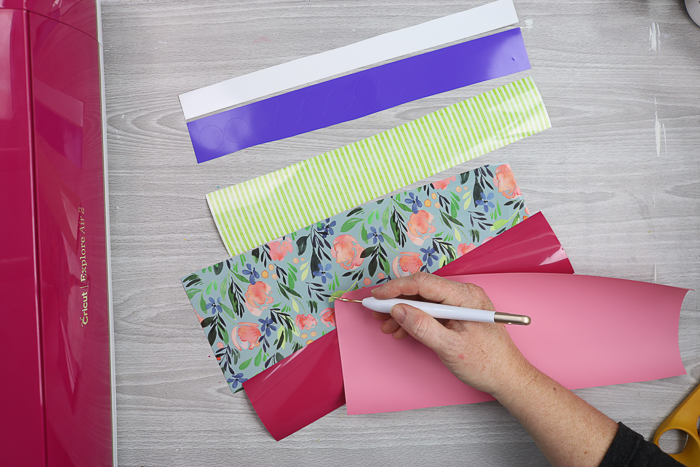
Weed around the outside of your designs as well as the centers of any letters.
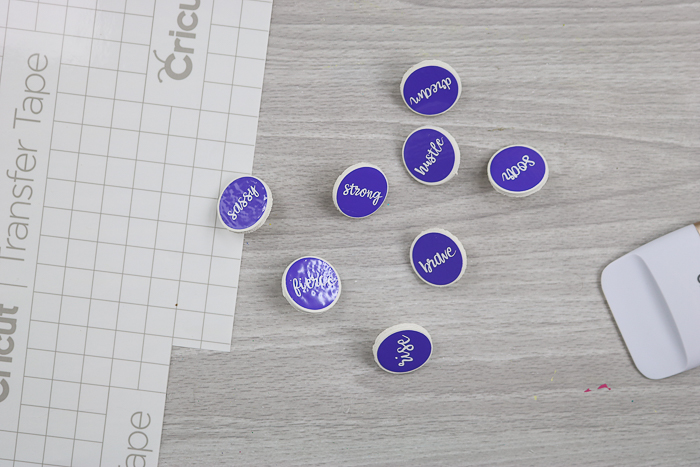
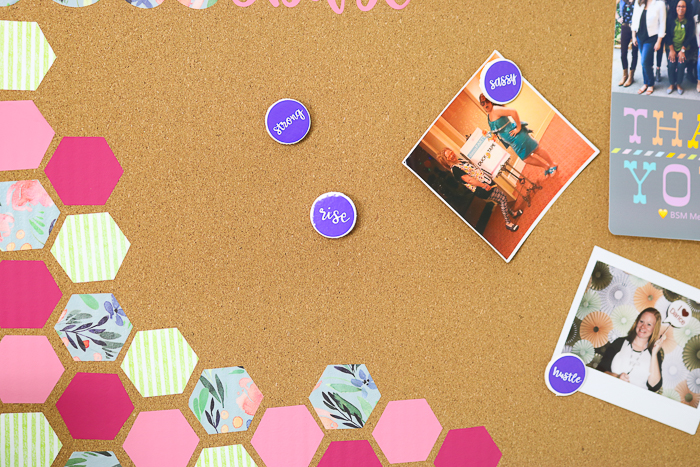
How to Make Custom Thumbtacks
Now it's time to pull everything together. We will start with custom thumbtacks featuring inspirational words.

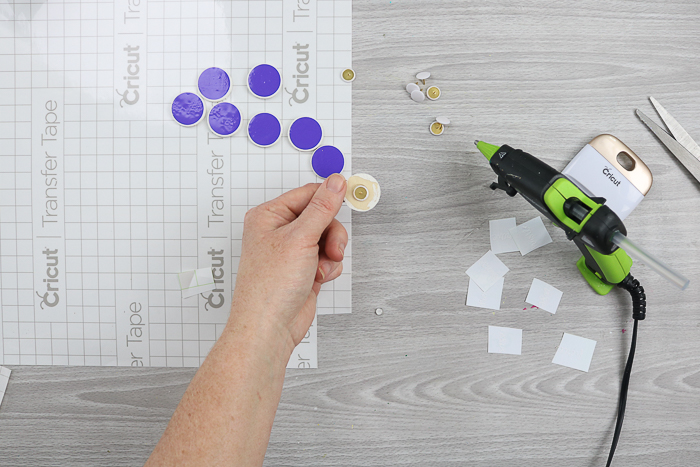
Place a vinyl circle on top of the painted wood discs.
Then use transfer tape to add the words to each one.
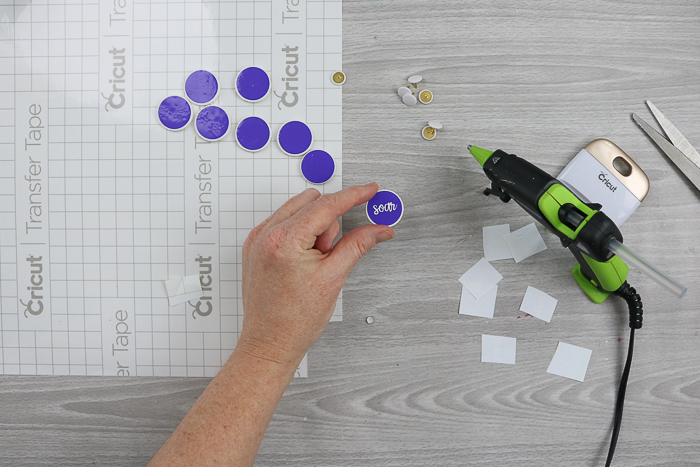
Use hot glue to add a thumbtack to the back of each disc.
Continue until you have a bunch of custom thumbtacks for your DIY cork board.
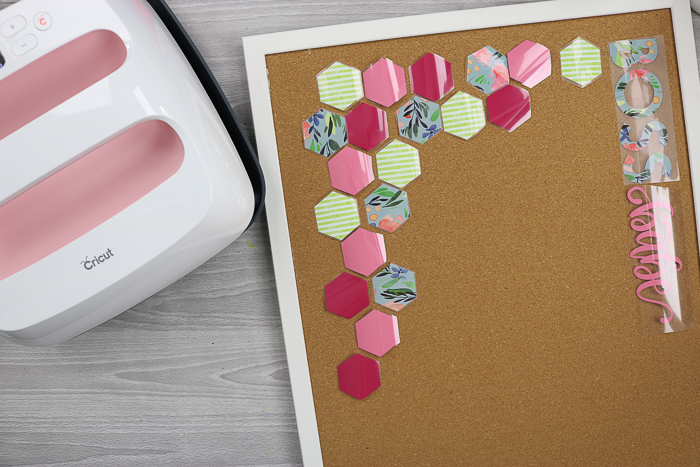
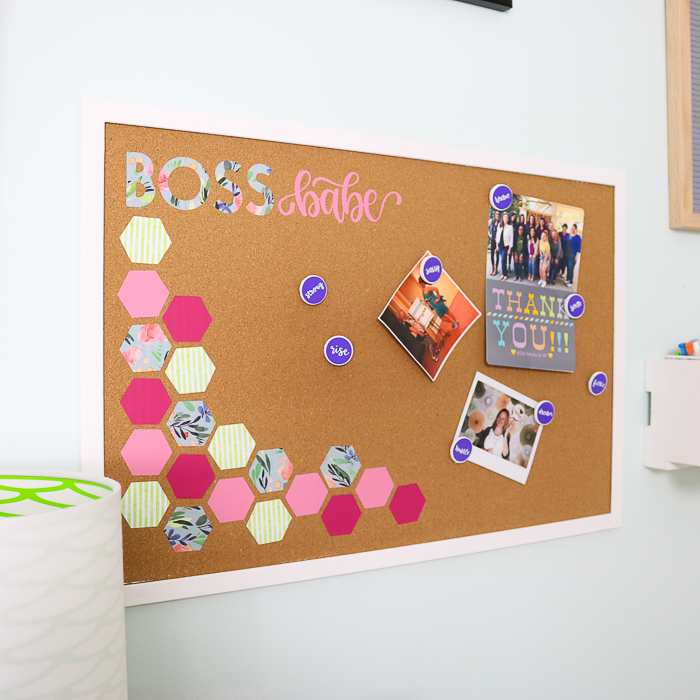
Adding Heat Transfer Vinyl to Cork
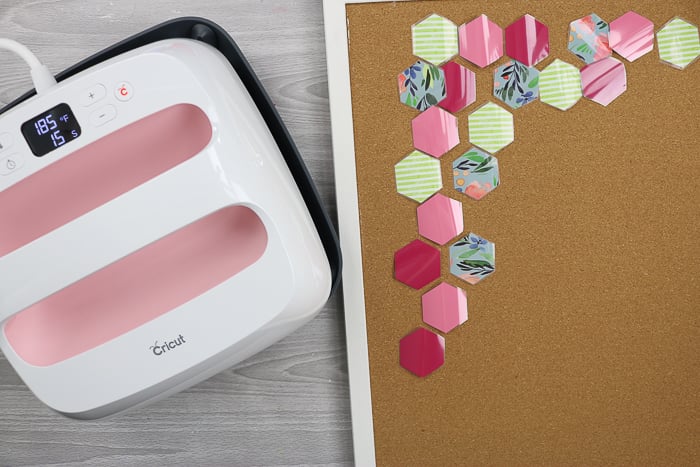
Now it is time to do some DIY cork board decorating. Once your iron-on transfer has been weeded, trim the carrier sheet as closely as possible to your design using scissors. Then lay out your pieces on your cork board.
You will need the Cricut EasyPress to add these pieces to your cork board. Refer to the Cricut Heat Guide for the time and temperature settings for cork. Set the time and temperature on your EasyPress and allow it to heat up until it beeps.
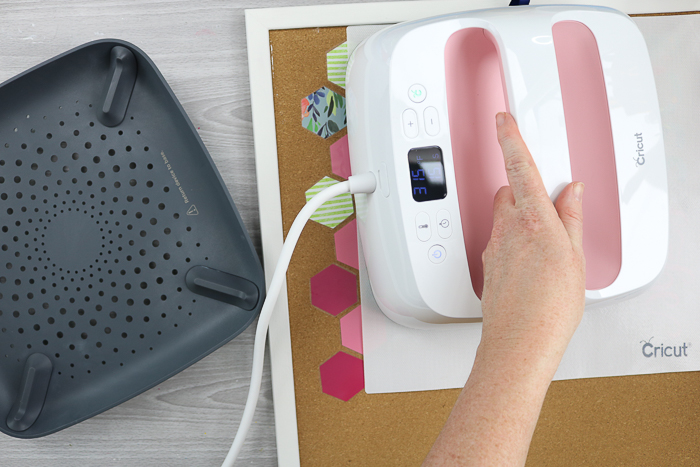
You will also need to protect the cork surface from the heat of the EasyPress. You can use the Cricut Iron-on Protective Sheet or some parchment paper for this.

Lay the protective covering over your iron-on and cork board, then put your EasyPress on top. Hit the “C” button to start the countdown timer. Press down firmly on the handle. Once your time is complete, move the EasyPress to the next area. It is okay to overlap areas during your presses.
Once you have pressed all areas, check to see if the iron-on has completely adhered. If it hasn't, then just repeat the pressing process. Continue this until you can remove the carrier sheets from your designs.
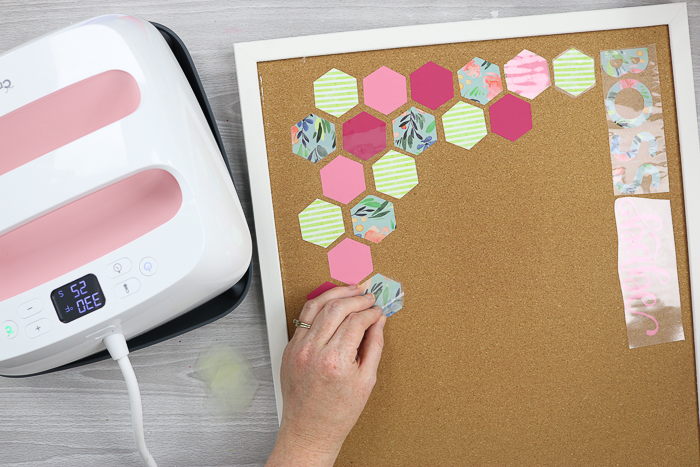
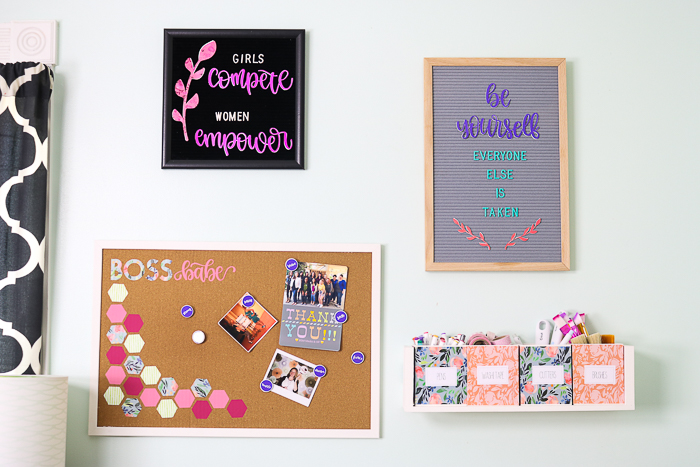
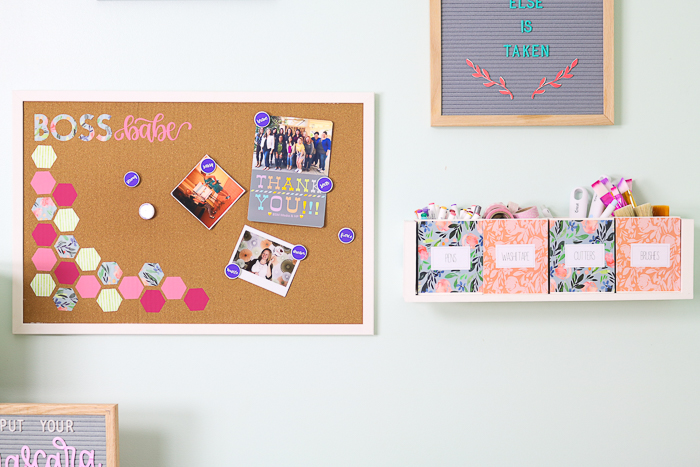
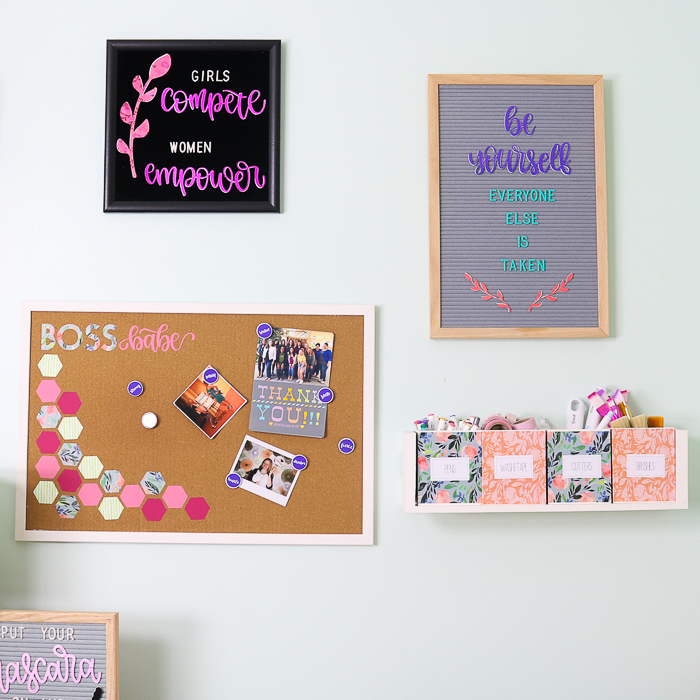
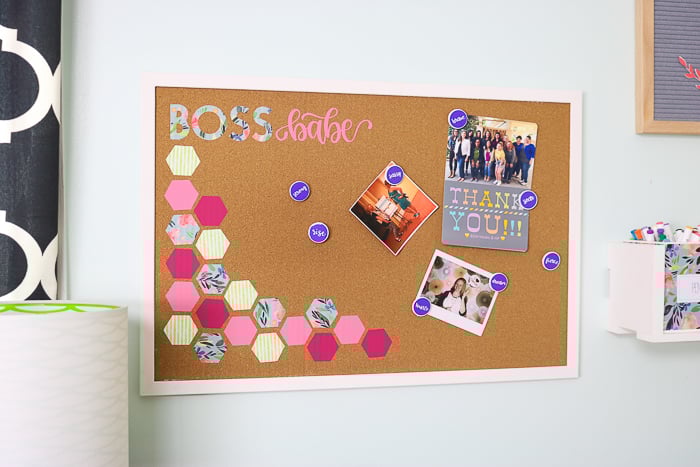
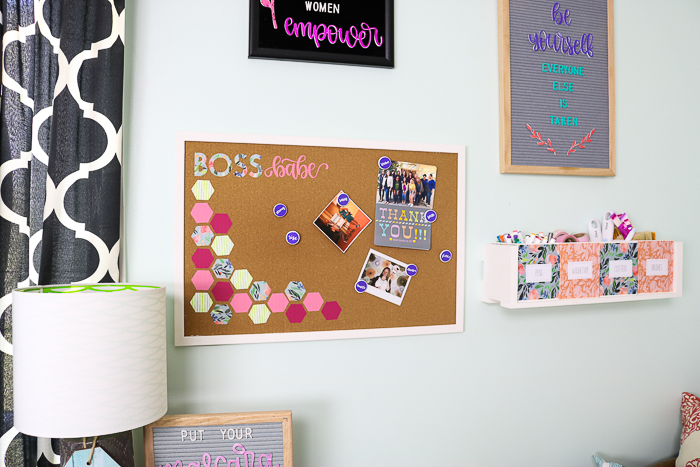
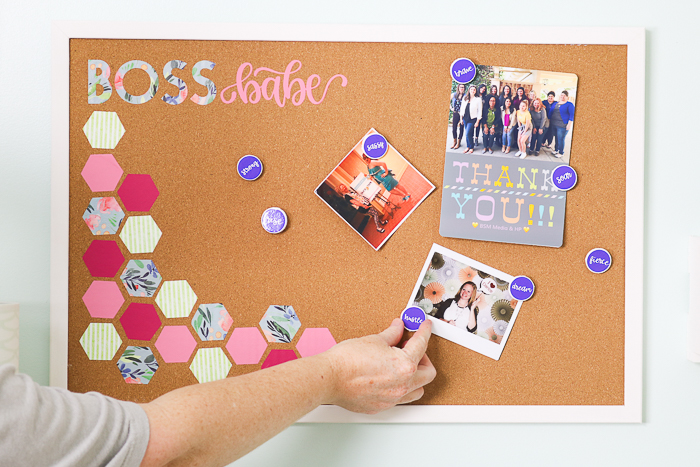
Once all of your iron-on is stuck and your carrier sheets have been removed, your DIY cork board is complete and ready to hang on the wall.
Be sure to add your custom thumbtacks to complete this DIY framed cork board.

I added my DIY framed cork board to my DIY letter board accessories, as well as the printable labels on my shelf organizer.
Office Organization for a Mom Boss Like You
The three projects work perfectly together in my craft room, but they would also work in a home office. I am always looking for ways to stay organized as an entrepreneur. Working from home is hard, y'all. There are numerous distractions, and having a well-organized workspace is at least half the battle.
I talked a little bit about quitting my job to pursue my dreams in a previous post. It was hands down the best decision I have ever made, both for my business and for our family. However, working from home can be challenging. If you find yourself challenged in a work-from-home position, channel your inner boss babe and use projects like these to organize your space. You will not regret it!
With Mother's Day just around the corner, it is the perfect time to find the “fearless” entrepreneur that may be lurking inside of you. The Cricut Explore line of machines might just help you do just that. I chose to use #selfmade as my hashtag. What would you put on your machine?
So, if you are a #selfmade entrepreneur and want to show off your style in your home office, give these fun Cricut projects a try.
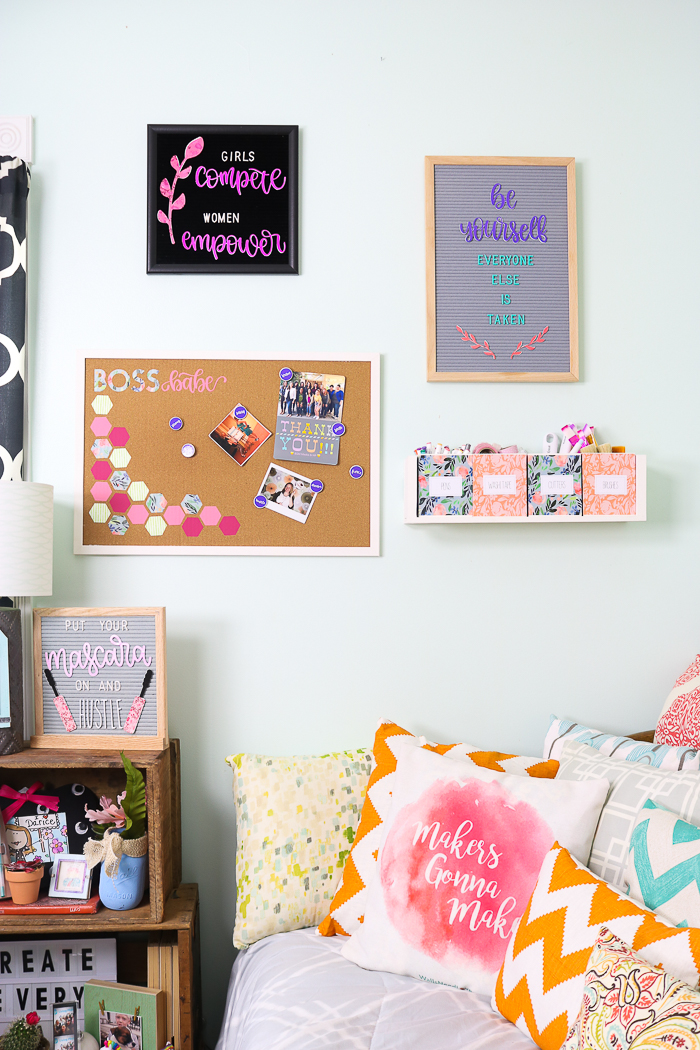
Cute organization is my jam when it comes to my workspace. Although my entire home may be filled with neutrals, I need a bright and cheerful space to spend my workday.
Plus, adding iron-on to a DIY cork board is just about the coolest project around. Who needs a plain Jane corkboard? Not you!
Use our design to create your own DIY framed cork board, or design a whole new one. I am just infatuated with the some of these vinyl patterns, so you will be seeing several more of those around here I'm sure.
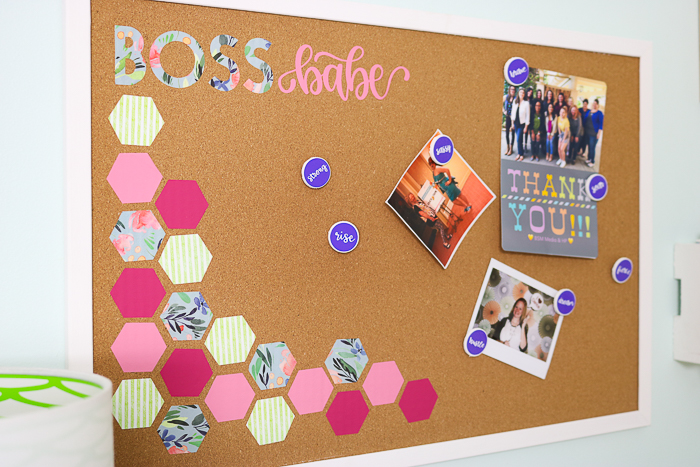
Are you a #fearless boss babe? Let yourself shine with this cute cork board in colors to match your home office.
Custom thumbtacks with inspirational sayings go a long way to lifting my spirits daily as well.
So, if you find working from home hard some days, take my advice.
Create a space that is fun and all your own for a boost to your creative soul. You will be so glad you did!

More Cork Board Ideas
So, do you need more DIY cork board ideas? Try the links below!


I love this project! Makes me want to try iron on on cork!
I love the combination of patterned and solid iron on you used! I am off to decorate all my cork boards!
This is such a cute idea. I just started using my cricut and am trying to learn all that I can do with it!
i love the fun of cork boards! I have bought several vintage ones from thrift stores for my crafting area!
Imagine the fun I could have with a Cricut!
Hello, Thank you for the detailed instructions! Your work is BEAUTIFUL. I am wondering if the vinyl can be removed easily without leaving pieces of the vinyl or an outline. I am a teacher and need top change my bulletin boards every few weeks. Thank you 🙂
It can probably be removed if you heat it again but the adhesive would leave a mark.