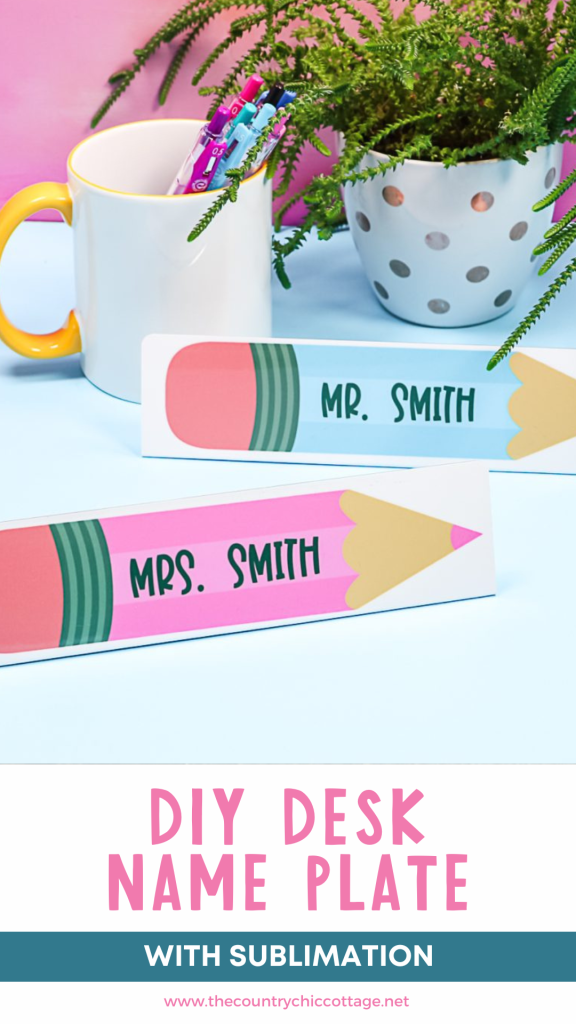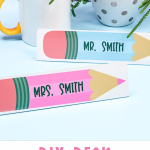
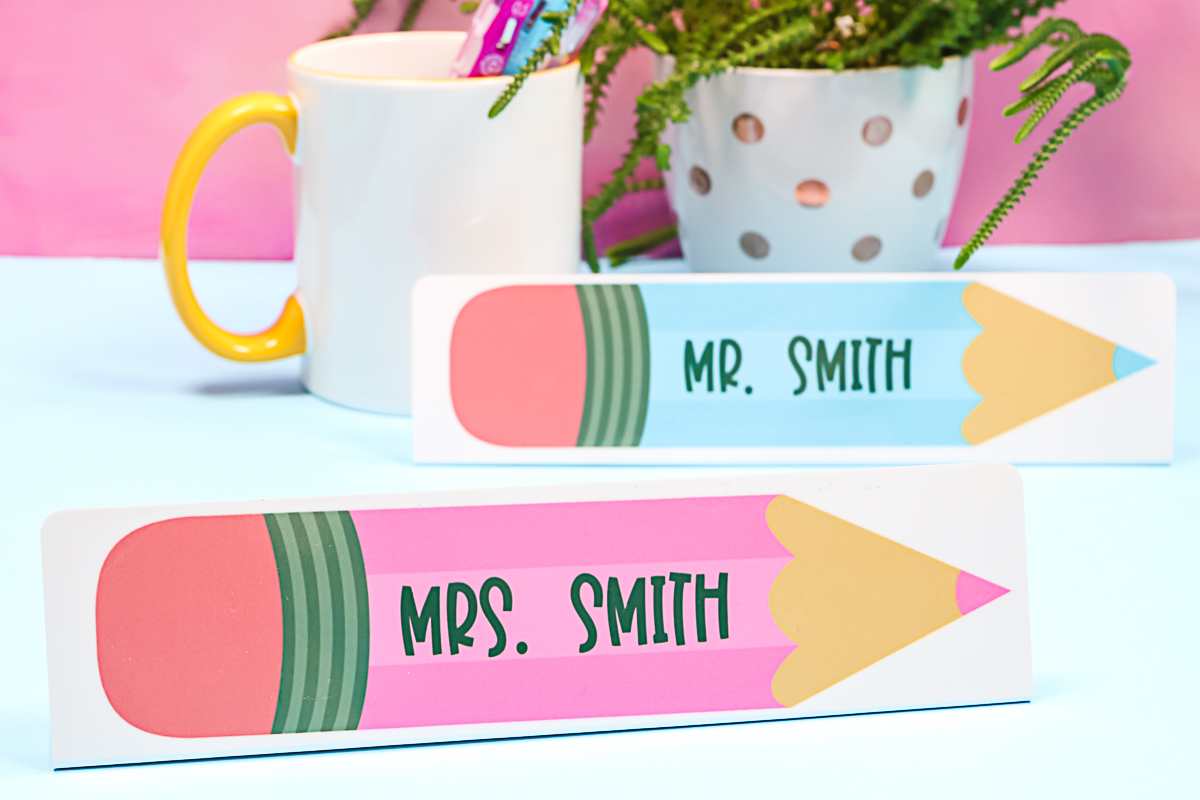
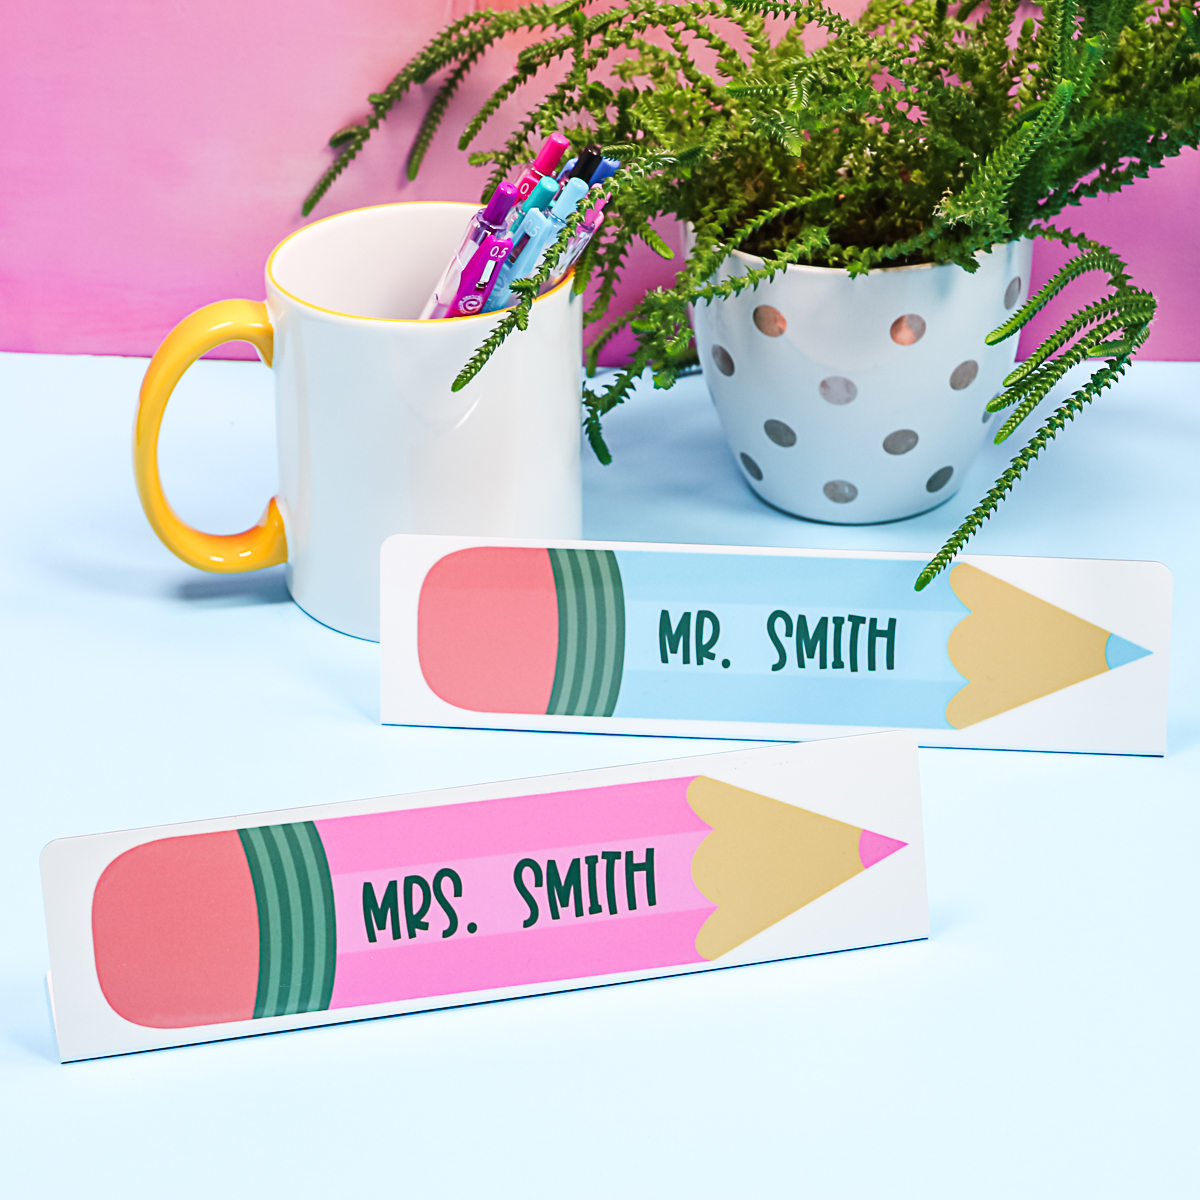
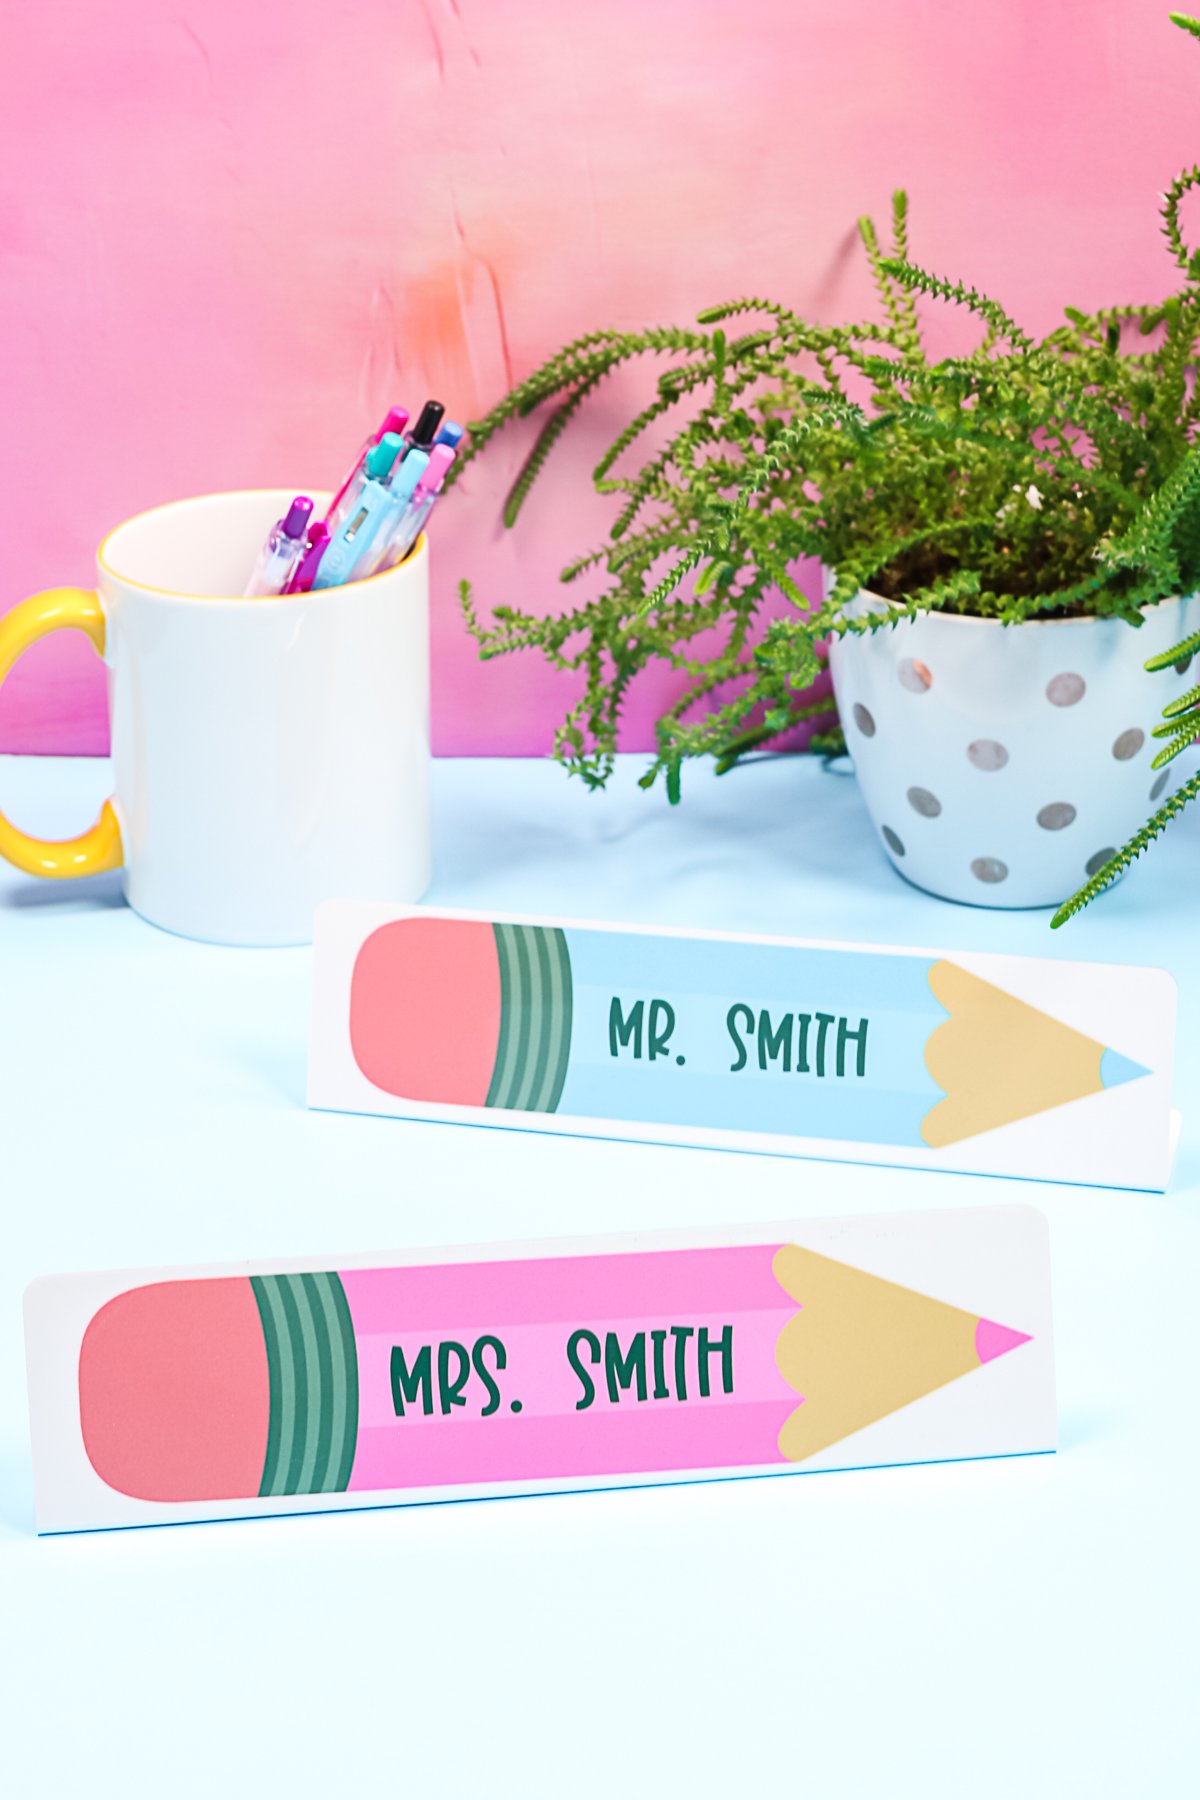
Are you ready to create a custom DIY desk nameplate with sublimation? You could use any design you would like for these. I'm going to use the idea of making these as a teacher gift, but you could also make them for friends, family, to sell, or for any other purpose you'd like. Yes, they do stand up on their own because we're going to sublimate them flat and then bend them. If you saw my previous post on sublimating on metal, I did photos in a similar way on bigger blanks.

DIY Desk Name Plate Video Tutorial
Want to see me sublimate and bend these metal desk nameplates? Just click play on the video below! I will walk you through the entire process.
Can't watch the video or miss some of the steps? You can follow along below as well!
How To Make DIY Desk Name Plate
As I mentioned before, this DIY desk name plate would make a great gift for anyone (especially teachers)! In this tutorial, I am using pink and blue pencils to create my teacher's nameplates. However, make sure you check out the ”Pencil image” link in the supply list below to see other pencil colors (like yellow, red, and even olive green)!
Note: Since publishing this post, the bendable name plates are no longer available. I've found a horizontal frame that will work nicely on a desk and linked it below.
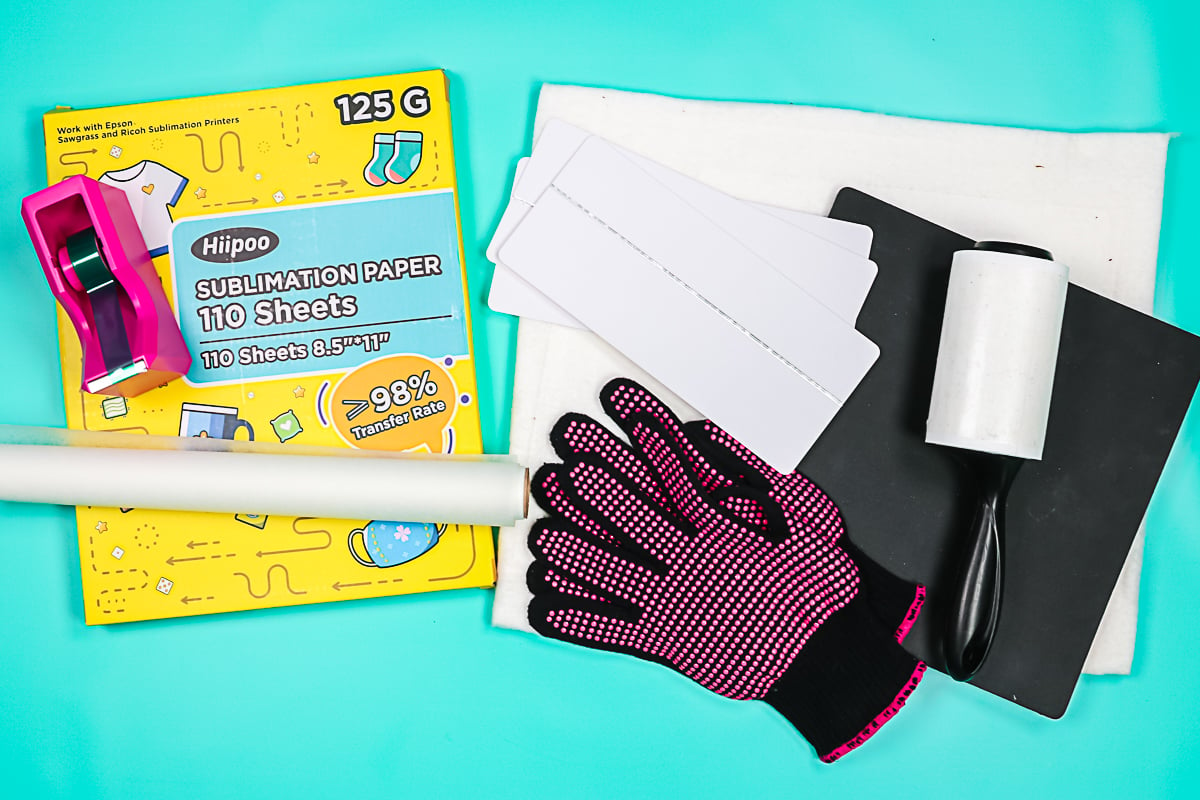
Supplies Needed To Make DIY Desk Name Plate
- Desk name plate blank (no longer available, but this one will work)
- Sublimation printer
- Sublimation ink
- Heat Press
- Sublimation paper
- Lint Roller
- Heat-Resistant Tape
- Artesprix Protective Paper
- Heat-Resistant Mat
- Heat-resistant gloves
- Nomex pad
- Pencil image
Designing In Cricut Design Space
I'm going to print these out from Cricut Design Space. You can use any program you prefer. Upload your image (here I am using one pink and one blue). Add whatever words you would like in any font. The font I am using is called BFC Santa's Candy. I changed my font color to gray instead of black. Locate your words on the image, then pick both the font and the pencil and click “Flatten”. This makes it a print then cut design. Repeat for all of your pencils. Then size them to fit on the front of the desk name plate.
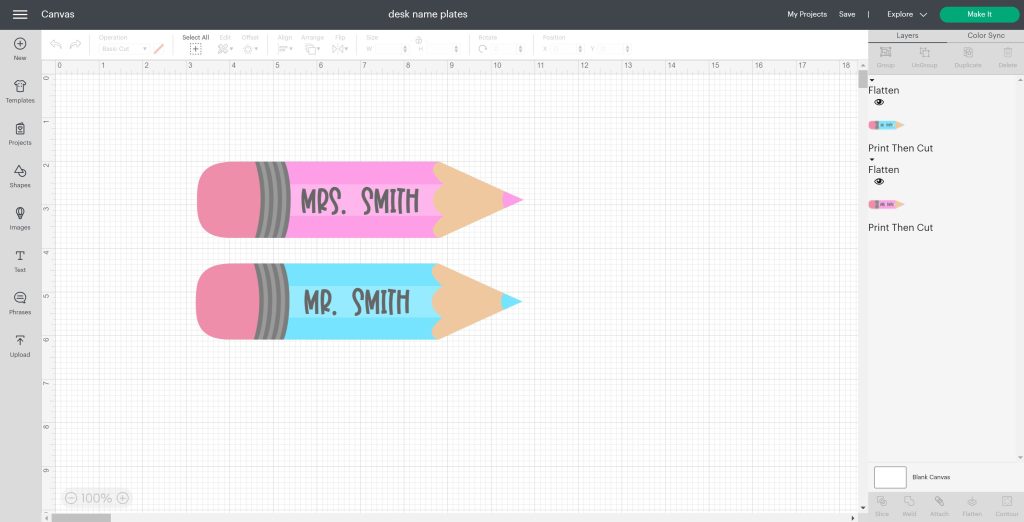
Click “Make”. Both of my pencils will fit on one piece of paper, but I wanted a bit more room between them. Click and drag them to move them around the page. Then click “Continue” and click “Send to printer”. Select your printer, turn off bleed, then enable the use system dialogue, and click “Print”. Choose print preferences to ensure you have a matte paper setting, high quality, a mirrored image, and high speed turned off. Then click “OK” and print.

Prepping Your Blank
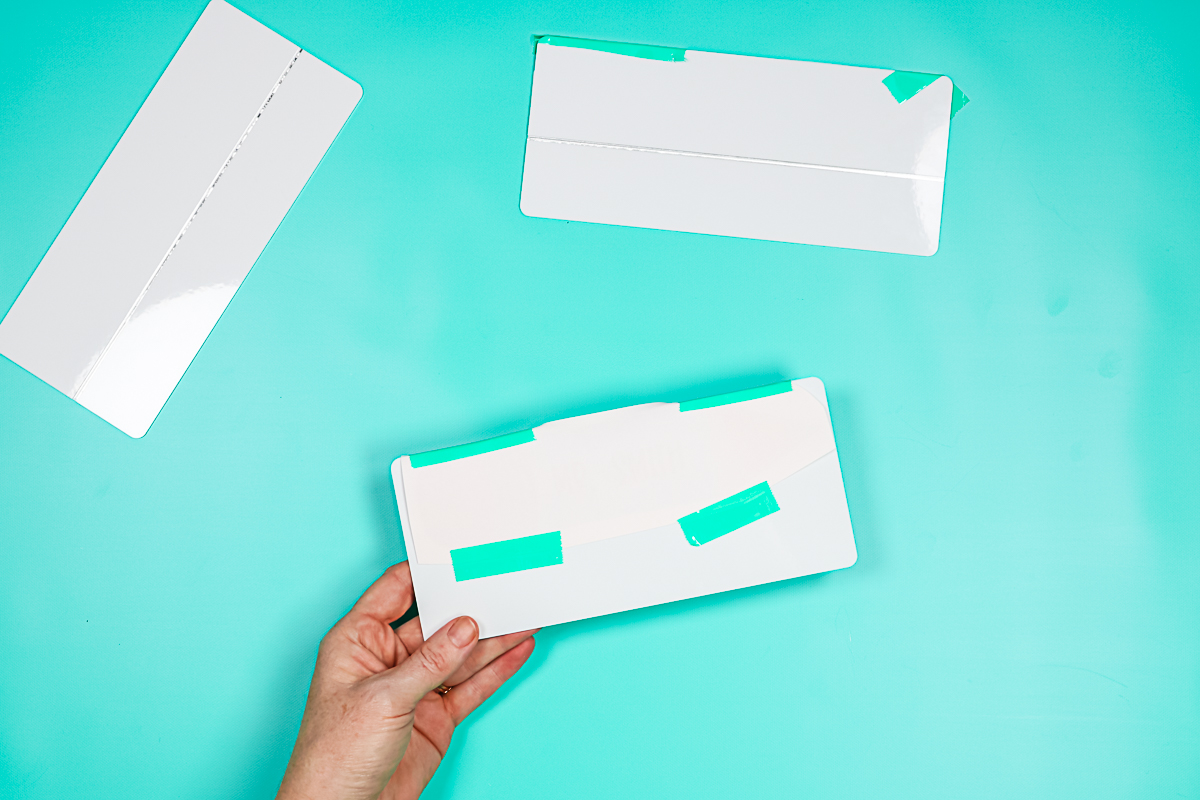
Once you have your print, cut each piece out with scissors, discarding the black box around the edge. You do not need the black box, as it is designed for use with the Cricut machine. You will note that everything is mirrored on these prints.
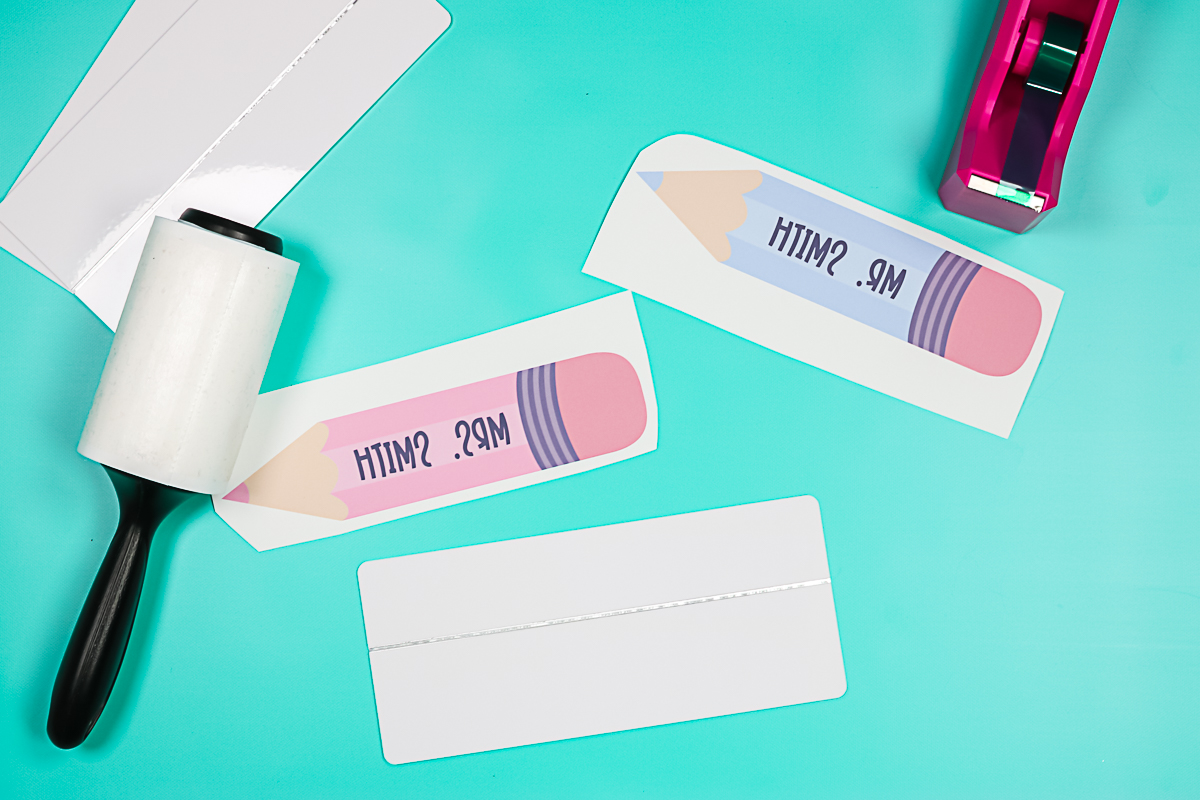
The side of the metal panel with the scoreline is actually the back. The front is plain. We only want to use the top portion of the front because that's all that will be visible when it's sitting on the desk. I like to take two pieces of heat-resistant tape, place them directly on the line on the back, flip that over, and then push the heat-resistant tape over to the front. Now I have a guide for placing my design.
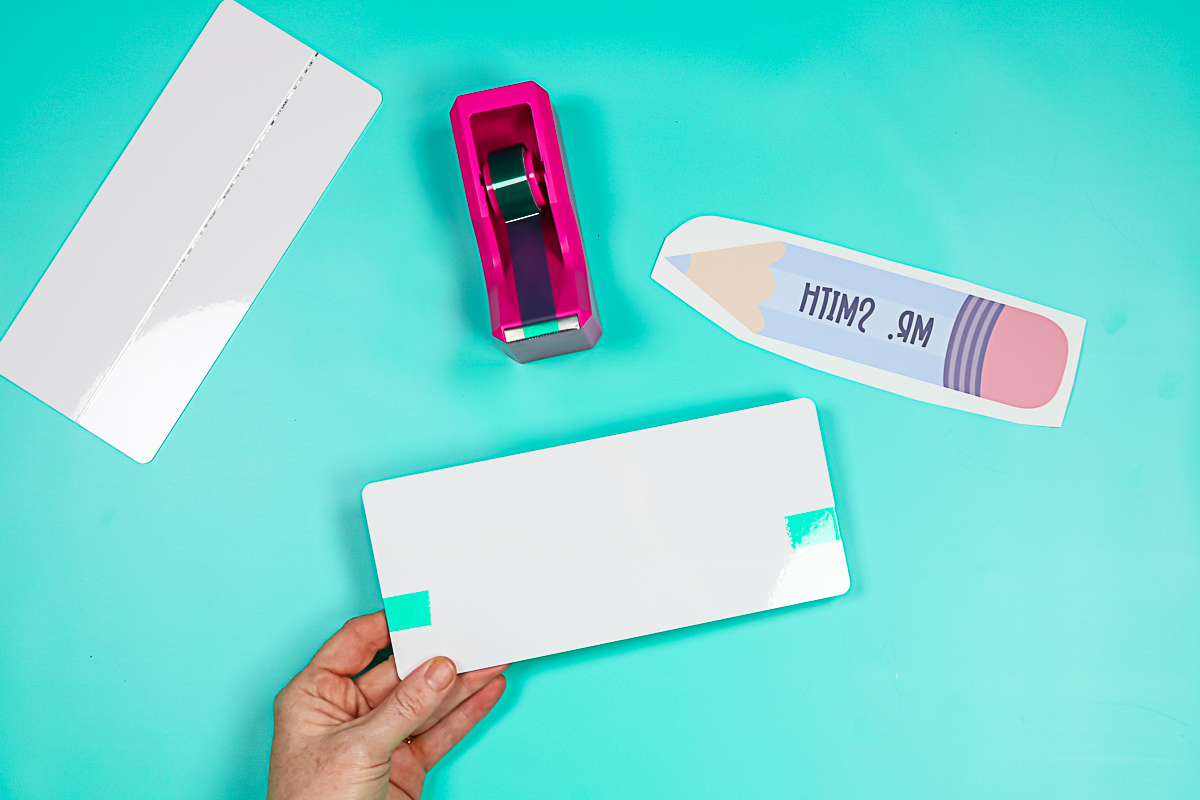
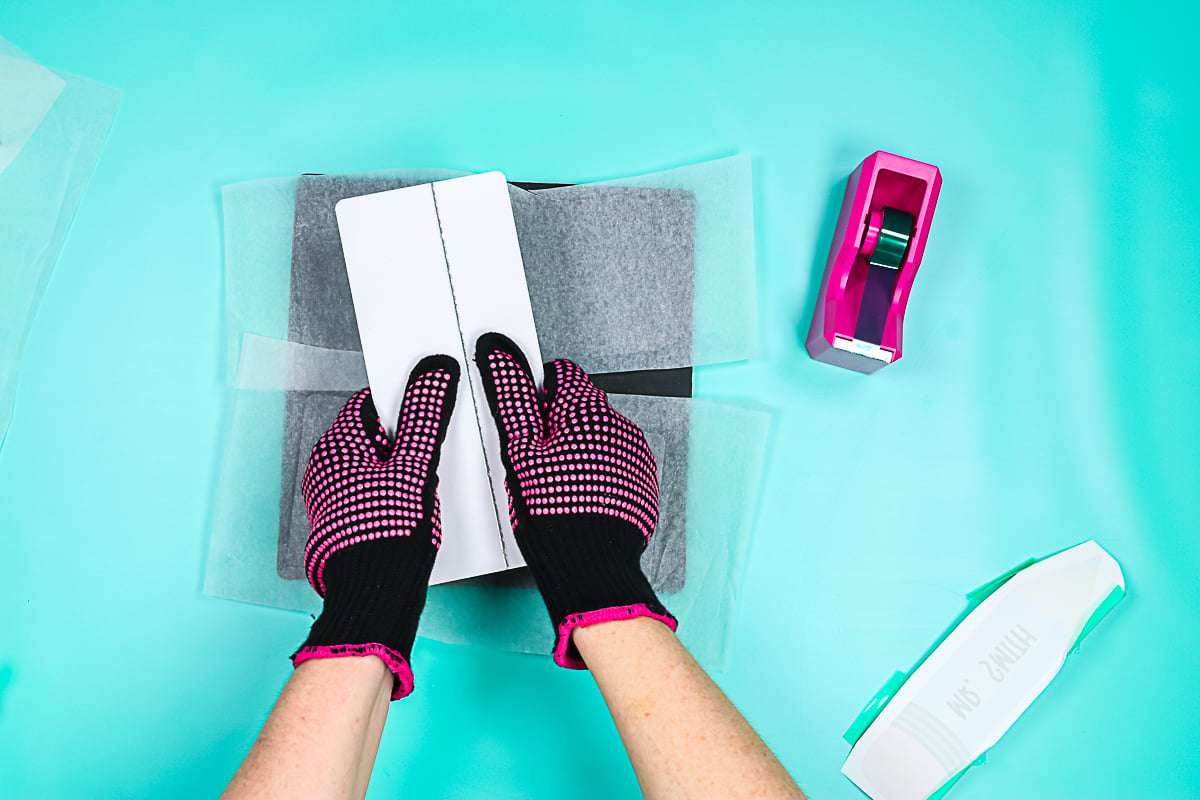
Clean the blank with a lint roller, then put your print on with the ink side down in the correct location. Once located, use some additional heat-resistant tape to hold it in place. You can remove the placement pieces you added above during this stage. Now my plate is ready for the heat press.
Pressing The Blanks
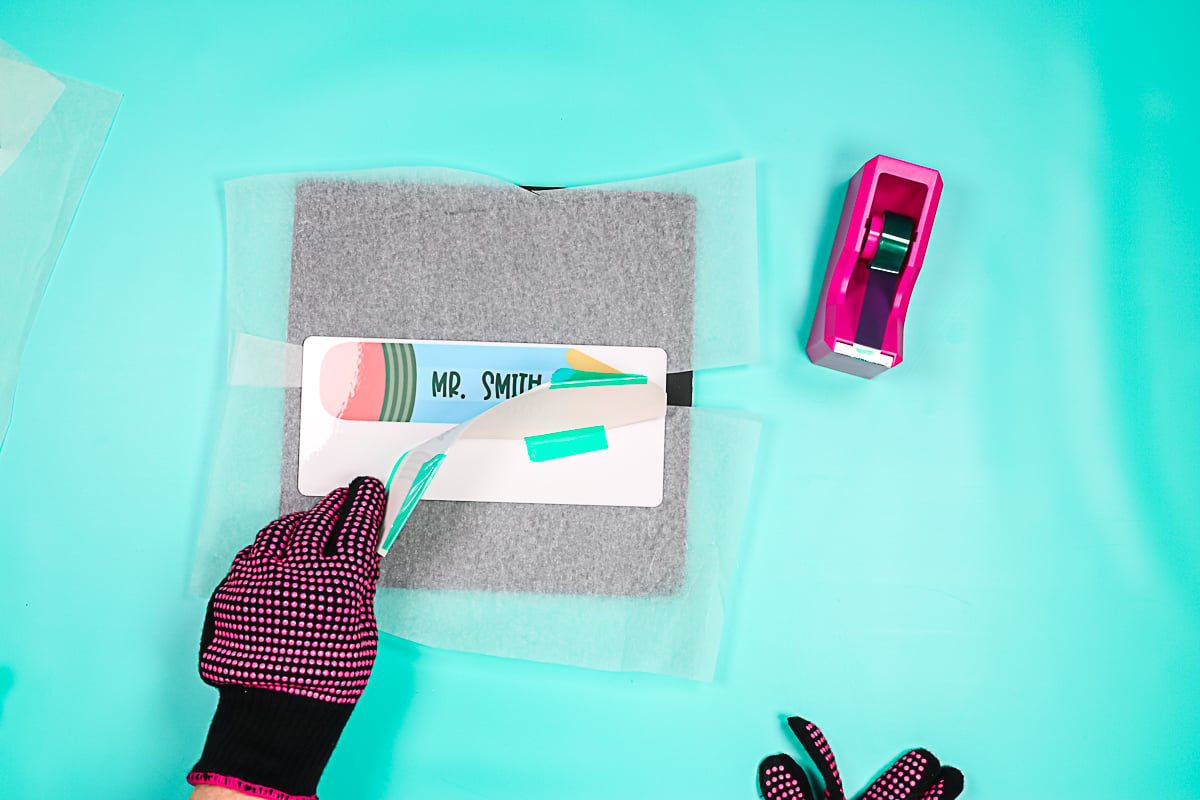
Heat your heat press to 385°F and set your timer for 120 seconds. Place the Nomex pad in the press, then cycle your heat press a couple of times to warm up the pad. You want the Nomex pad to be hot when you start sublimating these custom desk nameplates. Set your press to medium pressure during this step. Place the blanks inside the heat press with protective paper on the top and the bottom. The sublimation print should be face up in the press.
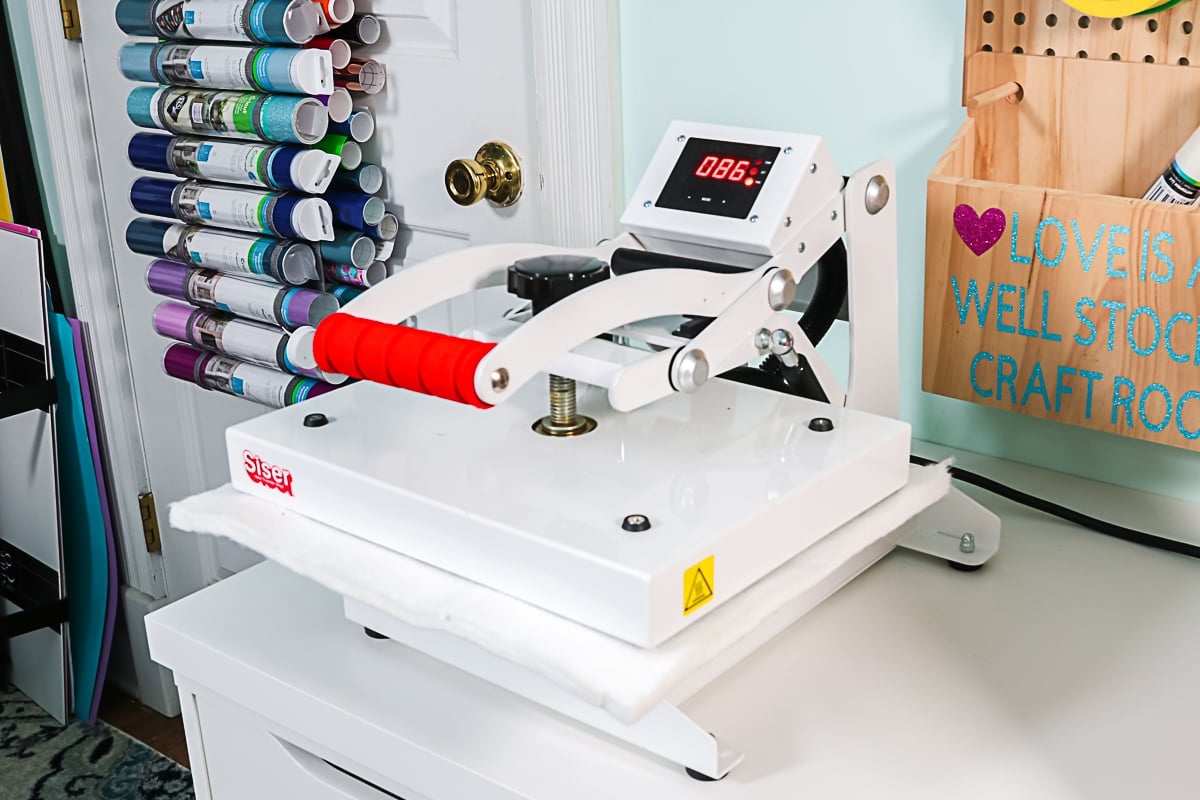
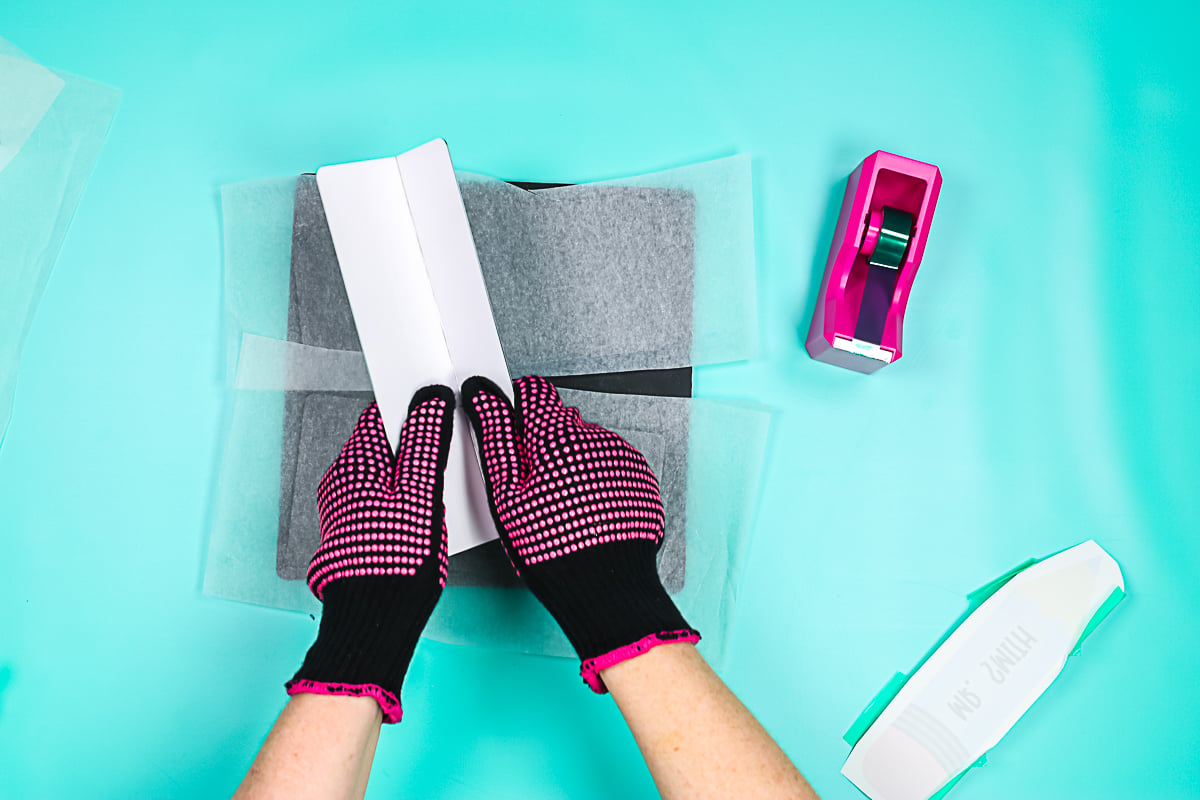
NOTE: I did press two blanks at one time. Once they are done, remove everything using heat-resistant gloves and place it on a heat-resistant mat to cool. You can allow this to cool completely, or you can do the next steps hot.
Bending The Blanks
First, remove your sublimation print. You can see just how cute these custom desk nameplates are turning out.
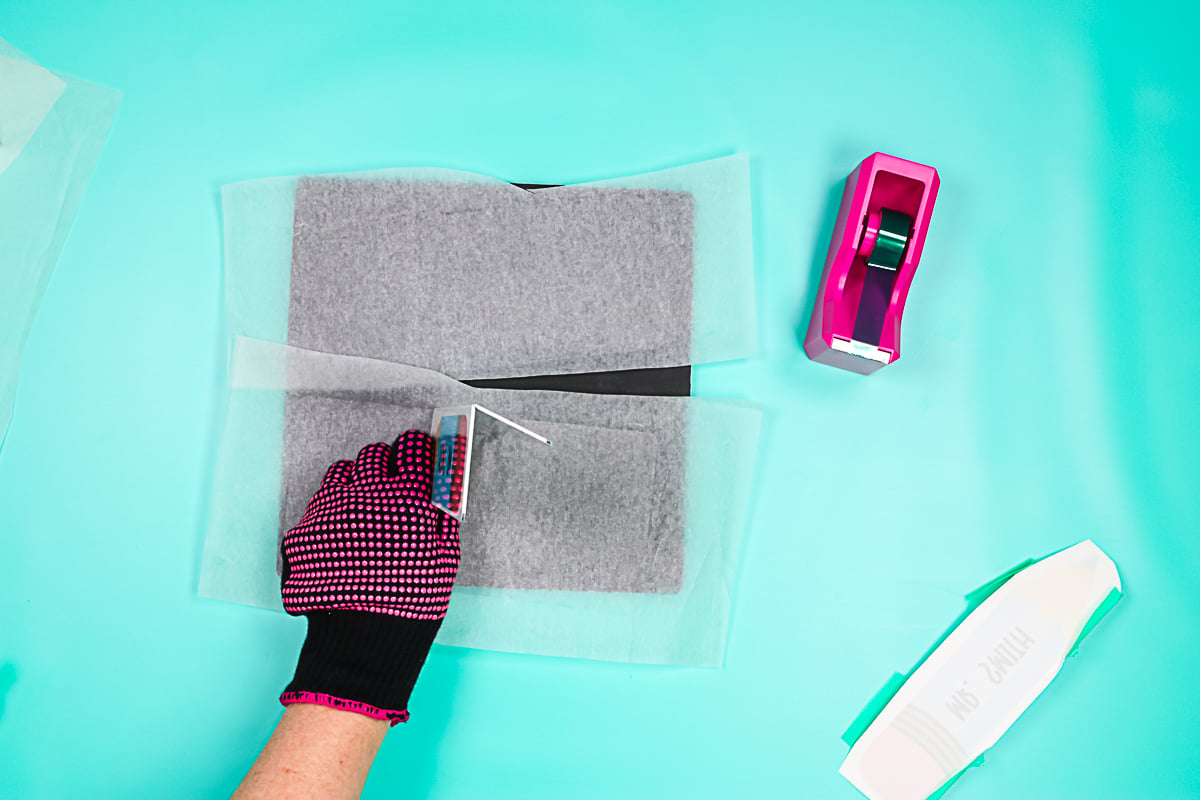
To bend each one, you'll want to bend along the score line on the back. I like to put thumbs on both sides of the score line and press in.
You can do it in a couple of different places, but the panel should bend fairly easily. Simply work your hands up and down the panel, bending each section equally until you achieve the desired look.
Once you have it bent to your liking, your nameplate is complete and ready to be gifted. Such an easy teacher gift, and you can make them in minutes!
Customizing This Project
Remember, you can customize these to suit your needs. Whether these are name plates for your boss for Boss' Day, gifts for holidays, or teacher appreciation gift ideas. You could even make custom desk nameplates for friends getting a job promotion. I think this is something unique that you can do with your sublimation printer, and it's also easy to make.
I used Cricut Design Space for my design, but you can also use other programs. You could create a more complex design in a program like Photoshop. You could even try Canva for making a design.
If you are looking for a way to create custom desk nameplates at home using your sublimation printer, this guide is for you. If you don't have a sublimation printer and want to use Infusible Ink for this one, you're more than welcome to do that as well. Infusible ink will definitely work on these types of blanks.
FAQs About DIY Desk Name Plate
Here are the questions I frequently see readers ask about making this DIY desk nameplate. If you have a question but don’t see it answered down below, please leave it in the comments so I can answer it for you.
Can I Use Any Cricut Machine For This Project?
No. The print-then-cut feature is compatible with the Cricut Maker, Cricut Explore series, Cricut Joy Xtra, and Cricut Venture.
What Font Did You Use For The DIY Desk Name Plate?
The font I am using is called BFC Santa's Candy.
I Only Have A Cricut Heat Press Can I Use That?
It should work fine! No heavy pressure is needed.
Would The Same Heat Temperature And Pressing Time Apply If Using Cricut Easy Press?
I think the same would work!
Is The Nomex Pad Optional?
You need something that will hold heat. An EasyPress mat may work as well.
5 More Sublimation Crafts
Did you love this DIY desk name plate and are looking for more sublimation crafts? Then check out the projects below!