
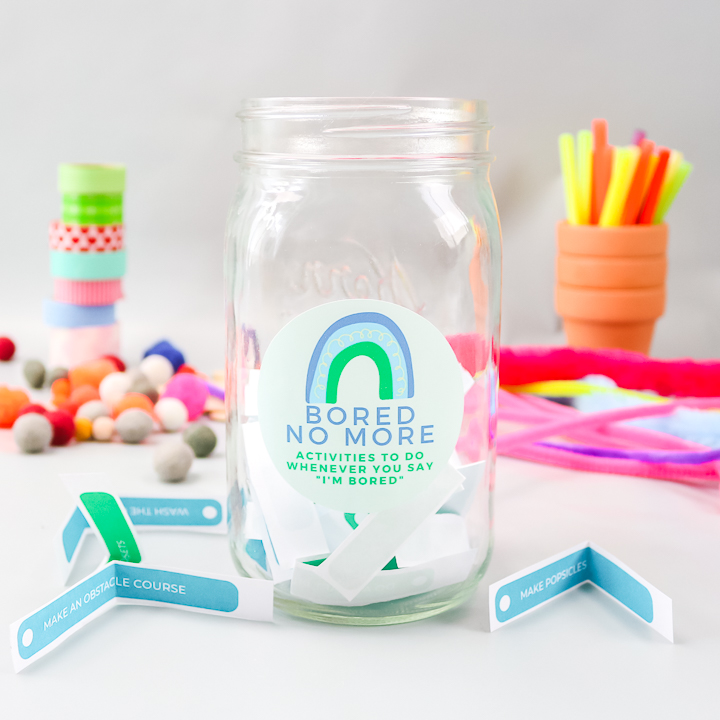
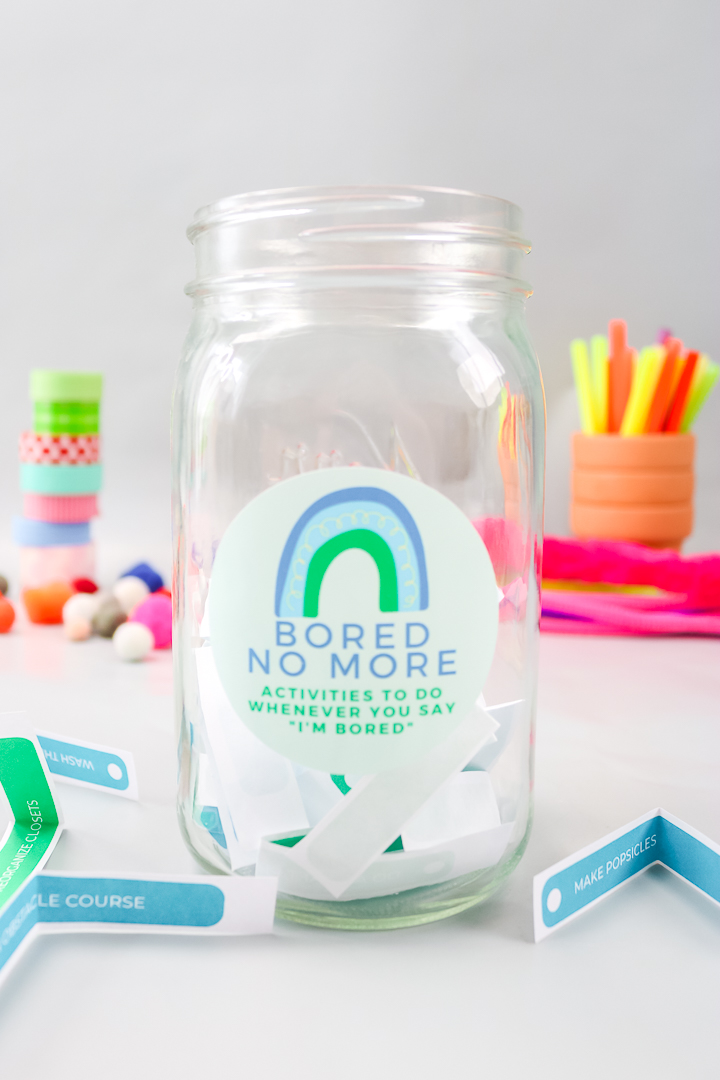
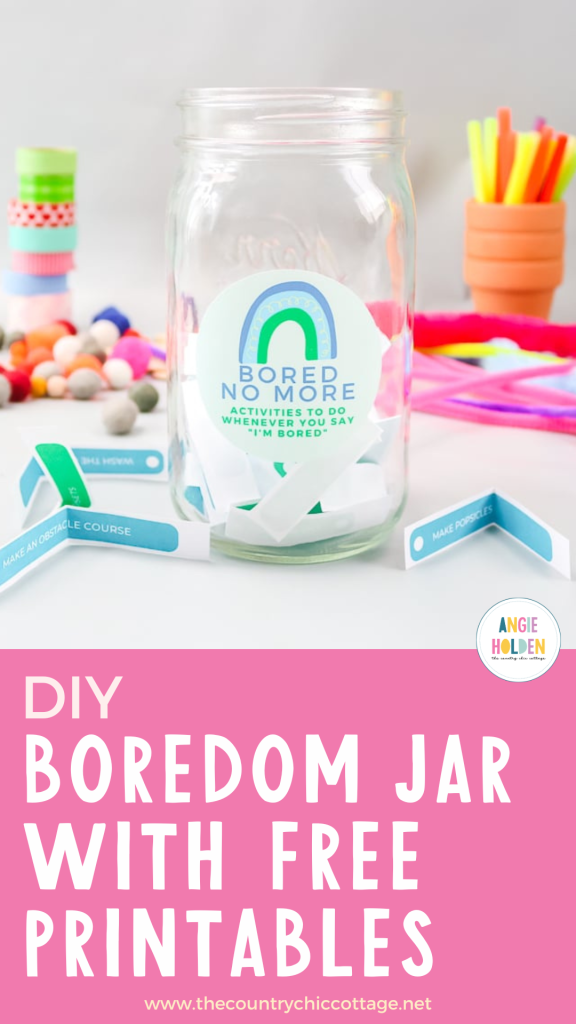
I'm wrapping up a week of family fun crafts with a boredom jar that will help keep your entire family entertained all summer. Fill this boredom jar with activities the family can do together. Then, every time someone says “I'm bored,” they have to pick an activity from the jar. Fun, right? Read on to see how I used Cricut printable vinyl to make my version of this jar.
Have you been keeping up with the ideas from this week? I posted my Tic Tac Toe game, Vacation Fun Jar, ‘Would You Rather' printable game, and printable Flat Stanley. Scroll to the bottom of this post to see even more family fun ideas from our blog partners for this series.
DIY Boredom Jar With Cricut Printable Vinyl Video
Want to see the entire process in a quick video? Just watch below!
Can’t watch or want more information on some of the steps? Just follow along below!
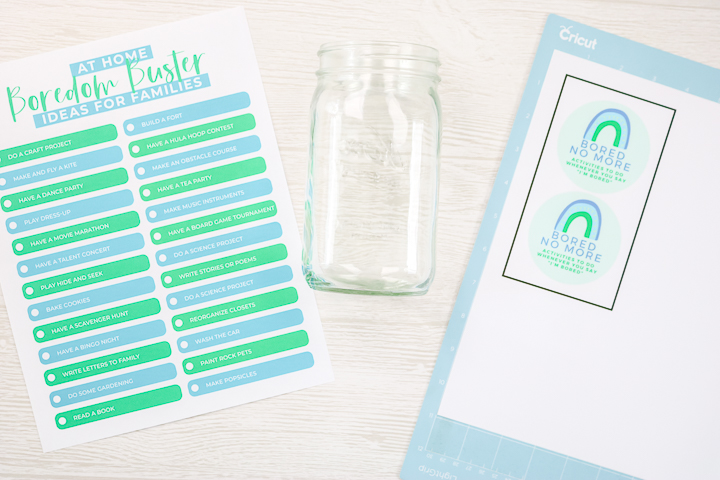
Boredom Jar Printables
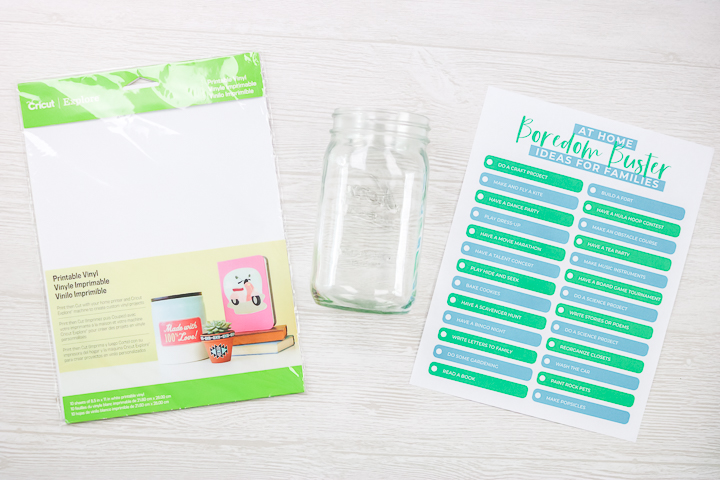
First, you will need to download our free printables. To download, please sign up for our newsletter using the form below. The files will then be sent to your email. You will click a button to download a zip file. You will need to unzip the file in order to print, but you can print as many copies as you would like.
Please note that these files are for personal use only. Please feel free to email me if you have any issues with your download.
Supplies Needed For Boredom Jar
- Cricut printable vinyl
- Boredom jar printables (see how to download the printables below)
- Cricut machine (or there is an option to cut with scissors, outlined below)
- Printer
- Mason jar with at least one smooth side
How To Make Boredom Jar
Once you have downloaded the file above, you can print it on regular paper and tape it to your jar, or you can print it on Cricut printable vinyl and cut your labels with your Cricut machine. To see how I used my Cricut machine, check out the video above or the instructions below!
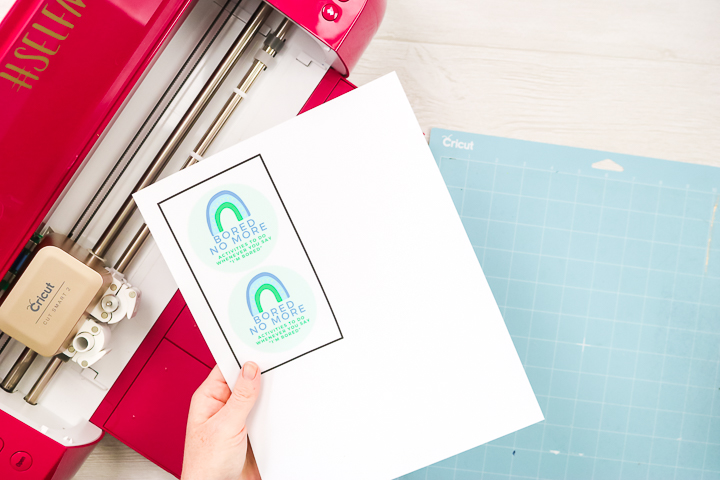
Step 1: Upload Design To Cricut Design Space
Upload the jar labels to Cricut Design Space. Be sure to use the PNG image and pick complex when uploading. Turn the surrounding area to checked when uploading, then save as a print then cut image. The video above demonstrates how to do all of this with a screenshot, in case you are confused.
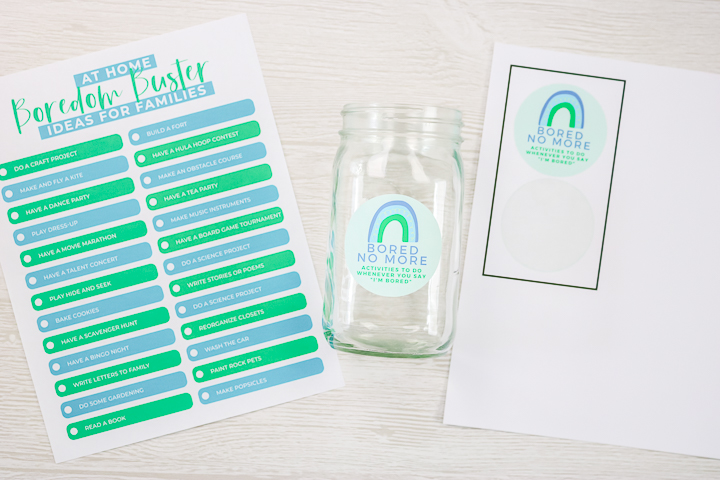
Step 2: Cut Design
Once you have uploaded your design, insert it onto your canvas and resize to fit your jars. Then click “Make” and you will be prompted to print. Please note that a box will be printed around your labels, and if the bleed option is selected, a fuzzy area may appear around the circles. That is okay! Once printed, pick Cricut Printable Vinyl from the list of materials to cut.

Step 3: Print Boredom Busters
Your machine will use the black box to locate the cuts and cut around the circles of the labels. You will also need to print the list of boredom busters to add to your jars. I just printed these onto regular copy paper and cut them with scissors. Remember, you can also print these jar labels onto paper and tape or glue them to your jar if you don't want to use the printable vinyl.
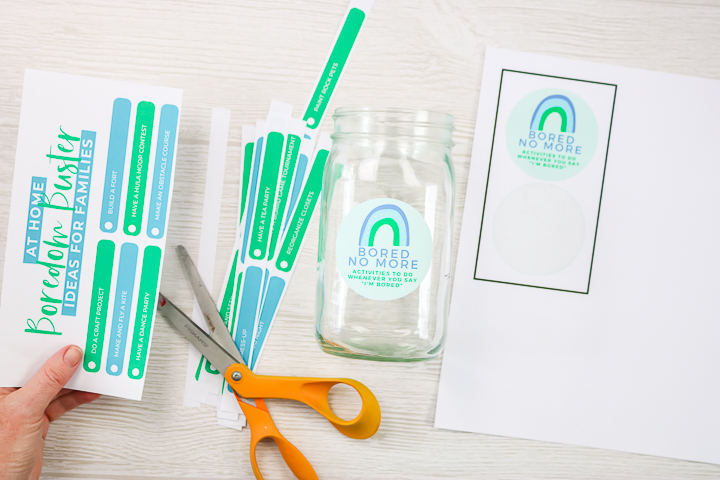
Step 4: Add Label To Jar
Then just peel and stick the labels into place on your mason jar. I prefer to use a jar that has at least one smooth side when working on projects like these.
Step 5: Cut Boredom Busters
Cut the family activity strips into individual pieces before adding them to your jar. You will also want to remove any activities that you either don't want to do or cannot do.
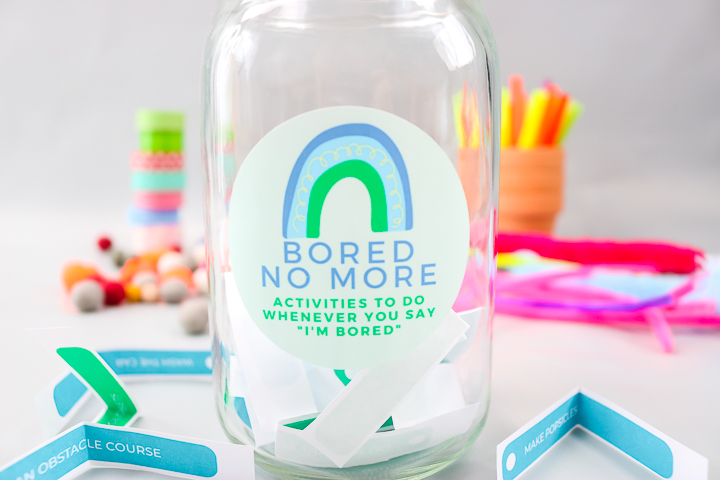
Step 6: Add Boredom Busters To Jar
Then just fold your boredom busters and add them to your jar. The next time you hear “I'm bored,” just send them to the jar to pick something fun to do!
This is a great project for those of you who may be staying home on those long summer days. The kids will love all the fun and creative activities, and you can even add some of your own ideas or your kiddos' favorite activities!
Before long, you'll hear the joyful sounds of fun and laughter! For any parent, those delightful noises mean that kids are happily playing instead of being bored. I hope you and your children enjoy using this boredom jar and that it provides hours of entertainment.
FAQs About Boredom Jar
If you have questions about making this boredom jar, I have answers for you! Please leave your question for me in the comments if you don’t see it already answered below.
What Cricut Machine Are You Using?
In this project, I am using the Cricut Explore Air 2.
Can I Use Any Cricut Machine For This Project?
No. The print-then-cut feature is compatible with the Cricut Maker, Cricut Explore series, Cricut Joy Xtra, or Cricut Venture.
What Printer Are You Using With The Cricut Vinyl?
I use an HP 6255 for most of my Cricut crafting. However, if you're looking for more in-depth information, check out my “Best Printer for a Cricut” video. In the video, I compare the printer I use (the HP 6255) with the popular printers on the market for crafters.
What Paper Source Or Print Setting Did You Select?
On my printer, I selected ‘Best Quality' when printing.
Do You Need To Put A Sealer Over The Printable Vinyl?
That would depend on what you are using it for. Printable vinyl is NOT waterproof as is. Due to that, you can add a sealer; however, for this project, I didn't.
5 More Cricut Family Crafts
If you loved this boredom jar and are looking for more Cricut family crafts, check out the projects below!
- Vacation Fund Jar: 4 Free SVG Files
- S’mores Caddy with Free SVG
- Would You Rather Game – Print Then Cut
- Felt Tic Tac Toe Board
- How to Make a Puppet with a Cricut Machine


Thanks so much for this adorable (& timely!) project, Angie! I made one for myself and three for friends! SO CUTE!
So glad you used it!