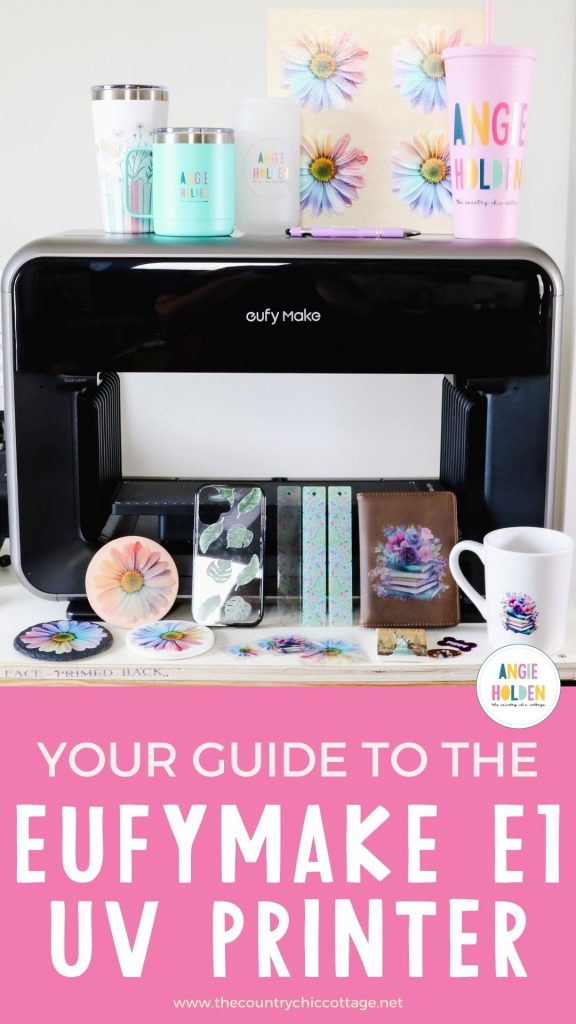
I am so excited to talk to you about the eufyMake E1 UV Printer. If you're looking for a printer that can print full color directly on mugs, wood, metal, and more, you want to keep reading!
The eufyMake E1 UV Printer is the world's first personal UV printer. Keep reading to see how it works, and see just a few of the projects you can make using this printer.
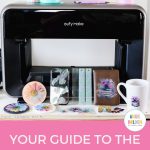
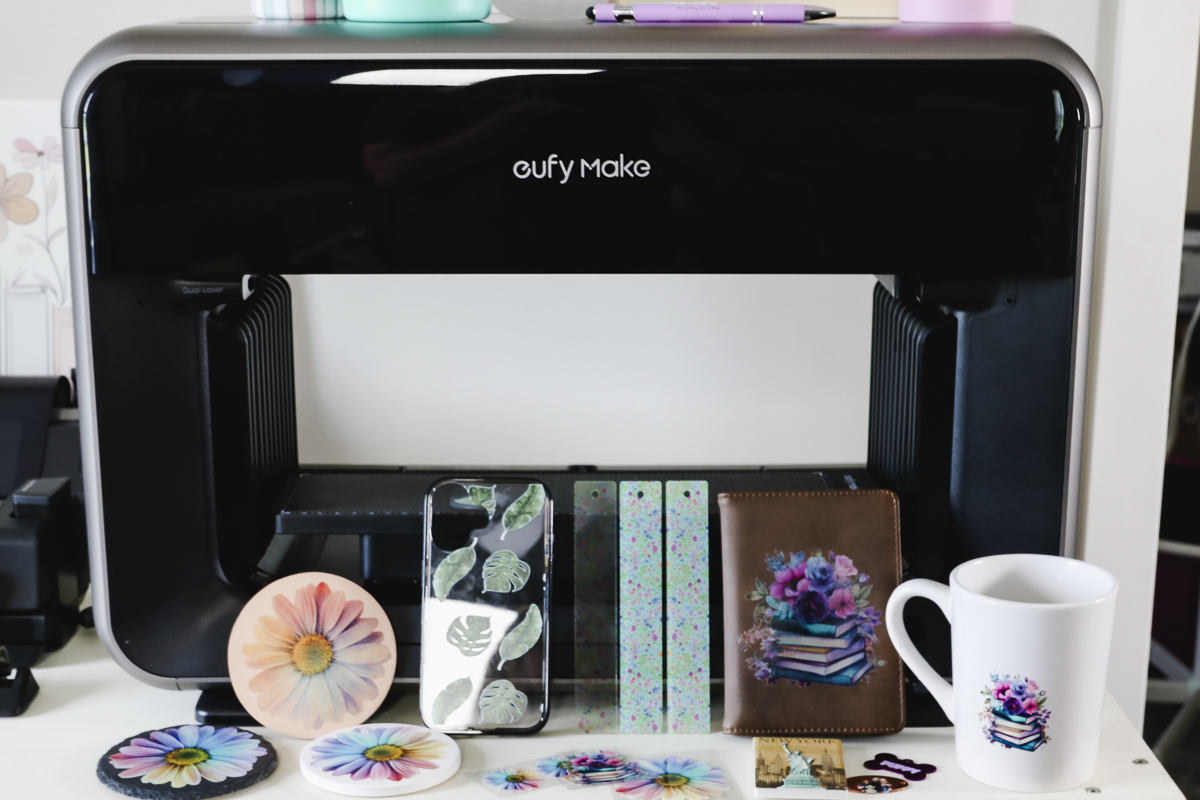
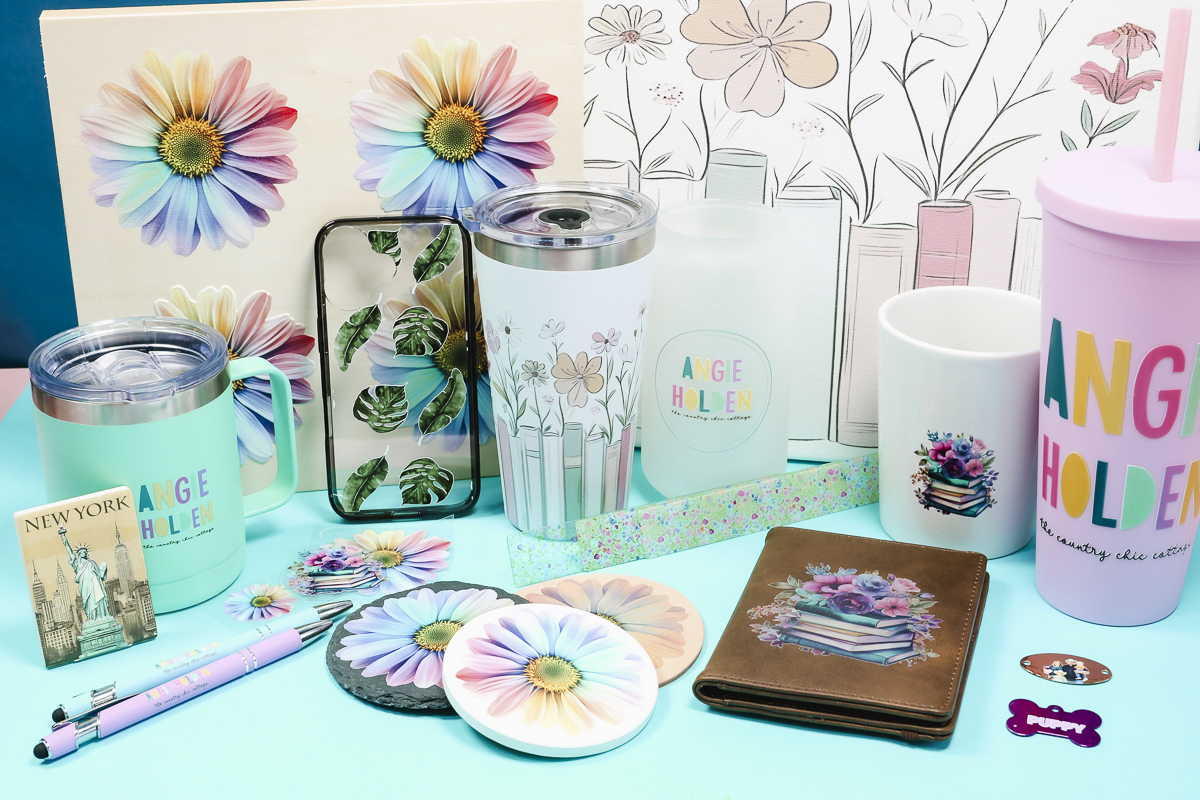
I am going to show you how to make a lot of different projects using the eufyMake E1 printer.
To see how I made these different projects and how the different blanks worked, press play on the video below:
eufyMake E1 UV Printer Basics
The eufyMake Personal UV E1 printer is a UV printer that prints directly on hard surfaces. It is easy to use, even for beginners.
Something I know you're going to love is the ability to print designs with a 3D texture. I can't wait for you to see these results.
This printer is tiny, but don't let that fool you; you can get large prints out of it, and I will show you how.
What is UV Printing
A UV printer uses special UV-curing inks and UV lights to instantly dry and cure the ink onto a variety of surfaces.
The Ultraviolet light instantly cures the ink, so you don't need to worry about transferring the prints from one machine to another or waiting for them to dry.
The UV light also removes the need for a heat source like you would need for sublimation, white toner, or DTF prints.
Unlike sublimation or DTG, UV printing doesn't need special coating on the blanks. It prints directly on surfaces like glass, metal, and wood with no heat press or coating required.
UV-cured inks are resistant to scratching, fading, and other damage, making them ideal for long-lasting designs.
eufyMake E1 Printer Unboxing
Now that we know a little more about UV printing, let's look at what comes in the eufyMake E1 printer box.
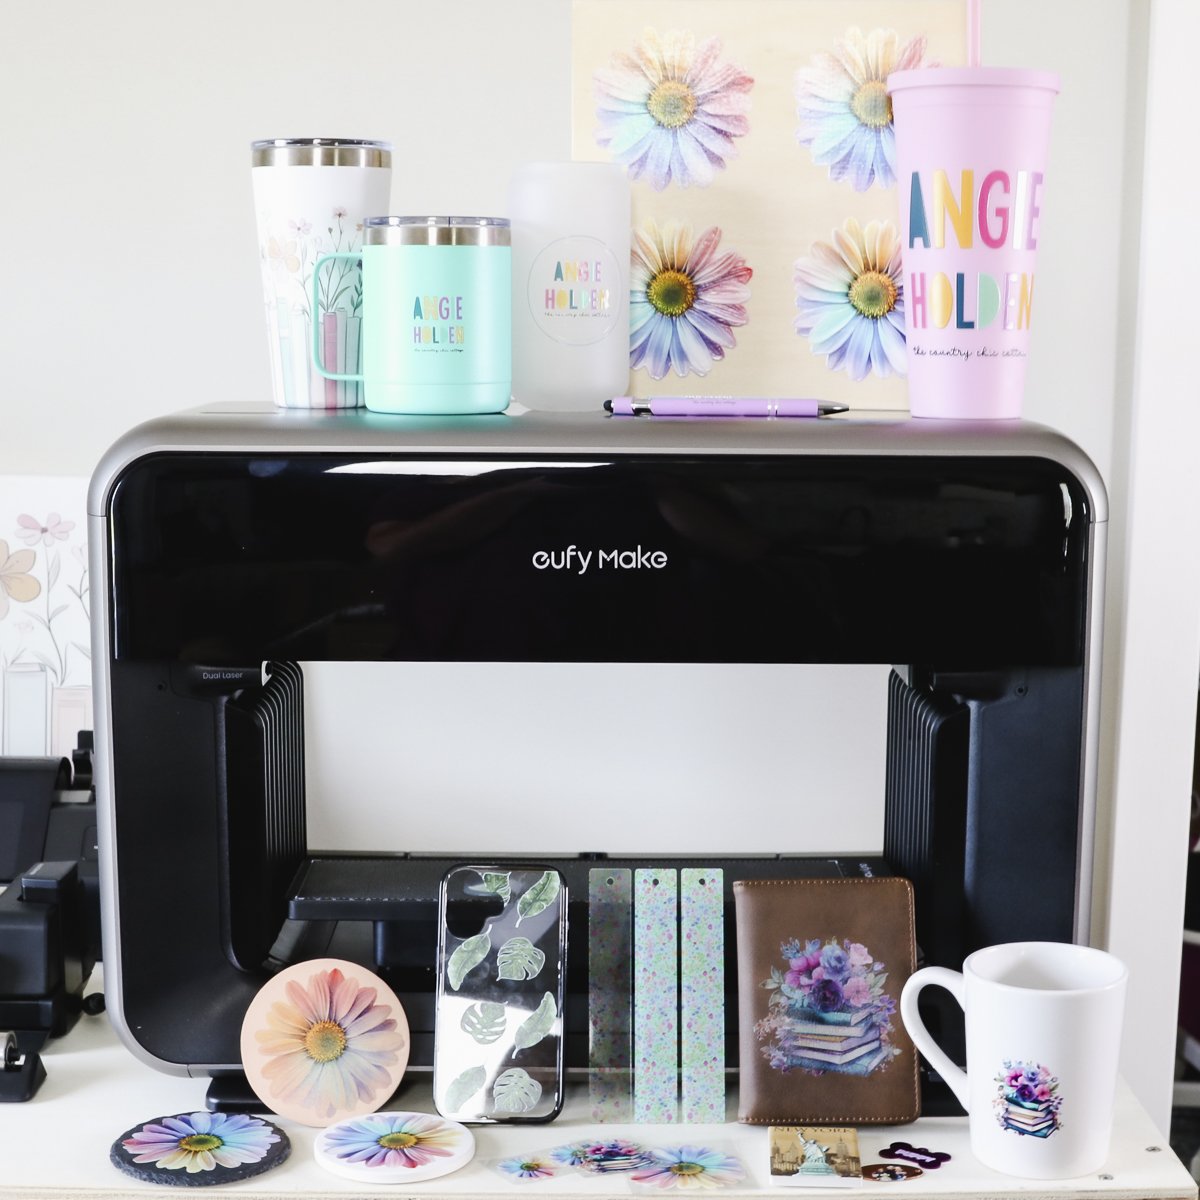
Unboxing this printer is pretty easy. The printer is medium-sized. I was able to handle it by myself without issue.
As you open it, you'll find that there are some components packaged inside the printer. Open the printer and remove everything from the inside.
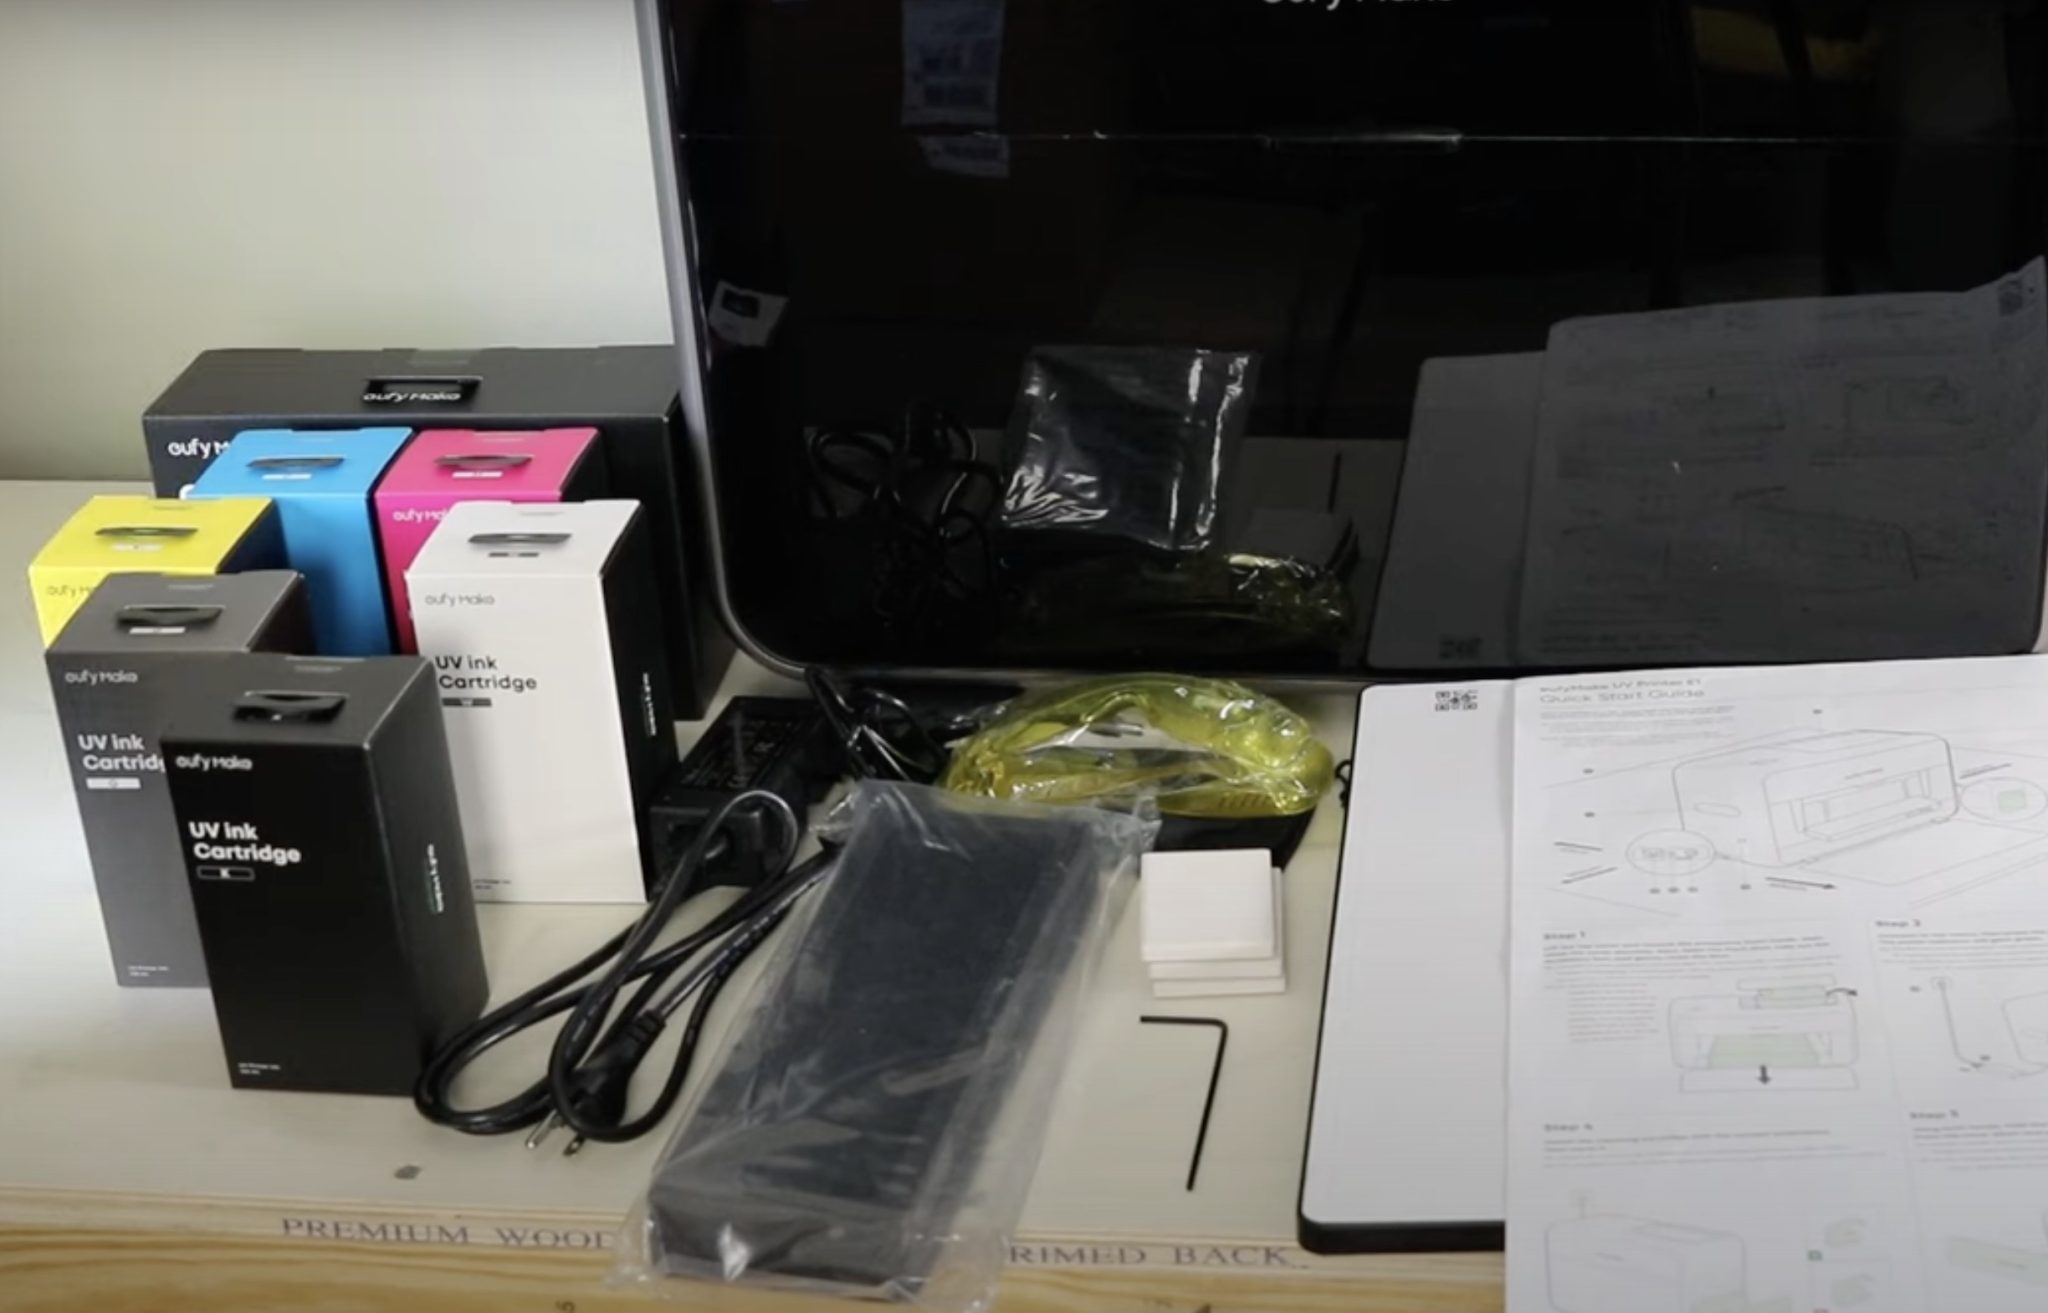
Included with the printer is:
- Safety Glasses
- Filter
- Power Cord
- Test Magnets
- Allen Wrench
- Quick Start Guide
- Standard Flatbed
- Standard Adhesive Mat
- Ink Cartridges (boxed individually)
- Cleaning Cartridge
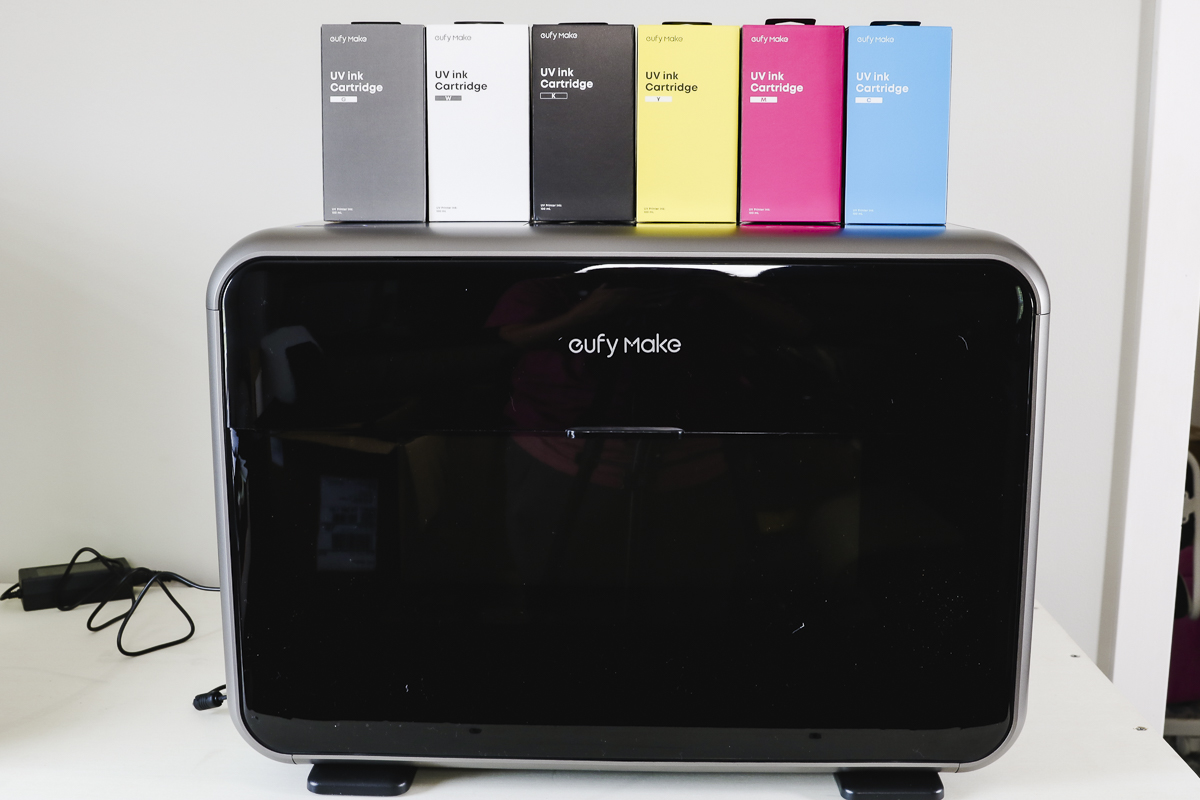
The ink cartridges included are Cyan, Magenta, Yellow, Black, and White. There is also a varnish cartridge. You'll see a G on the front because it is referenced as a gloss cartridge.
eufyMake E1 Printer Specs
The printer itself is 20.5 by 16.5 by 14.25 inches. You need to make sure there is room both in front and behind the printer during operation. The printer can work on a standard counter as long as you move it to the front edge of the counter.
I think the printer is compact enough to transport to craft fairs or craft classes. If you want to customize on-site or show how you create projects on-site, this UV printer could be a great option for you.
Even though the printer itself is small, the size of projects you can make is not limited to the size of the printer.
The max printing area is 16.5 by 11.75 inches with the large bed because it moves in and out of the printer. You can print even larger with the roller accessory, and I will show you that in a future tutorial.
Material Compatibility
Now, let's talk about which materials you can print on. There are some restrictions, so let's dig into what works and what doesn't.
- The eufyMake prints on rigid surfaces, you cannot print on textiles. While you can't print directly on a shirt, you can print on a lot of other materials. NOTE: There is a flexible white ink option that allows for a few soft surfaces and I will cover that in another video.
- Do not try to print on anything that is liquid or Teflon.
- Do not print on anything flexible, the print may crack or completely peel off. NOTE: There is a flexible white ink option that allows for a few soft surfaces and I will cover that in another video.
- It cannot print on surfaces like silicone, nothing sticks to silicone.
- Glass or glazed ceramic items may have issues unless you prepare the blanks ahead of time. You may need pretreatment or even flame-treated glass, and I did not find those blanks readily available. NOTE: A way to use this printer on glass is to create UV DTF stickers and add those to the glass surfaces.
- Powder-coated metal worked great, but uncoated metal didn't work as well. I had mixed results with metal, depending on whether it had a coating or not.
- Blanks can be up to 3.94 inches or 100 millimeters thick when printing with the flatbed, and that includes objects with a curve.
- With the laminator accessory, you can print directly on film to create UV DTF stickers.
- With the rotary accessory, you can print directly on tumblers. I will share the exact size restrictions when I show that example.
- Because the printer prints white, there are no restrictions on what color you can print on.
- Fairly smooth surfaces that don't have a significant height difference across the surface are going to do best with this printer since it auto-measures the surface for printing.
I am going to print on rigid leather, slate, powder-coated tumblers, plastic tumblers, pens, coasters, wood, and a plastic cell phone case.
You may notice that I'm testing both curved surfaces and flat surfaces. I am also going to test printing on a stretched canvas to see if I can make a piece of wall art.
eufyMake UV Printer Setup
First, make sure the printer is on a sturdy table with plenty of room around it.
Connect the power cord, plug the printer in, and power the printer on. You'll see and hear the printer turn on. The Start button will glow green when it's turned on.
Install Cartridges
On top of the printer, there is a slot for each cartridge.
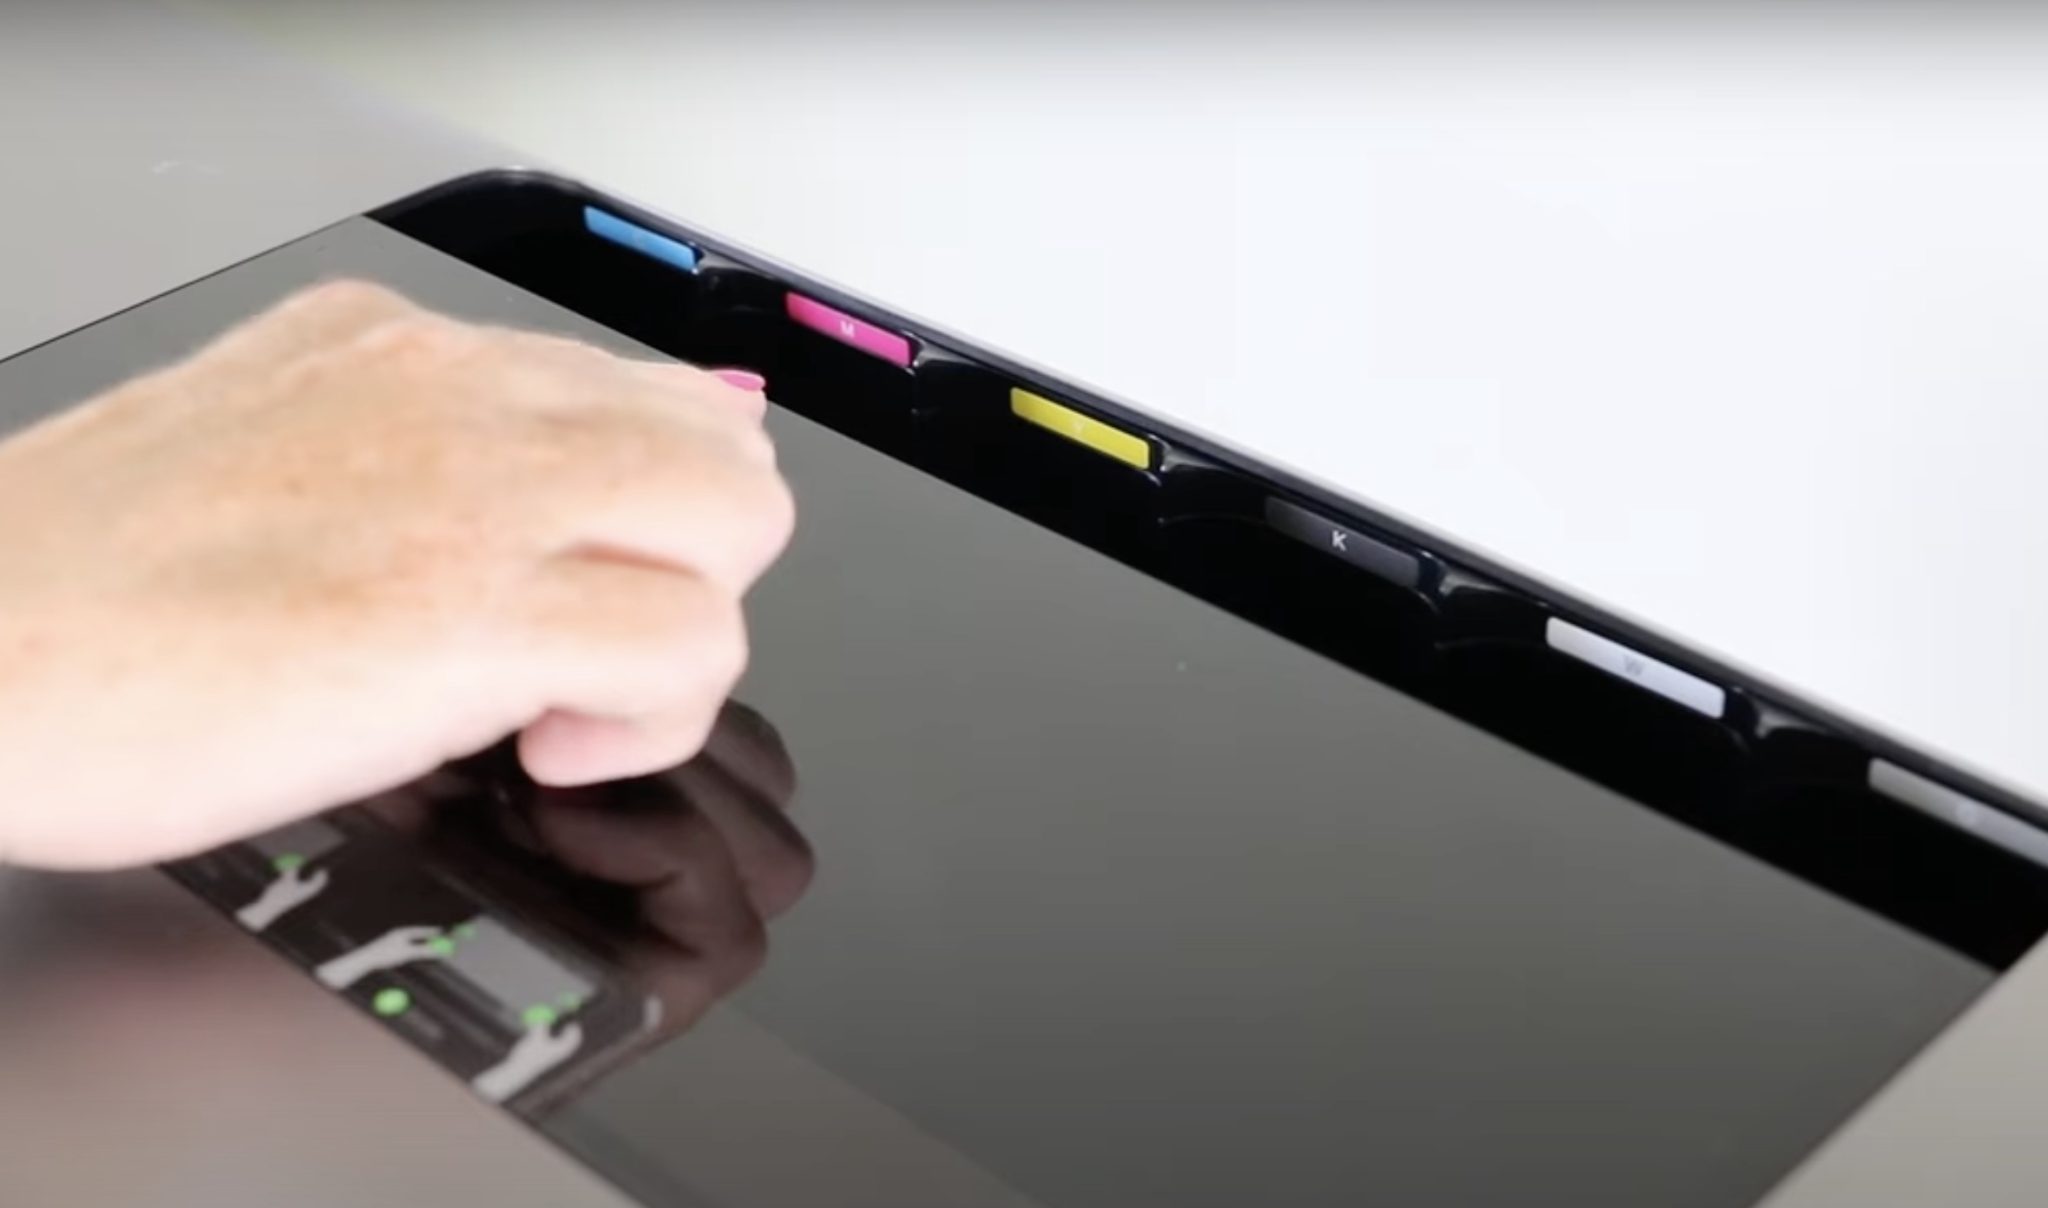
Match the color on the cartridge to the color of the slot. Double-check that you have everything lined up correctly, and then drop the cartridge into place.
You should hear a click when it's loaded correctly. Repeat this process for each cartridge.
Pay close attention to the last three: K is for Black, W is for White, and G is for Glossy.
On the right side of the printer, there is a panel that you'll open, and that is where the cleaning cartridge goes.
The first time you install the cartridge, there are protective caps that need to be removed.
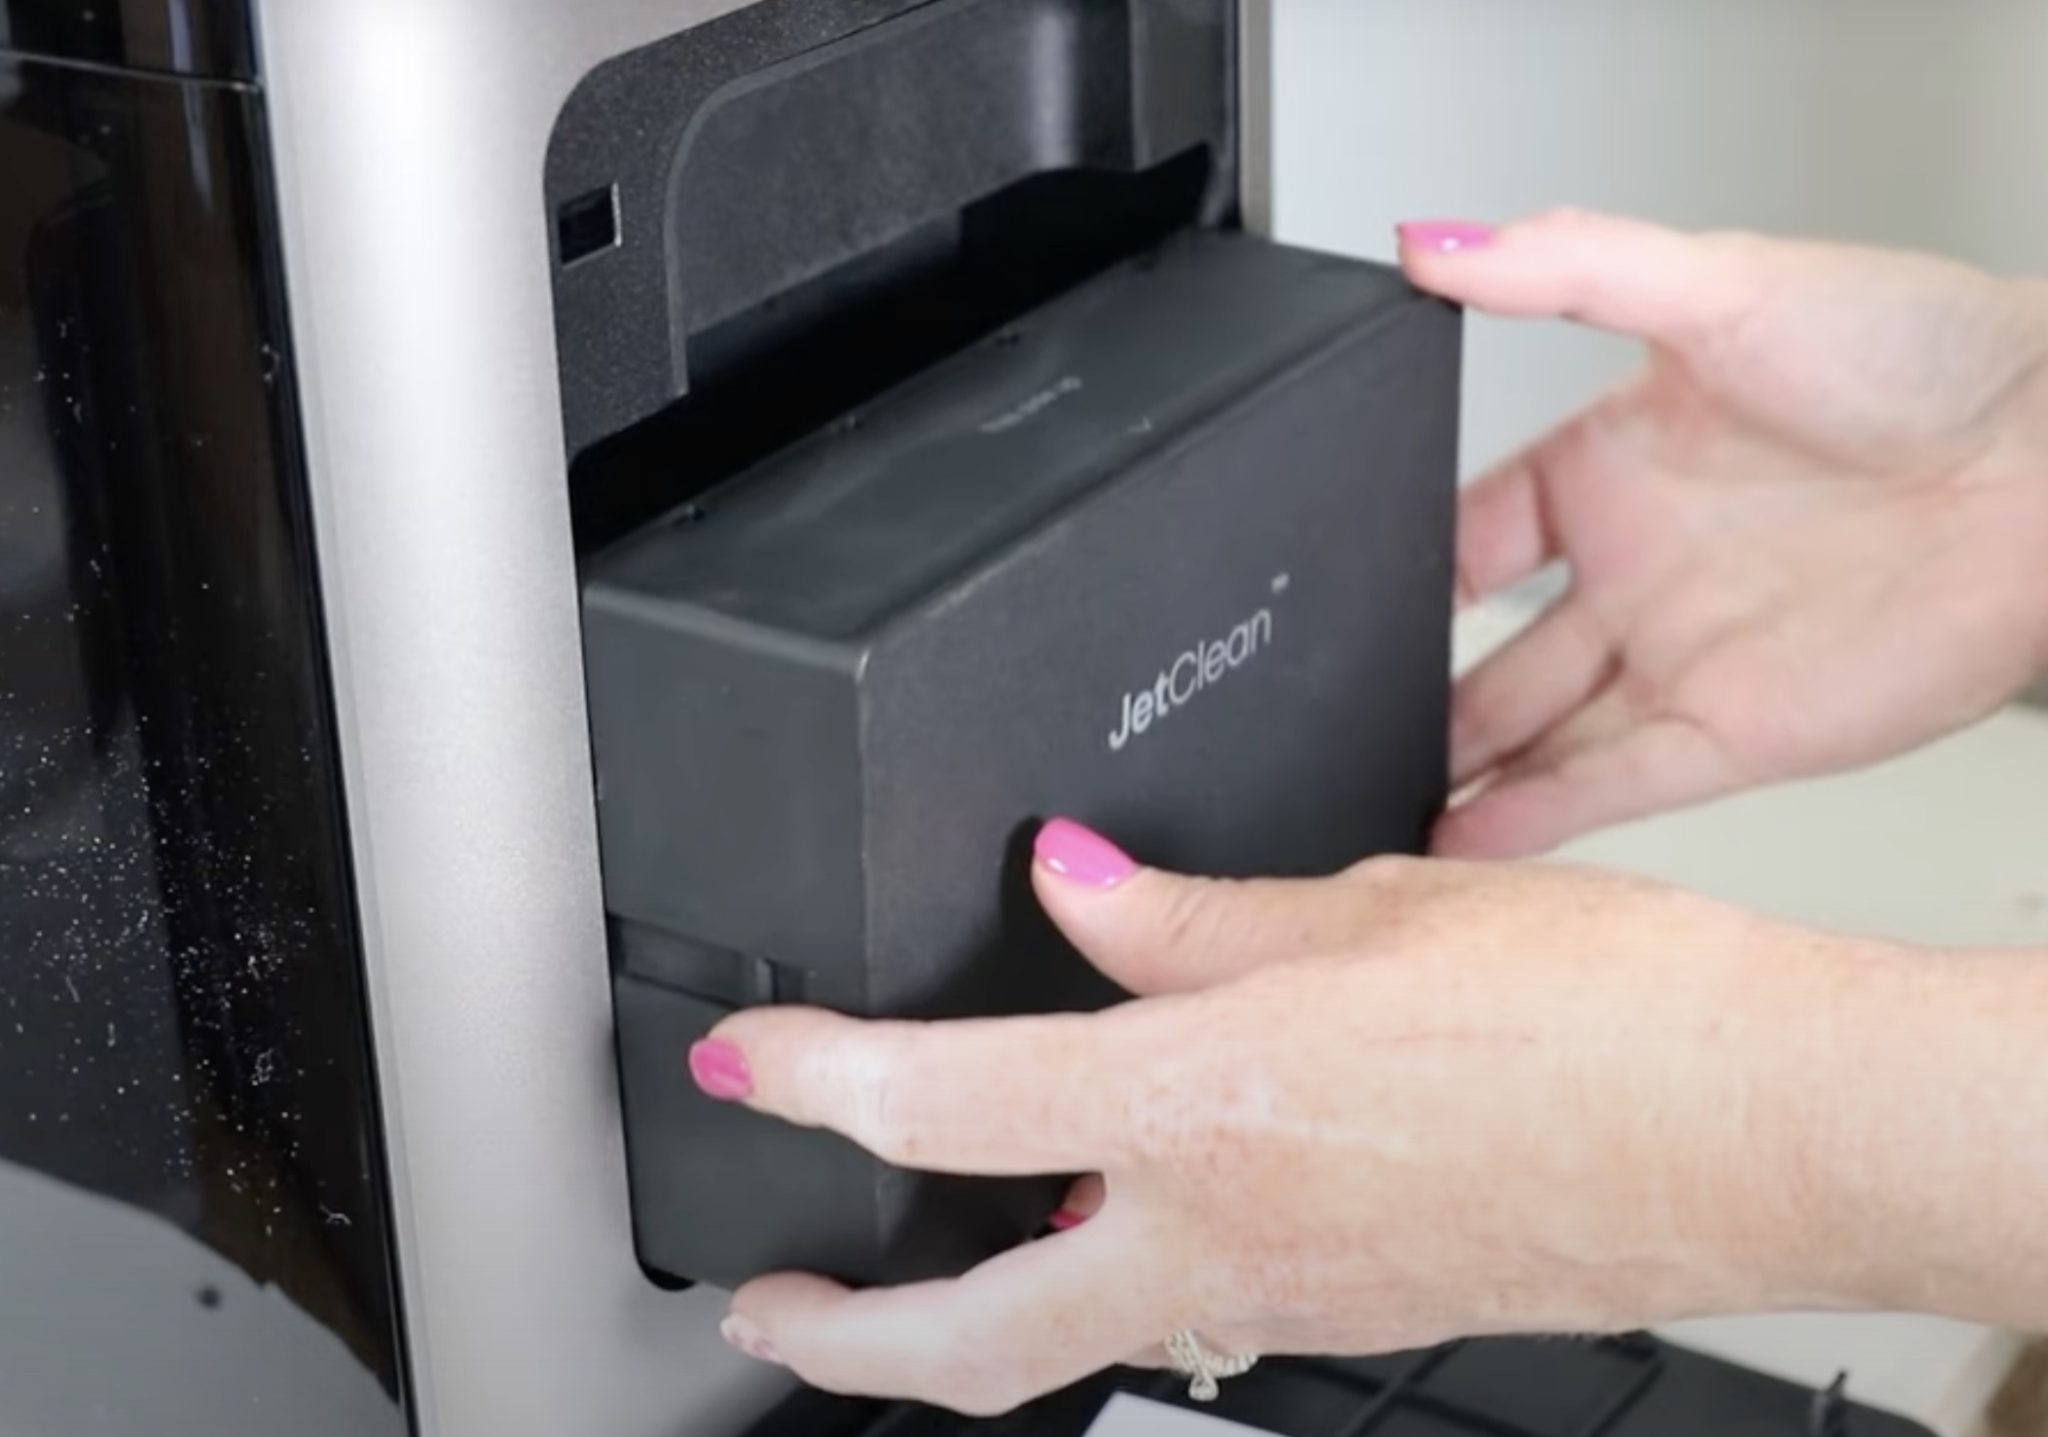
When you place the cartridge inside the side that says JetClean faces out, and is upright. It also says This Side Up on the outside. Push the JetClean into place until it locks in place.
You may hear the printer make a noise, and at that point, you can replace the cover.
Install Air Filter
To install the air filter, remove the front cover and hold the tabs, and slide the air filter into place.
Make sure the side that says Facing Out is facing out, and once it's fully seated, you can replace the cover.
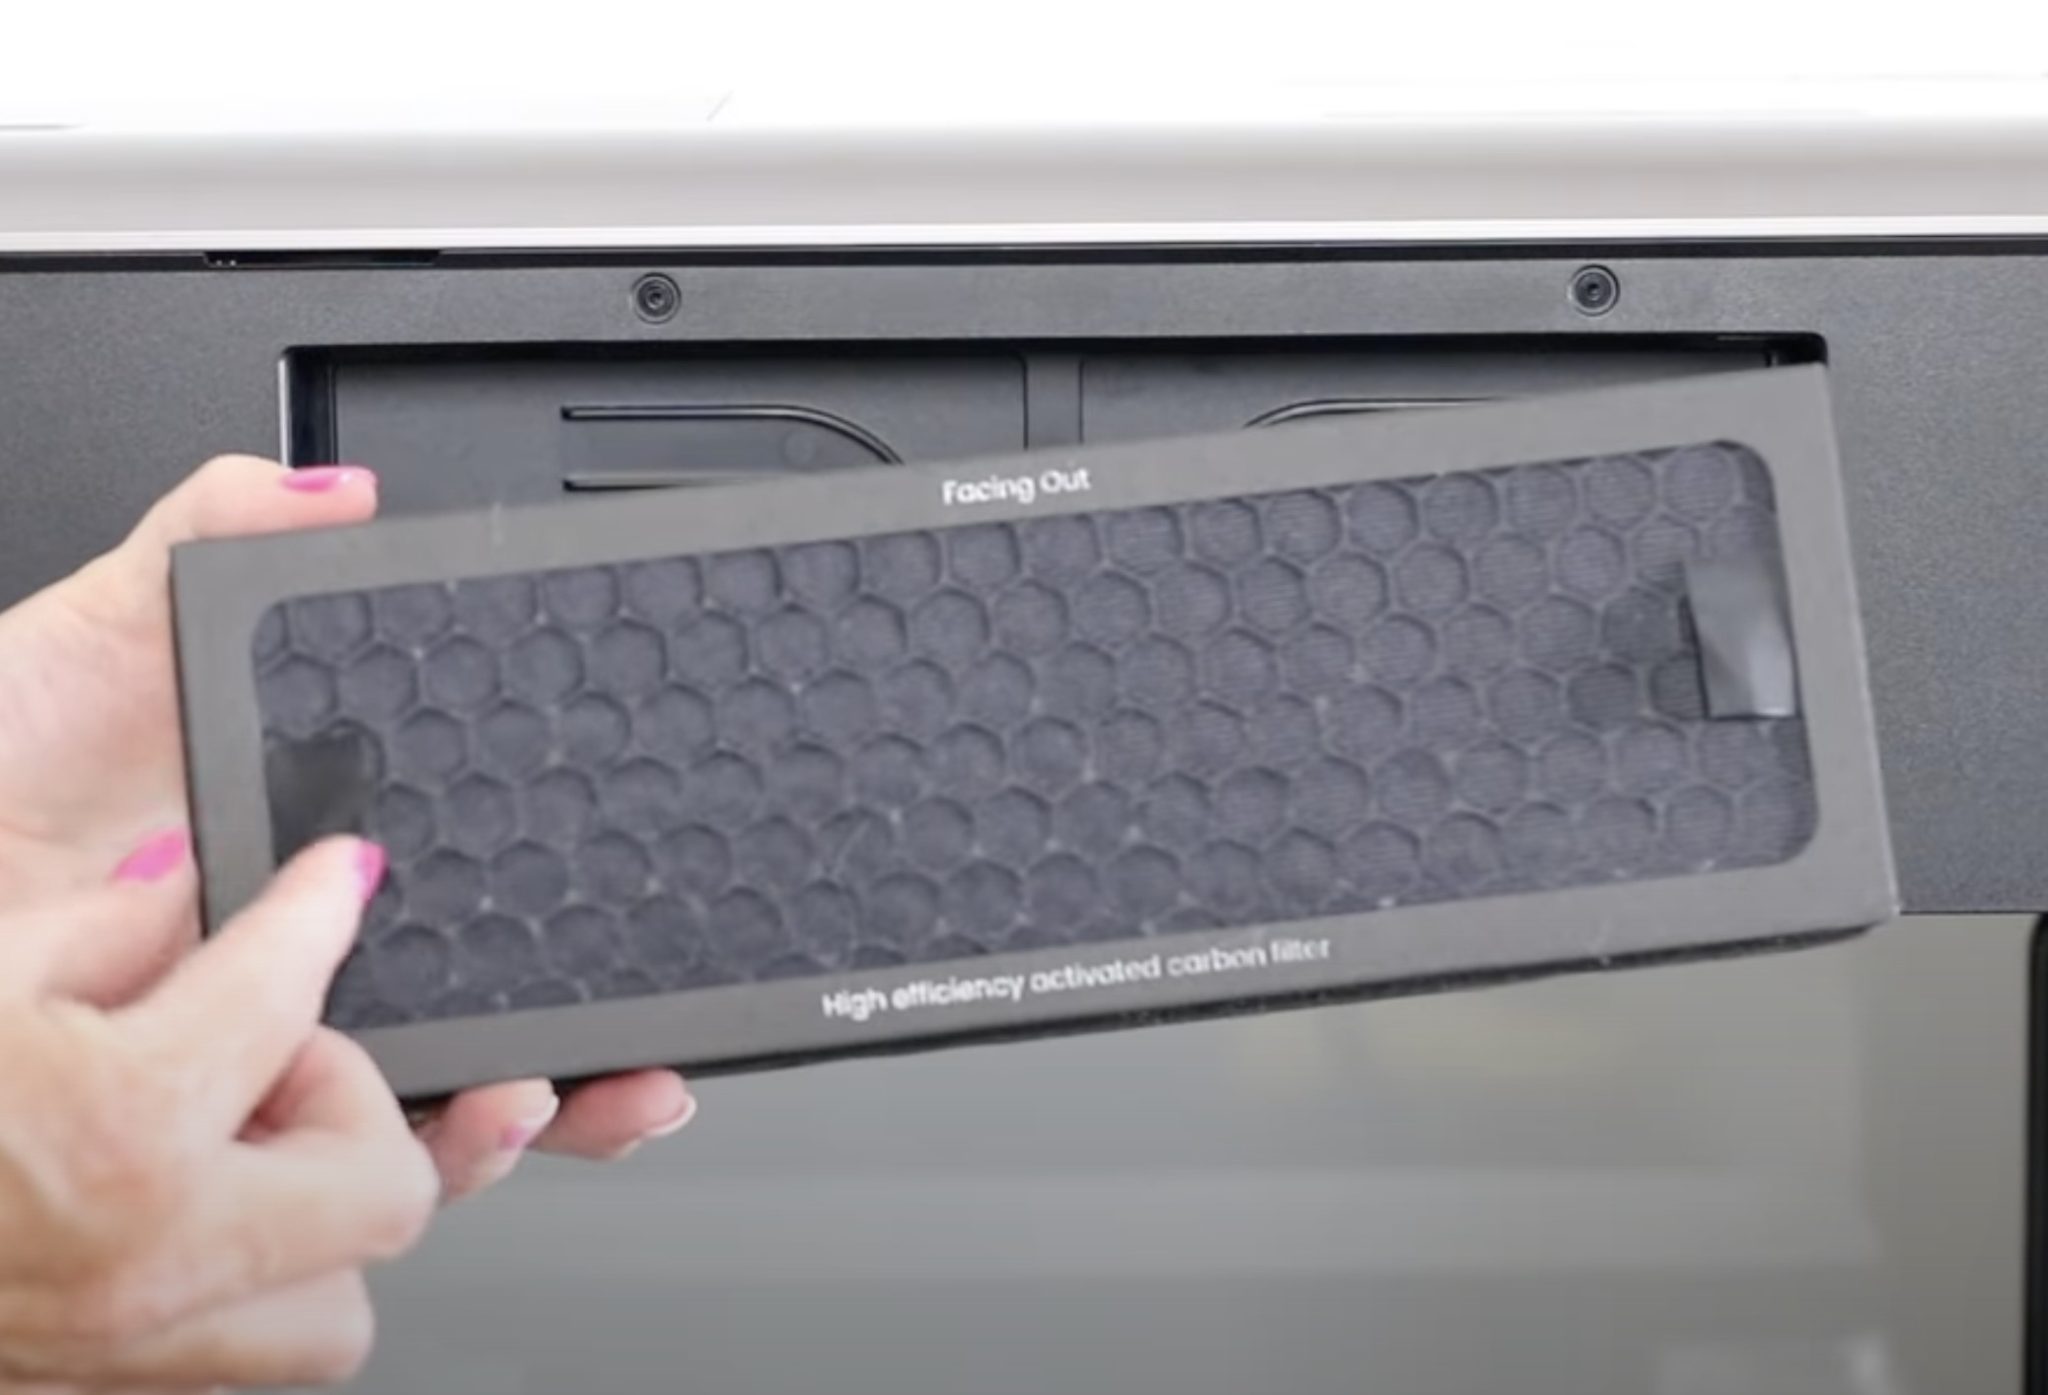
The cover is held in place with magnets, and now the setup is complete.
Printer Maintenance
If you've followed me for a while, you know I love DTF prints and UV DTF prints, but I have said I will not own one of those printers due to the maintenance required.
I want to talk about how this printer is different than others.
DTF and UV DTF are known for requiring a lot of maintenance and cleaning. The eufyMake E1 tackles maintenance with a process they call JetClean.
During the setup process, you saw me install the JetClean cleaning cartridge in the side of the printer. The cleaning cartridge is part of the maintenance cycle. If I am using the E1 printer regularly and leave it plugged in and turned on, it will flush and extract some ink and put it into a waste tank on a regular basis.
This process removes the need for me to do the maintenance and cleaning manually.
If I am going out of town or know I won't be using the printer for an extended period of time, I can do the shutdown procedure. During the shutdown procedure, the printer is going to dump all the ink in the lines and replace it with cleaning solution.
The next time I turn on the printer to use it, the printer will push the cleaning solution out of the lines and into the waste tank, and replace the cleaning solution with ink.
The ink charging process will take about 15 minutes. If you do the shutdown procedure regularly, you will fill the waste tank and need to replace it more quickly than if you use the printer on a regular basis.
I love the self-cleaning/maintenance feature of this printer and feel like it makes it much more user-friendly than a regular DTF or UV DTF printer.
Software Setup
Now that we have the printer set up, we're ready to move into the software setup.
Download the eufyMake Software
The eufyMake software is a RIP software. You need a RIP software to convert images into something that will work with the six-cartridge system.
You can download the software onto a PC or Mac, or download the app to use on mobile.
I am going to use the mobile app for part of this tutorial, and my Mac for the other part to show you how to use both.
Set Up the Software
Regardless of which device you use, the software will walk you through the setup. I found the process very easy for both devices.
During the setup process, your printer may require a firmware update, and it may take some time depending on how many updates it needs. Make sure you allow it to fully update.
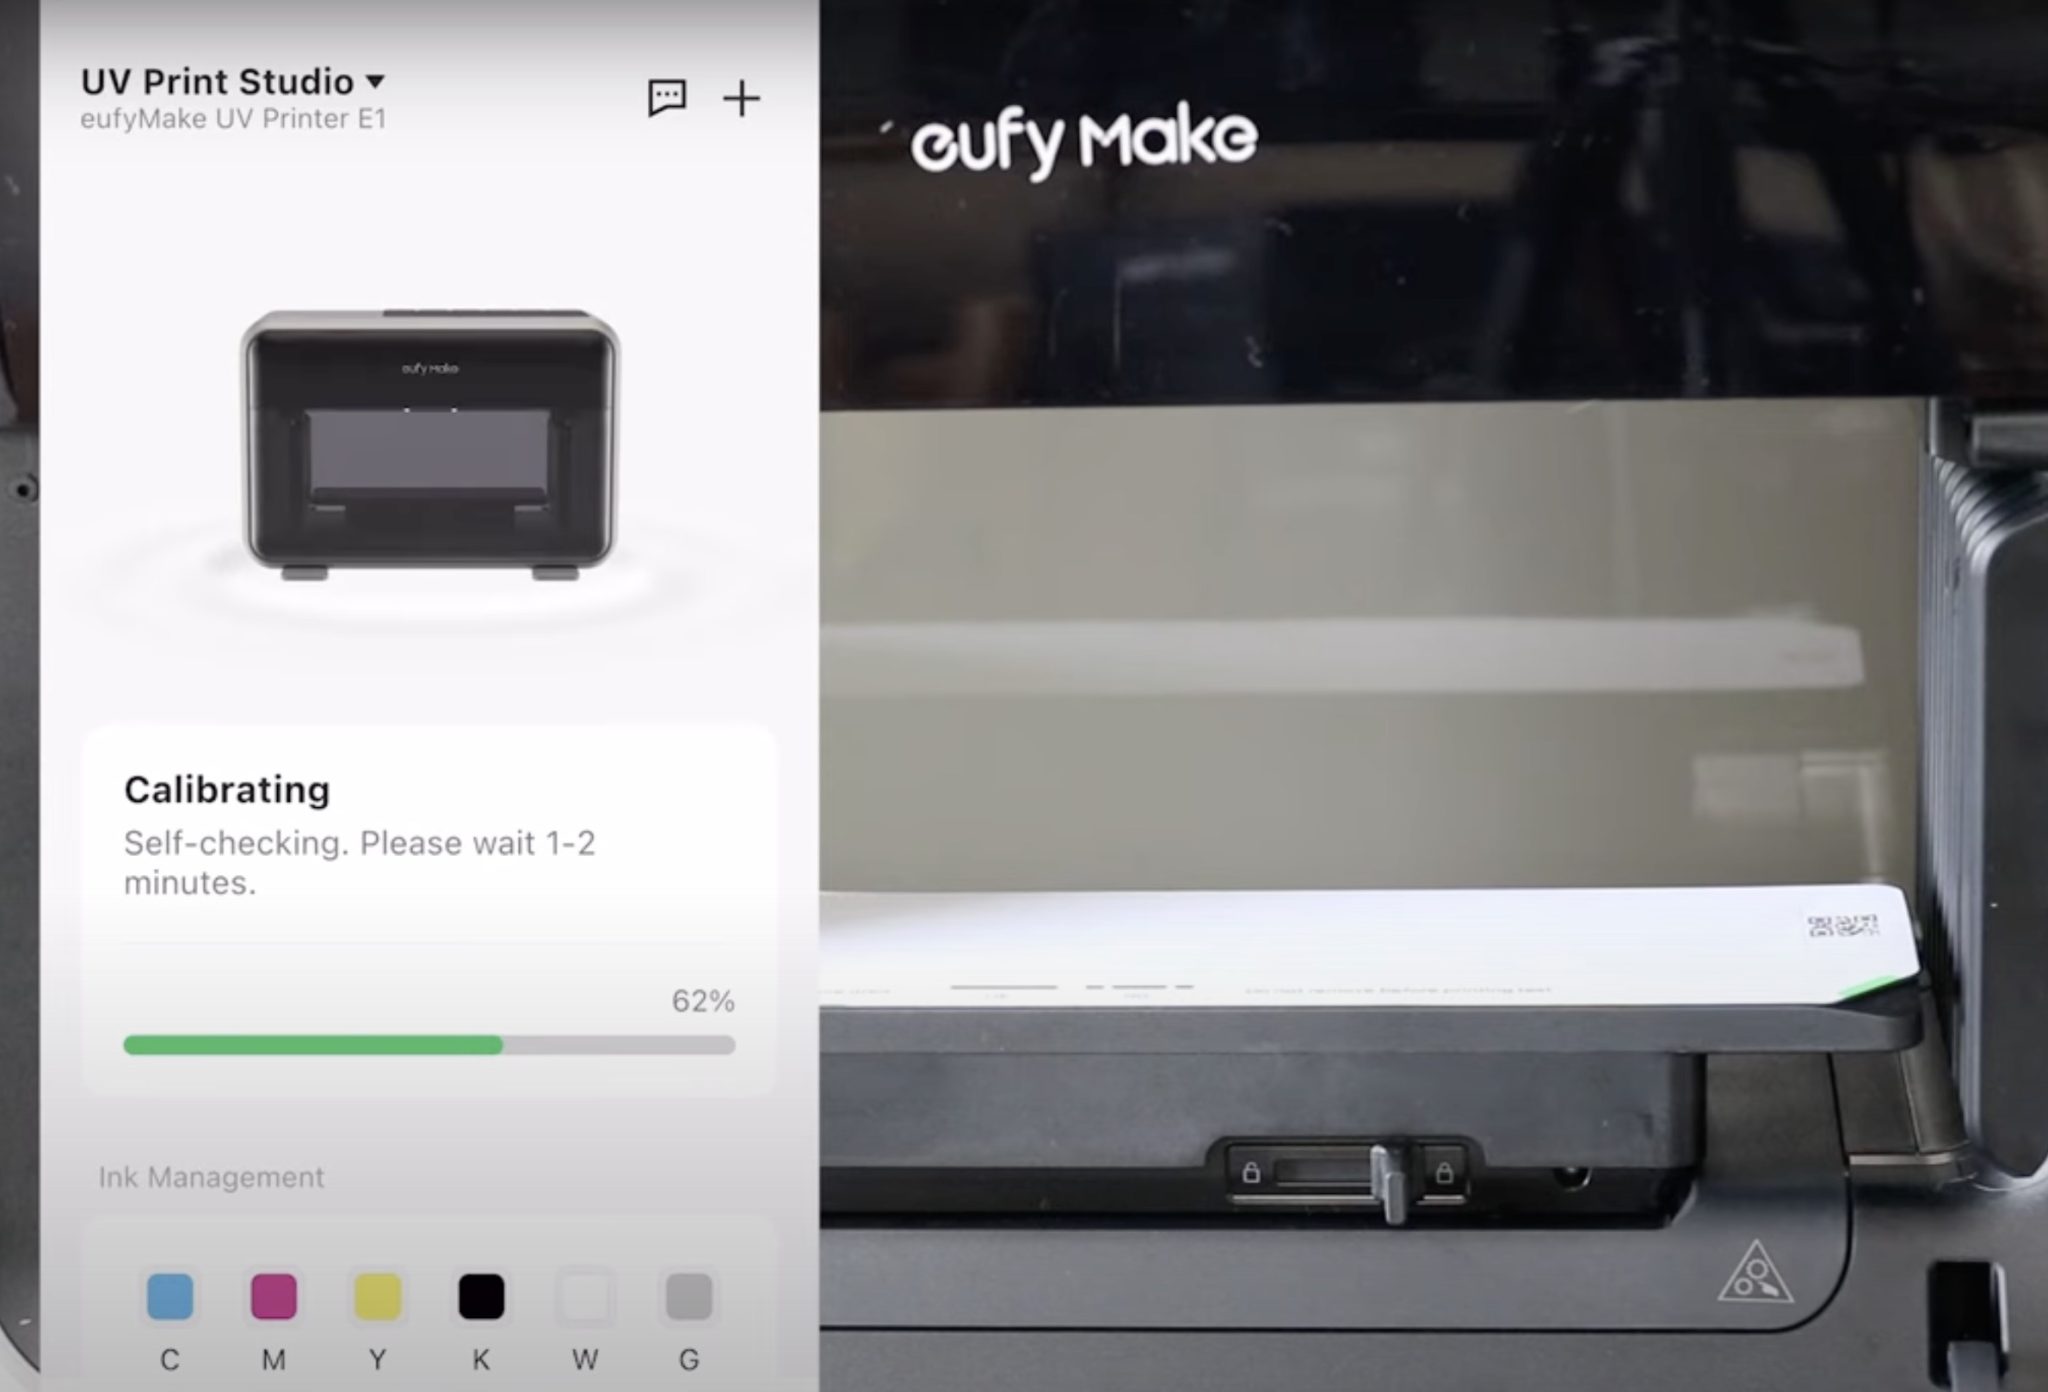
When the firmware update is complete, calibration will be done to finish the process.
Device Initiation
Before we start printing, we need to do the Device Initiation. When you start that process, the printer lines will fill up with ink. This process can take up to 20 minutes.
It will also do a test print and a camera calibration.
Test Print
When the process is complete, it's time to do the test print.
The mini flatbed is already installed in the printer when you open it. Add a mat to the flatbed. The mat comes with a sheet on it to do test printing. Remove the clear protective sheet from the back of the mat, revealing the adhesive.
Place the mat, sticky side down, on the flatbed. Do not remove the white paper from the top.

With the mat installed, the printer will do the test print.
When it's done, compare the print to the screen to make sure everything looks correct. If it does, you can proceed. If it does not, you can repeat the process. NOTE: The look of this test print has changed but the process is the same.

Calibrate the Camera
Next, the eufyMake E1 printer is going to calibrate the camera. It will do this automatically.
This process takes about 10 minutes. When it's done, the printer is ready to print.

Remove the white sheet from the top of the mat. The mat does have an adhesive to it, which helps hold blanks in place while you print.
eufyMake E1 Printer Safety
Now that the printer is set up and we're ready to print, let's talk about safety.
- Protect your eyes when using this printer. The light is a UV light, and it can be damaging to your eyes if you look right at it. You can operate the printer with the doors closed. If the doors are closed, you don't need to worry about your eyes. If the doors are open, make sure you wear protective glasses if you want to look at the printer while it's printing.
- Only use the printer in a well-ventilated area. You can use it in an enclosure and use a fan to vent it outside if you want. The inks, and especially the cleaning solvent, smell pretty strong, and that smell can permeate the space during the printing process.
- All eufyMake inks, including the cleaning cartridge, are GREENGUARD Gold UL2818 – 2022** certified. This certification provides assurance that these inks meet some of the world's most rigorous and comprehensive standards for low emissions of volatile organic compounds (VOCs) into the air.
Additional Accessories
There are other accessories you can purchase to do even more with this printer. I am going to do other posts on these accessories.
NOTE: The small and large flat bed come with the printer.
All of these accessories are additional purchases, but many of them can be purchased in a bundle with the printer.
- Rotary Module
- Laminating Add-on
- Roll to Film Add-on (not yet released)
The printer has a quick swap feature that makes it easy to swap between the different beds and accessories.
How to Make a Magnet with the eufyMake E1 Printer
The first project we're going to make today is a magnet. That is the test project that comes with the printer, and the software will walk you through the process.
Step 1: Measure the Blank
Place the magnet onto the mat with the print side up.
Take a snapshot. This will show you what you placed in the printer and automatically measure the height of your blank.
The printer measures the blank with two different lasers, and I found the measurement to be extremely accurate, even with transparent materials like clear phone cases.
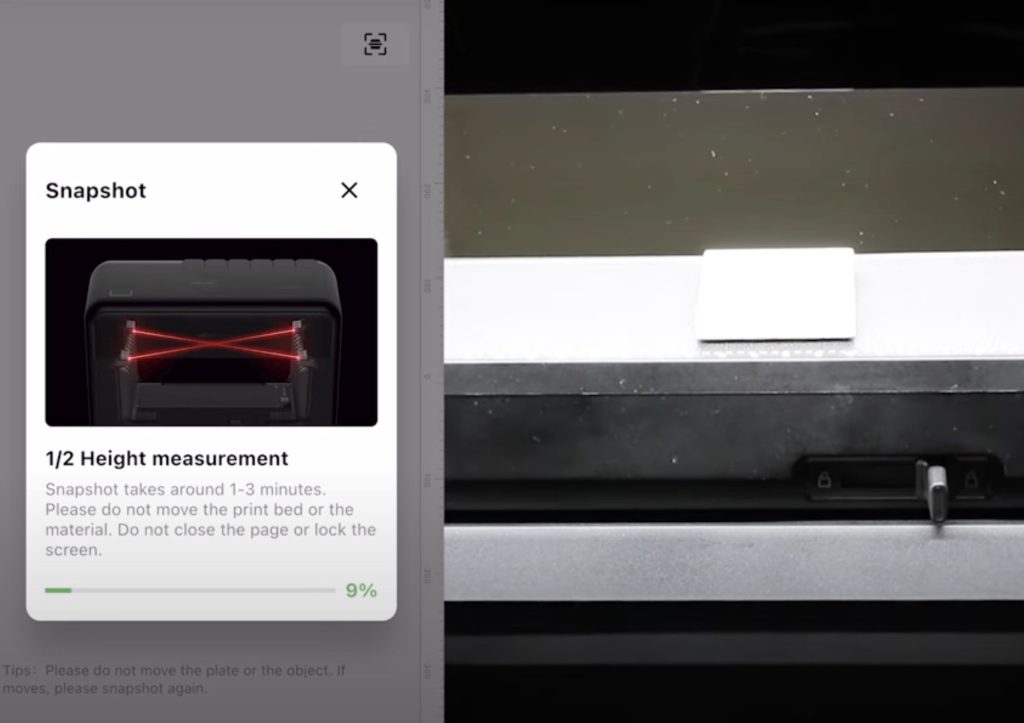
The magnet I'm printing on is not very thick. If I were using a thicker blank, I might need to do a manual measurement.
Step 2: Locate the Design
Along with measuring the blank, the built-in camera captured an image of the blank.
This makes it very easy to position the design right on the blank.
Select the design you're using and drag it over to the blank. Here you can resize and rotate as needed to fit your blank.
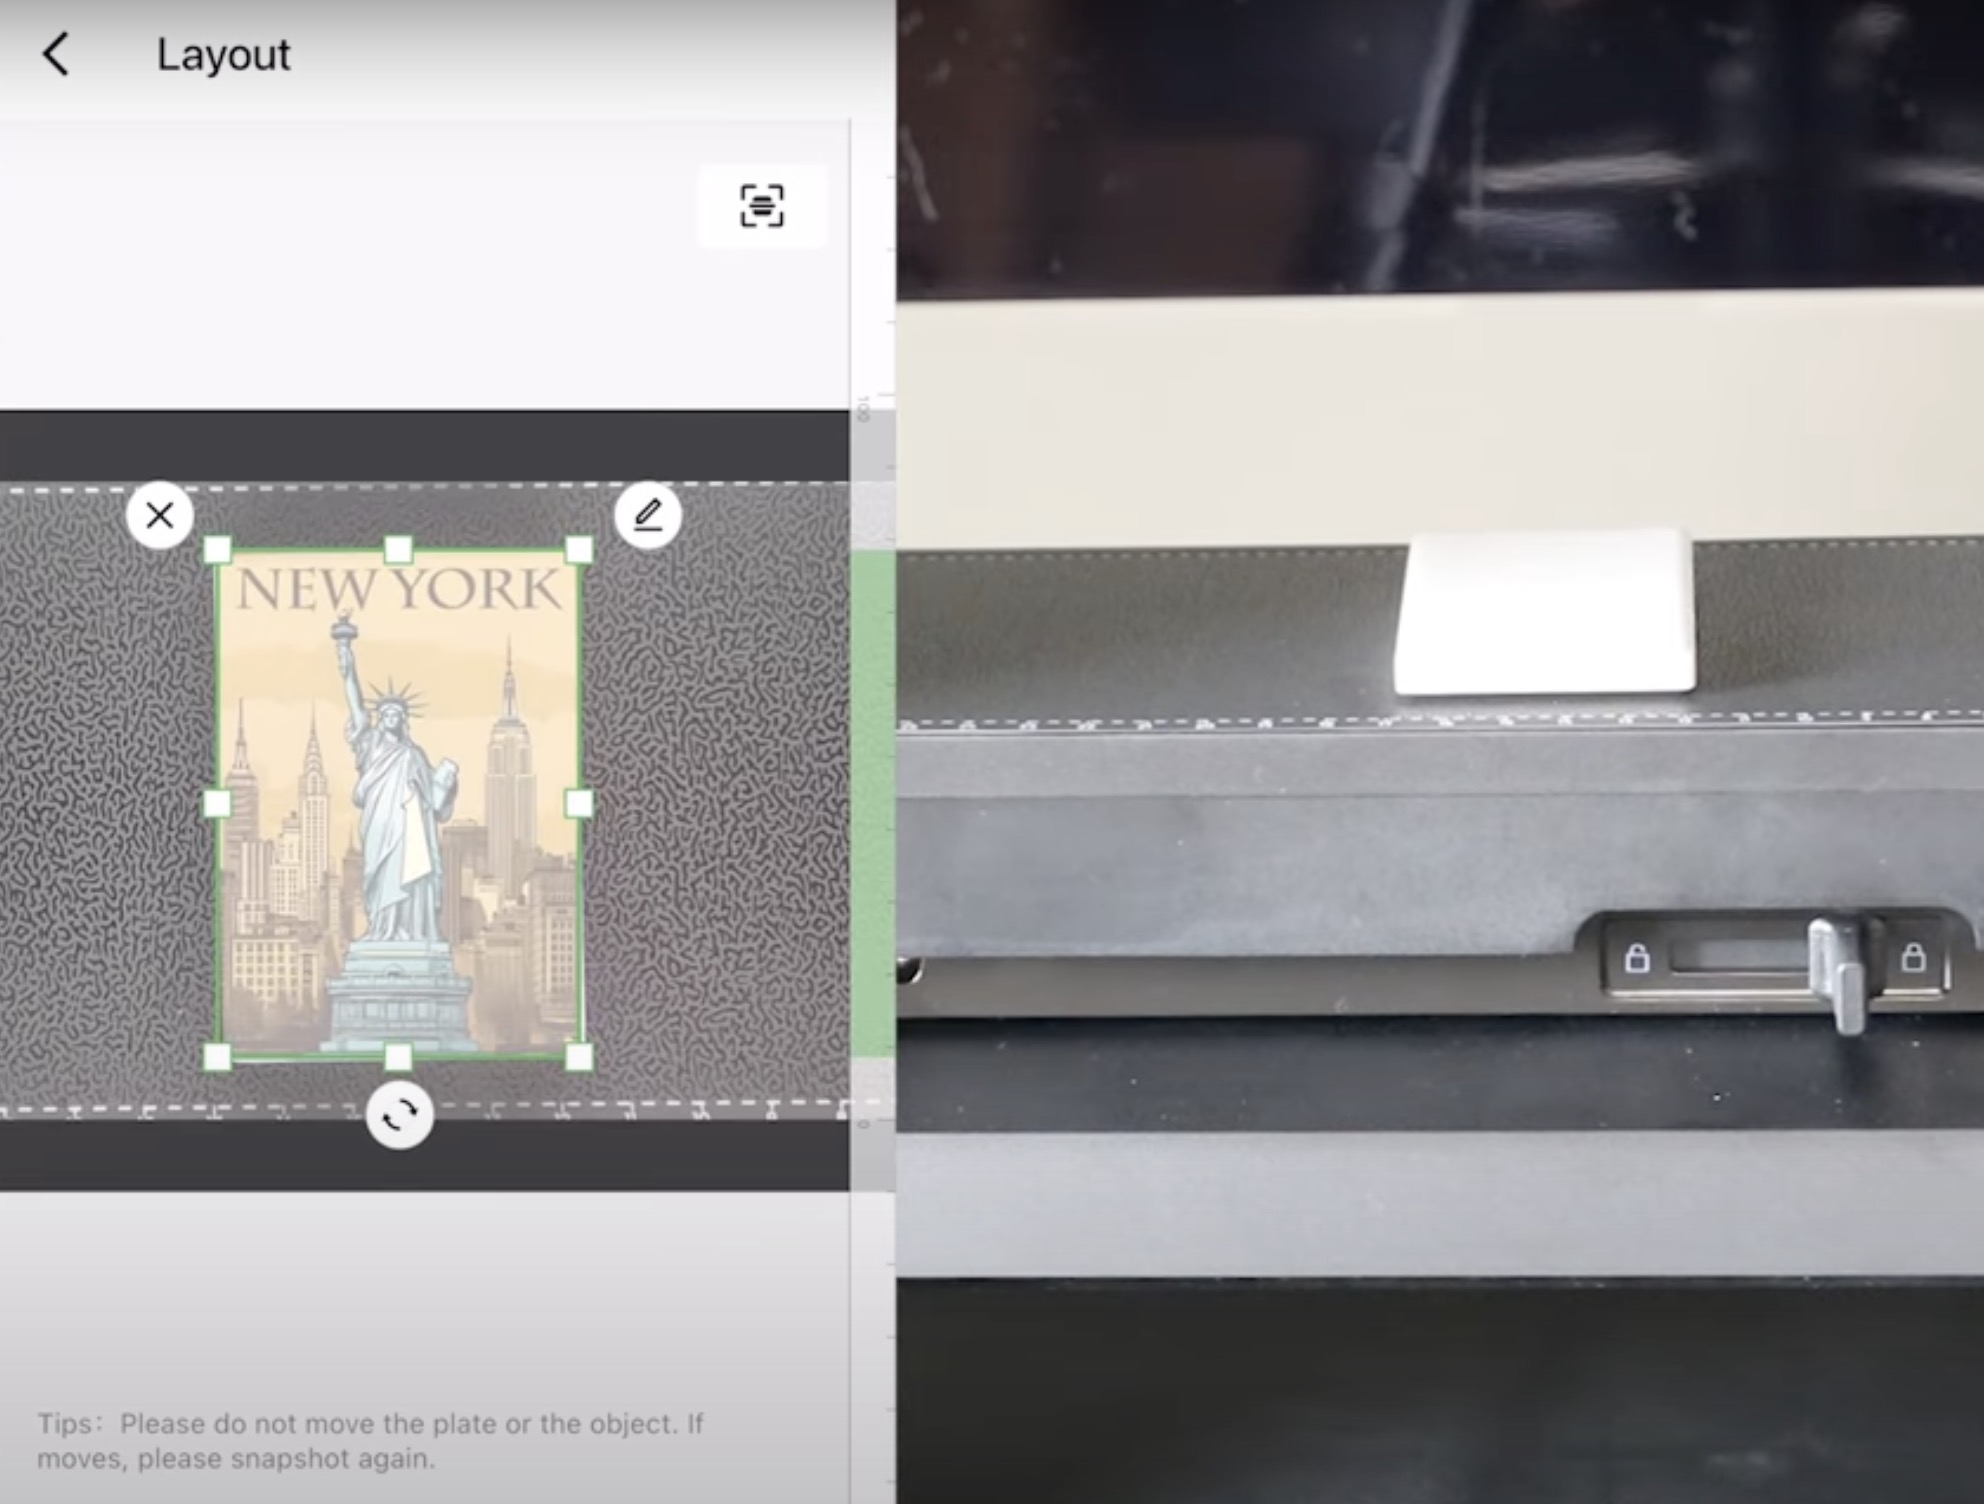
My blank was a little crooked, but I was able to adjust the design easily to fit the magnet perfectly.
Step 3: Print the Design
Once everything is located, click Start Print.
When using the eufyMake E1 printer, you either need to close the cover or wear protective glasses during the printing process.
To start any print, press the Start button on the top of the printer. You don't need to do anything else during the printing process.
Step 4: Remove Magnet from Printer
This magnet took 23 minutes to print. That is quite a bit of time, but when you look at the magnet, you can see that it is a 3D print. The printing process will be faster for a flat print.
When the printing process is done, the bed will lower, and you can remove the project from the mat.
This print looks absolutely gorgeous. I love that it is completely dry when it comes out of the printer. The UV light cures the ink as it is laid down, so you don't have to worry about messing up the print.
The print is bright and vibrant, and the 3D effect is awesome. For this design, the Statue of Liberty pops off the surface because the ink is layered in that area.
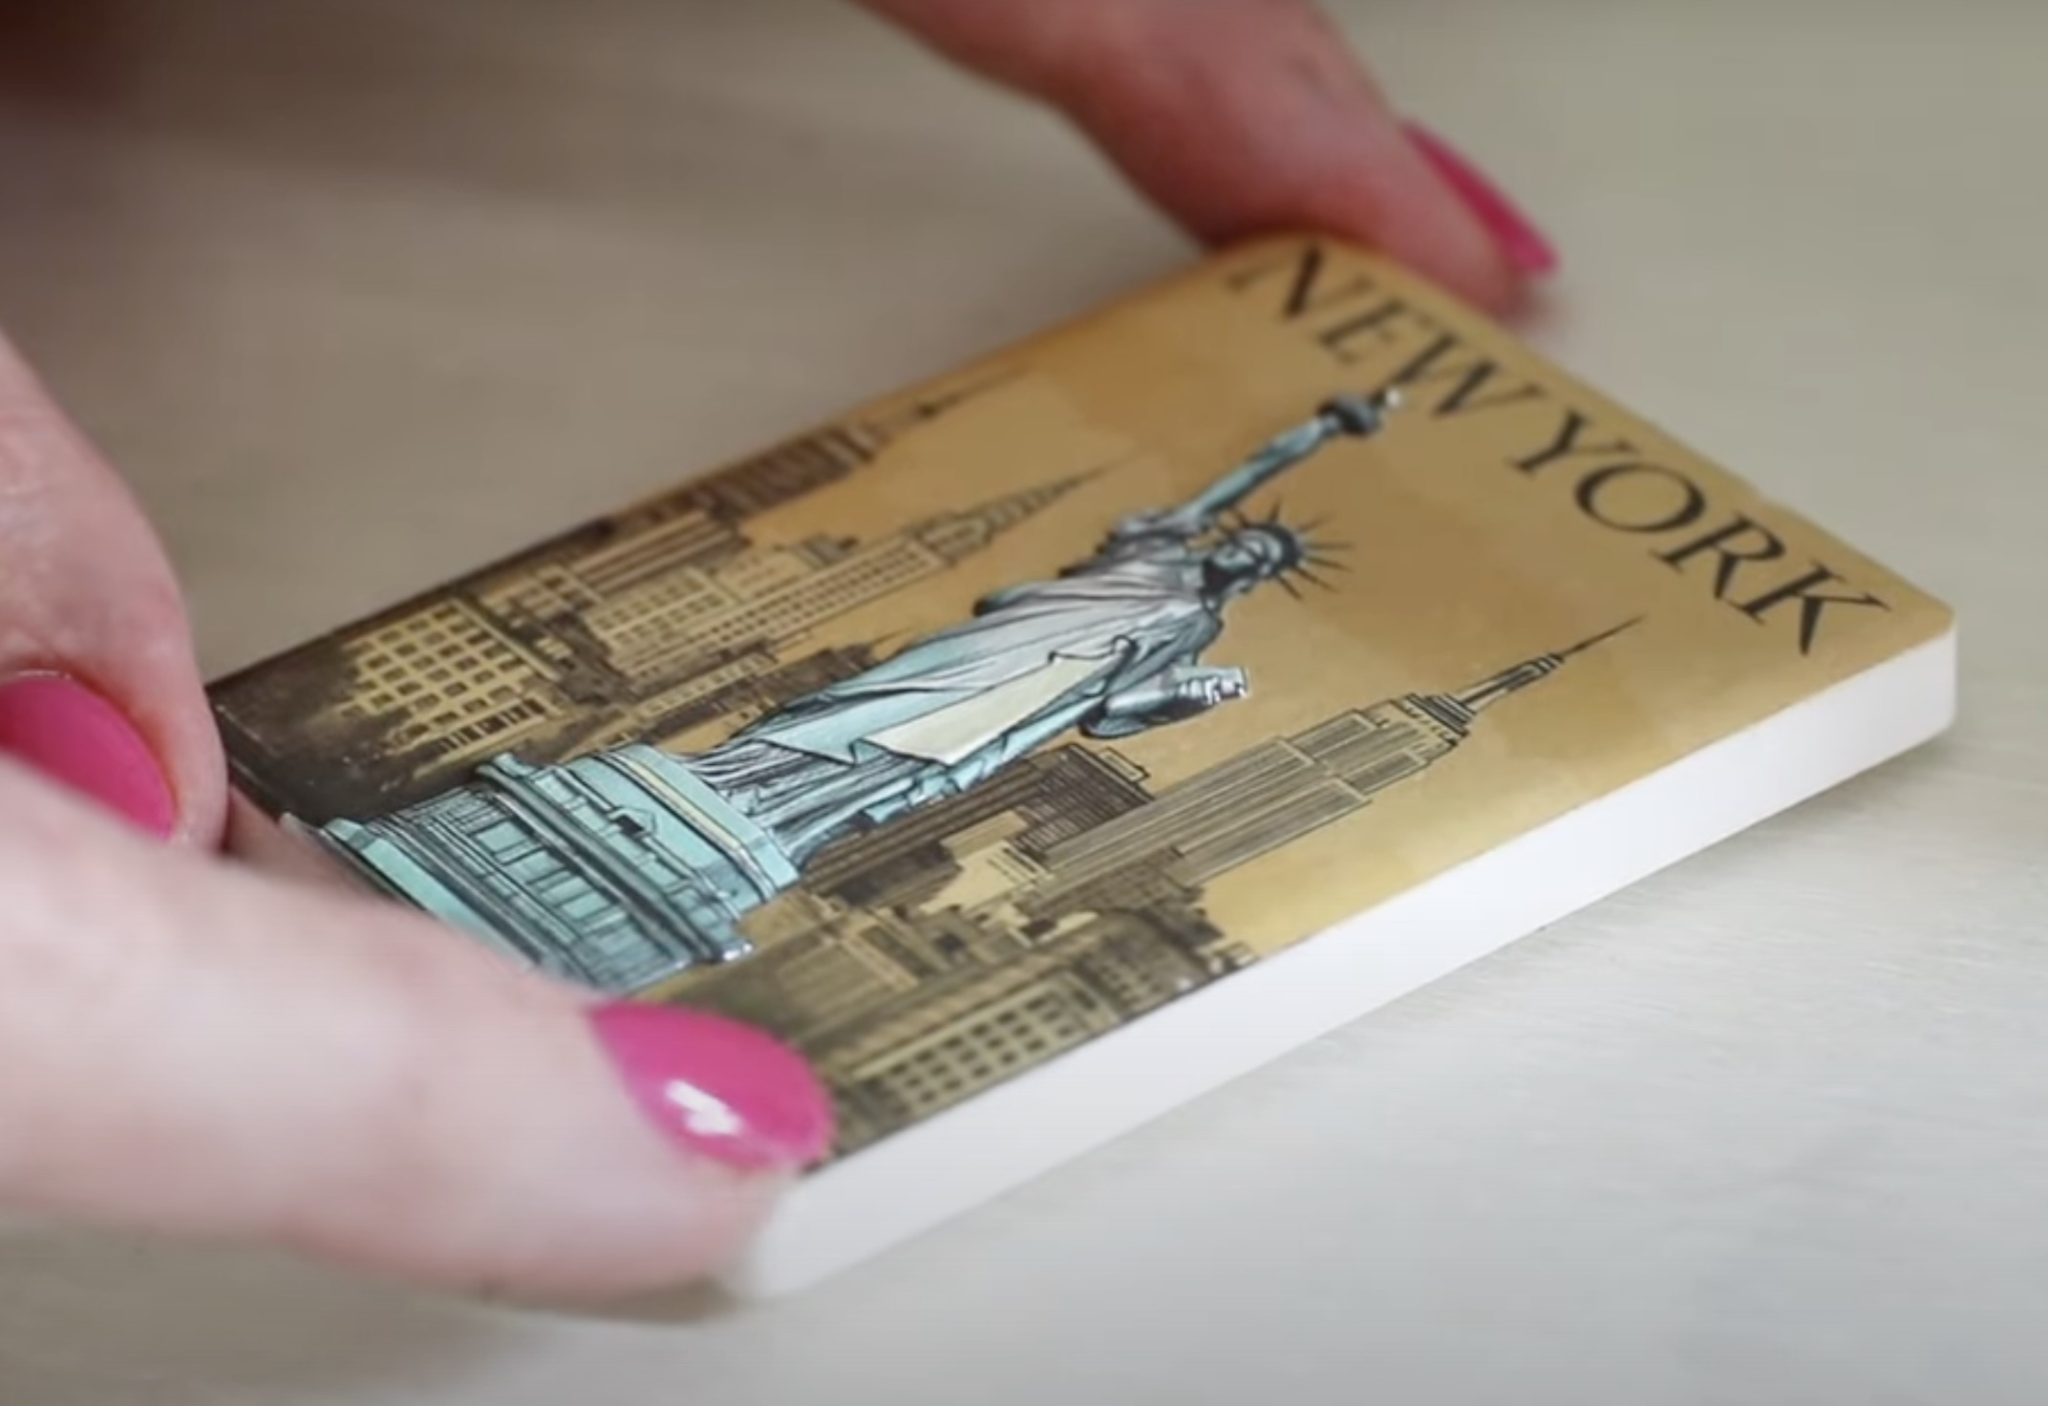
I think this effect gives you a very professional-looking magnet that you can make right at home.
The entire setup process was simple and explained well, even if you're a beginner.
NOTE: You can do more than one print at a time, however, make sure they are all the same. You cannot do multiple projects of different heights at once.
UV Printing on a Ceramic Coaster
Next we're going to make a ceramic coaster.
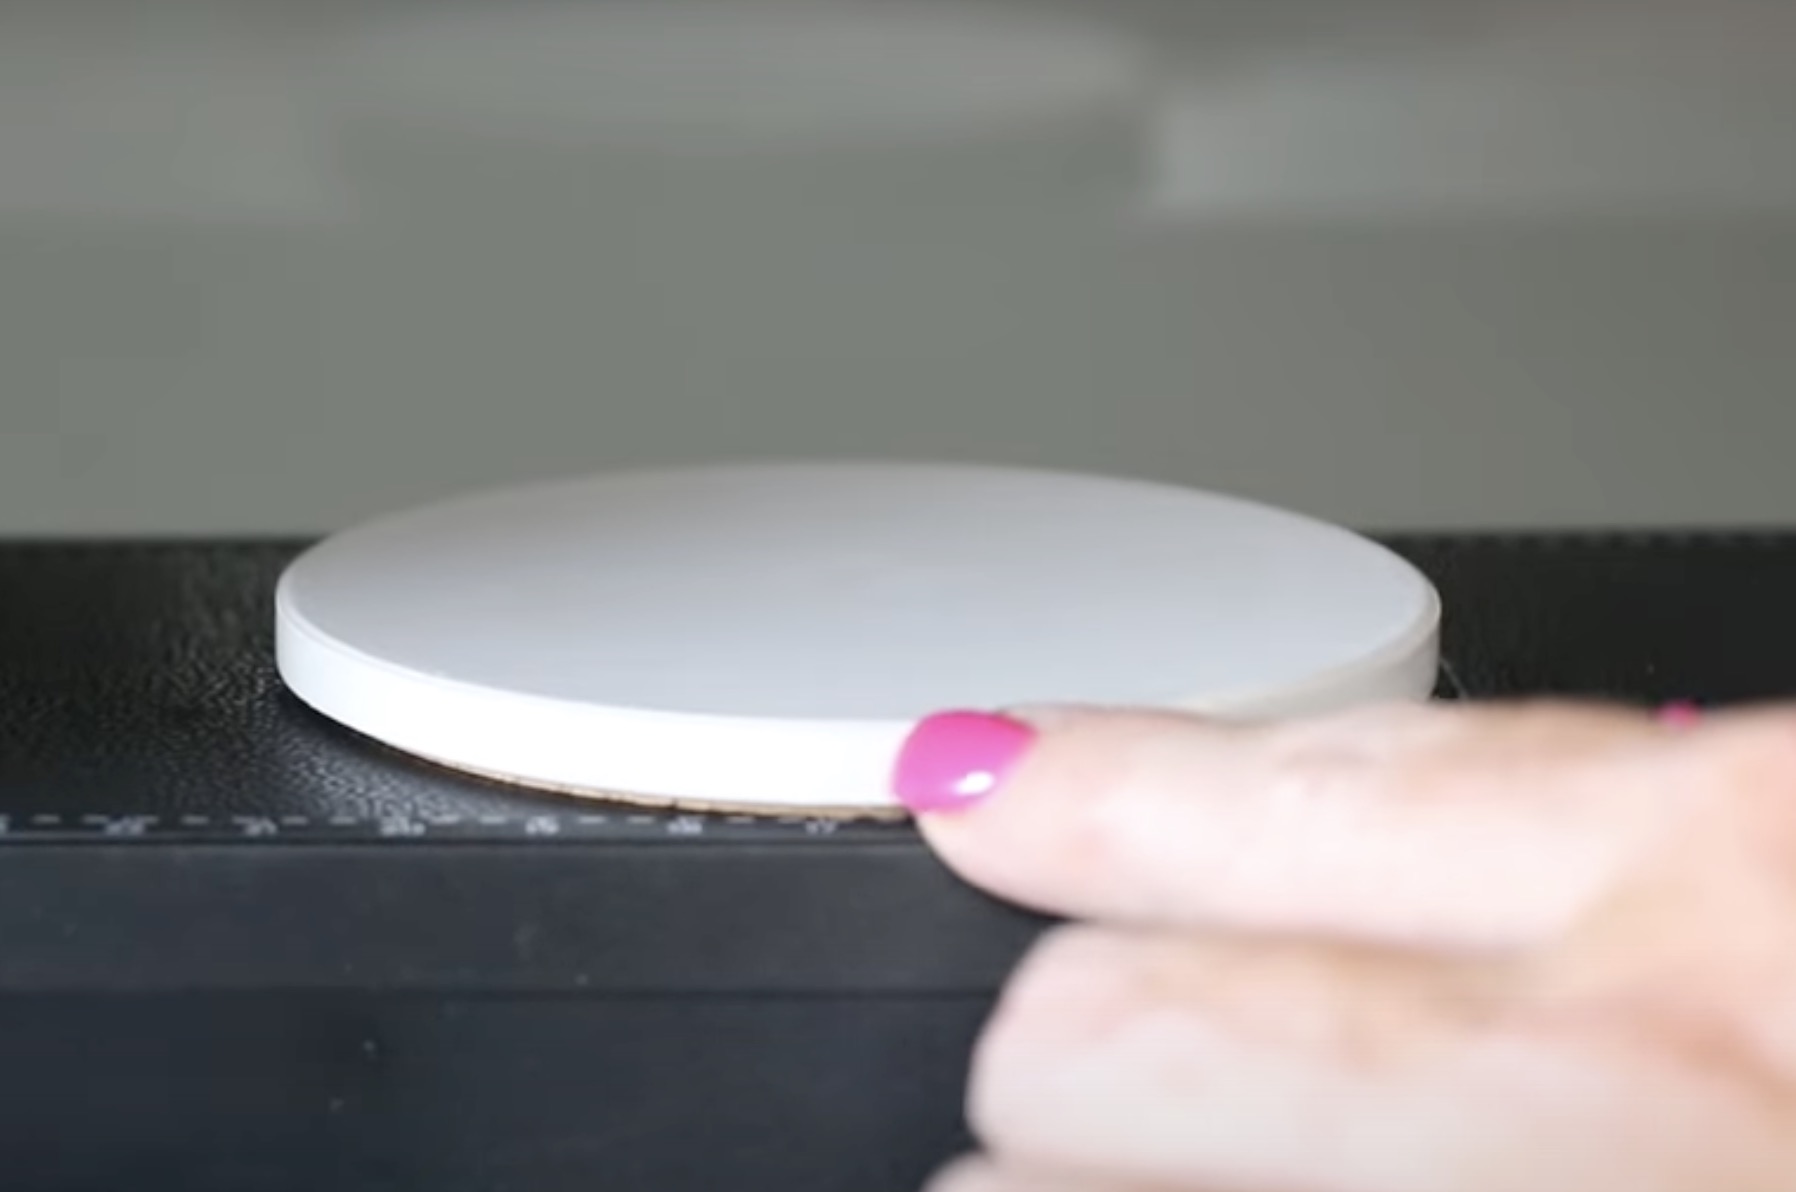
Step 1: Add Coaster to Printer
Place the blank on the sticky mat and head to eufyMake Studio. I am using a Mac computer, and I have connected the computer to the printer.
Step 2: Upload Design
From here, you can use images within eufyMake Studio, or you can upload your own design.
Click New Design, and that will open a blank canvas. Check that you have the right print bed chosen. I am using the Mini Flatbed, and I have that selected.
There are several templates and elements, including text, that you can add right in eufyMake Studio. There is also an AI tool that can generate a design for you.
I am going to upload my own design. Find the file on the computer and open it.
With the file open, options appear on the right toolbar. I selected Flat, so this print won't have any texture. If you want texture, there are other options, and we will look at those in other projects.
Click on the canvas and then click Snapshot. The printer will measure the height of your blank and take a photo of the bed of the printer.
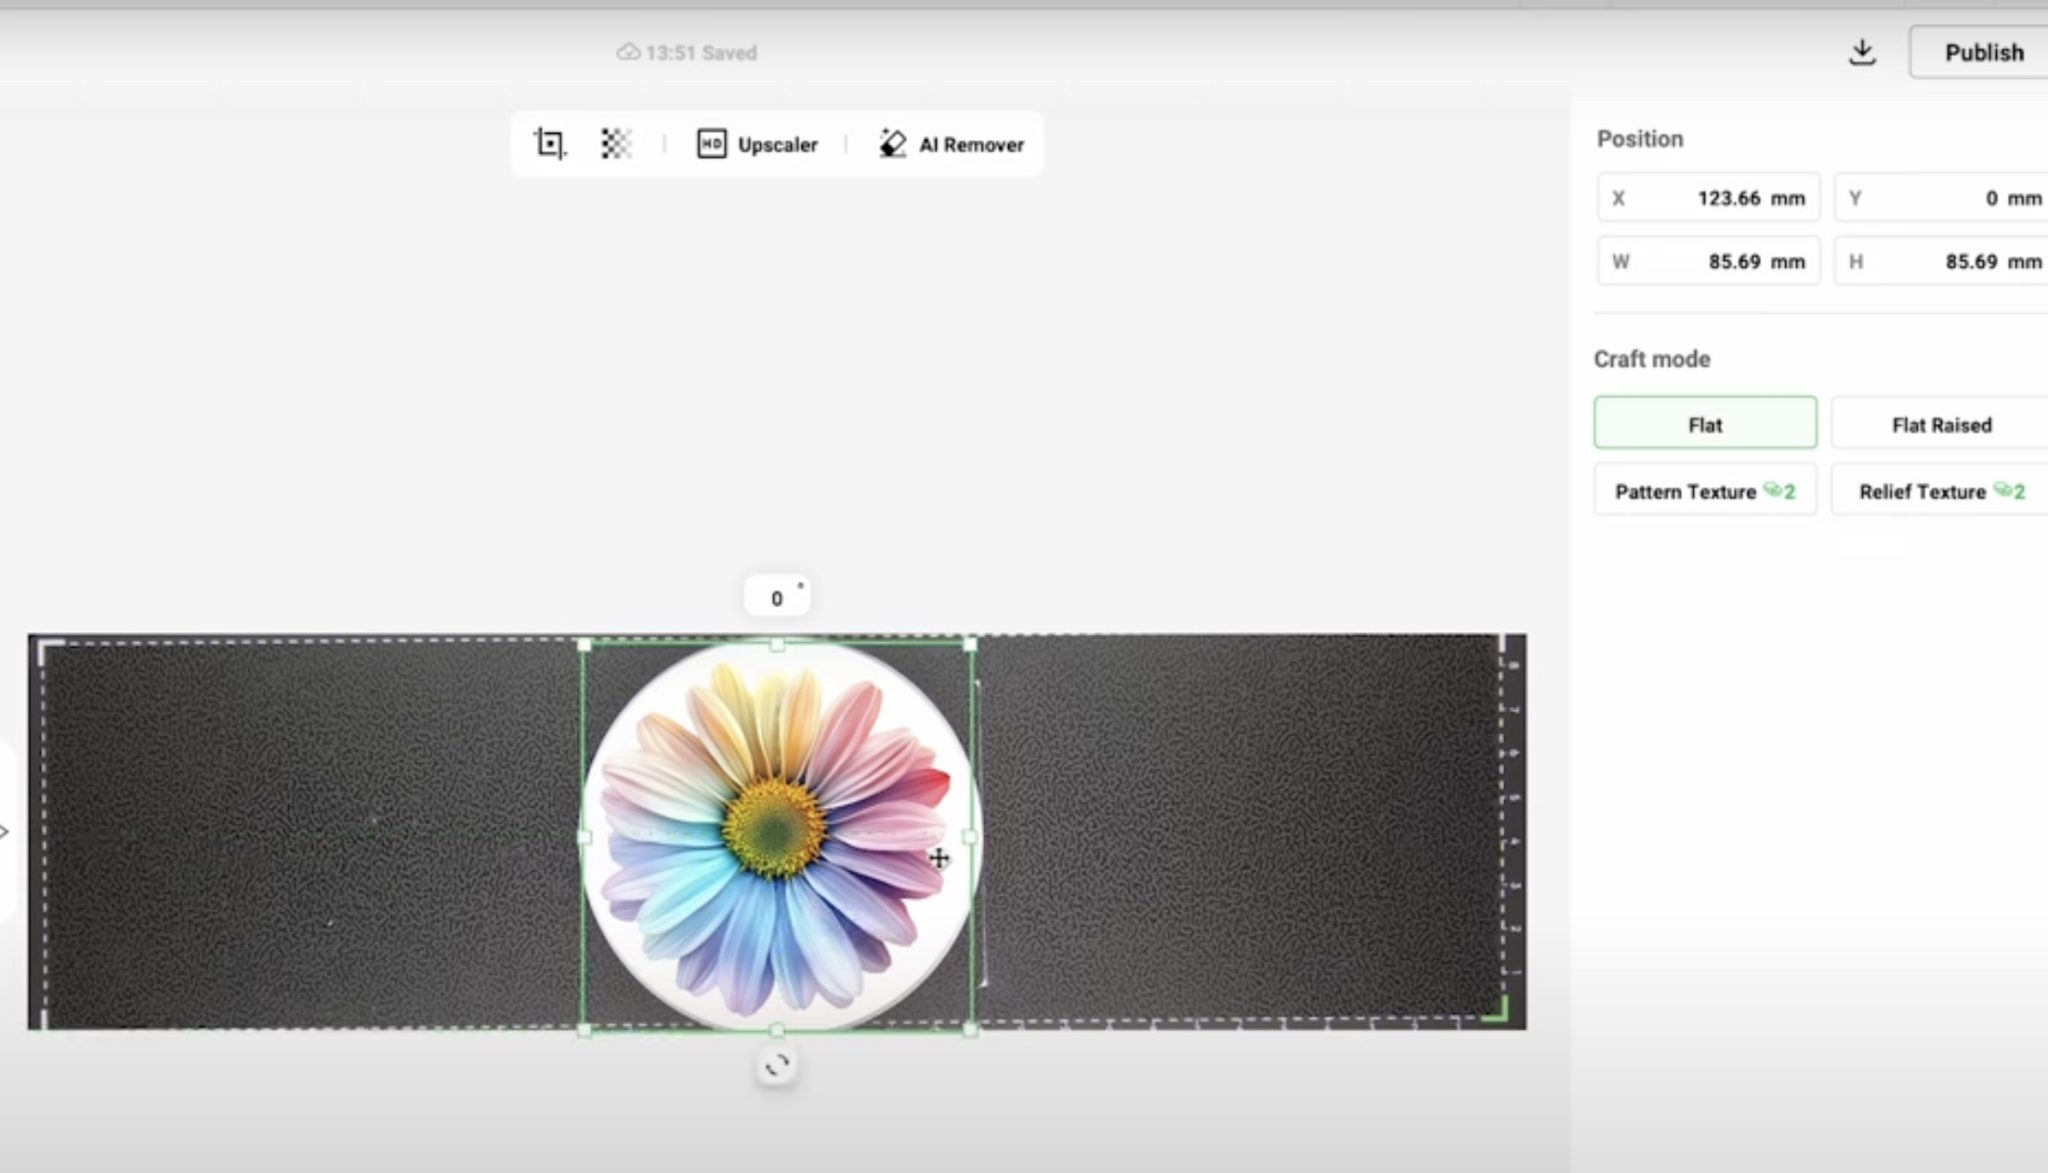
In the case of this coaster, it is actually a little large to print the entire surface. My design doesn't go edge to edge. If I wanted to print edge to edge, I would need to use the larger flatbed.
Do not move the blank during this process.
Step 3: Choose Ink Mode
When you have the photo of the printer bed, center the design on the blank, ensure everything looks like you want it to, and click Start a Print Task.
Pick the material that you are printing on. I am printing on a ceramic coaster, so I selected ceramic.
There are a variety of different ink modes.
- White>CMYK is going to put a white layer down first, and then print the CMYK over the top. This is great for full-color designs on colored blanks.
- CMYK is normal print without white. If you are printing on white, you can use this setting.
- You can also print just Gloss Varnish. This setting will print the whole design in gloss and will give you a tone-on-tone look with no color.
- The next option is White. This setting will print the entire design in white, even if it has other colors.
- If you wanted to print in reverse, you could print CMYK and then white.
- Another option is CMYK, White, CMYK. This setting is ideal for clear blanks where you want to see the design on both sides.
I recommend White, CMYK, with the gloss varnish for most projects.
Step 4: Choose the Quality Setting
There are a few different quality settings to choose from. For the coaster, I am using the Standard setting.
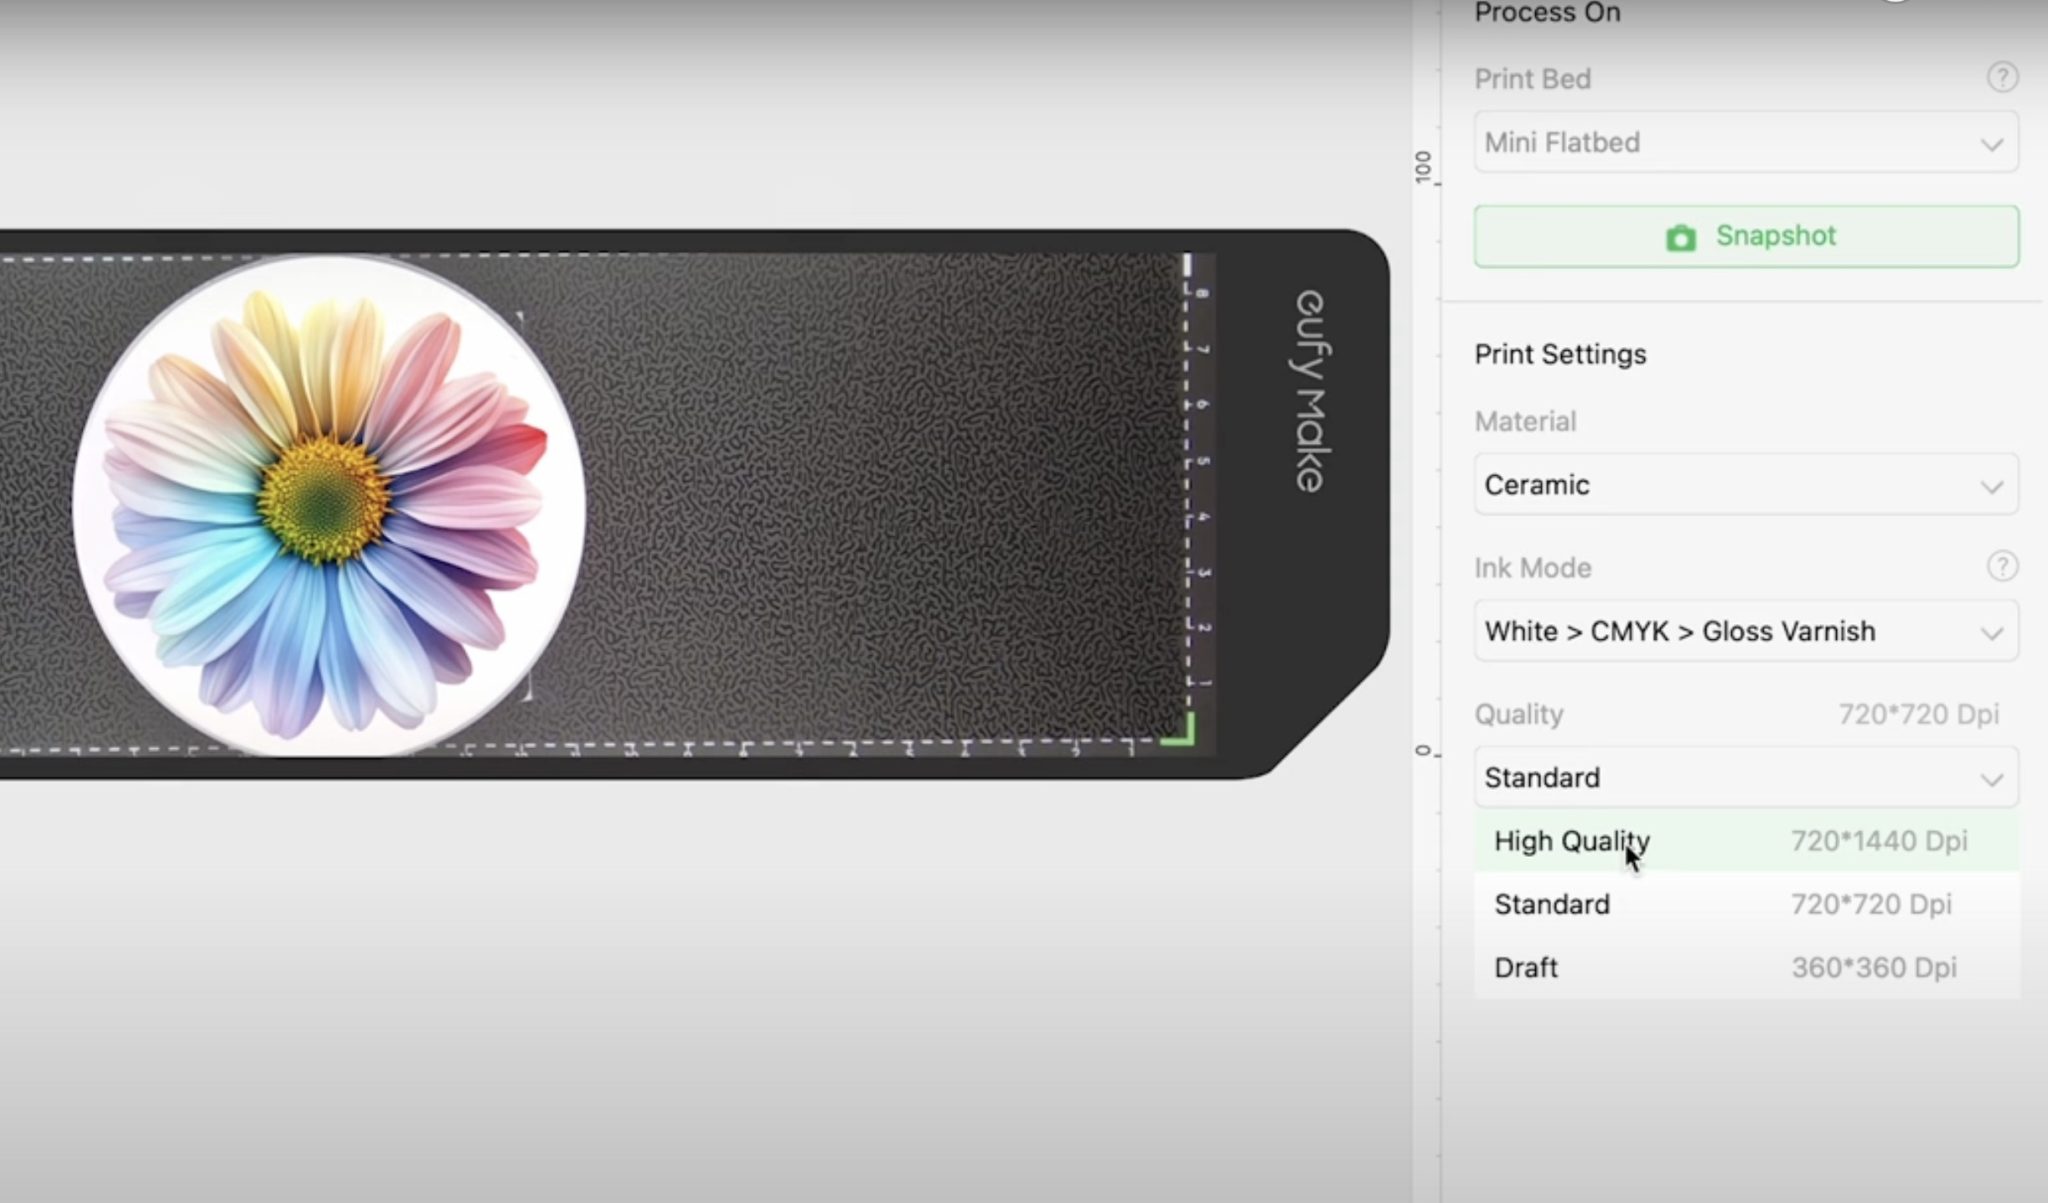
The higher the quality setting you choose, the longer the printing process will take.
I don't think I would use the Draft setting unless, for some reason, I needed the image printed but didn't need it to look good.
High Quality will take the longest time, but it will give you the very best prints.
Step 5: Print the Coaster
With all the settings selected, click Start Printing.
After you click Start Printing on the screen, the software will prompt you to press the Start button on the printer to start the print job.
It will also tell you the estimated ink volume it will use to print your project. This allows you to roughly estimate the cost of the ink, so you can decide if it's worth the cost before you start the print process.
Step 6: Remove Printed Coaster
When the printer is done, you can remove the coaster from the printer. The ink is dry as soon as the printing process is done, so you don't need to worry about smudging it.
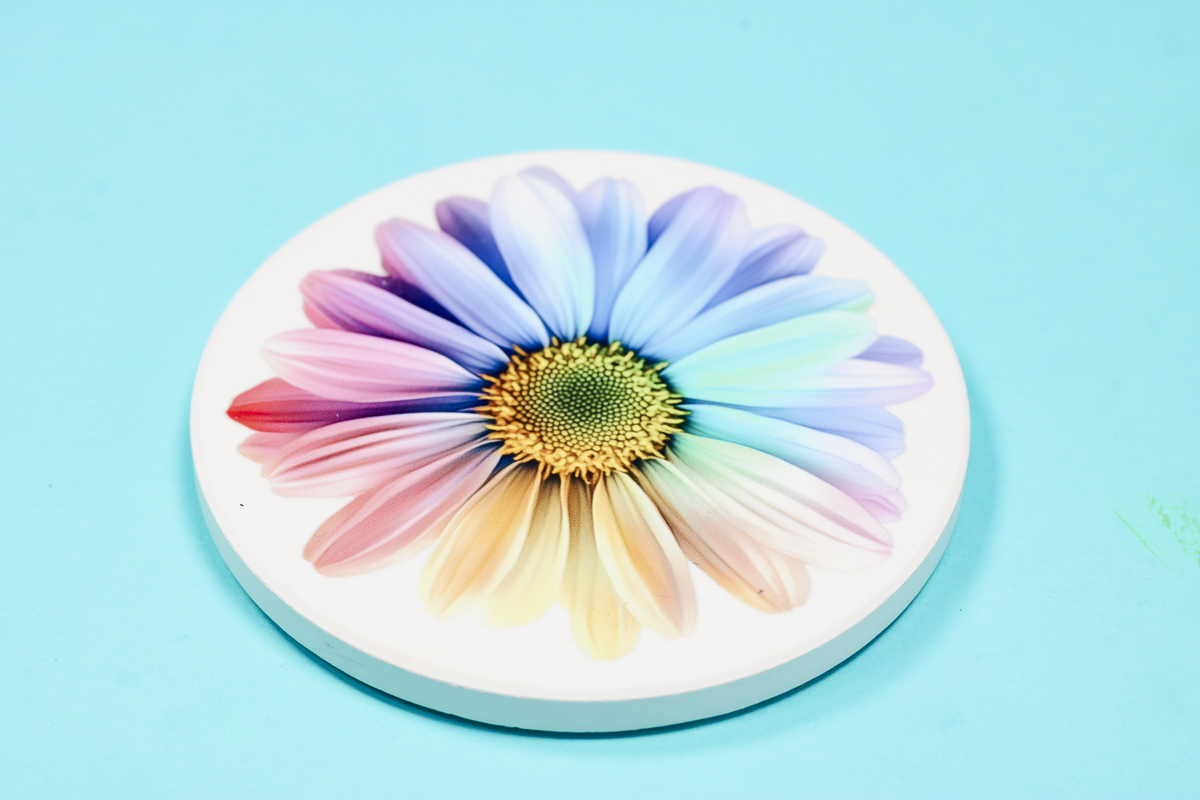
The color and finish look beautiful, and even if you scratch at it, it doesn't come off.
Printing on a Cell Phone Case
The process for making the cell phone case is going to be similar to the ceramic coaster.
- Remove any protective film from cell phone case.
- Place the phone case on the mat inside the printer.
- Take a snapshot of the bed of the printer.
- Find or upload a design and resize it to fit the phone case.
- Click Start a Print task.
- Select plastic as the material.
- Choose the Ink Mode. I am using White, CMYK, Gloss Varnish.
- Choose the Quality Setting. I am using High Quality for this phone case.
- Click Start Printing.
- When the printing is done, remove the phone case from the printer.
This cell phone case turned out amazing. It looks so good! Even the thin lines are stuck down well and appear to be durable.
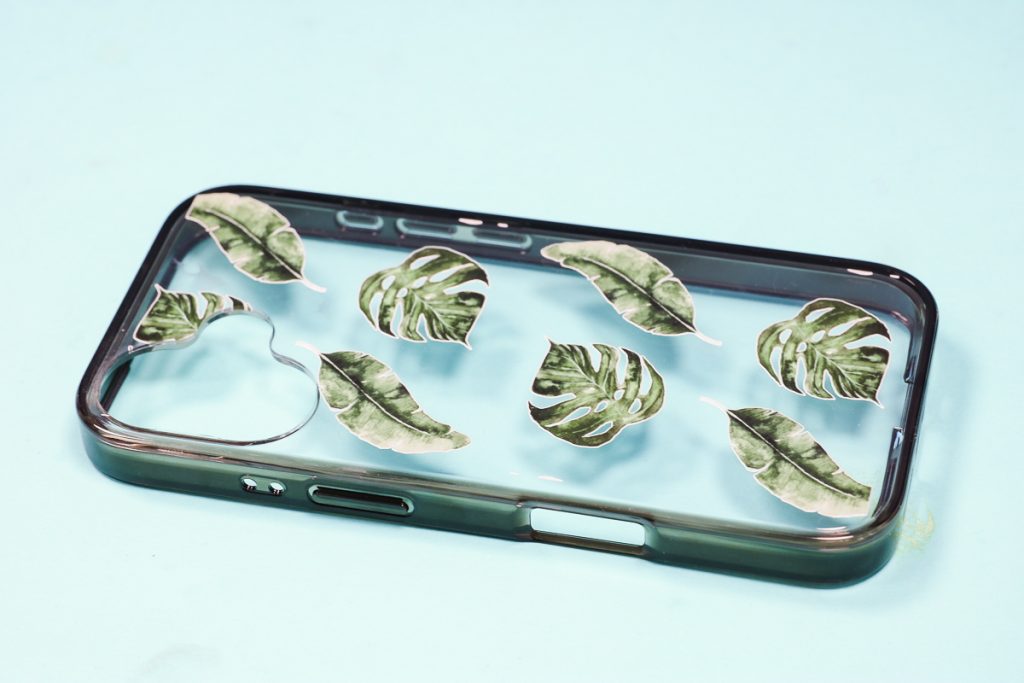
All the ink is dry, and it's not going to scratch off. This feels like a sticker on the surface because it is sort of raised up. Don't let this discourage you, it feels like a sticker in a good way, it is not going to come off.
I did include some print in the open area of the phone case where the camera lens sticks out.
I wanted to see what would happen on the mat if you print in an open space.
Ink was printed onto the mat. Just like the ink on the phone case, it is dry, so you can continue to use the mat.

I do think, if you regularly print larger than the blank or print into holes in your blank, it will shorten the life of the mat.
How to Install the Large Bed
Now we're ready to make some projects using the large bed.
Step 1: Remove Small Bed
To remove the small bed, flip the lever to unlock and lift the small bed out. I replaced the carrier sheet to protect the adhesive on the small mat while it's not in use.
Step 2: Add Large Bed
Make sure you have the back of the printer open so the large bed can fit inside.
You also need to make sure you have plenty of room in the front and back of the printer because the bed will move in and out of the printer during the printing process.
With the small bed removed, you'll see a recess inside the printer. The bottom of the large bed has a locator that sticks out. That piece fits inside the recess.
Slide the large mat into place and lock it in place using the same lever you used to unlock the small bed.
It is very easy to swap the beds.
Step 3: Add the Large Mat to the Large Bed
Just like the small bed, we need to add a mat to the large bed. Remove the carrier sheet from the bottom of the mat and locate it in place, and press it down.
There is a print test sheet on top of the mat in case you need to do a test print.
I am not doing a test print, so I can remove that page to reveal the adhesive mat.
Print on Stretch Canvas Art
For my first project on the large mat, I thought it would be fun to see how this printer does on a stretch canvas.
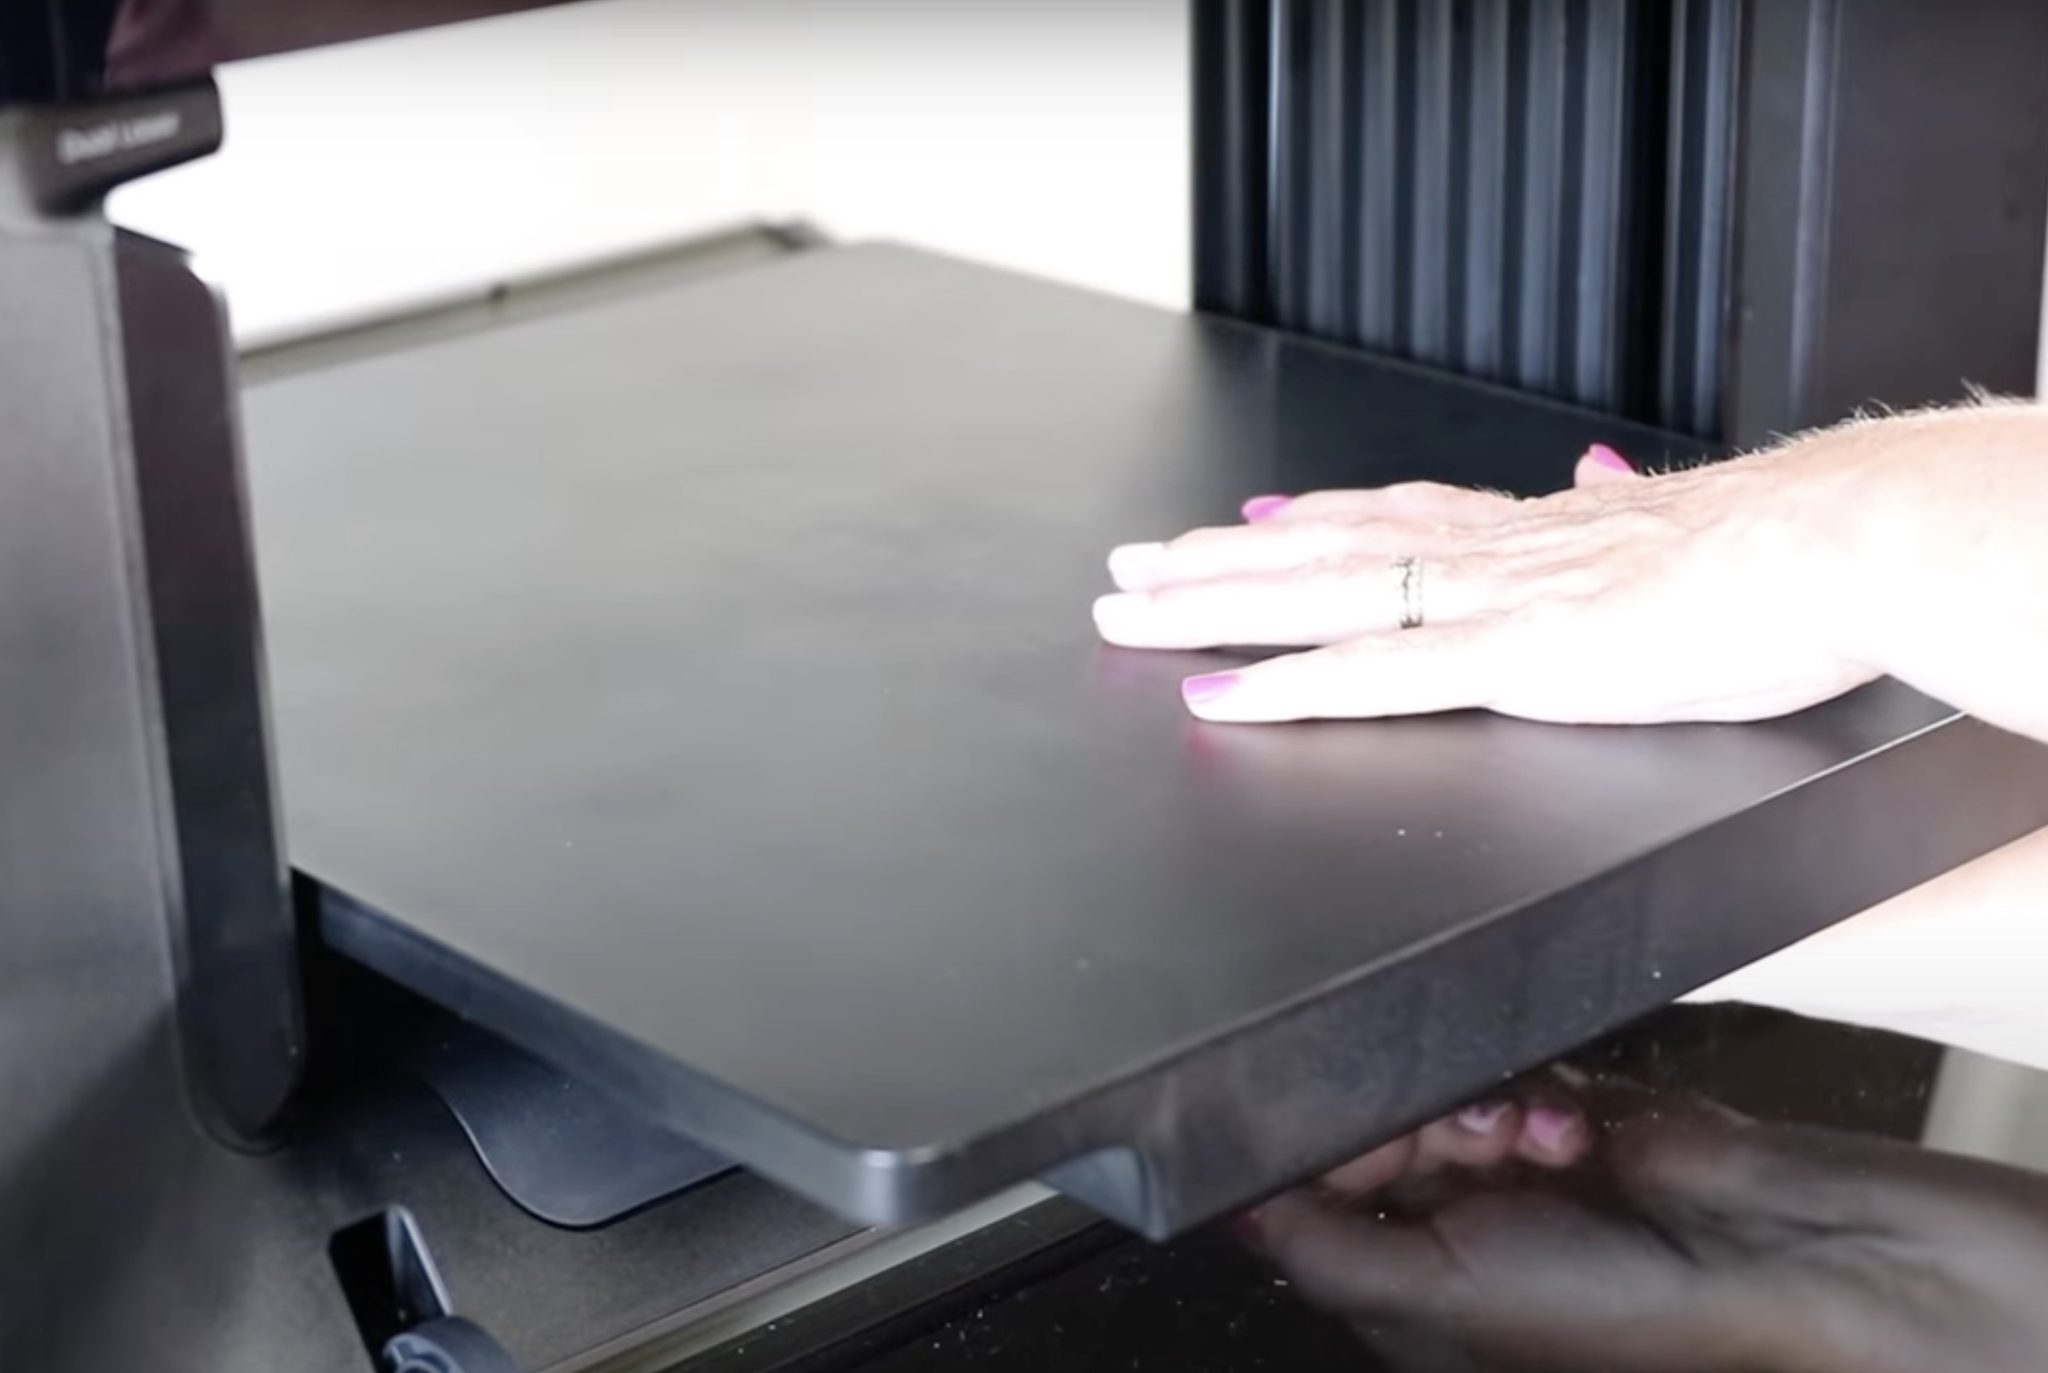
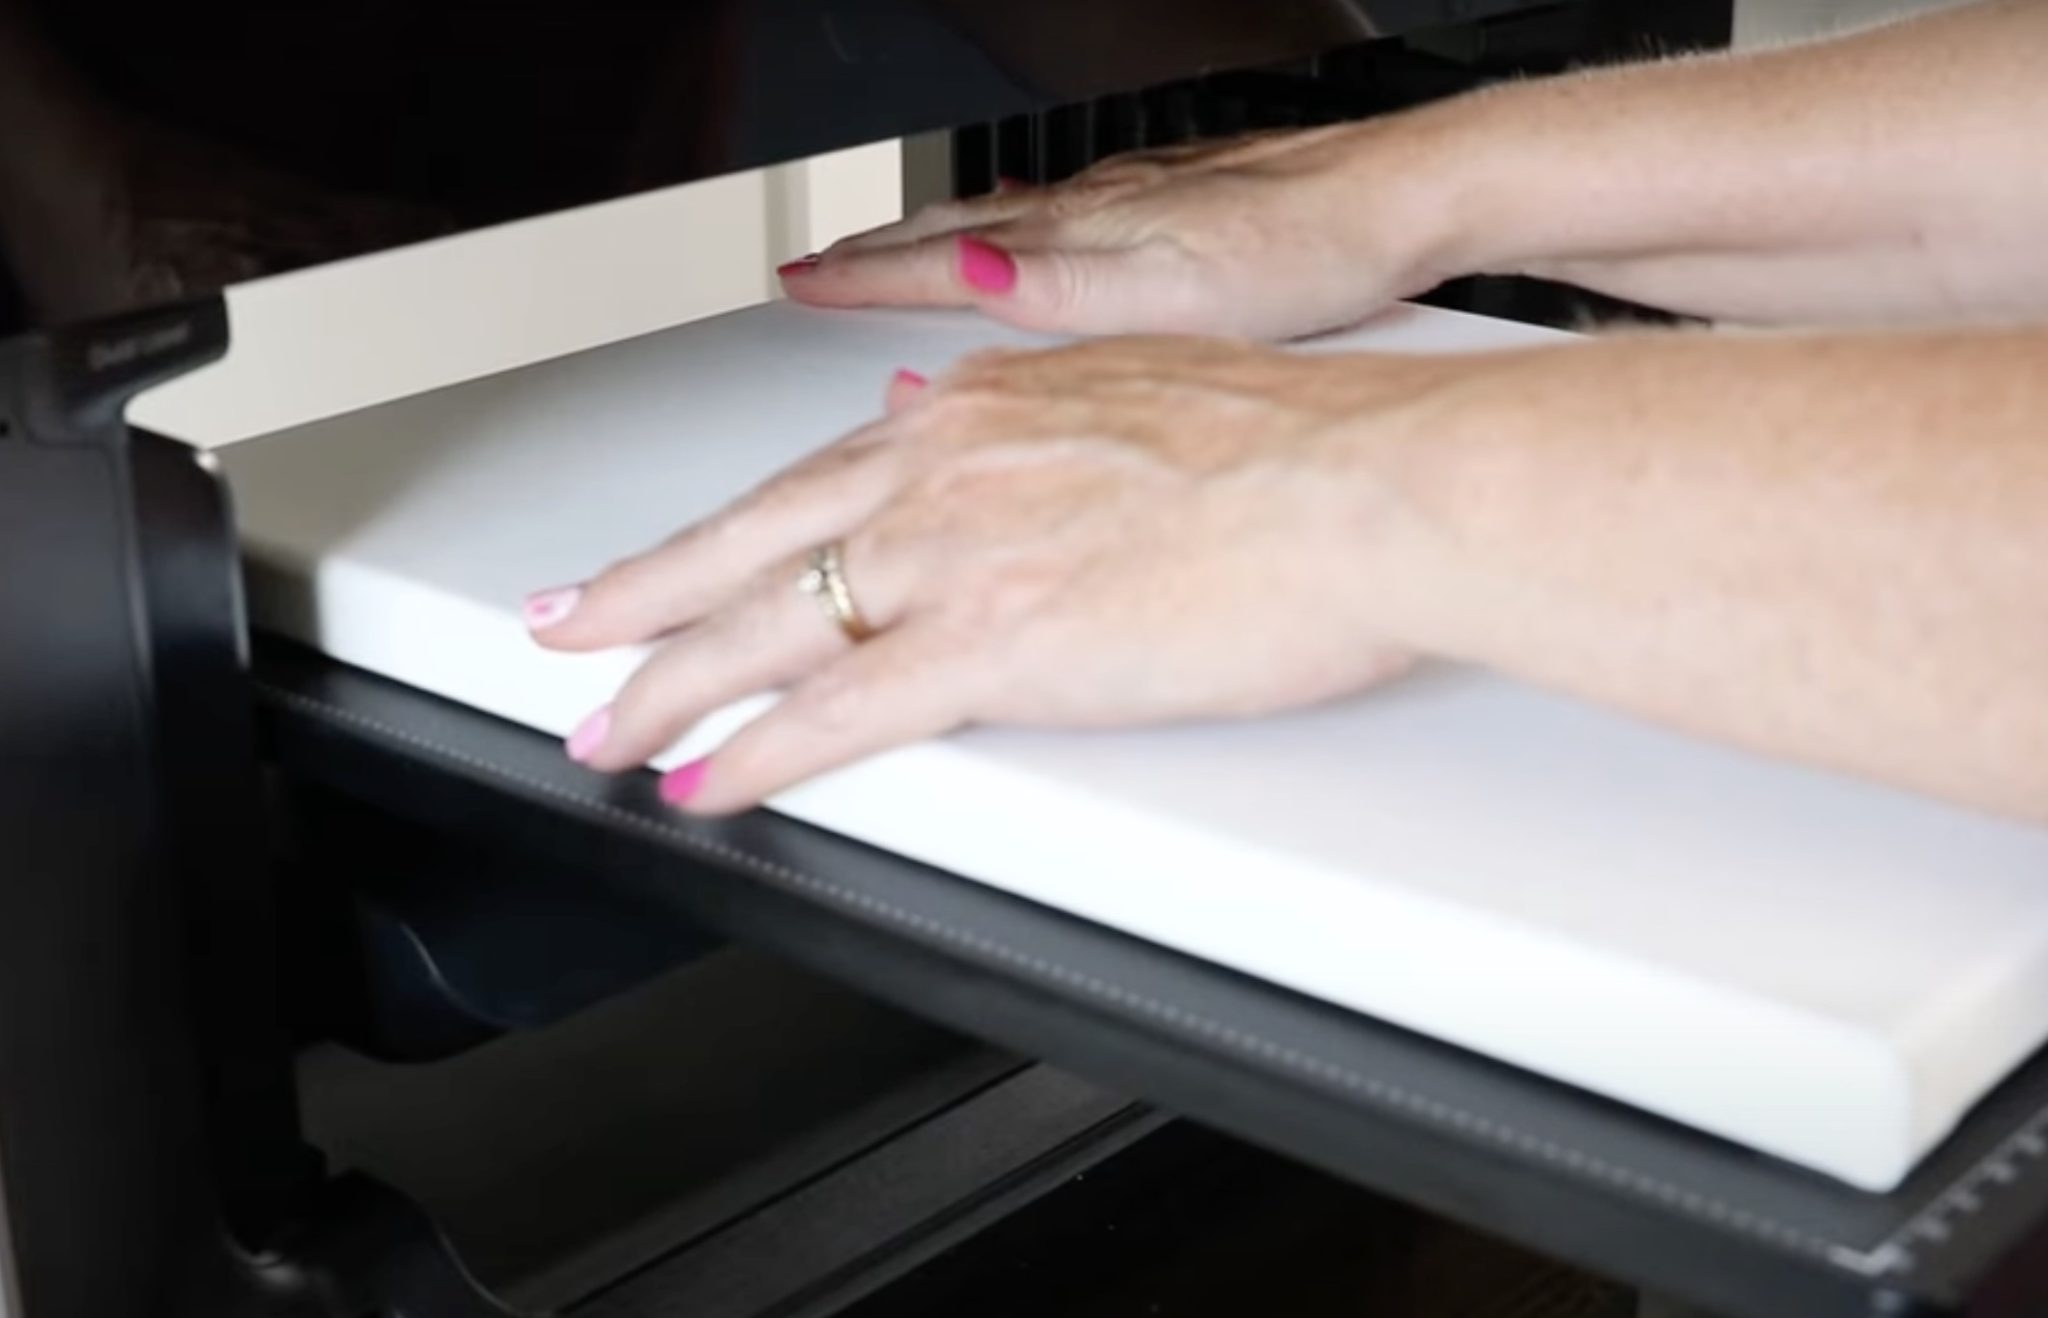
Step 1: Add Canvas to Printer
Press the canvas in place and then, in the software, change the print bed to the Standard Flatbed.
Step 2: Upload and Locate Design
Take a snapshot of the bed, and you can see your canvas on the screen.
Either find or upload a design and locate it where you want it on the canvas.
There is no canvas material in eufyMake Studio. I chose Drawing Board as my material to see how it does.
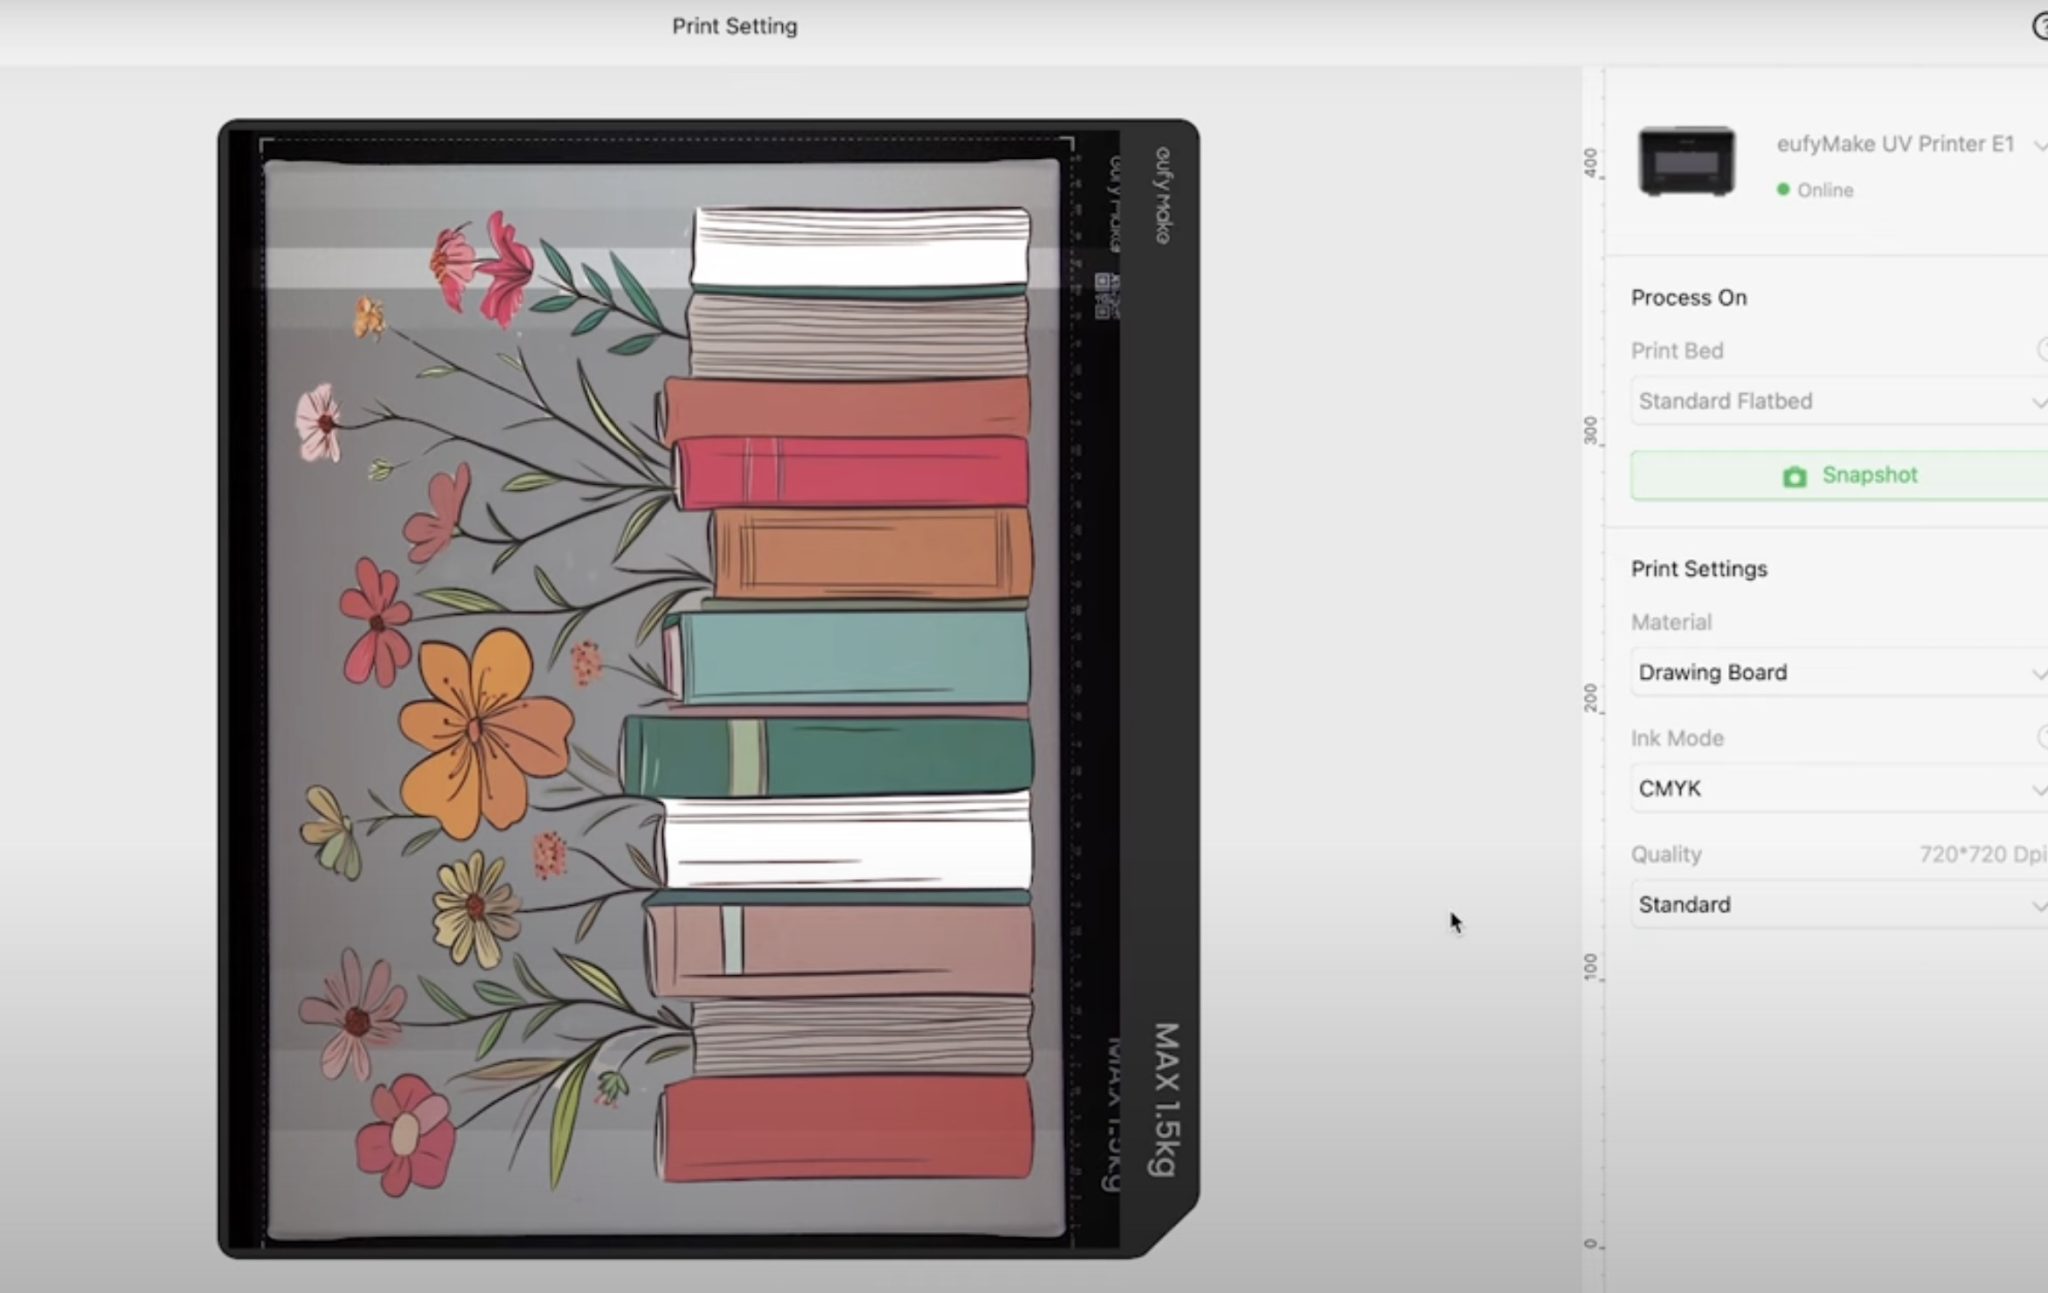
Because the background is white, I am printing in just CMYK and selected Standard Quality.
Step 3: Print on Canvas
Click Start Printing and print on the canvas. Once printing is complete, remove from printer.
The stretched canvas turned out amazing.
The ink is completely dry, and even when I touch it, it does not smudge at all.
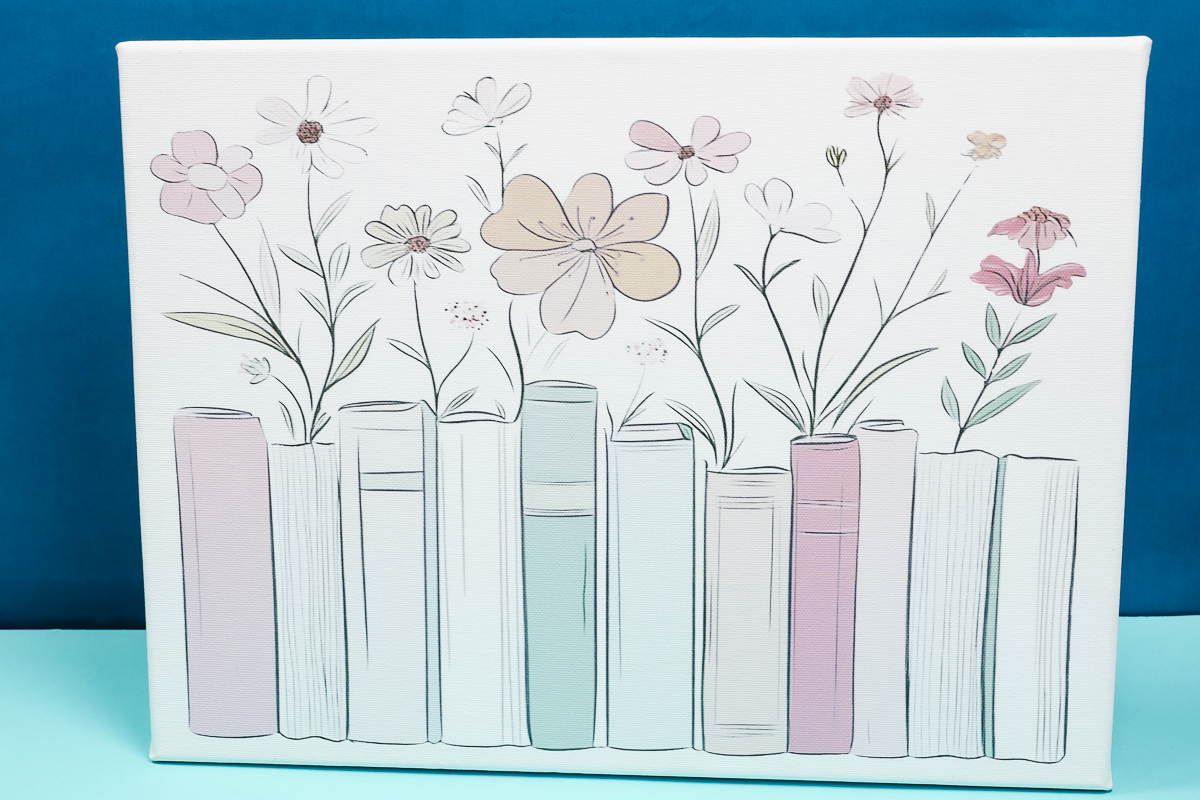
I am happy with the settings I used. Printing in just CMYK and not using white was the right choice because the canvas shows the white really well.
I also think it was a good idea not to do the glossy varnish over the top on this material.
So, while there is no Canvas material listed in the eufyMake Studio software, I was able to print on this stretch canvas using the Drawing Board setting.
You can try using different settings to see if they work with the blank you want to use.
Comparing Different 3D Printing Options
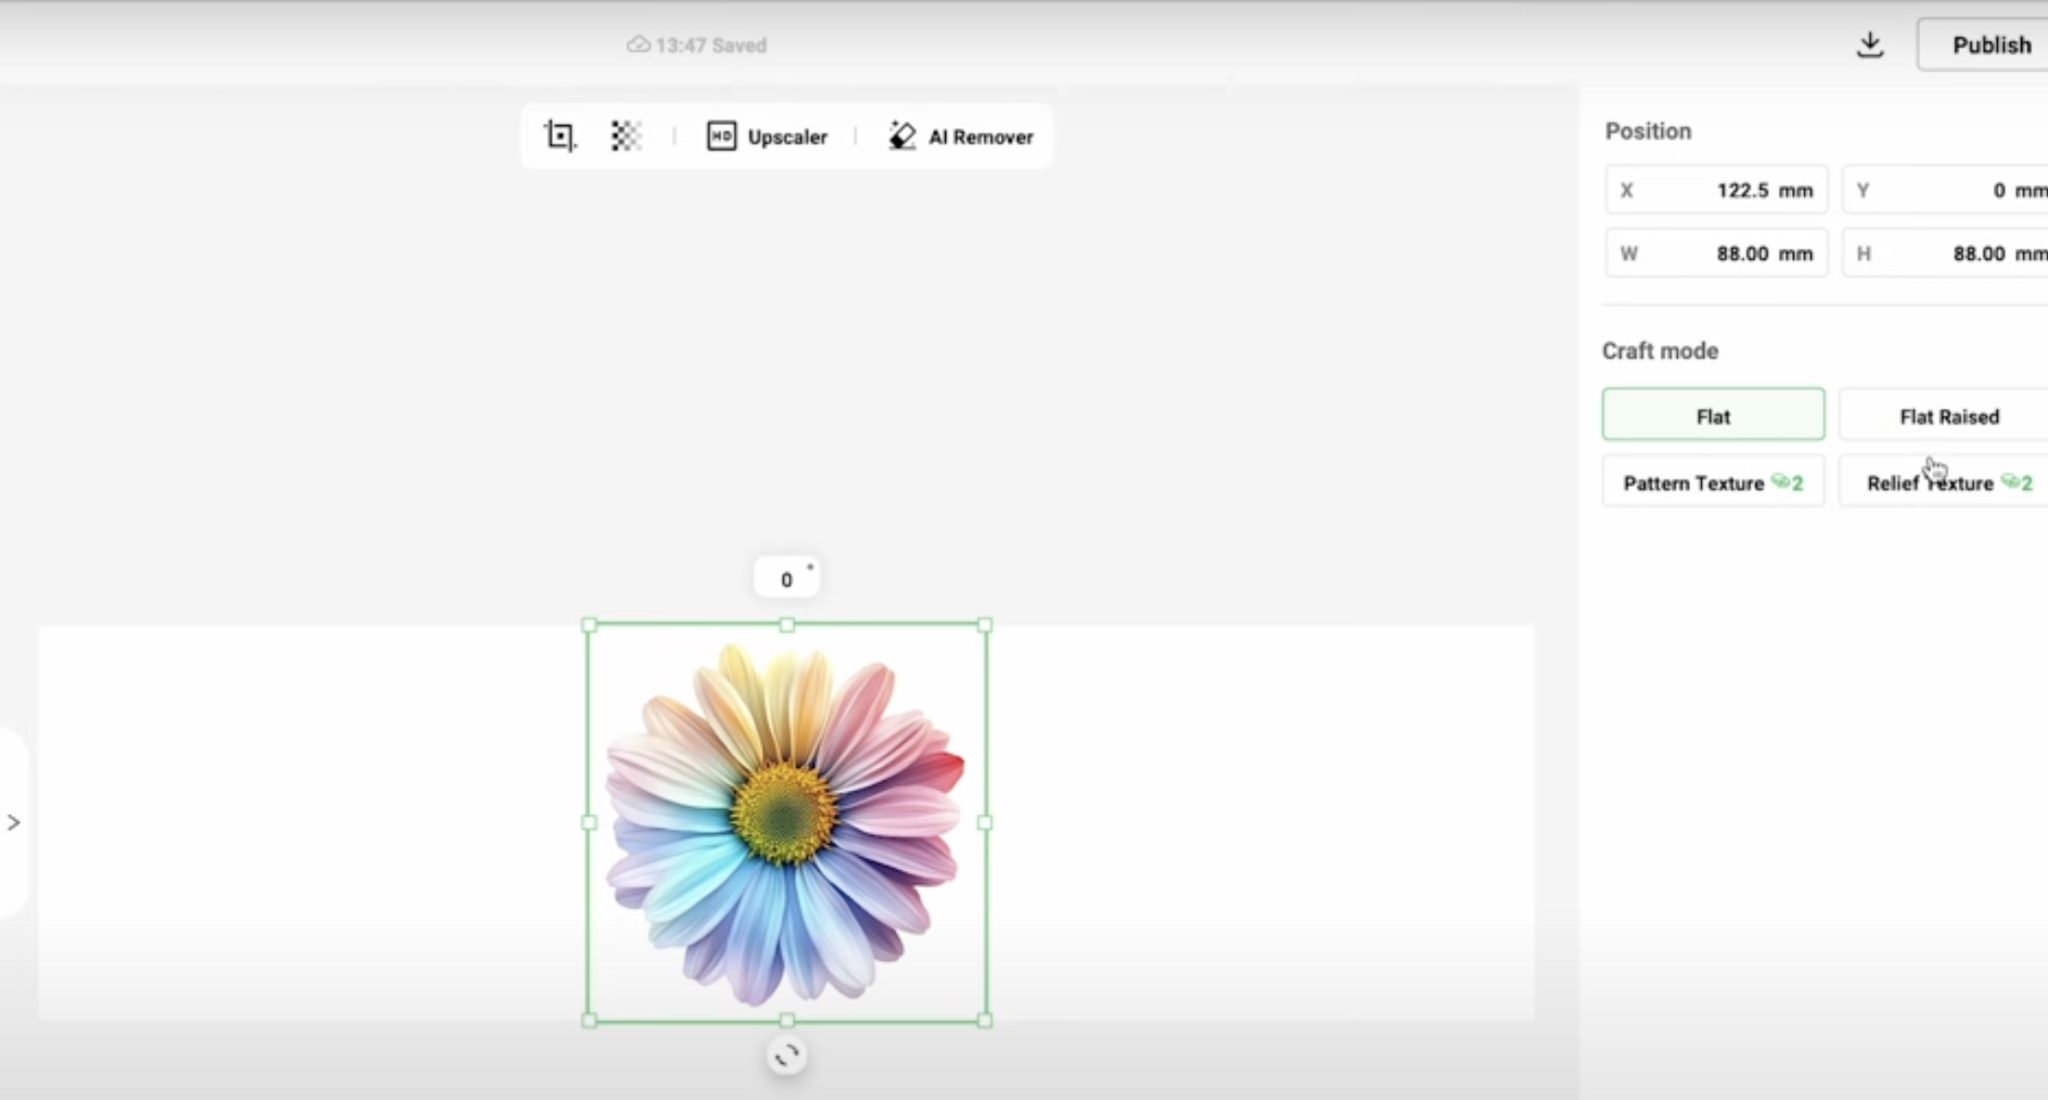
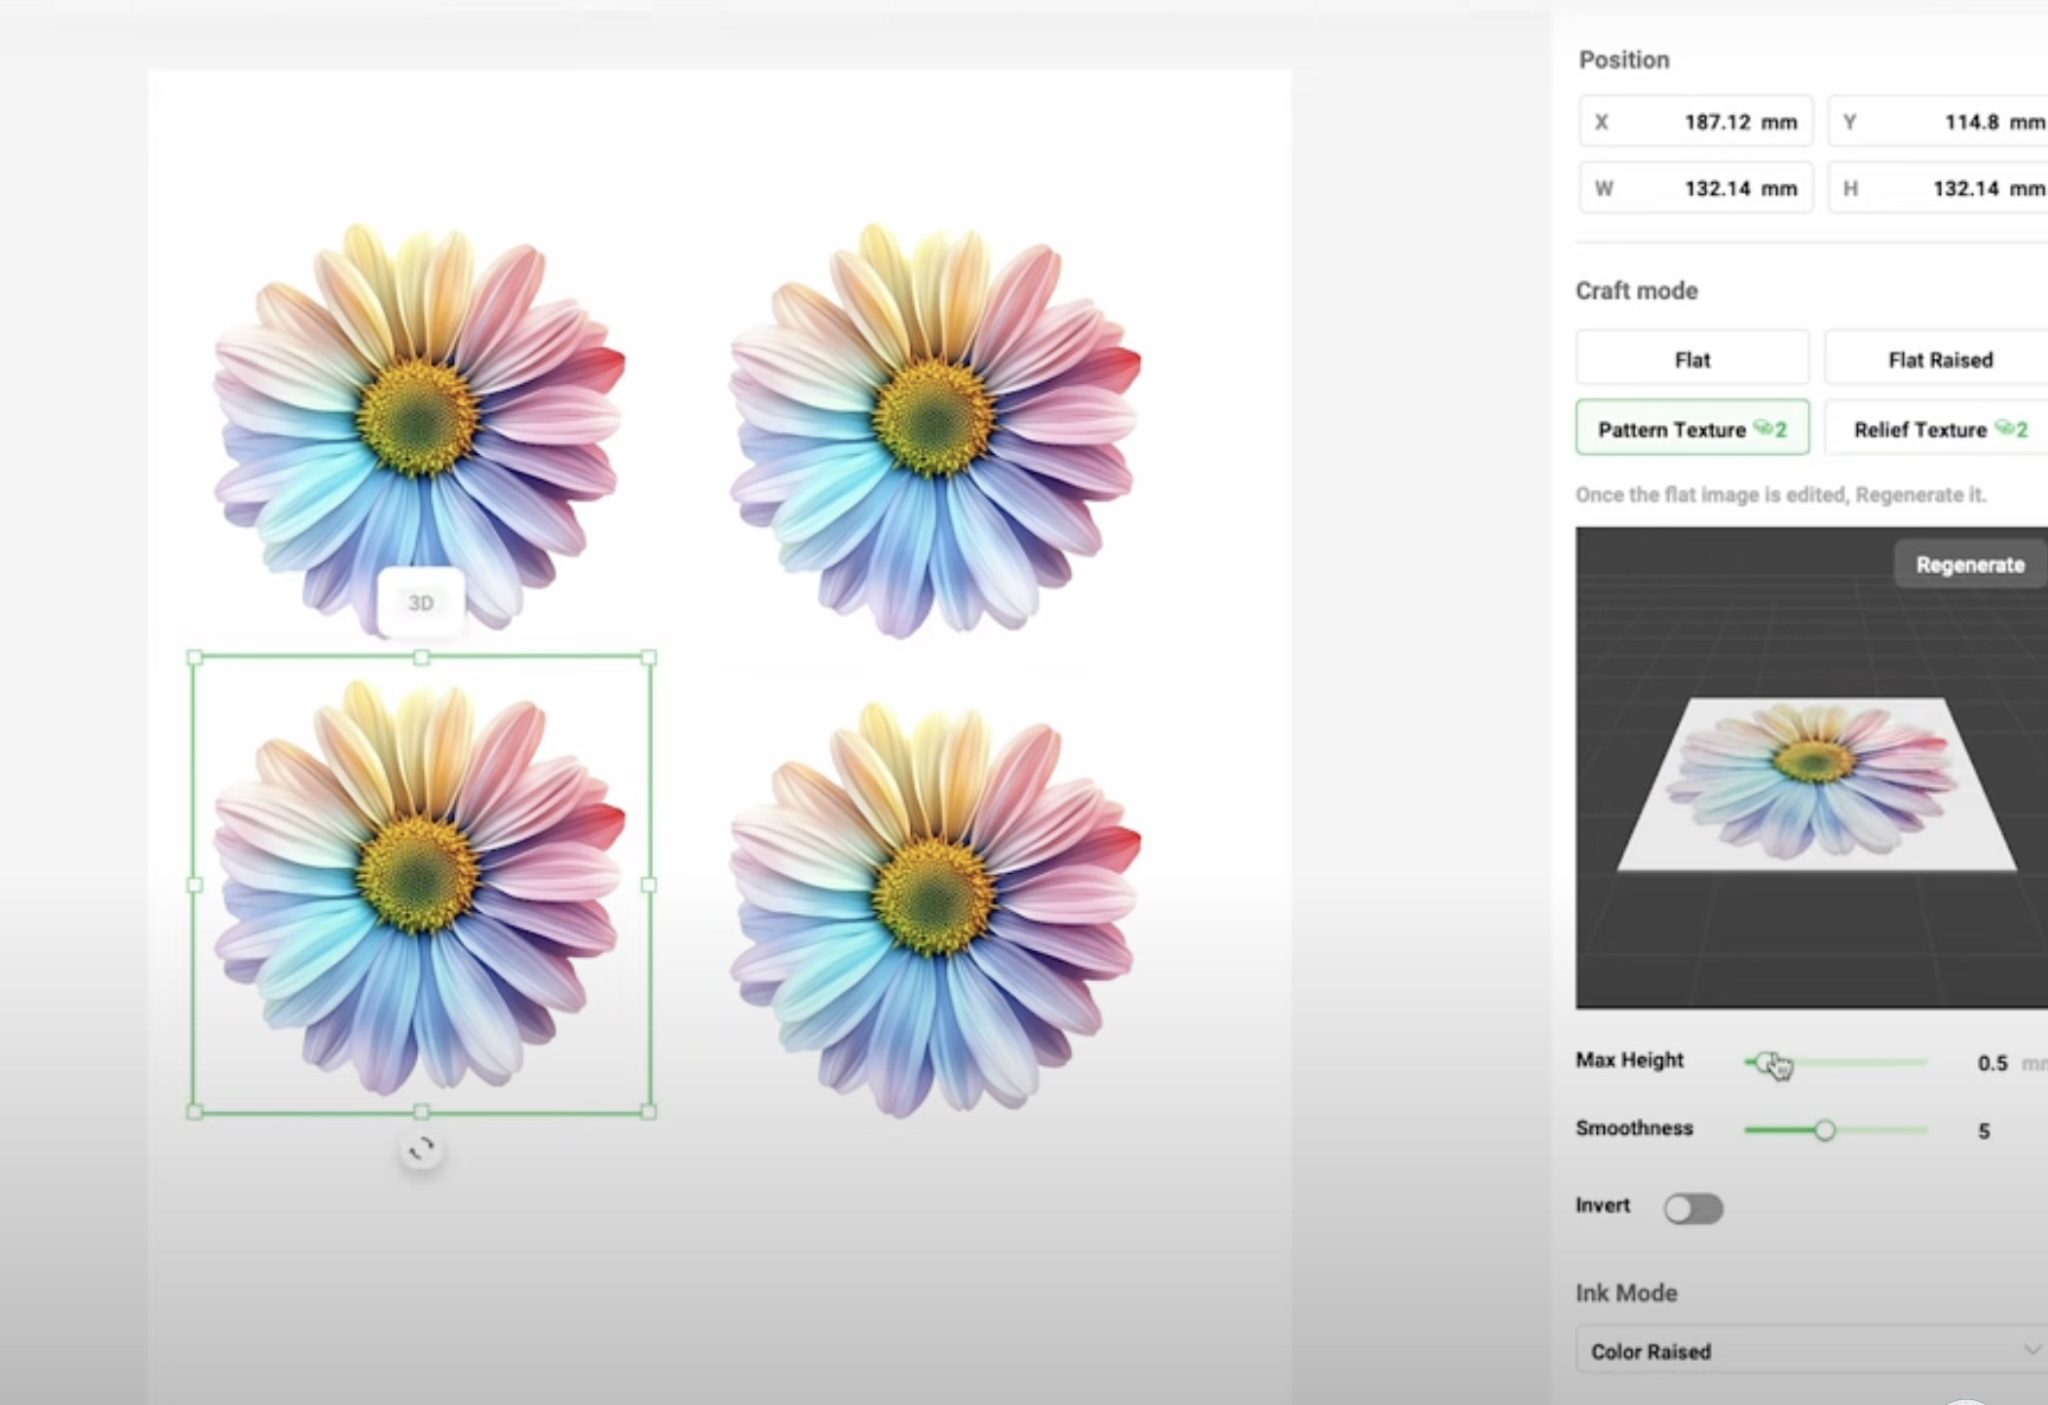
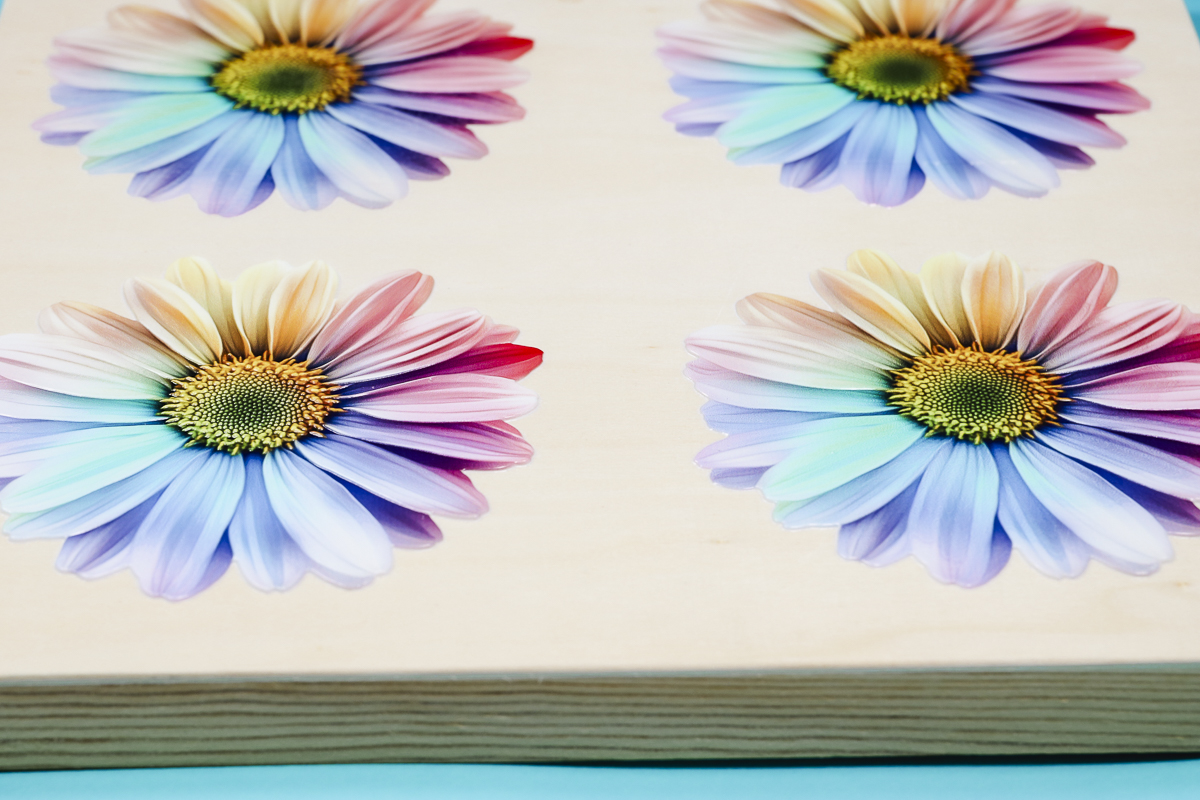
Next, I am going to compare the different printing options. When printing, you can select if you want Flat, Flat Raised, Pattern Texture, or Relief Texture print. This adds 3D dimensional effects to your projects.
I am going to use the same flower design I used on the coaster, and I am going to print it onto a drawing board.
Step 1: Choose Mode or Effect
First, I added the flower design and selected the Flat Mode.
Next, I duplicated the flower and selected Flat Raised. Use the slider to choose the height you want the raised section to be. The higher the number, the more ink will be used, and it will take longer to print.
You can select between color raised or gloss raised. I chose Color Raised and a height of 0.5 millimeters. The maximum height for Flat Raised is 3 millimeters.
Now, I am going to duplicate the design two more times and test the Pattern Texture and Relief Texture options.
These options are not free to use. You either need to purchase credits or have a monthly subscription.
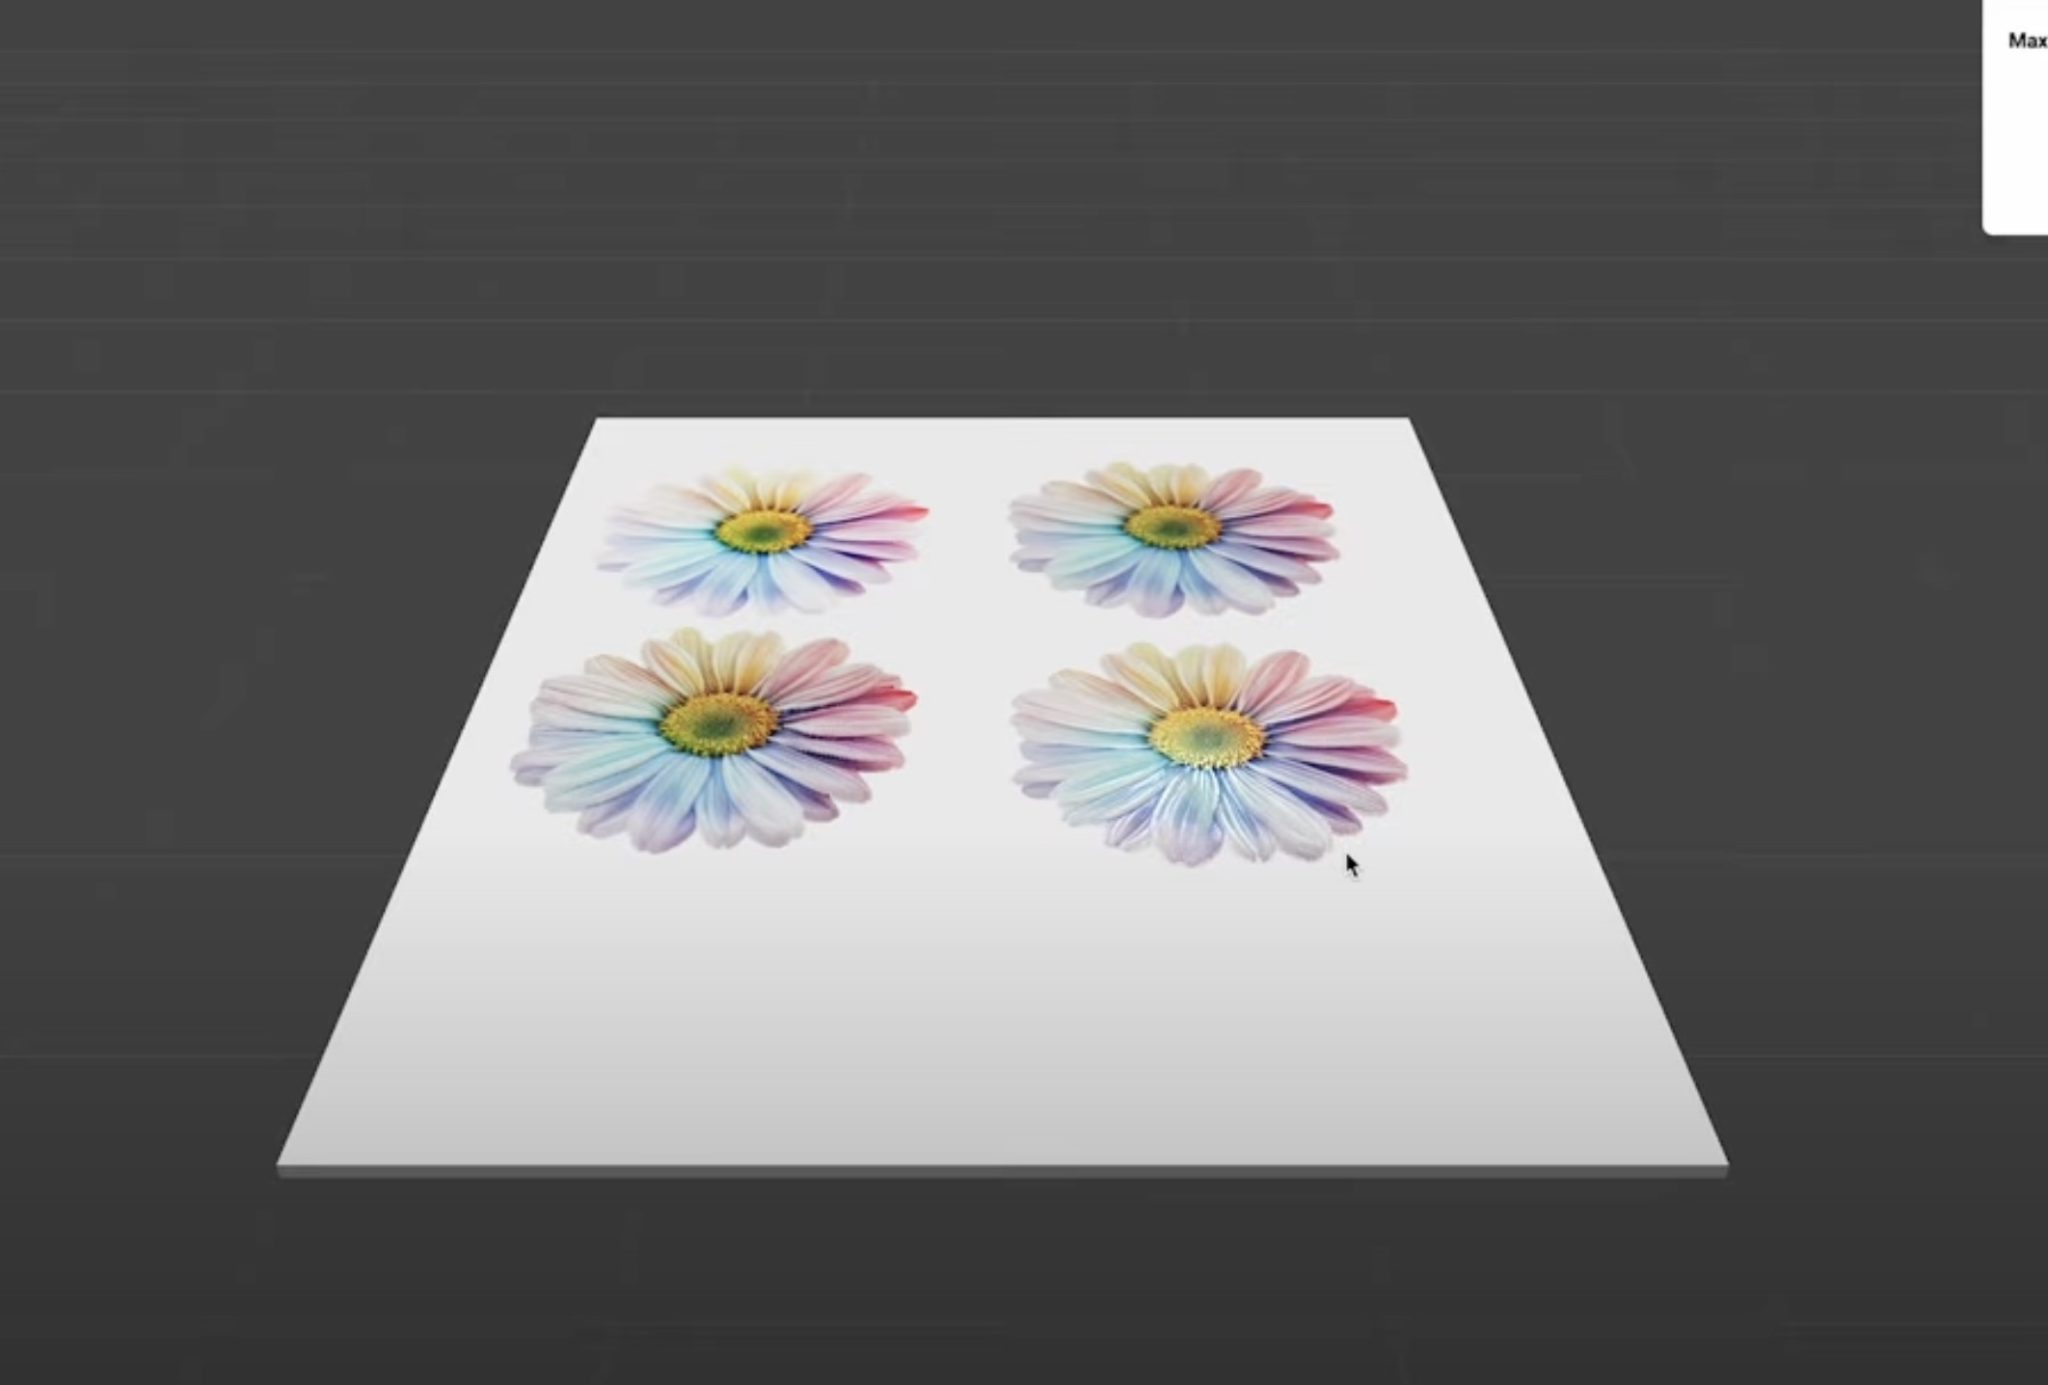
At any time, you can preview the print to see how things will look, so you know if you need to make any adjustments.
With these options, you can adjust the height and smoothness, and you can try inverting it as well.
I set the Relief Texture to 1 millimeter thick and the smoothness to seven. The Pattern Texture setting is also set at 1 millimeter, so the two are comparable.
The maximum Relief Texture setting is 5 millimeters, and that is the maximum height you can get with the flatbed printing. The maximum settings will depend on the settings you choose and the blank you're using.
Step 2: Print Your Design
With all 4 designs on the canvas, you can preview what they'll look like and then click Print.
With the drawing board on the large mat, click Start a Print Task.
I used the drawing board setting, and the Ink Mode is already selected because I added those texture effects. This is printing at High Quality.
Press Start on the eufyMake E1 and allow it to print.
Which 3D Effect is for you?
When the printer is done, remove the drawing board from the printer.
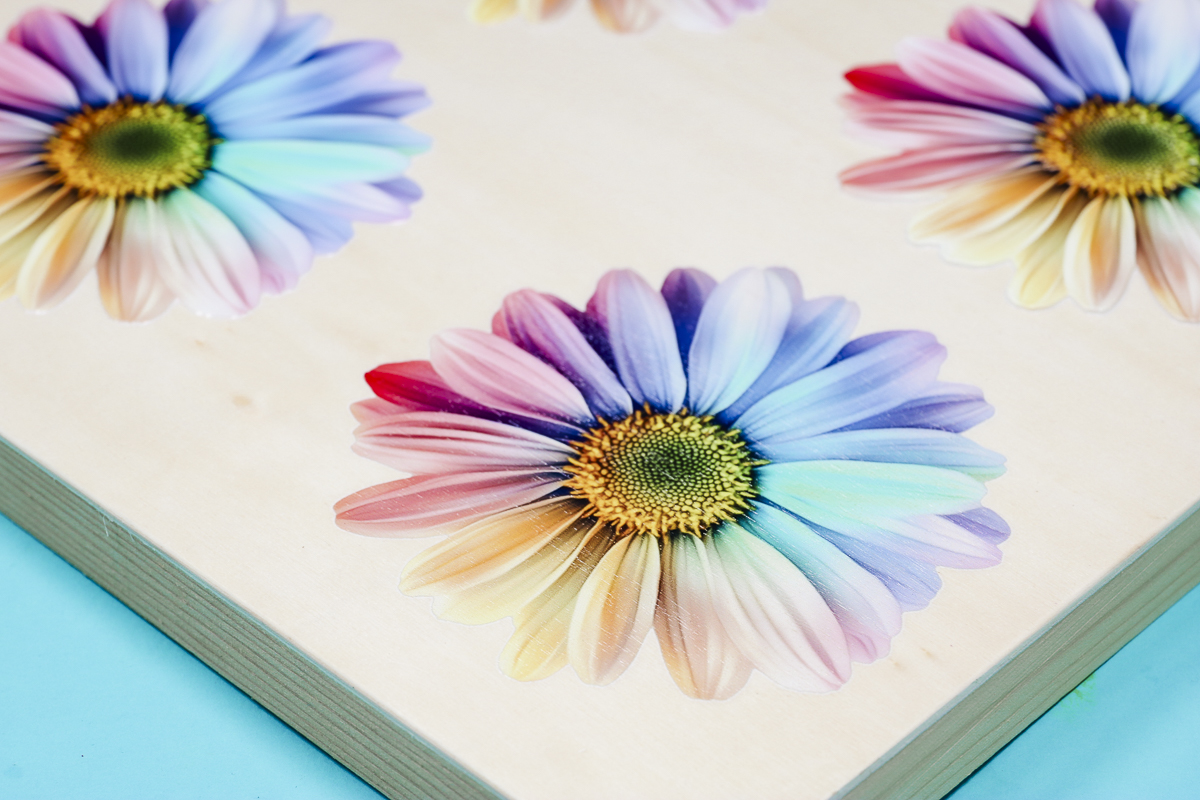
Now, we can look at and compare the different printing effects.
Flat Printing
I would consider the flat printing version a regular print. It is barely raised off the wooden surface, but it looks really good and is vibrant.
Flat Raised
The Flat Raised feature is free to use. You don't need to use any credits to get this effect.
You can see that the print is raised off the surface, and it gives you a textured effect. This setting raises the entire print, not just sections of the print.
Note: You can see a line in this print. I accidentally bumped the printer while it was printing, and it caused that line. You want to be careful around the printer while it is printing.
Pattern Texture and Relief Texture
The last two options are created using AI, and you have to use credits within the software to use them.
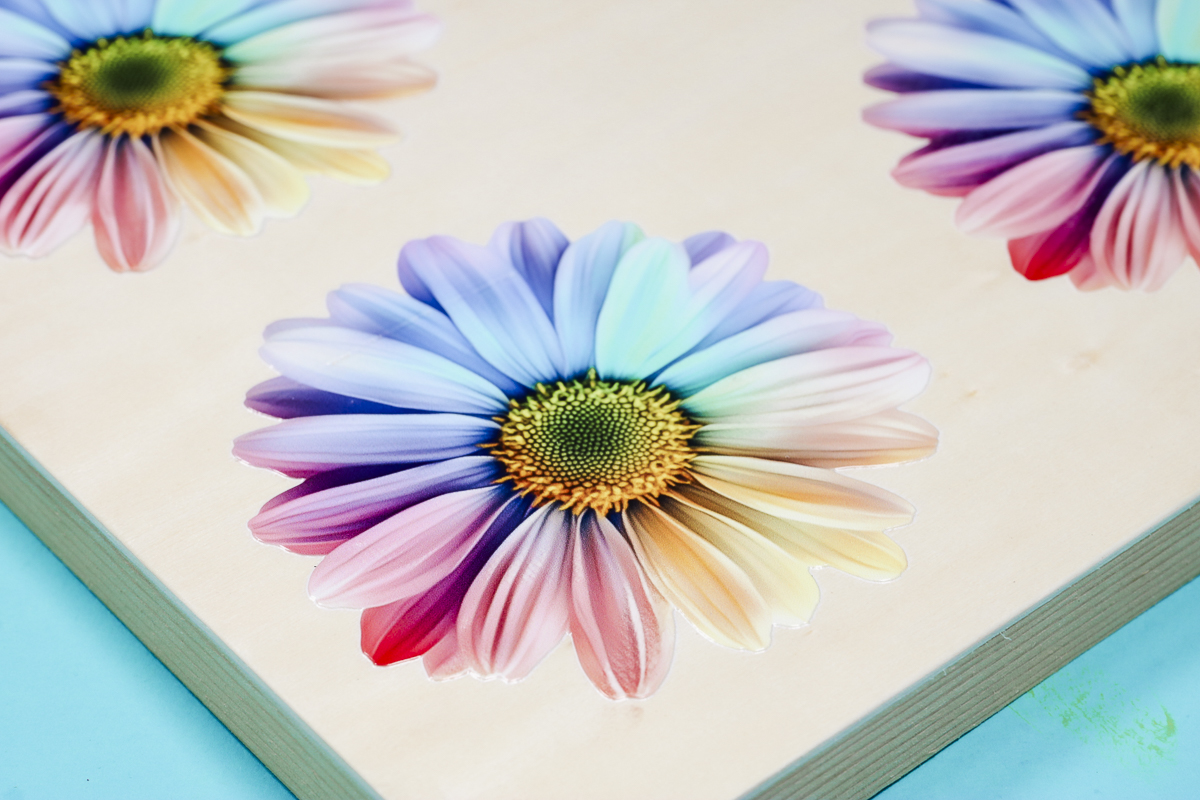
The Pattern Texture on the left has more texture, and the Relief Texture on the right is smoother but still has texture.
I love all the different print options available with the eufyMake E1. They are all vibrant and pop off the drawing board.
I think this is a good example of how you can use more than one option on the same print project.
Other Flatbed Printing Examples
Now that we've tested a few options, I wanted to show you some of the other projects I was able to make with the flatbed in the eufyMake E1.
Remember, the maximum thickness is 3.94 inches or 100 millimeters.
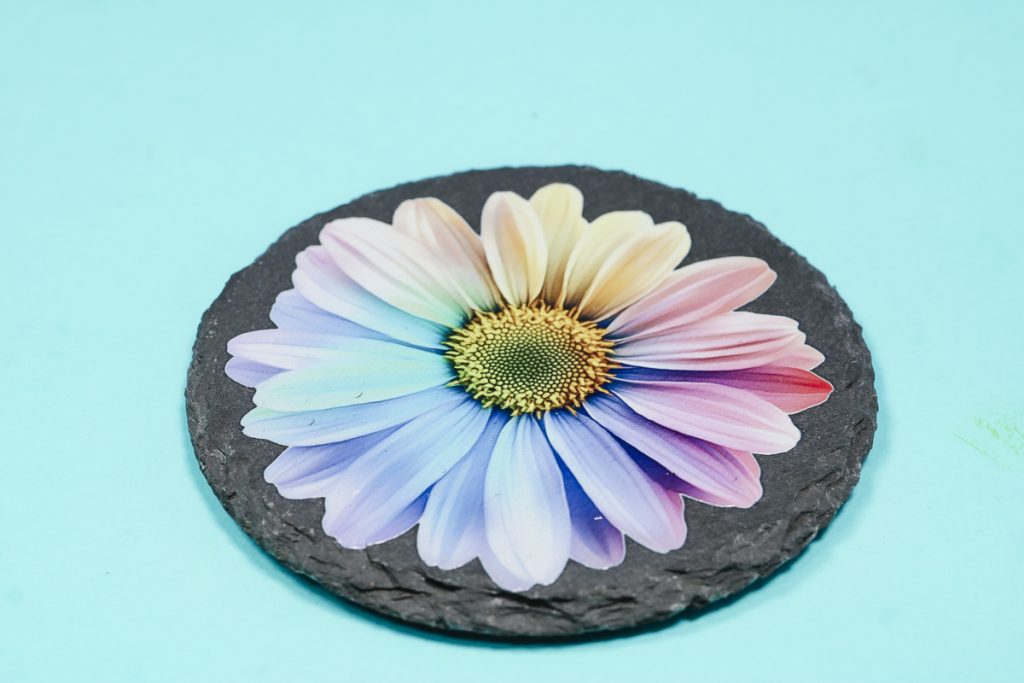
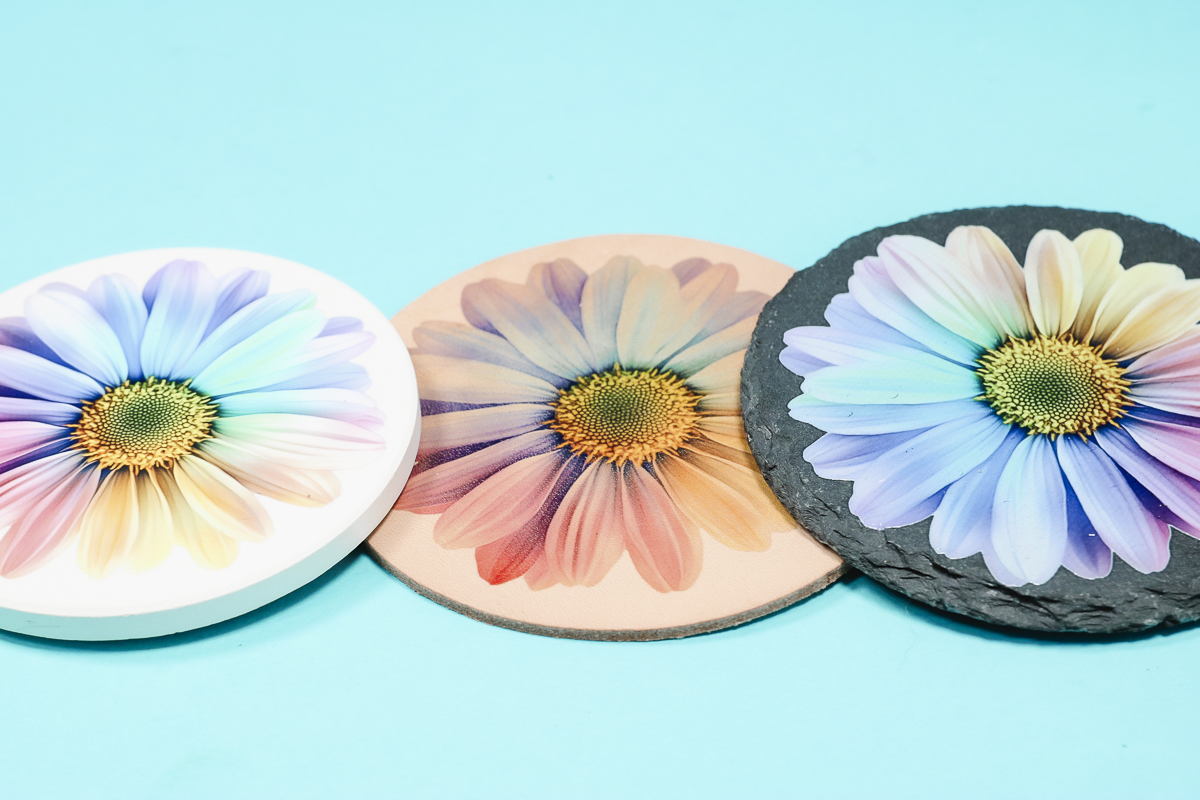
UV Printing on Slate
Here you can see the same floral print on black slate, and the image is just as vibrant as it is on the white coaster.
Printing on Firm Leather
Next, I tested some leather blanks. Both of these leather pieces are very firm, which I think helps the print adhere very well.
The first leather blank is a coaster, and for this print, I did not add the white layer of ink and you can see that the leather color shows through the print a little bit.
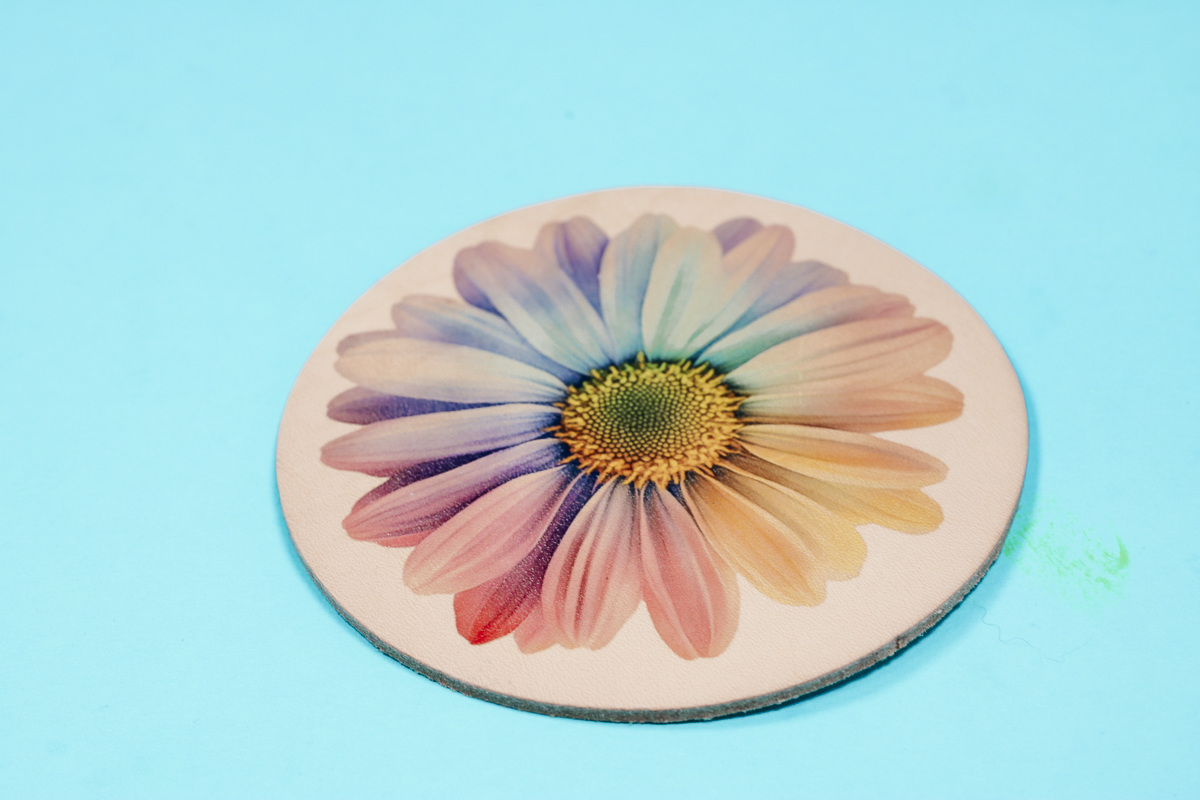
The print still looks really good, but it just isn't as vibrant as the designs with the white layer of ink.
Next, I added a UV print to a leather passport cover. This cover is pretty thick, but I was able to print on it without a problem.
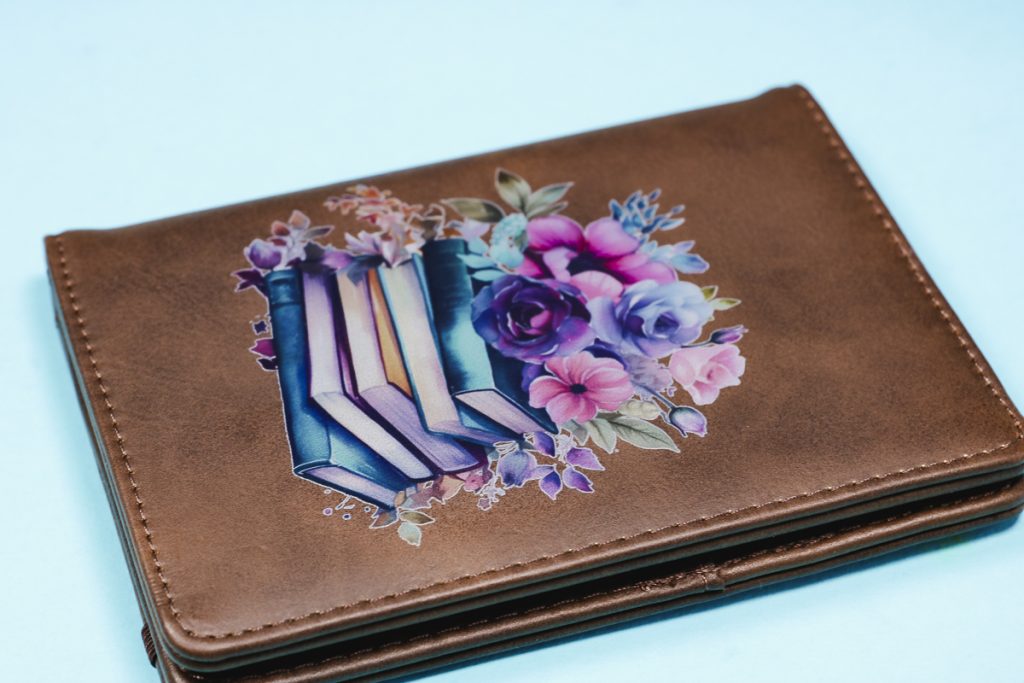
This design looks really good on the surface and feels stuck down really well.
If you use a more flexible leather and you bend it, you may see cracking or peeling. Especially if you use a thicker print.
I did not use any 3D effects on these cases, and I think that worked really well.
UV Printing on Metal
When printing on metal, you may need a pre-coating solution. I did experiment on a few small metal pieces to see how they would do.
First, I tried an uncoated aluminum, and the print peeled right off.
Next, I tried some metal pieces that are coated. The prints look good, but after trying a couple of times, I was able to lift the edge of the prints, and they scraped off.
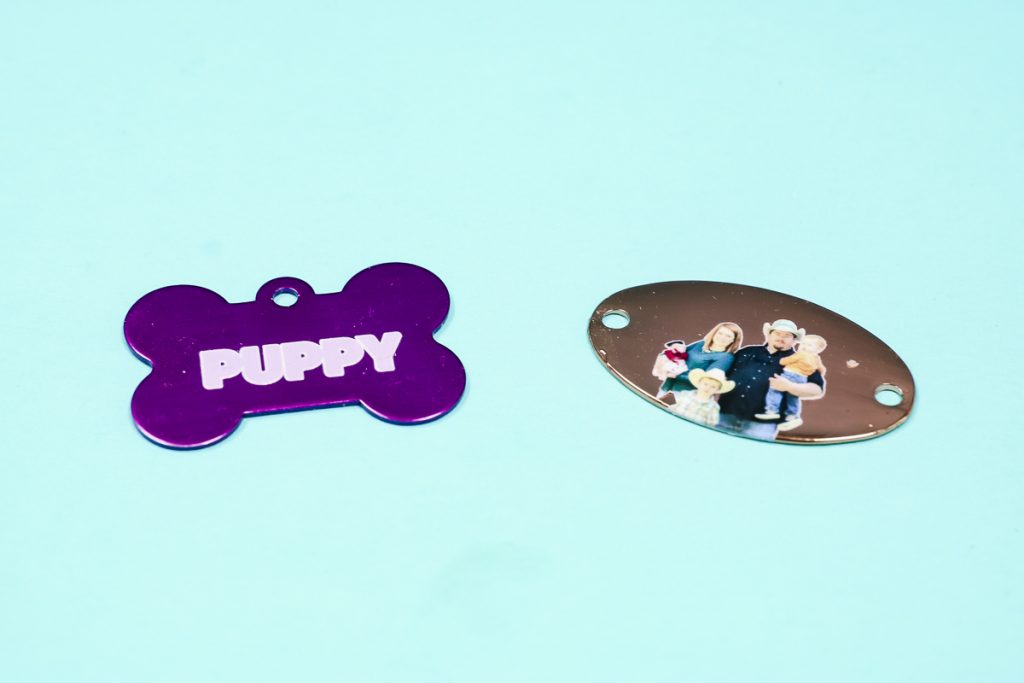
The prints did stick down, but they are not durable and won't hold up to much handling.
I think there are some metals that will work, but you will have to test them, and not all metal blanks will work.
Comparing Acrylic Bookmarks
Bookmarks are definitely trending right now, so I wanted to test a couple of different print options on acrylic bookmarks.

Acrylic Bookmark with CMYK Print
First, I did a standard CMYK print. There is no white in this print, so you can see through both the acrylic bookmark and the floral print.
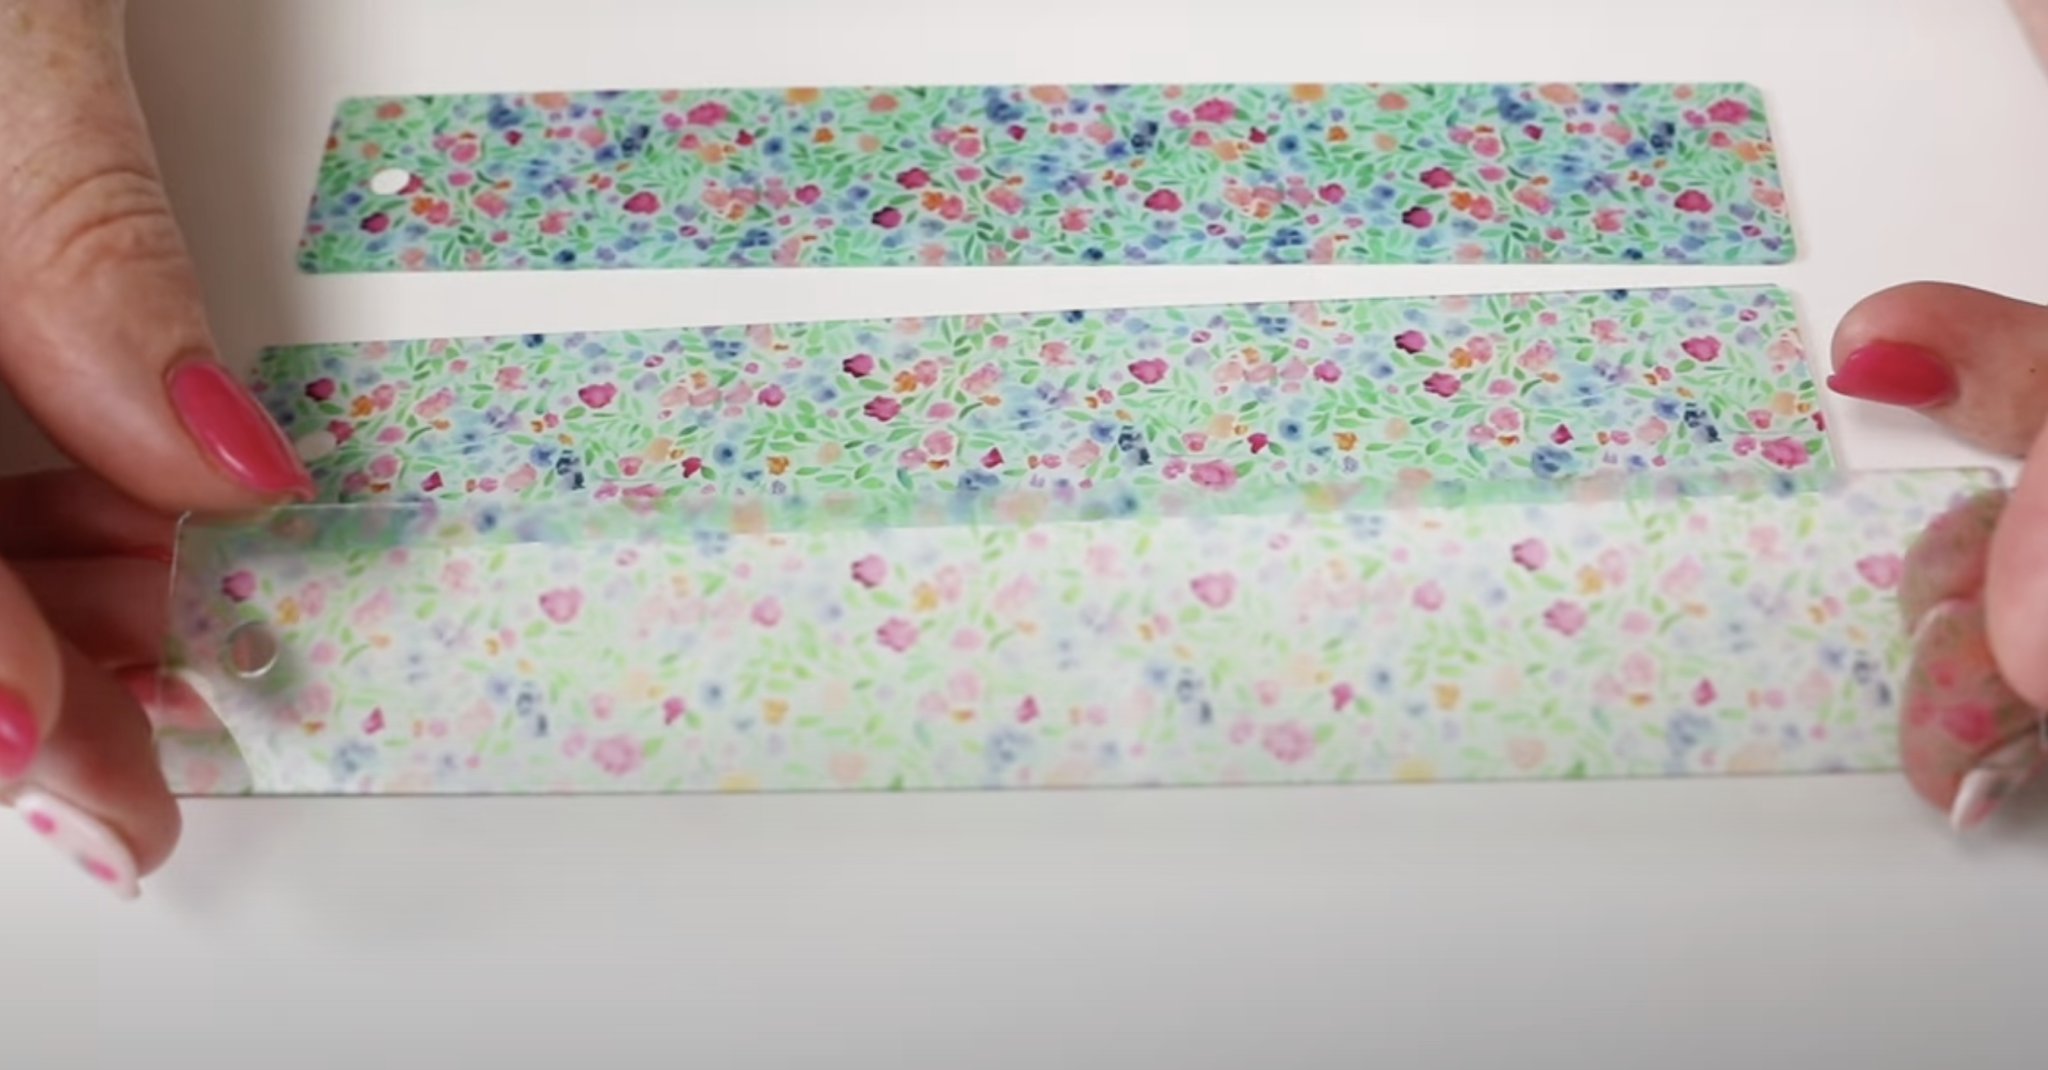
Acrylic Bookmark with CMYK then White Print
Next, I printed an acrylic bookmark with CMYK, then White. This is the opposite of what we did in the previous projects.
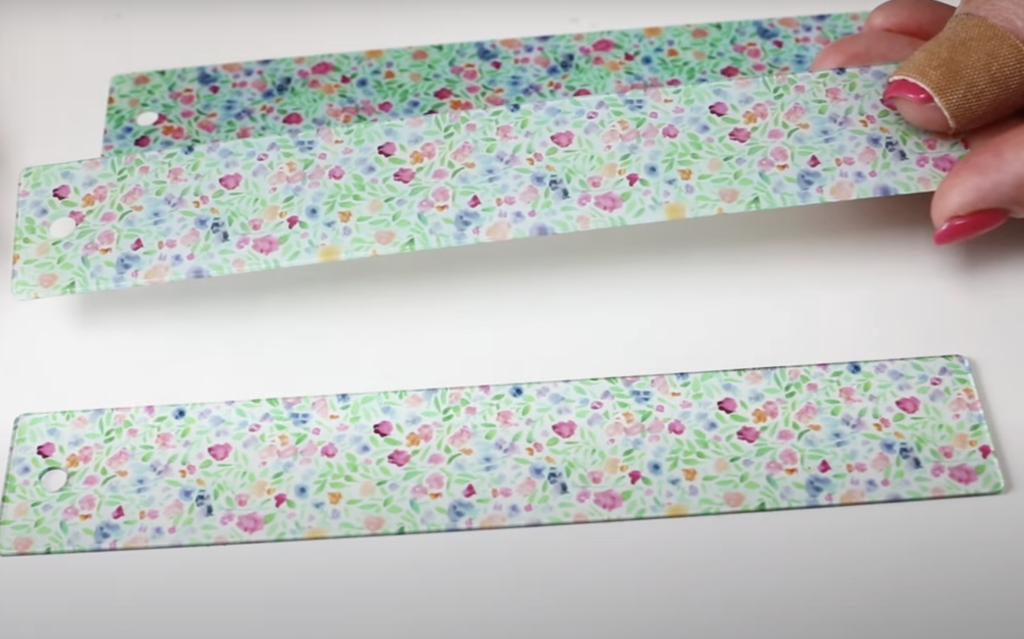
Here we are looking through the acrylic bookmark, and we see the CYMK first, and then the white is laid on top of the CMYK.
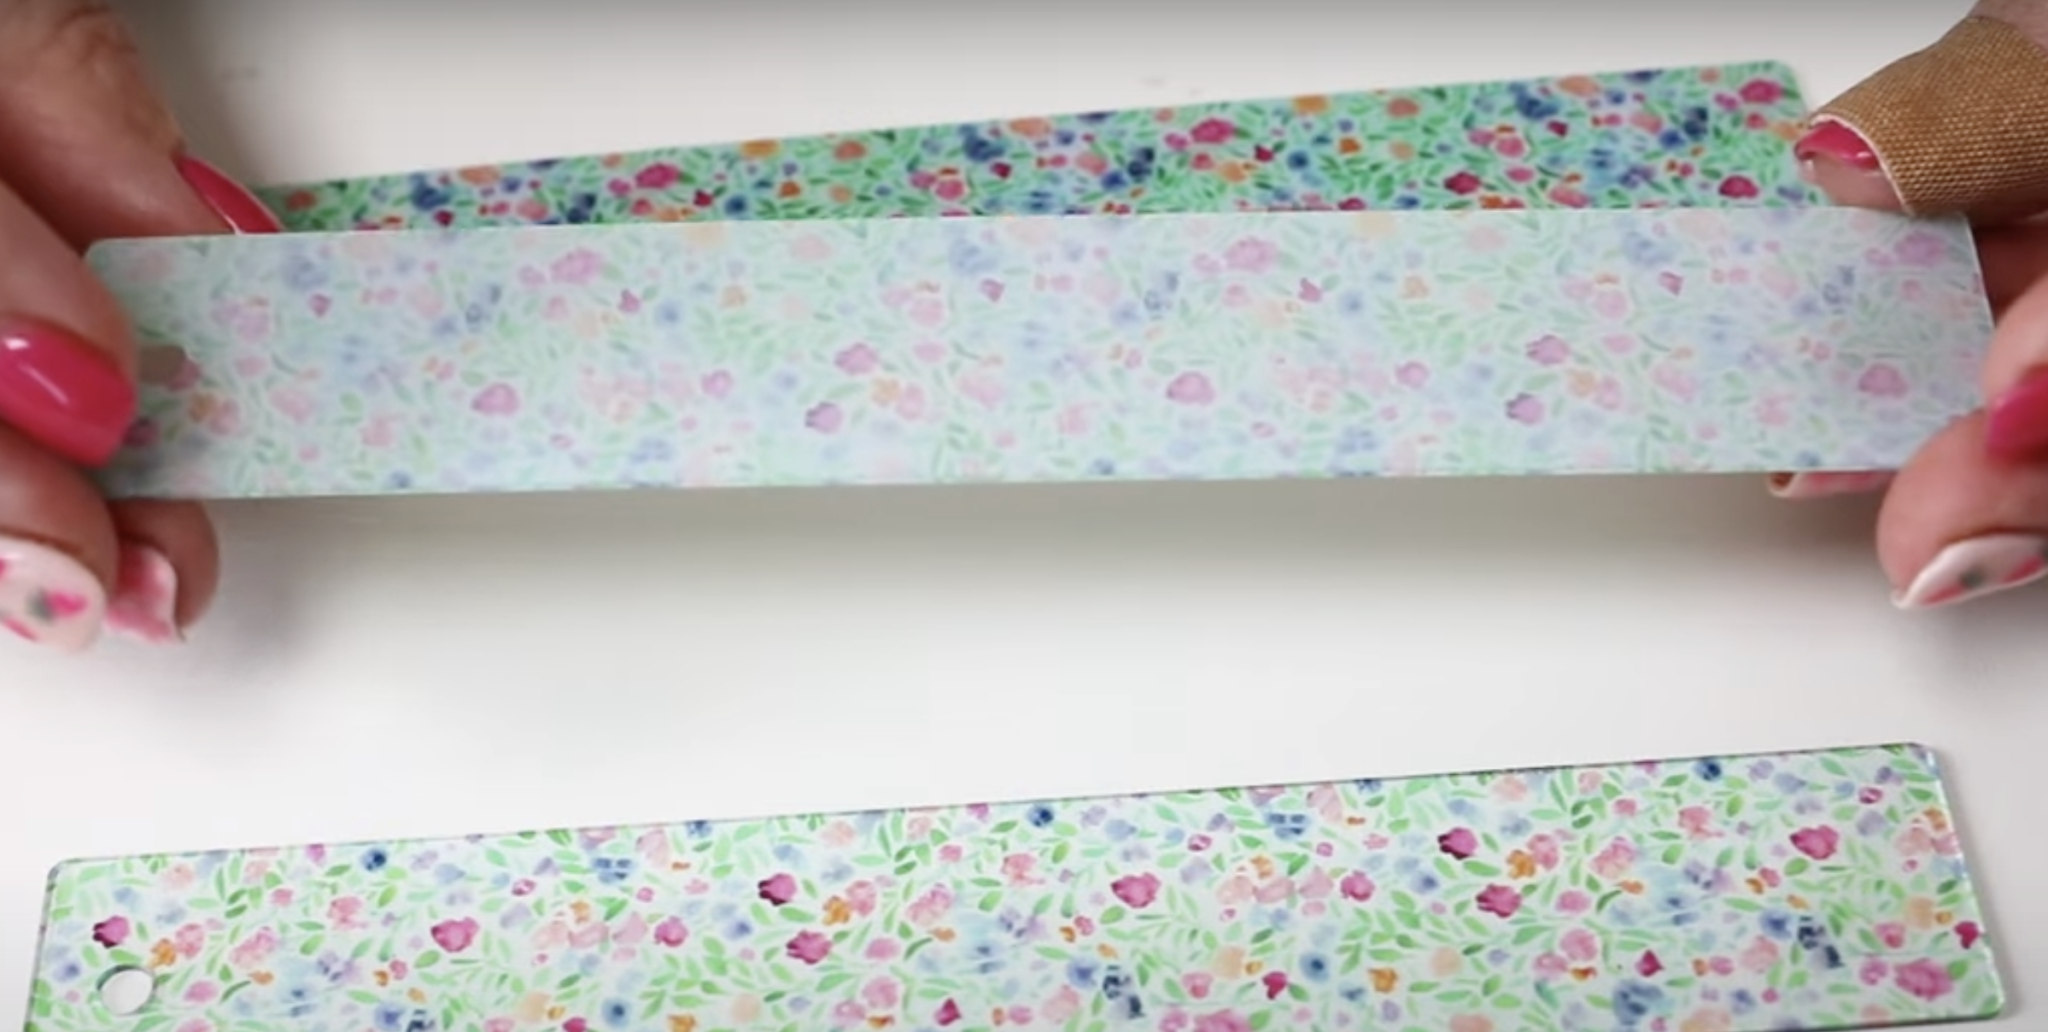
This is the back of the same bookmark. You can see the white ink and some of the CMYK ink.
You would use this printing process for blanks that are clear that you are printing on the back of the blank.
Acrylic Bookmark with CMYK then White then CMYK
This last printing process is my favorite for printing on clear blanks.
By printing CMYK, White, CMYK, the acrylic bookmark looks the same on both the front and the back.

This is the process I am most likely to use with clear blanks. I think it looks the best and looks the most professional.
eufyMake E1 Printing on Pens
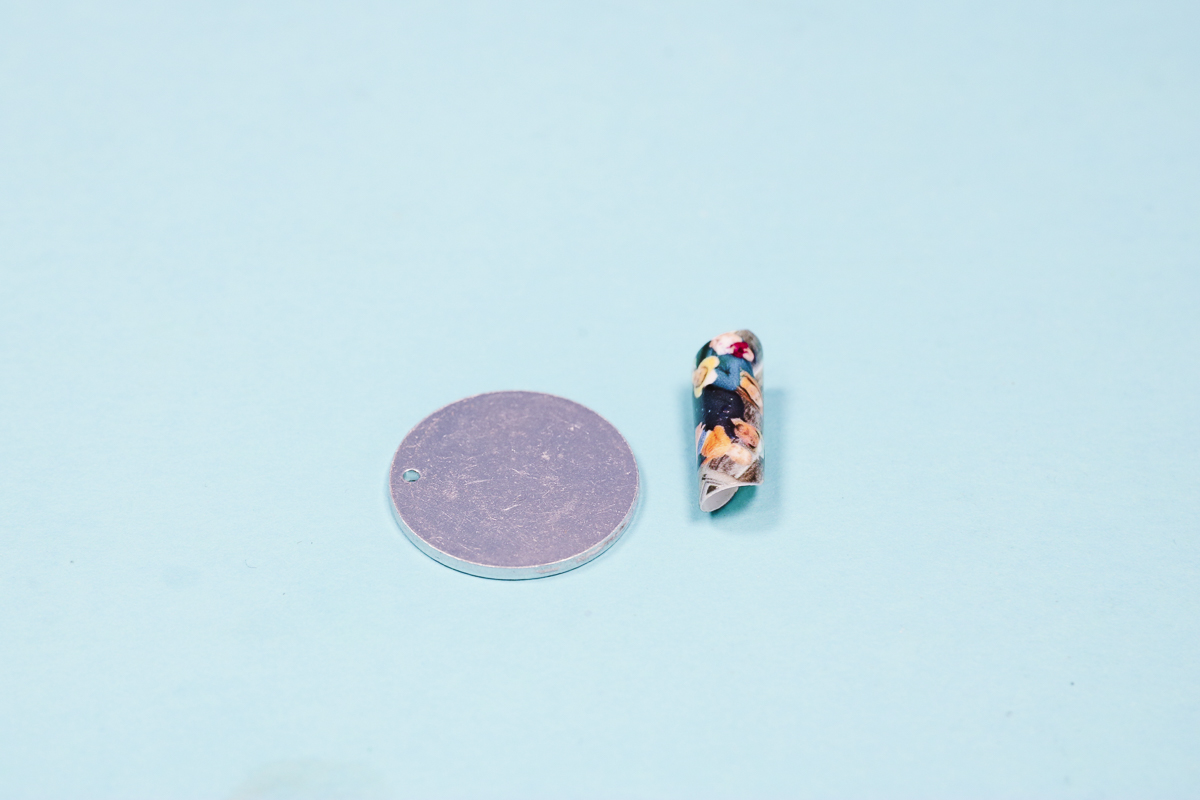
For my last flatbed printing test, I am going to print directly on pens.
I used double-sided tape to hold the pens in place so they wouldn't move during the printing process.
I printed one pen with regular printing, and it looks really good. The print wraps around the curved surface. You may notice the bottom of the Y and the G are a little light, but overall, it looks really good and it's very durable on the surface.
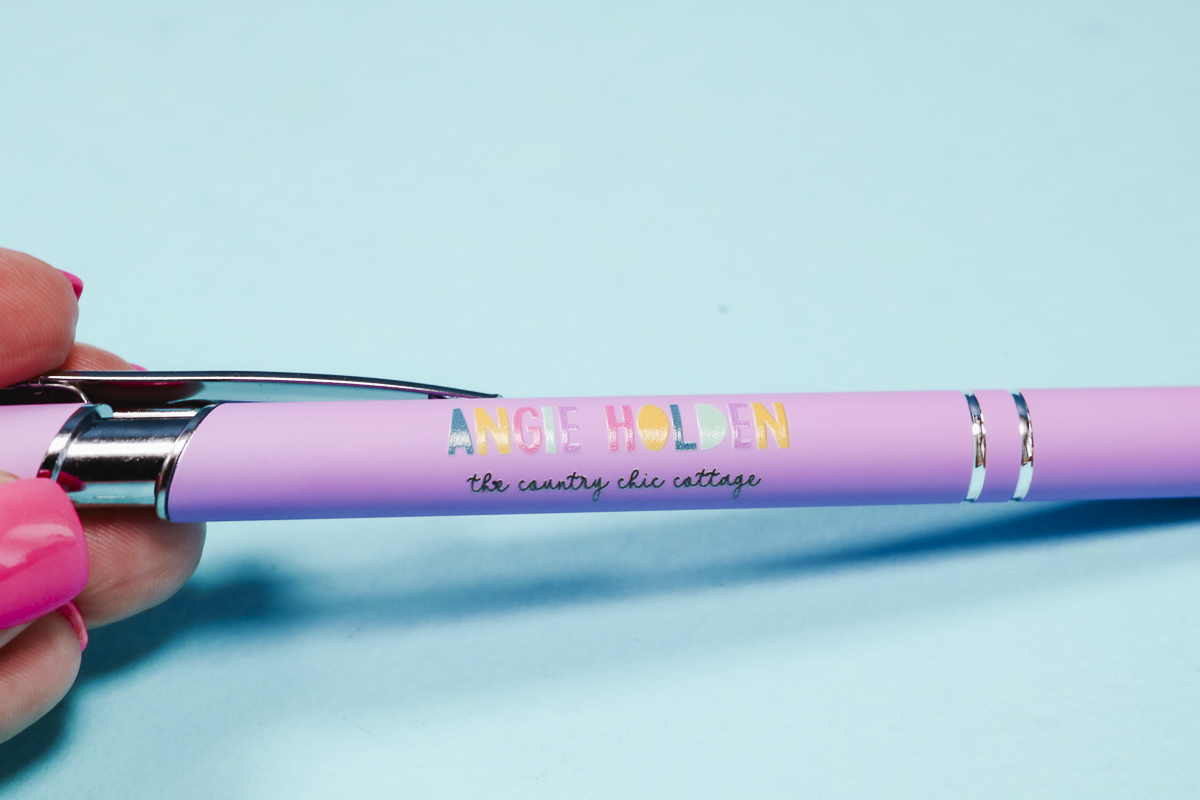
On the next pen, I used the same logo design and tried the raised effect.
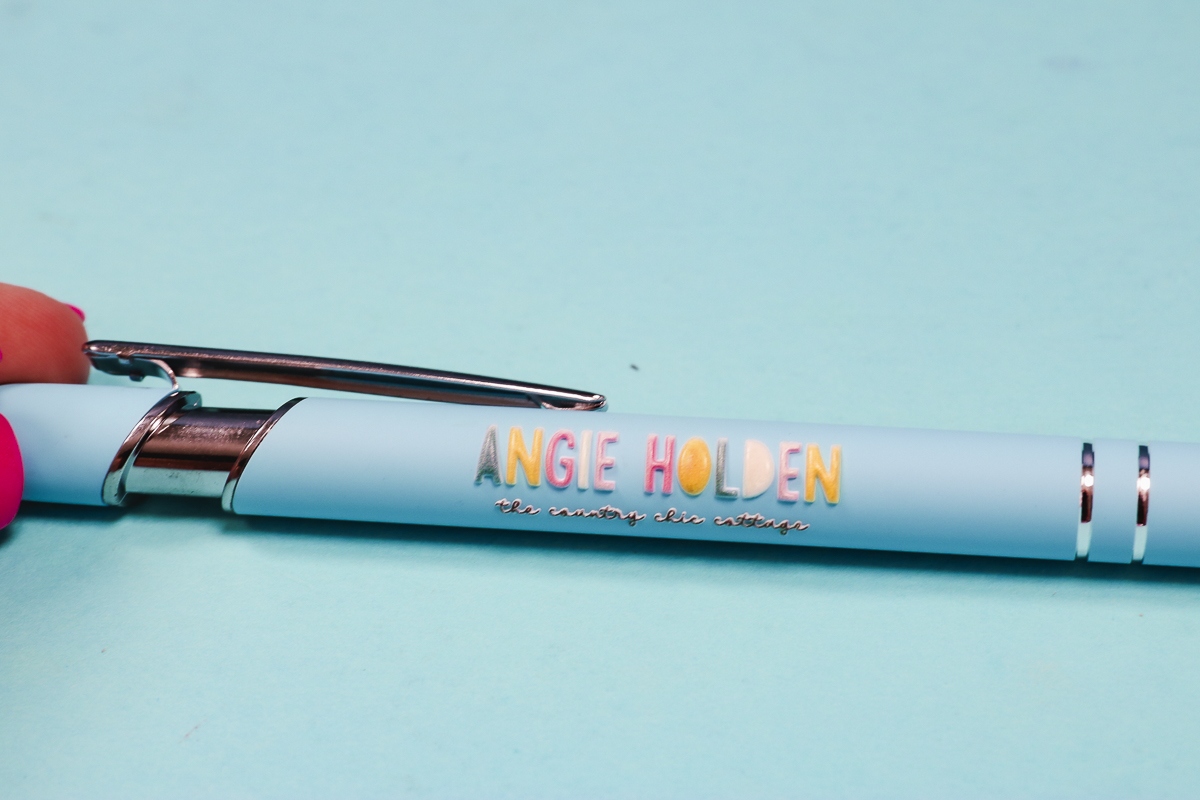
I love how this print turned out. All of the letters, including the small letters in the second line, are raised on the surface, and they are curved around the pen beautifully.
Both of these pens look great. The design wraps around the curved surface, and I didn't have to make any adjustments to get that look.
The prints are durable and don't feel like they're going anywhere on the pen surface.
Who is the eufyMake E1 UV Printer For?
This printer is perfect for DIYers, small business owners, Etsy sellers, and crafters who love to try new things.
If you want pro-grade UV printing in a small package, this may be the right printer for you.
Coming in at under $3,000, the E1 is the most budget-friendly UV printer on the market.
I also think the eufyMake E1 printer is great for people who own a laser and want to print directly on the blanks you create.
You can also print something with your printer and then cut it with your laser. Yes, you can laser cut through the UV ink.
If you love the idea of full-color textured prints, you'll love this printer.
How Much Does it Cost to Run the eufyMake E1?
The E1 is a six-cartridge system. Each cartridge is 100 millimeters, so you're starting with 600 millimeters of ink.
Every time you print, the software will tell you exactly how much ink the print is going to use.
This will allow you to calculate how much ink is going to be used, and then you can decide if you want to do the print or not.
Along with ink, you'll want to factor in the consumables. Consumables would include things like the adhesive mats, cleaning cartridge, air filter, and, if you need to use the AI credits.
Knowing all this information will allow you to calculate how much it's going to cost to print your project.
eufyMake E1 UV Printer Pros and Cons
Let's talk about the pros and cons of the eufyMake E1.
E1 Pros
- My number one pro is the compact size. I love that I could take this on-site if I wanted.
- Next, the printer does its own maintenance. I would not own it if it didn't.
- This printer is very easy to use. I expected the learning curve to be higher, but from the very first print, my projects looked amazing.
- I love the ability to add 3D texture to prints. Whether you do a raised print or the full 3D texture, you can create amazing projects with this printer.
- All of the prints, on approved blanks, were very durable and felt great on the surface. They are water and UV-resistant and can last for years on hard surfaces.
- I also love that you can get the same results time after time. If you want to make and sell your products, consistent results are necessary.
- My last pro would be all the attachments you can add to the printer. With the rotary attachment, you can easily print on mugs and tumblers. The laminator allows you to quickly make UV DTF stickers. With these accessories, you essentially get three printers in one.
E1 Cons
- Because of its smaller size, this printer is not for someone who is doing very large projects or very large orders.
- Next, you may have some trial and error on some surfaces. With metals, glass, and ceramics, you may have to test multiple things to be able to print directly on the surface.
- I didn't have a problem with the print time for most of these projects, as I am used to using fairly slow lasers. Some projects are going to take a very long time to print, especially if you use the purchased 3D effects.
- While the printer tells you how much ink is going to be used for each print, it doesn't tell you how long the print will take until you start the printing process. NOTE: This was fixed in later versions of the software.
- Printing may take a long time. For example, the pens each took a couple of minutes, but the 4 designs on the white board took close to two hours. Different settings will impact the print time. The size of the print and the print settings you choose will be the most important factors. A basic CMYK print is going to print much faster than a print with 3D effects. The higher you make the effect, the more time it will take to print.
How Does the eufyMake E1 Compare to Other UV Printers?
The eufyMake E1 is a Pro-Grade UV printer at a very affordable price. The basic bundle will be $2,299, which includes a printer and ink bundle.
This is the most budget-friendly UV printer on the market. It is more affordable, more compact, and is made for people like me.
Frequently Asked Questions
How long do prints last?
UV ink is highly resistant to wear, water, and sunlight. These prints can last for years!
Is the E1 safe to use at home?
The E1 emits minimal fumes, making it safe for home use. Just make sure you use it in a well-ventilated room.
Can I use third-party inks?
It is not recommended to use third-party inks. The E1 is tuned specifically for the ink cartridges made for it. Any attempt to refill or disassemble the cartridges will void the warranty. Using third-party inks can also cause issues such as printhead clogging, printer damage, or color distortion.
How noisy is the eufyMake E1 UV printer?
The E1 is about as loud as a desktop 3D printer. I find it's quiet enough to use in a home or office.
What is the learning curve?
The software is easy to use, and I had success with my first project. You do not need to have any 3D design skills.
What is the warranty?
For this printer, you get a standard 1-year warranty and a 3-month warranty on the print head. They also have replacement parts available for purchase.
Can you sell products made with the eufyMake E1?
Yes, you can sell products made with the E1. Some examples eufyMake gives are:
2×2 fridge magnets. You can make approximately 240 per day with a total cost of $3 per blank and $0.27 in ink. With an example retail sale price of $8, your profit before consumables would be over $4 per blank, and if you could sell 240 in a day, that would be a daily profit of approximately $960.
Another example is a custom tumbler. With a retail price of $24 and a cost per blank of $10, and an ink cost of $0.13 your profit would be over $13 per unit. You can make approximately 40 tumblers per day, which would give you a daily profit of approximately $520.
I've had so much fun testing the eufyMake E1 UV printer. I love all the projects I've made with it and can't wait to continue to test new print options and new blanks.
I hope I've answered any questions you have about the printer. If you have any additional questions, leave them in the comments, and I'll be happy to answer them for you.