
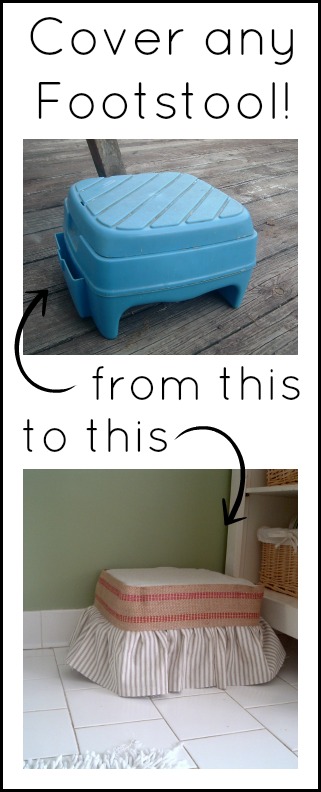
Learn how to make a slipcover for a footstool in this tutorial! Take an old plastic stepping stool from drab to fab in a few easy steps.
Say goodbye to the kids' old footstools for teeth brushing and hello to a budget-friendly, yet elevated epicycle. We're all about easy steps and big transformations, so let's dive into this budget-friendly adventure together.
I am absolutely in love with this little project!! All plastic foot stools need to look out…I am on the rampage now!
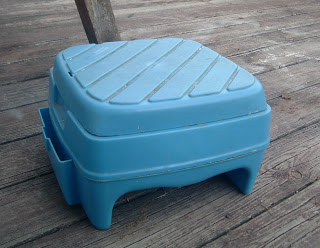
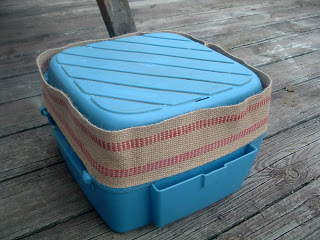
I started with this blue footstool we have had for many, many years. It has seen a ton of tooth paste and little feet.
Let's cover it up and make it pretty!
How to Make a Footstool Slipcover
Supplies needed for a plastic footstool slipcover
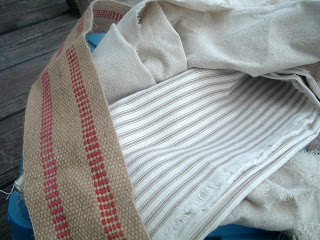
- Canvas drop cloth
- Chair webbing
- Tan ticking
- Sewing machine
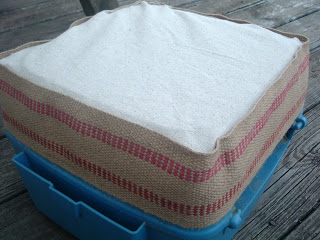
I grabbed some canvas drop cloth, chair webbing, and my trusty tan ticking. I heart that burlap chair webbing…like I dream about it at night! I get it at Wal-mart in the trim by the yard section. My Wal-Mart only has the red version but I have seen other colors floating around.
Let's get to sewing! I cut my webbing to length using my stool as a guide. Then sewed the ends together…
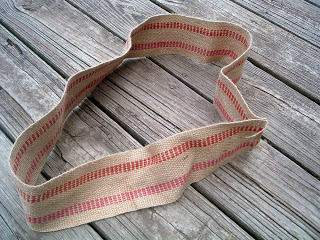
See…great fit…
I then used my stool to tear a piece of my canvas drop cloth to size.

One step I did not do that I think would make this easier for y'all — pin each corner into place on the webbing. That way if you get to the corners and have extra fabric you can pleat each one. I just sewed mine all at once and the last corner was slightly off. I can live with it…but a warning for those of you that can't.
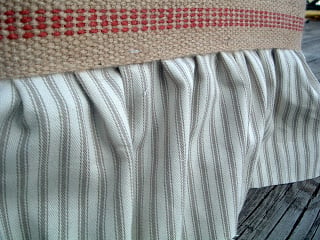
Next take your ticking and again use your stool to measure. I made mine long enough to touch the floor. Don't forget to give yourself enough for a seam allowance.
Now I sew my ruffles free-hand. I just fold over some fabric every now and again. You can pin if you want. I am anti-pinning. Don't judge. I don't sew correctly I just get it done! 🙂
Now instead of measuring the amount I needed to go all the way around. Just leave some extra when you start. And after you pleat the entire way around…stop sewing before you get to the end. Cut off the end even with your start piece and sew them together at that point. Then finish up sewing it to the webbing. See no measuring and no pinning — I am a rebel.
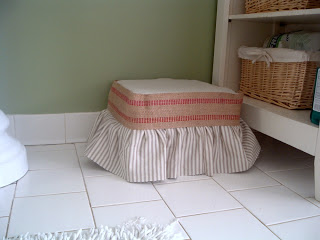
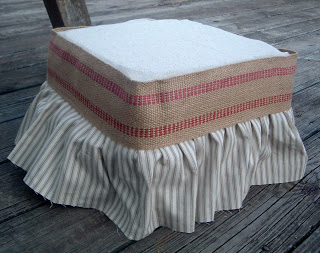
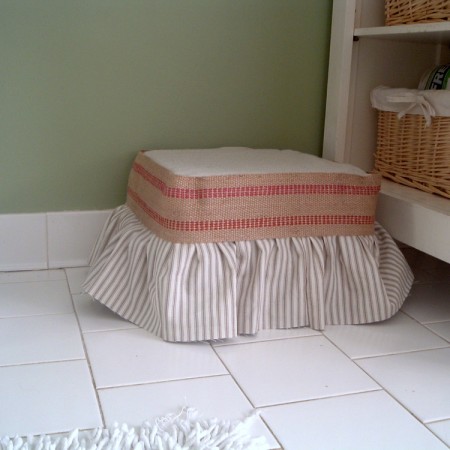
That little pleated skirt allows for the pockets, etc on the sides to be hidden also…pure love…
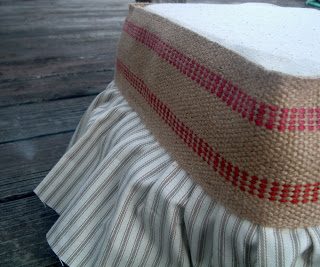
Looks soooo much better! And you will notice I did not hem the bottom of my skirt. If you are not into shabby, go ahead and hem it. Me? I love shabby so that frayed edge will blend in with the rest of my home! And for me, frayed edges and burlap ribbon go together like peas and carrots!
Here is the great before and after comparison for y'all….
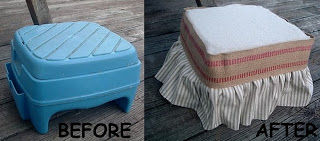
Amazing right?? A little fabric, a little sewing, a new stool…
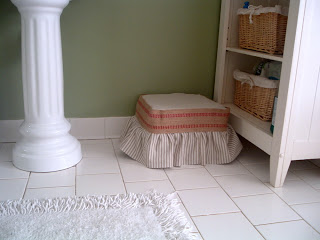
The perfect addition to my bathroom!
Supplies
- Canvas drop cloth
- Chair webbing
- Tan ticking
- Sewing machine
Instructions
- Cut webbing to length using my stool as a guide. Then sew the ends together…
- Used my stool to tear a piece of my canvas drop cloth to size.
- Next take your ticking and again use your stool to measure. I made mine long enough to touch the floor. Don’t forget to give yourself enough for a seam allowance.
- Pin the ruffles as needed.
- After you pleat the entire way around, stop sewing before you get to the end.
- Cut off the end even with your start piece and sew them together at that point.
- Then finish up sewing it to the webbing.


This is the most precious re make ever. I love it with the ticking.