


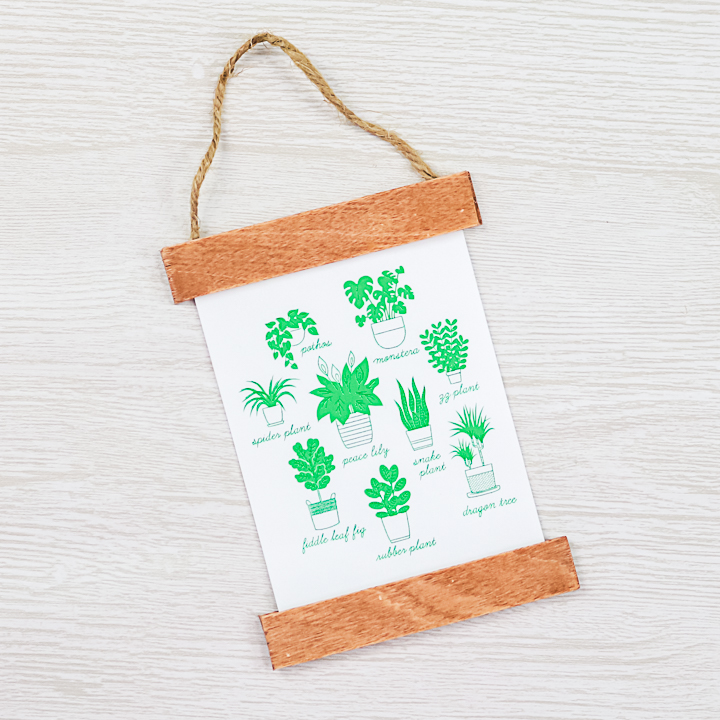
Are you ready to add some sparkle to your crafting? With a Cricut Foil Transfer Tool, you can create stunning projects effortlessly! Today, I'm sharing a simple tutorial for making charming art featuring a print then cut image with beautiful foil accents. This budget-friendly piece makes for a perfect gift, whether it’s for a birthday or just because. Plus, I’ll be sharing eight more fantastic gift ideas from fellow bloggers in this special series. Let’s get started!
Foil With Print Then Cut Video Tutorial
You can watch the entire process of me foiling this plant art in the video below. If you are confused about how to add those foiling lines to your project, be sure to watch our video here on the Cricut Foil Transfer System.
Can't watch the video or missed some of the steps? I have instructions for you below as well!
How To Foil With Print Then Cut
If you love metallic accents, learning how to use foiling with your print then cut projects will be a game changer! So, grab your Maker or Explore machine and let's make this cute project!
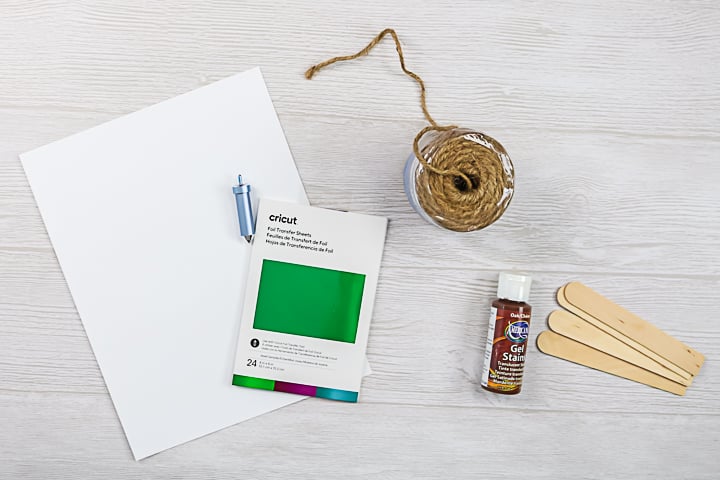
Supplies Needed To Foil With Print Then Cut
- White cardstock
- Cricut Foil Transfer Tool
- Green foil
- Cricut Design Space project
- Printer and ink (this is the printer that I use)
- Craft sticks
- Stain
- Twine
- Hot glue and a glue gun
Step 1: Print Project & Add To Cricut Mat
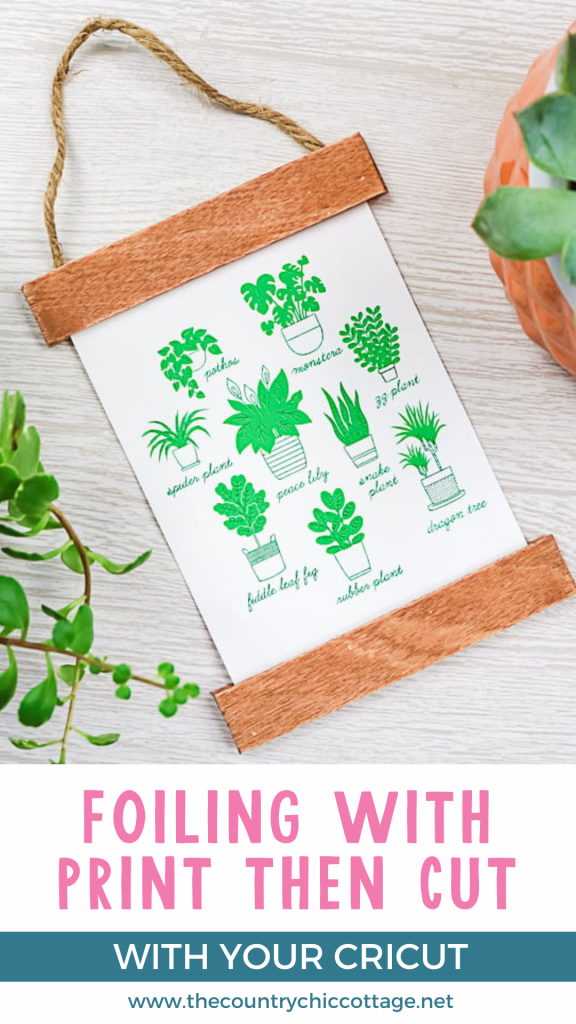
Click here to access my Cricut Design Space profile and then scroll to the “Foil Print Then Cut Plant Art” project. Print your project when prompted and add it to the mat as shown in Design Space.
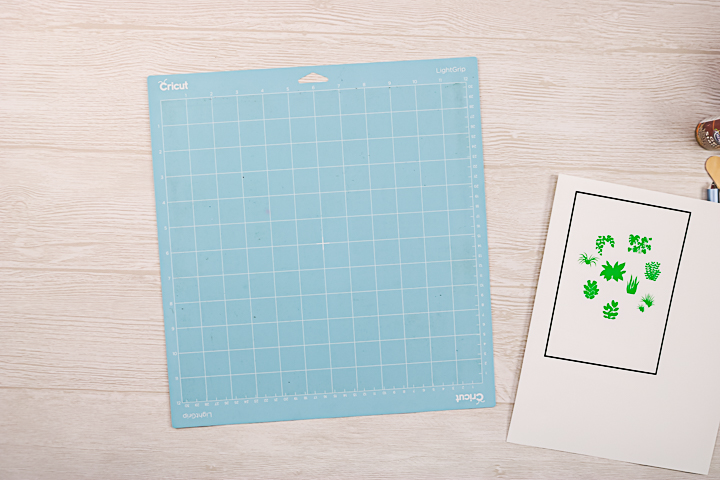
Step 2: Add Foil To Mat
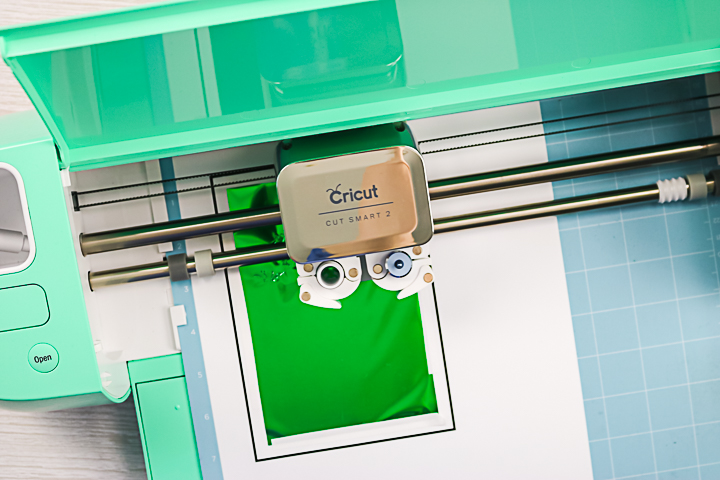
The software will ask you to add the foil layer at the appropriate time. When adding the foil, be sure not to cover any of the black box lines with tape. I like to cut my tape pieces in half lengthwise. Then cut your foil slightly smaller than your box. Add the foil to the print with the tape, being cautious not to cover any of the box markings as shown in the image below.
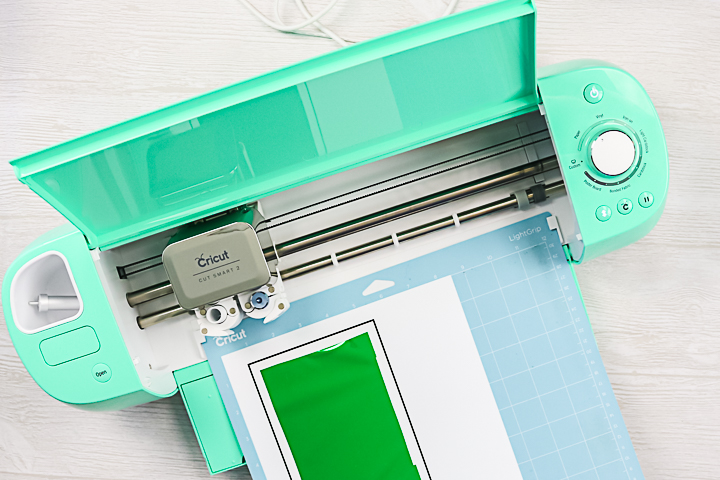
Step 3: Add Cricut Foil Transfer Tool To Machine & Foil Design
The machine will then add the foil lines using the foil transfer tool. Be sure the tool is in the machine and the correct tip is installed before pressing go.
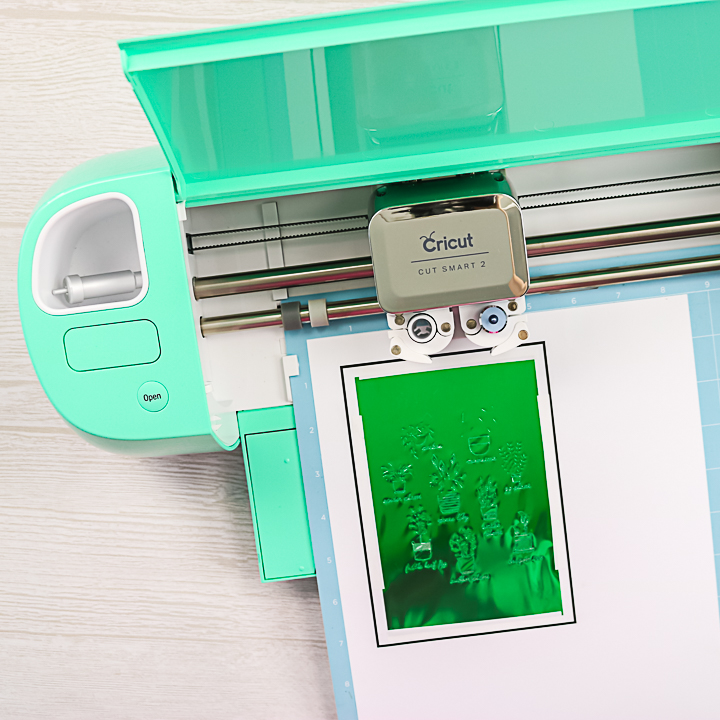
Step 4: Remove Foil & Cut Design
Once the foiling is complete, the machine will eject the mat far enough for you to remove the foil. Gently remove the foil and tape, then add the blade to the clamp to cut your art.
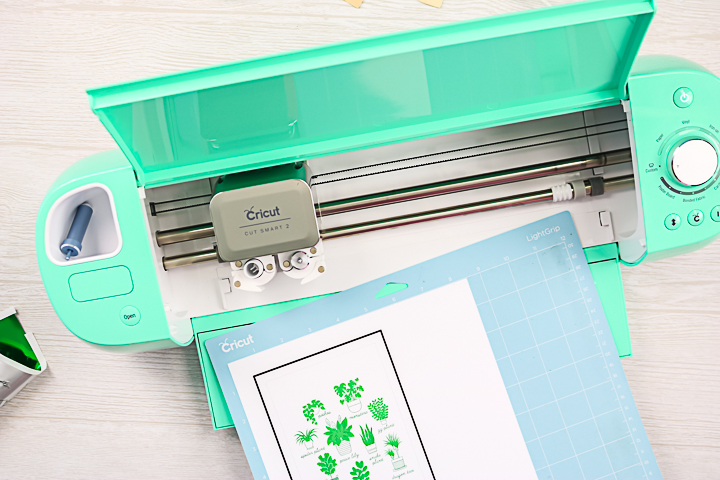
Step 5: Remove Mat From Machine
After the cut is complete, you can remove your mat from the machine to complete the project.
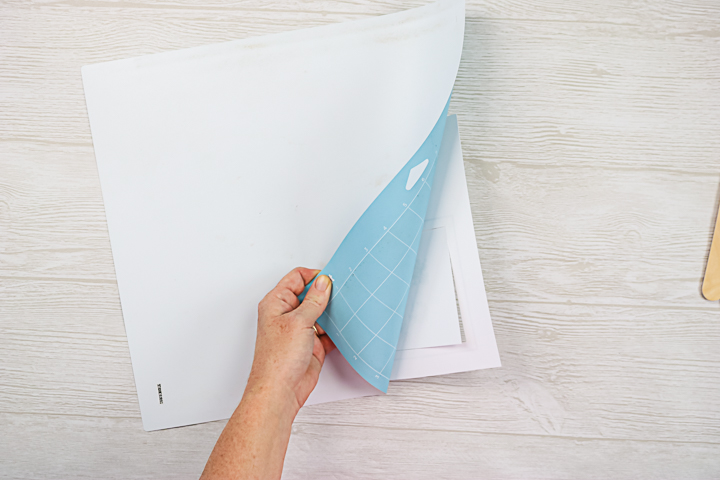
Step 6: Peel Mat From Design
Carefully peel the mat back away from your project to avoid curling.
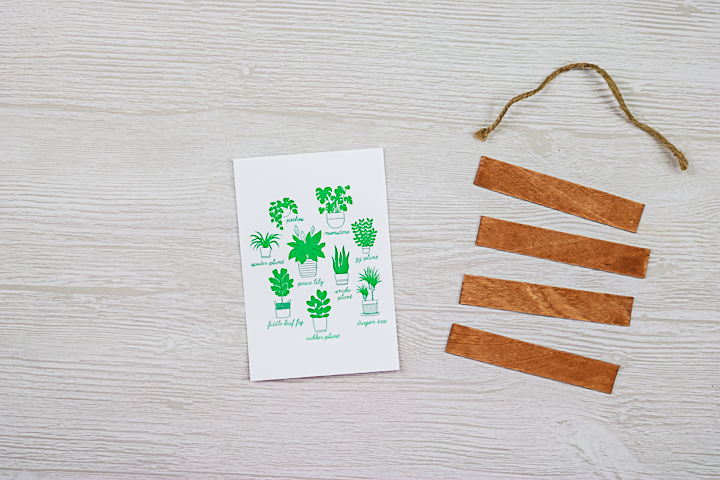
Step 7: Cut Craft Sticks
Cut the ends of the craft sticks at a 90-degree angle. Then it should be slightly wider than your print.

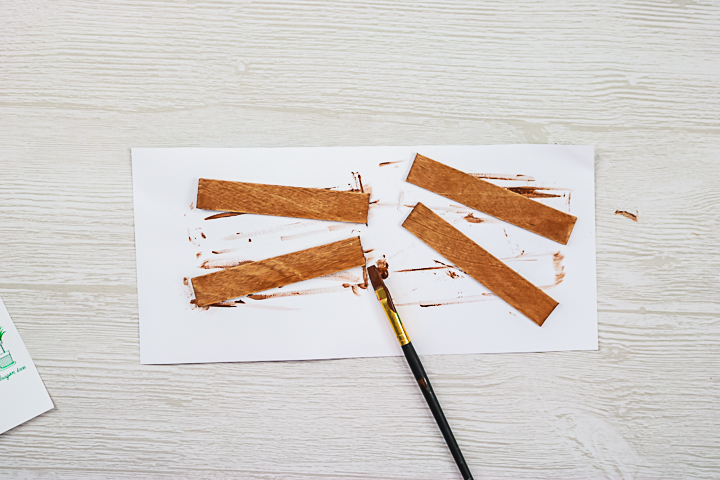
Step 8: Stain Craft Sticks
Stain each stick on the front and sides. Wipe the stain on, allow to sit for a few minutes, then wipe away the excess. Allow to dry completely.
Step 9: Cut Twine
Cut a piece of twine to hang at the top of your wall hanging.
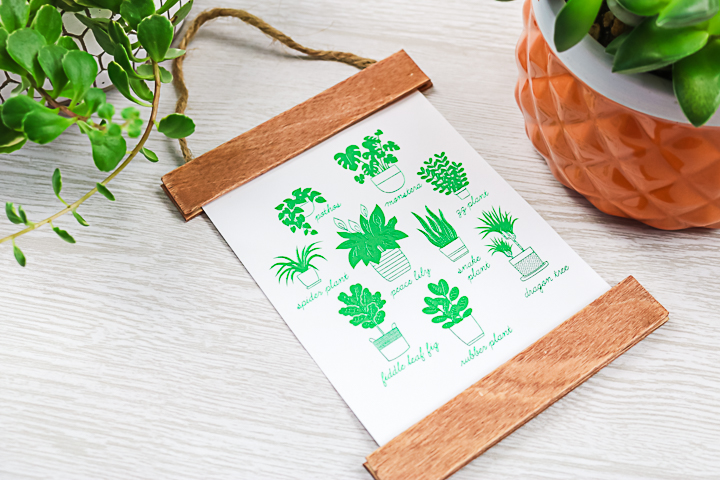
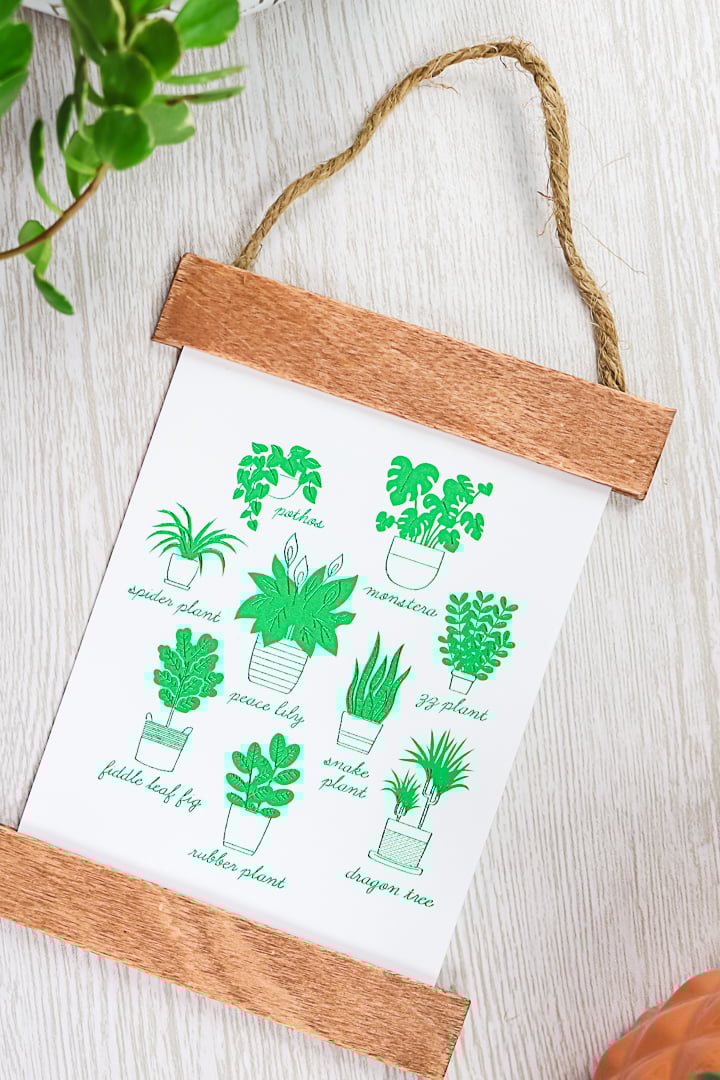
Step 10: Add Craft Sticks & Twine To Foil Design
Sandwich the paper between the craft sticks on both the top and the bottom using hot glue. At the top, add the twine in between the sticks as well. Your foiled plant art is ready to hang or to give as a gift!
This easy DIY art project is perfect for getting started with foiling and printing with your Cricut. Now you can take those print then cut projects to the next level with this easy technique and the new Cricut Foil Tool!
Don't love the green foil I used on this one? Try a different color, or maybe gold, or silver. There are a ton of options to add sparkle to any print then cut project you can dream up!
I want to note that the maximum print and cut area is 9.94″ x 15.94″, so make sure your project fits within that window to print with your Cricut machine. Otherwise, have fun with this technique! Now that you know how to foil with print, then cut, the sky is the limit!
FAQs About Foil With Print Then Cut
Here are answers to some of the most frequently asked questions I receive about foiling with print then cut. If your question isn’t listed, feel free to drop it in the comments, and I’ll be happy to help!
Do You Need To Print The Design Using A Laser Printer For It To Work?
No! Any printer will work!
How Would You Create This Foil With Print Then Cut In Design Space?
First, you would make your design. When you do this, you will have a print layer and a foil line layer on the same project. This means two different layers in Design Space. Click make it, then you will be prompted to print the design first, then foil.
To see an example of how this is done, you can check out this video here!
Do You Fatten The Foil?
The foil layer should NOT be flattened. Flatten only the areas you want printed. Then attach the foil lines to the printed lines.
Was The Text The Part That Was Foiled?
Yes! Text, pots, and some of the details in the leaves.
Was The Foil Applied To Fill The Plant Leaves? Or Was It Only Applied To The Border Of The Leaves?
It was just lines as an accent on the leaves.
Can You Choose Elements To Foil Rather Than The Whole Thing?
Definitely! Just ungroup any lines.
9 Cricut Gift Ideas
Looking for more ideas for things you can make for gifting with your Cricut machine? I have 9 ideas below that you are going to love!

- Buffalo Plaid Earrings – Hey, Let’s Make Stuff
- Foiled Plant Art – The Country Chic Cottage (YOU ARE HERE)
- How to Make a Customized Candle Gift – Lydi Out Loud
- Plant Lover Gift Idea – Lemon Thistle
- DIY Santa Snack Plate – Hello Creative Family
- Holiday Gift Tag Labels – Liz on Call
- Merry & Bright Infusible Ink Mug – Happiness is Homemade
- Baby It’s Cold Outside Scarf Girl – Paging Supermom
- Personalized Coasters with Infusible Ink – That’s What Che Said
So, try your hand at using foil with print then cut, and make a few of these other gift ideas as well. You will love the results, and everyone will love getting handmade gifts for the holidays.
5 More Foil Projects & Resources
Did you love learning this new technique and want more foil projects and resources? Then check out the ideas below!
- Foil Brand Comparison with the Cricut Foil Tool
- How To Make Cricut Foil Insert Cards
- Adding Cricut Foil on Photo Paper
- How to Use Heat Transfer Foil With Sublimation
- How To Cut Out Fall Leaves: Fall Place Setting with Foil Accents


Angie! Please direct us the where this file is in DS. Your link does not take us there.
I am trying to add all of my design space projects here: https://www.thecountrychiccottage.net/ds-profile-aff