
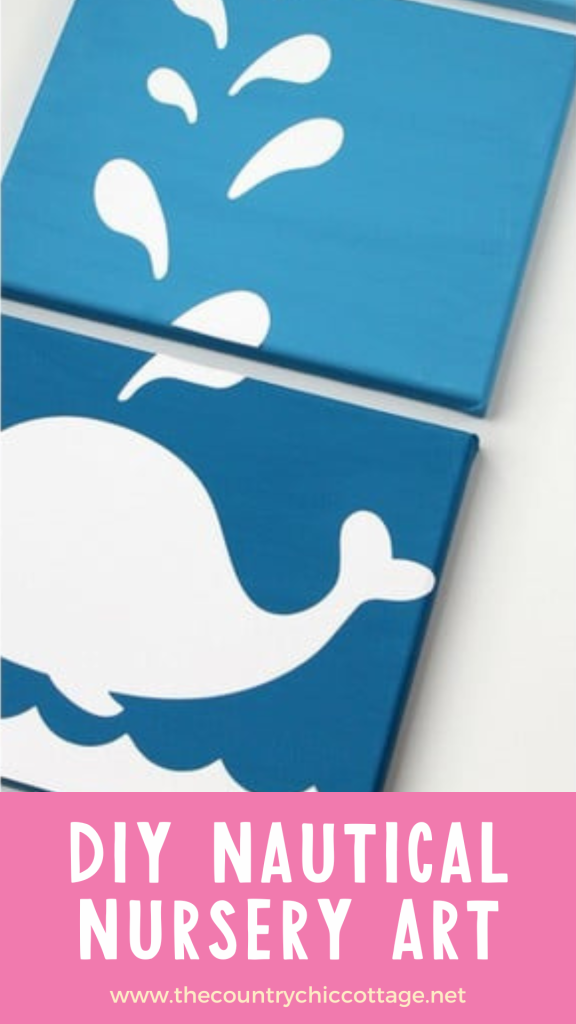
I showed y'all my whale dresser and more of the nursery for my grandson here. One of the highlights is the delightful DIY nursery art that brings fun and personality to the room. If you're inspired to create something special for your space or as a thoughtful gift, follow along with my craft tutorial below. I’ll guide you through the steps to create these adorable canvases, which will add a fun touch to any home!
I love how this project turned out. You can make this with a cutting machine in an afternoon. The part that takes the longest is waiting for the paint to dry!
Supplies needed
- Three 8 x 10 Canvases
- Chalky Finish paint in Legacy
- Chalky Finish paint in Everlasting
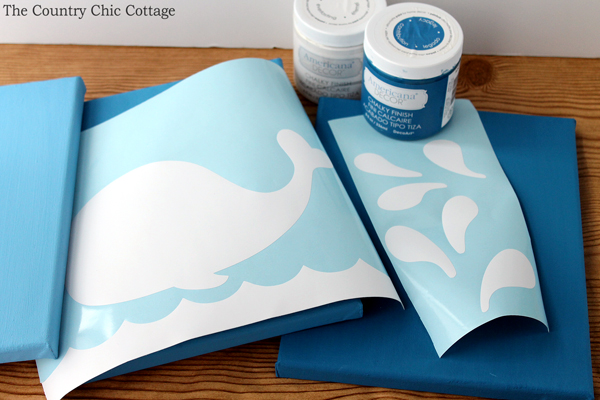
- White adhesive vinyl
- Transfer tape
- Scissors
- Cricut machine
Step 1 – Prep canvases
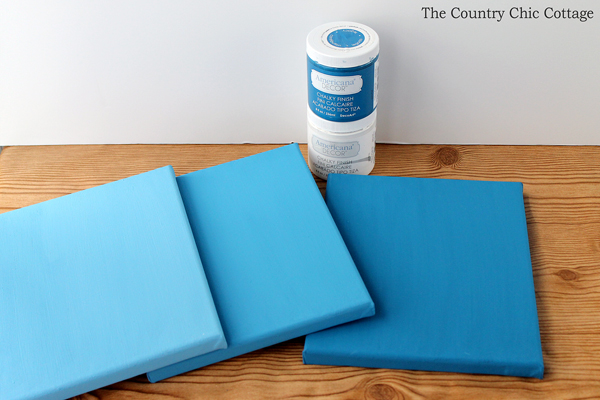
To make this ombre DIY nursery art, start by painting your canvases with the Chalky Finish paint in Legacy. You can choose another dark blue if you prefer; simply follow the same directions.
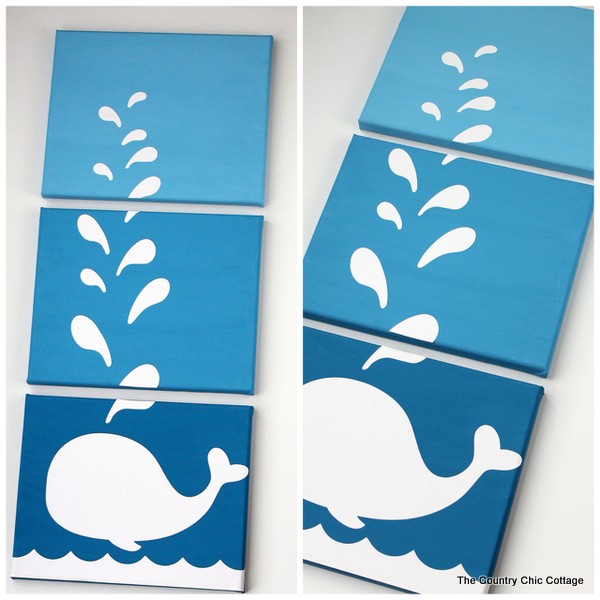
The first canvas is painted with the Legacy color straight from the container. The second is mixed with a little bit of the Everlasting color to create a medium shade. The third is combined with even more of the Everlasting color to create a lighter shade. My canvases required two coats of paint each, with drying time between coats.
Step 2 – Create your design
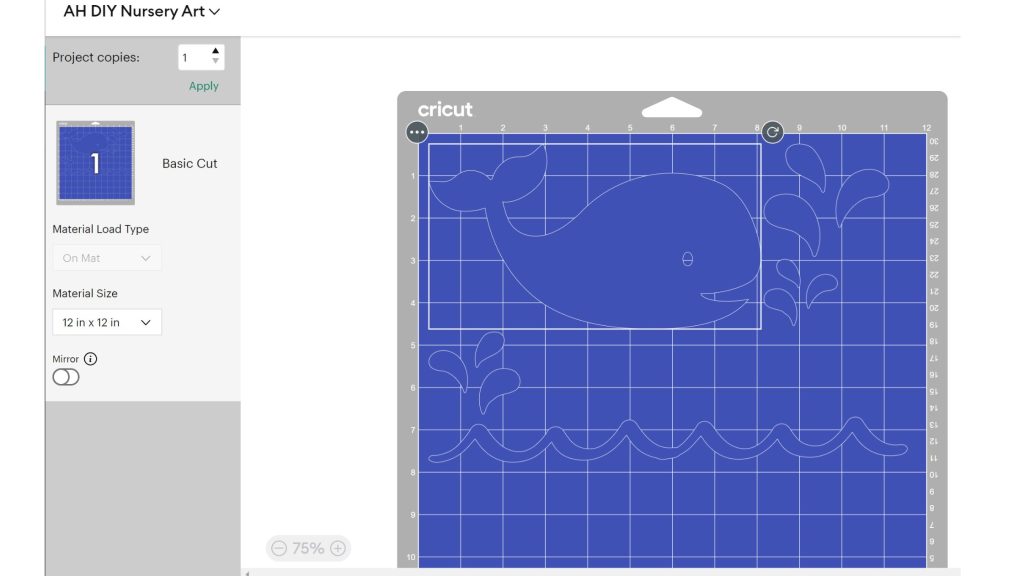
Next, open Cricut Design Space and go to a blank canvas. To add a similar image, you can search for “whale” and choose the one you like to add to your canvas. In the examples below, I am using design #M40FEA1 for the whale with the spouting water.
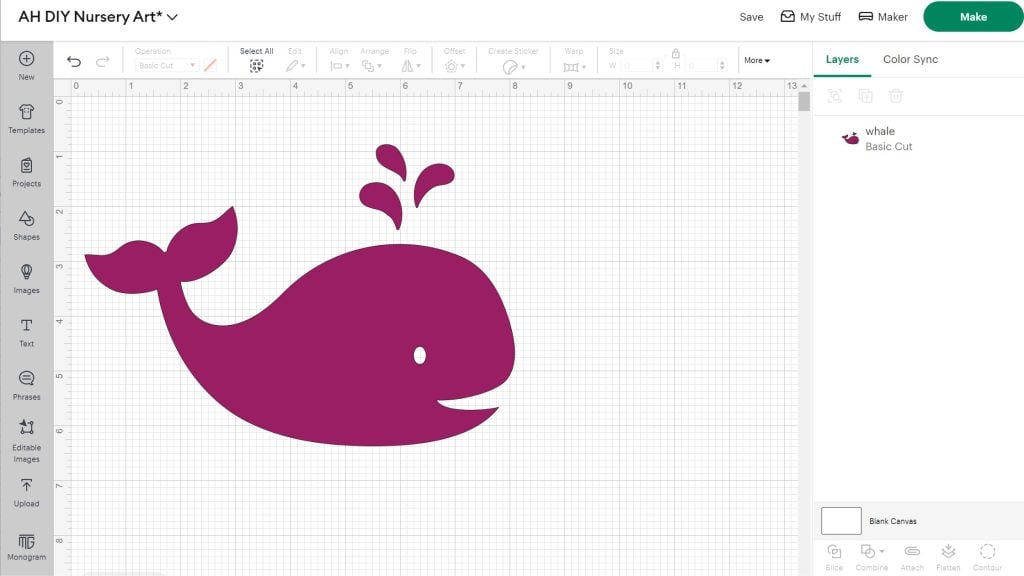
Once you have your whale on the canvas, use a square shape from the Shapes panel to slice the water droplets, allowing you to move and duplicate them. After slicing, you can delete the parts you don't need. You can see the cuts in the layers panel.
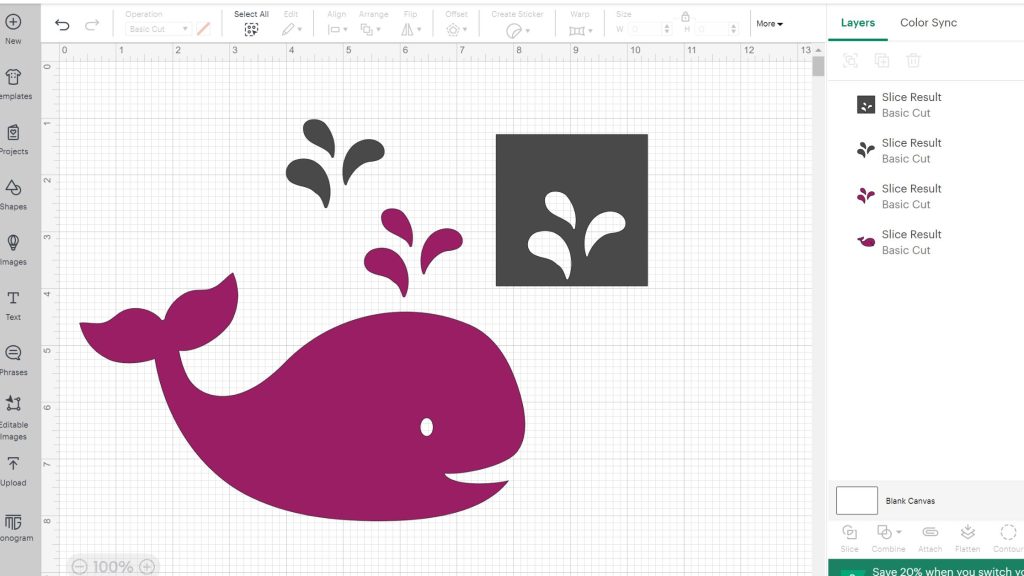
Then, move the water drops around, resize them, and adjust them. You can also flip them horizontally to give them a custom look.
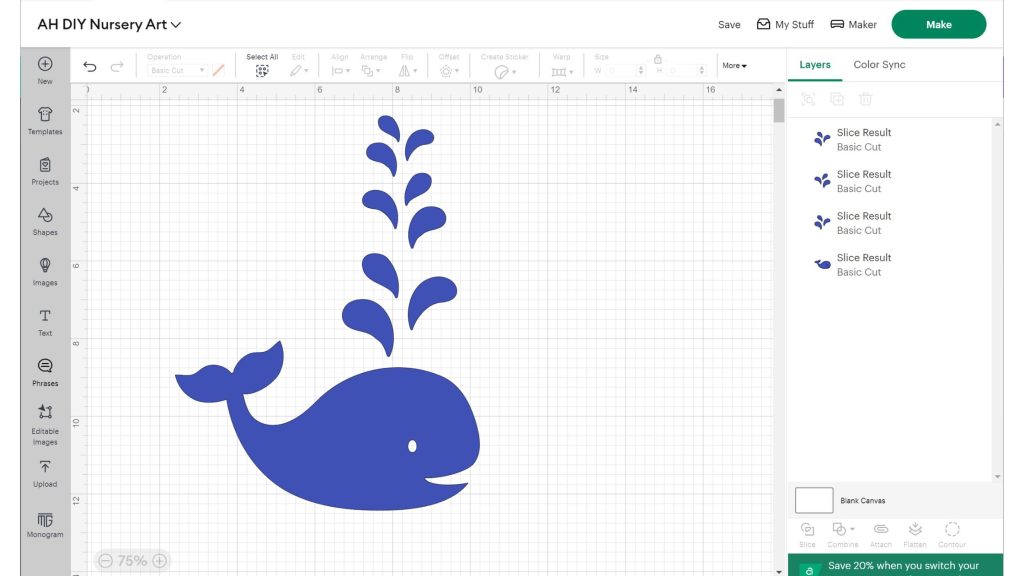
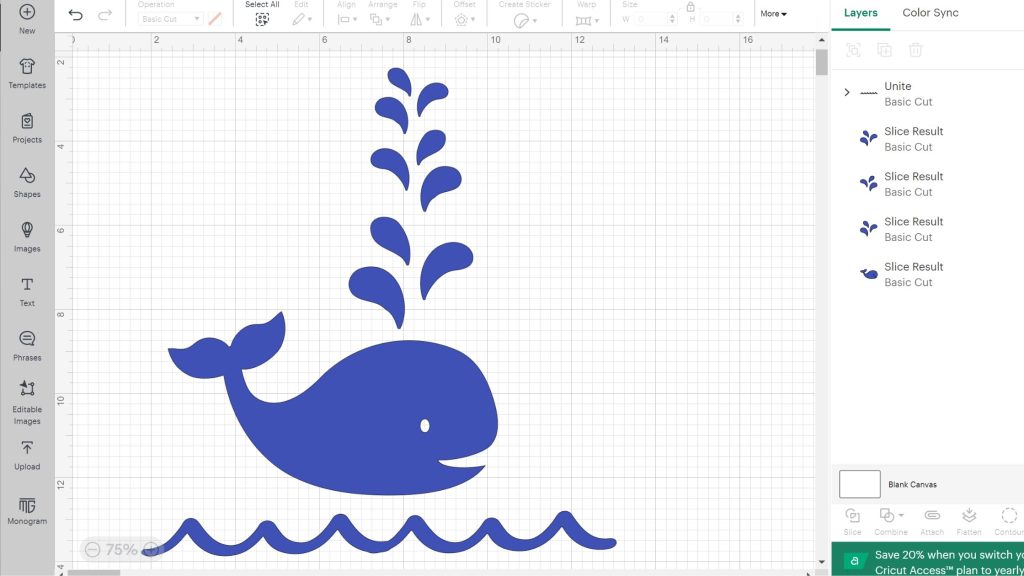
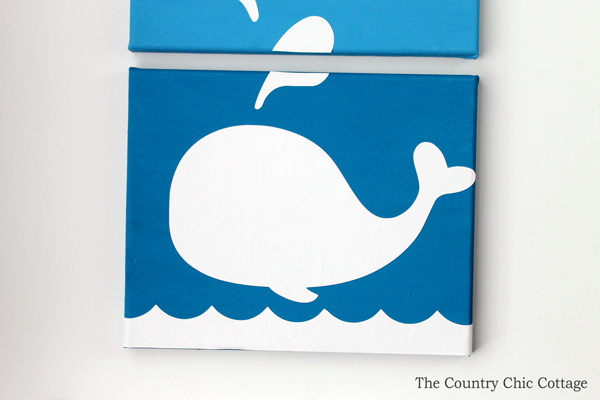
To add the waves under the whale, I used #MB534002. I ended up duplicating the wave image to make it fit under the whale.
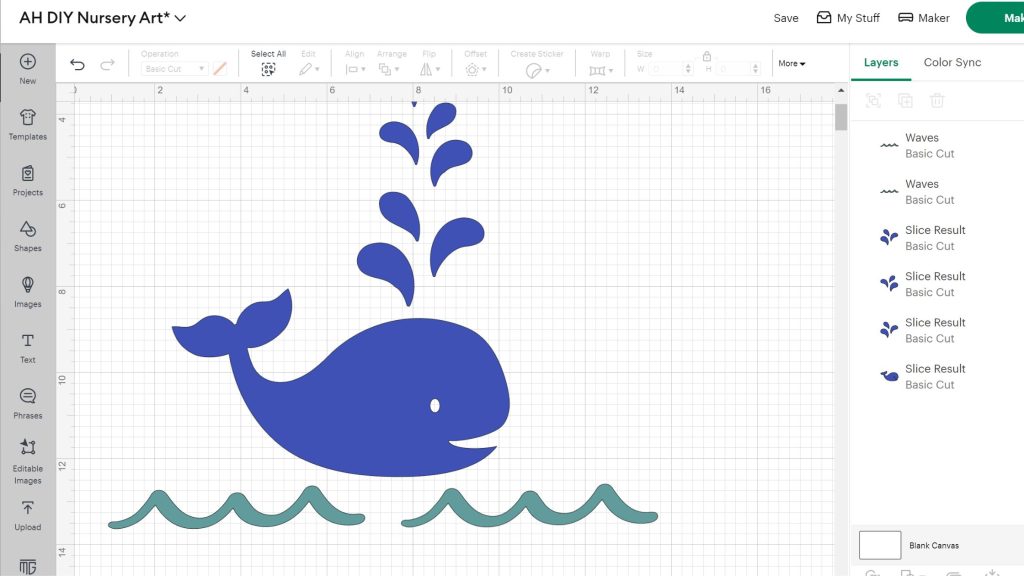
To complete the look, adjust the waves so they overlap slightly and then click Unite. Pro Tip: You can also cut waves by hand with your white vinyl.
Now you are ready to cut your vinyl. Select your entire image to resize it for your canvases. Then, click ‘Make' to send your DIY nursery art to cut. If you are using 8×10 canvases, you should be able to fit the whole design on one cutting mat.
After cutting the vinyl, you're ready to assemble this cute DIY nursery art.
Step 3 – Put your DIY nursery art together
Do you really want to see how this project came together? And in just 6 seconds? I've created a cool video of the process below. Just click play and see how this craft was made….in seconds!
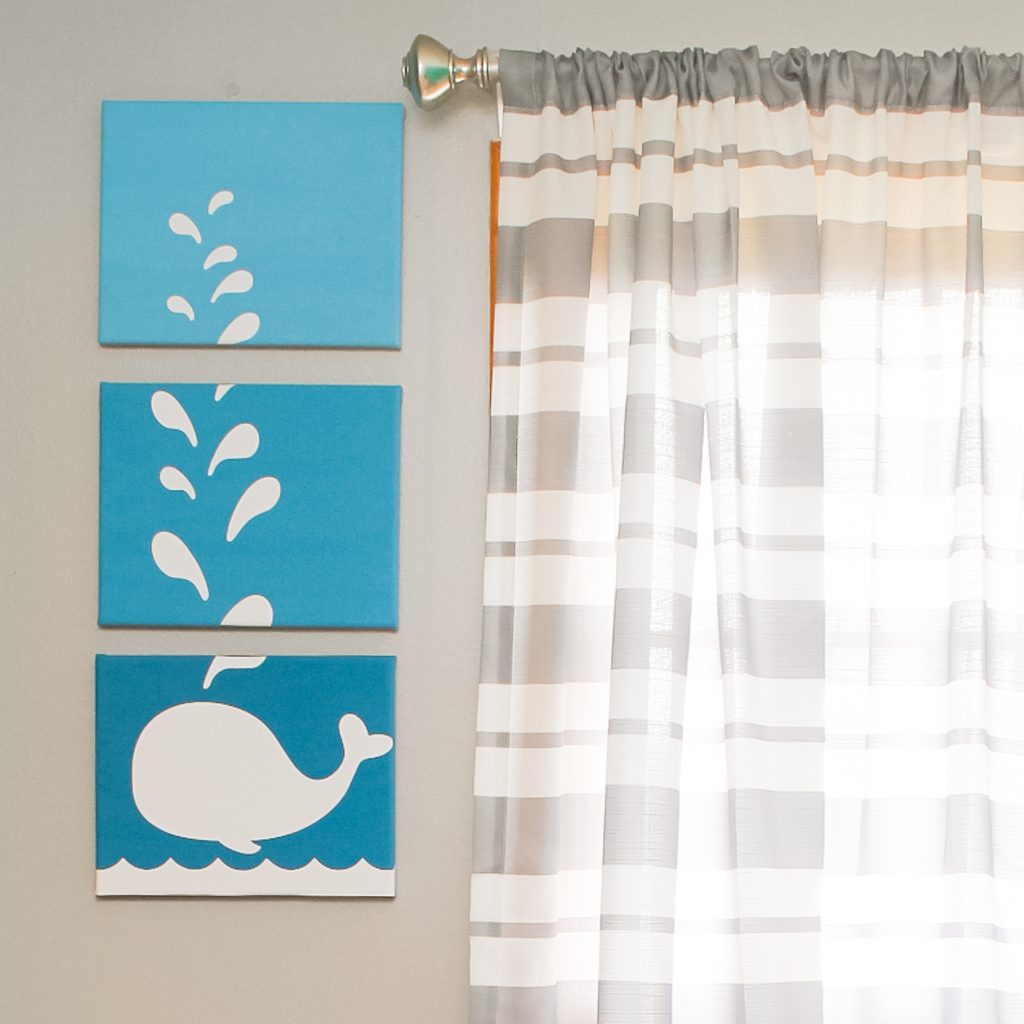
The adhesive vinyl is super easy to peel and stick to the canvases. You can also use transfer tape if you prefer. Here are some images of the canvases to give you an idea of their placement.
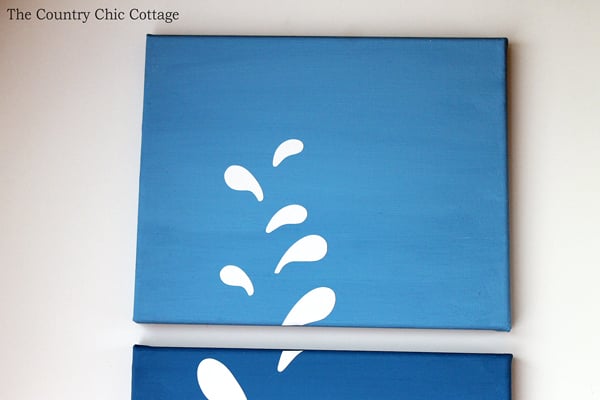
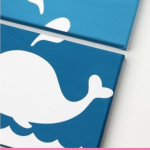
The top two canvases are all water droplets. I made a few droplets span two different canvases. I just used scissors to cut those in half.
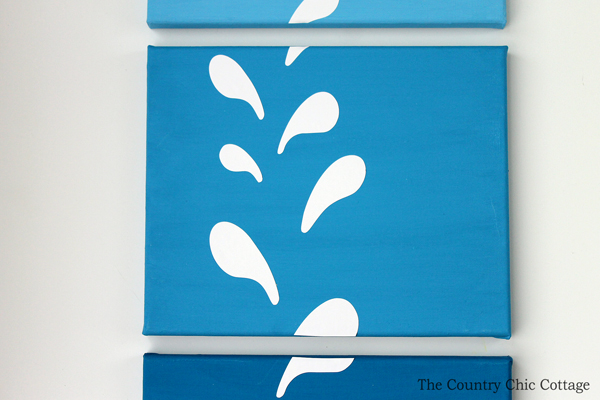
Press the vinyl down really well as you apply it. You might find that a book behind your canvas helps with this. The waves on the bottom of the canvas were also cut to length with scissors.
This DIY nursery art is perfect for a nautical nursery, but you can also use the same idea for some bathroom art. Y'all enjoy this fun canvas art, and be sure to use this idea for your home!
You can see more about the nursery here, including where that art was placed. Doesn't it look adorable in the image below!??!


I love the whale canvas. I don’t have a cameo machine. Do you sell your vinyl art on etsy? I would love to buy it from you and make one for my nephew coming soon in Dec.
Sorry Lauren I don’t sell it! I think this one would be easy enough with a pair of scissors. Just print and trace the images and cut!
I am new to the die cutting machines, I currently have a Cricut Maker, can I use that to make this?
Yes you can!