

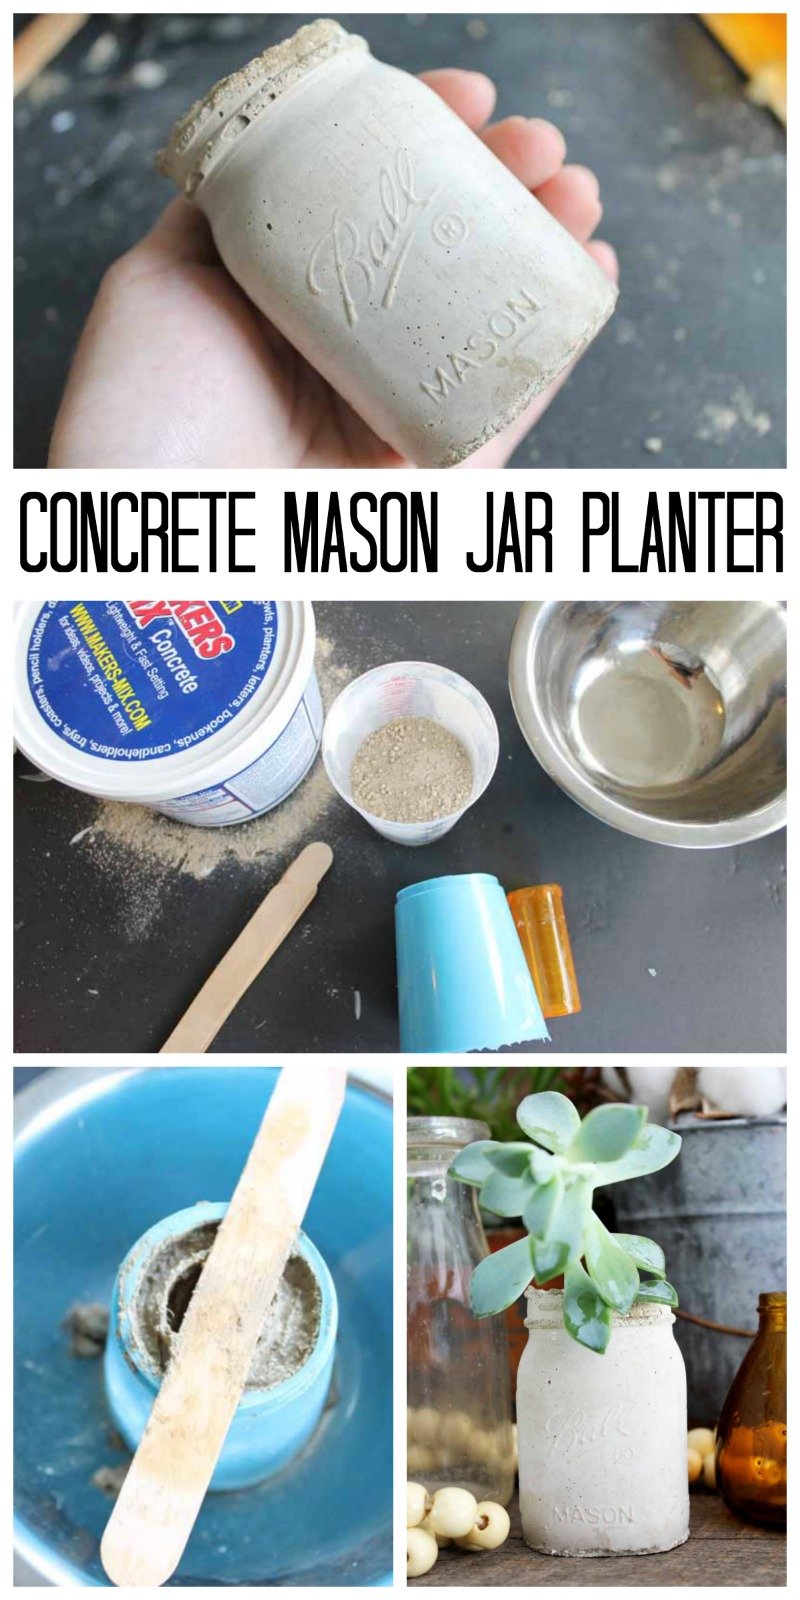
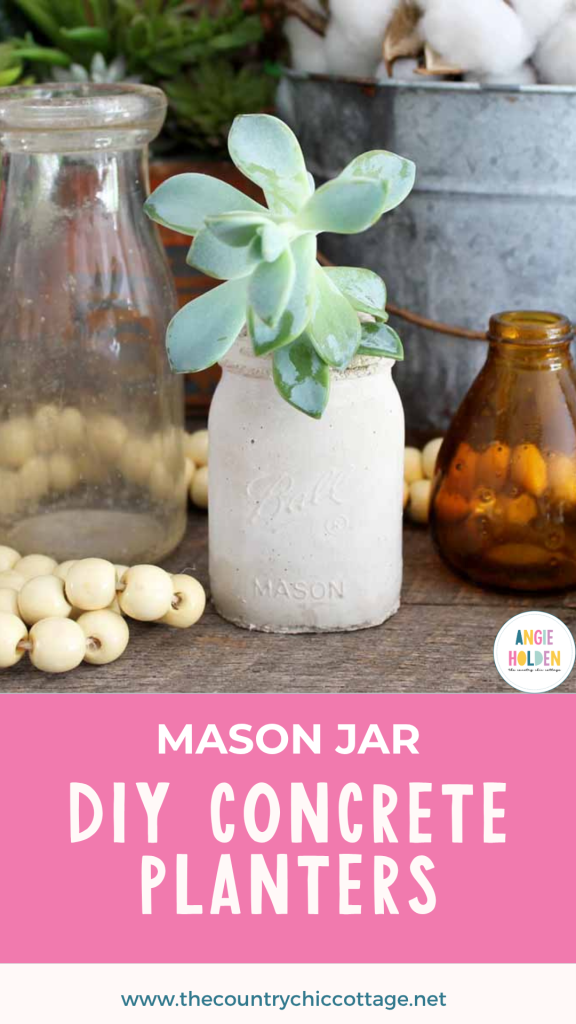
Did you know that you can make your own mason jar planter from concrete? It is actually a fairly easy process, and this adorable mason jar-shaped pot can be yours! You can, of course, make an extra for a gift, but you will definitely want at least one in your home. Follow this tutorial to make some DIY concrete planters for your home!
I have been seeing so many succulents on sale lately, and they would look perfect in these pots. Making concrete planters can be super easy and can be made in different molds.
In today's project, I will be using a mason jar mold to make these smaller concrete planters. You can use any shape of mold you desire, but I think the mason jars give it a nice rustic touch. You could even paint them to add a pop of color!
How To Make DIY Concrete Planters
Give your succulents a place to shine and keep growing strong by making these easy-to-follow DIY concrete planters. Here's everything you will need to make them…
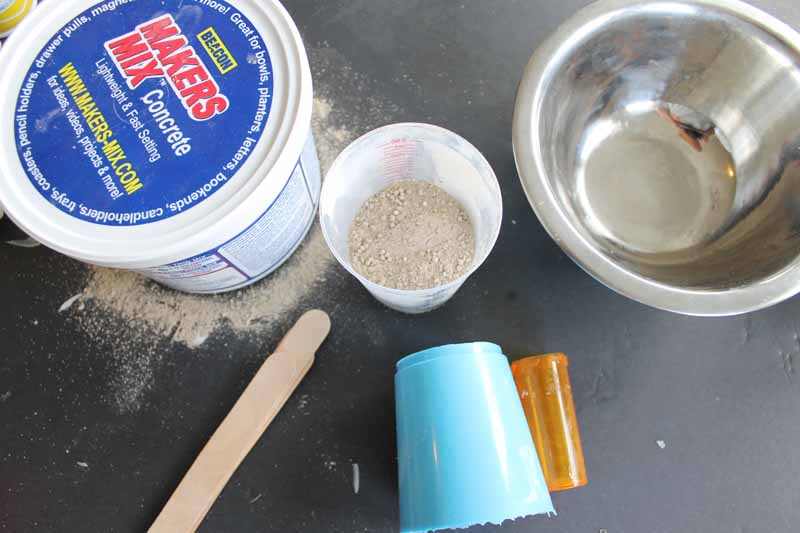
Supplies Needed:
- Mason jar mold (you can see how to make that here)
- Empty pill bottle
- Hot glue and glue gun
- Craft sticks (for stirring)
- Metal bowl
- Plastic mold sealer
- Maker’s Mix concrete
- Vegetable oil (or cooking spray)
- Disposable measuring cup
Instructions:
Here's how to make these mason jar planters…
Step 1
Start by following the instructions here for how to make your mason jar mold!
Step 2
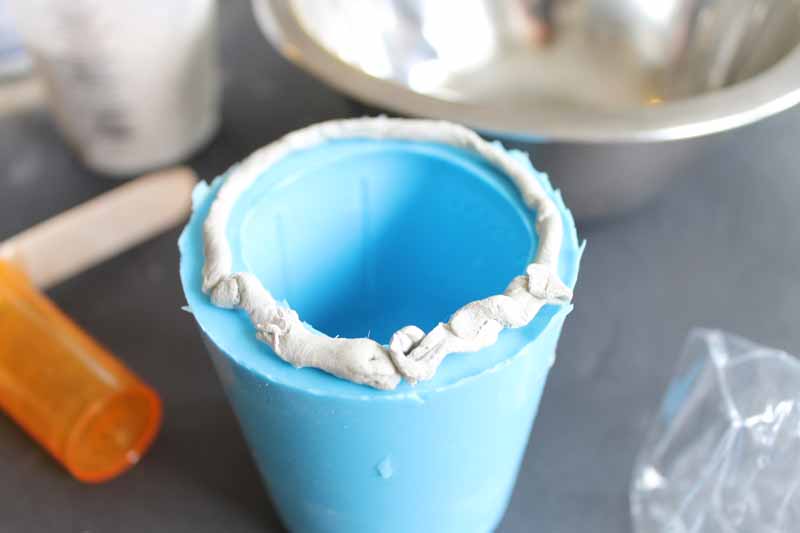
Then, add mold sealer to the bottom of your mold, being sure not to leave any gaps. Press well into the bottom of a metal bowl.
Step 3
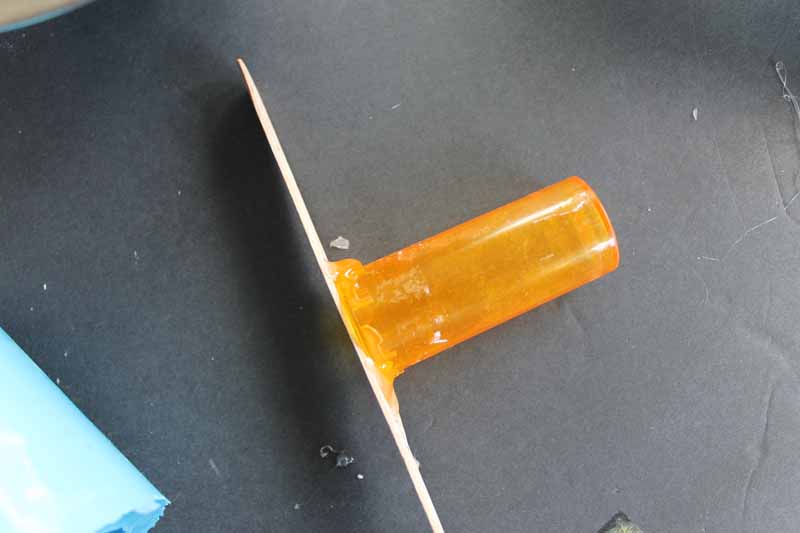
I used an old pill bottle to make my hole in the center of the mason jar planter.
Add a “handle” to your pill bottle with some hot glue, as shown below. This will ensure that it does not sink too far and that you are able to remove it easier.
Step 4
Coat both the inside of your mold and the outside of the pill bottle with oil or cooking spray.
Step 5
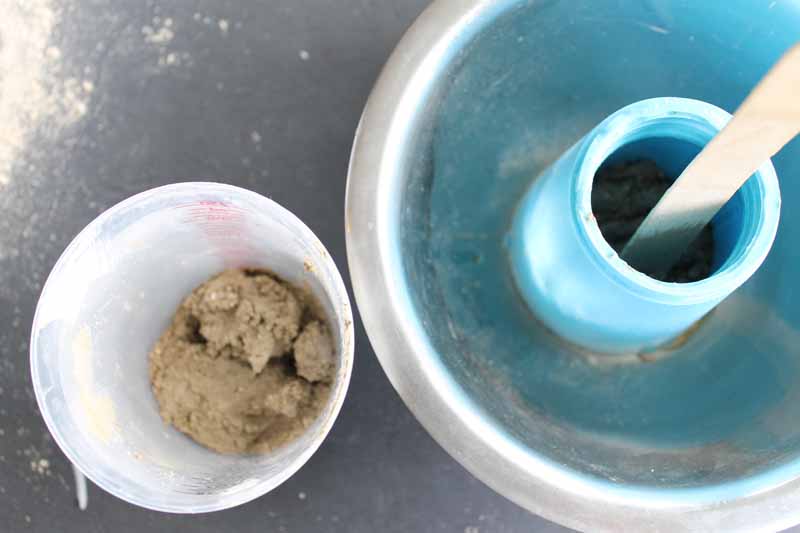
Now, you need to mix the concrete in your mixing cup!
Measure according to the package directions for a thin mix, then add a little more water. About 1/2 to 1 tablespoon of additional water should work.
I found that this thinner mix worked best with the mold and allowed me to get the fine detail.
Note: You should measure and mix the concrete with utensils that you can throw away.
Step 6
Start adding your concrete mixture to the bottom of the mold. Use an additional craft stick to press the concrete into the bottom and sides as you add.
Step 7
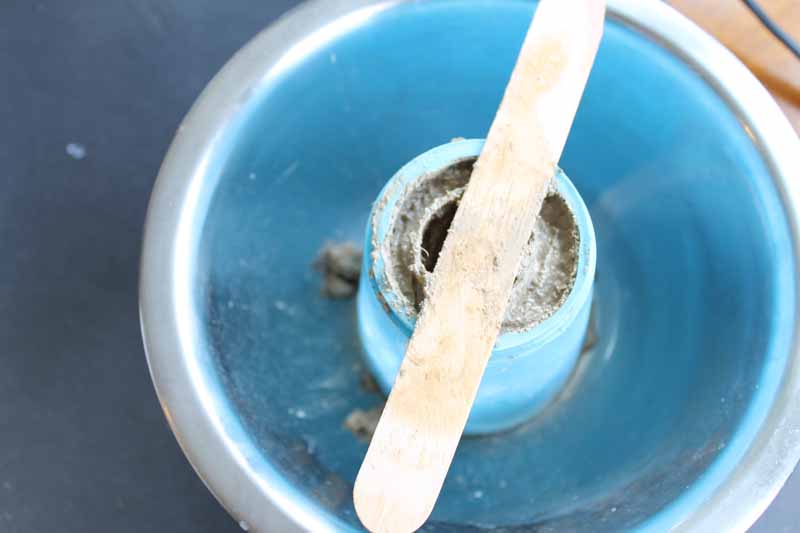
Fill the mold almost to the top, and then press your pill bottle into the center. The mixture should come almost to the top but not quite.
If you have too little, remove the pill bottle and add more. If you have too much, remove the pill bottle and remove some. Then, press your pill bottle into place once more.
Note: The stir stick on the pill bottle will prevent you from pressing too far into the mold.
Step 8
Now all that is left to do is wait!
Allow your concrete to cure completely before removing the pill bottle or the mold.
Since we added some additional water to the concrete mix, you will need to wait longer than the directions indicate for everything to cure. I waited about an hour before removing my mold.
Note: Remember that your mold is reusable! It took me a few tries to master this technique, and it may you as well. Just keep trying until you get a perfect mason jar planter.
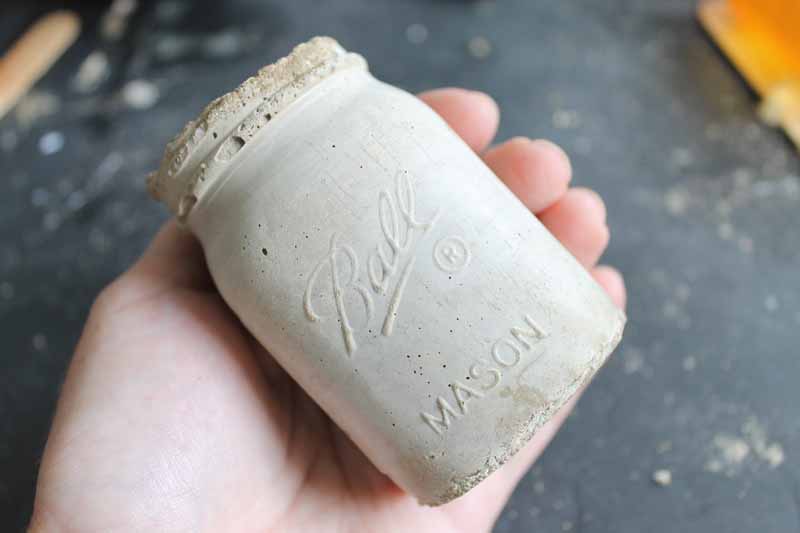
Step 9
Once everything is cured, just remove the mold from the metal bowl. Next, remove the pill bottle from the center by twisting (you may need pliers). Then, just work your mold until the planter pops free.
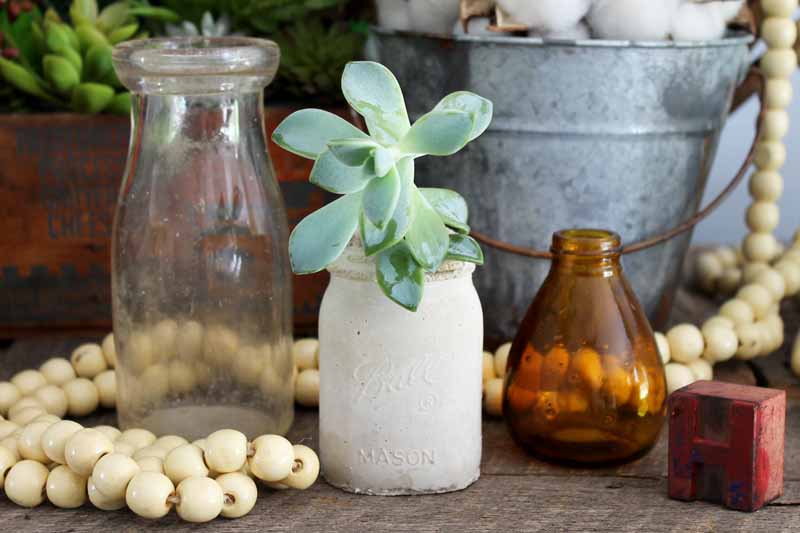
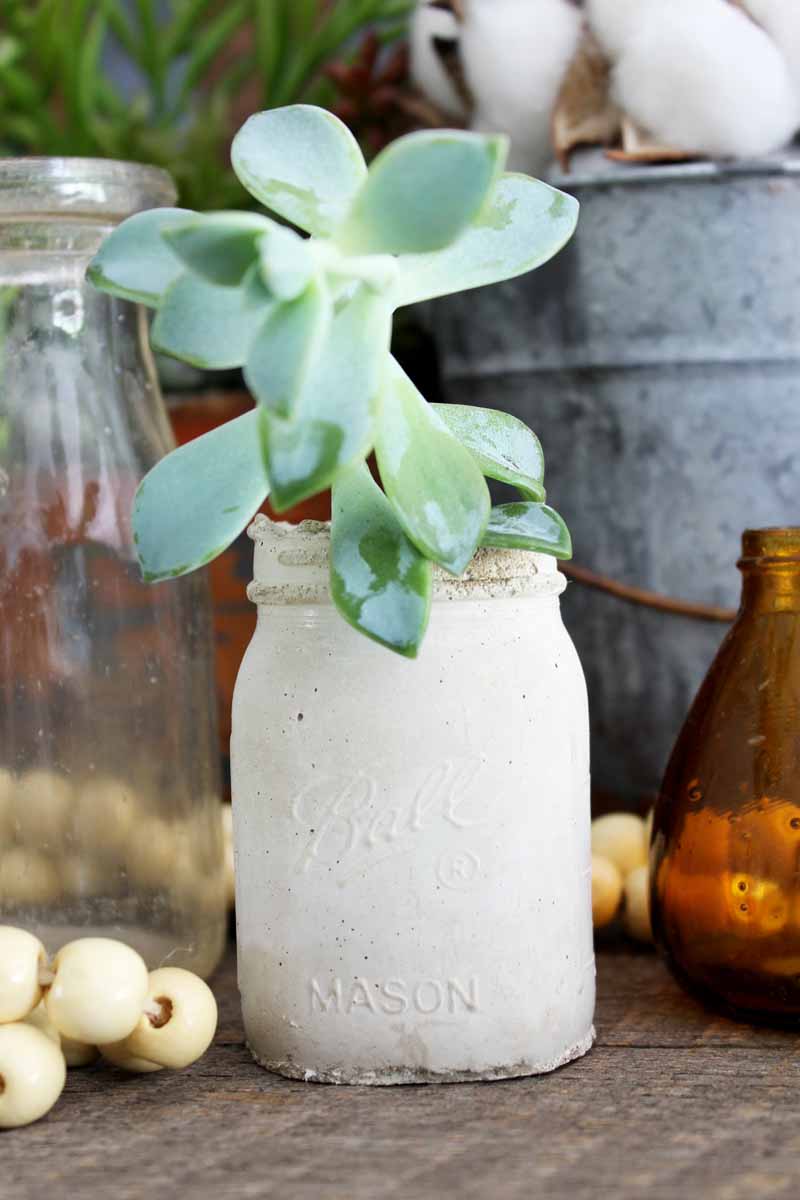
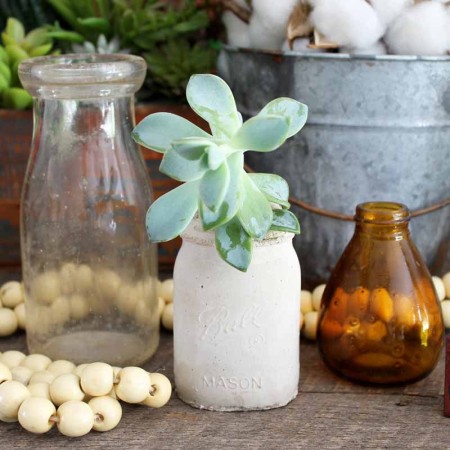
Add in the dirt and a plant, and your cute planter is ready for display.
FAQs
Here are a couple of questions that I see readers ask about making this faux magnolia garland. If you have a question, please check to see if I’ve already answered it below. Don’t see it? Leave it for me in the comments!
Do I have to use a mason jar mold?
Nope! You can use any kind of mold you like.
Do I have to use a metal bowl?
No, any bowl that can hold your mold in place will work. I’ve even seen people use plastic buckets.
Do I have to use concrete?
No, you can use plaster of Paris instead!
Can I use any kind of mold sealer?
Yes, you can use any kind of mold sealer. I like to use silicone because it’s easy to work with and clean up. You can also use petroleum jelly or cooking spray.
What if I don’t have a disposable measuring cup and pill bottle?
You can use any kind of container to mix the concrete. Just make sure it’s one that you don’t mind throwing away. You can also use any kind of small object to create a hole in the center of your planter. It just needs to be something that you can remove easily from the concrete once it's added.
How long do I have to wait for the concrete to cure?
It depends on how thick your concrete mixture is. If you add extra water as I did, you’ll need to wait longer for it to cure completely. I usually wait at least an hour before removing the mold.
Do I have to wait for the concrete to cure before adding dirt and plants?
Yes, you should wait for the concrete to cure completely before adding dirt and plants. Otherwise, your planter may not be strong enough to support the weight.

Just look at the detail on this one! Would you believe that this is concrete? I know that I wouldn't…and I made it! This is one unique project that any mason jar lover will appreciate.
Grab your supplies and get started on making your own mason jar planter today. You will love the look of this one around your home!
Love these DIY concrete planters and want more ideas? You might also like the links below!
Supplies
- Mason jar mold (you can see how to make that here)
- Empty pill bottle
- Hot glue and glue gun
- Craft sticks (for stirring)
- Metal bowl
- Plastic mold sealer
- Maker’s Mix concrete
- Vegetable oil (or cooking spray)
- Disposable measuring cup
Instructions
- Start by following the instructions here for how to make your mason jar mold!
- Then, add mold sealer to the bottom of your mold, being sure not to leave any gaps. Press well into the bottom of a metal bowl.
- Add a "handle" to your pill bottle with some hot glue, as shown below. This will ensure that it does not sink too far and that you are able to remove it easier.
- Coat both the inside of your mold and the outside of the pill bottle with oil or cooking spray.
- Measure according to the package directions for a thin mix, then add a little more water. About 1/2 to 1 tablespoon of additional water should work.
- Start adding your concrete mixture to the bottom of the mold. Use an additional craft stick to press the concrete into the bottom and sides as you add.
- Fill the mold almost to the top, and then press your pill bottle into the center. The mixture should come almost to the top but not quite. If you have too little, remove the pill bottle and add more. If you have too much, remove the pill bottle and remove some. Then, press your pill bottle into place once more.
- Allow your concrete to cure completely before removing the pill bottle or the mold.
- Once everything is cured, just remove the mold from the metal bowl. Next, remove the pill bottle from the center by twisting (you may need pliers). Then, just work your mold until the planter pops free. Add in the dirt and a plant and your cute planter is ready for display!


This is the cutest, Ang!
OMG I LOVE IT!!! I mean I LOVE IT!!! Gotta try this one for SURE!!! Hugs…