
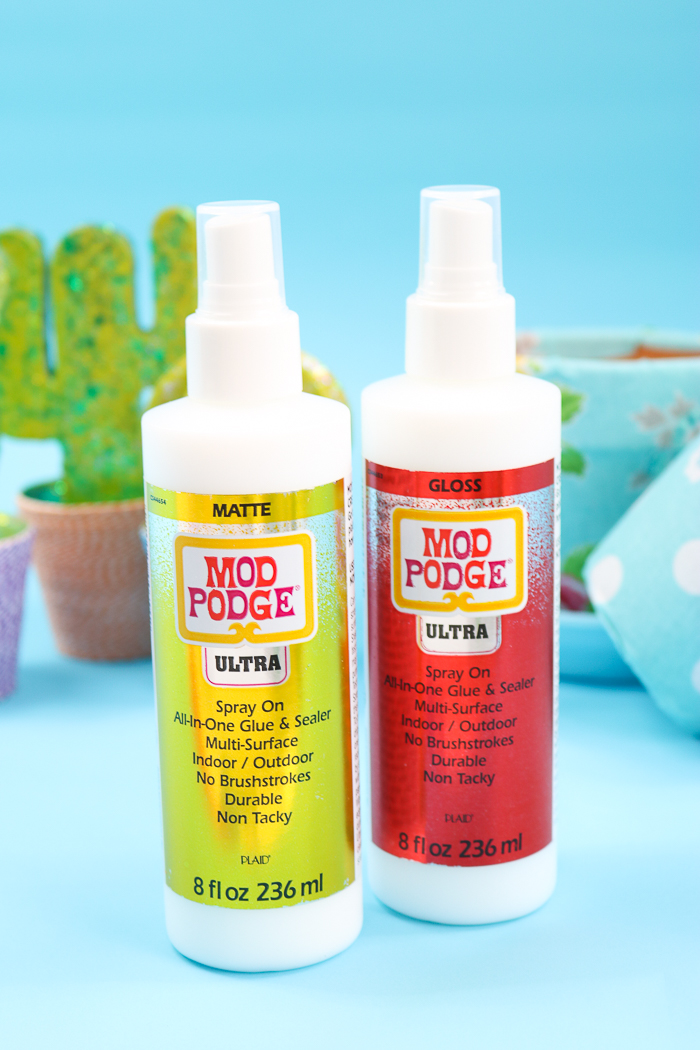
Mod Podge is a sealant that's often used in craft projects. Now, there's Mod Podge Ultra, a super-strong, non-toxic spray version of your favorite crafting sealant! Here's everything you need to know about using Mod Podge spray.
I use Mod Podge all the time in different crafting projects. It's really the creme de la creme of sealants, so it's hard to imagine that the company would need to develop and release a new formula.
But it has!
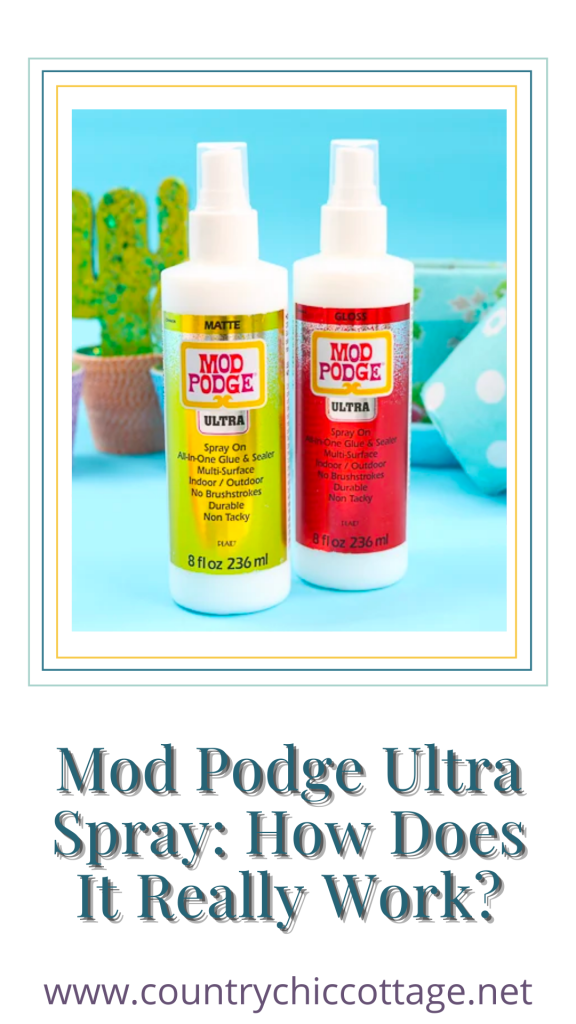
Meet the newest member of the Mod Podge line of products: Mod Podge Ultra. This newbie takes Mod Podge to a new level to create a hard-working Mod Podge spray.
Here are a few notable facts about this product. It's:
- Non-tacky
- Indoor or outdoor
- Self-leveling so no brush needed to even it out
- Quick-drying
- Perfect for multi-surfaces
- Very durable
I wanted to give it a try before deciding whether to recommend it to you, so I spent an entire week using Mod Podge Ultra on a wide variety of surfaces so I could give you an honest rundown of how this product really works.
Spoiler alert: I am extremely impressed and this may very well be my favorite new craft product! It's definitely a game-changer for a wide variety of crafts. I am warning you now that you are going to want to try this spray Mod Podge for yourself!
Let's dive in so I can tell you more about Mod Podge spray to see if it might be a good fit for you.
What is Mod Podge Ultra?
It is the new Mod Podge spray formula that is literally brand new to the craft market. It has a super-strong hold, dries quickly, and self-levels. Bye-bye, brush strokes! 😉
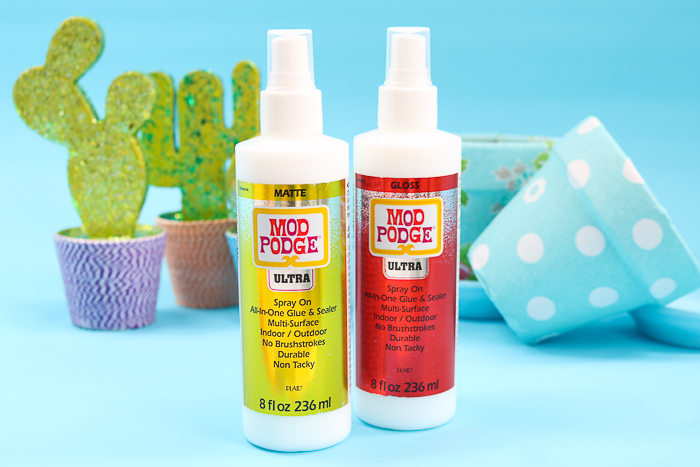
You can get it in both a matte and gloss finish as well as both a 4 or 8-ounce bottle. It is a water-based, non-toxic formula so the clean-up is everything you already expect from the Mod Podge brand.
I also love that it is an indoor/outdoor product and doesn't leave any stickiness behind once it dries.
How do you use Mod Podge spray?
Here's how to use this formula:
- You will need to shake the bottle well. Shake vigorously for at least 10-15 seconds.
- Be sure to protect your work surface. I like using wax paper.
- Spray onto a scrap piece of paper or paper towel to prime the pump. You are looking for a consistent spray from the nozzle.
- Then spray onto your project, add your embellishment, and do a light top coat over the entire project.
NOTE: Thin coats are better than thick coats.
Tips & Tricks
- Elevating your project when drying is always a good idea so it does not stick to your surface.
- You will want to clean your pump well before storing. I would recommend removing it entirely from your bottle and running water through it then putting it back on the bottle.
- Allow your project to dry. It can take 4 to 24 hours depending on thickness. You can add more layers after it dries if you would like.
- As you apply Ultra, be sure you are evenly spraying the project surface while moving the bottle from left to right.
- Work in small sections at a time. If you are adding additional design elements to the surface, add them immediately after spraying.
What materials can you use Mod Podge spray on?
I put this formula to the test on quite a few materials last week. Mod Podge Ultra can be used on many common crafting surfaces including:
- canvas
- wood
- papier-mâché
- terra cotta
- tin
- sculptures
- fabric (for decoration only)
- glass (for decoration only)
- ceramics (for decoration only)
Video Tutorial
I made a video to show myself using this product. Check it out to see how industrious I was and how much fun I had using Mod Podge spray!
Projects Using Mod Podge Ultra
If you can't watch the video or missed some information, keep reading about the projects and materials I used below.
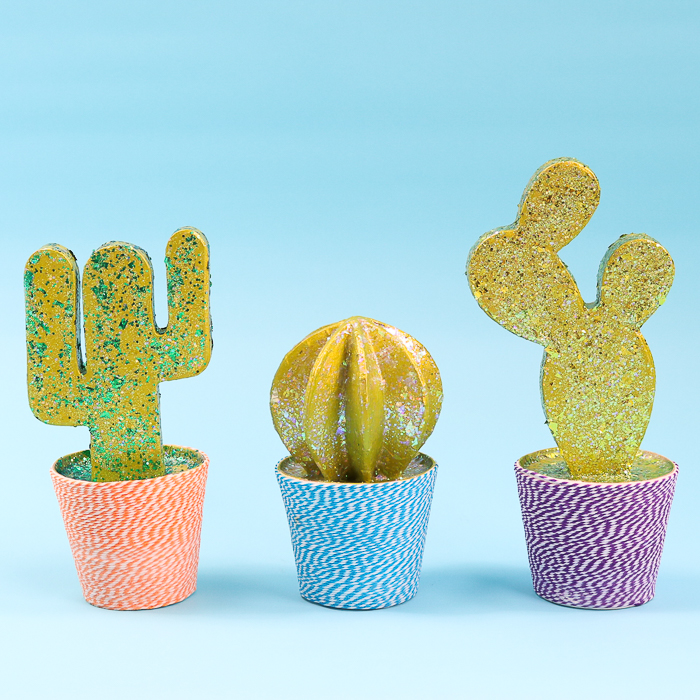
DIY Cactus Project
First up was adhering baker's twine to paper mache in my DIY cactus project.
I actually poured the formula in a cup in this case and ran my baker's twine through then wound it around the paper mache. This was by far the easiest method I have found for doing a twine wrap. It turned out perfectly!
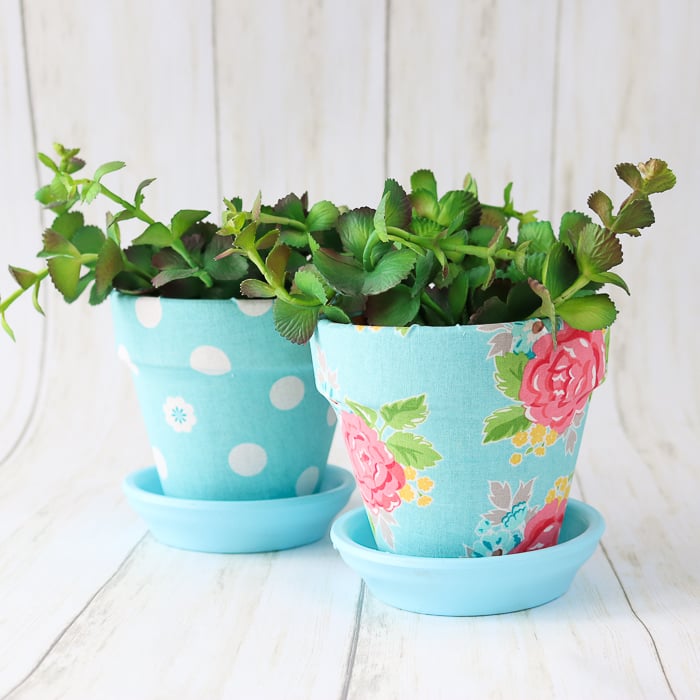
Fabric-Wrapped Pots
Next up, I tried fabric on terracotta pots. It worked great!
The fact that the Mod Podge Ultra is an indoor/outdoor product makes it great for planters. See for yourself how to wrap pots with fabric to give them new life.
Letter Board Accessories
Of course, I had to test the spray Mod Podge on paper! I used it to make these DIY letter board accessories and I loved both the hold and the ease of use.

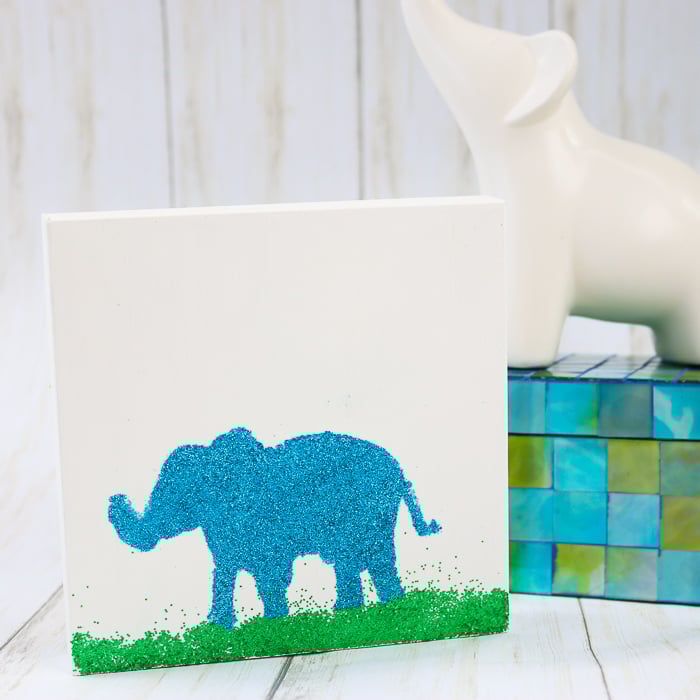
Glitter Glue
What could I possibly test next…glitter, of course!
I applied a glitter design to wood and am seriously declaring Mod Podge Ultra the best glue for glitter. It creates a project that does not shed and you can even make stenciled designs like the one below with the spray easily.
As far as I'm concerned, it's a miracle worker when it comes to working with glitter!
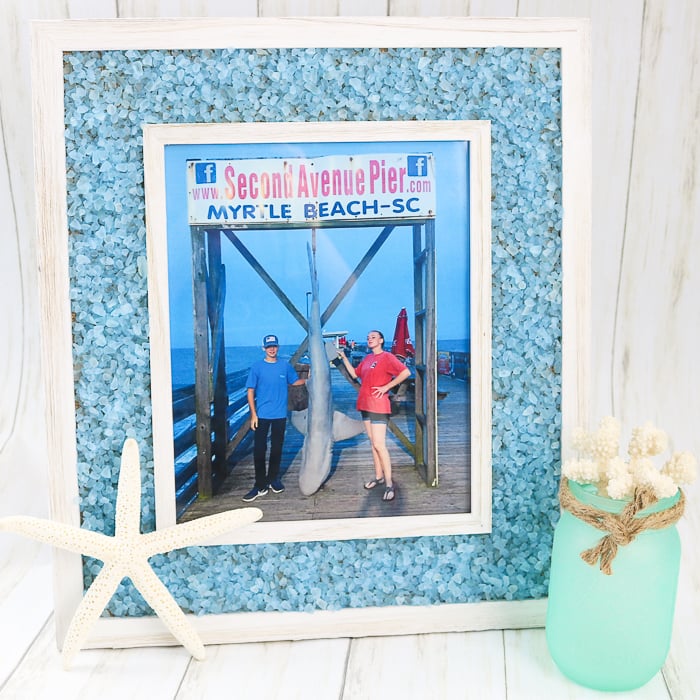
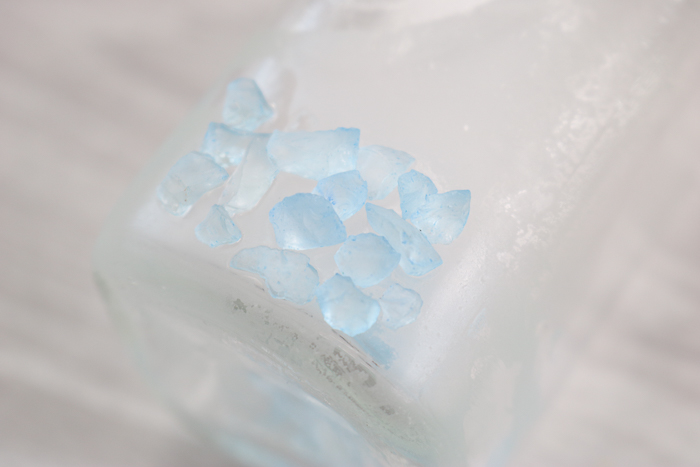
Broken Glass Mosaic Frame
Finally, I was ready to put the Mod Podge spray to the test and used it on glass.
You can see this broken glass mosaic frame here where I put layers of glass on the side of a frame and only used Mod Podge Ultra as my adhesive. I did have to use several layers, but overall I was blown away by the power of this magic spray.
Y'all, it's like magic!
As you can see, the spray Mod Podge can be used with a vast array of surfaces and design elements. It works well on everything from the super light to heavier items like glass pieces.
I am sure I will have many more projects and opportunities to test them in the coming months.
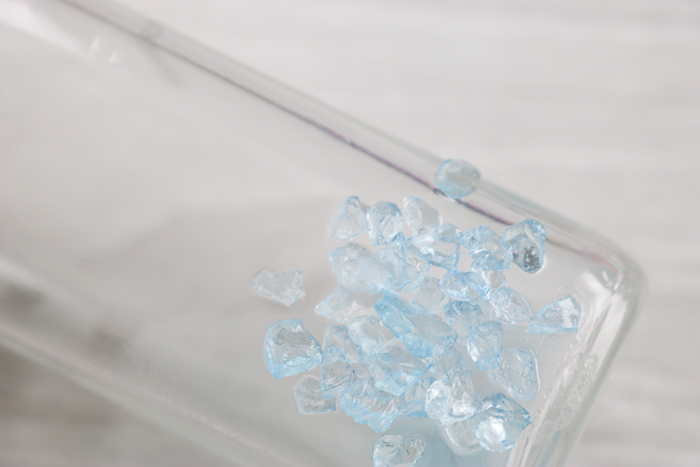
Matte Or Gloss?
You might be ready to buy now but which one is right for your project? I thought I would do a little experiment. I used both matte and gloss to adhere some small glass pieces to a clear glass bottle.
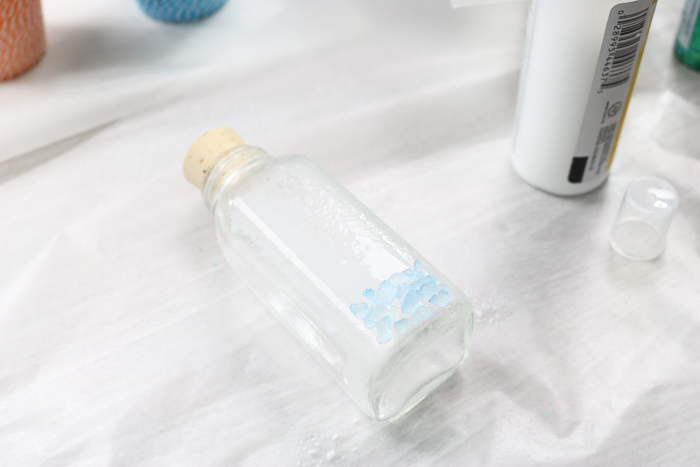
Once dry, you can see a haze with the matte.
The gloss however dried extremely clear. So, if you are using it on clear surfaces or anywhere you want a glossy finish, gloss is what you'll want. The matte version will deliver a more matte/flat finish.
FAQs
Here are a couple of questions that I have seen readers ask about using Mod Podge Ultra. If you have a question, please check to see if it's already answered below. If you don't see it, please leave it in the comments so I can answer it!
Where can I buy Mod Podge spray?
This spray is still fairly new to the market but it's available on Amazon! I have also started seeing it in some of my local craft stores.
I think this will be one product that everyone will want! You might even want to get 2 bottles while you are shopping as I went through one super fast spraying all the things!
How long does it take for Mod Podge Ultra to dry?
After spraying your project with Mod Podge Ultra, it will take 4 to 24 hours to thoroughly dry. I recommend keeping the project surface flat and level until the Mod Podge spray sets. Once it sets and completely dries, any 3D items will be securely in place.
Can Mod Podge spray be used on outdoor surfaces and projects?
Yes! Mod Podge Ultra is really amazing. It can be used on both indoor AND outdoor project surfaces since it's both water-resistant and UV-resistant.
More Inspiration Using Spray Mod Podge
Of course, you might want a bit more inspiration for projects you can tackle with this great product. Try a few of the ideas below!
- Decoupage Quilt Sign
- Glitter Distressed Wood Sign
- Lace Crowns
- Custom Candles
- Scrapbook Paper Coasters
- DIY Unicorn Clipboard
- Button Tree Art
- Sand Painted Mason Jars
- Rainbow Glitter Monogram
- Mosaic Coasters
- Sea Glass Art


Hi Angie,
This sounds like a great idea; I can’t wait to try it when we get home from our current road trip. I do a lot of crafting and use quite a bit of Modge Podge so I appreciate all the tips you included in your post. Have a good week and thanks again for sharing this, Cheryl
Hi there . I am experiencing to make my own ultra mod podge . Already got really good results by adding 1/3 clear varnish . It goes on as a spray and with a brush . Maybe you could try it for yourself. It will save a lot of money , but try o lying to make enough for what you need as it may not keep to long . Will try adding some silicone, oil , so , let’s see .
How does it work on canvases with the Dollar Store gift bags?
What about diamond painting, I want to know if I use it will it work at preserving my project from dust?
It would seal it but the project would still get dusty.
Can you use this on Styrofoam?
I think sprays will melt the styrofoam but I believe you can coat it with regular mod podge!
I’m wondering how long does that 8oz bottle last?
I don’t know that I could give you a time frame. Would depend on what projects you are making and how much you have to use on them?
I have already placed pressed flowers on canvas not glued down. Is there something I can use to adher to the canvas so I can leave the flowers where they are?
I have not tried that yet. Normally I would say Mod Podge and brush it on. I’d look for something that says it’s good for those materials and will dry clear.