

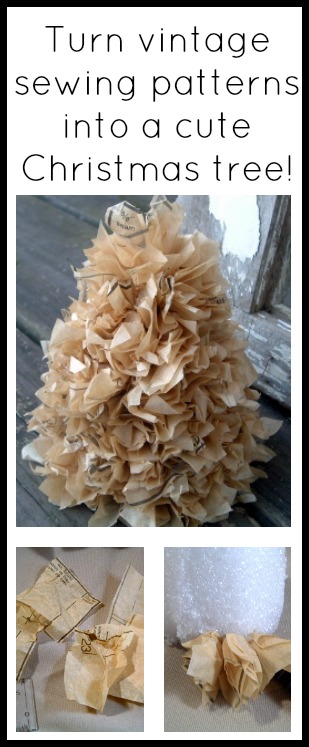
Christmas sewing patterns are a delightful way to bring a festive touch to your crafts, and they are particularly wonderful when applied to handmade tree crafts. This easy DIY Christmas decor is perfect for kids and adults! Made with recycled sewing pattern squares, this tiny tree is a great way to get creative this year for the holidays.
Making your own Christmas holiday decor is a breeze with these tree crafts. All you need are some leftover pattern paper, hot glue, and styrofoam to make your own unique Christmas decorations. And best of all, you don’t even need to know how to sew!
Even if you’re a beginner when it comes to crafts, this simple tutorial will help guide you through the process. Once you have your shape assembled, it’s time to give your tree a festive touch—you can either add tiny ornaments or wrap it in colorful yarn or ribbon!
Note: Looking for more Christmas crafts? Check out this list of 40 Christmas craft projects that are ready in 15 minutes or less!

Make Your Own DIY Christmas Sewing Patterns
Cost-effective, festive, and made with simple materials, this DIY Christmas tree craft is perfect for whenever you want to create your own holiday decorations!
Have a small space you need to garnish with the Christmas spirit? This tiny tree made with pieces of sewing pattern paper is ideal for those spaces that are hard to decorate. Put this tree on a table or in the corner for extra festive fun.
Both the kids and adults will enjoy crafting this tree because it is so easy and fun!
Supplies Needed
Here's everything you need to gather:
- Styrofoam: I used some old styrofoam that was in my attic and carved it into a Christmas tree shape. You can buy your own styrofoam tree or make your own like I did! It was very easy.
- Scissors: Use your favorite shears to cut the sewing pattern paper into 2×2-inch squares.
- Sewing Pattern Paper: Use any color or patterns you have! I love the delicate soft tan color vintage sewing patterns create.
- Pen: Any kind of pen will work! You just need something sharp to stuff the paper with.
- Hot Glue: Hot glue allows this tree to retain its shape and keep the layers in place.
Note: Get extra creative and paint the sewing pattern pieces or stick some glitter or “snow” to the tree.

How to Make Your DIY Christmas Tree Craft
If you're looking for a stress-free and minimal craft this year, you have found the place! Who said crafts have to be difficult?!
Step 1: Cut sewing patterns
First, cut the sewing patterns into squares and make sure the styrofoam is in the shape of a tree.

Step 2: Stuff the paper into styrofoam
Using a pen, start to stuff the squares of sewing pattern paper into the styrofoam. Make sure all sides are evenly covered with paper. As you go up the tree, make sure to slightly overlap each layer of paper.

Step 3: Add hot glue
Put some hot glue on the end of the sewing pattern paper and puncture the styrofoam with it. You want to make sure you are stuffing the sewing patterns into the styrofoam.

Step 4: Let it dry
Repeat the steps over and over again. Let the glue dry for a few minutes, and then your tree is ready! You now have a decorative Christmas tree craft that you made with sewing patterns.
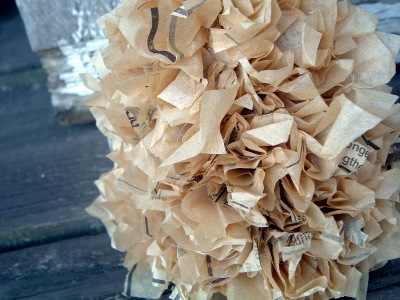
The tighter and closer you stuff the sewing patterns, the fuller the tree will be!
This is what the tree should look like.

How To Use
This DIY Christmas tree is perfect for tablescapes, bedrooms, entryways, and so much more. You can even spray-paint the sewing patterns gold or silver if you want something different! I pull this tree out every year during the Christmas holidays.
Have some leftover vintage sewing patterns lying around somewhere? Put them to good use with this DIY Christmas tree!

FAQs
If you have questions about using Christmas sewing patterns, I have answers for you! Please leave your question for me in the comments if you don’t see it already answered below.
What other Christmas crafts can I make with sewing patterns?
You can make a variety of Christmas crafts with vintage sewing patterns, including ornaments, cards, gift tags, and more!
Can I use regular paper instead of sewing patterns?
Yes, you can definitely use regular paper for this craft. However, the sewing pattern paper makes it look more festive and adds a unique touch!
More craft ideas
If you love this project and want to make more Christmas decor, we have those for you! Just follow the links below.
- Christmas Projects Gallery
- DIY Paper Ornament You Can Make
- Easy DIY Christmas Cards
- Christmas Tree SVG File for Outside
- Pallet Christmas Tree

Equipment
- Styrofoam
- Sewing patterns
- Hot glue and gun
Supplies
- styrofoam buy a styrofoam tree or make your own
- sewing pattern pieces cut into 2×2-inch squares
- pen
- hot glue
- glue gun
Instructions
- First, cut the sewing patterns into squares and make sure the styrofoam is in the shape of a tree.

- Next, take a retracted pen and wrap a piece of the sewing pattern around the dip.
- Put some hot glue on the end of the sewing pattern paper and puncture the styrofoam with it. You want to make sure you are stuffing the sewing patterns into the styrofoam.
- Repeat the steps over and over again until you have a fully stuffed Christmas tree craft. The tighter and closer you stuff the sewing patterns, the fuller the tree will be!


Loved your project’s.Can’t wait to try them.
Looks like a great website. I am definetly going to try making this one.