
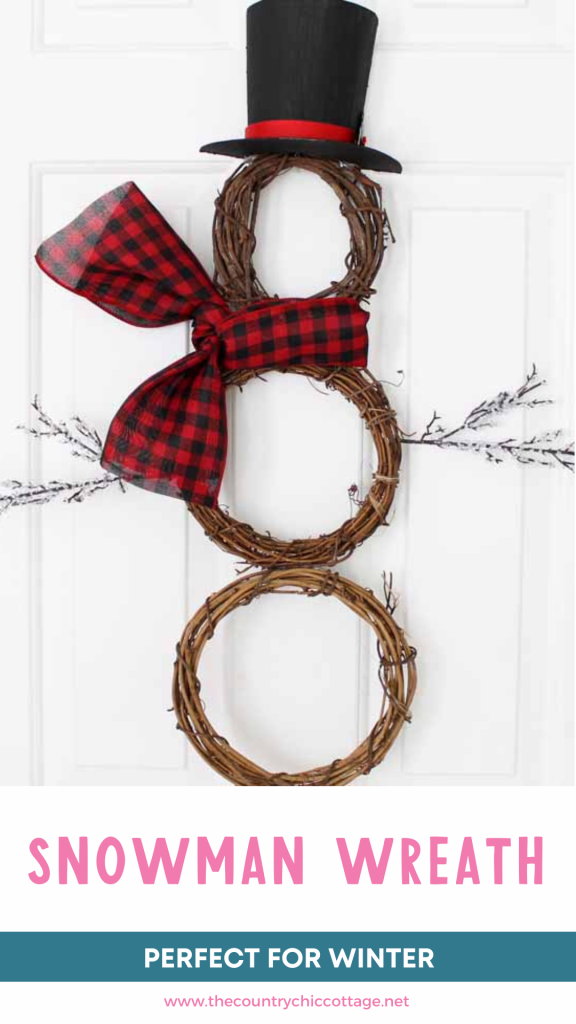
This adorable snowman wreath is perfect for winter! Hang it up when it turns cold, and leave it up until springtime! The grapevine wreaths make it strong enough to withstand a lot of winter weather, so you don't have to worry about it falling apart. This easy tutorial can be adapted to whatever color and style you prefer!
How To Make A Snowman Wreath
Make this snowman wreath for your door this winter! I always struggle with decorating in that awkward time between Christmas and spring. But I love wreaths, and they are a great way to show you that you are festive without committing to fully decorating the outside of your home. It's a bit of festive flair that I love displaying and creating.
This snowman wreath is perfect when you're unsure how to decorate your home to celebrate that frosty time of the year. It would also work for Christmas, so next year, you can hang this one up after Halloween or Thanksgiving and leave it up for months. That is my kind of decor!
If you love wreaths as much as I do, definitely check out the other projects on this site. I have tutorials for every season and celebration!
Supplies Needed To Make This Snowman Wreath
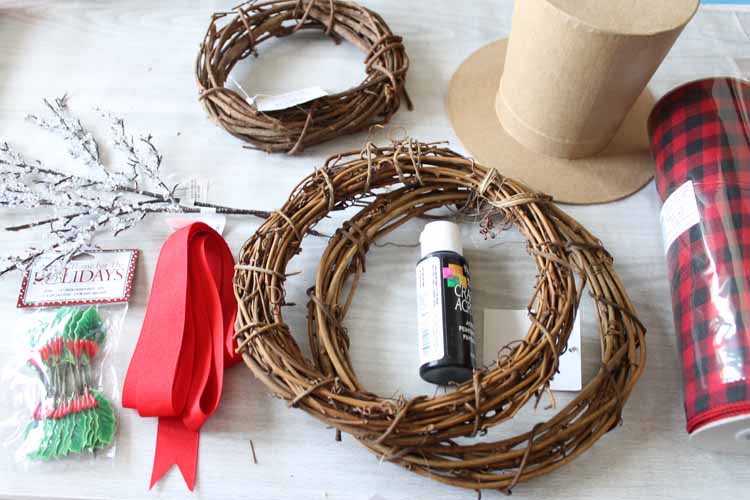
- Grapevine wreaths (I used two 8-inch and one 6-inch)
- Black craft paint
- Red ribbon (for the hat band)
- Holly leaves (optional as they make this a bit Christmasy)
- Iced branches
- Darice paper mache hat
- Plaid ribbon (9 inch wide version)
- Dowel rod
- Hot glue and glue gun
- Scissors
- Craft knife
- Paintbrush
Step 1: Cut Paper Mache Hat
Use your craft knife to cut the paper mache hat in half, as shown below.
NOTE: As I mentioned in the supply list, if you can't find a paper mache hat, you can cut a premade snowman hat (like this one or this one) in half and use that instead. If you do that, cut the hat in half and skip to step 3.
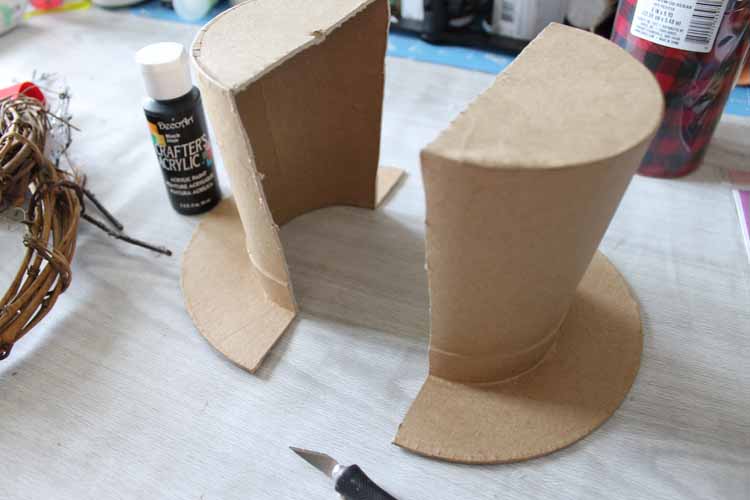
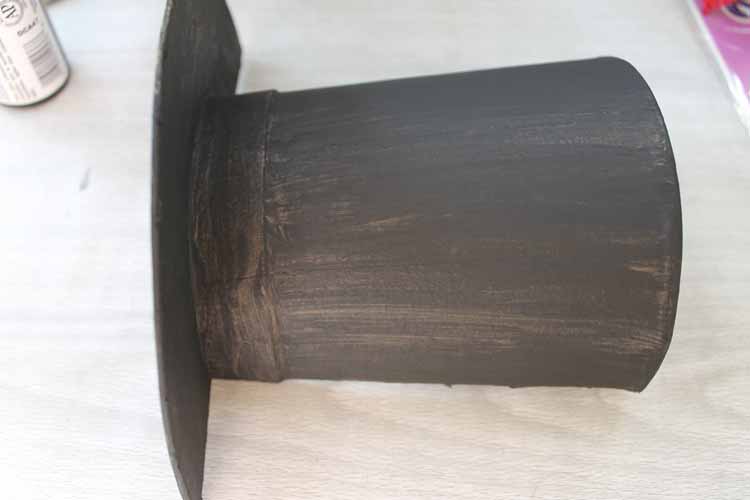
Step 2: Paint Paper Mache Hat
Paint half of the hat with black craft paint. It will probably take a few coats for complete coverage. Be sure to allow it to dry completely before continuing.
Step 3: Secure Wreaths Together
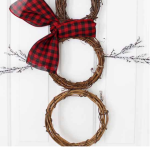
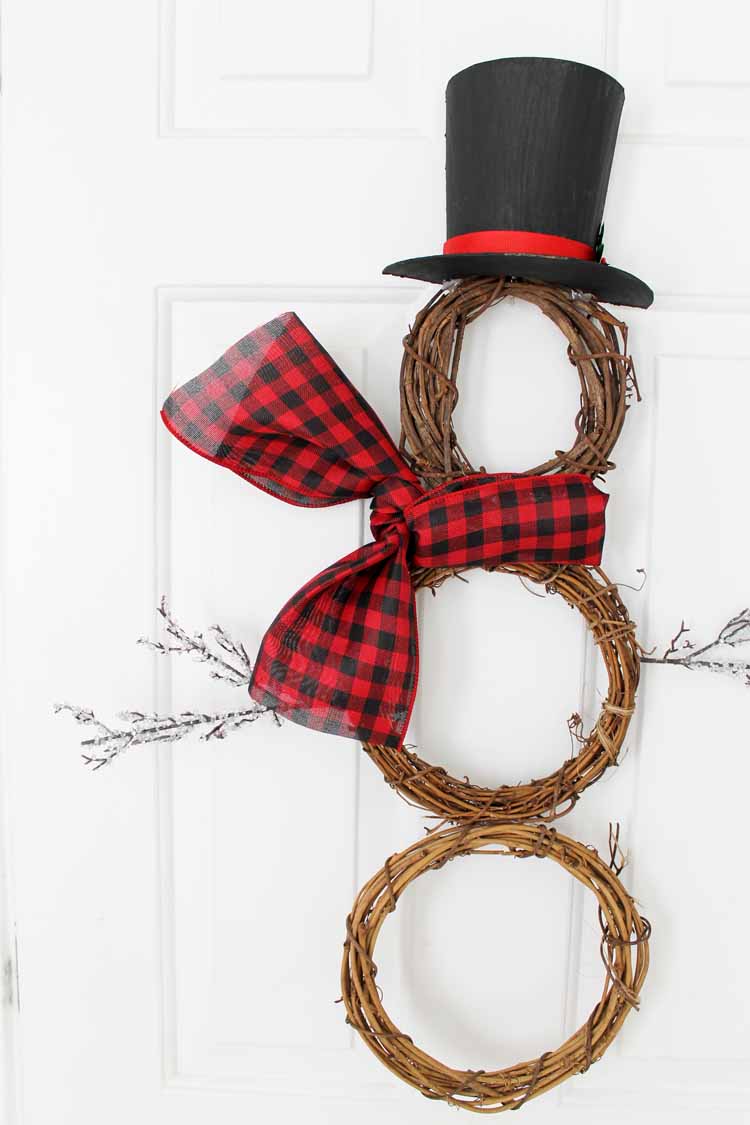
In the meantime, you can assemble the wreaths into a snowman. Use hot glue to secure the grapevine wreaths together. I also added a small scrap of ribbon to the back of each joint to have an additional surface for adding glue.

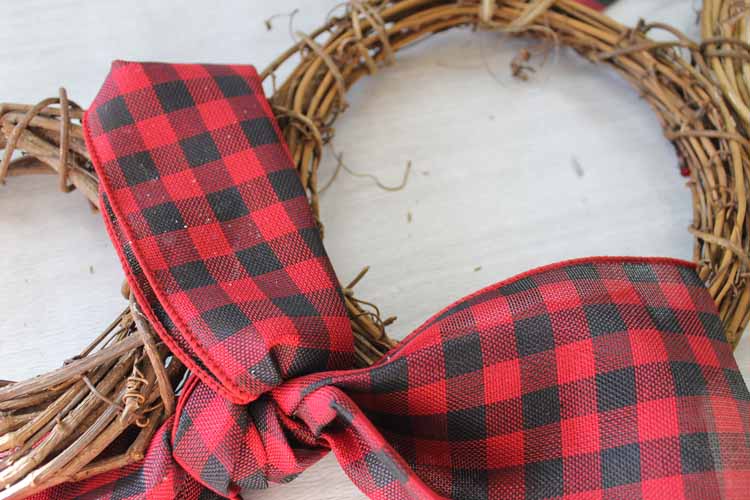
Step 4: Create Scraf
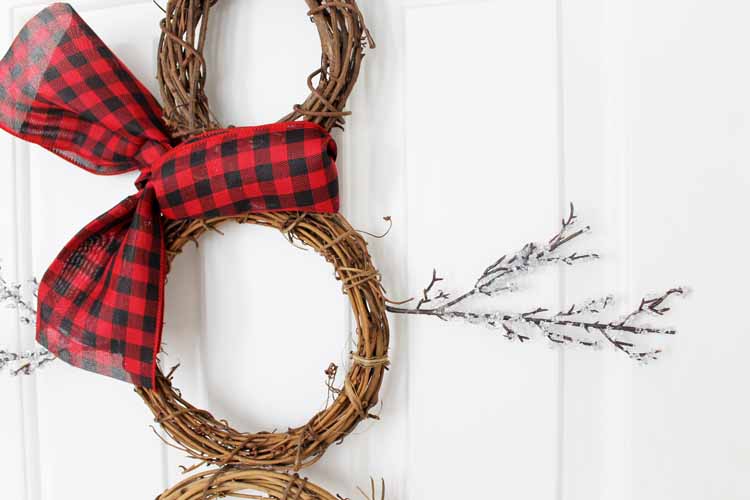
The smallest 6-inch wreath goes on top as the head of your snowman. Tie a length of ribbon around the “neck” under the head for his scarf. You can use more hot glue under your scarf to help to hold everything together.
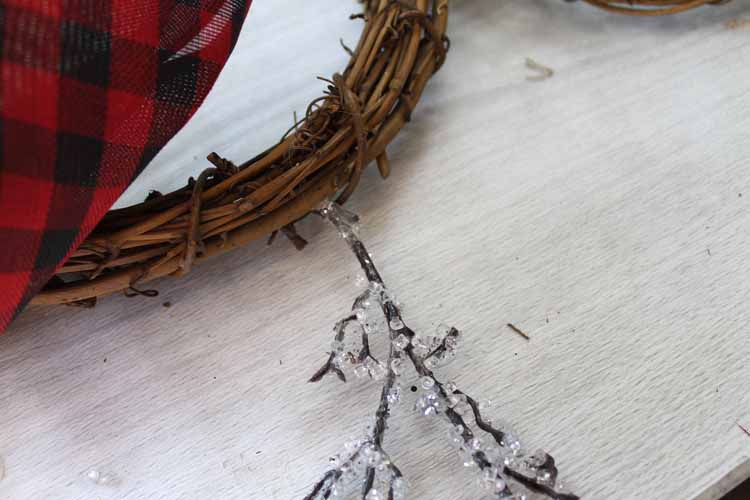
Step 5: Add Branches
Trim your iced branches to length with scissors and add them as arms with more hot glue.
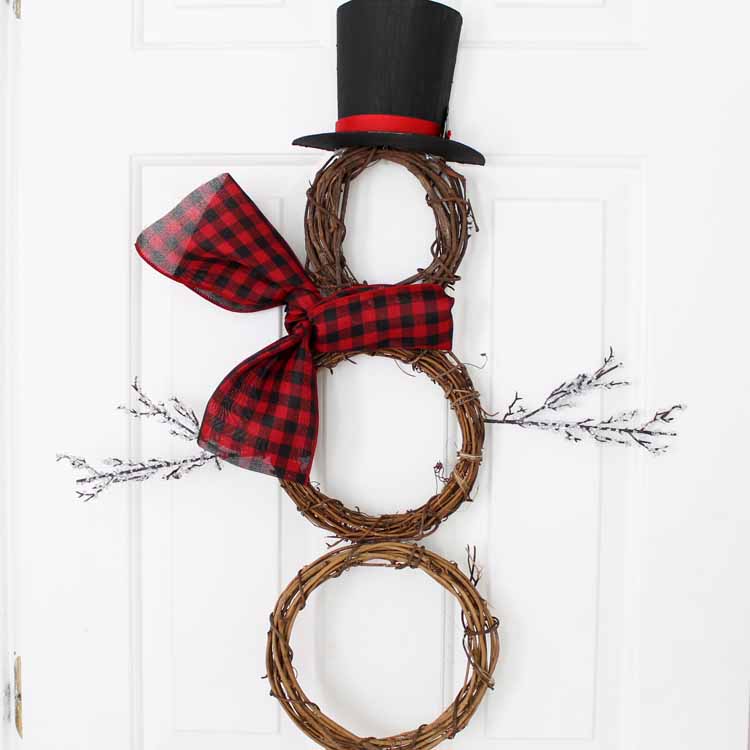
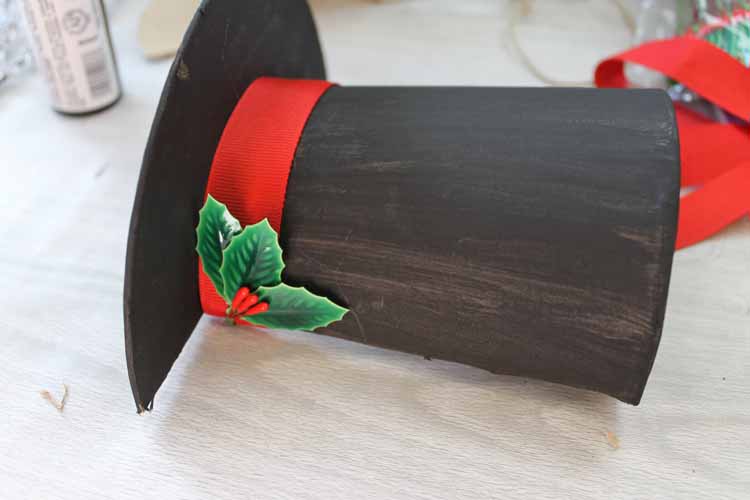
Step 6: Add Red Ribbon Around Hat
Add a red ribbon around the bottom of the hat as a hatband. You can also add a few holly leaves if desired. Secure everything into place with hot glue.
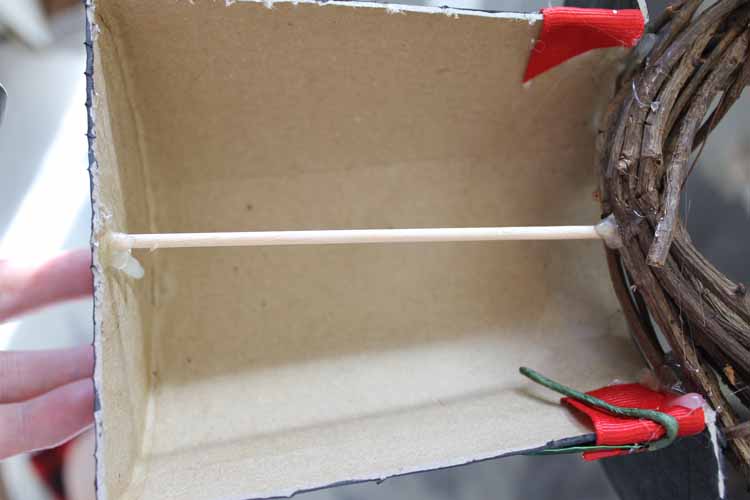
Step 7: Add Dowel Rod To Hat & Wreath
Then, add the hat half to the top of your snowman wreath with hot glue. It will not stand up all by itself, so add a cut dowel rod to the inside of the hat, as shown to help it stand up. Use hot glue to secure.
Step 8: Hang Snowman Wreath
All that is left is to add this one to your door. A cute and simple wreath perfect for winter!
Will you be making your own snowman wreath?
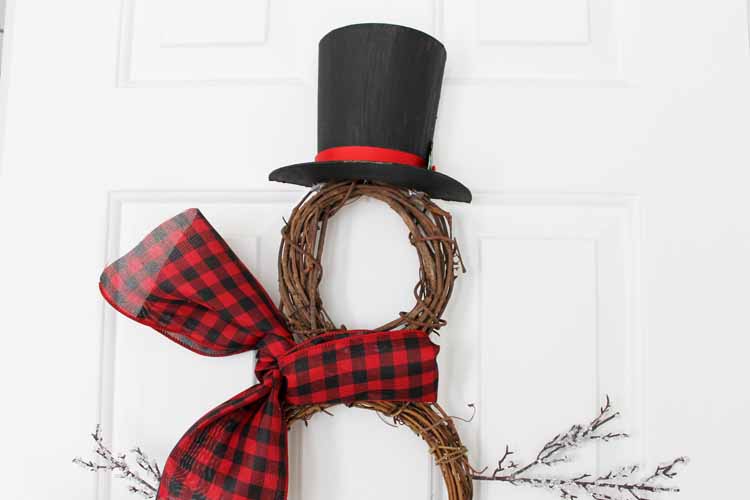
Change up the scarf material however you like. I love me some buffalo check plaid, so I went with it in this case.
This little guy will be gracing my door this winter. A snowman wreath is easy to make and will look great on your door!
Tips and Tricks for Snowman Wreath
Now that you’ve seen this fun snowman wreath, are you ready to make your own? Here are a few tips and tricks to ensure your project goes as smoothly as possible!
- Change Up The Size – Make your snowman wreath big or small by simply changing the size of each grapevine wreath!
- Skip The Iced Branches – If you can't find ice branches or don't want to use them, you can use branches from your backyard for the snowman's arms.
- Change Up The Colors & Style – As I mentioned, you can make this wreath in any color or style you like. You could choose red and white (for a Christmas look), blue and white (for a winter look), or go rustic and use burlap!
- Use A Snowman Kit – If you are having difficulty finding supplies for your wreath, use a snowman kit and grapevine wreaths! This is because a snowman kit usually includes a hat, arms, and scarf.
6 More Snowman Project Crafts
Did you love this snowman wreath and want more snowman crafts? Then check out the projects below!
- Preschool Snowman Craft
- Polymer Clay Snowman Earrings
- Winter Snowman Art with Burlap
- Make a 3D Light Up Paper Snowman
- Snowman Jar Luminary
- Snowman Felt Board


Angie, this is the cutest! Just love it! ♥
Hi Angie, Nice article… Sharing this post right now!