
Let's try some Cricut embroidery today! You might think of a Cricut machine and think of cutting paper or vinyl, or a heat transfer vinyl for shirts, but a Cricut machine can do so much more. I love to push all of my Cricut machines to the limit, and today I'm going to use the Cricut Maker 3 to draw embroidery patterns onto fabric. This is a great way to get started with embroidery or push your embroidery skills to the limit. Plus it will work with any of the Explore or Maker machines.

Cricut Embroidery
Let me tell you a little bit about my crafting journey. As a young child, I loved cross stitch and embroidery. As I got older, I stopped doing it as much. However, I see all of these amazing embroidery crafts on places like Pinterest right now and I'm kind of obsessed. I tried to think of a way where I could use my Cricut machine to work with embroidery and bring those two worlds together and maybe get back into embroidering myself. If you're like me and you used to do cross-stitch or embroidery, and want to jump back in, you might want to try drawing some embroidery patterns onto fabric with your Cricut machine. Want to watch me draw some embroidery patterns onto fabric? You can see my step-by-step process in the video below!
Can't watch the video or miss some of the steps? You can follow along below as well!
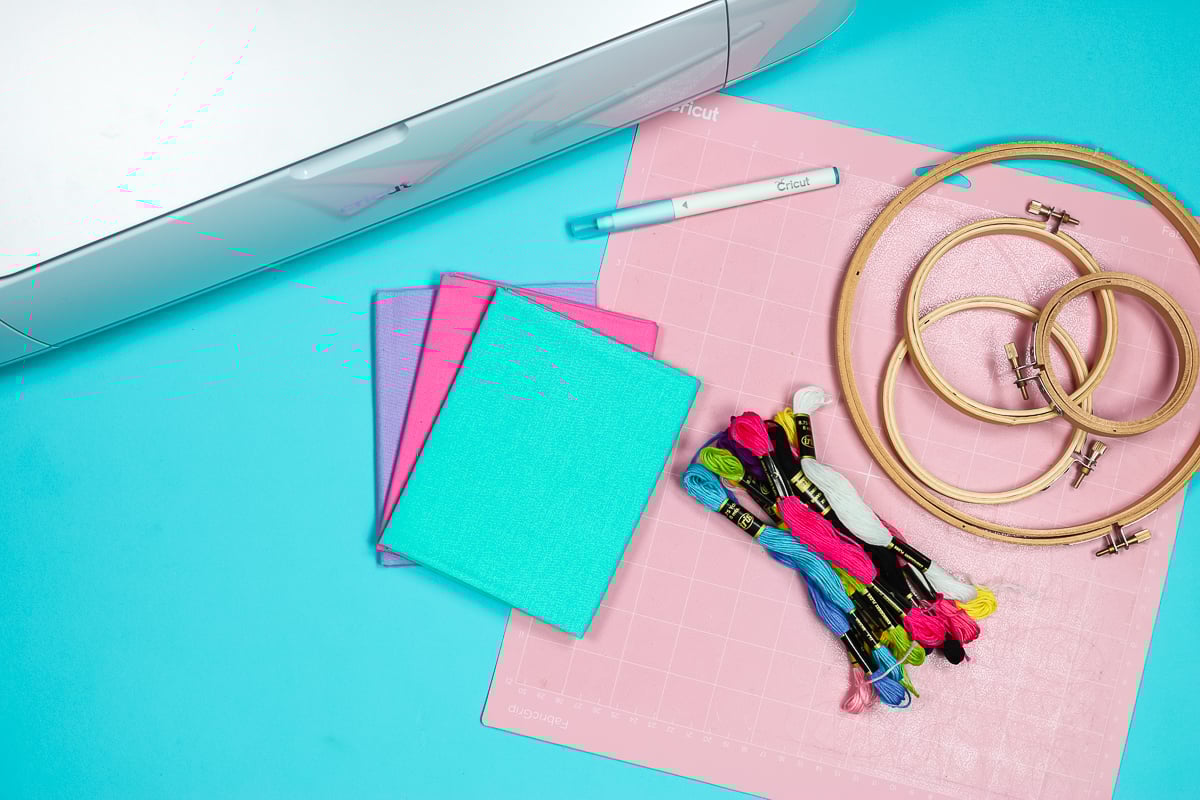
Supplies Needed
- Cricut machine (any from the Explore or Maker series will work)
- Washable fabric pen
- Fabric grip mat
- Fabric
- Embroidery thread
- Embroidery hoops
- Needle
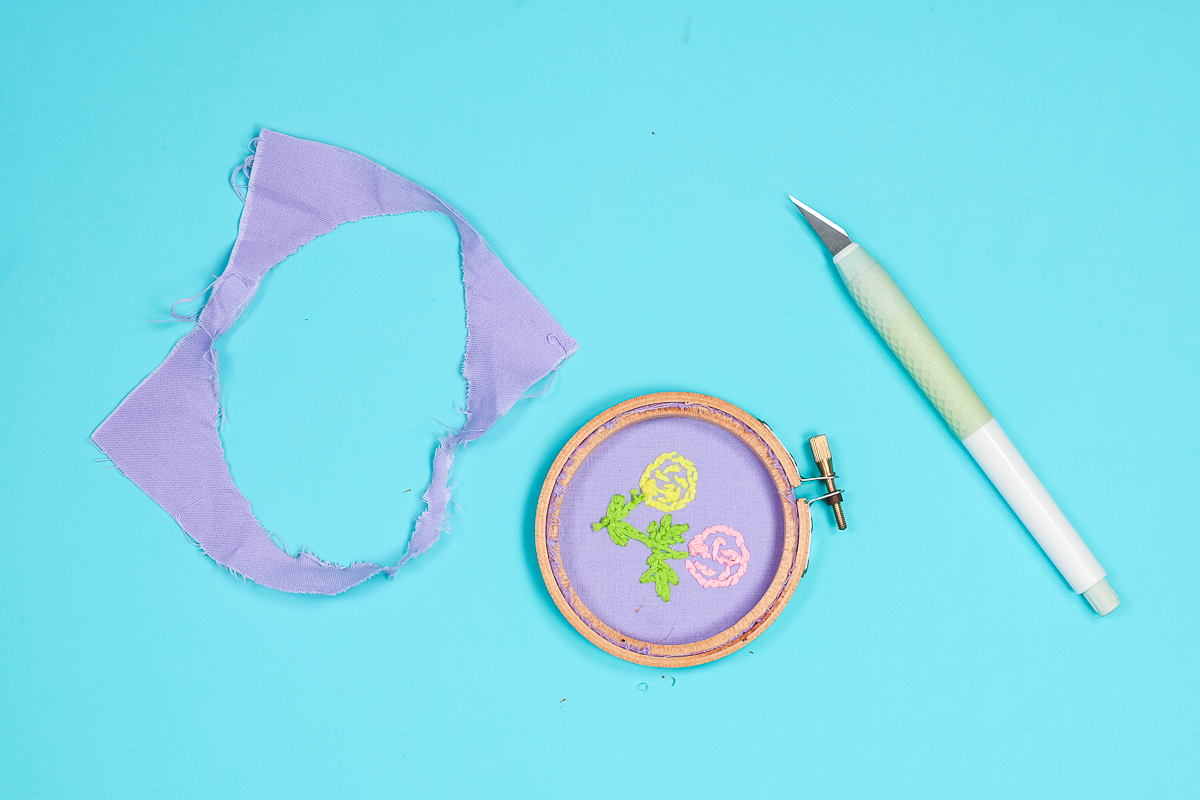
- Craft knife
- Hot glue and glue gun
- Scissors
Choosing the Right Design
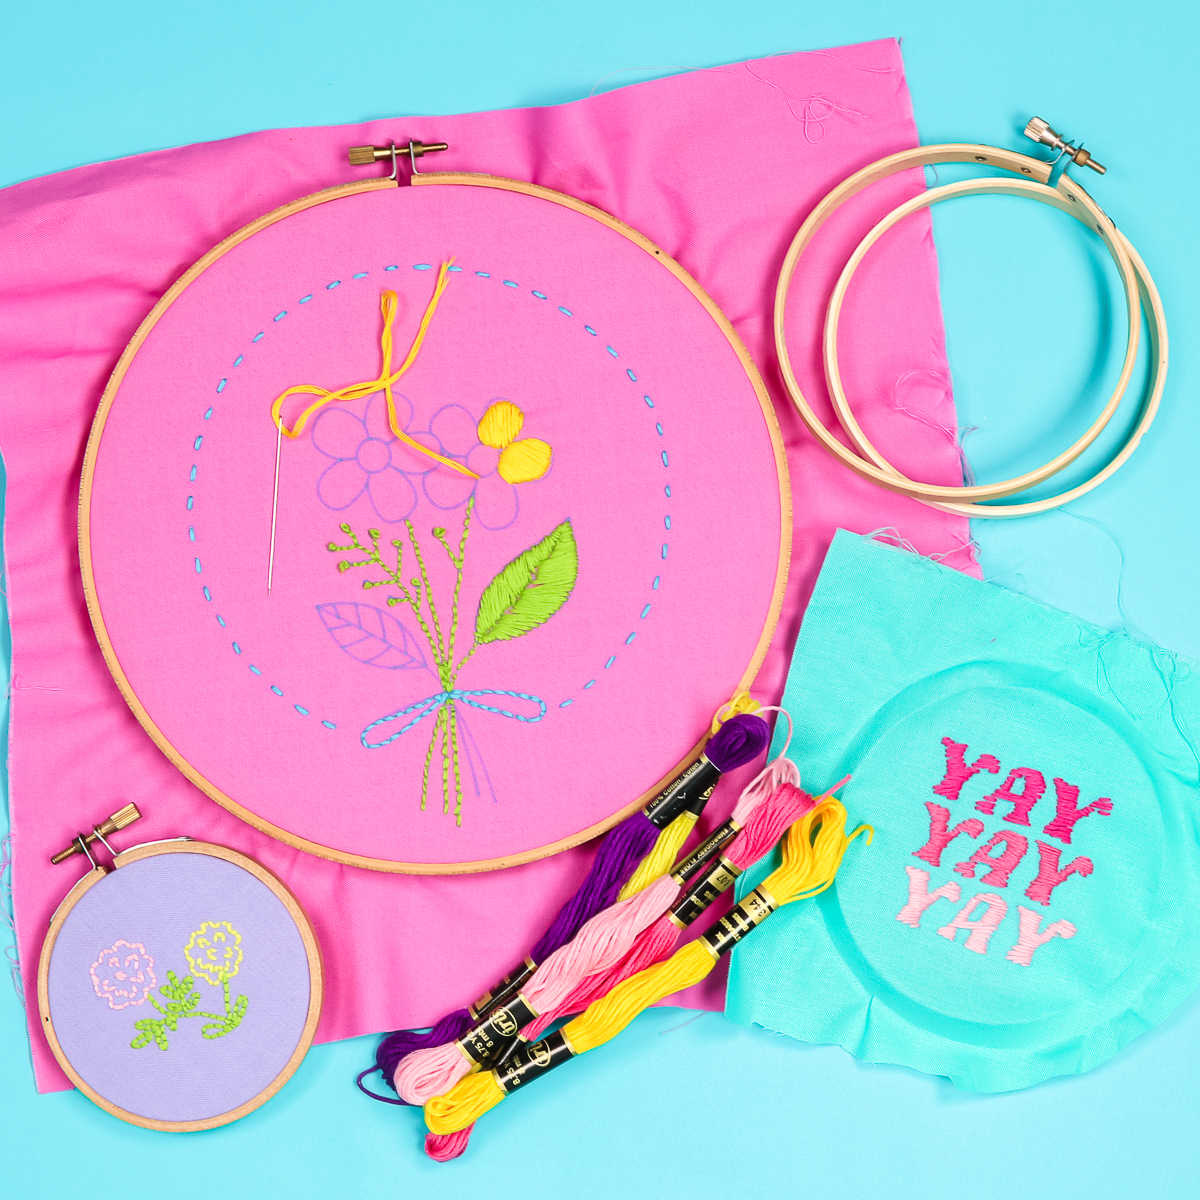
You want to choose certain images and designs for this project, so let's take a look in Cricut Design Space and pick a few projects to start on. I like to look for designs that are single-line designs. To find these types of files, click “images” then filter them by operation type and choose “draw only”. That sorts for designs that are just a single line and can be drawn with a pen. You can then search for any image that you may want to add to your project. Once you have your image, be sure to resize it to fit your embroidery hoop and make sure all of the lines are draw lines then click “make it”.

NOTE: You can use the contour feature in Cricut Design Space to remove some of the designs if you would like.
Drawing on Fabric with a Cricut
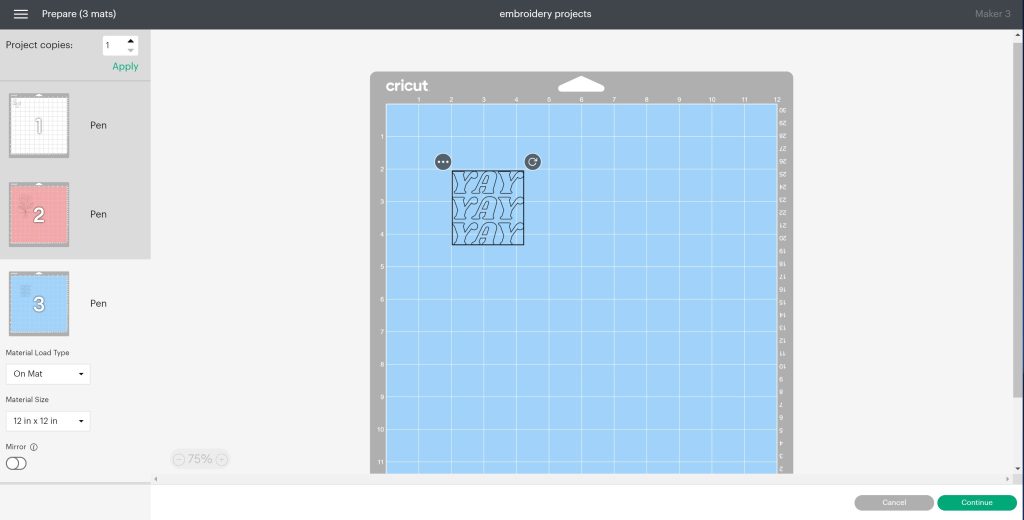
You will find that your designs are all on one mat and you will need to move them to different mats. Click the three dots, then click “move object”, and put it on a new mat. You can pick the color of that mat and click “confirm”. Continue until each project is on its own mat.
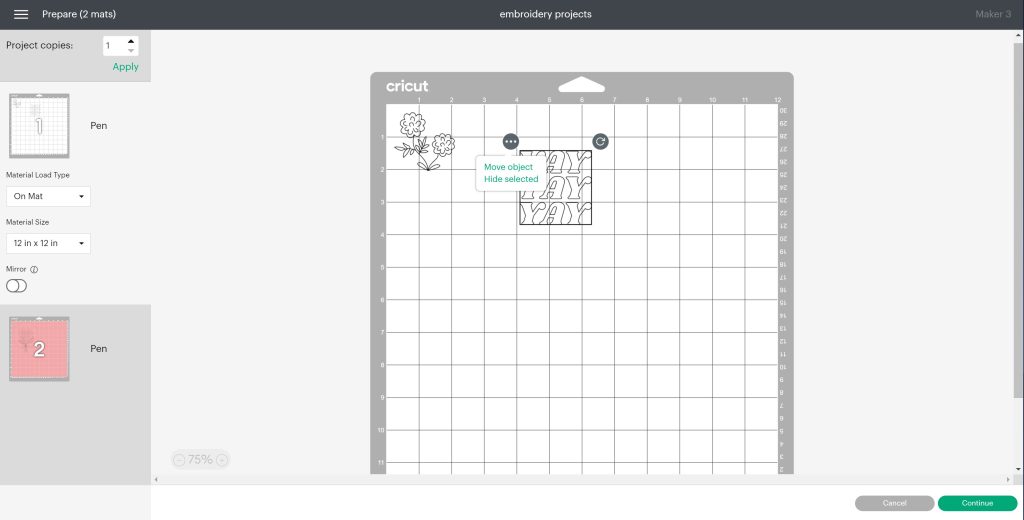
I do want more room left around my design to actually put it in my embroidery hoop. Click the object and move it around on the mat to a better location. Again, repeat for each design. Once everything is moved and in location, click “continue”.
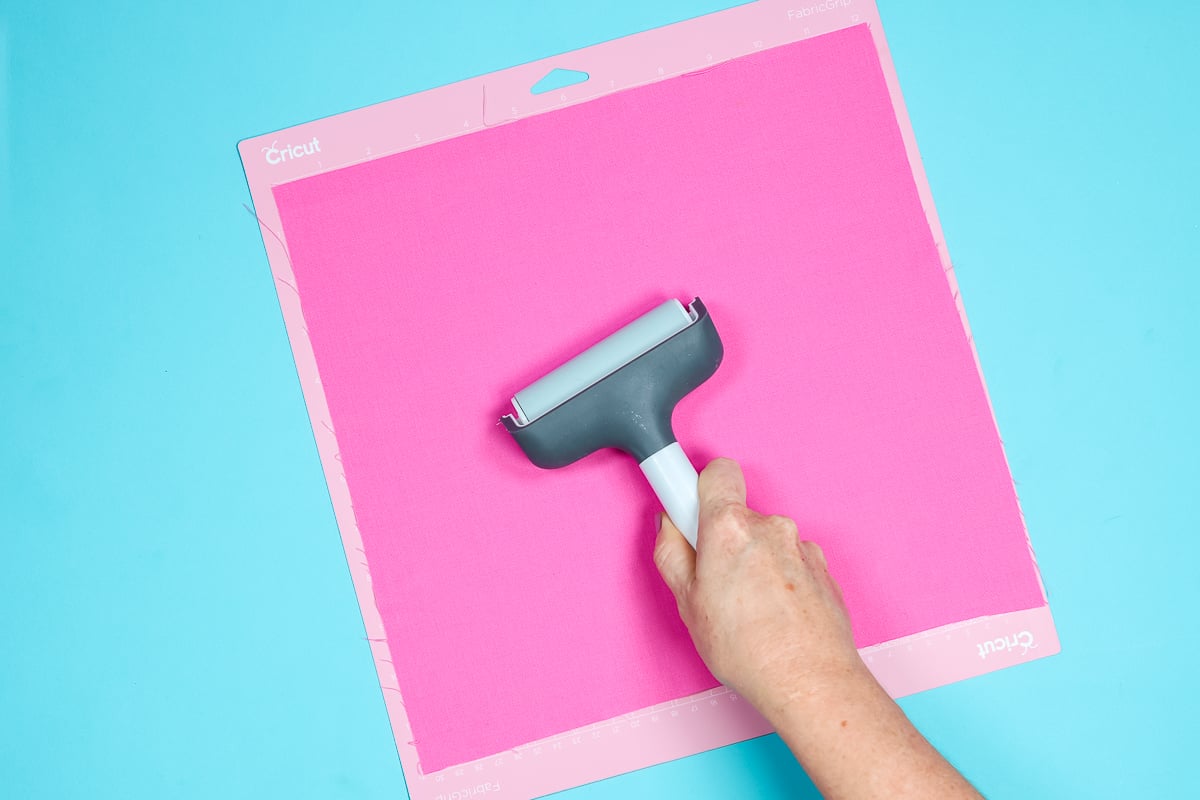
Add your fabric to a fabric grip mat and use a brayer to press it down well.
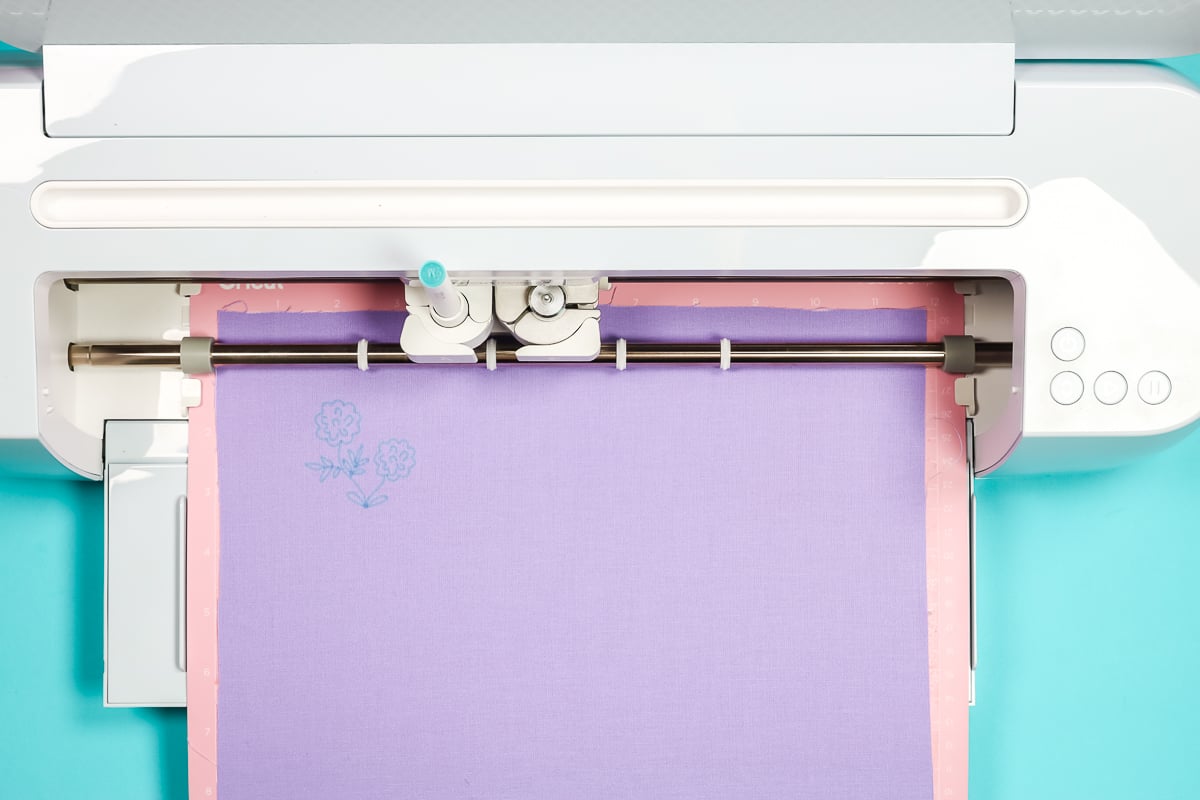
Set your base material to whatever you're using. I'm using a piece of light fabric, so I used the cotton setting. Load your pen into your machine and you actually don't even need a blade in clamp B, because we are just going to draw on the fabric and not cut it. Load your mat into your machine and press the “go” button to draw the design. When the machine is done drawing, you can eject the mat and start some embroidery.
Adding Embroidery Stitches
Please note that this is not a tutorial on how to do embroidery or any of the embroidery stitches. I know there are plenty of experts out there on embroidery and I am definitely not an expert on embroidery. I'm just picking up the craft again and sort of practicing my stitches.
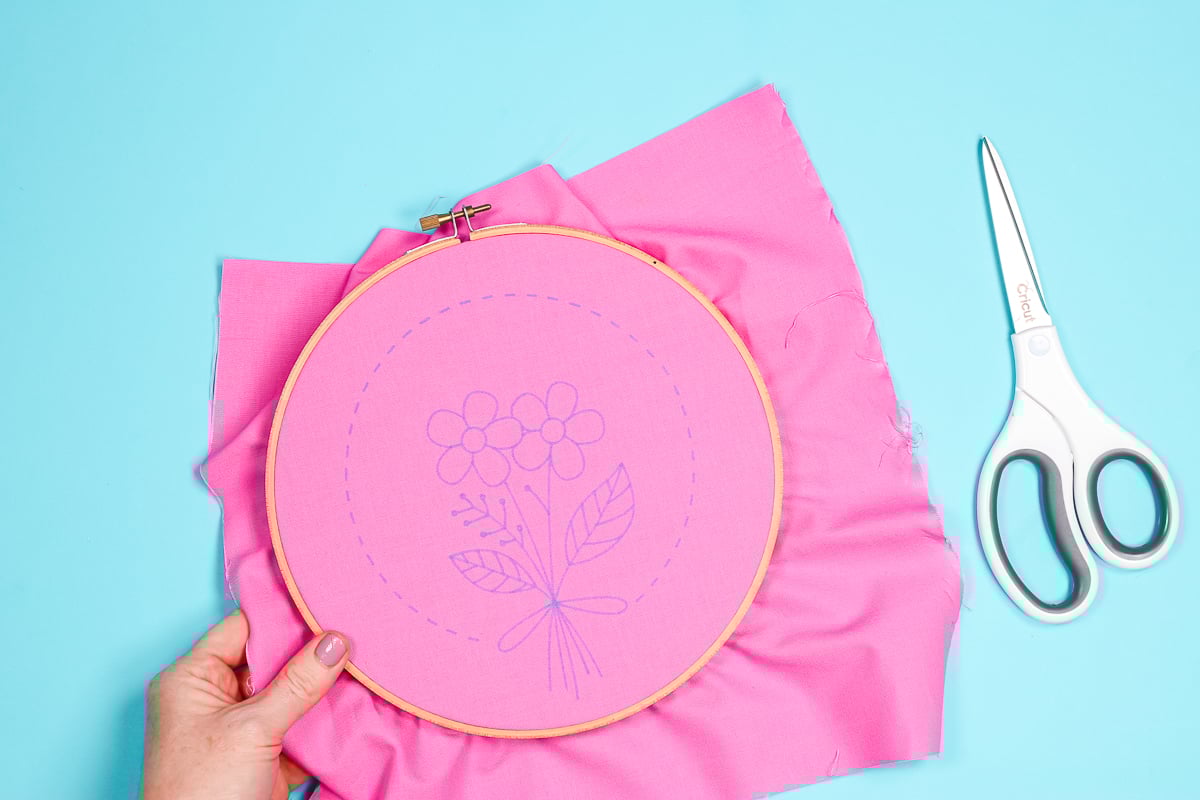
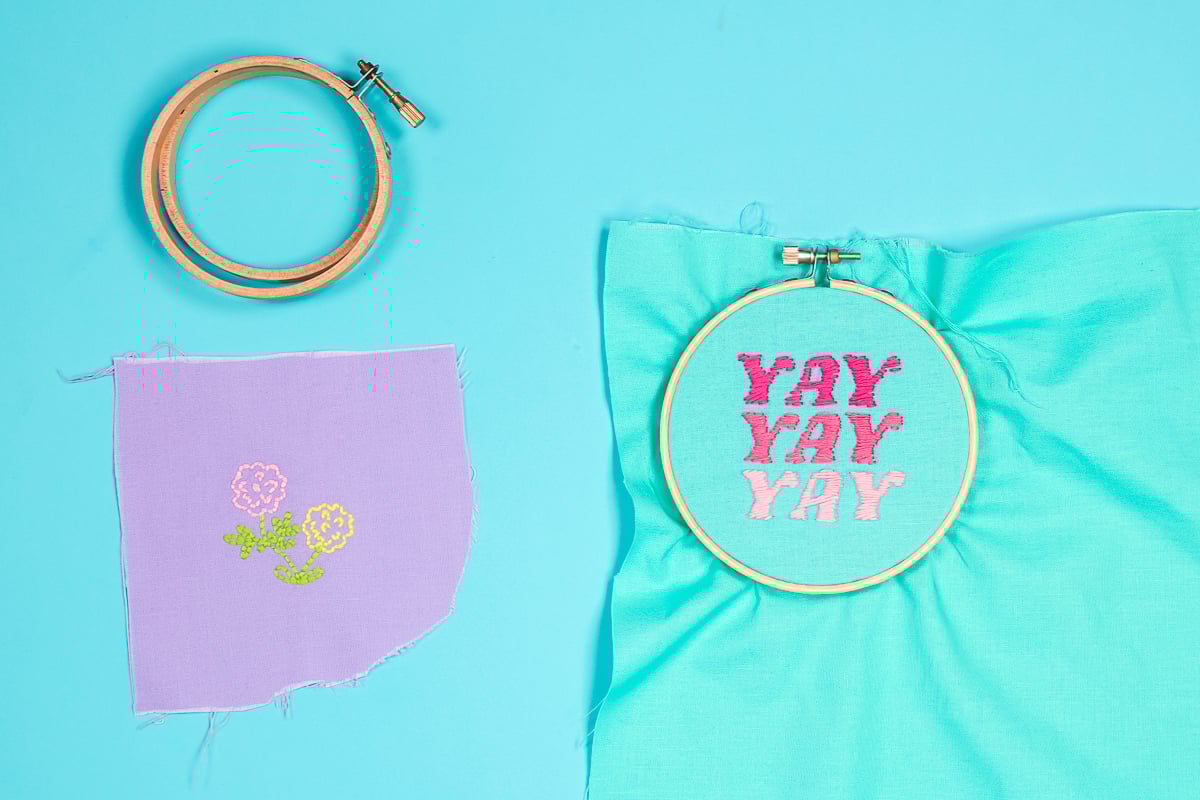
To start embroidering, peel the fabric back from the mat then add it to your embroidery hoop. Separate the two rings and put the inner ring behind the design. Press down on the top ring once you have your design located. Tighten the screw at the top and then pull the fabric tight. I like to pull it from the back, however, you don't want to pull it too much. It should be like a drum but your image should not be distorted. Then finish tightening the screw at the top once everything is tight. Do not cut away any of the fabric as we will be removing this later.
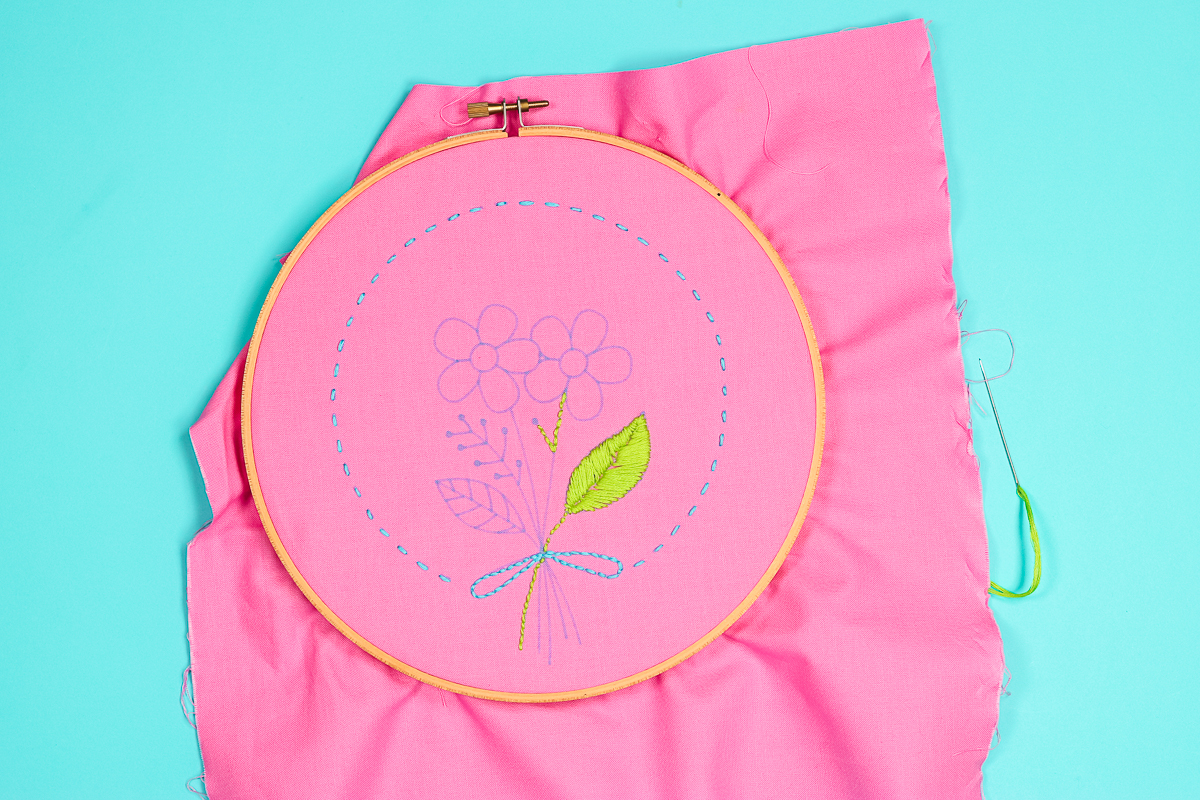
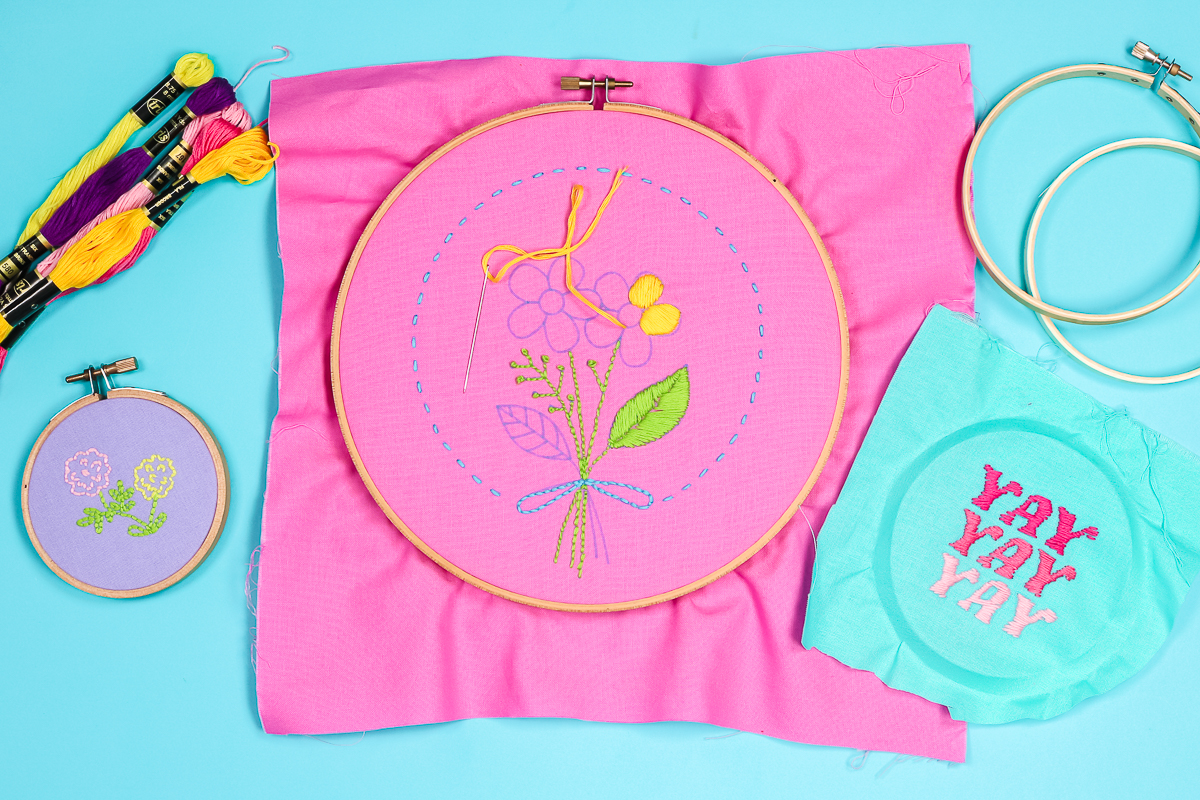
You can use any color embroidery thread that you would like, and any stitches. You can learn different embroidery stitches and do them with this technique. You're just using your Cricut machine to draw on the actual pattern, and then you're just filling it in with embroidery thread. Do that in any way you would like depending on the design, the look you're going for, and how talented you are with embroidery. Just have fun with it, and fill in your entire area with various stitches.
Removing the Washable Fabric Pen
When you're done with the embroidery, you will need to remove any marks that are from the washable fabric pen. To do that, first, trim around the outside. I do like to leave quite a bit at this point. Then, loosen the screw and remove the piece from the hoop. The best way to remove this pen is with hot water. I like to take this to my kitchen sink, use my kitchen sprayer, and spray hot water over the entire area. Let it dry once the pen marks have disappeared then iron if needed.
Finishing your Cricut Embroidery Hoop Art
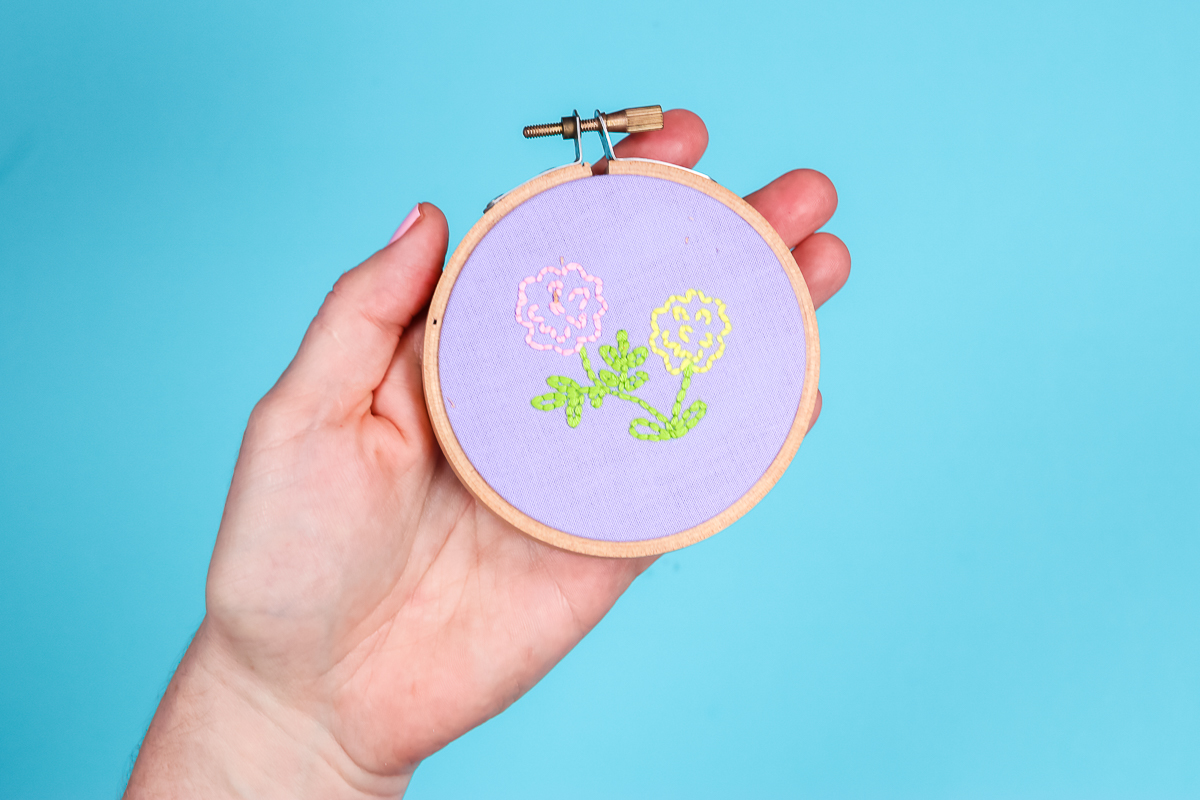
To finish, add it back to the embroidery hoop, put the outer ring back on, and center the design. Once the design is where you want it, tighten the screw and pull the fabric to where it's tight. Do not distort the embroidery image. Once you have it where you want it and it's tight, tighten the screw as much as possible. I like to finish off the back using a craft knife to cut the fabric as close as possible to the hoop.
Then, you can just use hot glue around the back to secure everything into place. Once you've done that, your embroidery hoop art is ready to hang on the wall.
Now that I've been stitching away, you can see some of the results. You saw me finish one of my projects, and I'm going to continue and finish the rest of these as well. I feel like I got better with each project. I'm hoping as I improve my skills, I can get better at embroidery and start doing it regularly with my Cricut machine.
So, are you going to give Cricut embroidery a try with your machine? Pick up the washable fabric pen to make this project easy. Then just practice adding stitches to whatever fabric you have on hand. You may just find a new craft that you love!
For me, Cricut embroidery is a chance to go back to my crafting roots a bit. Plus, embroidery really is a relaxing craft. So, if you are looking for a zen craft activity, you may just try drawing embroidery patterns with your Cricut machine.
Love this and want more Cricut craft ideas? Try the links below!


Loving this. I use my Cricut to make my cross-stitch designs. I am glad more of you talented ladies and gents are showing other mediums to use our machines for. Thank you for sharing.
Isn’t it so fun! I love seeing all the different ways Cricut can be used.
Could you use alternate fabric pens (the type that disappear with heat), assuming they fit in the Cricut pen folder? Of course, one would need to be aware of the effect(s) of heat applied to whatever fabric you are applying the design. Just a thought since I already have a supply of fabric pens and refill inks that are heat erasable.