
Making your own stencils is one of the easiest ways to make your own crafts. Determining the best stencil material for Cricut can be a lengthy process, so I've done all the work for you, allowing you to create perfect projects every time.
Today, we're going to talk about different ways to make a stencil with your Cricut. We're going to compare stencil vinyl with removable vinyl and permanent vinyl to see which of these three materials is the best for making stencils.

Best Stencil Material For Cricut Comparison Video
Want to watch this entire comparison on video instead of reading about it? You can do that below!
Can't watch the video or missed some of the information? I am also covering everything you need to know below.
Best Stencil Materials For Cricut
There are three different options for creating a stencil with your Cricut.
- Stencil vinyl is specifically designed for creating stencils with your Cricut machine and is self-adhesive.
- Removable adhesive vinyl has a sticky backing and should peel back easily from your project.
- Permanent adhesive vinyl is also sticky, but it creates a stronger bond with any surface to which it is added.
Don't love these materials? We are testing these three today, but you can also see the posts on other types of stencil material using these links:
Which one is the best material for making stencils? First, let's compare the three, and then we'll create a simple farmhouse project.
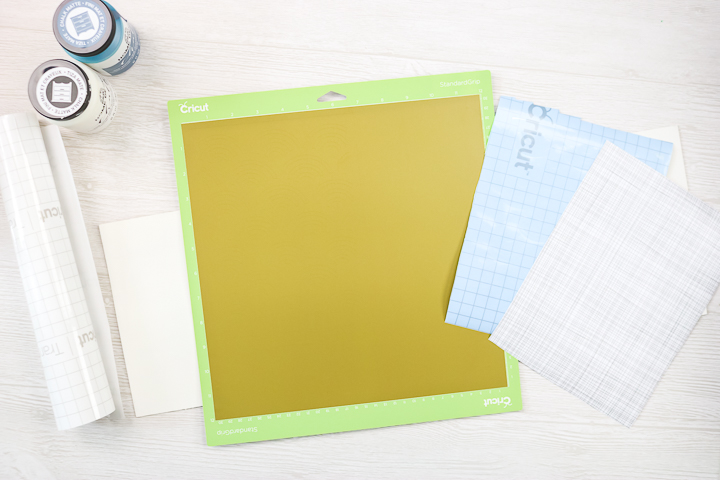
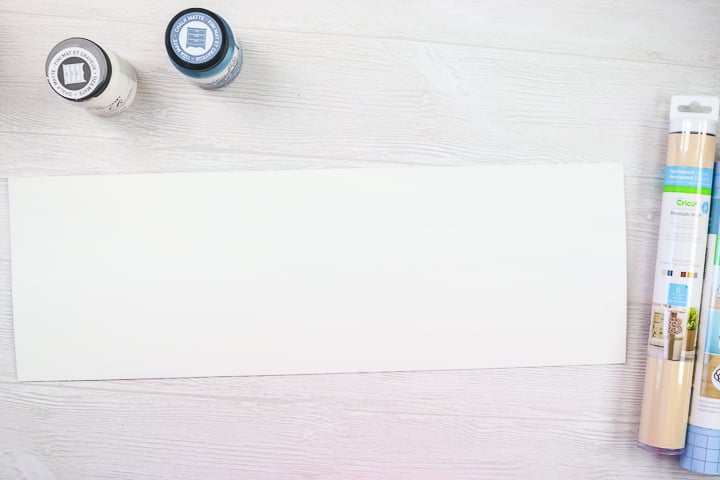
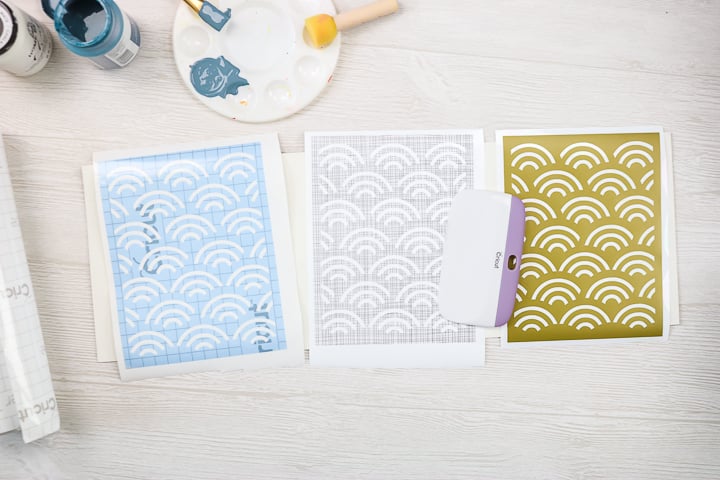
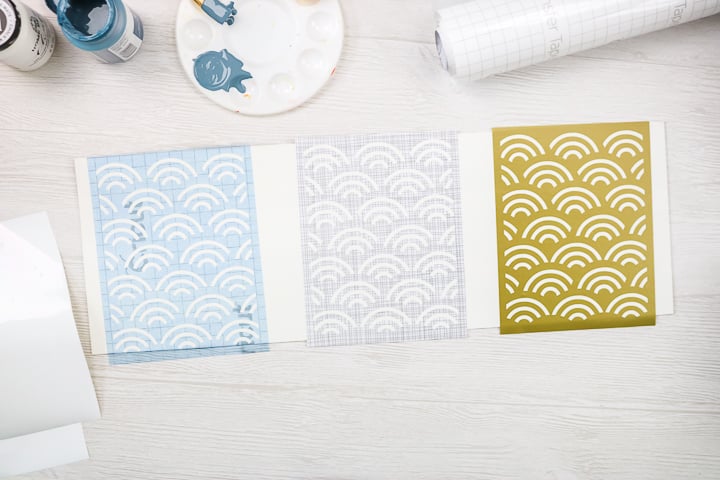
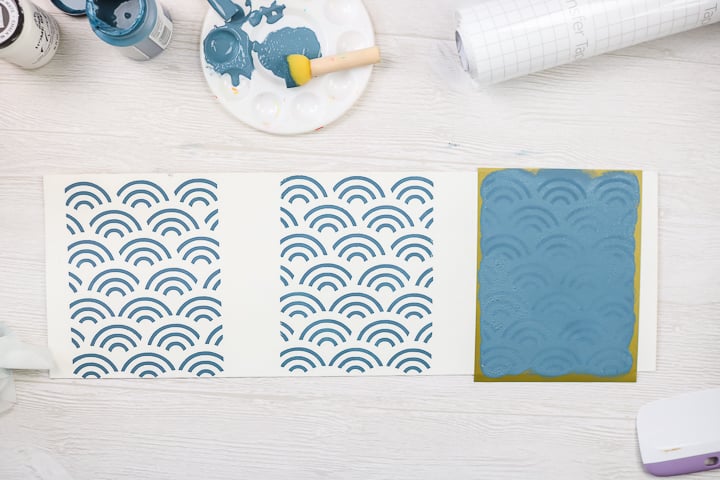
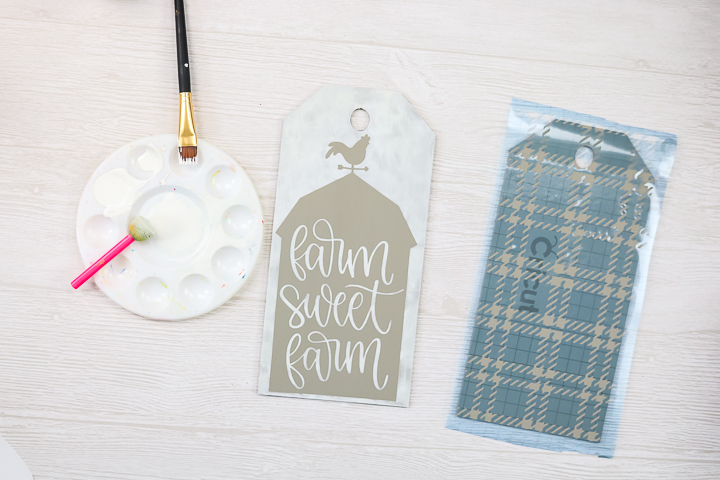
We're going to test all three of these on a piece of wood painted with chalk paint. I'm going to paint a piece of wood white, and then stencil with all three of these in a dark blue over the top so we can see any bleeding. I'm going to cut the same stencil from all three materials to ensure a fair comparison, and then use them with the same board. Our comparison will focus on the amount of bleed we have. For this test, the gold vinyl is the permanent vinyl, the patterned vinyl is the removable vinyl, and the blue vinyl is the stencil vinyl.
Would you like the cut file for the stencil shown? In Cricut Design Space, it's #MABC8E86
How To Cut Cricut Stencil Vinyl
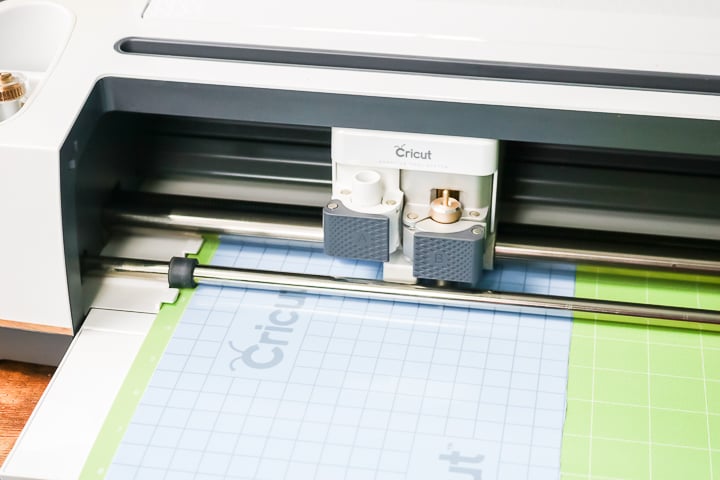
Stencil vinyl is placed face up on the mat, and then added to the Cricut machine with the fine-point blade installed. I'm using my Cricut Maker with “stencil vinyl” picked from the material list. However, the Cricut Explore, Cricut Joy, and Cricut Venture models will also work with this project.
How To Cut Vinyl To Make A Stencil
Place the vinyl (both removable and permanent are the same) on your Cricut mat face up. Choose “vinyl” from the material list and cut using the fine point blade. Then we can remove this material from the machine. Again, any of the Cricut machines will equally work with this vinyl.
How To Weed A Cricut Stencil
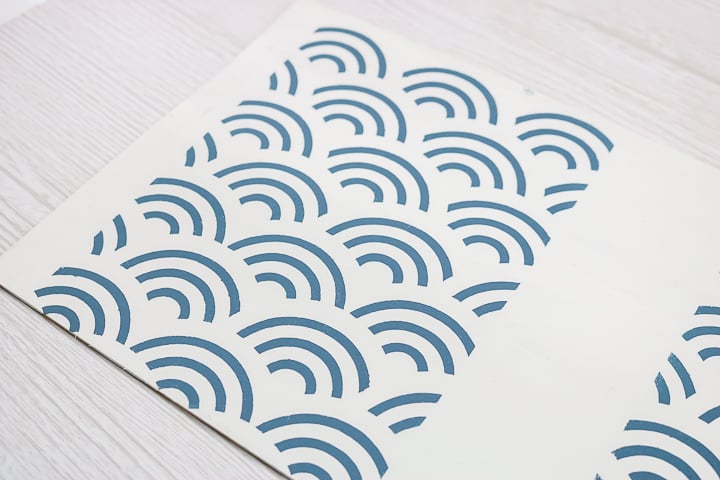
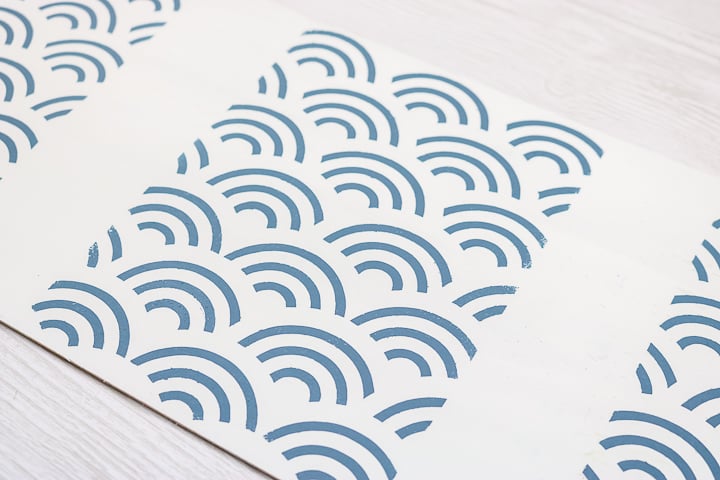
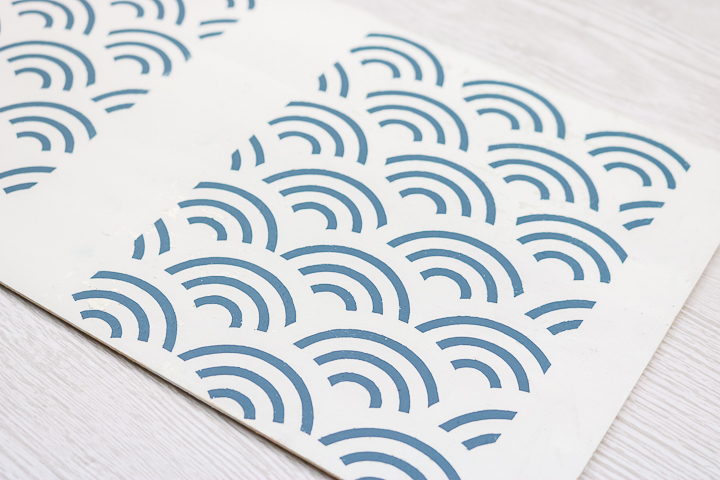
Since these vinyl designs will be used as stencils, we will remove everything around the outside edge, and then we will remove each of the inner pieces.
Stencil vinyl is slightly different. I'm going to go ahead and weed it in the same way, but you can also try to just pick it up and not weed away all this excess. I always feel better when I weed away all this excess, and then I have something to put it back on. The stencil vinyl is supposed to be reusable, whereas removable or permanent vinyl isn't. However, when you attempt to remove it, it will stretch and distort, and sometimes it may tear slightly, rendering it unusable for reuse. That's one of the reasons I actually weed all of them, and I just use a weeding tool and pick up the middles.

Applying Your Stencil to Wood
After the vinyl stencil designs have been weeded, we'll apply them to our board and start our paint test. The wooden board I am using is slightly rough in texture. I wanted that slight roughness because that's the main problem I have with stenciling. The board was painted and then allowed to dry overnight. I recommend allowing your paint to cure before starting any stenciling project. It will help ensure that your stencil does not lift your base coat of paint.
Peel the vinyl from the backing paper. To make the process easier, you can apply transfer tape over the top of the vinyl. For the stencil vinyl, I usually just peel it back. The stencil vinyl has less stretch and is less likely to tear than regular vinyl.
Apply the vinyl stencil where you want the design to go. Once it is applied, use a tool like the scraper to gently press it down. You want to burnish it down really, really well, and get it really stuck. I like to use a pretty large scraping tool for this. You can use a smaller one and just go over more times and in multiple directions. Take note of any bubbles that may appear and work them out as needed.
Using Transfer Tape
You can also try using transfer tape to add your stencils to the wood. If you're using the transfer tape, peel back the backing, place it on your design, and press it down firmly. I like to flip it over, peel that backing paper away, and then apply it to the board.
Then, slowly peel back your transfer tape, ensuring that your stencil remains on the wood. Once you have removed the transfer tape, burnish thoroughly in all directions, looking for any bubbles.
How To Stencil On Wood
There are a few tips to keep in mind when stenciling on rough wood.
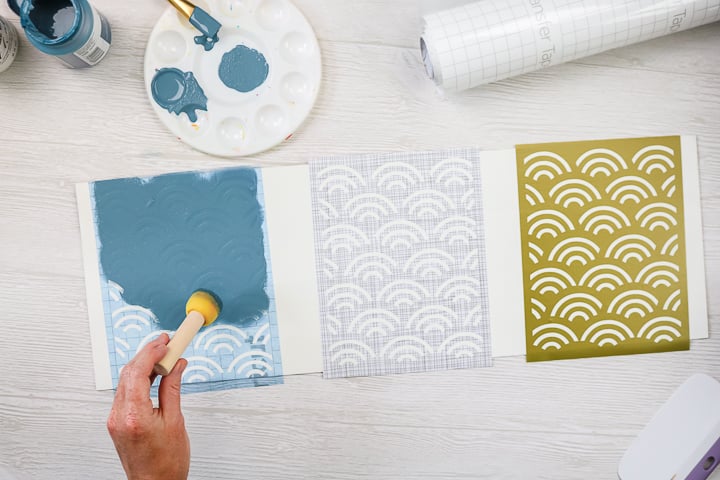
- Use a stencil brush. I like to use a pouncer brush.
- Do really light coats of paint. Three light coats are better than one heavy coat!
- Ensure your stencil is sealed around its edges. Take the time to burnish the edges. If there is a gap, the paint will seep through.
- Paint your first coat in the same color as your board (or decoupage if your board is raw or stained) and allow it to dry. Then you can continue with the color you want for your design. Anything that bled would be the color of your board, and that would block any bleeding that's your design color.
- Always paint with the stencil brush in an up-and-down motion. If you use a side-to-side motion, you risk forcing the paint under the stencil.
- Remove the stencil when the paint has dried for a few minutes. You don't want it so wet that the paint gets all over your hands when you remove the stencil—keeping a rag close by so you can wipe your hands off as you peel up.
- Remove the stencil by peeling it up from one edge and peeling it across.
Best Stencil Material for Cricut Results
Let's take a super close look at the results so that we can see which vinyl performed the best and is the best material for making stencils.
Stencil Vinyl
One of the benefits of stencil vinyl is that it is supposed to be reusable. When I was removing the stencil vinyl, it ripped multiple times, making it unusable for additional projects. You can see a slight bleed in a few small areas, but it is pretty clean overall. Overall, I'm impressed!
Removable Vinyl Stencil
Again, the removable vinyl tore as I was pulling the stencil off. The removable vinyl overall looks pretty good. There is a slight bleed compared to the stencil vinyl. However, it is still a great choice! The benefit to me of the removable vinyl is that you might have some in your stash that you no longer like the color of, so it's kind of like having a free stencil.
Permanent Vinyl Stencil
The permanent vinyl really stuck down, which is a bit of a problem when trying to remove it. It leaves some adhesive residue because the adhesive is so strong. You would almost have to have a whole different method of removing the adhesive, especially on something white. The stencil itself is really clean, but I wouldn't use the permanent ink, at least not on wood, as I wouldn't want to have to remove that adhesive residue. So for me, the permanent vinyl is out.
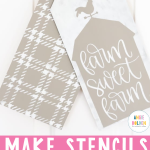
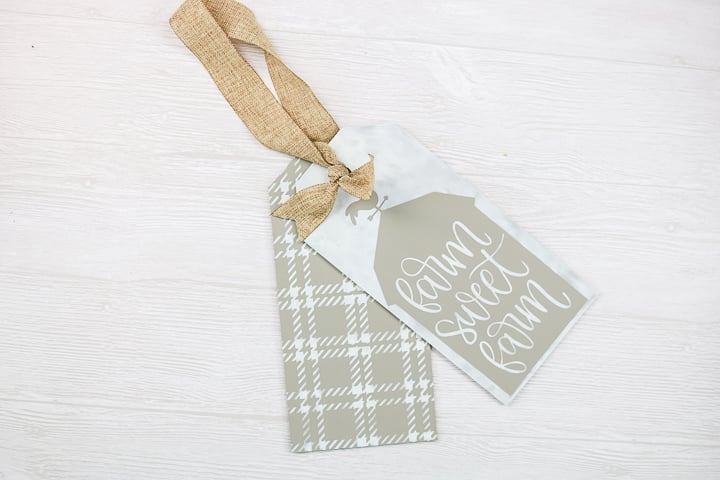
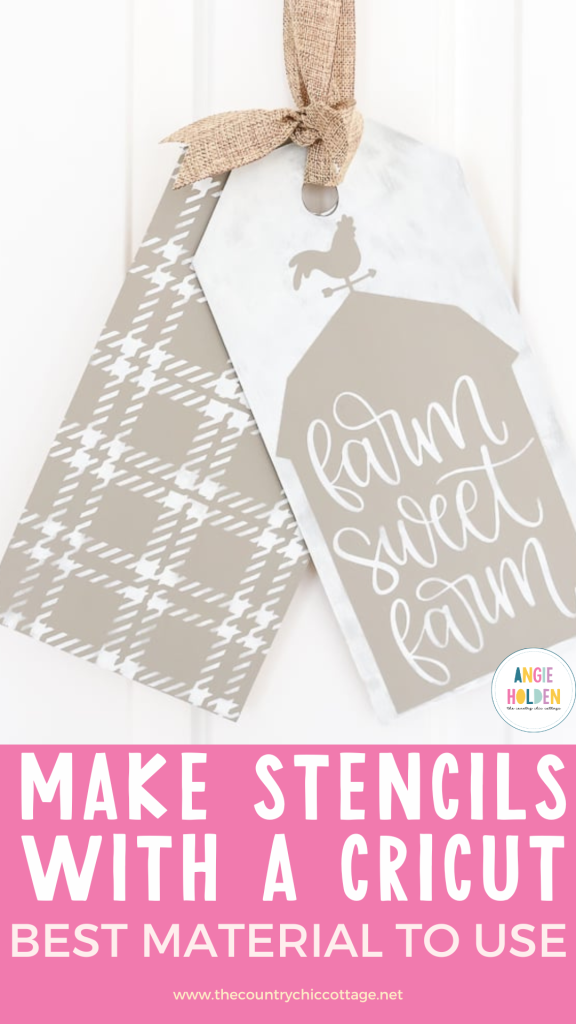
DIY Stenciled Wood Tags
Now that you've seen that my favorite material for making stencils on a Cricut is stencil vinyl, let's create a cute project! Confused about cutting wood with your Cricut Maker? For more tips and tricks, please visit here.
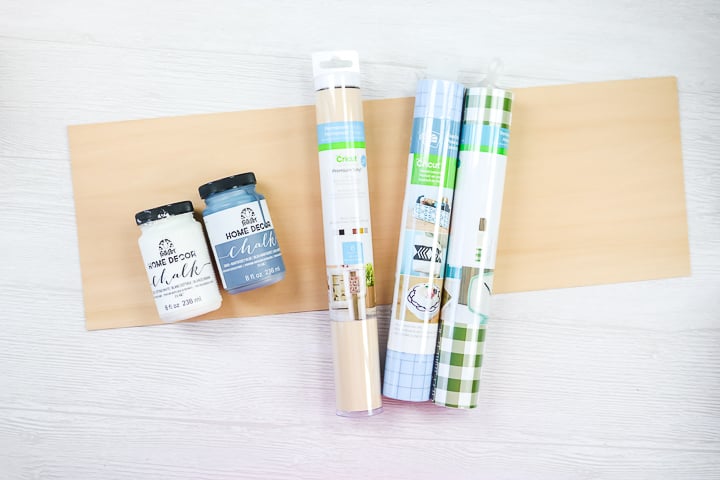
Supplies Needed To Make Wood Tag
- Cricut Maker
- Knife blade
- 6 x 12 basswood from Cricut 4 sheets (one package)
- Stencil vinyl
- Transfer tape
- Chalk Paint white and brownish-gray
- Cut file for tags and stencils
- Wood glue
- Burlap ribbon
- Hot glue and glue gun
Step 1: Cut Basswood
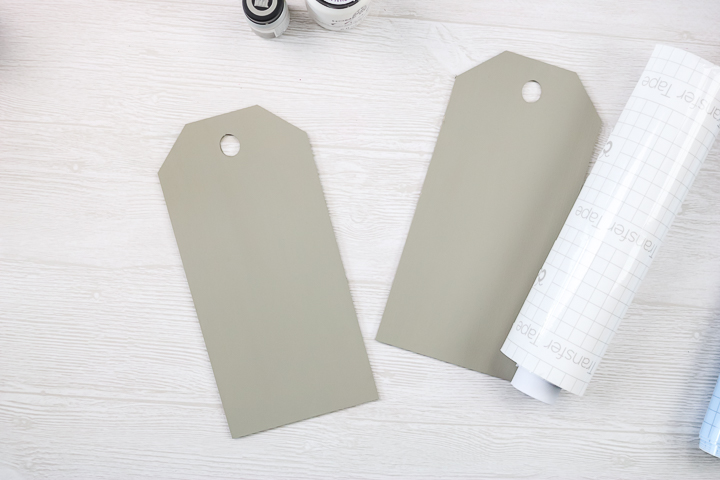
Cut basswood on the Cricut Maker. You'll need four tags in total, cut with the knife blade. Assemble them into two sets with glue, and paint one side. Let the paint and glue dry overnight so that they will be dry for stenciling.
Step 2: Cut Stencil & Weed Design
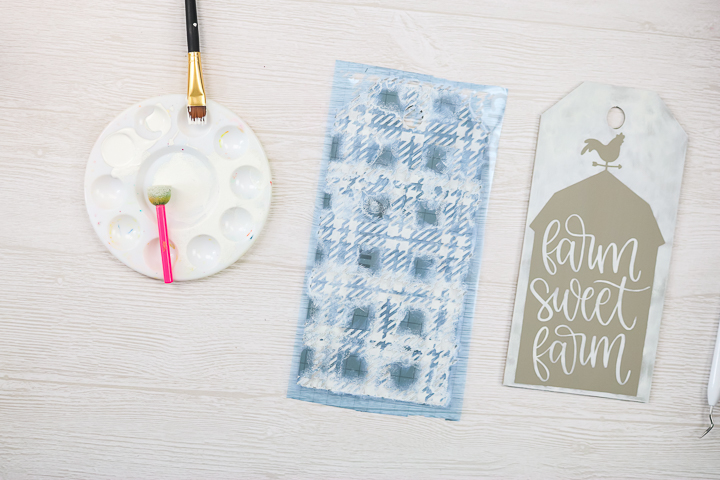
Cut your stencil design using stencil vinyl. Weed away all of the excess.

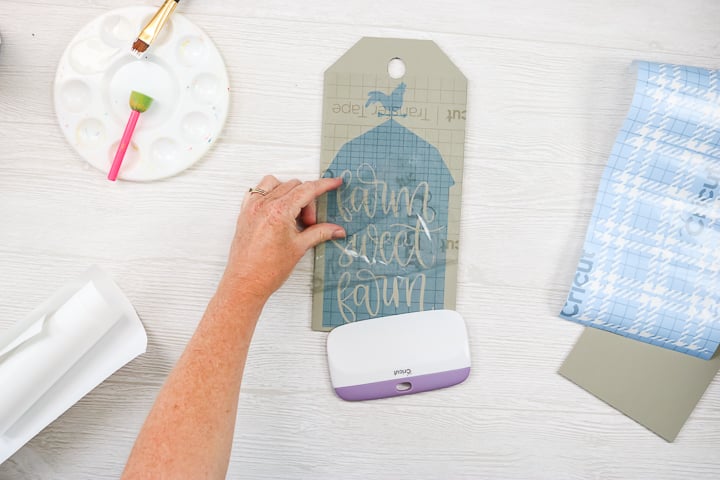
Step 3: Add Transfer Tape To Stencil
Add transfer tape, if needed, to the top of your design and burnish well. Peel back the transfer tape and ensure your vinyl is securely adhered to it. Place the stencils on the wooden tags and burnish well. Peel back the transfer tape. Press the stencils down really well so that there is minimal seepage underneath the stencil.
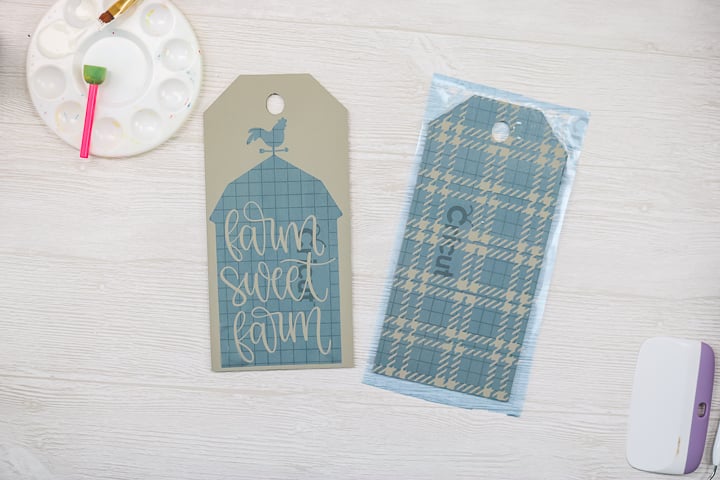
Step 4: Repeat Step 3 With Your Other Design
Repeat this same procedure with the other design. I actually didn't even use transfer tape with this version.
Step 5: Add Paint To Your Stencil
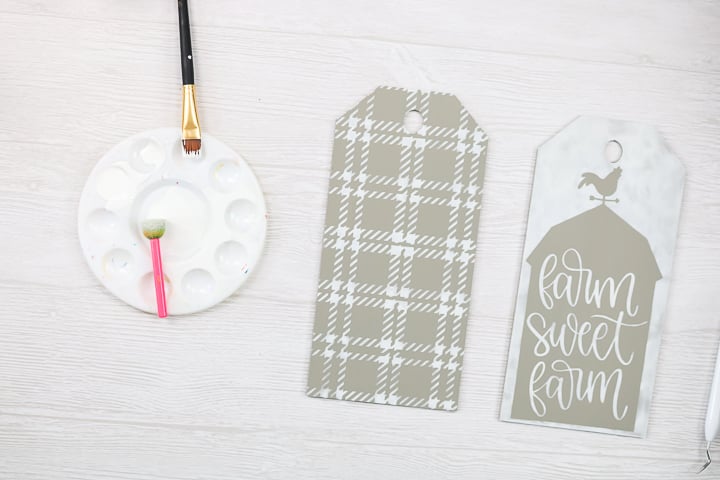
I'm applying a light coat using a dry brush technique for a rustic look. Remove as much paint as possible from your brush. Start to the side and work your way towards the stencil. Some of the first layer of paint will show through the white, and that's the look we want. This gives the paint a rustic, worn look without requiring any sanding or similar treatments. I like to gently brush over the top once the paint is in place to remove any brush strokes.
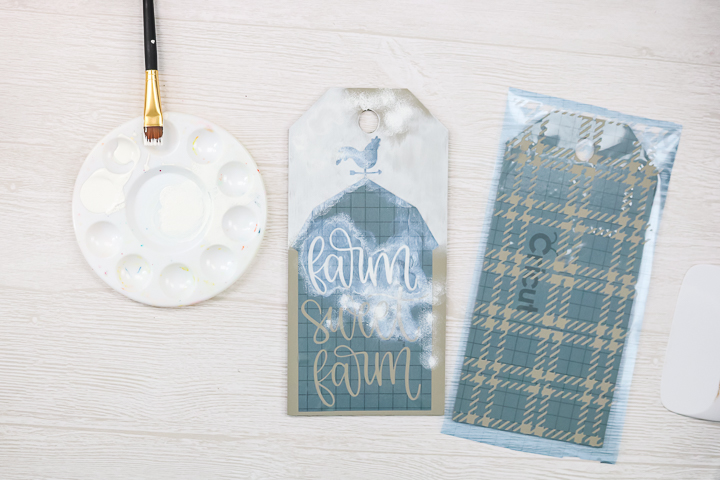
Step 6: Continue Painting & Remove Stencil
Continue the same paint method over the entire surface. Then remove the stencil and reveal the finished piece.
Step 7: Repeat Step 6 With Your Other Design
Repeat the same method for the plaid tag.
Step 8: Allow Both Tags To Dry
Allow both tags to dry completely. This should not take long, as the white paint is very thin.
Step 9: Choose Your Ribbon
You can finish it off however you would like. I'm going to add a little burlap ribbon, but you could definitely add some color to this portion if you would like.
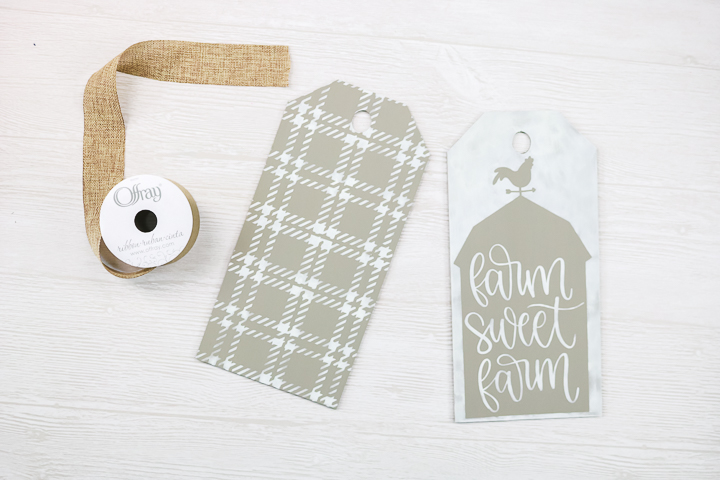
Step 10: Tie Tags Together
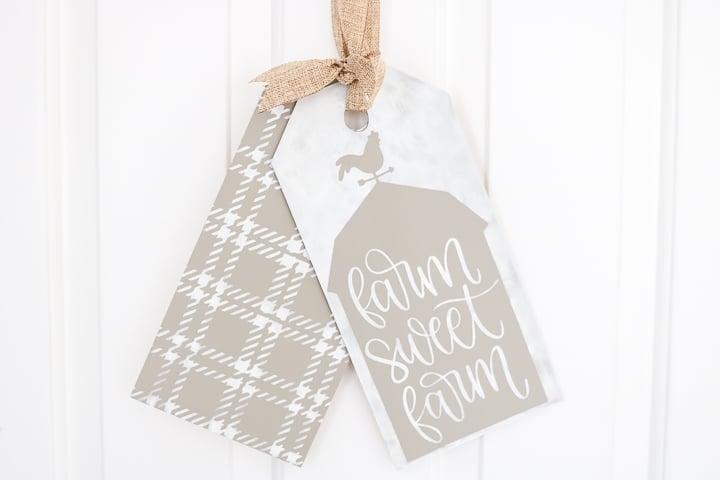
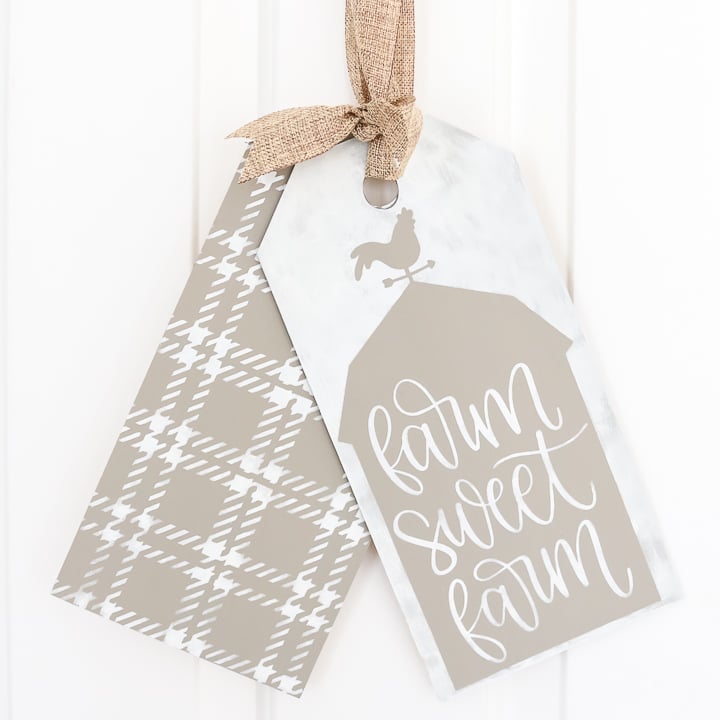
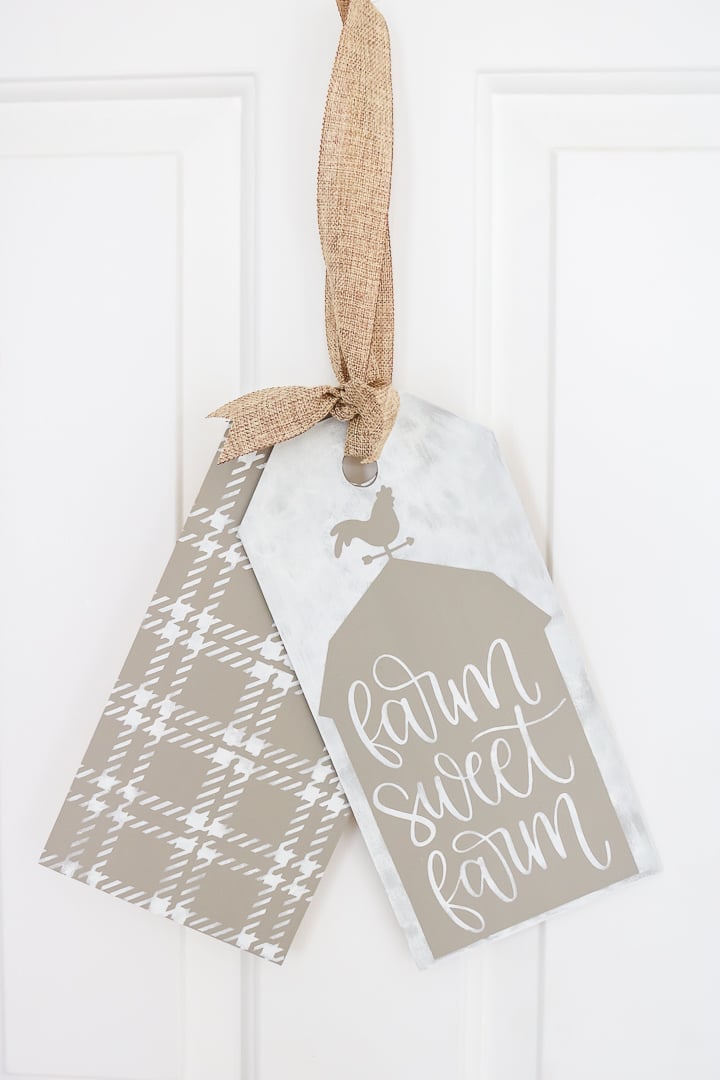
Stack your tags together and place the bottom one at a 45-degree angle. Glue them together where they are touching using hot glue. Then make a tie from the burlap ribbon. This one is ready to hang on your door!
Final Thoughts On Best Stencil Material For Cricut
Now that you know you can make your own adhesive stencils with your Cricut, there are so many projects that you can make. I have given you one to get started, but you can really let your imagination run wild with this one.
Plus, if you have ever wondered how to get those tags to paint for your front door, why not just make them with your Cricut Maker and the knife blade? Of course, if you don't have the Maker, you can purchase the wood tags and cut the stencils with any of the Cricut machines.
What is the best material for making stencils on a Cricut? I think stencil vinyl is the clear winner here, but if you have some removable vinyl on hand, it will do in a pinch. Happy creating!
FAQs About The Best Stencil Material For Cricut
Here are answers to some of the most frequently asked questions I receive about the best stencil material for Cricut. If your question isn’t listed, feel free to drop it in the comments and I’ll be happy to help!
Where Can I Purchase The Stencil Designs Used For This Best Stencil Material For Cricut Project?
You can get the stencil designs for this project by clicking here.
Could You Use The Transfer Tape To Remove The Stencil After Painting?
I wouldn't risk ruining your paint.
Are You Placing The Permanent And Removal Vinyl Face Up Or Face Down, And Also Do You Have To Mirror Your Images?
Just cut face up and no mirror.
Are There Differences That You've Seen With Cricut Stencil Film Vs Cricut Stencil Vinyl?
No differences that I noticed. I just used the new stuff here!
What Color Is The Grey/Brown That You Used In This Best Stencil Material For Cricut Project?
I think it is Parisian Grey from FolkArt.
Would You Suggest That I Stick With Those Brushes For A Stencil Project, Or May I Modify It To A Spray Paint?
Either one would work!
5 More Cricut Stencil Crafts
Did you love learning about the best stencil material for Cricut, and are looking for more Cricut stencil crafts? Then check out the projects below!


I haven’t completely read this post but I have an older Cricut and am wondering if there is a way to make stencils to use in decorating cookies with an air brush. Can an older Cricut use design studio to download fonts for stencils. Would you class help with older Cricuts? Could you email your response?
I think you can use stencil film for this and an older Cricut should cut it just fine. I don’t know if it will be food safe, however. Might want to check the material packaging and see.
I have been admiring these large “tags” for some time. Been on the lookout for the wooden shapes every time I go into Joann’s! No such luck! Cannot believe that I could just make my own on my maker. Thank you so much for the tutorial and the comparison of stencil materials. Downloaded the files and now I just need to get brave enough to cut wood on my maker, as I haven’t done this material yet. Thank you, thank you!
Not sure if anyone posted this, but I found my tags at Dollar Tree! They had a print on them already, but that was easily painted over! Can’t beat the pair of tags for $1!
Love your videos.
Thank you!
I hate watching videos they take much longer to understand especially when speakers forget to tell you important steps. I have to read directions I am not a visual learner and that is why I don’t get on my Cricut much. Recently, I purchased the buffalo print and gray print to make deer shirts for the hunters in my family. Needless to say I couldn’t find anyone who said that you must put this type of paper a certain way. I quit. I had a binder but I could not find one this affordable. Then my house caught on fire. I thank God that my Cricut and Computer were safe at my daughter’s house. She uses it more than me. Not now! Thank you for offering that binder organizer and for comparing best stencils. The cricut stencil did not work well for me and tore also. My daughter found a thick clear paper almost like a transparency and it works great. you have to put more pressure on it but she made the cutest signs for her garden. I am going try playing with it now. I painted a Rosary and now I want to paint words on the crucifix. The colors I found are heavenly so I am excited to out shine her beautiful craft items. I am the t-shirt queen. She has signs, rugs, etc.
Thank you again this will make working on projects quicker and if a person cannot comprehend they can preview your videos this was an awesome idea.
I have a Silhouette but I still enjoy your newsletter & crafts. Thank you!!