I'm very excited to introduce you to the xTool Apparel Printer. If you've followed me for a while, you've probably heard me say I would never own a DTF printer and may be wondering why that has changed.
In the past, my concerns stemmed from the maintenance requirements and the safety surrounding the adhesive powder.
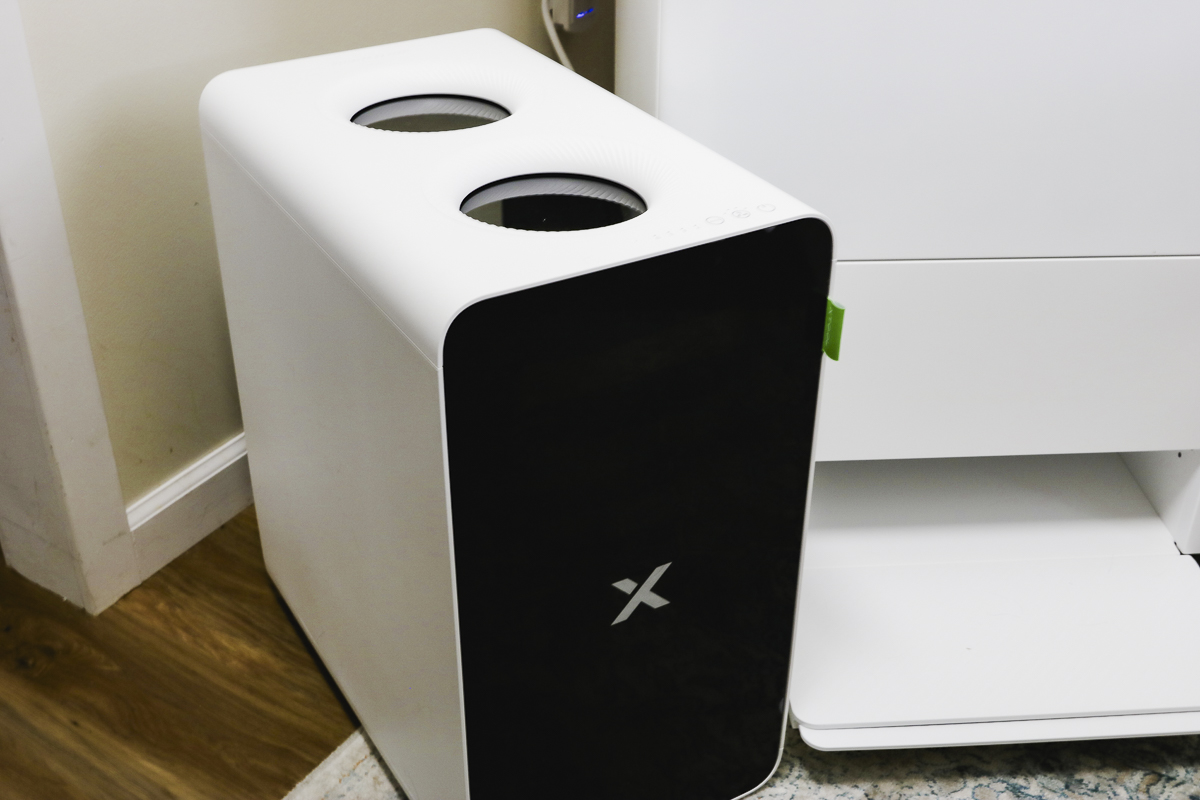
The xTool Apparel Printer performs some of its own maintenance, reducing what is required of me, and with the shaker oven, the powder is completely enclosed. These two things make this DTF printer a much better fit for me and my craft room than previous options.
With the external air purifier and shaker oven, I am a fan of how this printer works. The image prints, automatically powders, shakes excess off, and immediately goes into the curing oven, where the powder is cured.
The powder isn't out in the open, and I don't have to touch it. This is a win in my book.
It is recommended that you ventilate the printer to ensure your craft area stays safe during the printing, powdering, and curing process. I am using an external air purifier.
You can watch me go through the whole setup and first prints with the xTool Apparel Printer by pressing play on the video below.
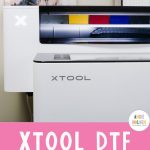
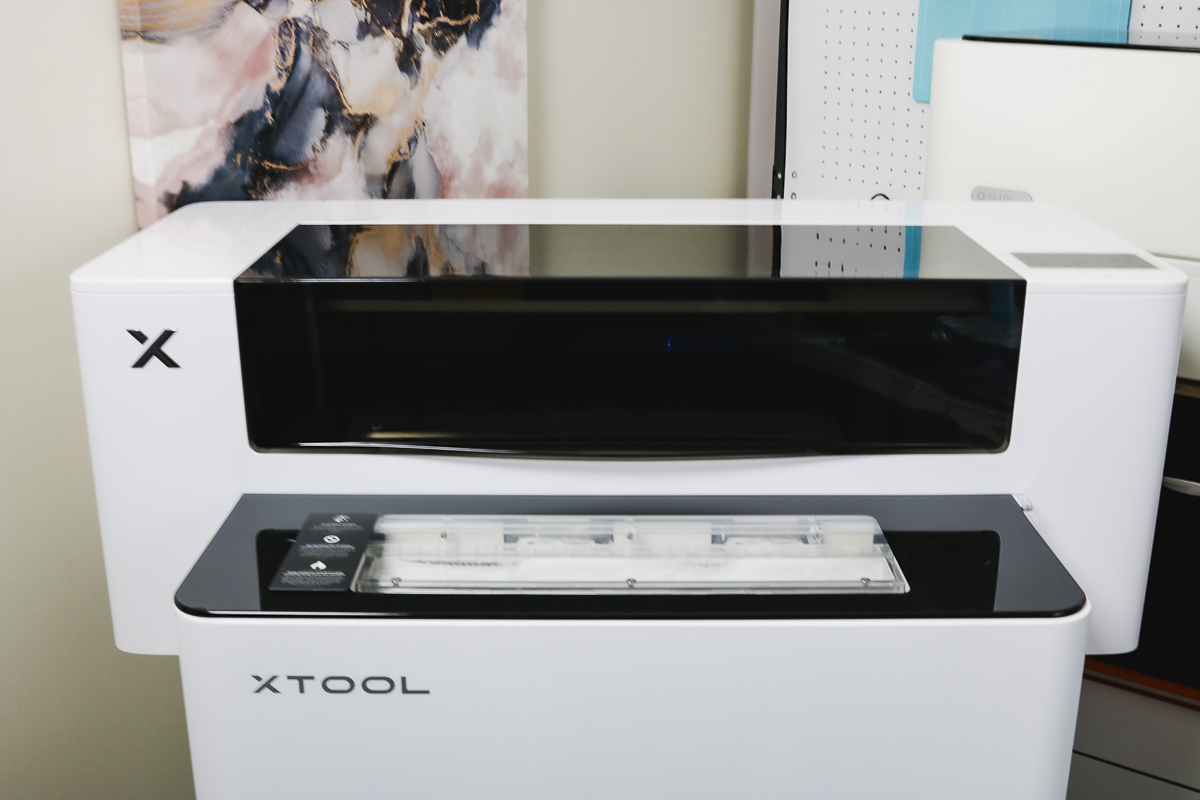
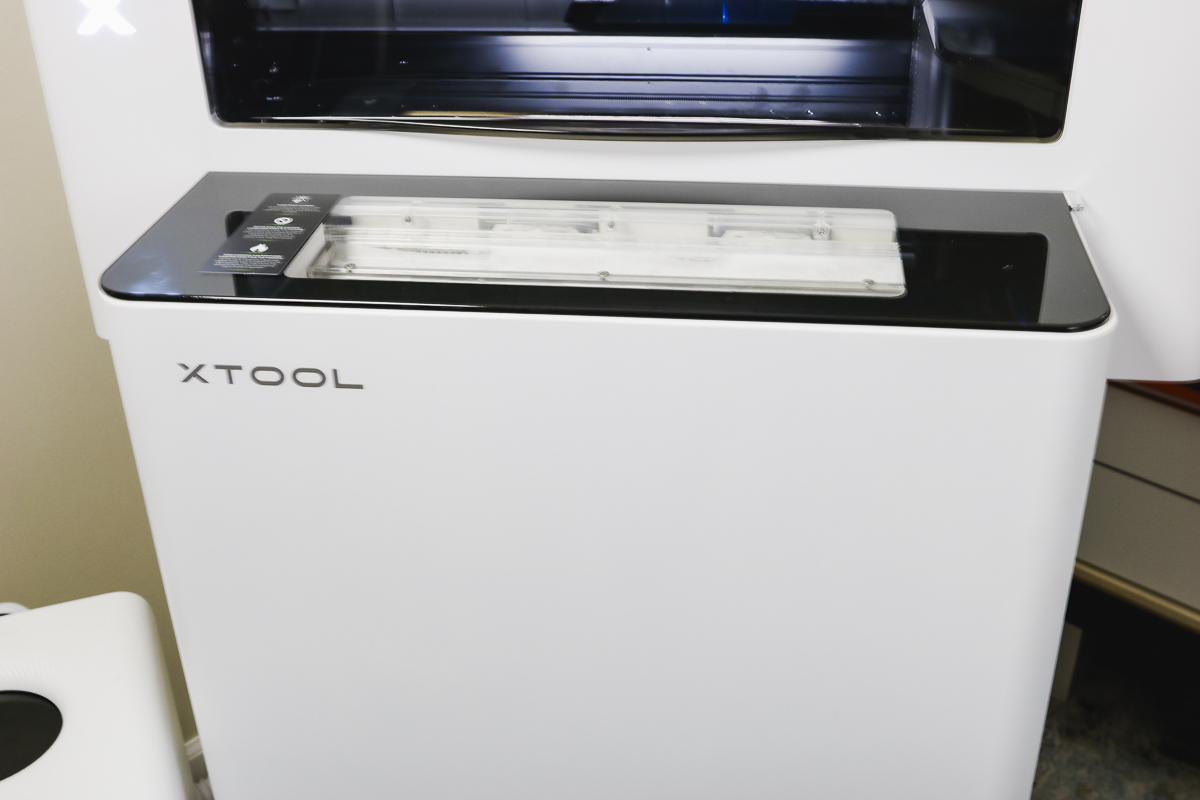
xTool Apparel DTF Printer
The first thing we're going to do is set up the printer. Don't be stressed about this step; it is much easier than I expected.
NOTE: I would not have been able to set all of this up on my own. I recommend having a second person on hand for the setup process to help with lifting the printer and locating it on the oven.
xTool Apparel Printer Set Up
The xTool apparel DTF printer comes on a pallet and is very easy to set up.
The shaker oven is essentially one piece, and it rolls right off the pallet. Both the shaker oven and printer were packaged really well, and because of the simplicity, I was printing in no time.
Step 1 – Unbox the Printer and Shaker Oven
With the machines removed from the pallet, go ahead and completely unbox them, place the printer on top of the shaker oven, and remove all the packaging materials.
There is tape in a variety of different locations, and mine had packaging inside it as well.
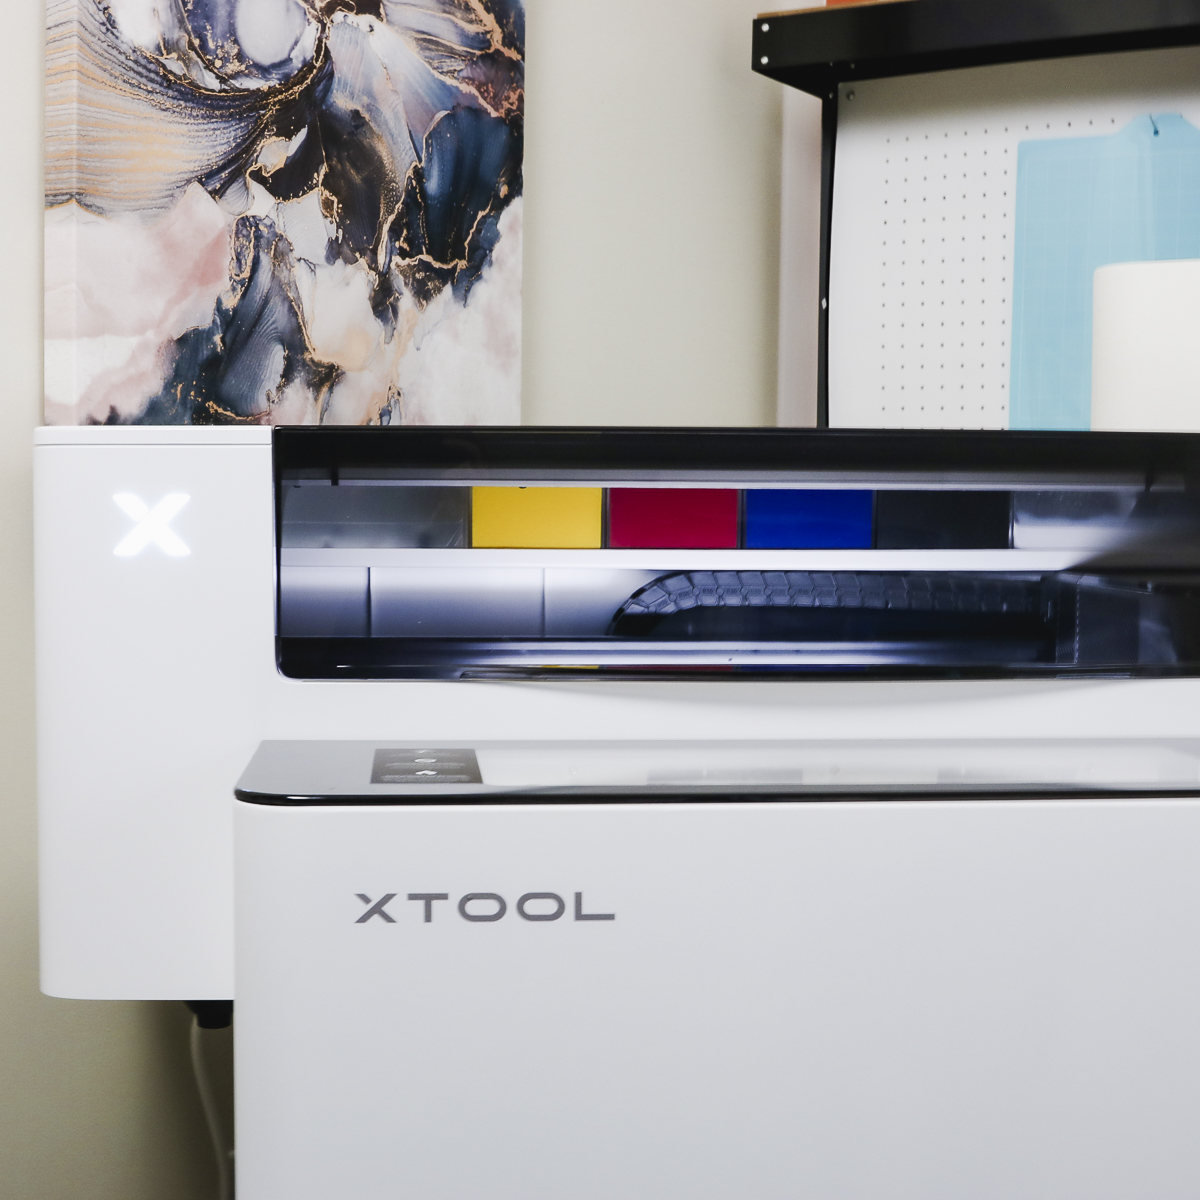
Move the print head away from the side and remove the foam packaging from around it and under where it was inside the machine.
There is also packaging wrapped around the print head. Remove that and slide the print head back to the side.
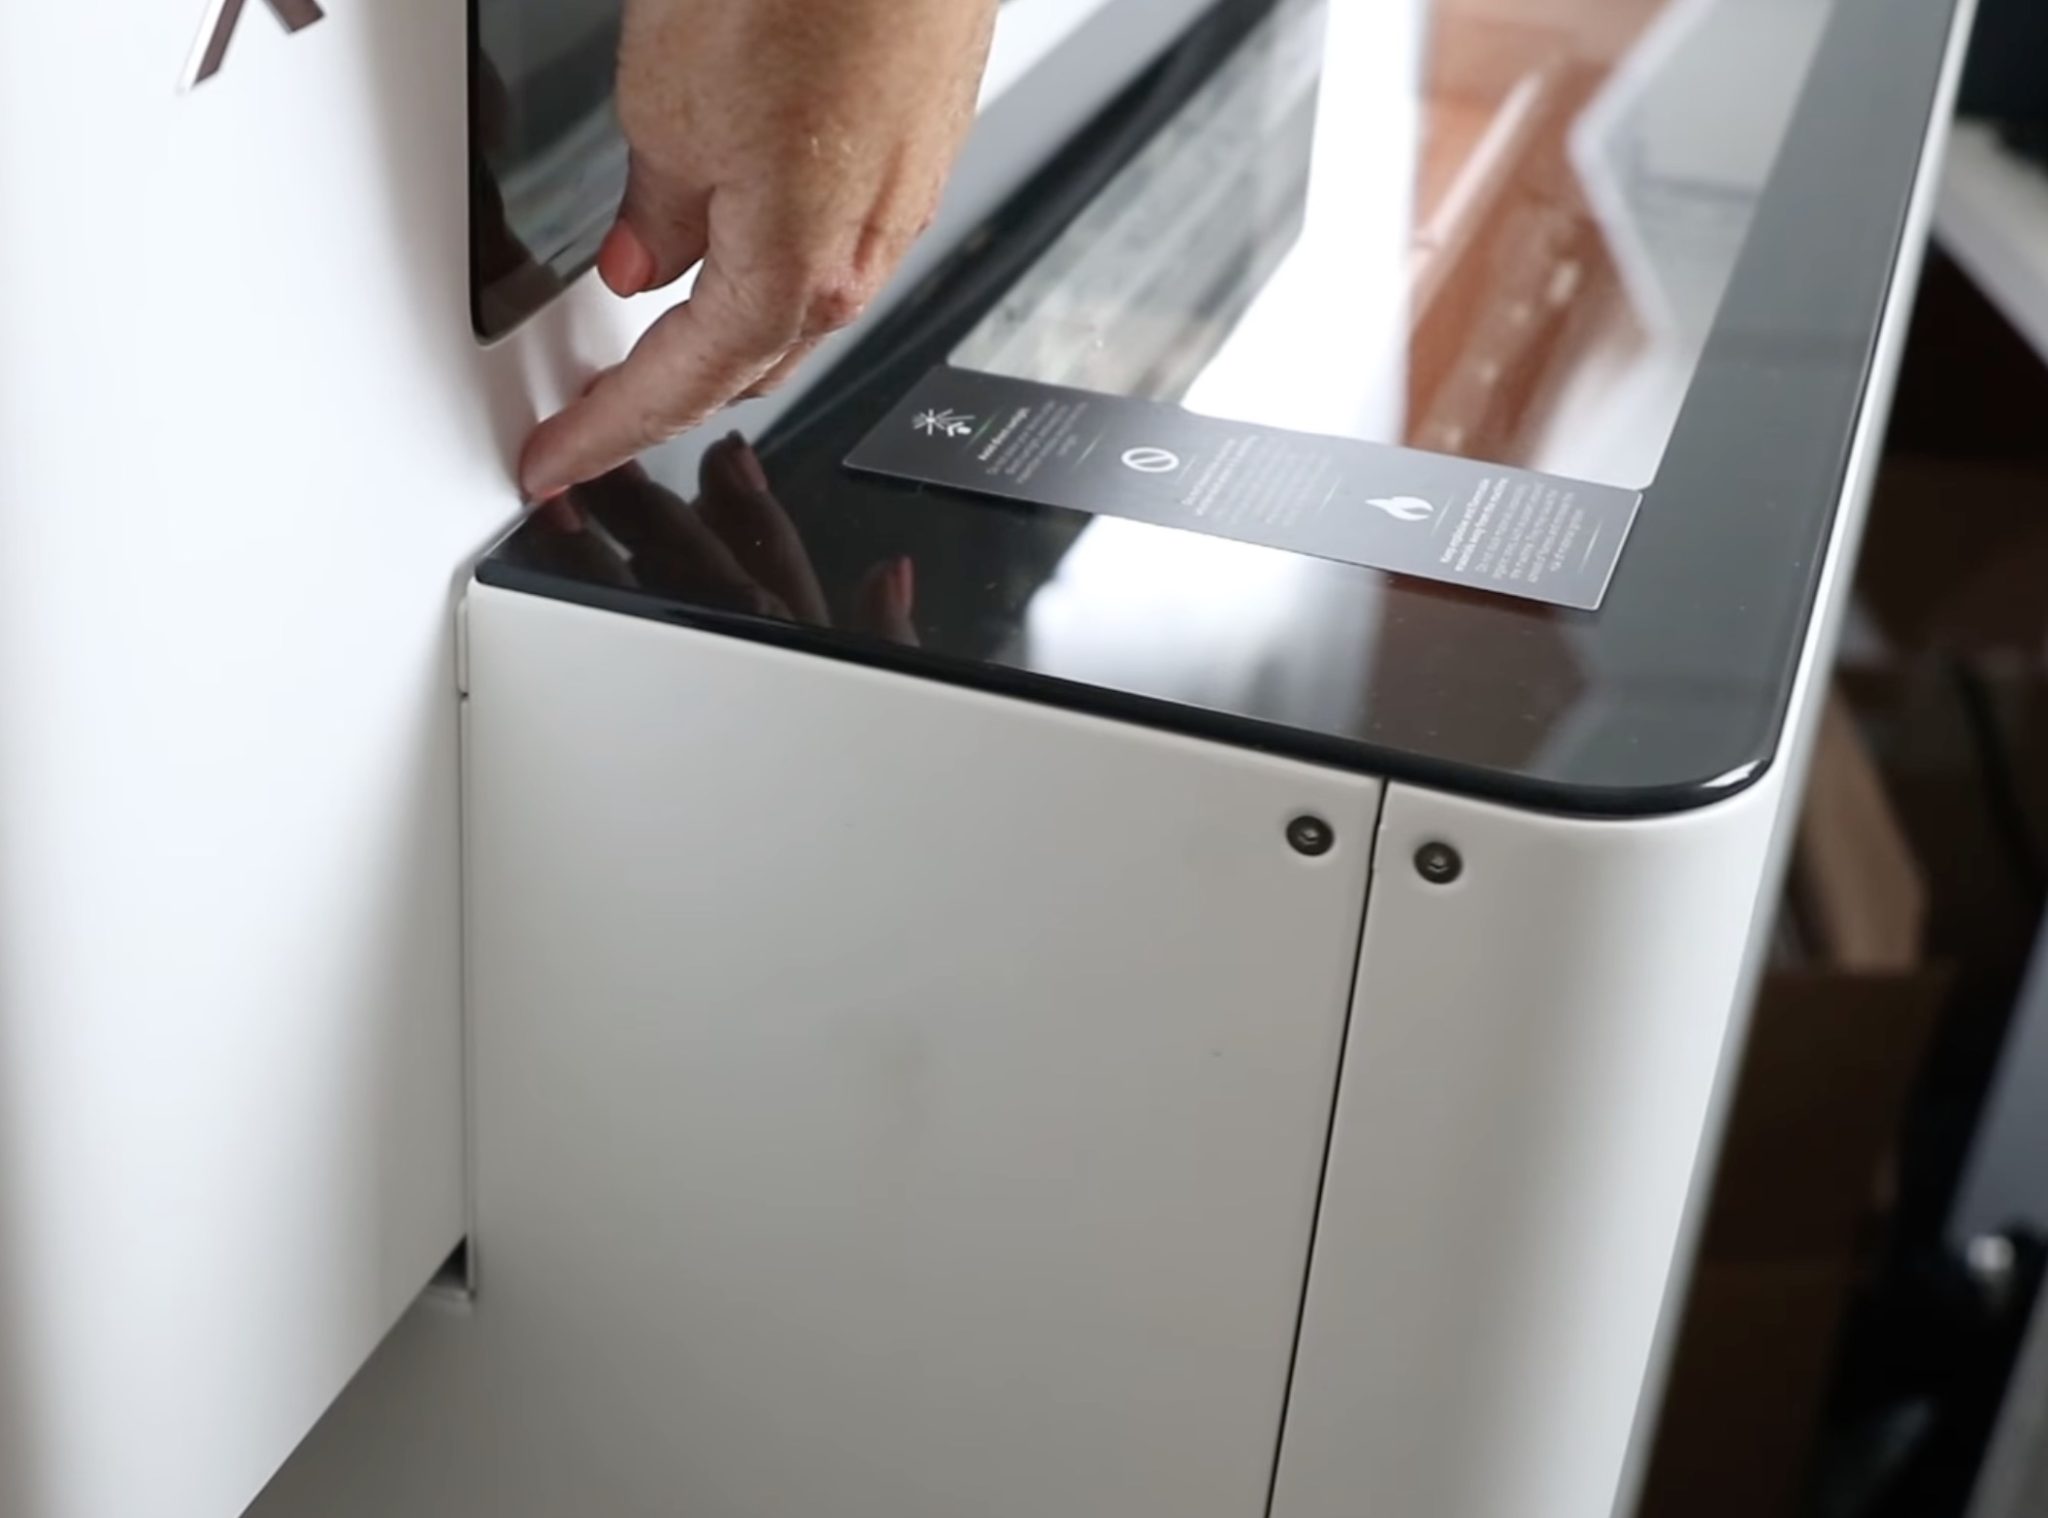
Open the door on the side of the machine and check to see if there is a film on your print head.
Do not touch the print head itself.
With the print head moved over to the side, through this opening, I saw and was able to remove the plastic film without touching the print head.
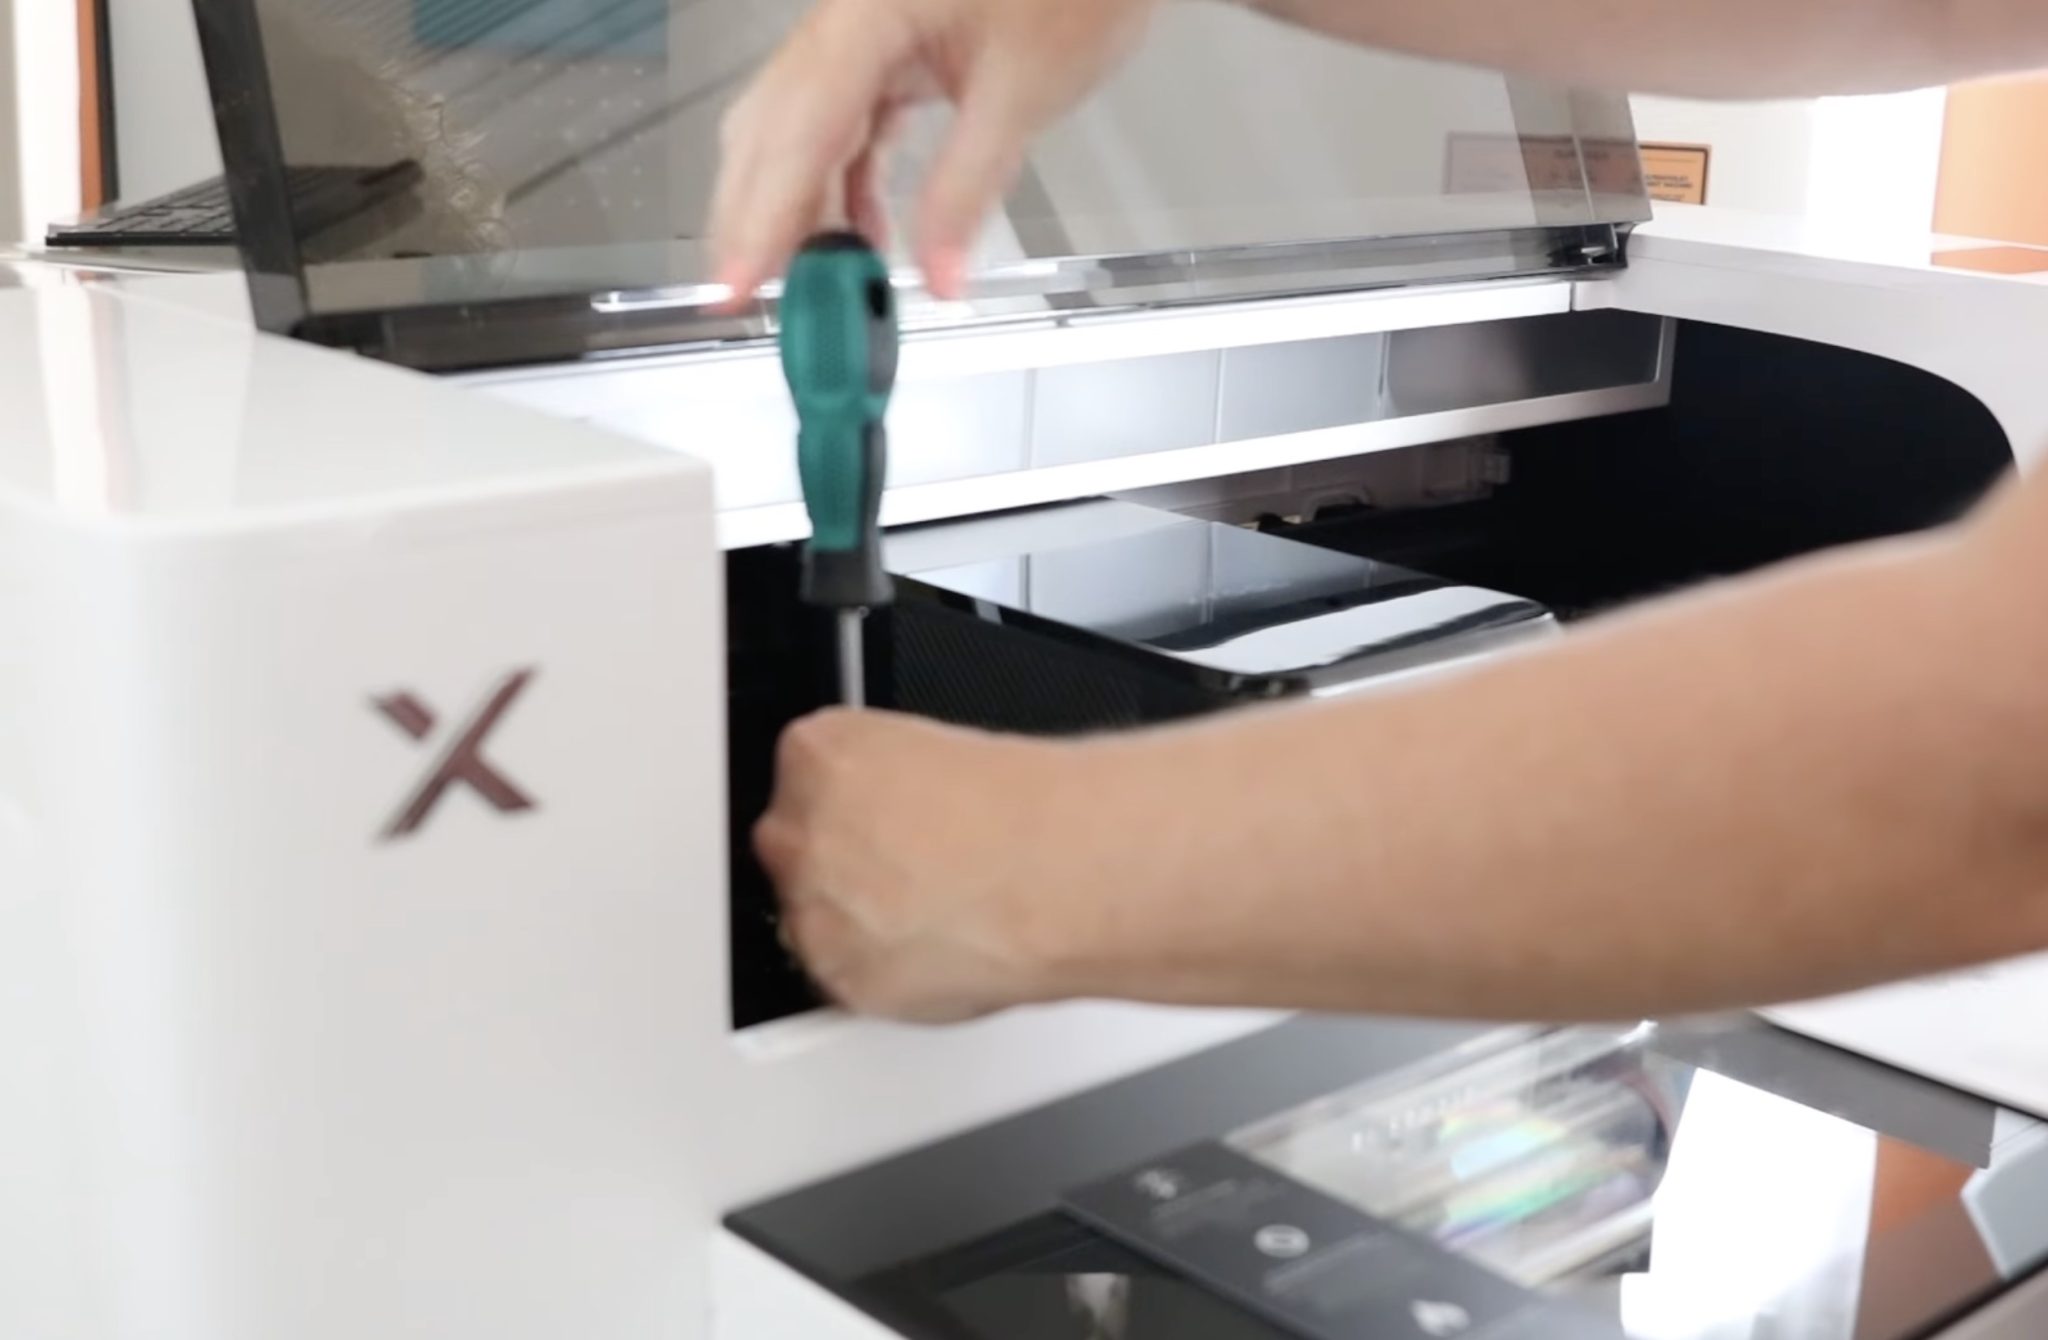
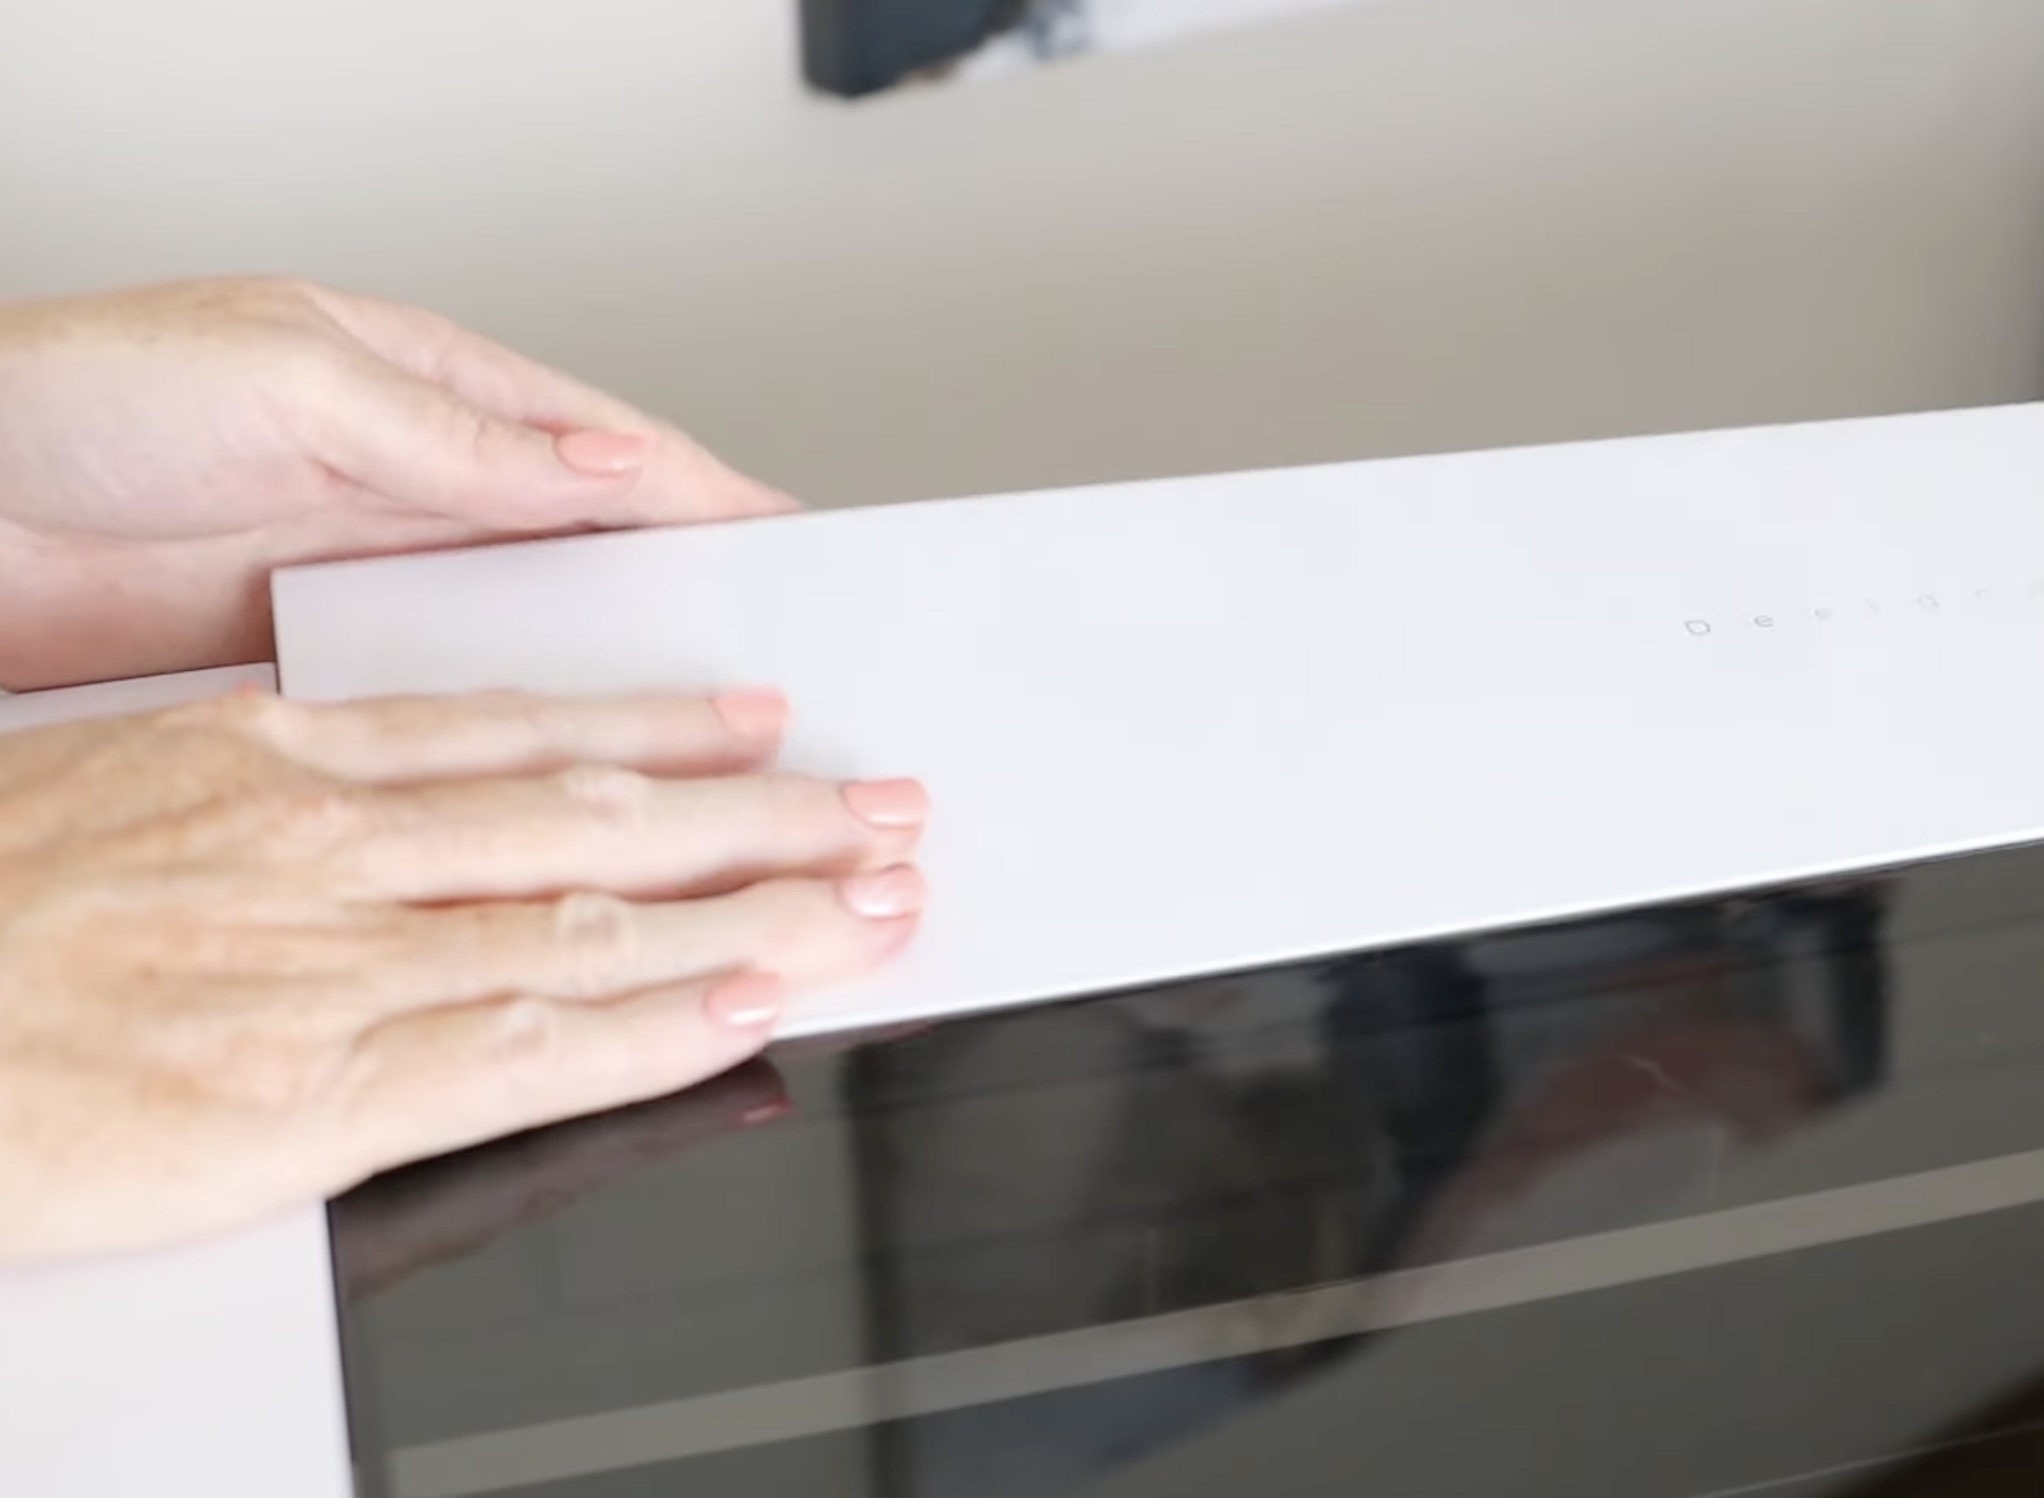
Step 2 – Attach the Printer to the Shaker Oven
Ensure the printer is fully seated against the shaker oven. We did have to move and wiggle it a bit to get it located properly.
Your printer will come with a screwdriver that has two ends; you may need to remove the handle and move it to the other end, depending on how yours arrives.
There are two screws used to attach the printer to the shaker oven. You'll need to tighten those with the tool.
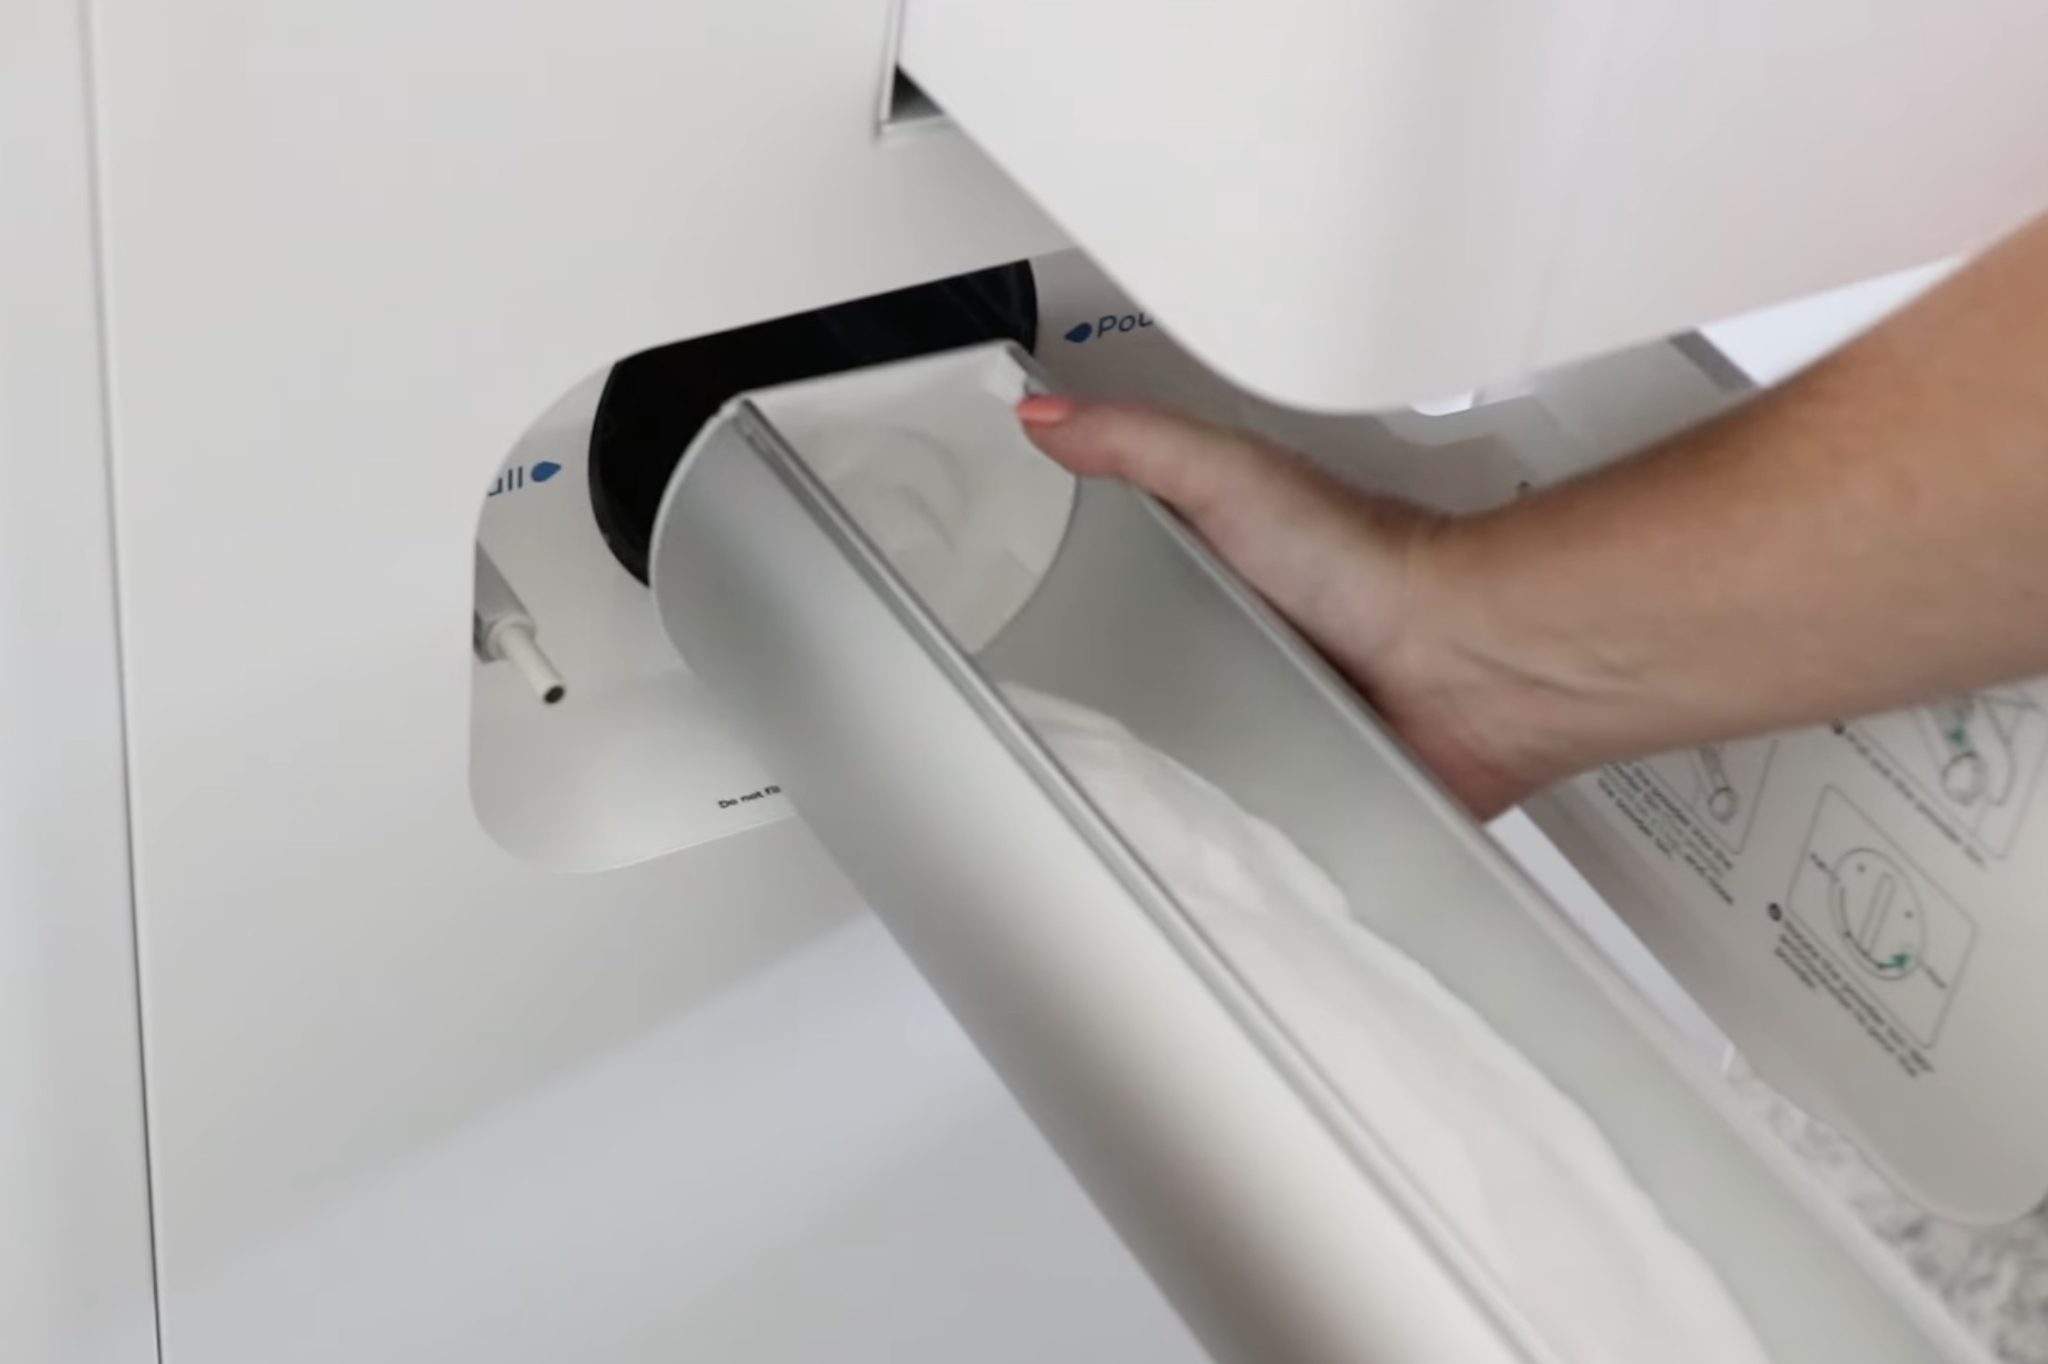
Step 3 – Fill the Adhesive Powder Tray
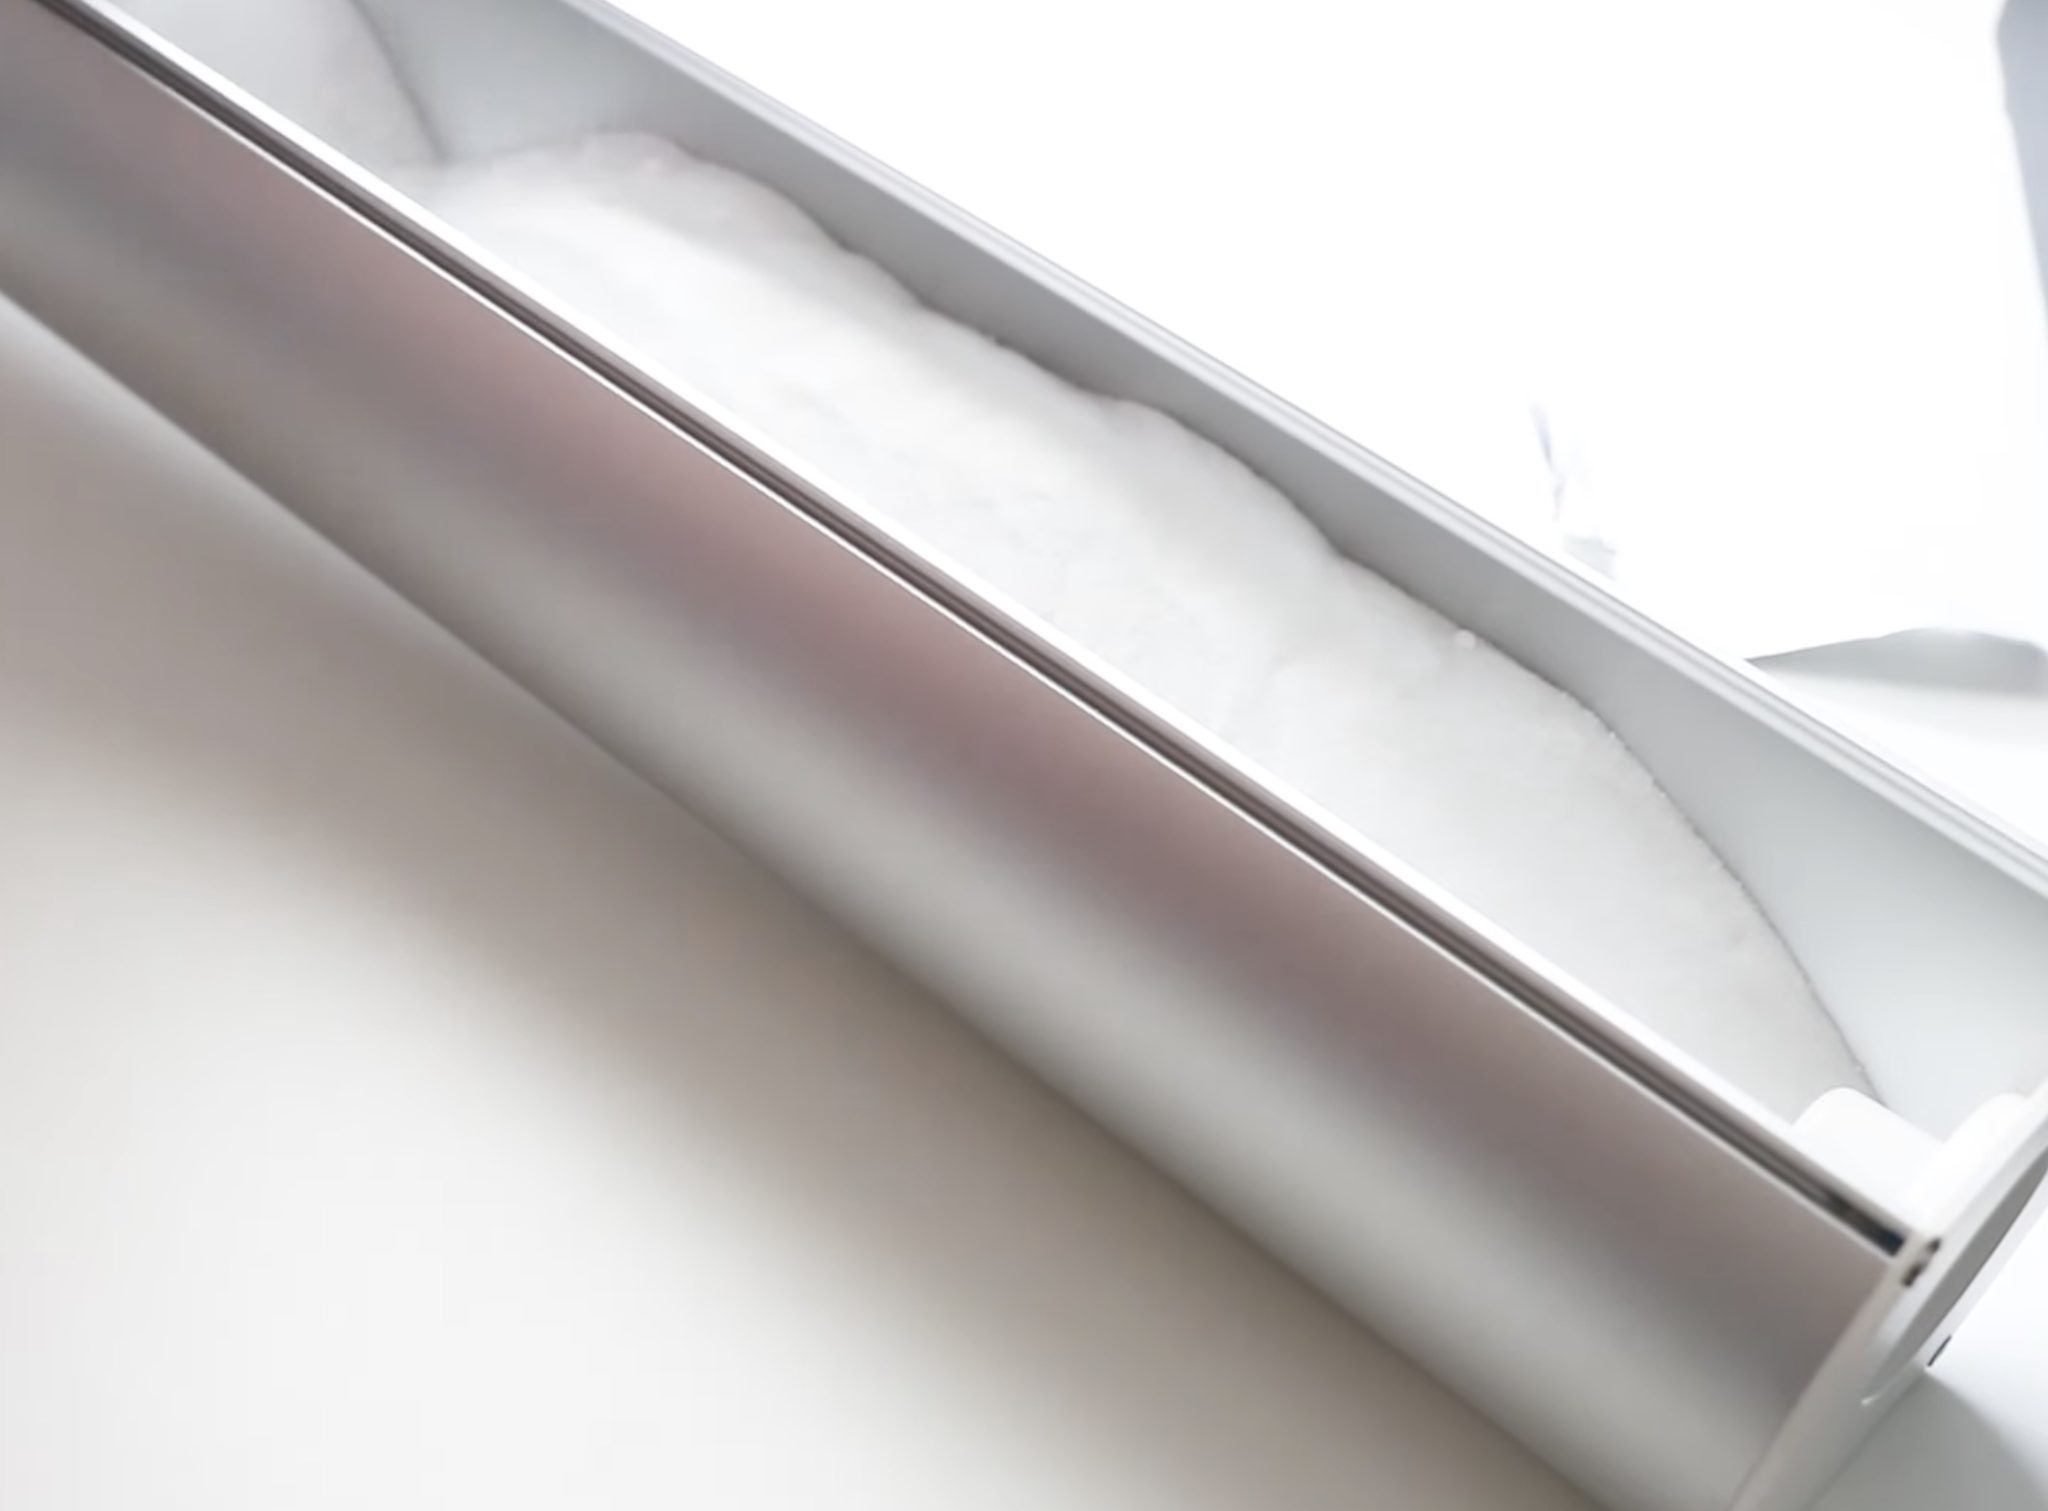
On the side, there is a door. Behind the door is the tray where you'll place the adhesive powder.
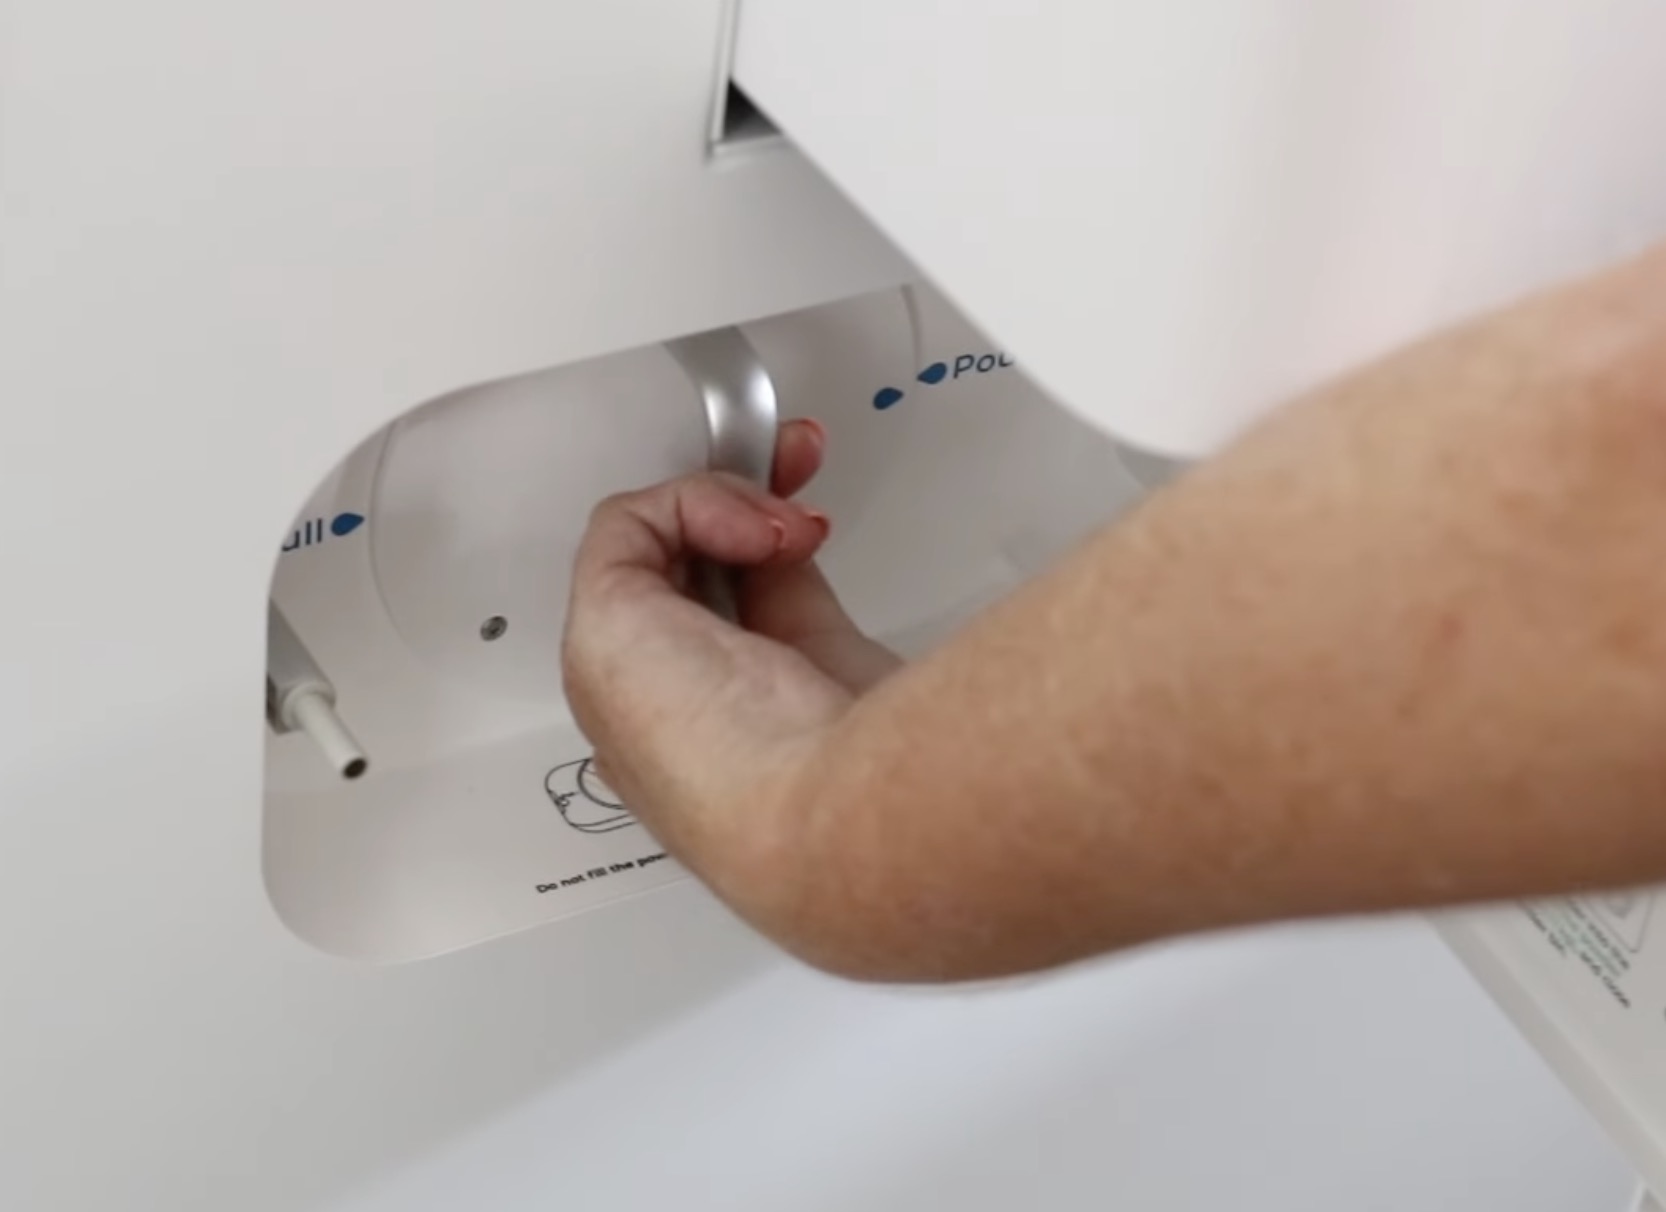
Rotate the handle from Pour to Pull and pull it out.
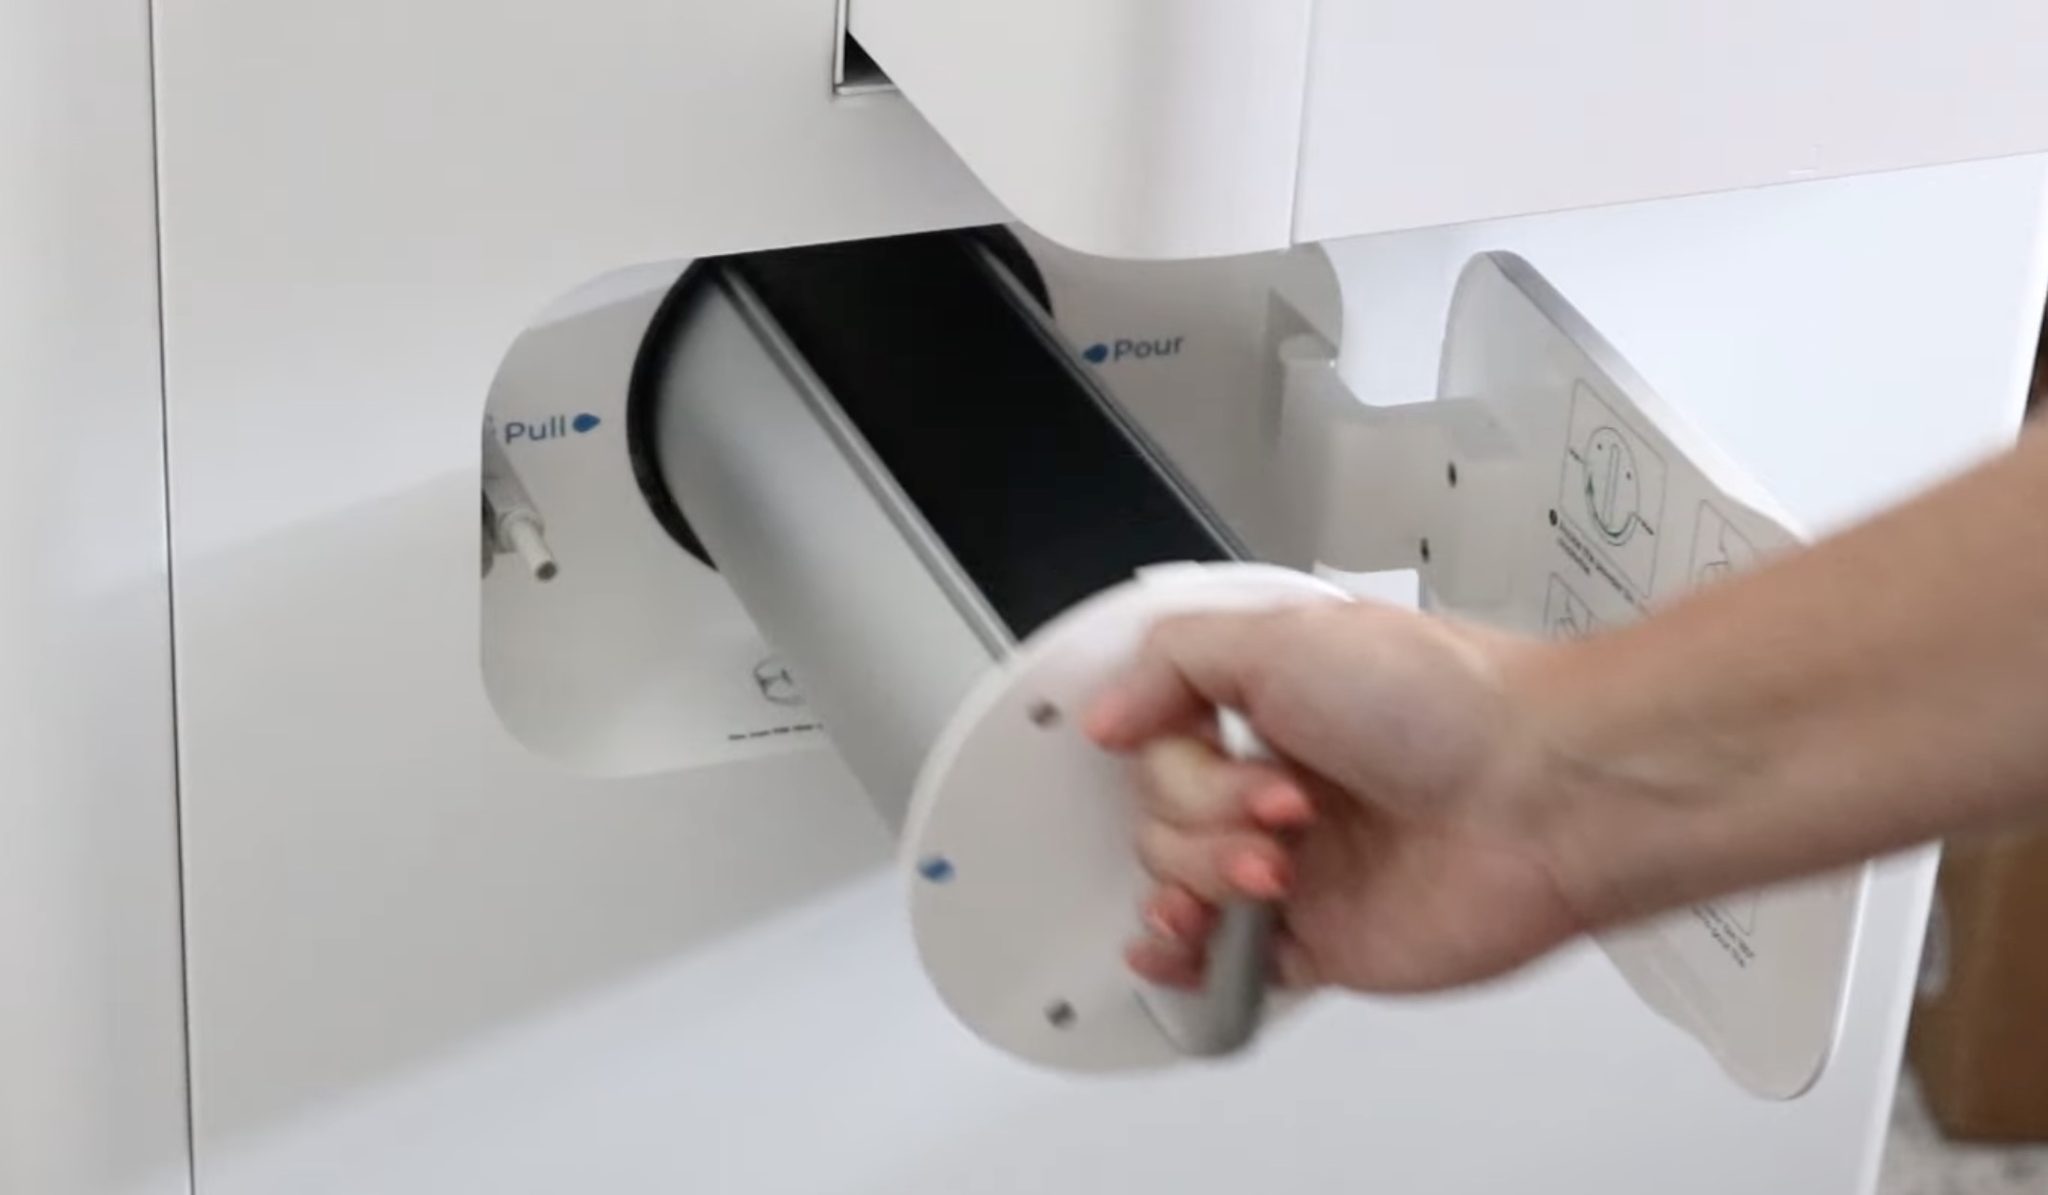
Pour the powder into the tray one bag at a time. Make sure nothing is in the tray, and slowly pour in the bag, trying to reduce the dust.
Slide the tray back into the oven and push it all the way in. Rotate the handle to move the blue arrow from pull to pour and close the door.
That pours the powder down into the shaker.
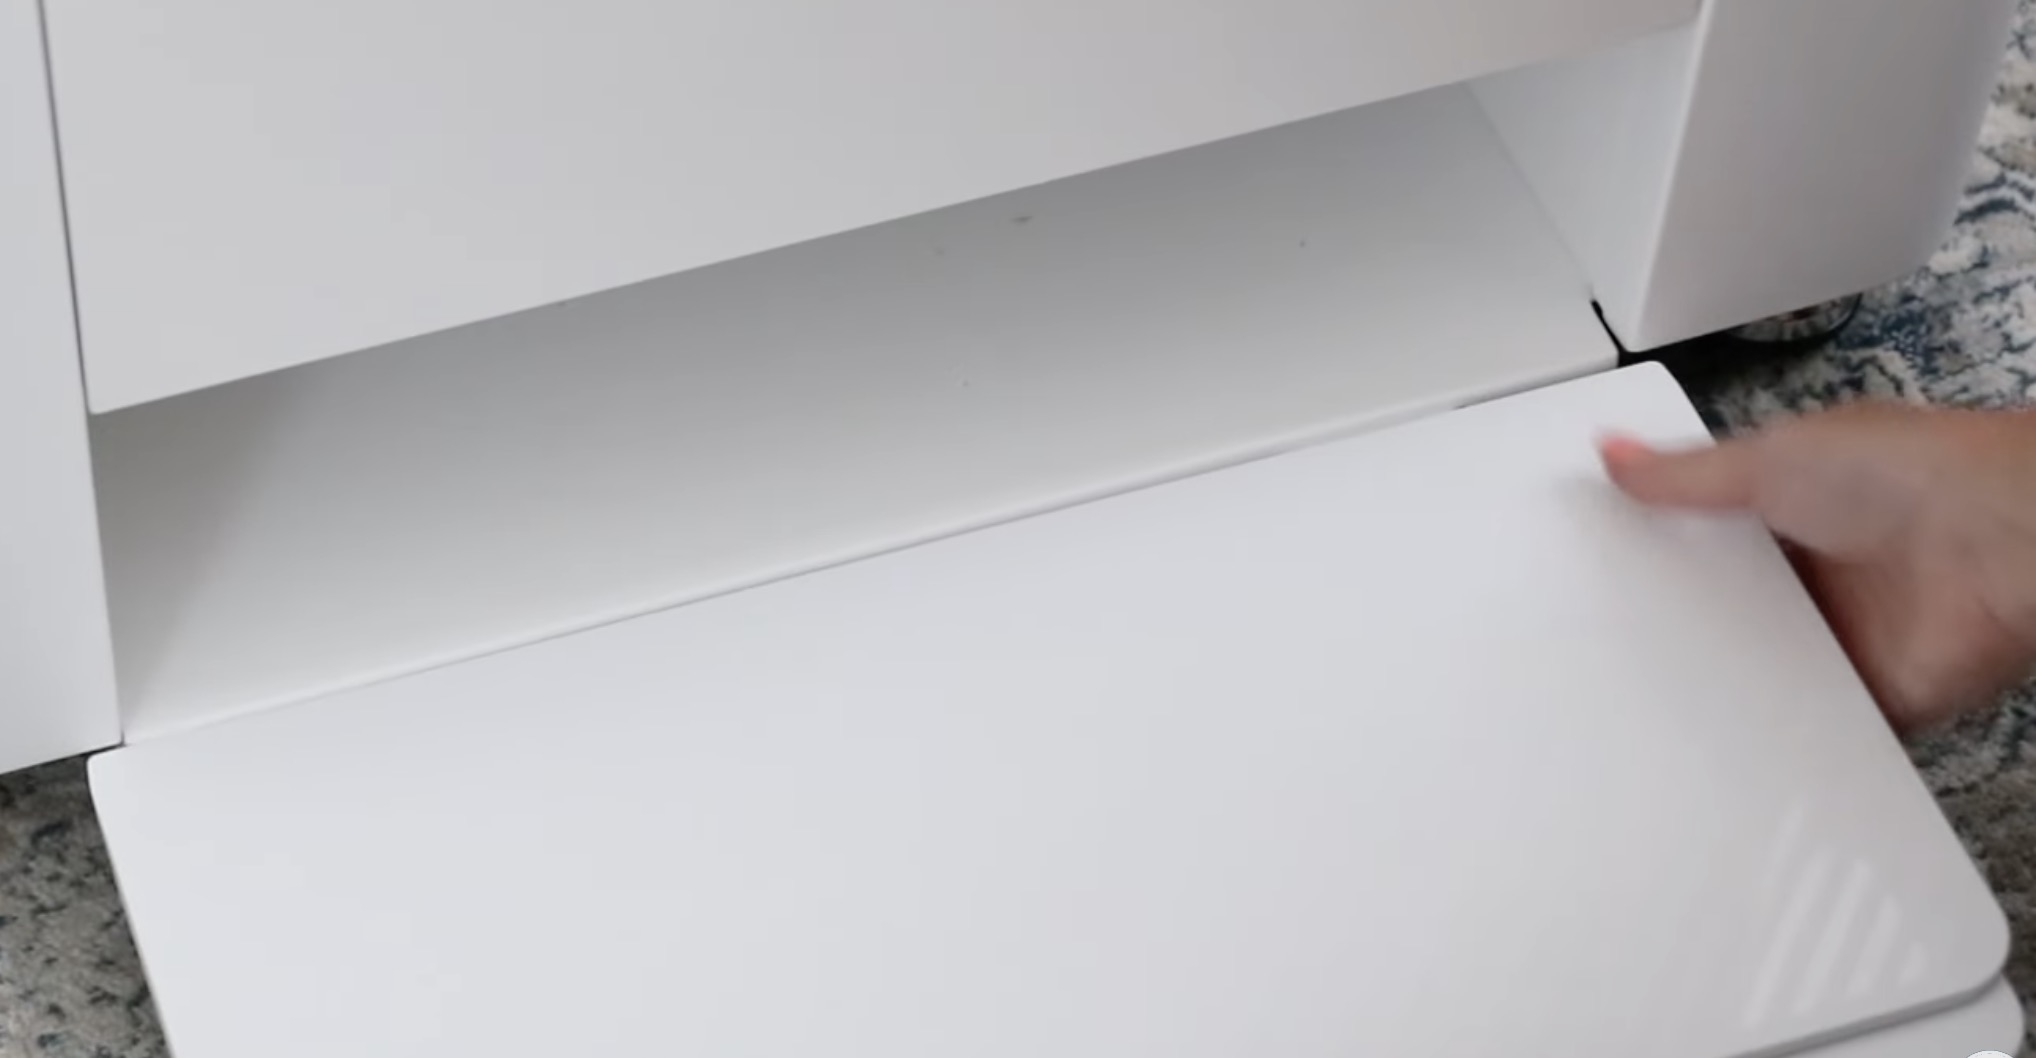
Step 4 – Attach the Output Tray
At the bottom of the shaker oven, there is a little slot to attach the output tray. Make sure the feet are extended to support the tray and slide it into place.
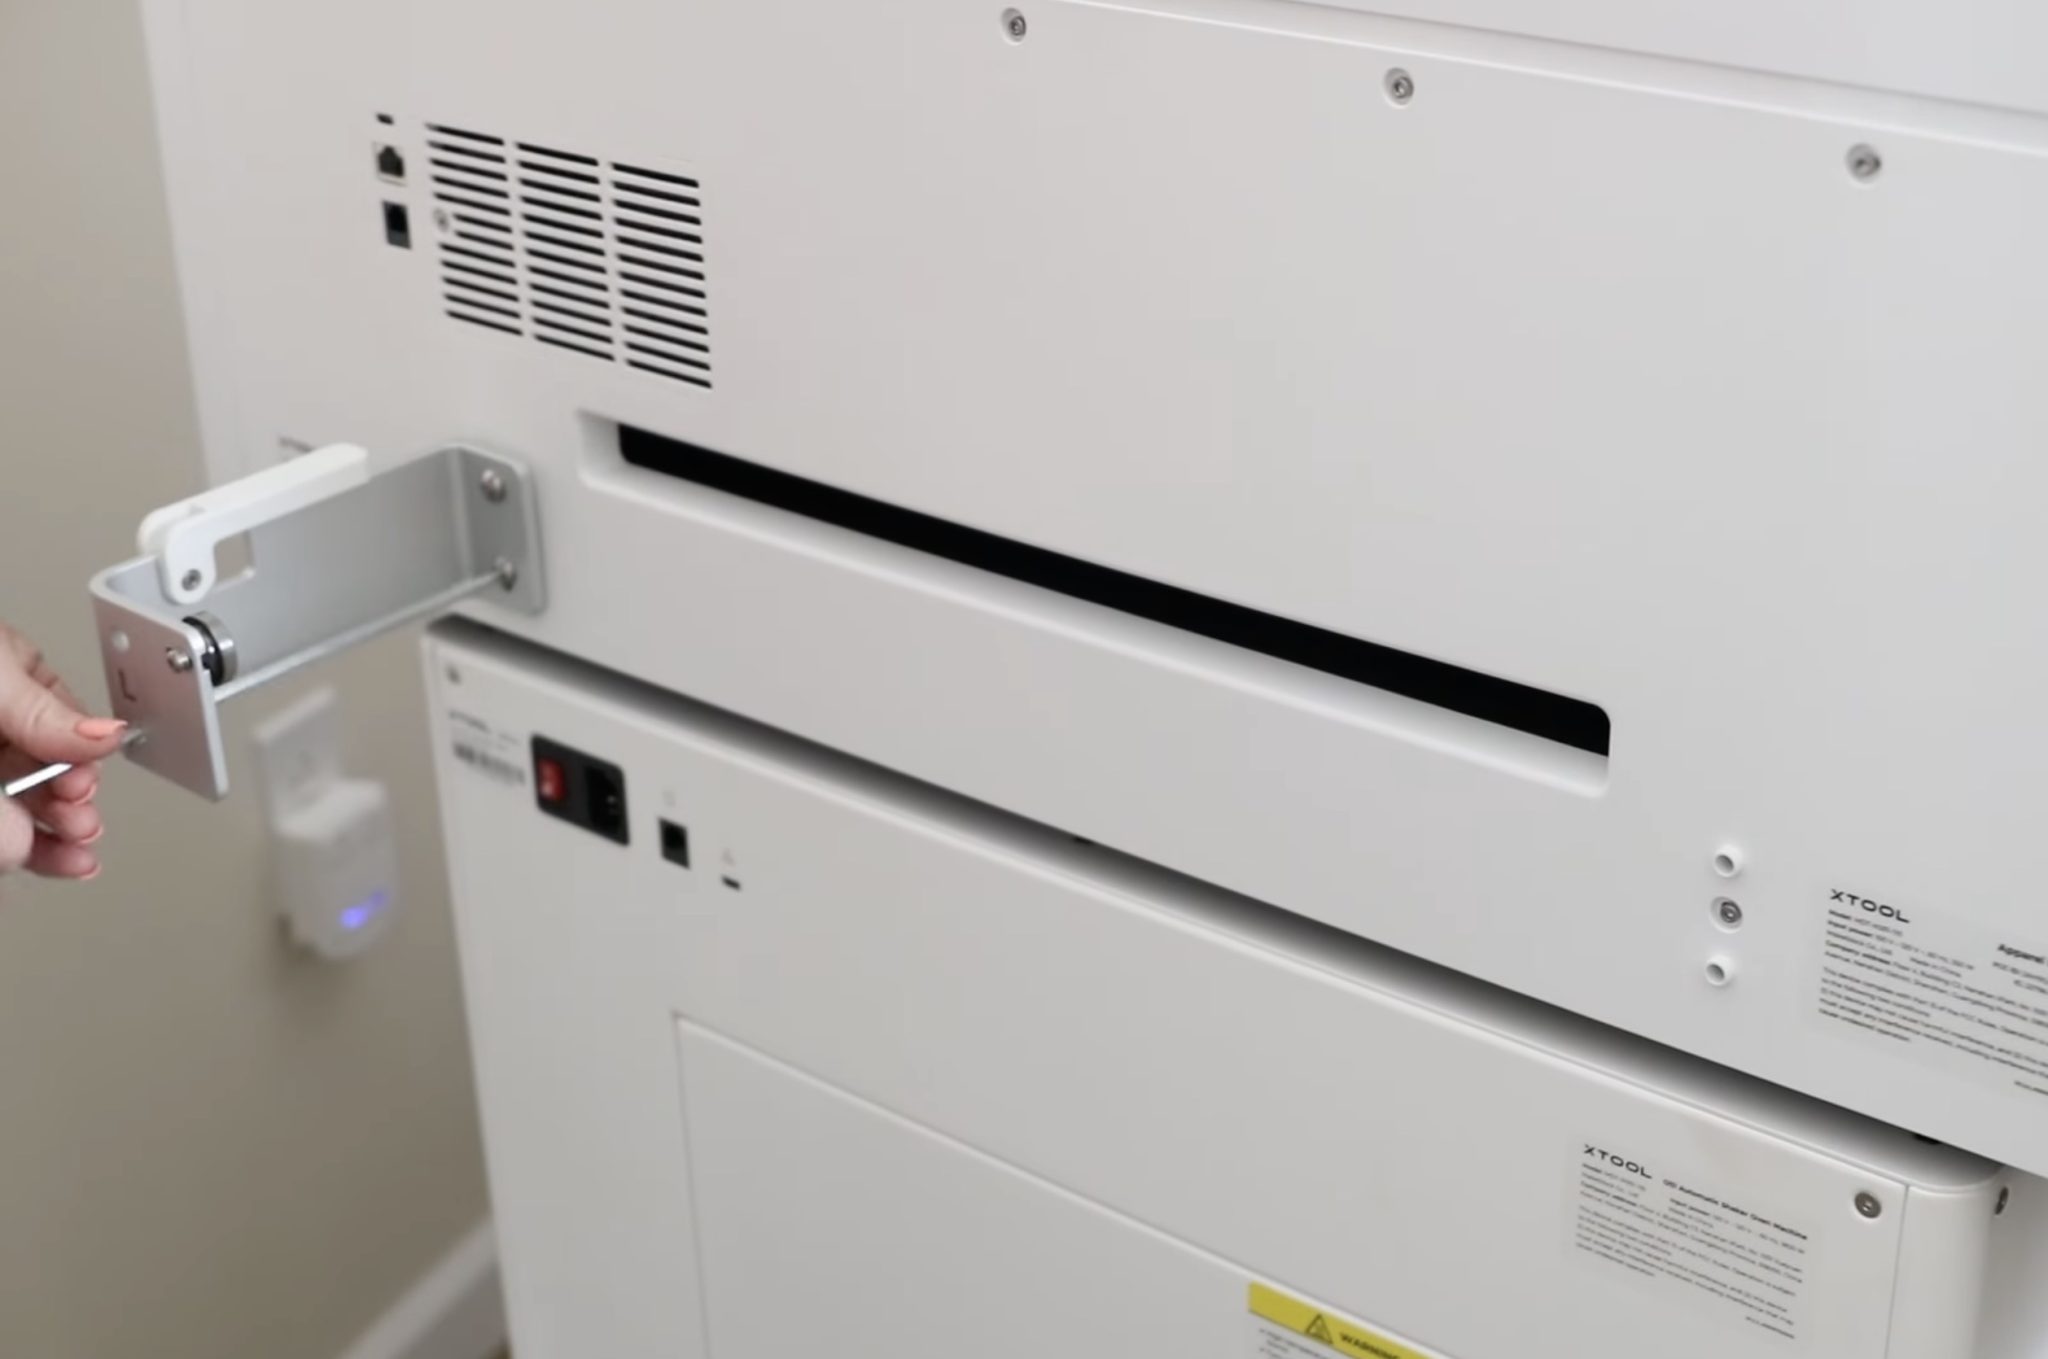
To finish setting up the shaker oven, attach the power cord and vent pipe to the back.
Step 5 – Add Paper Roll to Printer
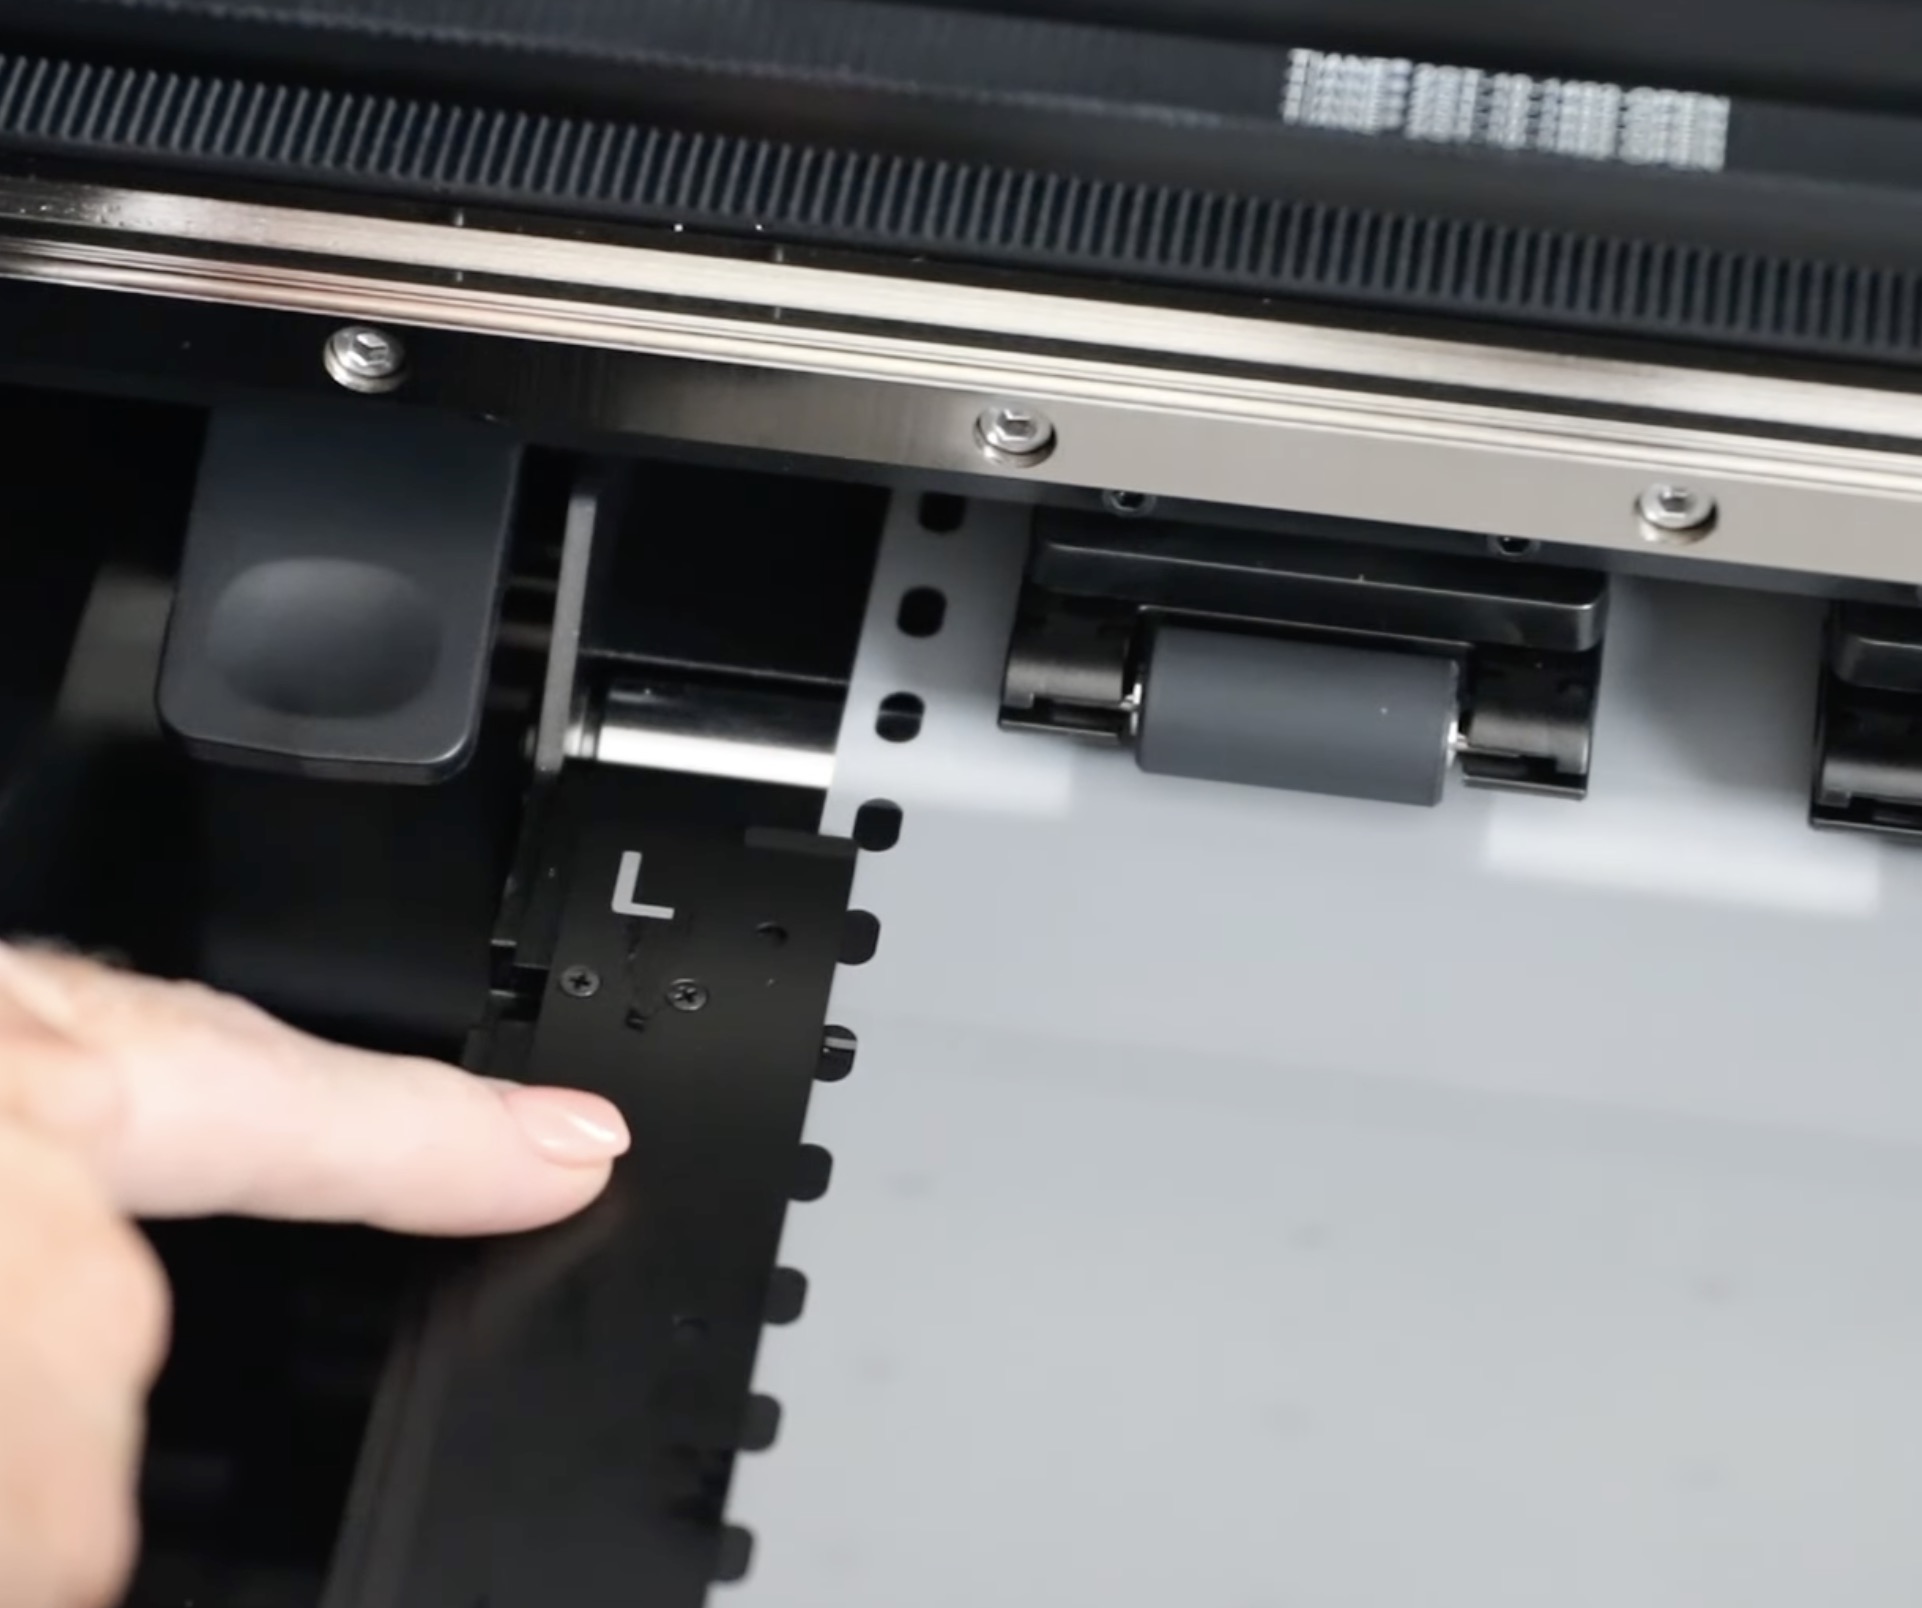
First, move the print head all the way to the right and open the pinch rollers.
Inside the printer, on the left, there is a switch. Flip that switch up, and you should see the pinch rollers lift.
On the back of the printer, we'll add the brackets that will hold the paper roll in place.
Note – You may hear the material the DTF printer prints on referred to as paper or film. These are the same thing and can be referred to as either.
There are left and right brackets, and they're clearly labeled. Use the included screws and screwdriver to install the brackets.
Flip up the white lever and add the roll of paper. Make sure the roll is loaded with the paper coming over the top.
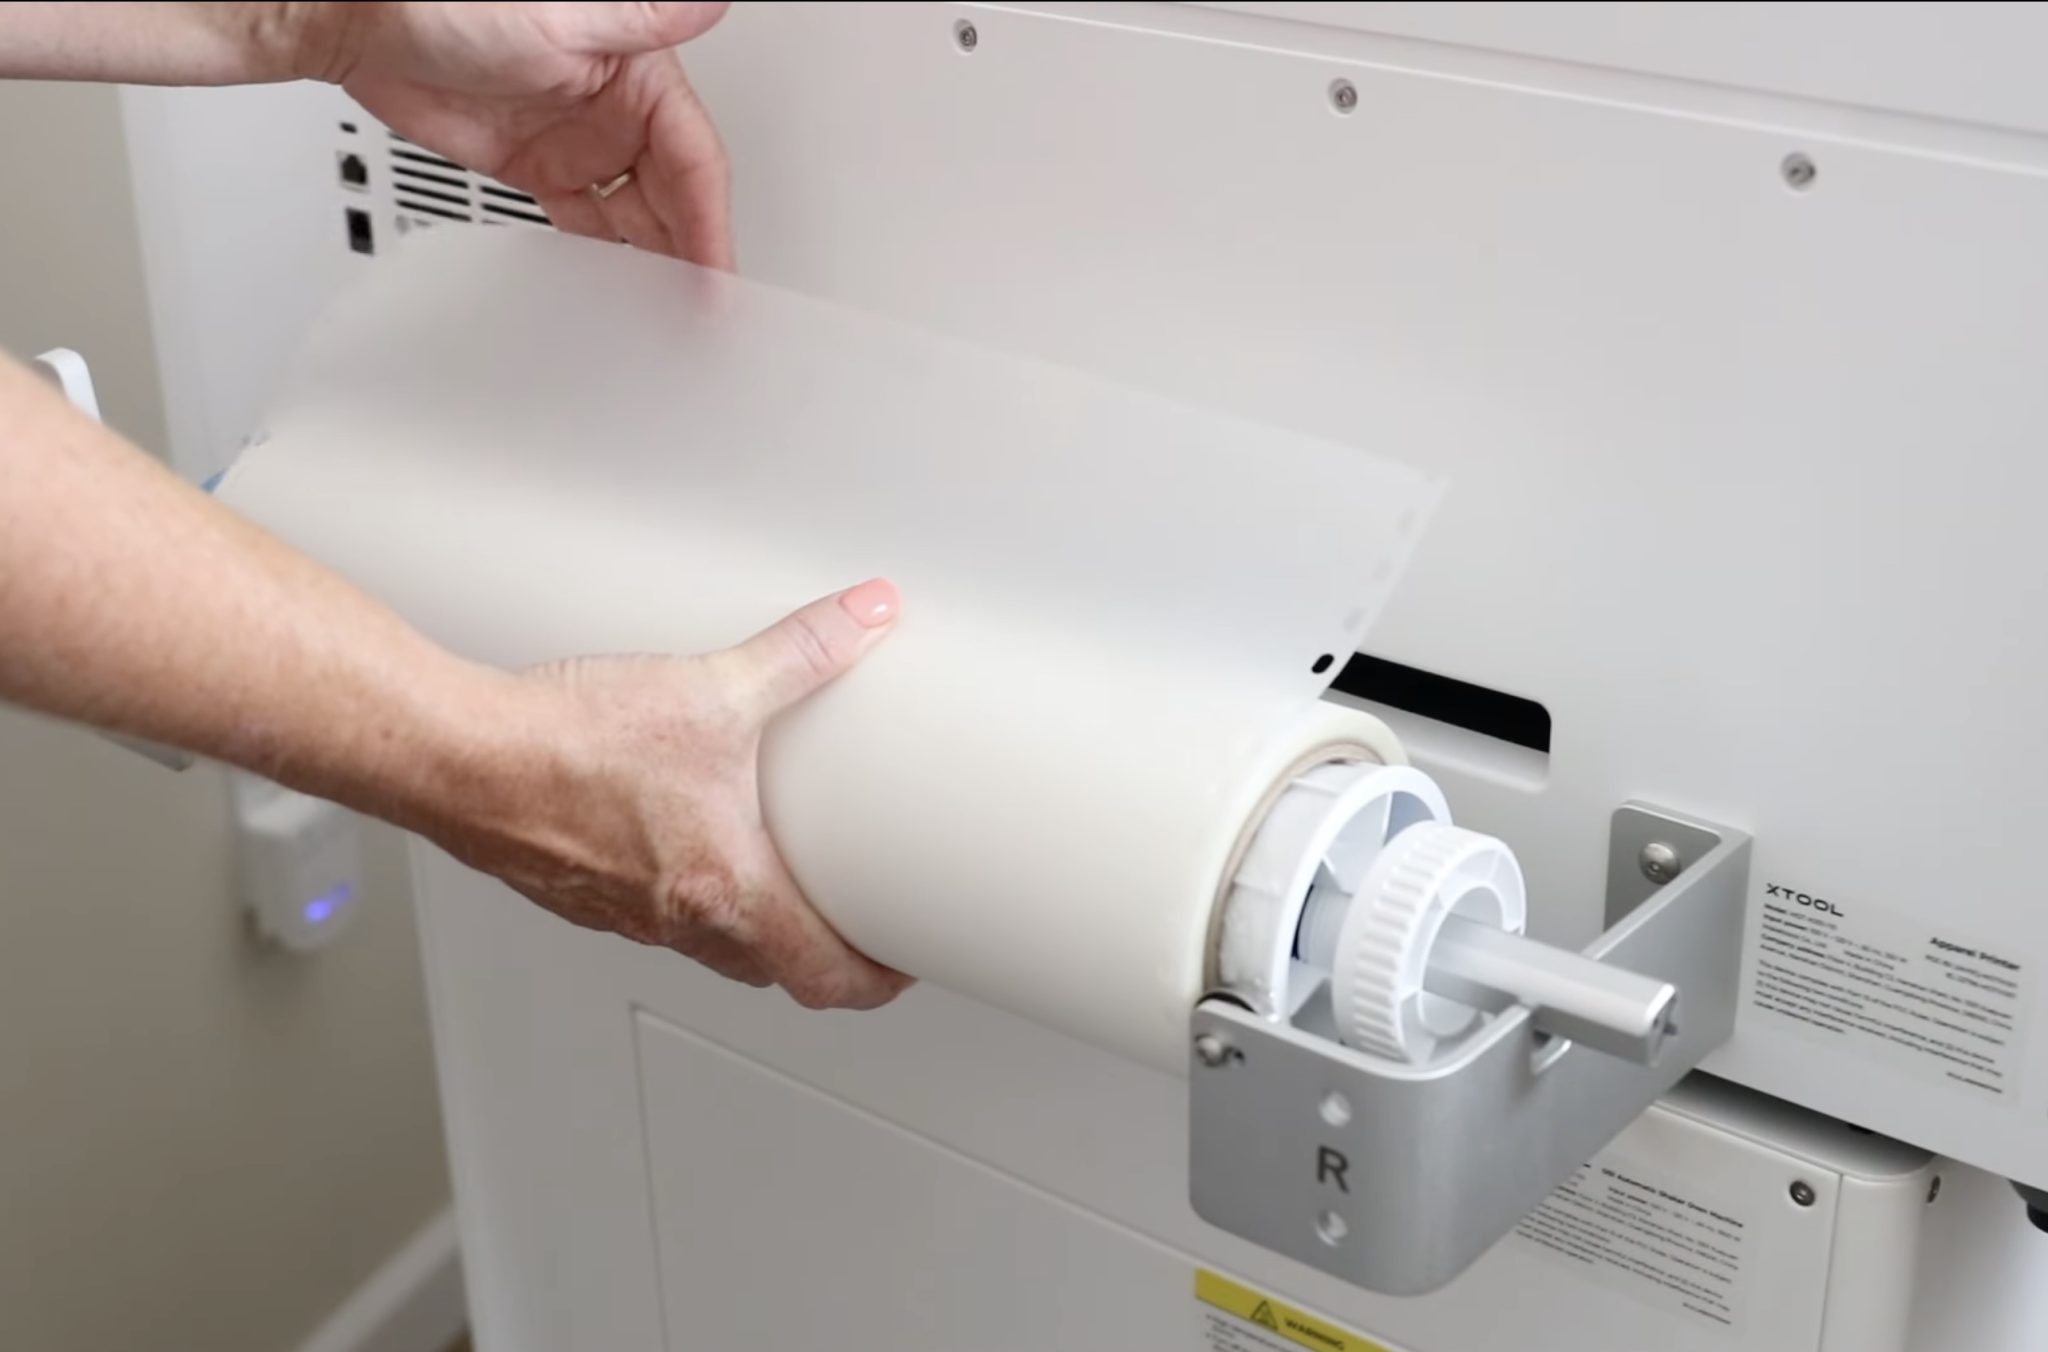
Secure it on both sides and flip the lever down to hold it in place.

Feed the paper into the back of the printer and move around to the front to make sure it's lined up.
Line the paper up so it's under the rollers and the guides on both sides.
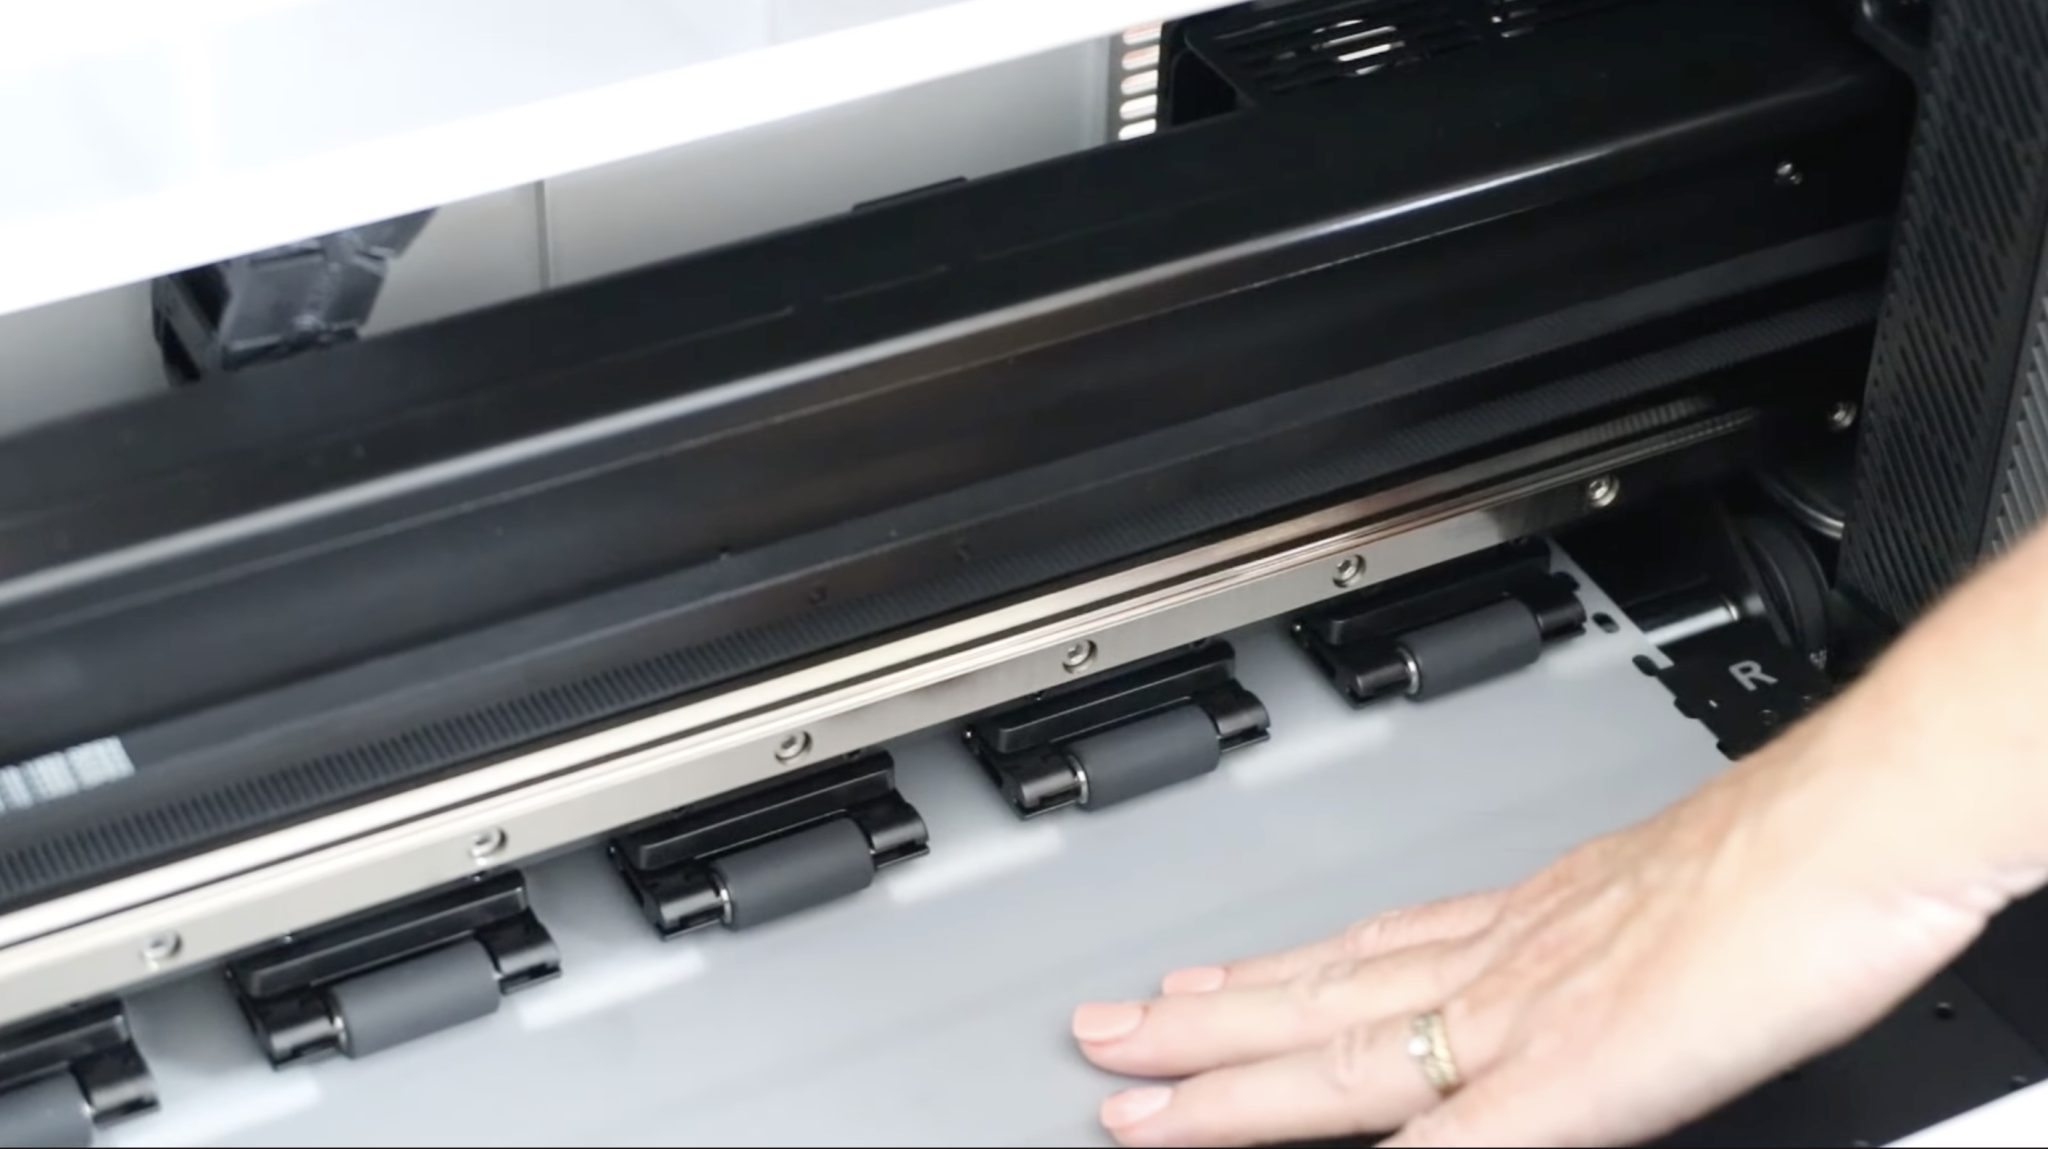
A good rule of thumb is to have the edge of the paper showing about halfway through the holes on the guide. If it isn't lined up, you can move the guide plates on either side.
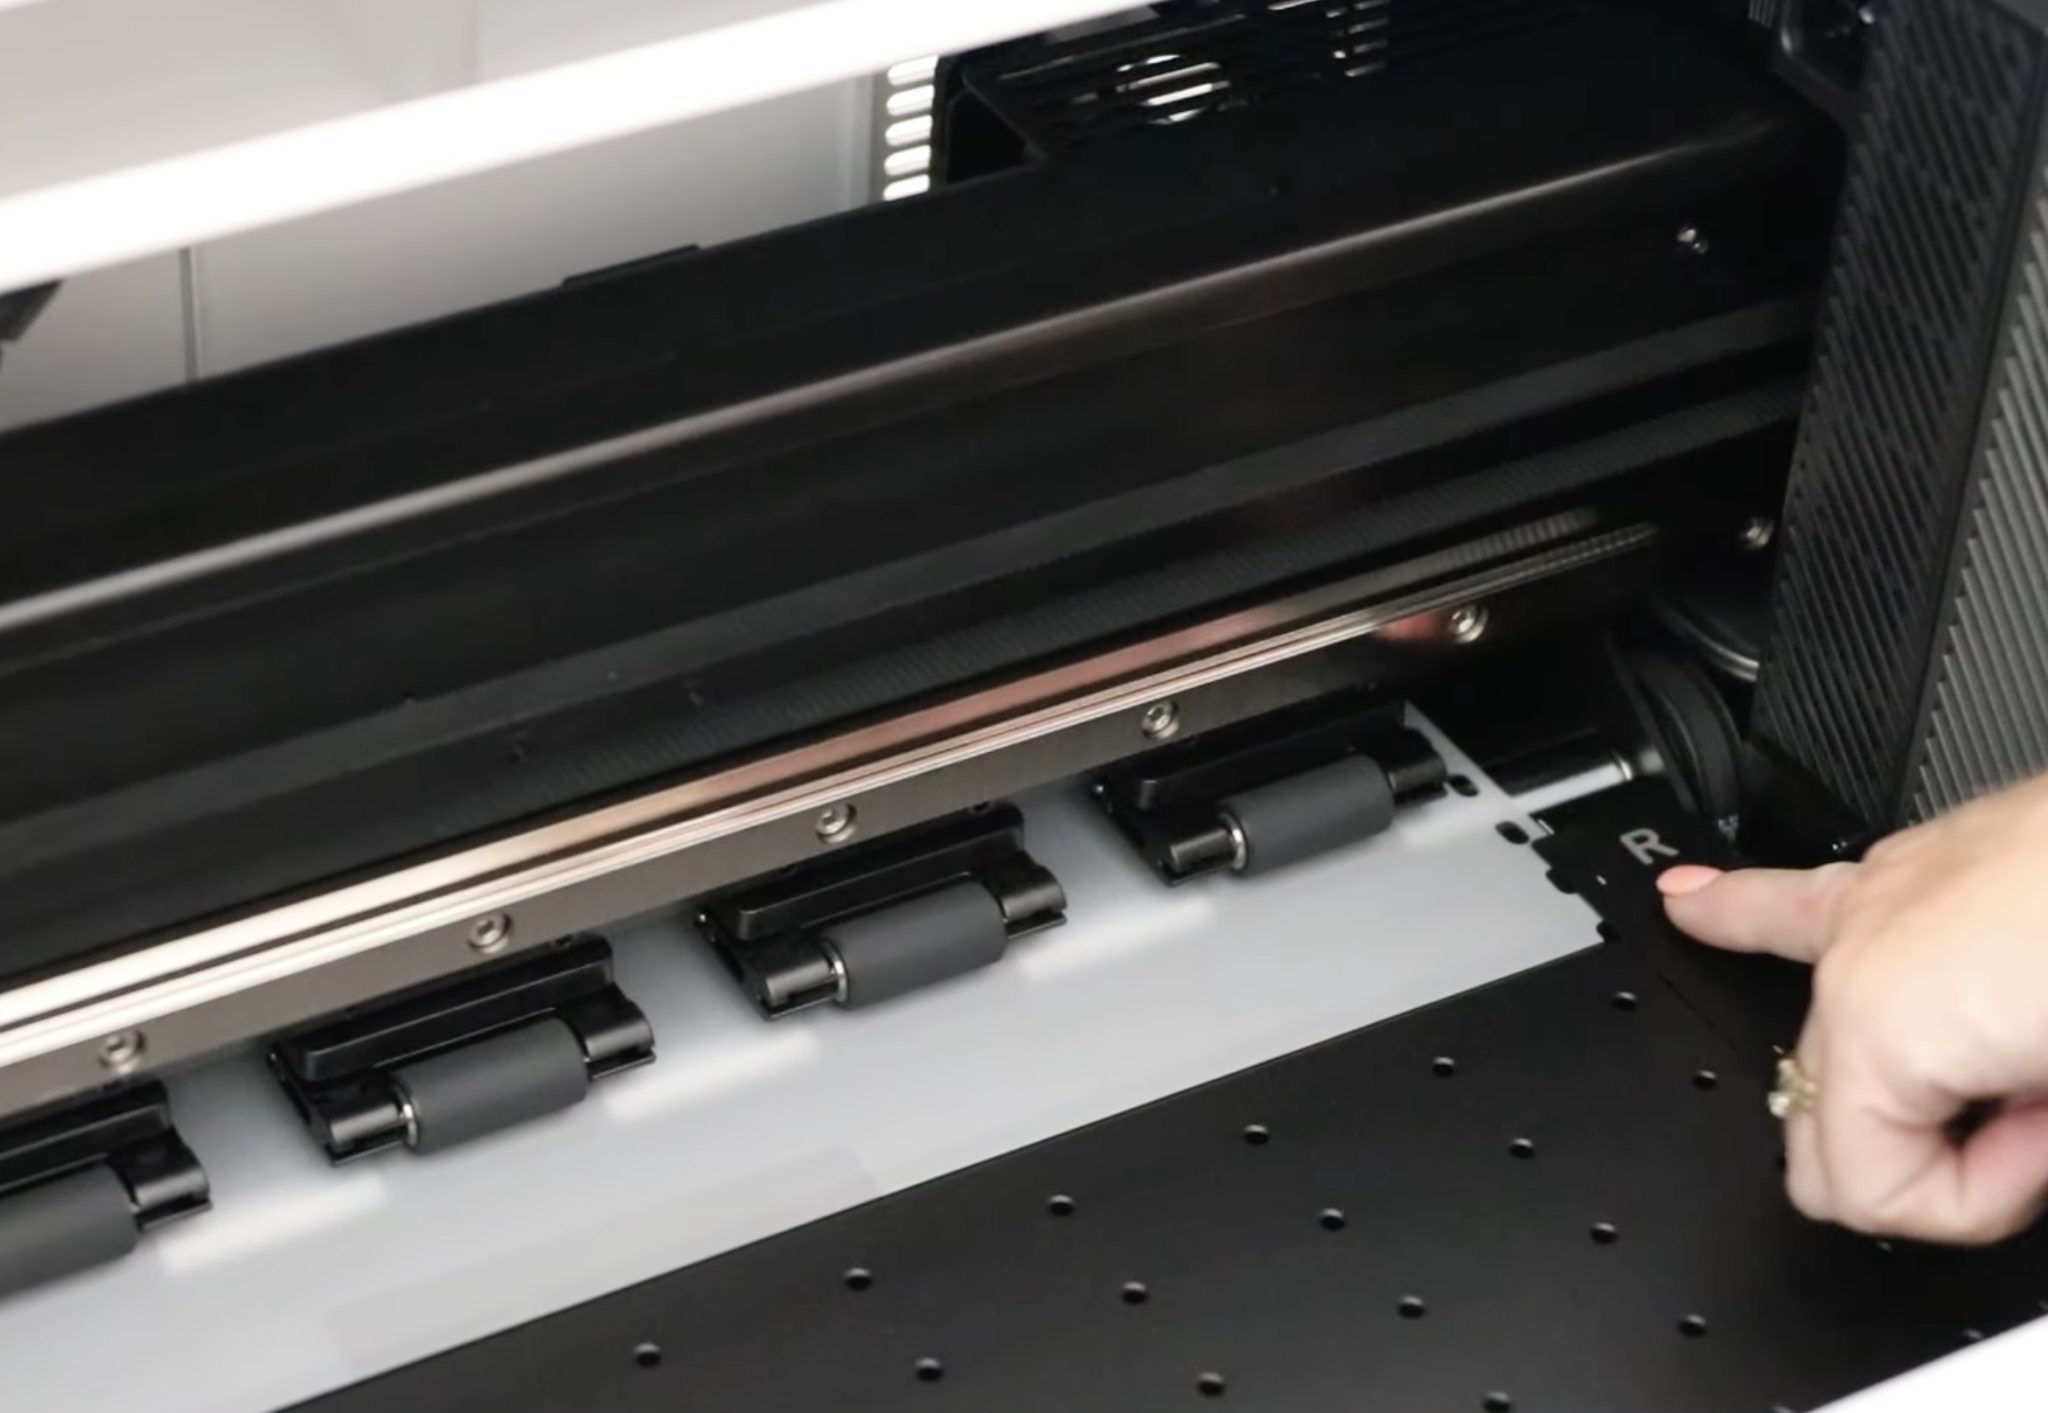
To move the guide plate, just push it over until the dots line up with the edge of the paper roll. Repeat this process on each side if needed.
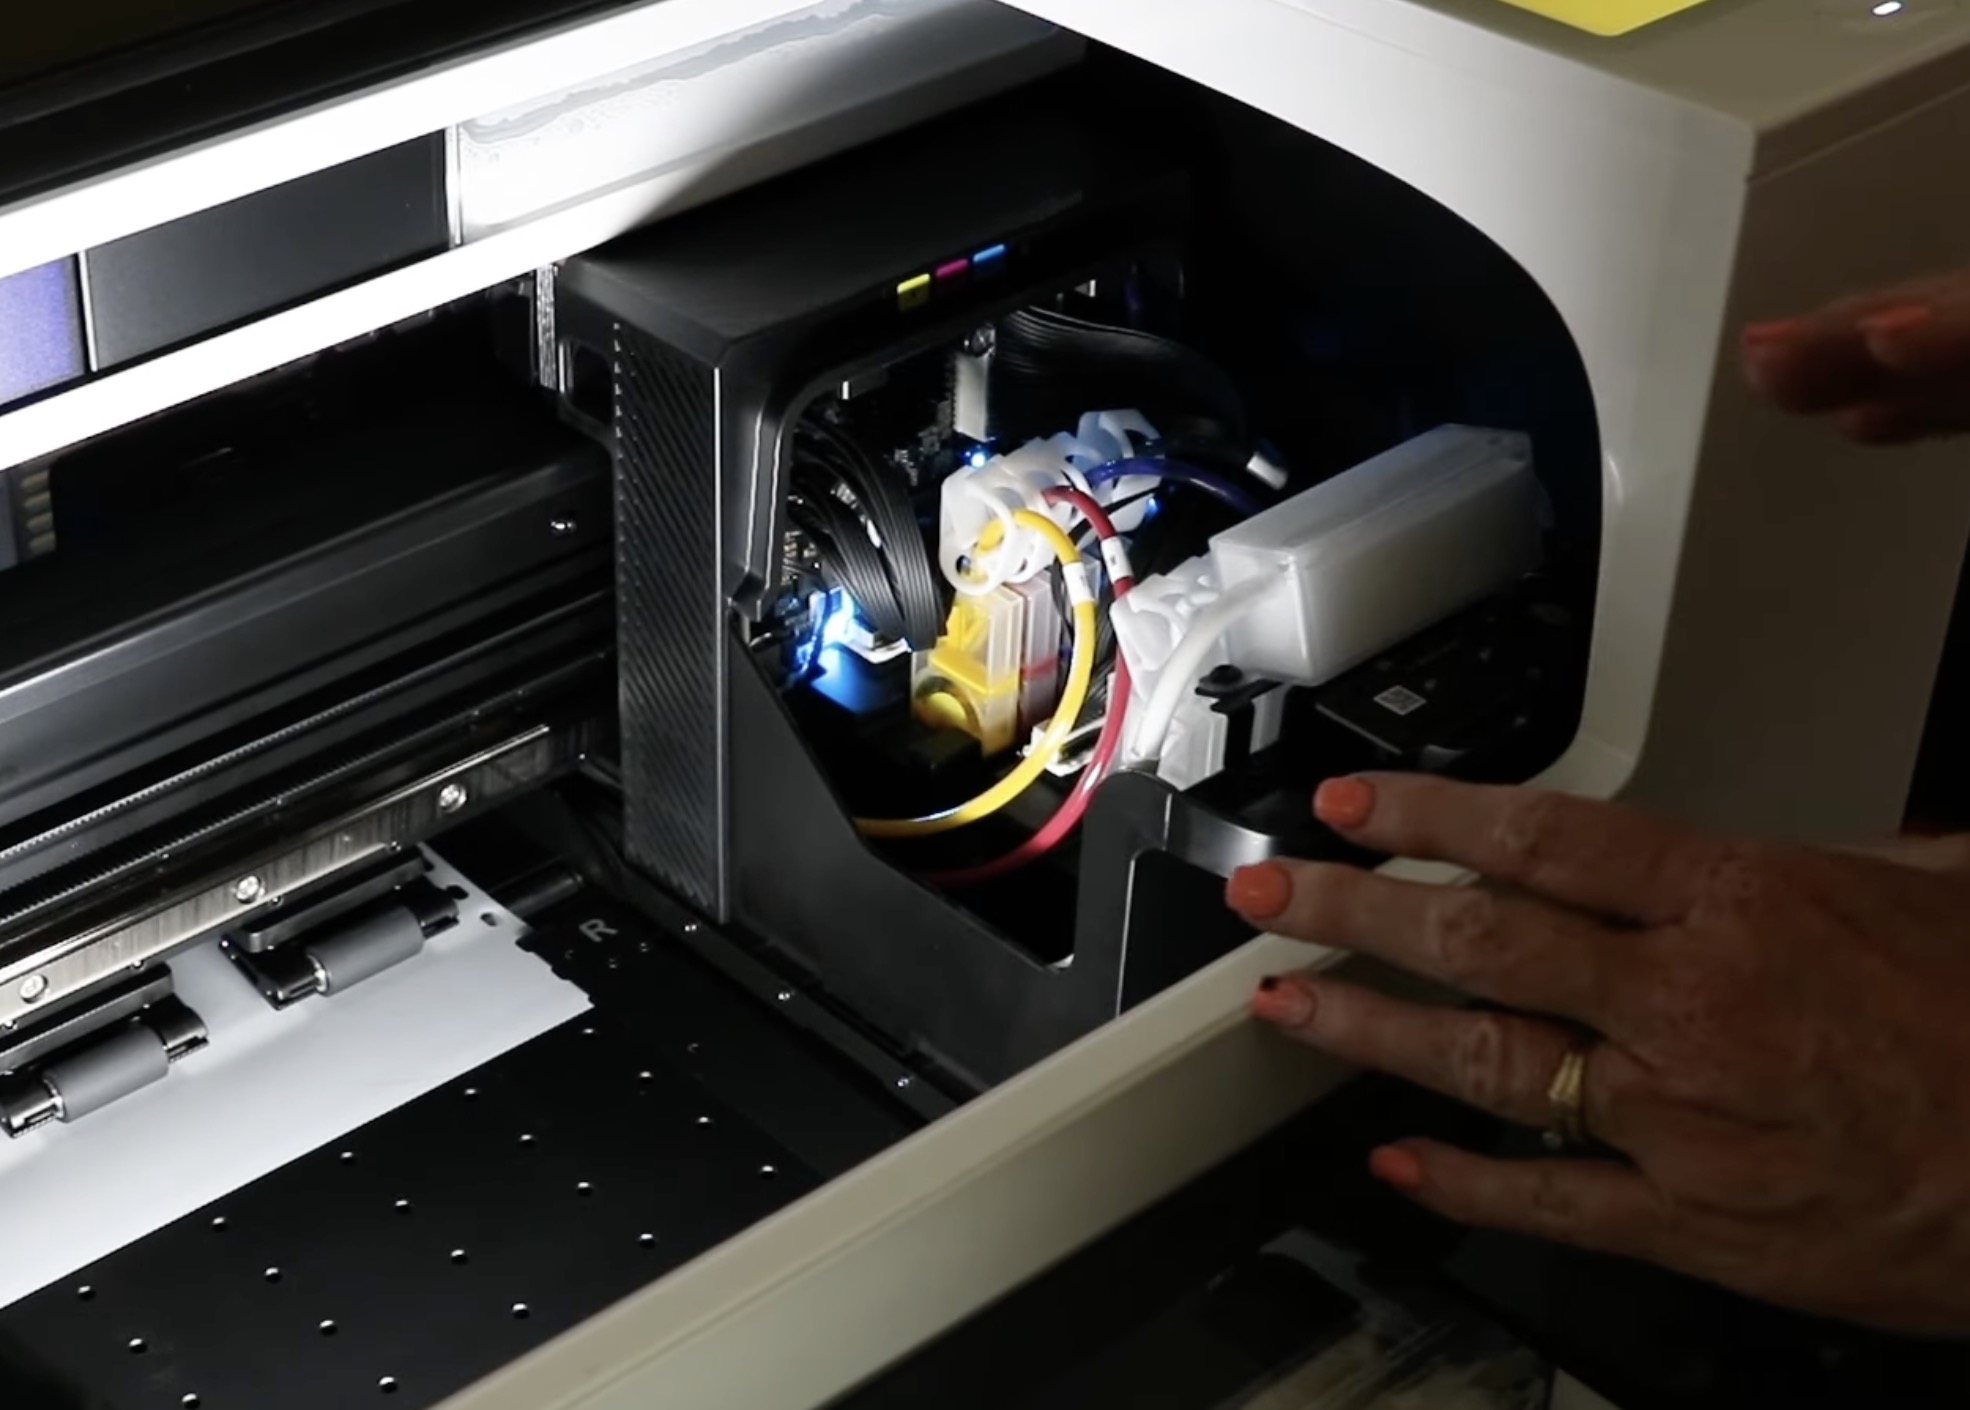
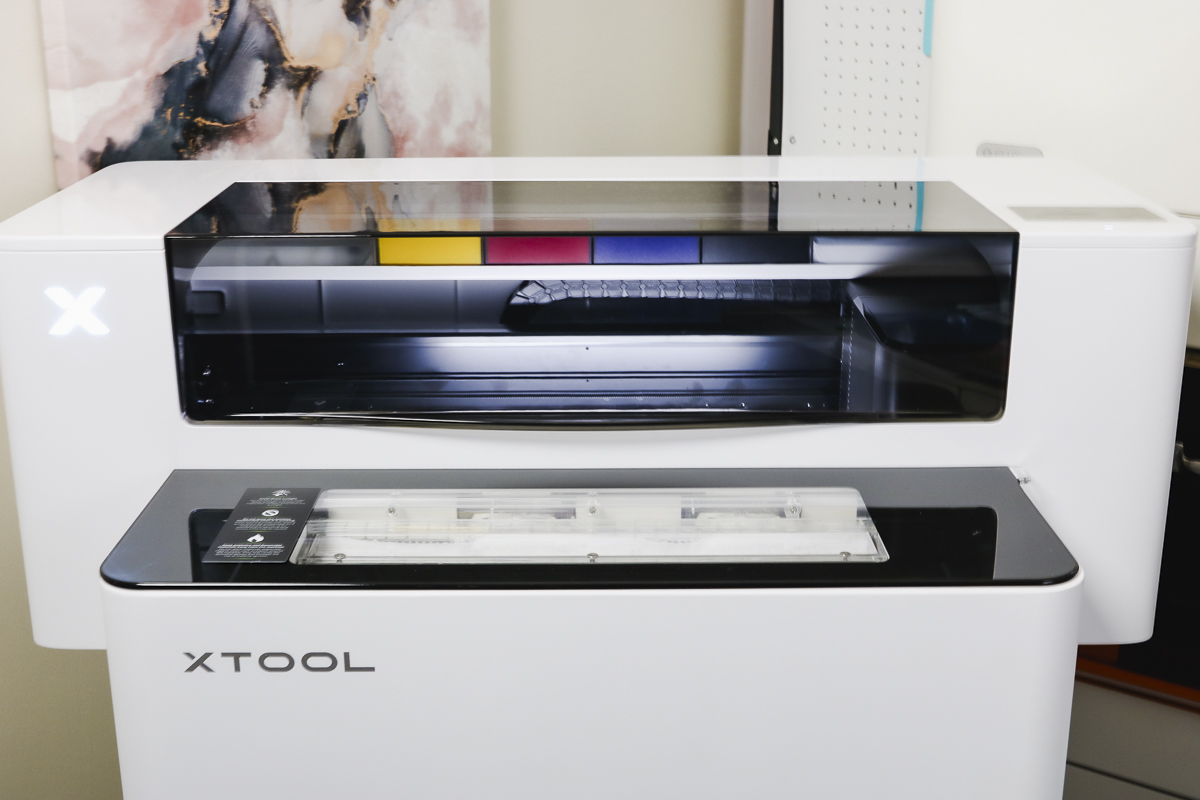
Step 6 – Add Ink to the Printer
This printer has CMYK and White ink. There is also a moisturizing liquid spot. To add the ink, remove the cover from the back of the printer
The moisturizing liquid is for maintenance, and I am going to fill that one up first.
Open the flap and add the liquid, making sure not to overfill. The maximum capacity for the moisturizing liquid and white ink is 1,000 ml. The maximum capacity for CMYK is 500 ml.
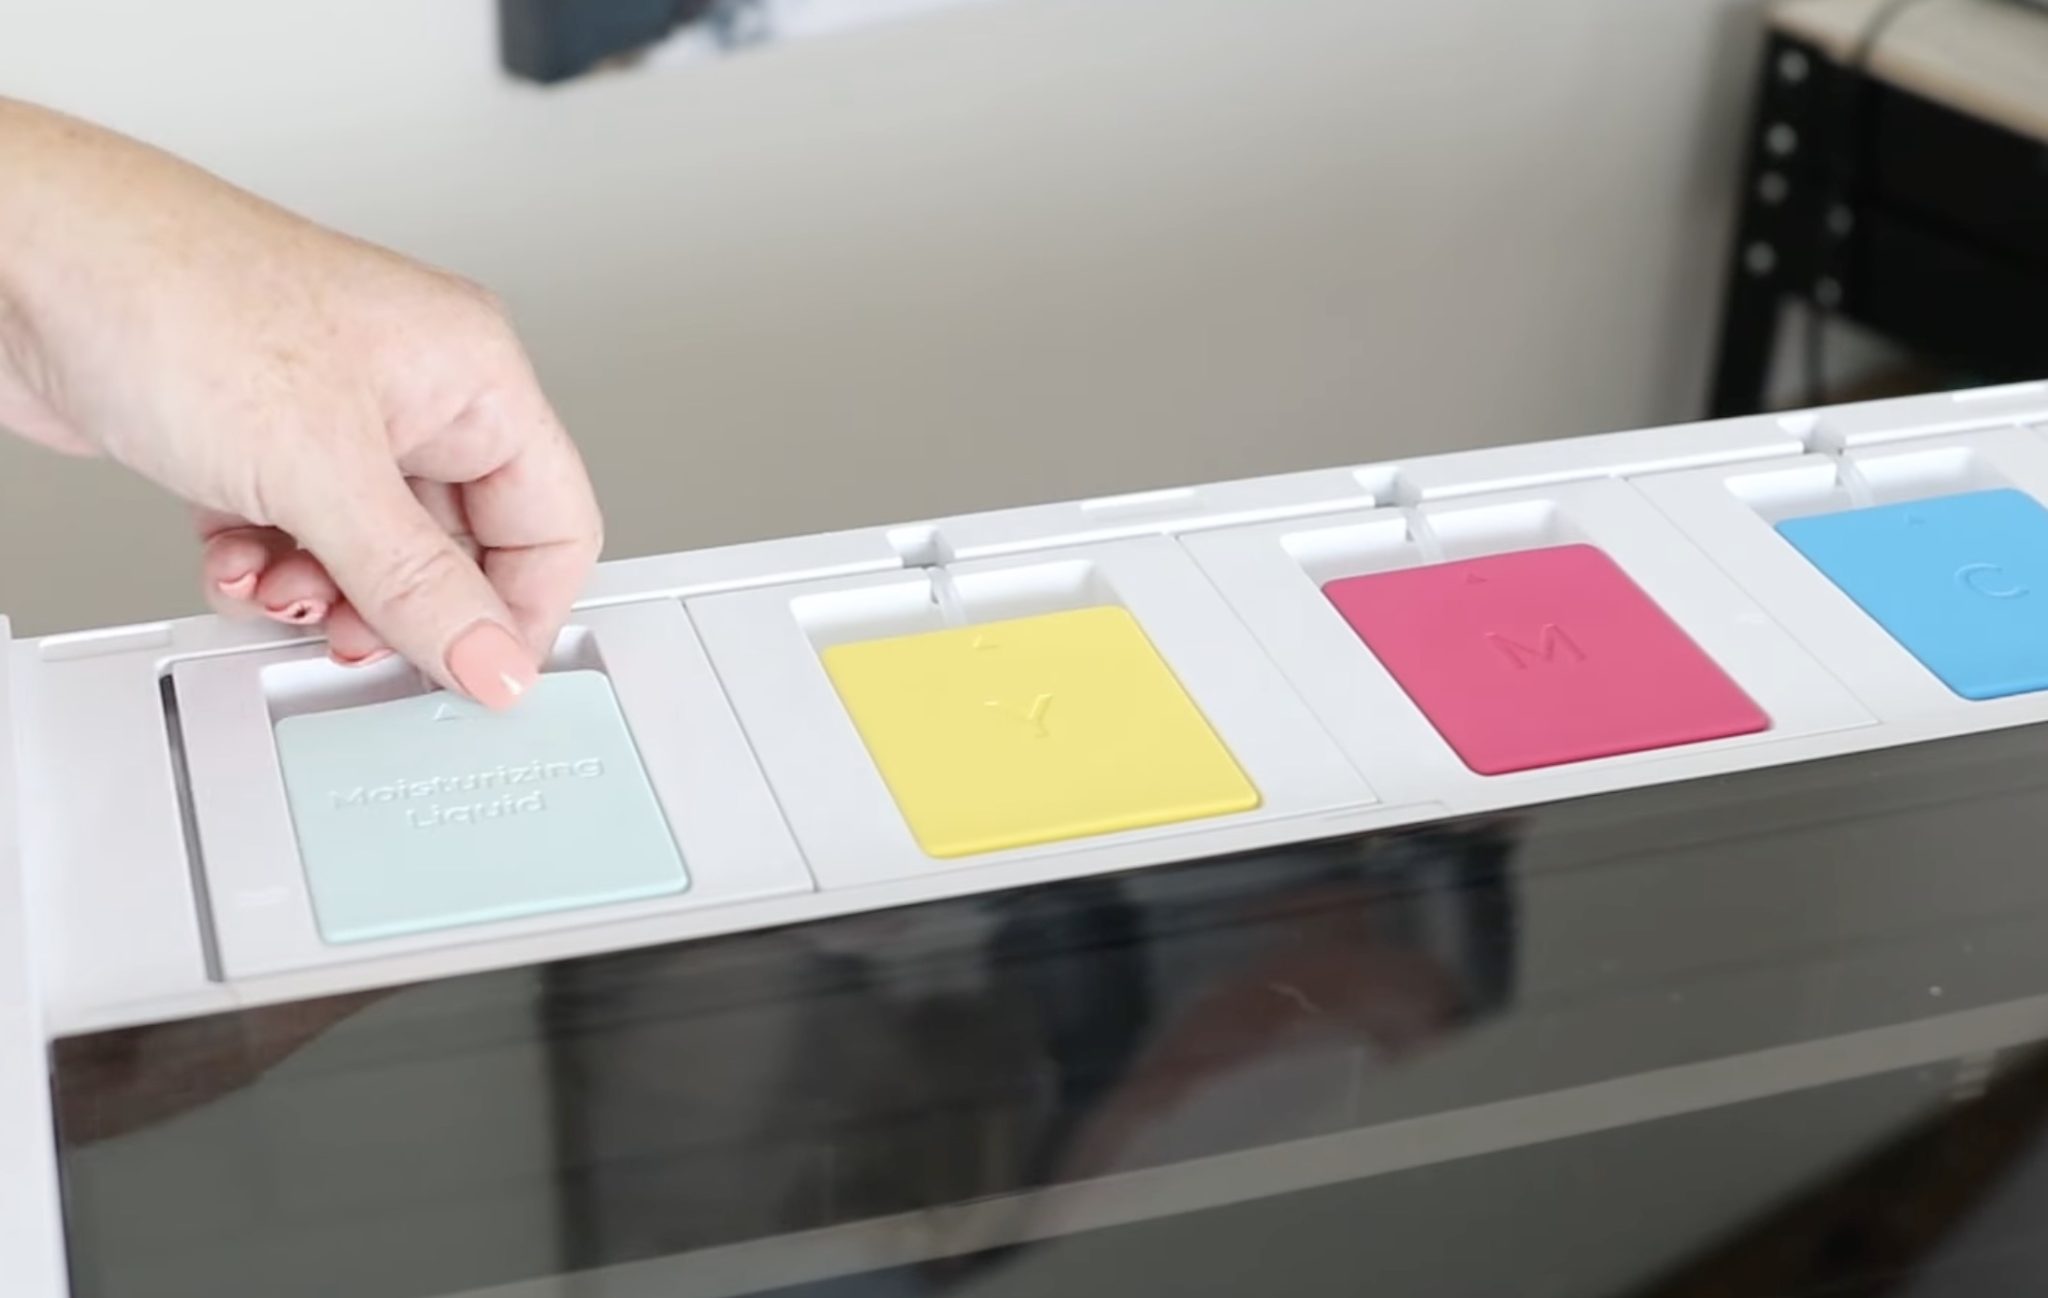
Read each bottle name and match it to the name on the flap.
Note – While pouring the ink into the printer, I had a little splashing. Only open one flap at a time to ensure you don't get colors mixed.
On each bottle, you'll need to open the lid and remove the plastic film.
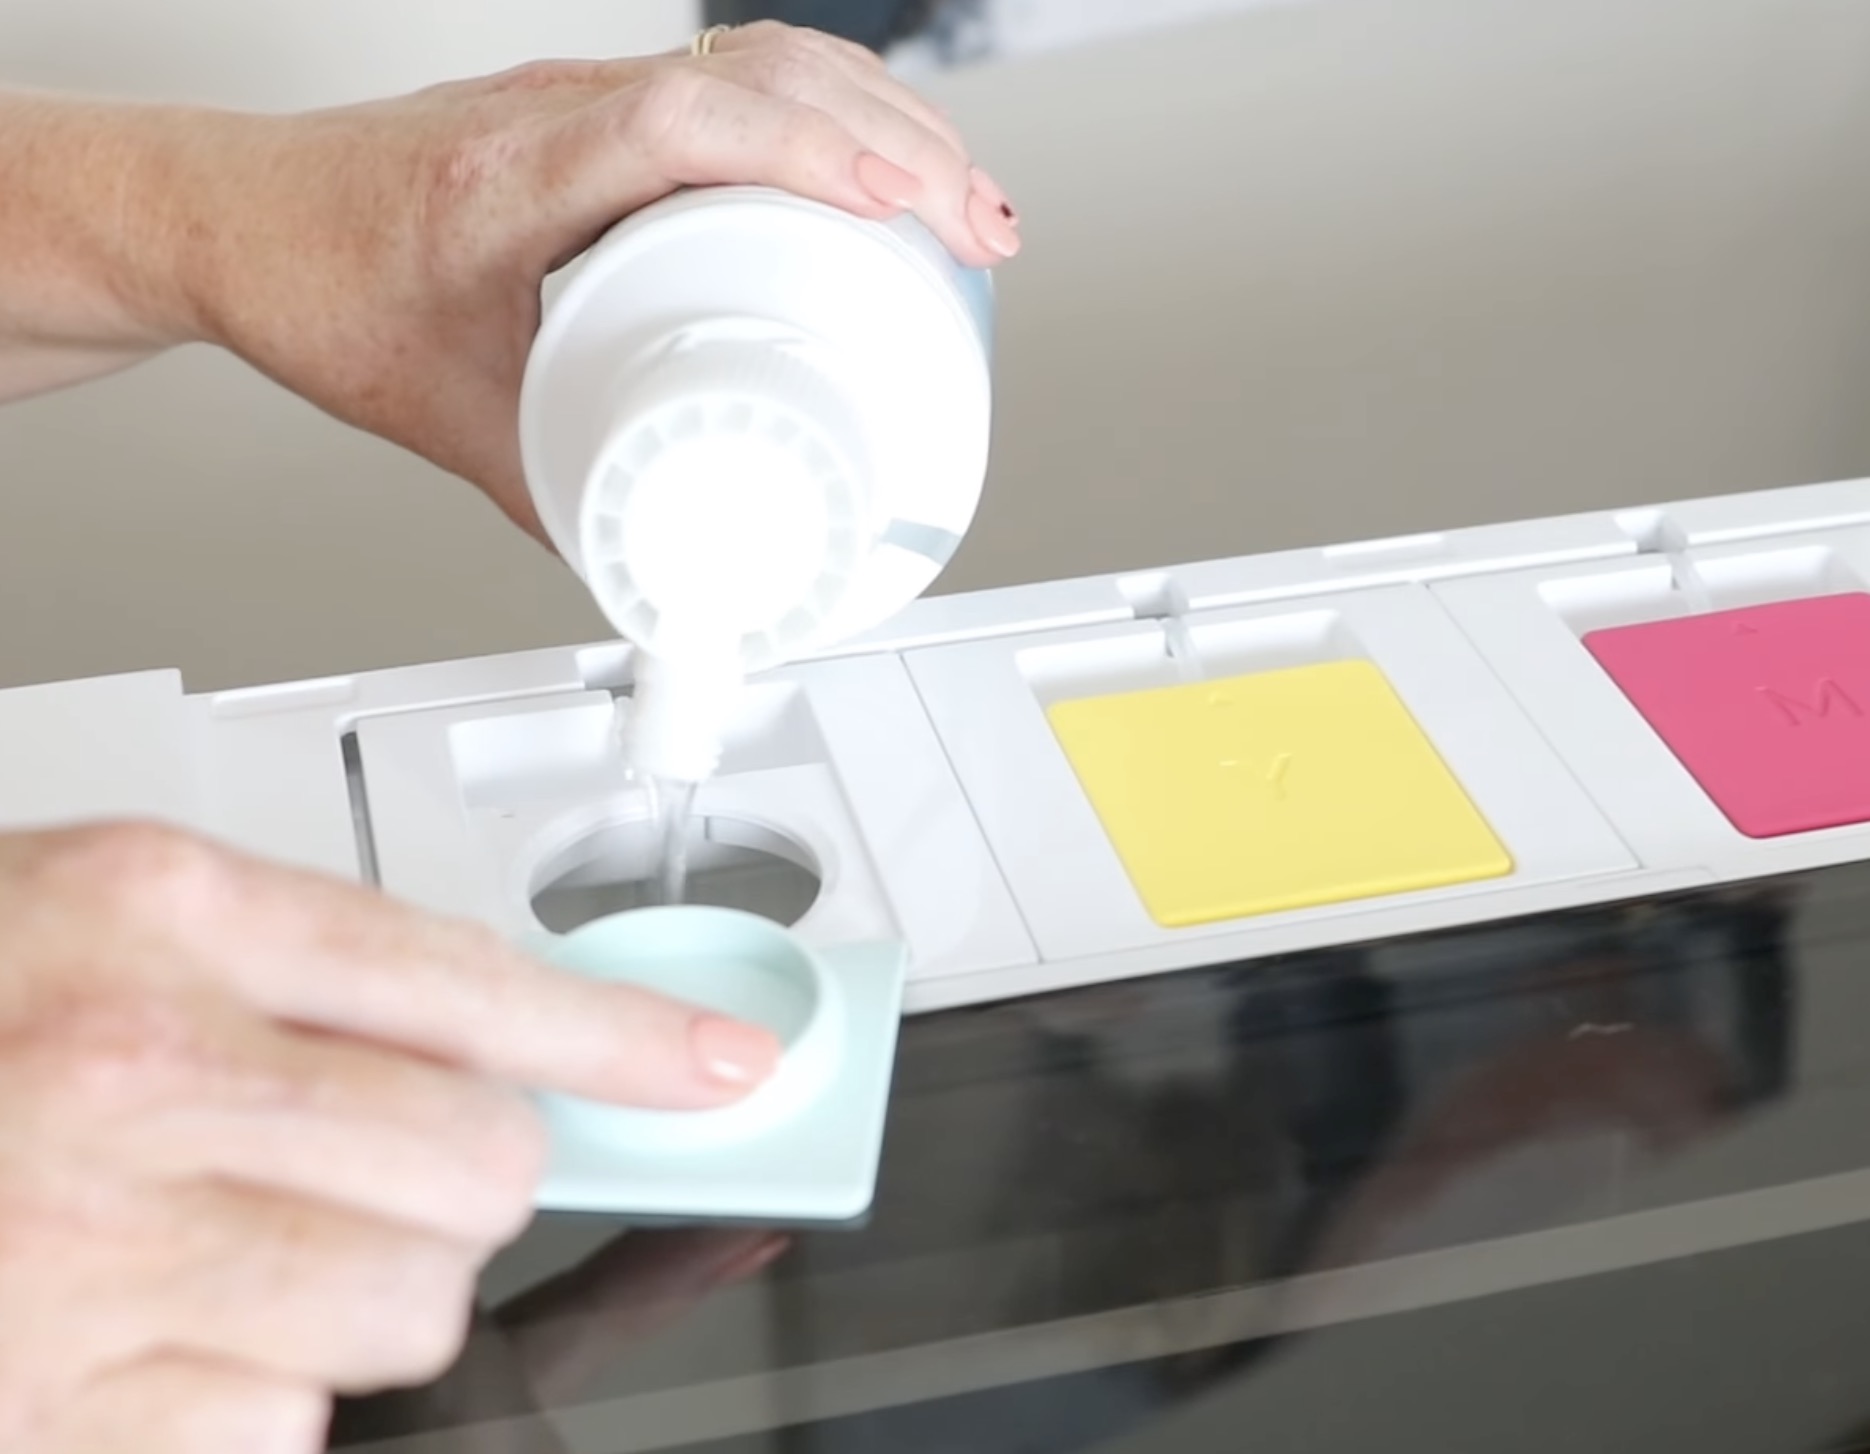
Replace the lid and carefully pour the liquid into the machine. Keep an eye on the tank, ensuring you don't overfill it.
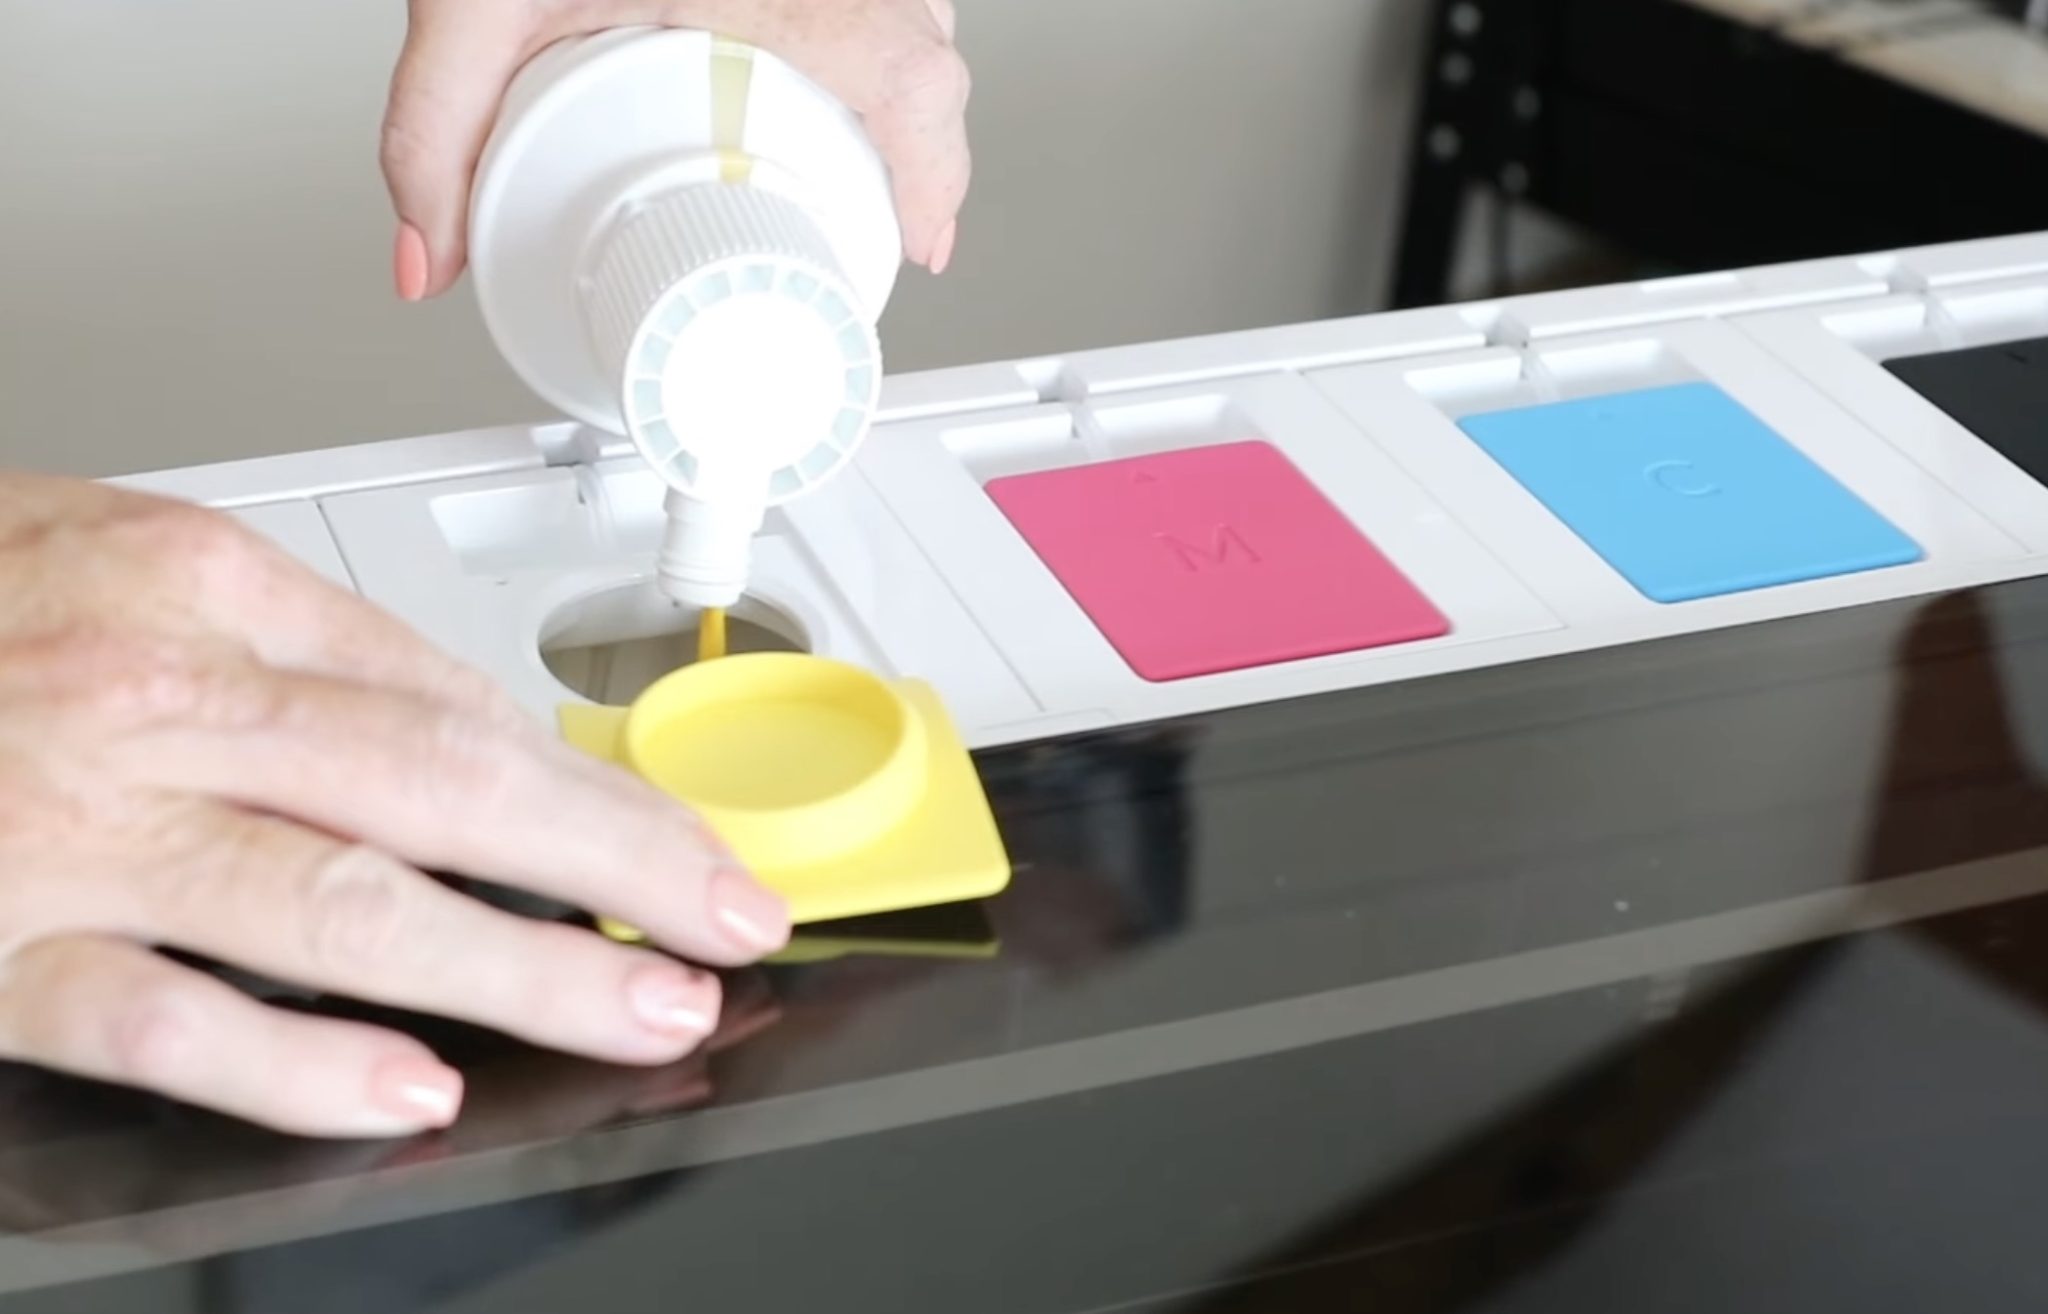
When you get to the white ink, make sure you shake it really well for about a minute before pouring it.
Replace the cover, and you're done filling the ink.
Step 7 – Powering On the Machine
There is a power cord for the printer, another one for the shaker oven, and another for the air filter.
There is also a cord to connect the printer to the shaker oven.
With both the shaker oven and printer plugged into the outlet, power them on.
Step 8 – Finish the Setup Process
Before connecting your printer to a computer, follow the prompts on the screen to complete the setup process.
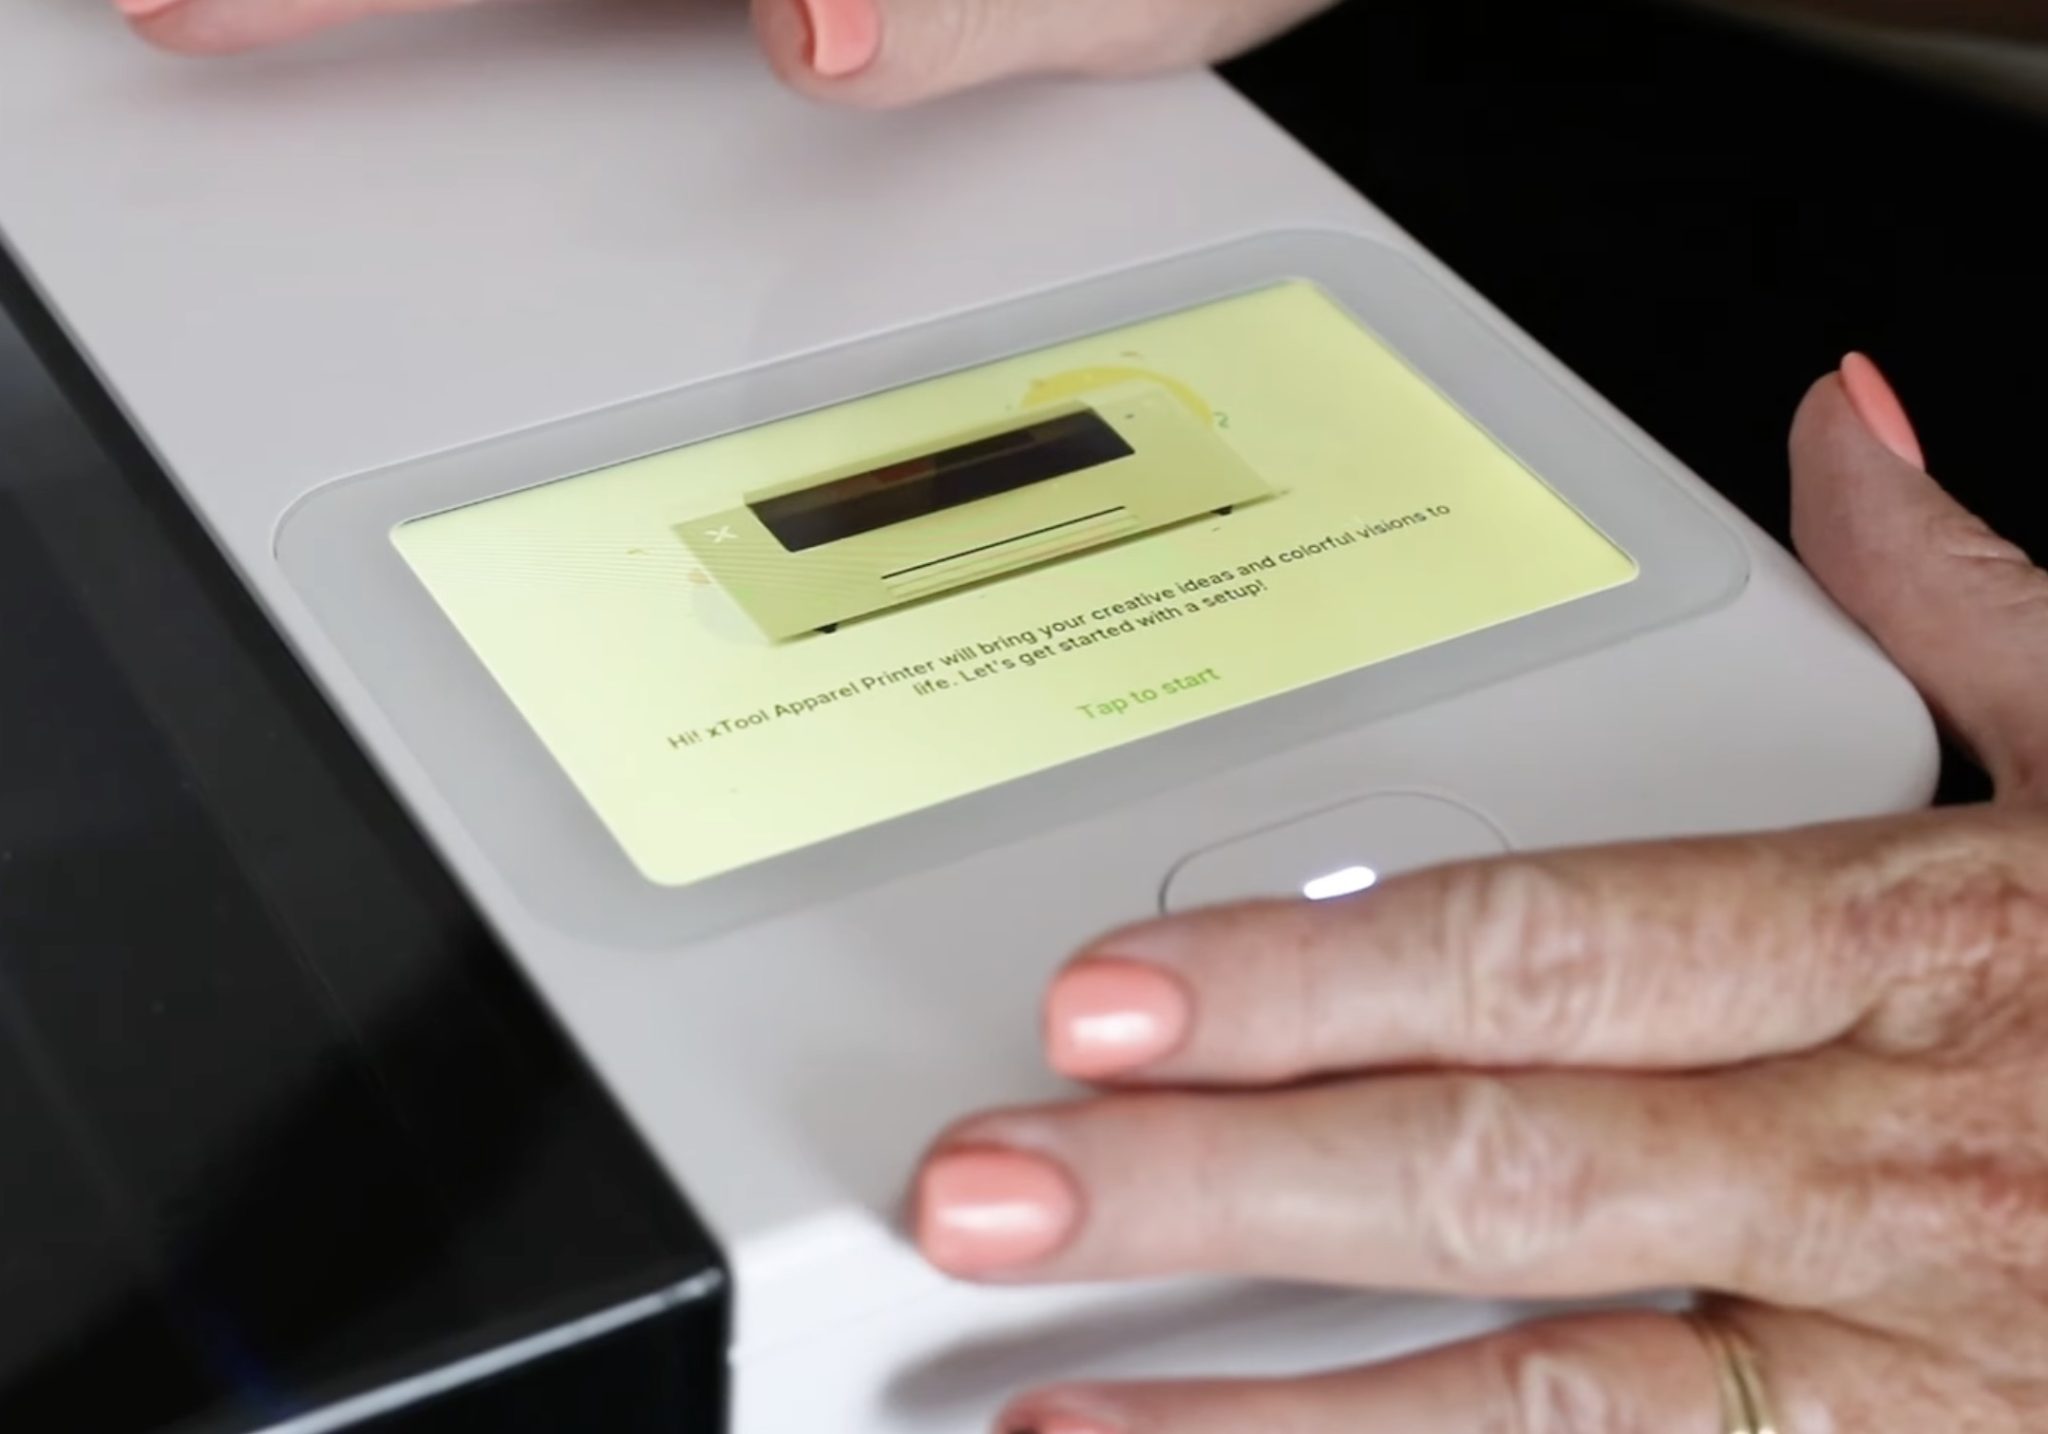
One of the steps I had to do was to remove the cover from the print head and open and close the different clamps.
Make sure you follow all the steps on the screen to ensure your printer is set up correctly.
Note – This is not a quiet printer. With the printer, shaker oven, and air purifier on, it's pretty noisy, so I want you to be aware of that.
xTool Apparel Printer Safety
This printer is on wheels, and for safety reasons, when printing, I will have it moved to the center of the room.
It is also recommended that during the printing process, you have the air purifier as far away from the printer as possible.
I highly recommend you read through the manuals that come with the printer, shaker oven, and air purifier, and follow all the safety instructions when operating the printer.
Step 9 – First Print
With the printer set up, it will walk you through printing your first print. This first print is a sample print, and I highly recommend going through that process.
It really helps you familiarize yourself with the software, printer, and shaker oven.
Step 10 – Open xTool Studio and Upload Image
If you have used any other xTool machine, this software is the same. It used to be called xTool Creative Space but has recently been updated to xTool Studio.
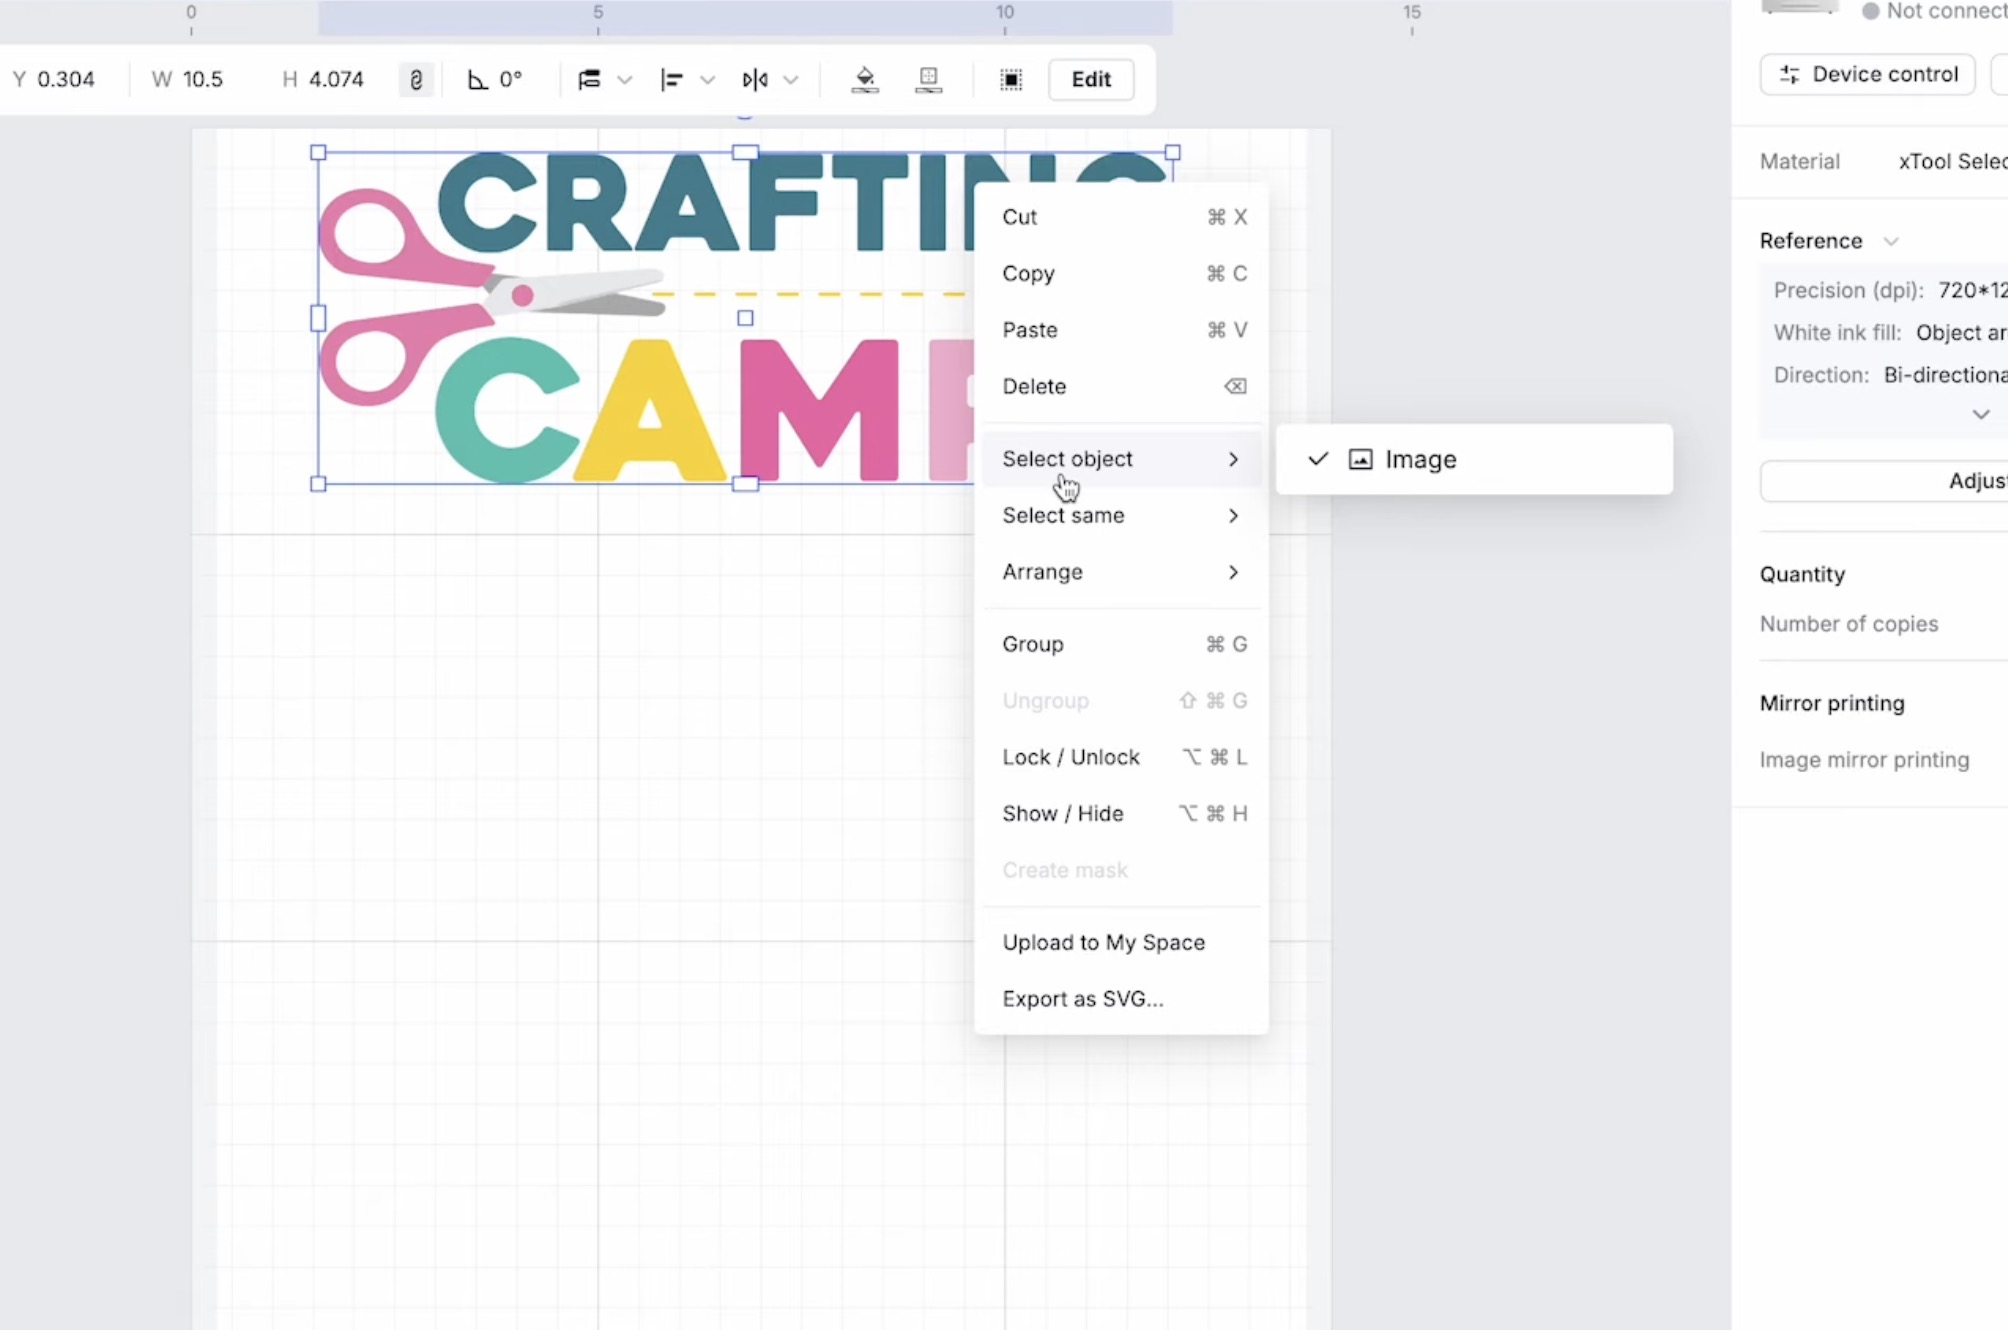
If you haven't updated your xTool software, it may look different than mine.
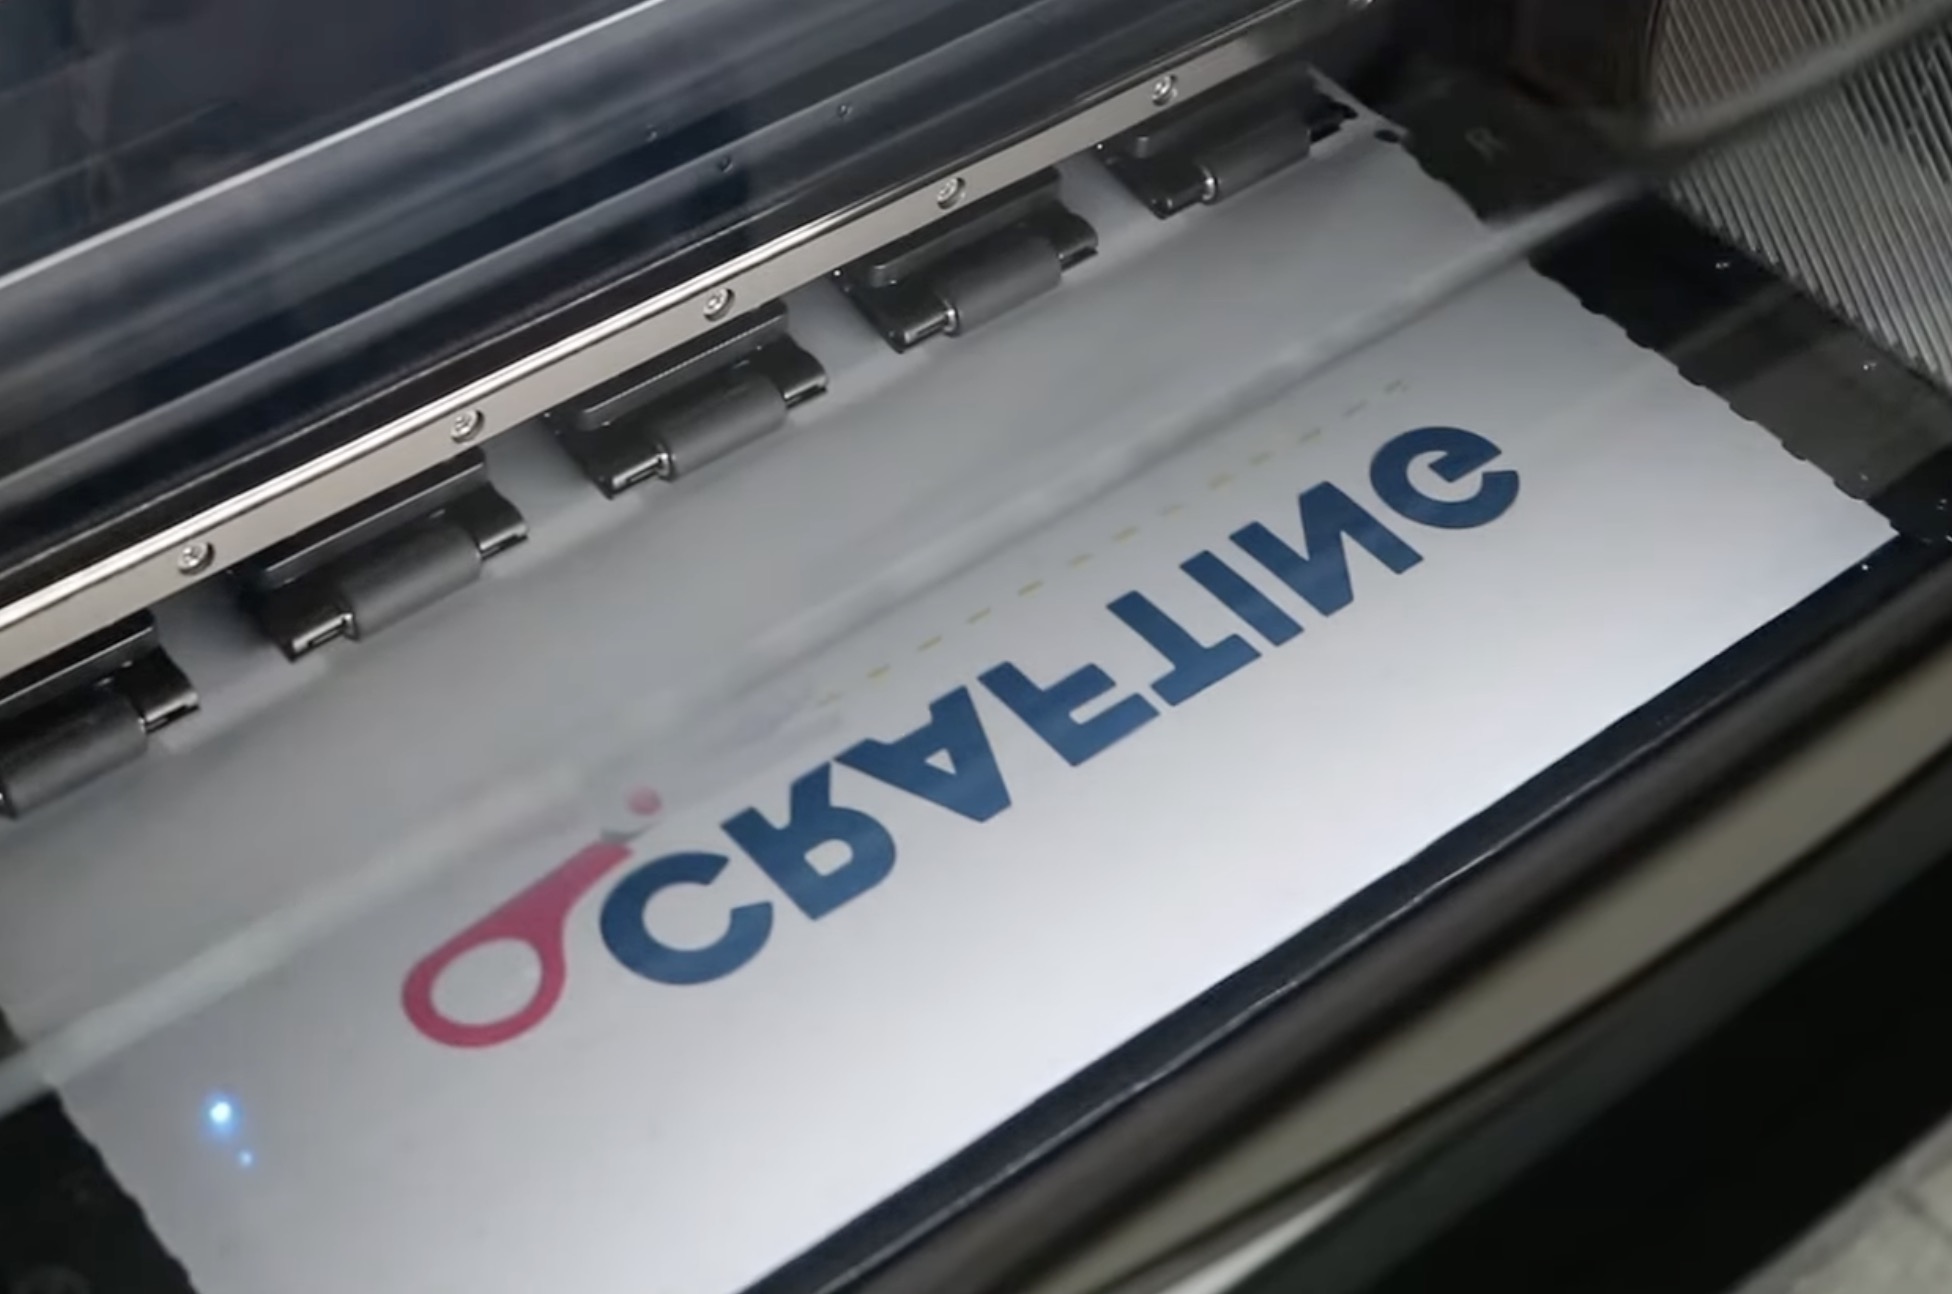
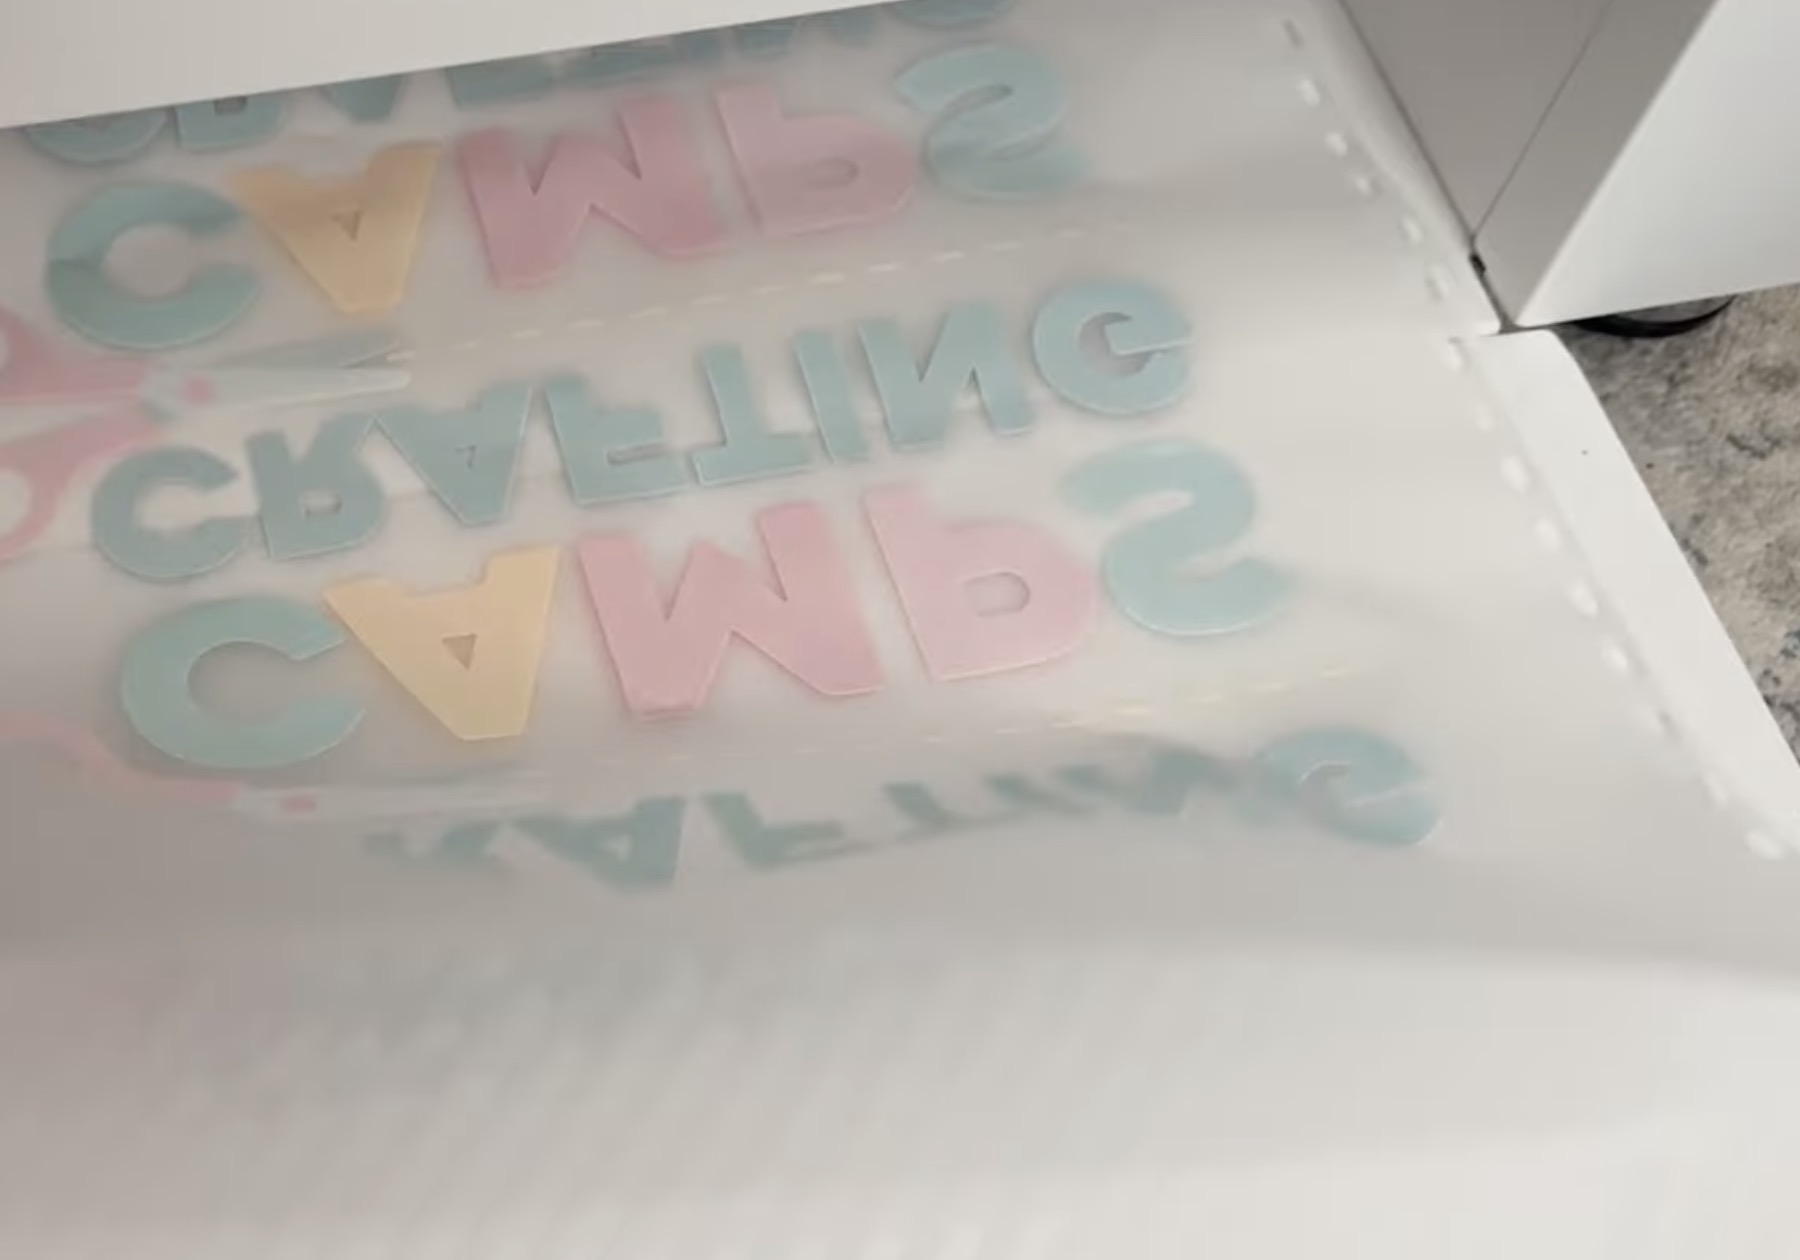
I uploaded the design I wanted to use and resized it to fit the paper.
I like to duplicate the image or add others to fill the entire sheet.
The film roll is about 14 inches wide, and there is a greyed-out margin area which limits the printable width to about 13.5 inches. The maximum length is about 17 inches.
Step 11- Make Any Changes to the Print Settings
With the design in xTool Studio, you can make changes to the white ink and color ink output.
For this first print, I left the settings at the default because I want to see what the prints look like without any adjustments.

Step 12 – Print the Design
Before you click Print in xTool Studio, make sure the printer, shaker oven, and air purifier are all powered on. They need to be turned on before you try to print.
Click Print, and the printer will begin to print on the film.
The image is mirrored, so it is going to print the color ink first, and the white will be added last.
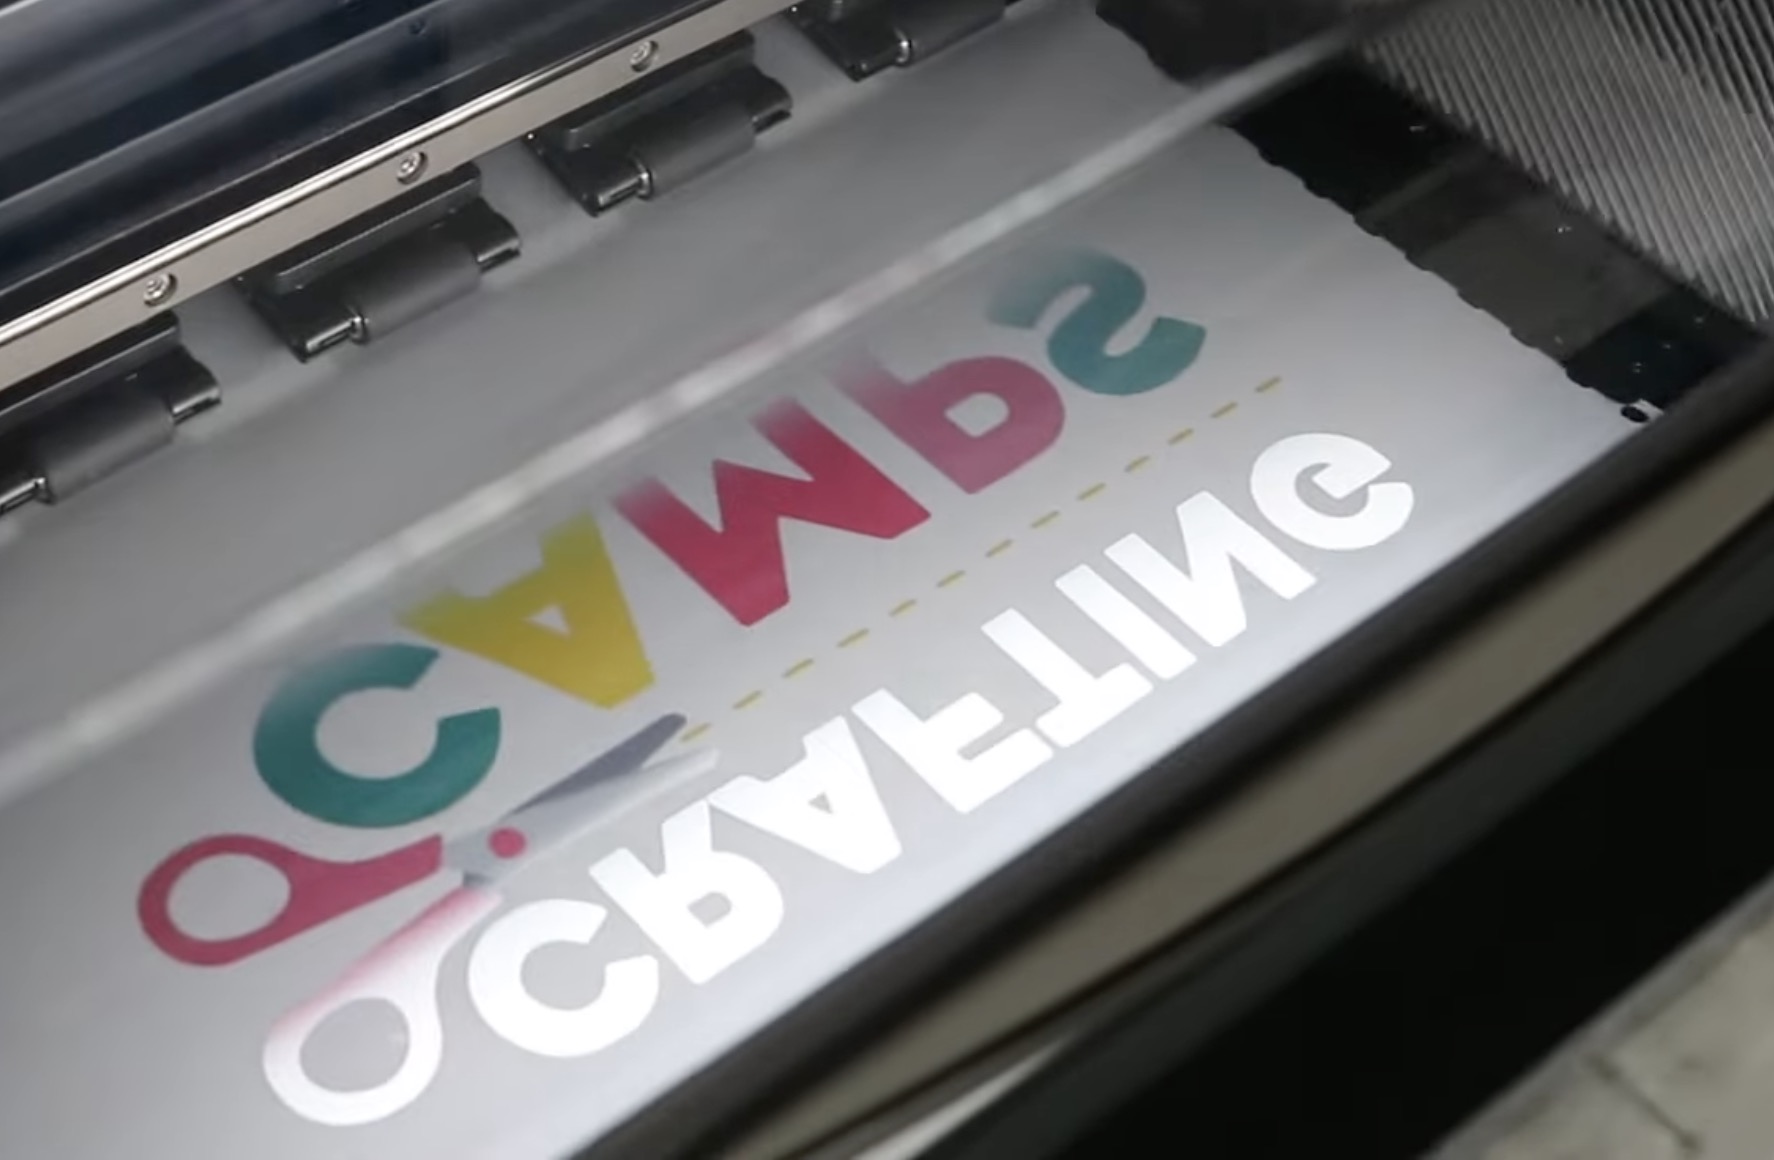
After it's done printing, the printer will feed the film into the area where it will be powdered.
As it's being powdered, it shakes to help make sure the powder gets on all of the ink, and excess powder is shaken off.
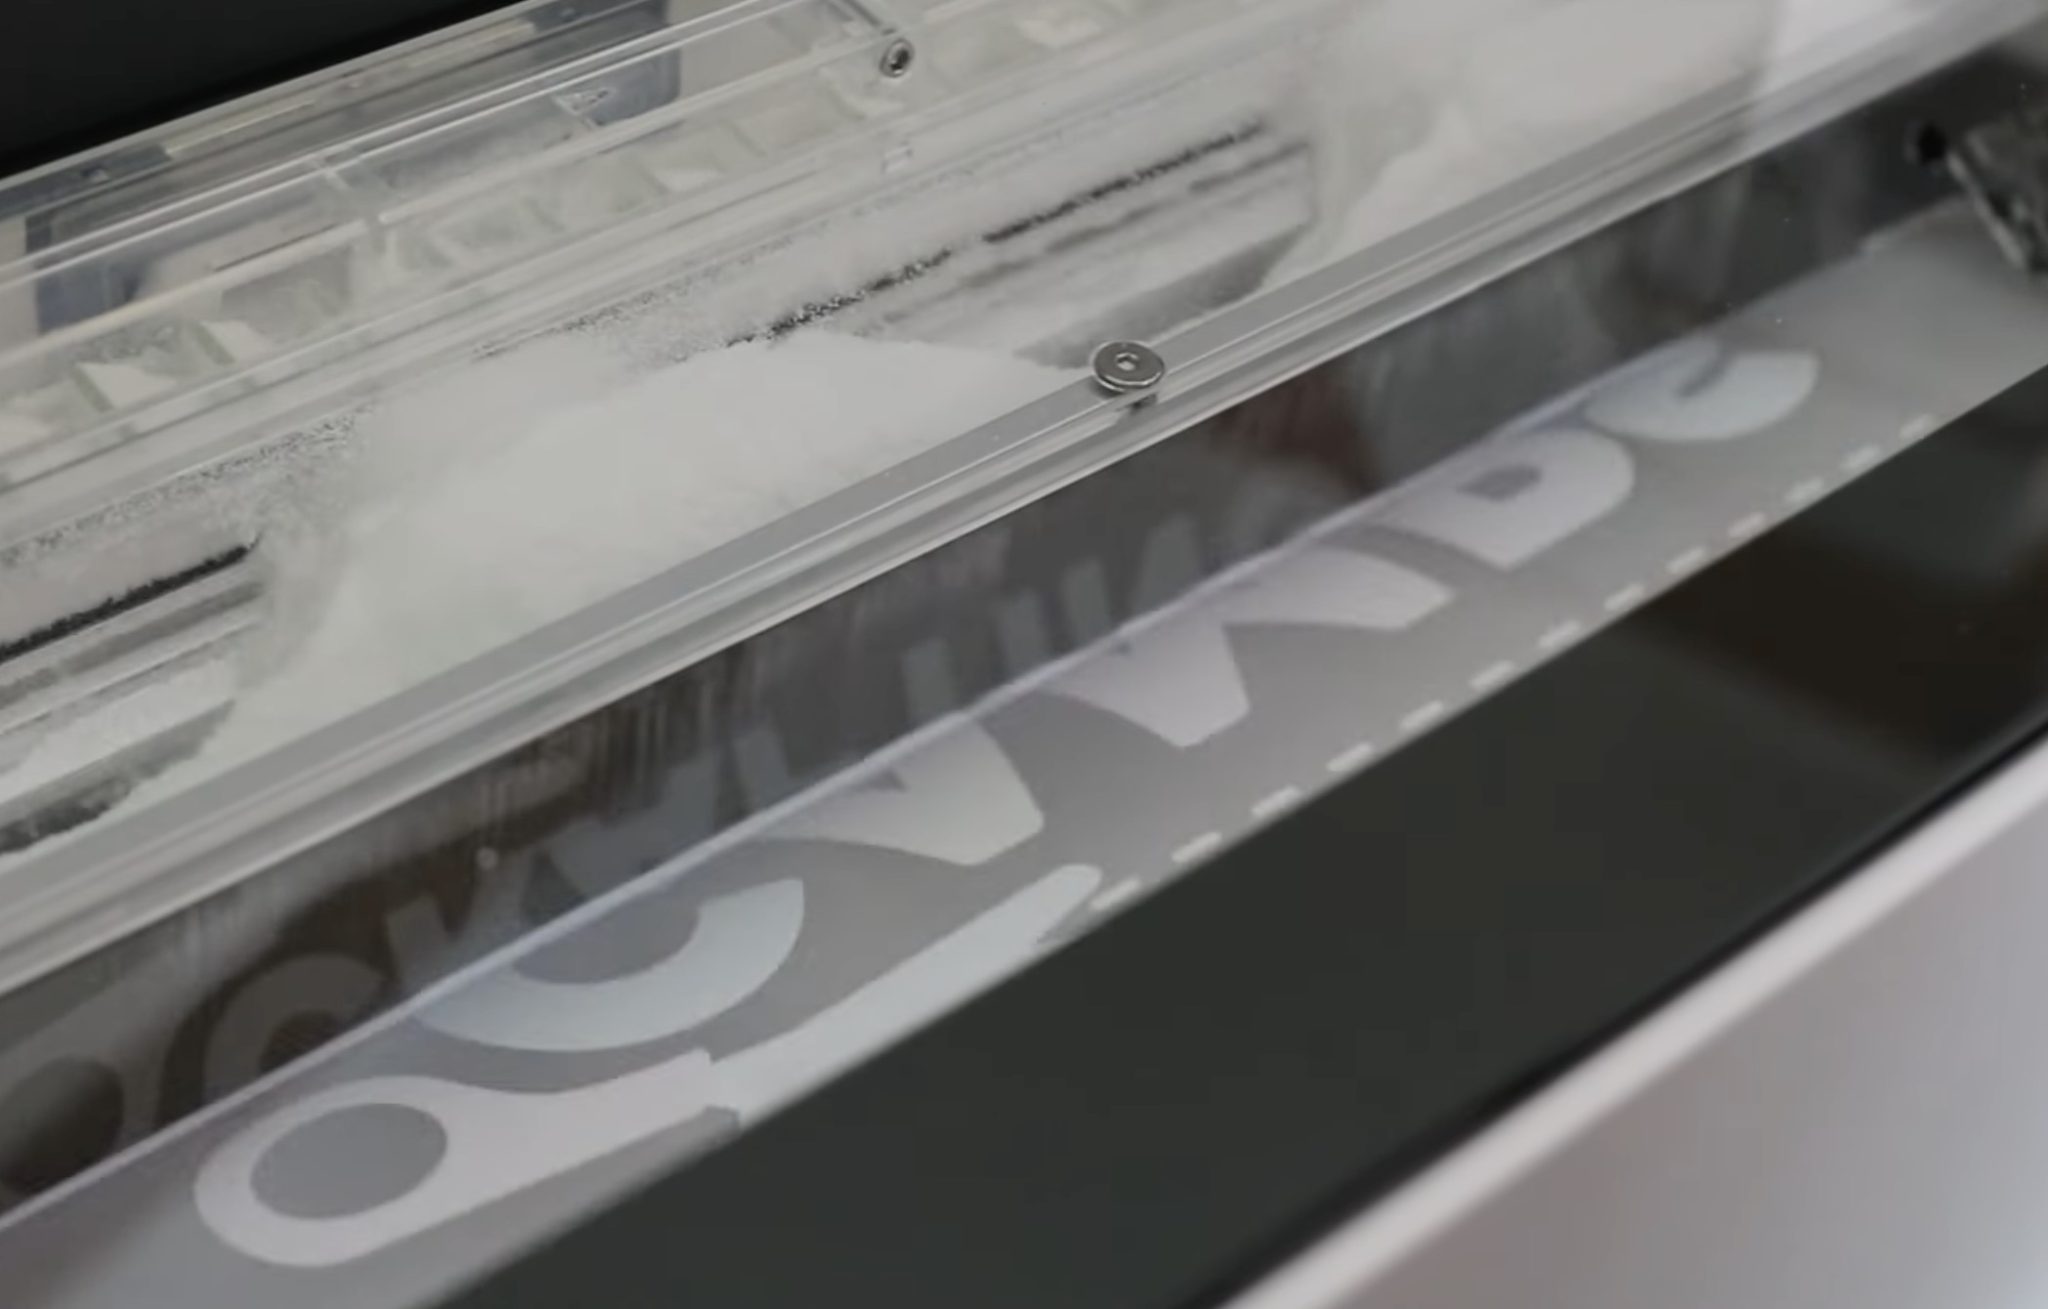
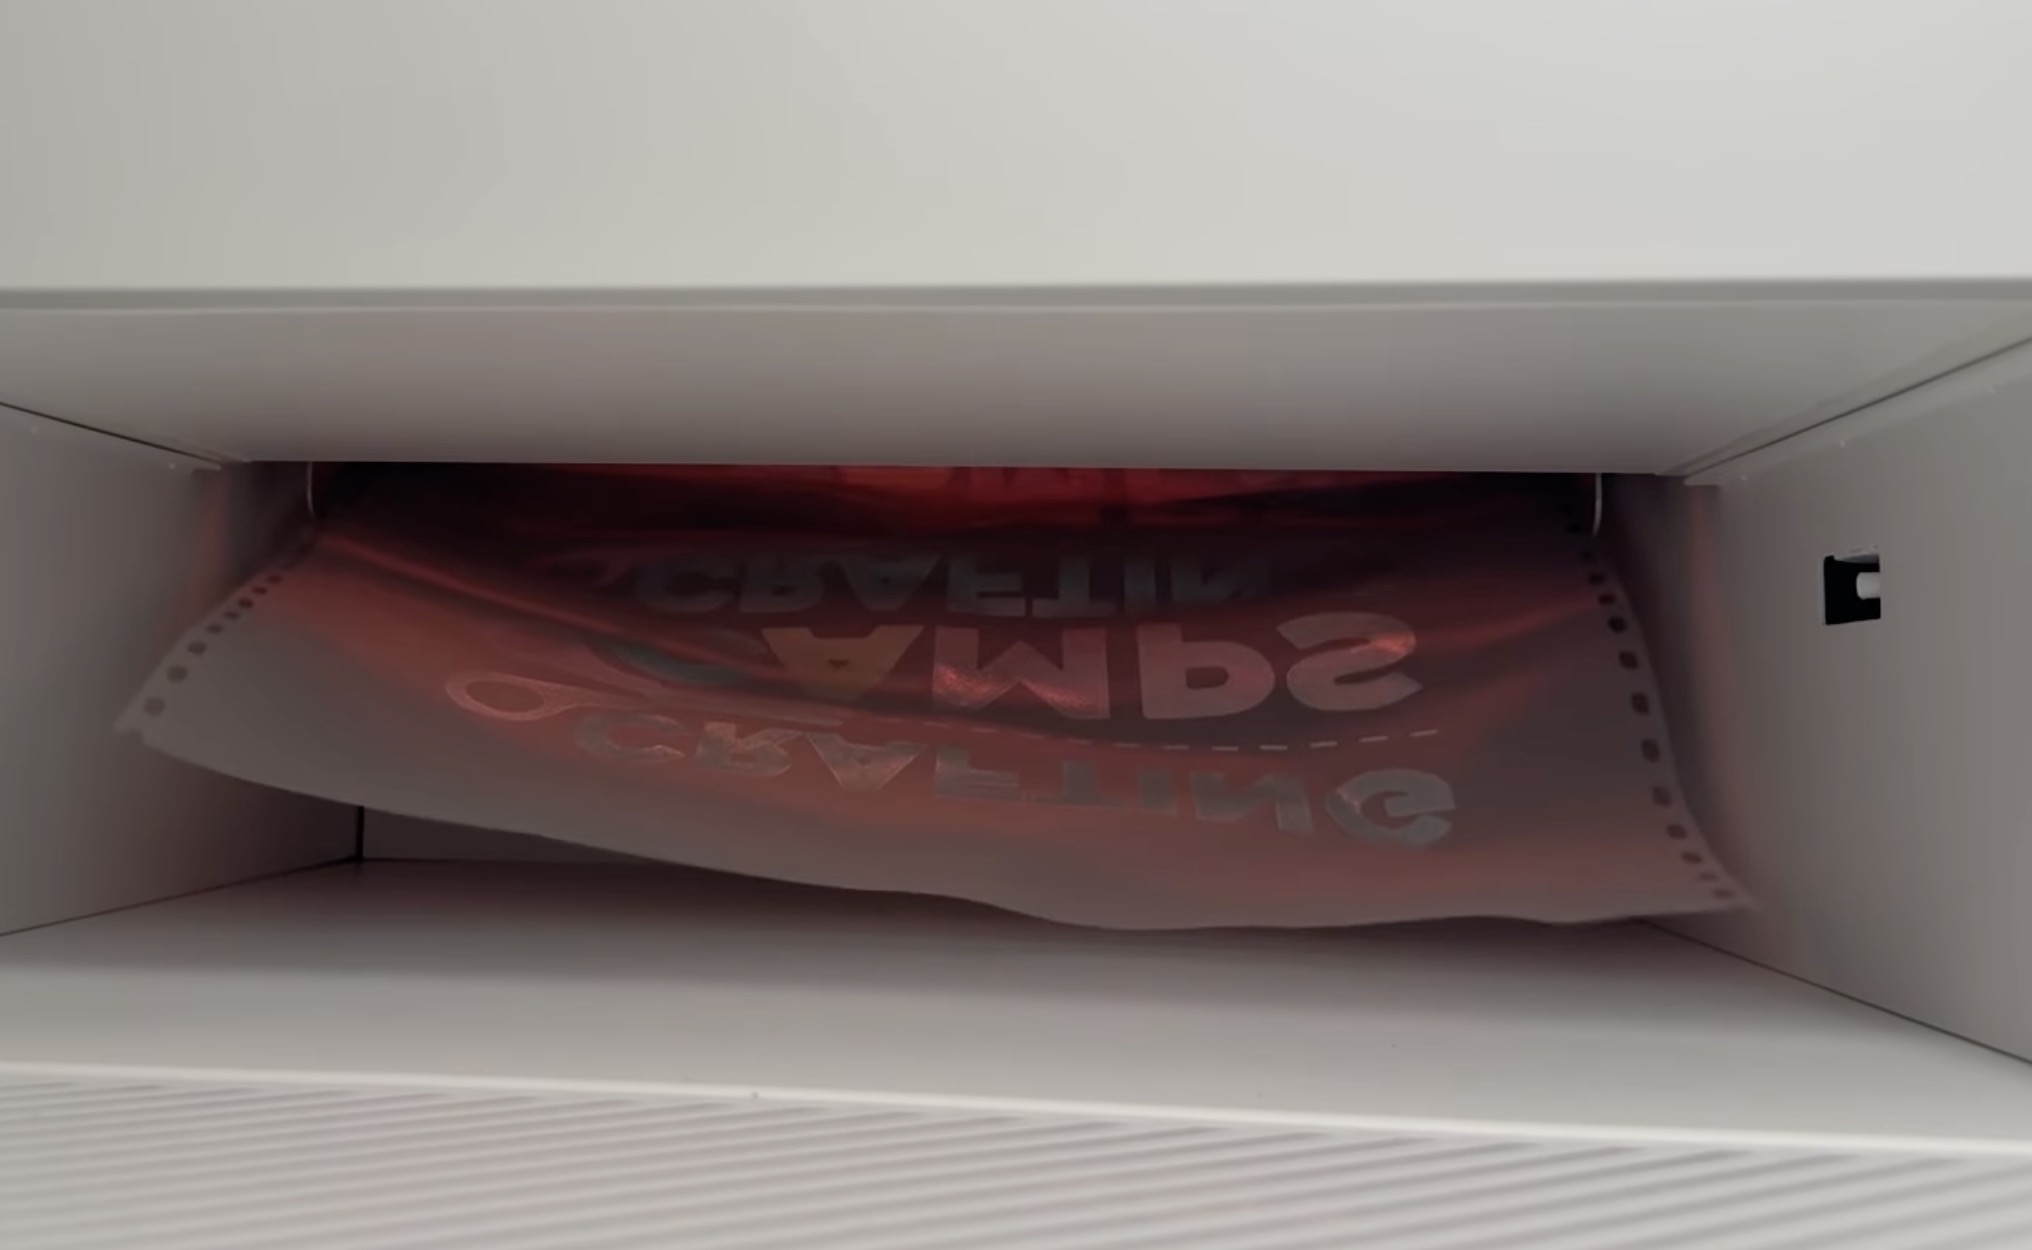
When the powdering process is complete, it will drop down to the oven area to cure the powder.
While the powder is curing, you can send another project to the printer.
Note – The print time you see on the screen only includes the time it takes to print the design. That time does not include the powdering or curing time.
When the oven is done curing the print, it will come out of the tray at the bottom of the printer.
I found the printing process very easy, and the print looks so good.
At this point, the print can be handled and is ready to press.
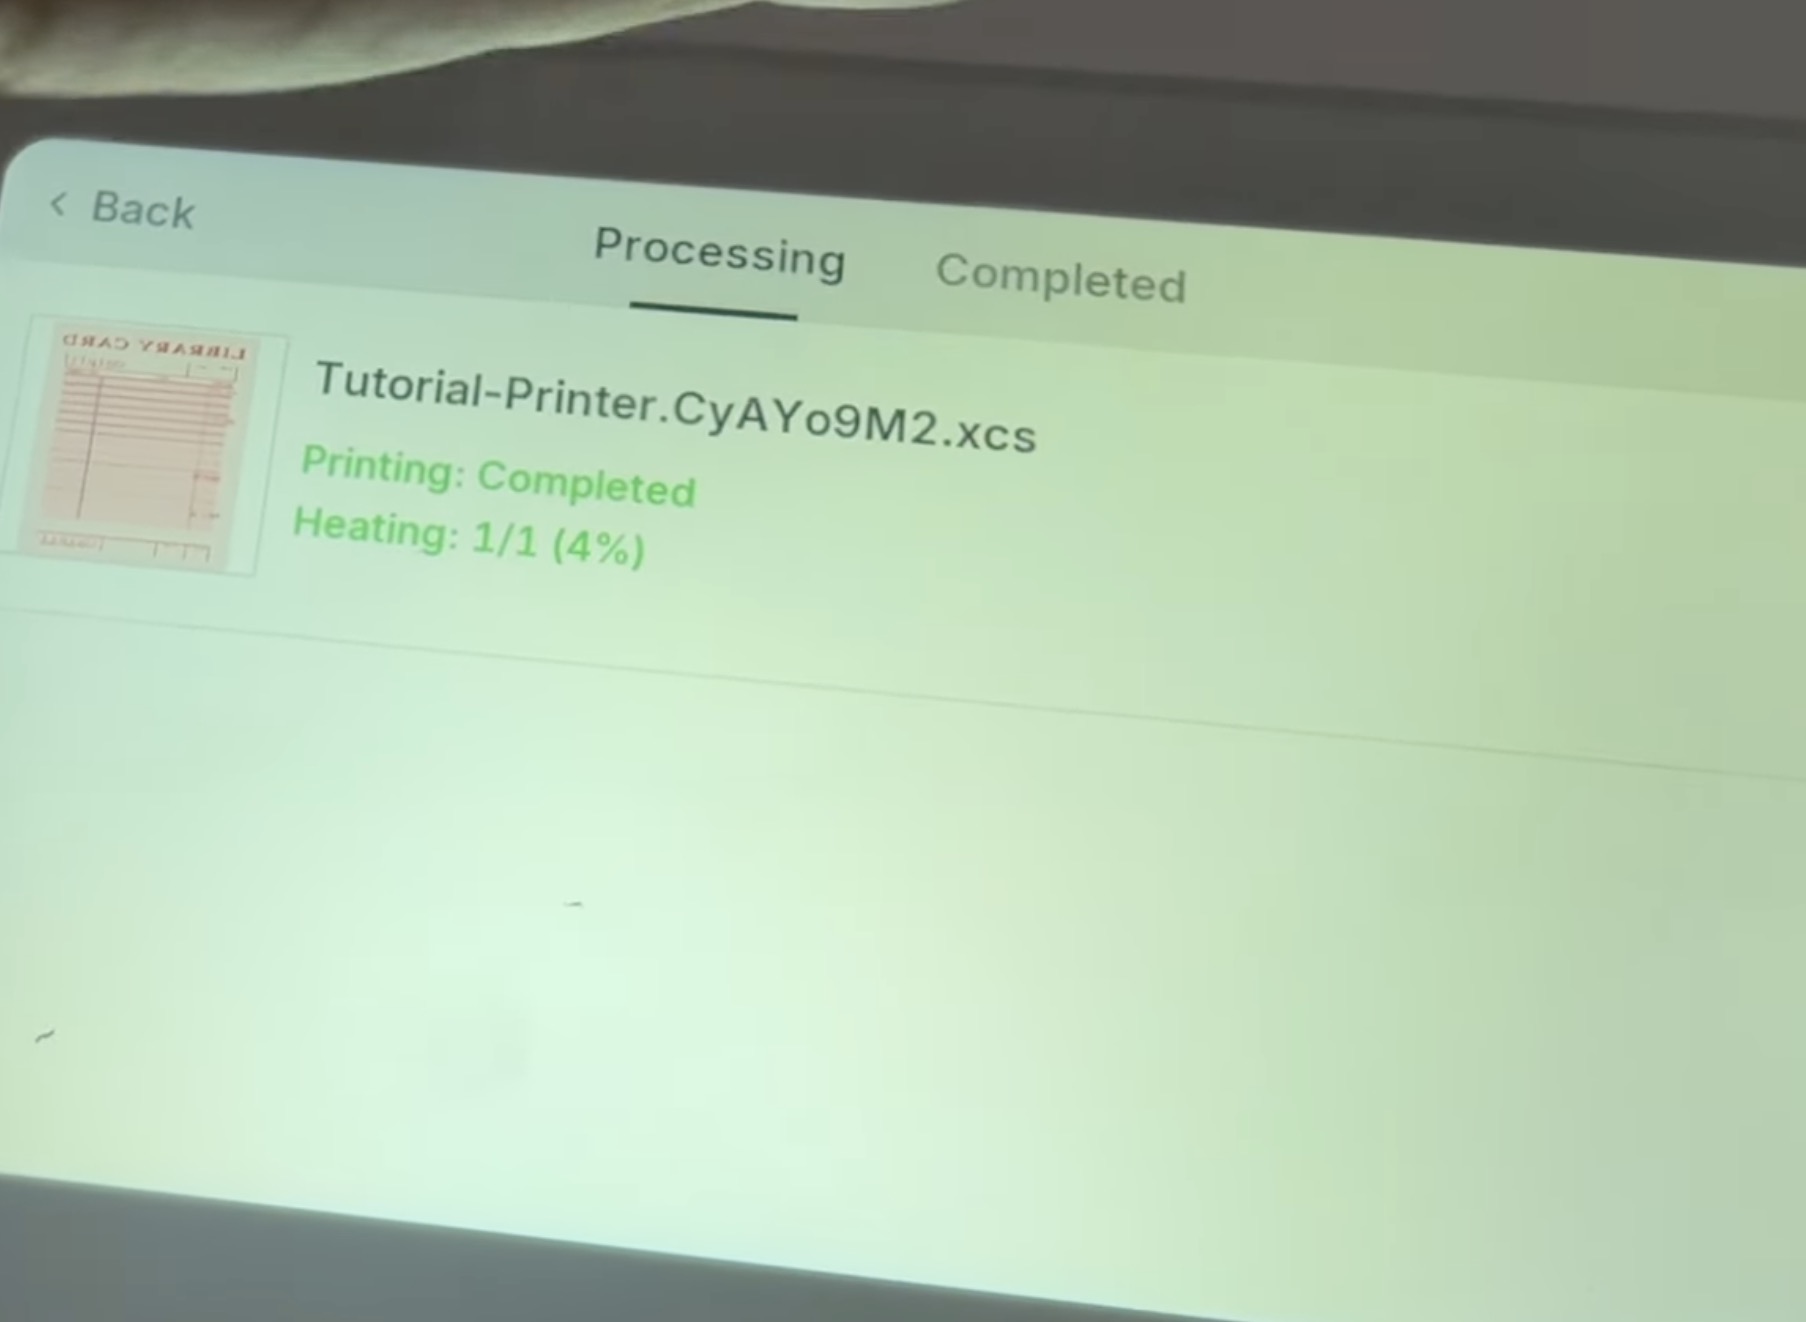
On-Screen Display
I really like the digital control panel. Right on the panel, I can see exactly what is happening with the printer. I can see the progress of my print job, do some printer maintenance, and even see past completed projects.
What Can I Add DTF Prints To?
Now that we have our design printed, we're ready to press it onto something.
Remember, DTF prints are for textile surfaces. Think things like shirts, tote bags, hats, fabric banners, dishcloths, etc.
I love that I can print designs large enough to do the entire front of a shirt, but also small enough to add to a hat or other small materials.
The designs I am printing today are large, but you can do much more than just large projects.
When doing small designs, I would do a test, especially if the design includes text, to make sure it can easily be read.
I also recommend using the full width of the film, no matter the size of your design.
The printer will cut off the print where the printing stops, and I don't like wasting material, so even if my design was 3″ x 3″, I would add more designs to use that full 13.5-inch width.
Note – When printing small designs, move the design to the top of the page in xTool Studio so you don't waste film.
Pressing xTool Apparel Printer DTF Prints
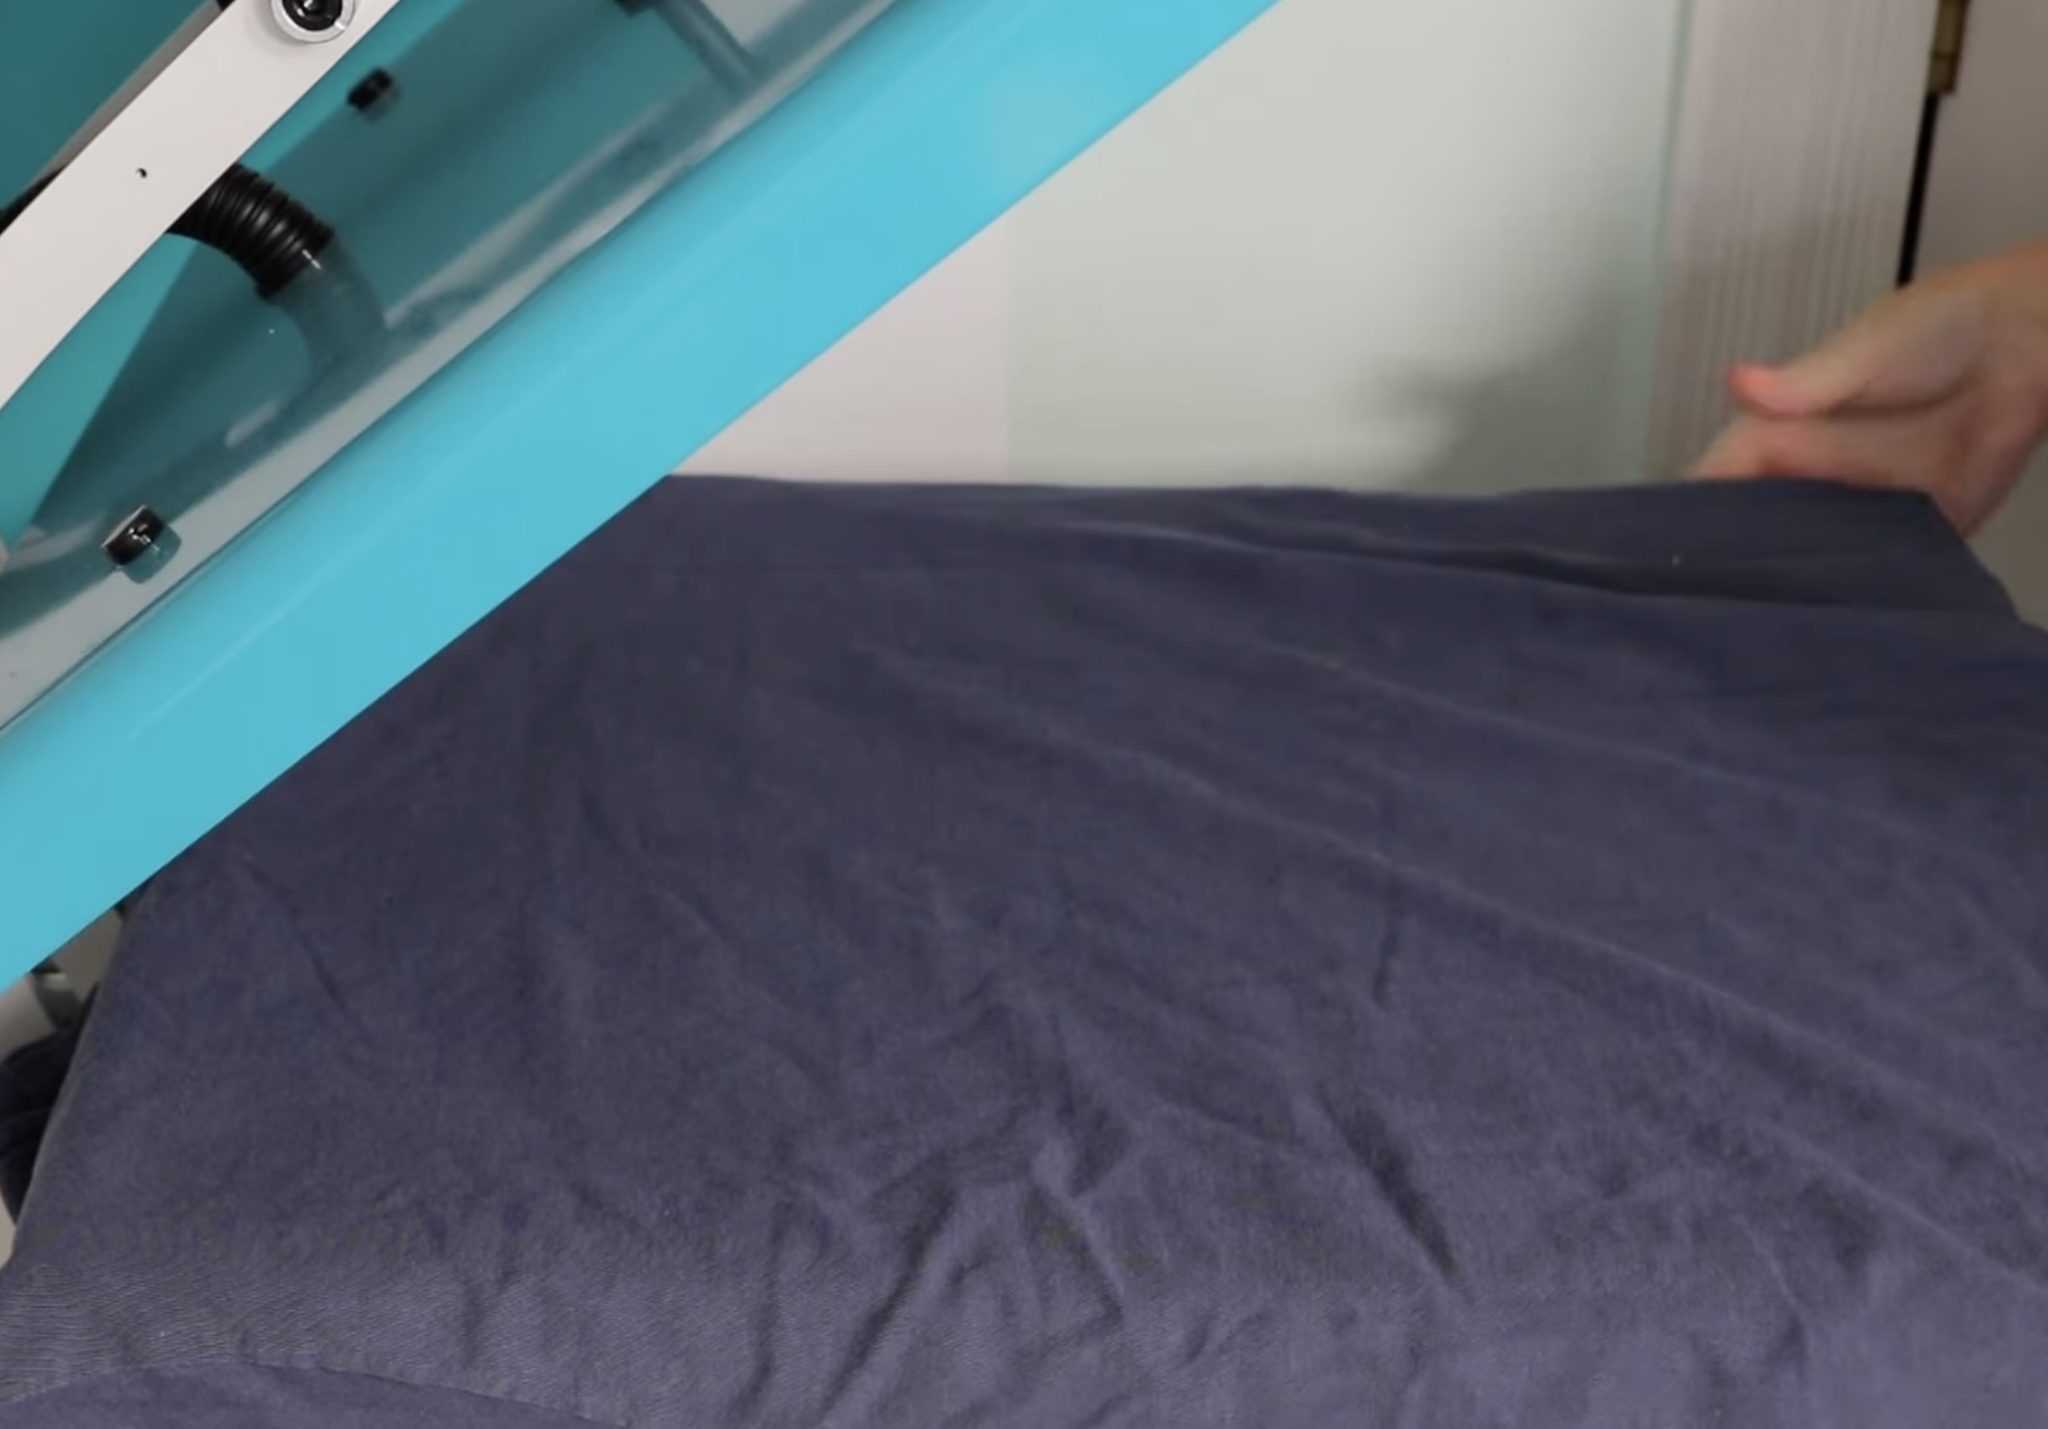
Now, we're ready to press this first print.
If you printed more than one design, cut them apart now, and trim away the edges of the film that have the feed holes.
Step 1 – Preheat the Blank
I always preheat the blanks I'm using to remove any wrinkles and moisture.
I have my heat press set to 330 degrees, and the timer is set to 15 seconds.
You don't need to preheat for the full 15 seconds, but if you notice a lot of steam coming off your blank, I would pre-press again to get that moisture out.
Step 2 – Locate DTF Print
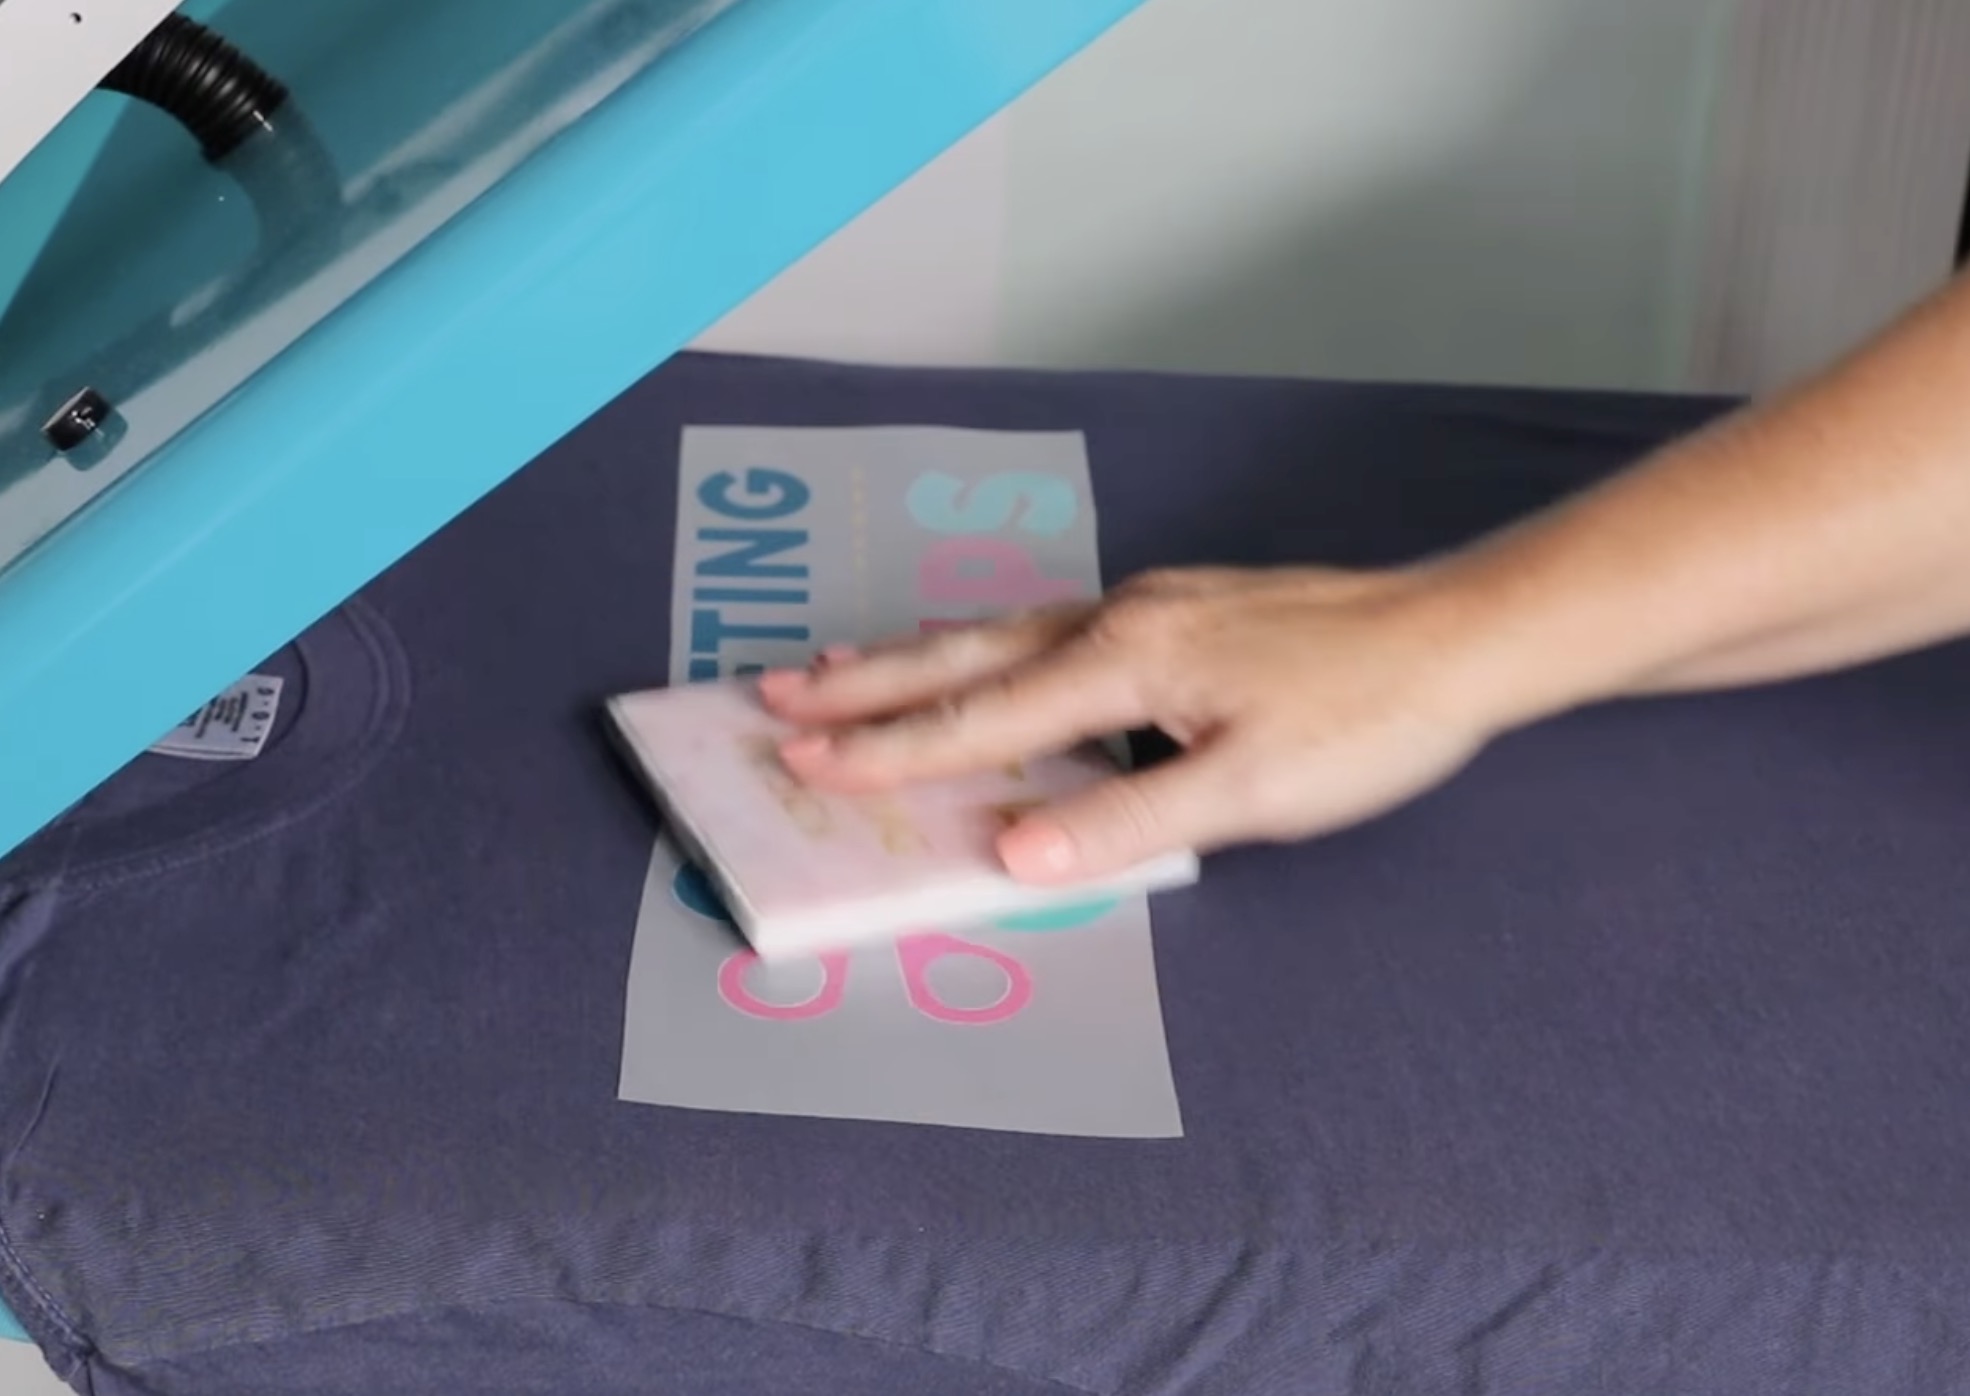
Locate the print where you want it on your blank, and if needed, secure it in place with heat-resistant tape.
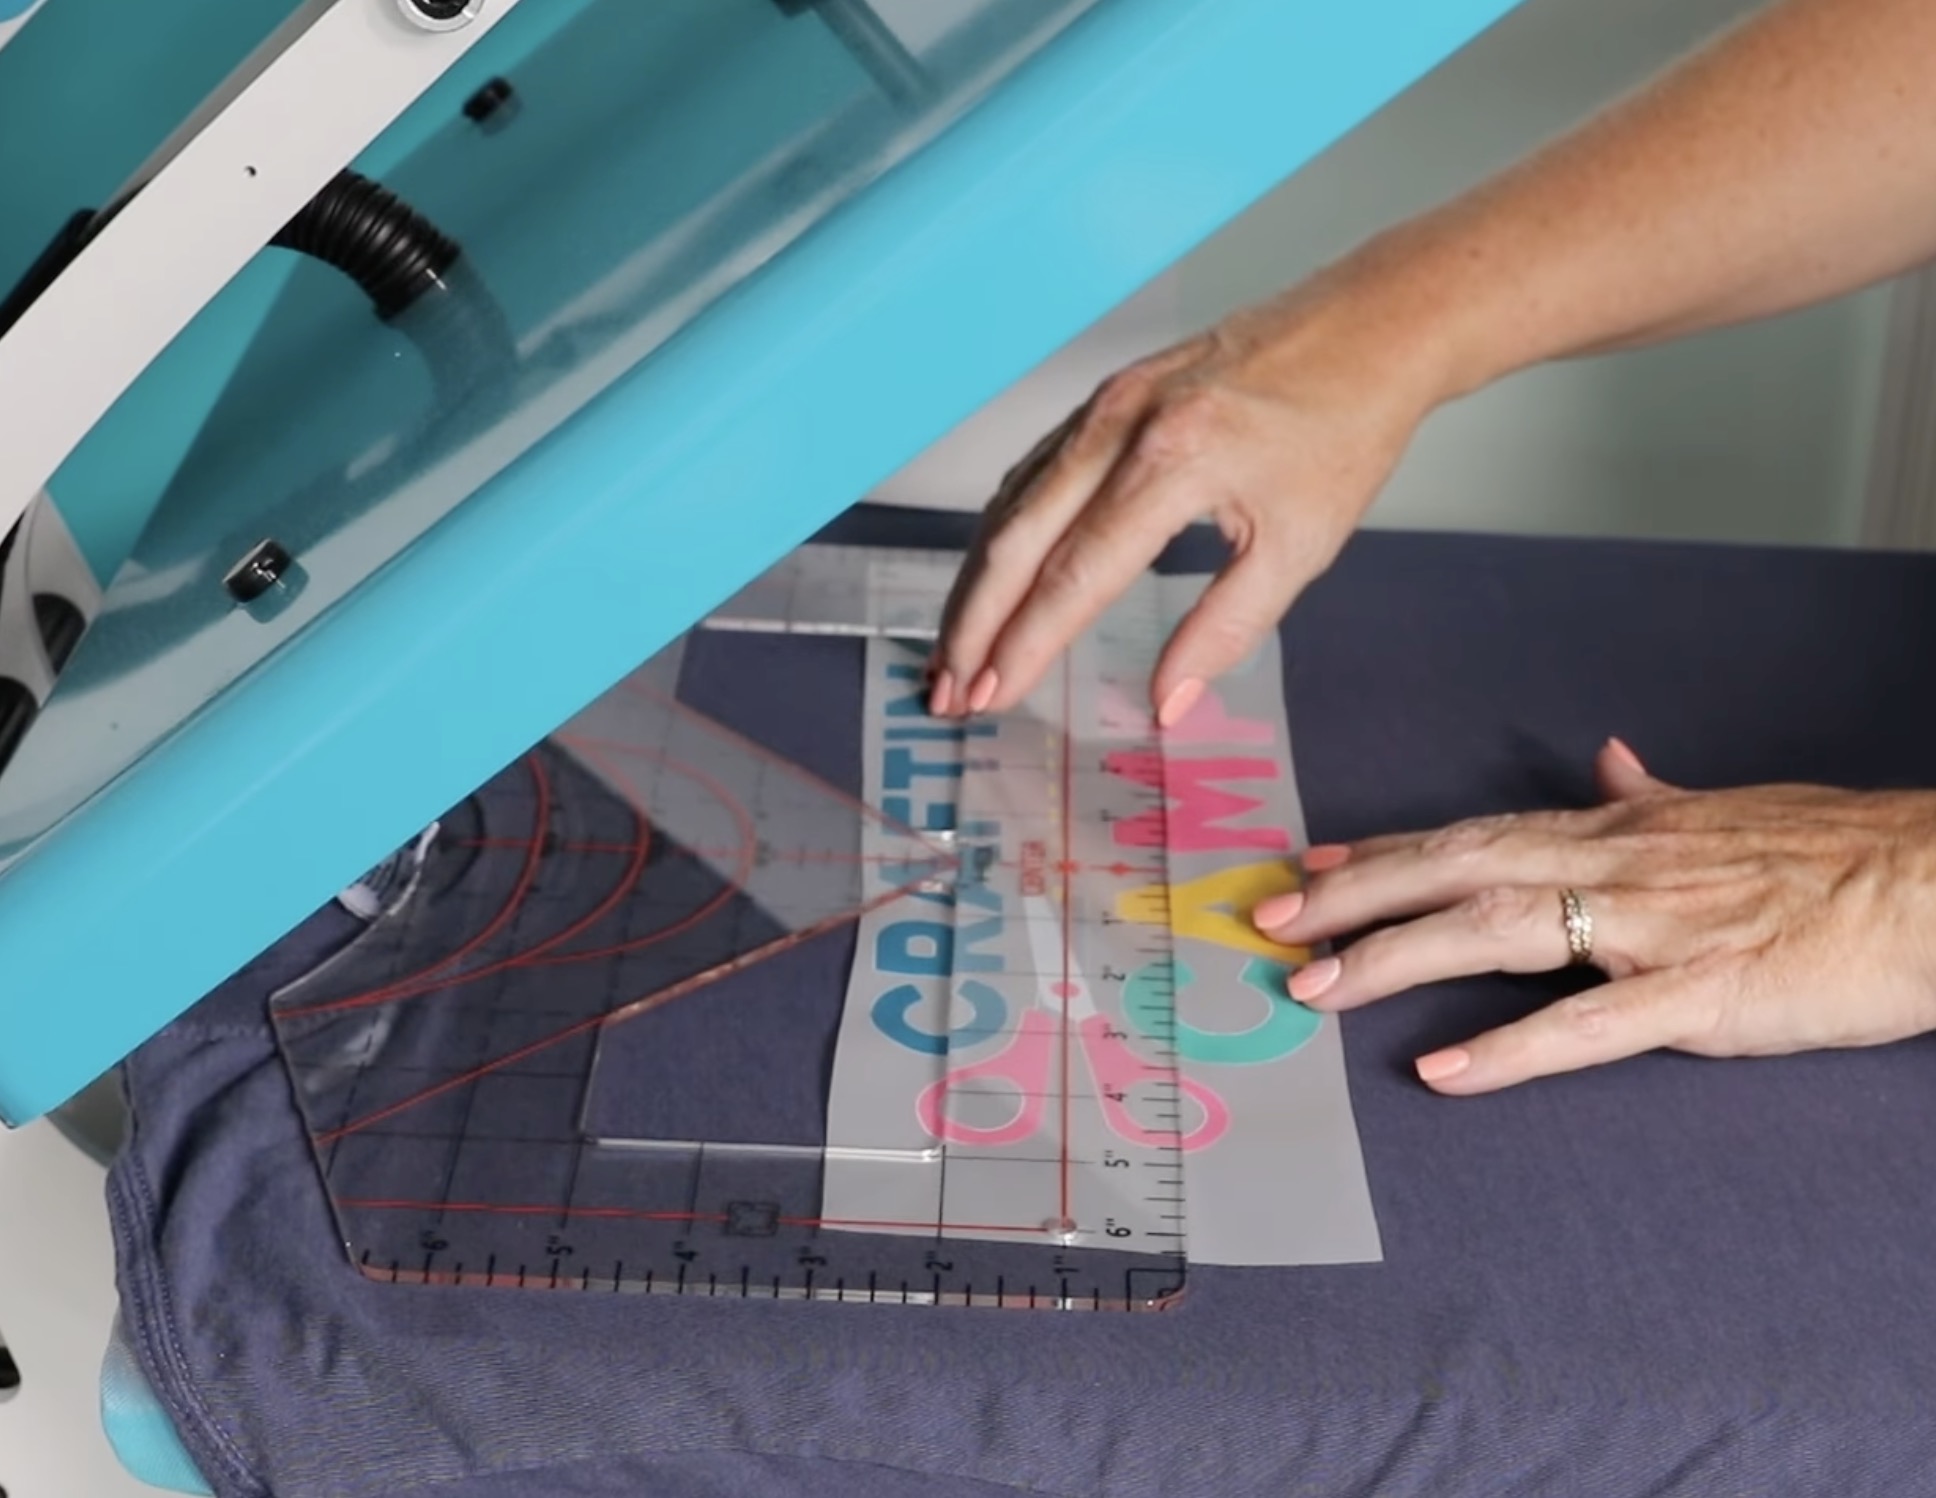
If your design is larger than your press, I definitely recommend using heat-resistant tape so nothing moves when you press a second time.
Step 3 – Press the Design
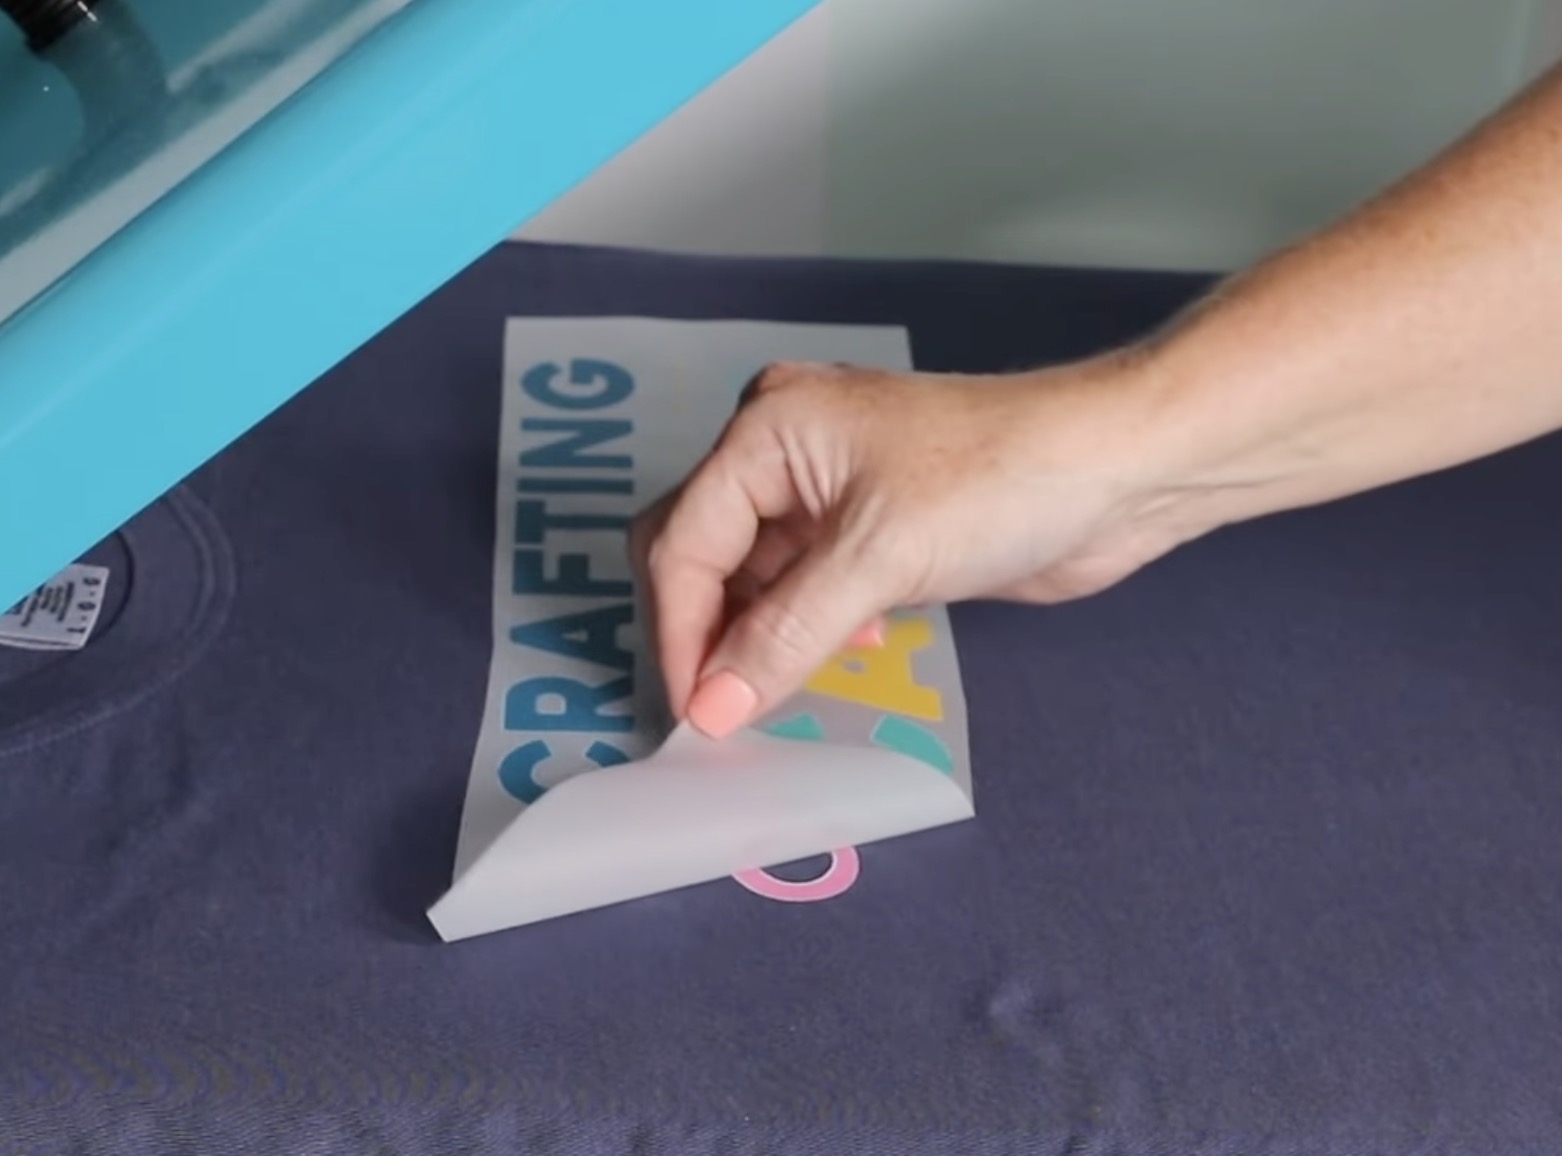
With the print in place, press for 15 seconds with medium pressure.
Allow the design to cool before removing the carrier sheet.
Note – You can use a DTF cooling block to help speed up this process without removing your project from the press.
When it's cool, gently remove the carrier sheet, making sure everything is stuck down.
Step 4 – Post Press
Add a piece of parchment paper over the top of the DTF print and do a post-press for 5-10 seconds.
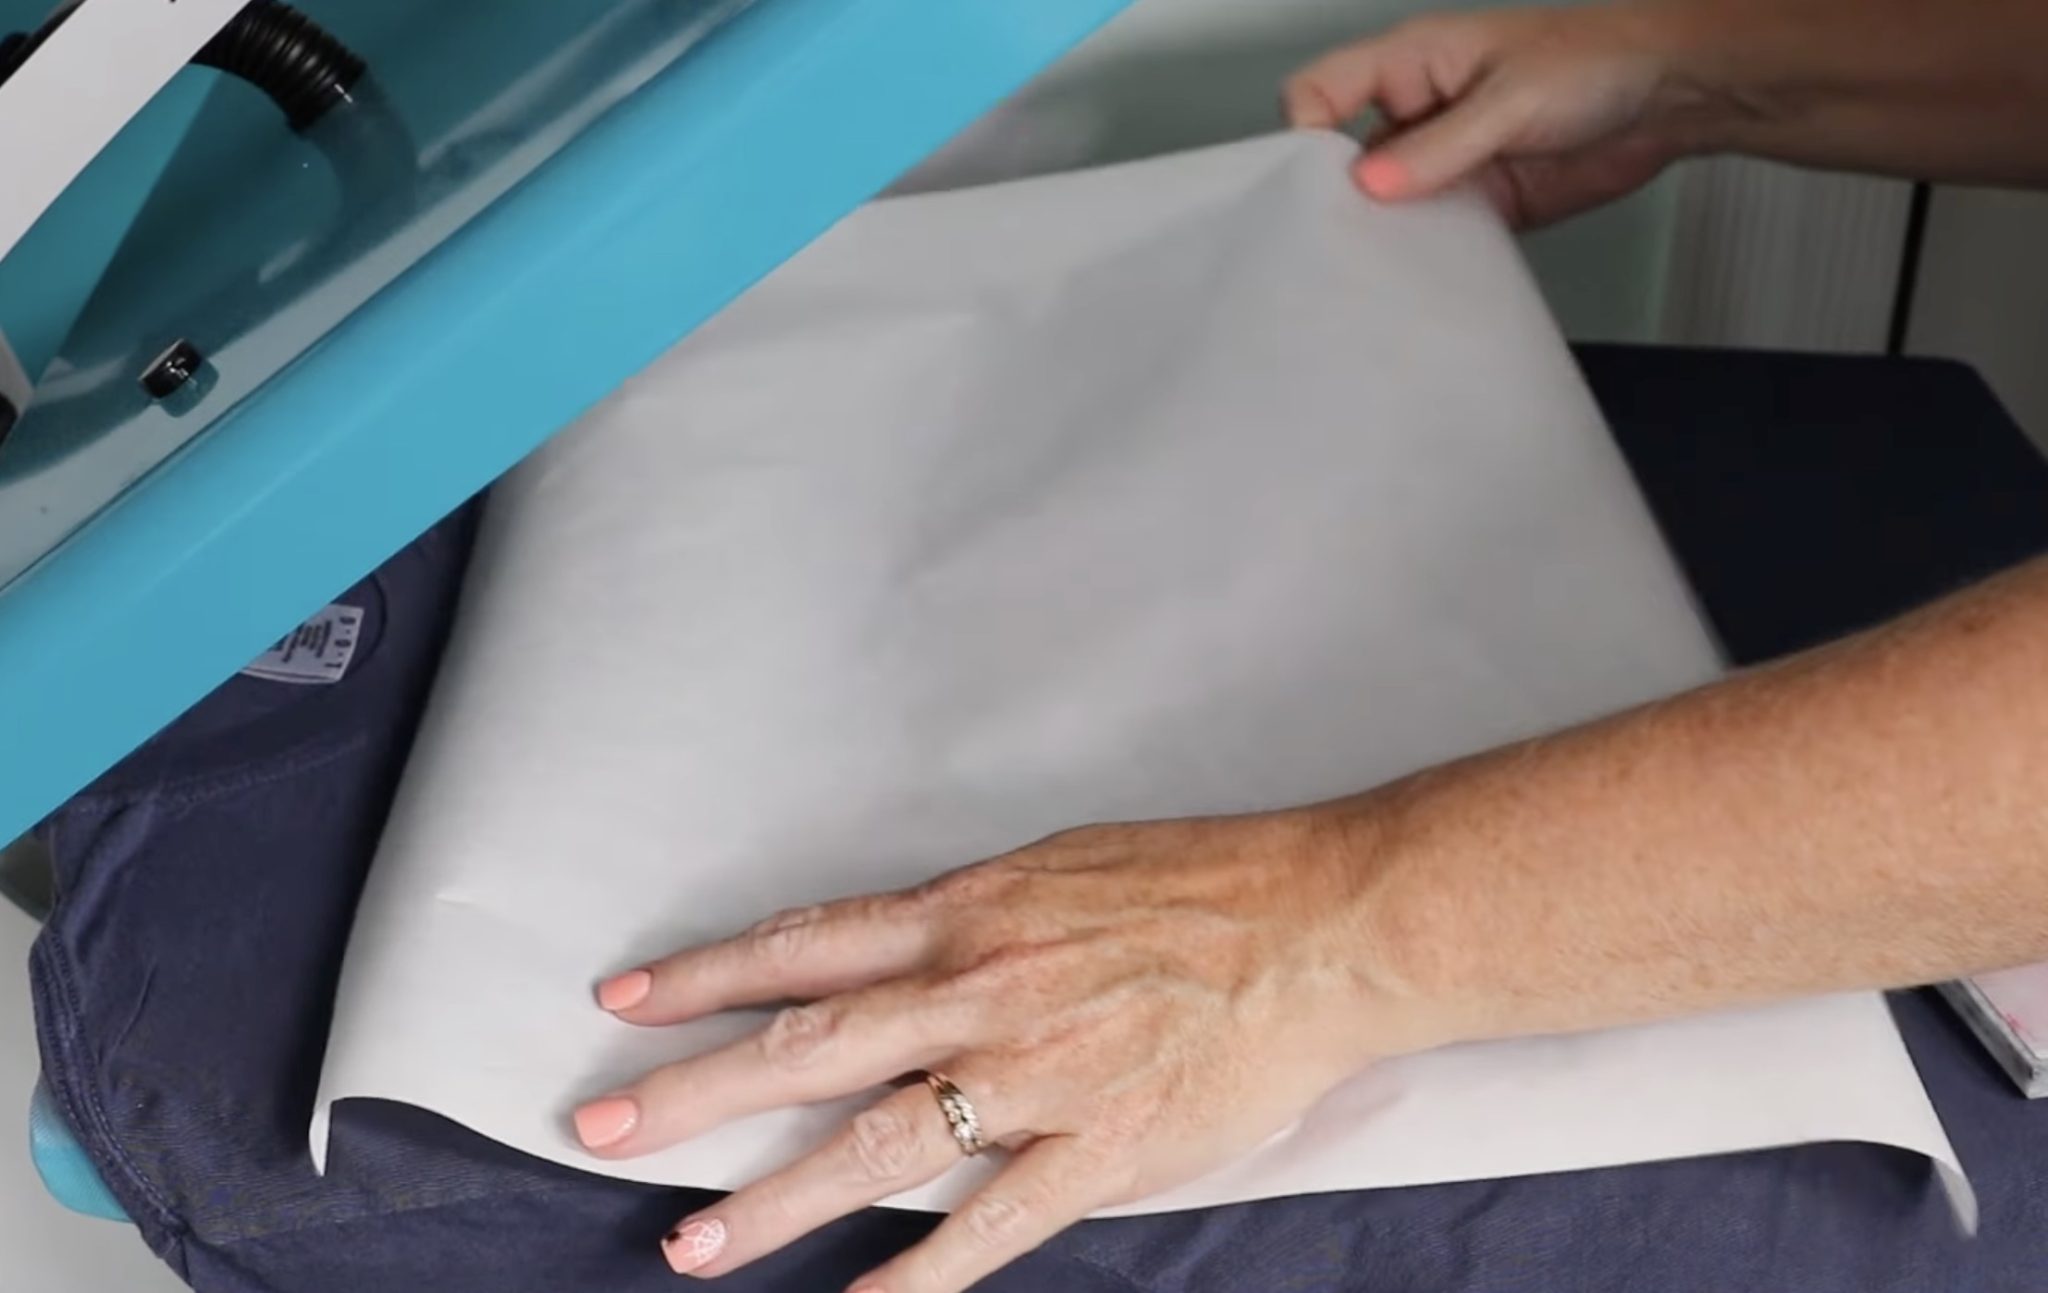
This is a really important step. After the post-press, you'll see that the design is really down in the fibers of the shirt.
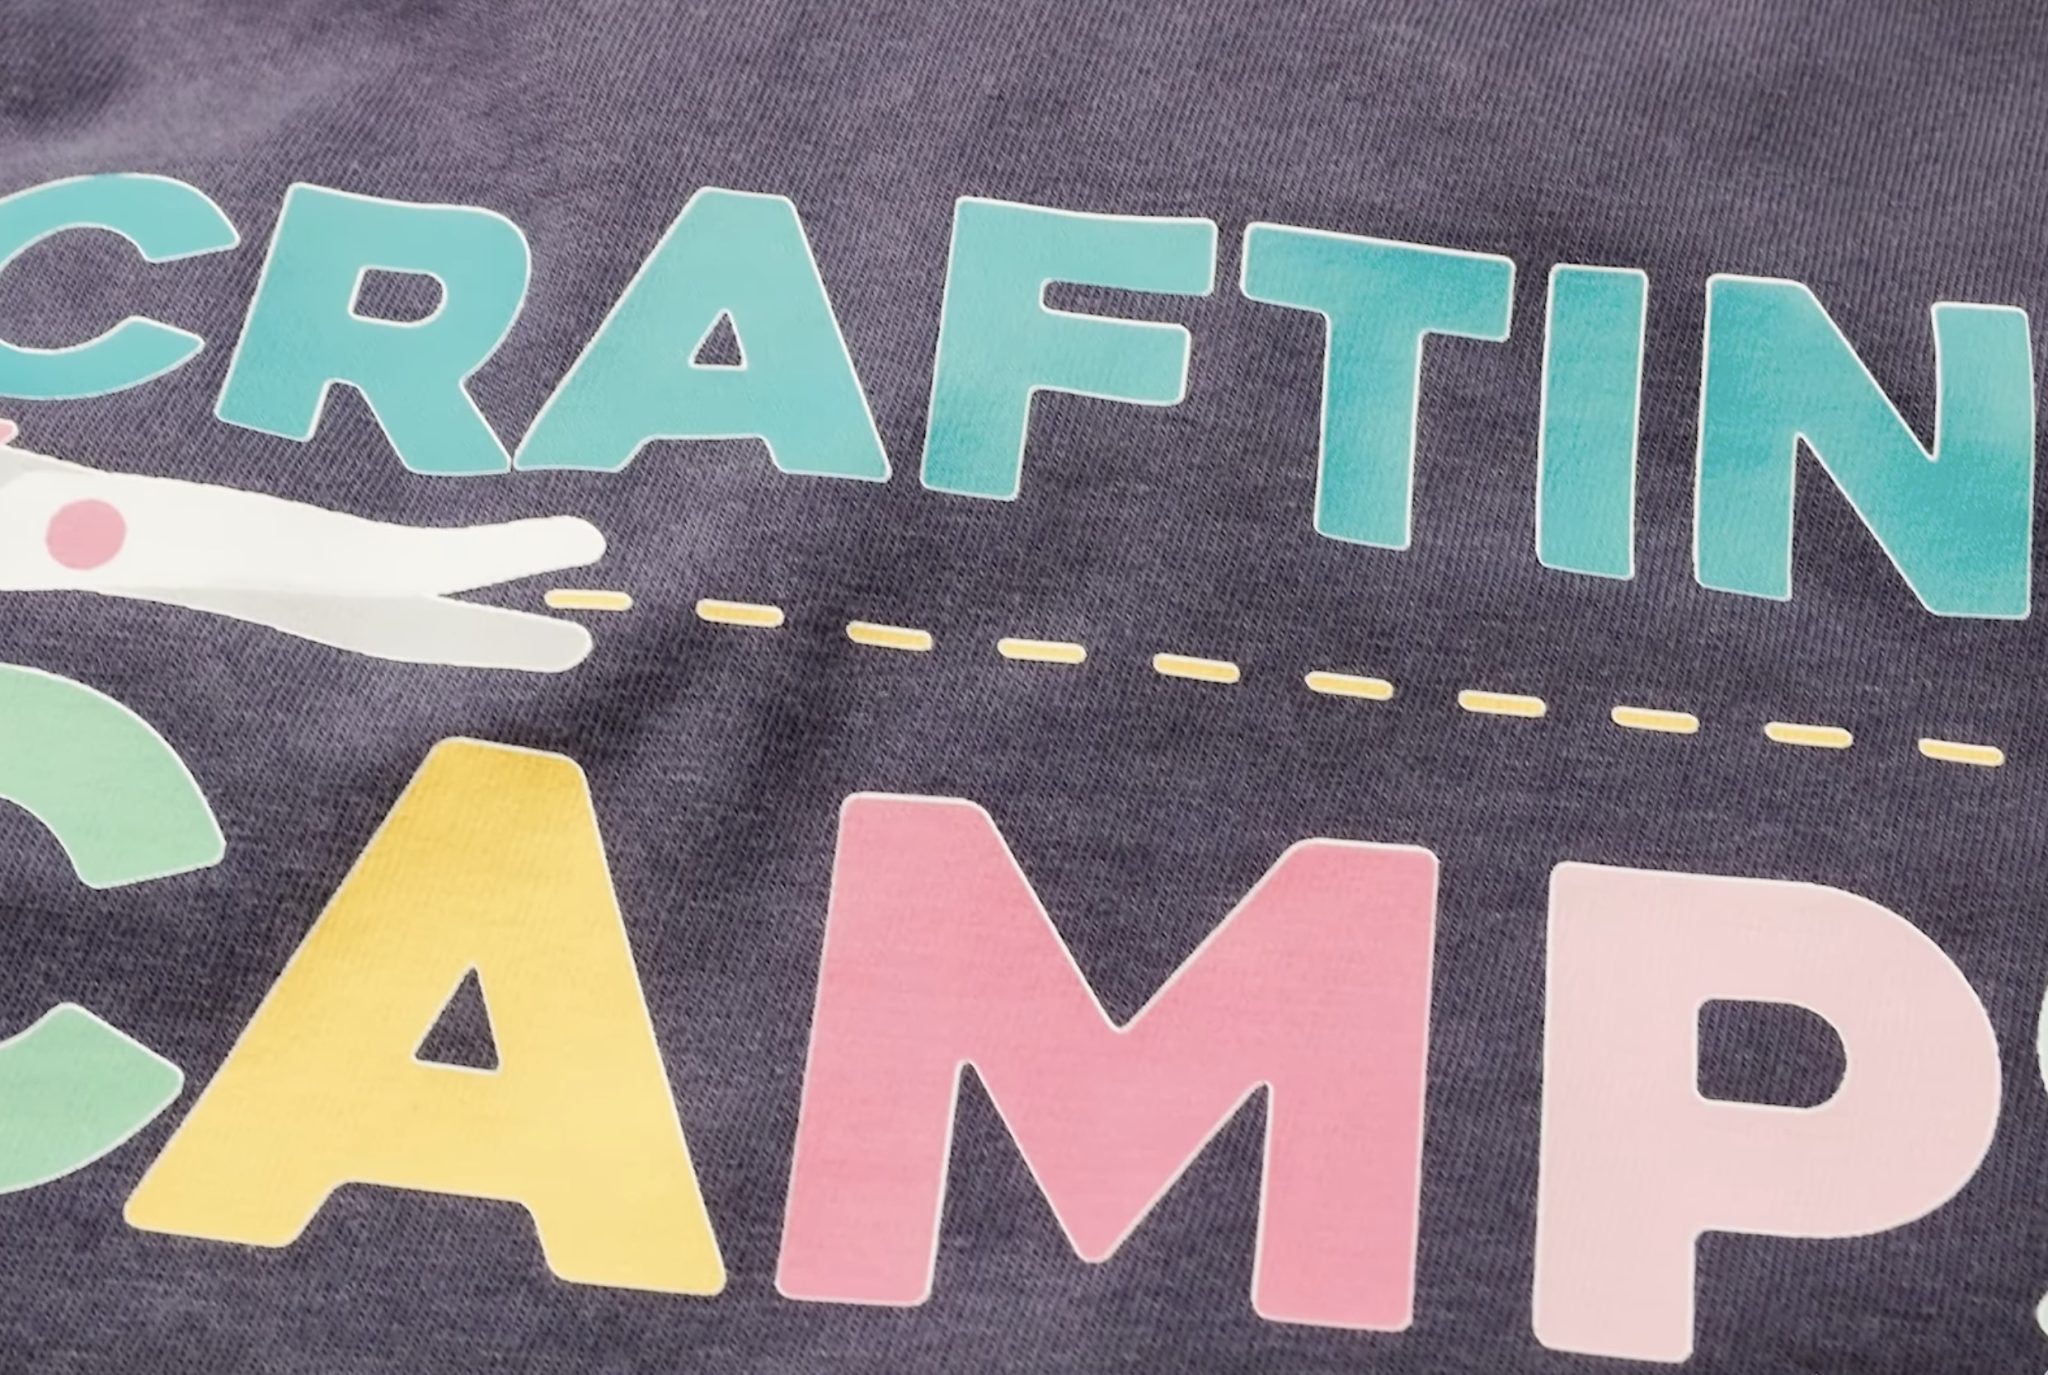
With the post-press complete, the project is done. You can wear it, use it, gift it, etc.
How Long Do DTF Projects Last?
When applied correctly, DTF prints last a really long time. I haven't had any issues with the projects I've made, and they've been washed and used many times.
I really like DTF projects and am excited to have a printer at home that has less maintenance and is safer than the options I've seen in the past.
xTool Apparel DTF Printer Maintenance
While this printer requires a lot less maintenance than other DTF printers, it does still have maintenance that needs to be done.
- Included with the printer is a shortcut guide to the maintenance you should be performing.
- You need to print regularly, at least once a week. If you're unable to print, there is a shutdown procedure you need to perform to prevent the ink from clogging in the lines. Other DTF printers require maintenance every time you print, both before and after printing.
- Keep the xTool DTF Apparel printer plugged in and powered on so it can do some of the regular maintenance all on its own, like stirring the white ink.
- You can turn off the shaker oven and air purifier when you're done printing for the day, but don't turn off the printer.
Note: When the printer is on but not in use, it goes to sleep, and the lights turn off. Simply touch the button near the control panel, and it will wake the printer back up.
Is the xTool Apparel Printer Right for You?
If you've been in the market for a DTF printer, I think you should look at the xTool Apparel DTF printer.
I like the size of this printer. Even with the shaker oven and air purifier, it fits in my tiny house craft space.
Safety is a big concern of mine when it comes to DTF printing, and this checks the boxes for me. The powder is enclosed inside the machine, and I don't have to do any of the powdering myself.
Machines that require manual powdering or maintenance before/after every use do not fit my needs, and I won't be reviewing those here.
One of the reasons I really like this DTF printer setup is the size. Other DTF printers that include contained shaker ovens are very large, too large to fit in my crafting spaces.
With the shaker oven and air purifier, I feel completely safe using the xTool Apparel Printer in my house.
If you're in the market for a smaller-sized DTF printer that is safe to use at home and requires less maintenance than other DTF printers, this may be the perfect printer for you.
Note – You can purchase this printer alone, but I highly recommend purchasing the printer, shaker oven, and air purifier together. This is the safest combination. You don't have to worry about breathing in any of the dust, as everything is contained inside the printer, and the air purifier takes care of the fumes.
What Would You Like to See Next?
I am really enjoying using the xTool DTF Apparel Printer, and I can't wait to make more projects with it.
I'd love to hear what projects you'd like to see me make, and to hear any questions you have about the printer itself, the printing process, or DTF in general.
Leave your project requests and questions in the comments, and I'll be happy to add them to the tutorial list and to answer your questions.