
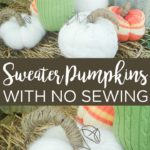
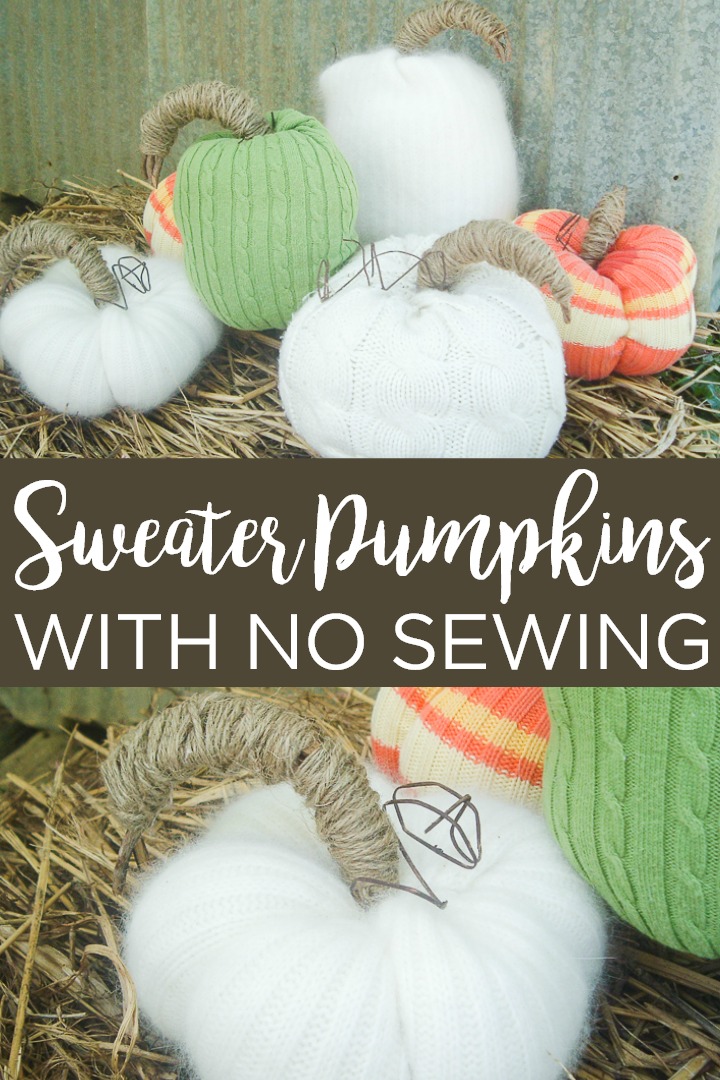
Are you ready to learn how to make sweater pumpkins? Last year I made no-sew sweater sleeve pumpkins. They are still going this year! So, when Goodwill had sweaters for 99 cents, I decided to go BIGGER! These no-sew DIY sweater pumpkins are larger for all of your decorating needs. Ready to learn how to make sweater pumpkins of your very own?
This was first published on October 2, 2011 but I am republishing with more information.
Supplies needed to make DIY sweater pumpkins:
- Old sweaters
- Scissors
- Rubber bands
- Hot glue and a glue gun
- Needle
- Hemp cording
- Grapevine pieces
- Twine
- Stuffing

How to Make Sweater Pumpkins:
DIY sweater pumpkins are easy to make and you can follow along with our simple instructions below to make your own.
Cut Pieces
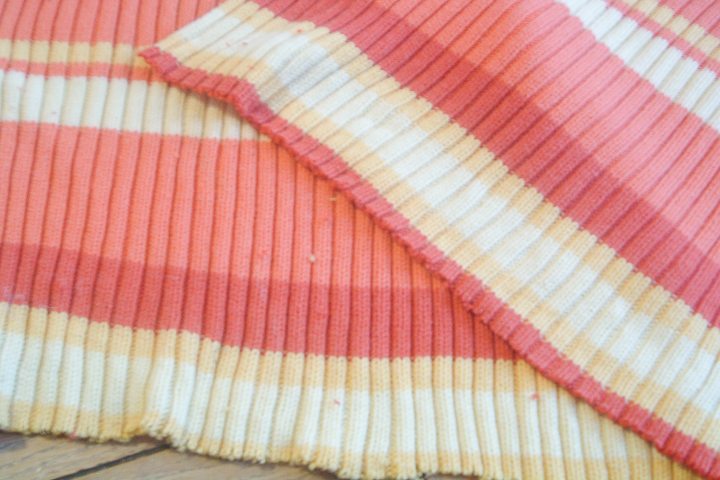
Start by cutting off the bottom of your sweater. You can use the top and sleeves to make smaller pumpkins but we are going to use the bottom piece for this tutorial.
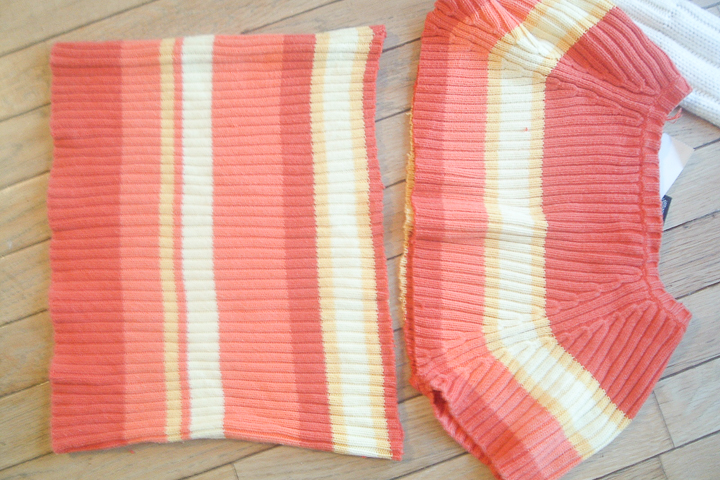
Cut your piece into two along the seams on both sides. Each of these pieces will make one pumpkin.
Use a Rubber Band to Make a Tube
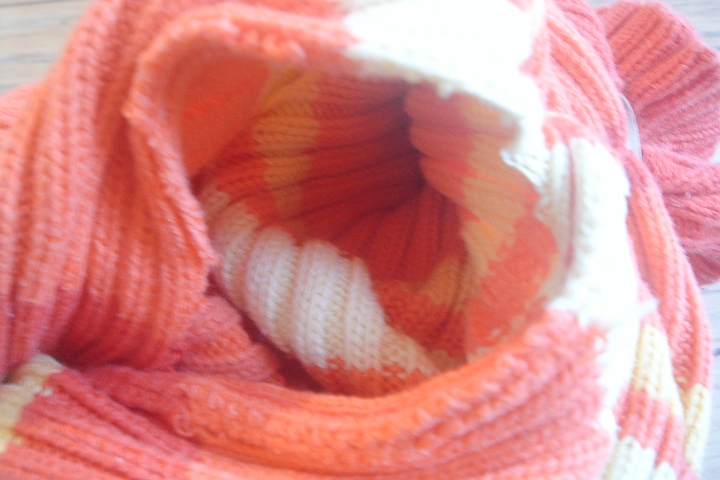
Turn one of your pieces right side in and gather up each end with a rubber band.
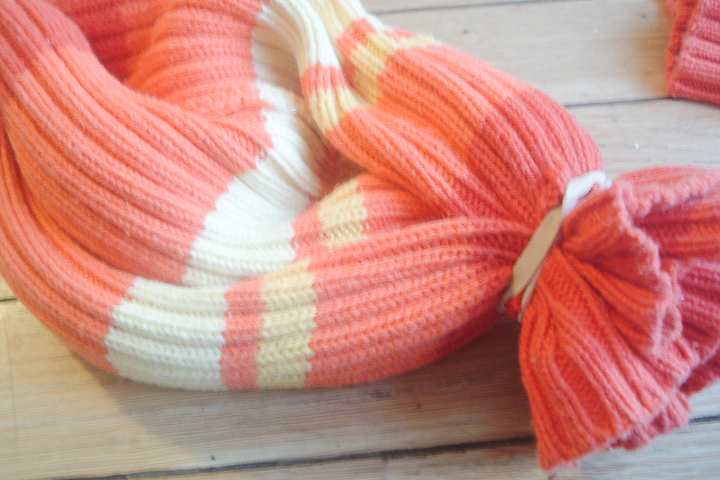
Then use the opening to turn it right side out.
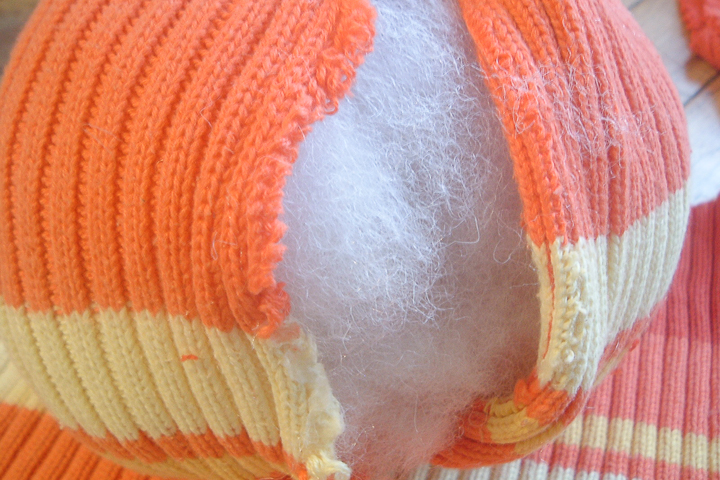
Stuff Your Pumpkin
Add stuffing until you are happy with the look. Then just hot glue your seam closed. Don't be skeptical! It works and, more importantly, it holds up great!
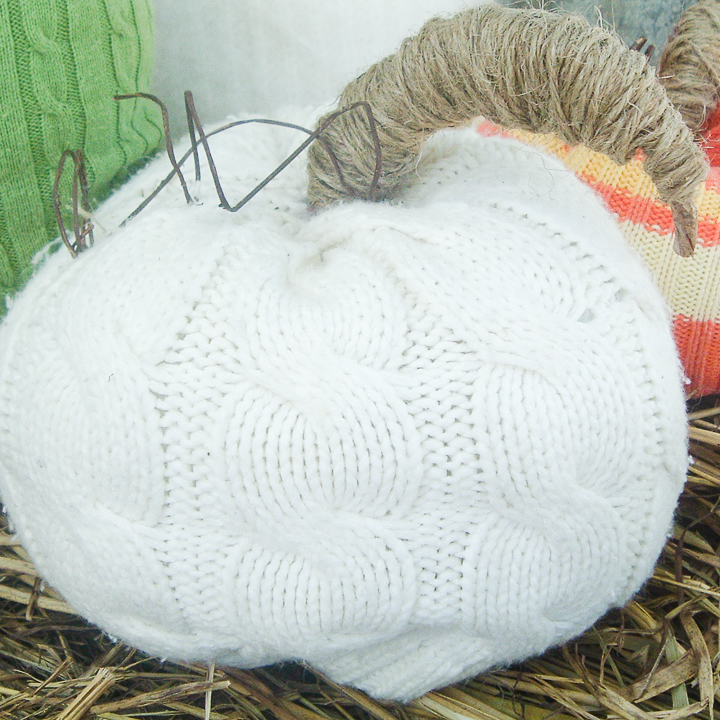
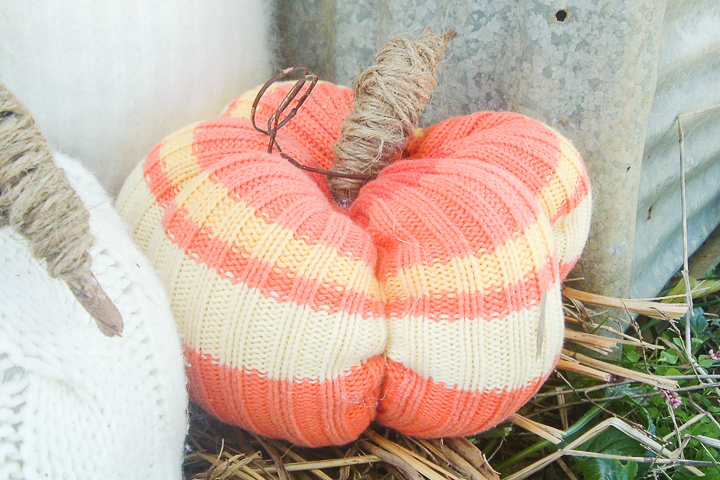
Make Segments
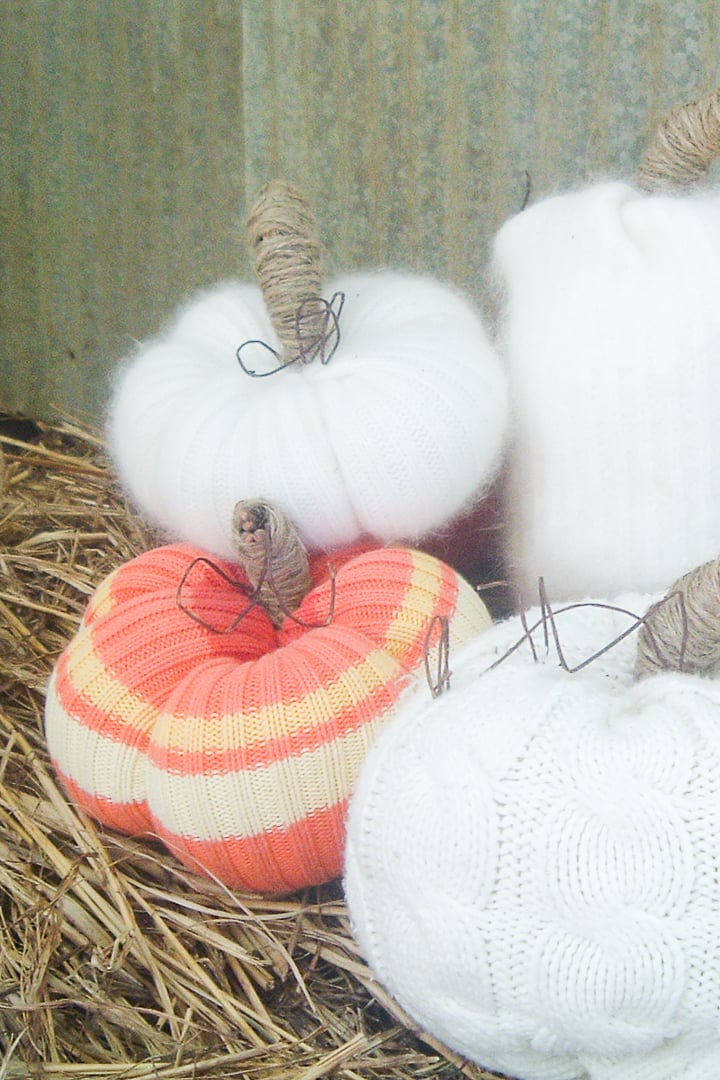
Now these next few steps I did not do on all of my pumpkins. I will go through the steps then show you how a pumpkin looks if you stop here. I used hemp cording (found in the jewelry making section). Run your hemp threaded needle all the way through your pumpkin.
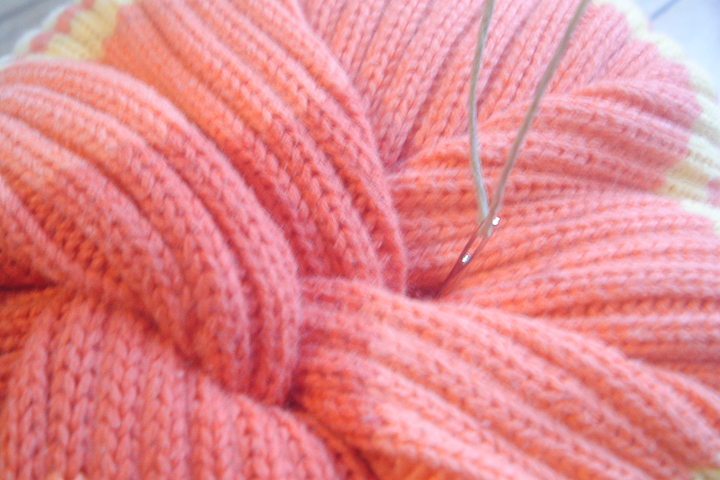
Then run your cording around the outside, then through the middle again. Repeat until you have 5 or so “sections” to your pumpkin. You will need to pull each one really tight to get it to pull together. When you have it looking just right, tie off your cording.

What happens if you skip this step? You end up with a tall pumpkin instead of a squatty one with sections.
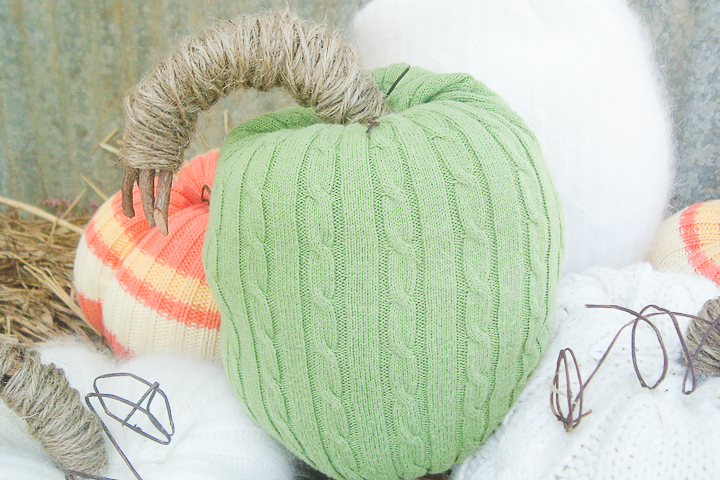
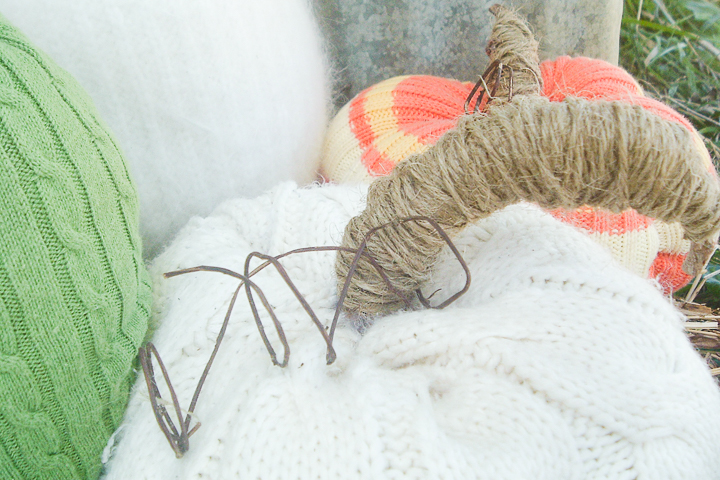
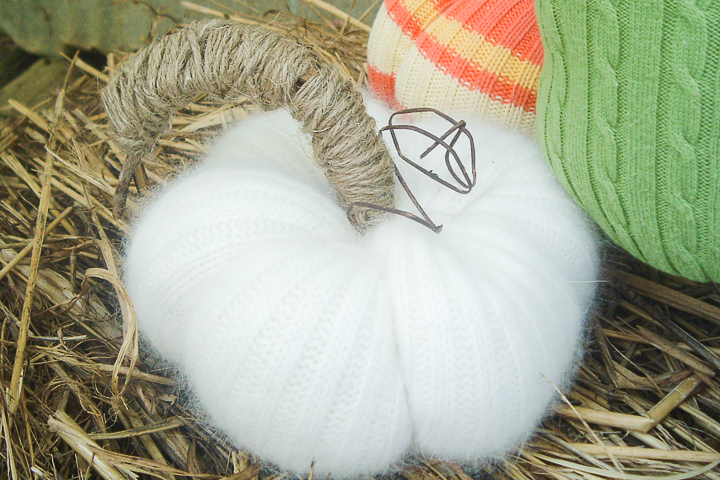
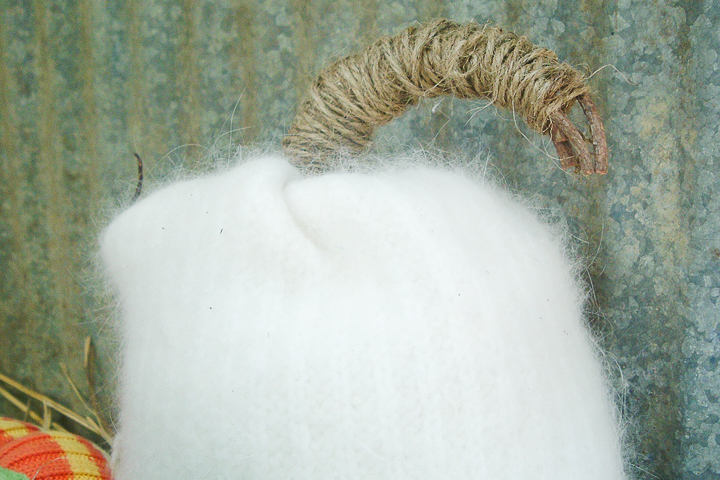
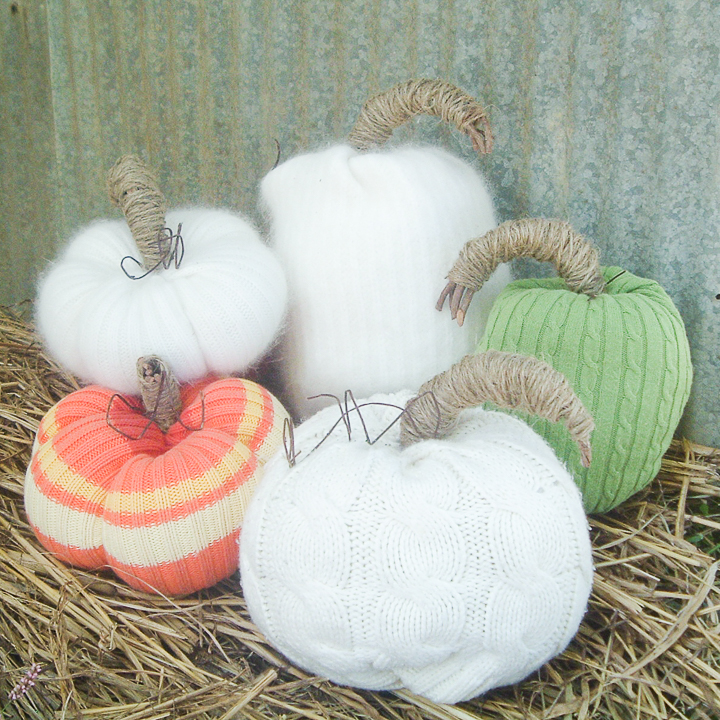
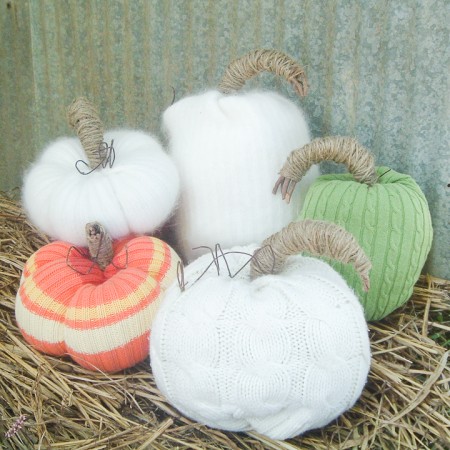
Now for the stems. I had some mini grapevine wreaths so I took them and cut them in half, then wrapped them with twine. You could totally use a stick that is slightly curved. I have also used driftwood pieces for this step and they look great as well. Think outside of the box for the stem portion.
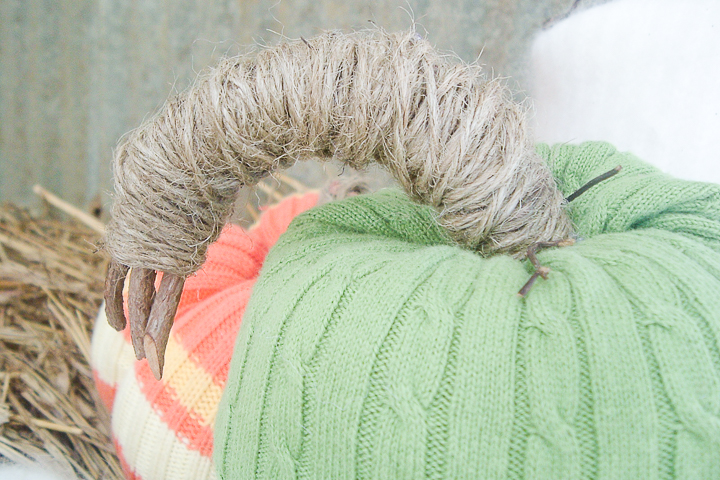
Add the stems to the top of each DIY sweater pumpkin with a bit of hot glue.
I also added some bits of grapevine around the stems for a little something extra.
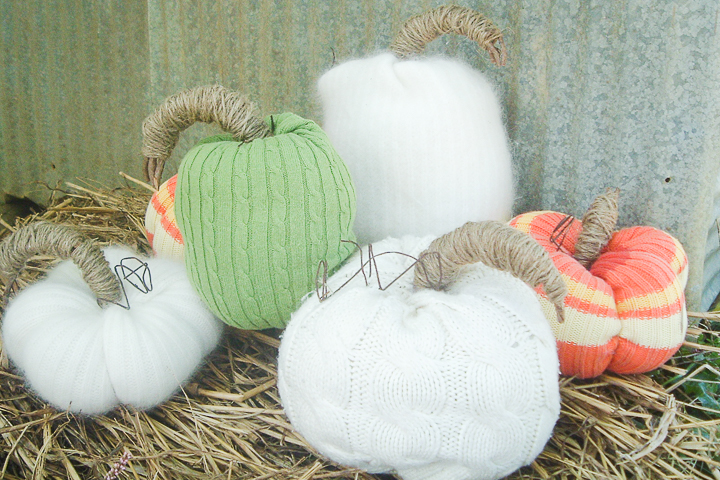
So, whether you add the segments or not, you can have your own pumpkin patch in minutes. Now that you know how to make sweater pumpkins, how many will you make?
I personally made a total of six pumpkins to display for Thanksgiving. But, I totally didn't want to stop there!
My favorites are the fuzzy ones! This was a rabbit hair sweater and it is so fuzzy and soft! It really made perfect pumpkins.
Whatever type of sweater you choose, you really can't go wrong with these cuties all around your home this fall.
Will you add some DIY sweater pumpkins to your decor? Now that you know there is no sewing required, there really are no excuses.
Maybe you have a sweater in your closet already that you don't want anymore? Go get it now and get busy! No sew your way to some fabulous fall home decor. Learning how to make sweater pumpkins is easier than you think! Now that you know how to make sweater pumpkins, the only question is how many will you make?
Love these fall pumpkins from sweaters and need more ideas? Try the links below!
- Free Fabric Pumpkin Patterns and Sewing Tutorial
- Pumpkin Door Hanger with Testors Paint
- Pallet Pumpkins in Minutes – No Tools Required!
- Pumpkin Planter for Fall with Your Cricut
- 30 Upcycled Sweater Ideas
Want to print this sweater pumpkin tutorial? Try the card below!
Supplies
- Old sweaters
- Rubber bands
- Needle
- Hemp cording
- Grapevine pieces
- Twine
- Stuffing
Instructions
- Start by cutting off the bottom of your sweater. You can use the top and sleeves to make smaller pumpkins but we are going to use the bottom piece for this tutorial.
- Cut your piece into two along the seams on both sides. Each of these pieces will make one pumpkin.
- Turn one of your pieces right side in and gather up each end with a rubber band.
- Then use the opening to turn it right side out.
- Add stuffing until you are happy with the look. Then just hot glue your seam closed. Don't be skeptical! It works and, more importantly, it holds up great!
- Now these next few steps I did not do on all of my pumpkins. I will go through the steps then show you how a pumpkin looks if you stop here. I used hemp cording (found in the jewelry making section). Run your hemp threaded needle all the way through your pumpkin.
- Then run your cording around the outside, then through the middle again. Repeat until you have 5 or so “sections” to your pumpkin. You will need to pull each one really tight to get it to pull together. When you have it looking just right, tie off your cording.
- What happens if you skip this step? You end up with a tall pumpkin instead of a squatty one with sections.
- Now for the stems. I had some mini grapevine wreaths so I took them and cut them in half, then wrapped them with twine. You could totally use a stick that is slightly curved. I have also used driftwood pieces for this step and they look great as well. Think outside of the box for the stem portion.
- Add the stems to the top of each DIY sweater pumpkin with a bit of hot glue.
- I also added some bits of grapevine around the stems for a little something extra.


These are just so adorable! I would love to feature this on Reduce, Reuse, Upcycle. Feel free to stop by and grab a featured button. Thanks!
hanks for the thorough tutorial. Very clever. I think I’ll save the idea on my pinboard for next year… might have too many pumpkins already for this year! 🙂
Pinning you now!
~ Meredith From A Mother Seeking Come find me on my blog, A Mother Seeking…
Your pumpkins are so cool! I’ve seen others yet this was a new twist on the theme.
Would you consider also linking to our Linky Party? (i found your post on the FollOWeen site). The theme this week is “Share Your Halloween Tips & Tricks (or Treats!)” – the blog is about ‘conservation’ and your idea certainly fits!
Our blog is fairly new yet it’s getting quite a bit of traffic already and ranking very well.
Thank you for your consideration,
Pam Hoffman
http://conservationofeggs.blogspot.com/2011/10/2nd-conservation-linky-share-your.html
Fabulous! Especially the orange striped one! It’s the perfect sweater for that project! Thanks for linking up to The “Autumn Décor” Talent Scouting Party at WhisperWood Cottage!
Super cute craft that is inspiring and achievable! Some of Martha’s stuff is impossible or takes way too long!
These are fabulous! Found you thru WWC. 🙂 Congrats!
Sweet pumpkins!!! Found you on Pinterest and I’m happy to be your newest follower. Would love to have you stop by for a visit. Blessings ~ Judy @ http://www.vintagestreetdesigns.com
Very interesting things on site to make would not have thought of. I will try them out soon.
Great post!!!