
Make these clay feathers for your Christmas tree! These fun ornaments are easy to make and require only a few basic supplies. Plus, you can customize these handmade clay ornaments to match the sizes and colors of your Christmas decor theme.

How To Make Clay Feathers
Feather ornaments are amazing, right? I know I have been loving them, but they can be expensive!
So I wanted to try my hand at making a less-expensive version of some white bisque feather ornaments that I saw in a catalog. In the catalog, they were $49 for a set of 3, but I knew I could make them for a lot less!
Actually, I made them for free! – Yes, I said FREE!
I had everything on hand that I needed to make my version, and I bet you do too! Are you ready to create your own set of clay feather ornaments?! Then let's get started!
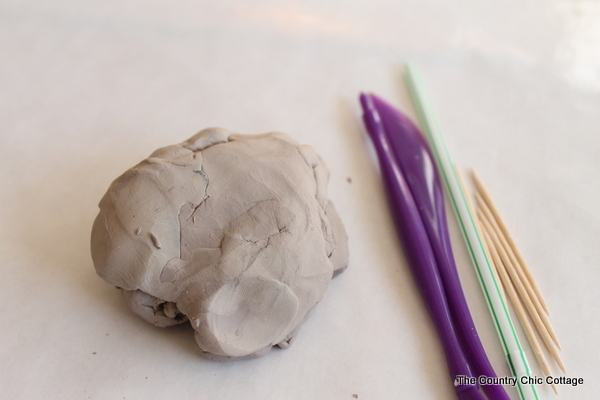
Supplies Needed To Make Clay Feathers
- air dry clay
- Toothpicks
- Straw
- Some clay tools
or a butter knife
- white paint
- white ribbon
NOTE: I used air-dry clay because it was already in my craft room. Use whatever type of clay you have. Don't feel like you need to buy anything special to make these. If you need to purchase clay, you do not need much for this project. That hunk pictured below would have made a dozen or more of these feathers.
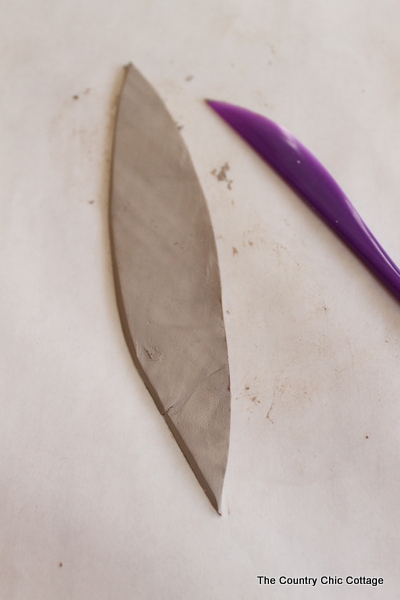
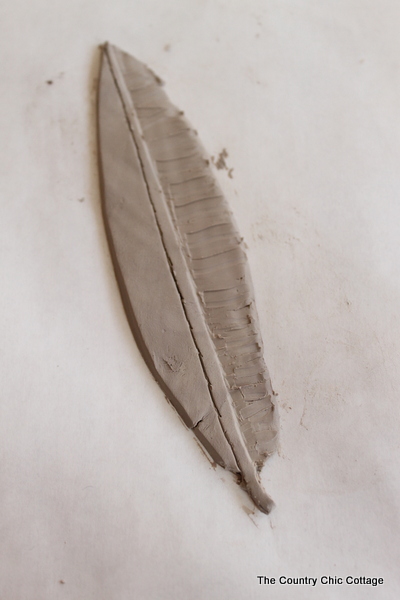
Step 1: Create Feather Shape Out Of Clay
Start by flattening out a piece of clay, then cut a feather-like shape. Use wax or parchment paper under your project. I am using some plastic clay tools that came with a kit I purchased a few years back, but you could use a butter knife instead.
Step 2: Draw Feather Stem
Roughly draw in your feather “stem”. Again, use what tools you have on hand. Trim away on one end to make a stem.
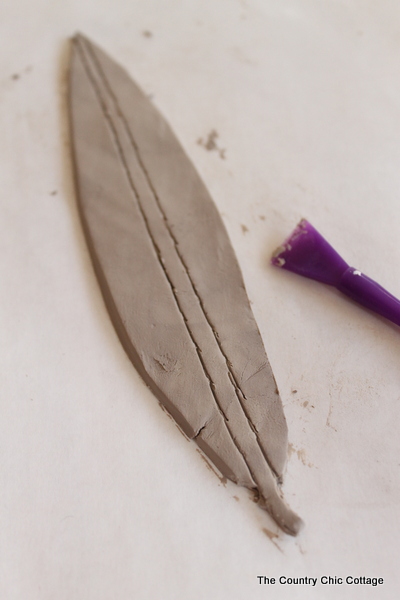
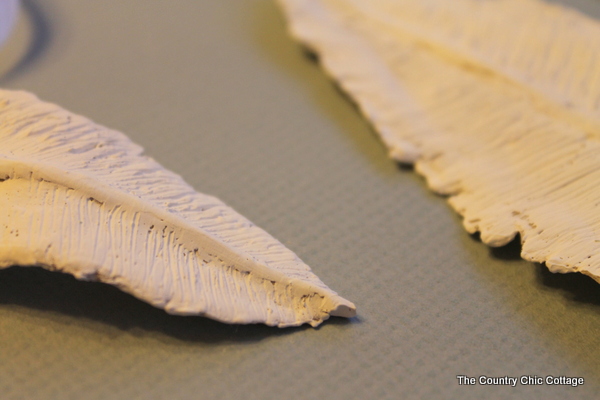
Step 3: Draw Edges
Begin pressing and dragging the clay to the edge using the tool pictured above or a similar one. Repeat on both sides.
I would pull the clay, and some would break away. I would just put those pieces in a pile to reuse later. A rough edge is okay. As a matter of fact, it is perfect! The rough edge will make your feather look more realistic.
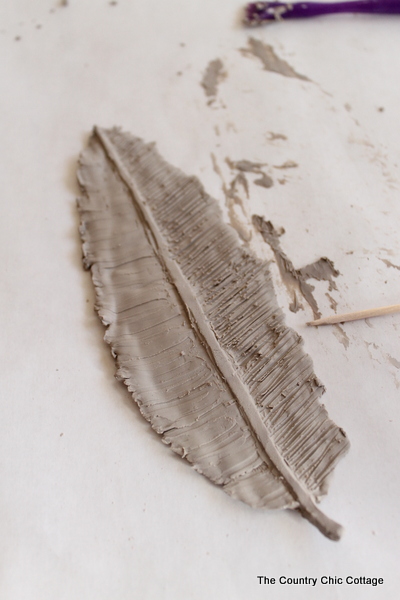
Step 4: Cut Feather Away From Parchment Paper
I kept starting in the center and pulling the clay out until I was happy with the shape and appearance of my feather. I then took one of my flat tools and cut the feather away from the parchment paper underneath.
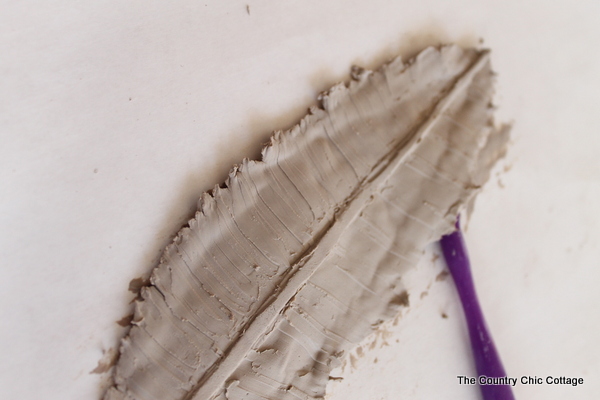
Step 5: Add Details With Toothpick
Then I used a toothpick to add the fine details to the feather. The lighter you can go with your toothpick, the better. If you use any kind of pressure, you will start to remove clay. If that happens, again, remove the material and set it aside.
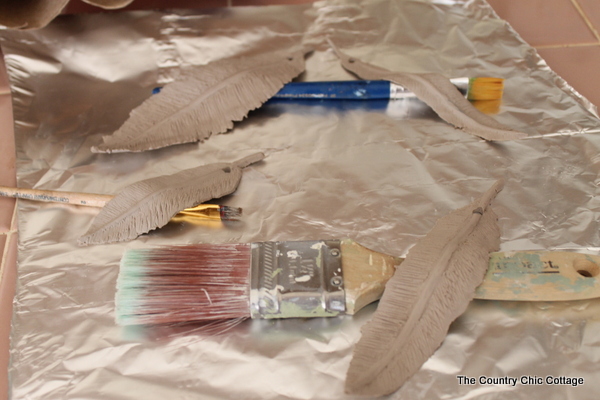
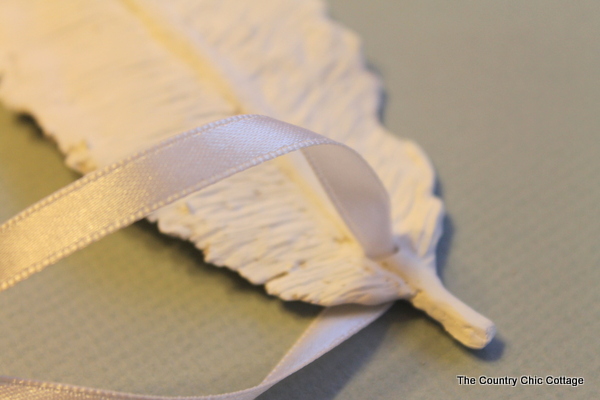
Step 6: Add Hole At Top Of Feather
Take a straw and make a hole in the top of your feather for hanging. Then draped your feathers on paint brushes to dry. This gives them a more three-dimensional look.
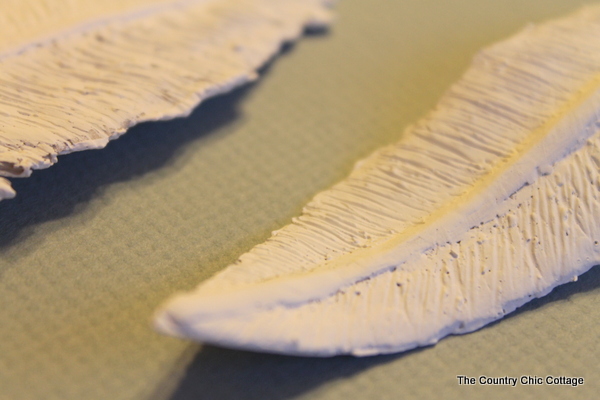
Step 7: Let Feathers Dry & Paint Them White
Let them cure according to the package directions, then apply a coat of white paint to both sides. Please note that my feathers are only finished on one side, but I recommend painting both sides.
Step 8: Add White Ribbon Hanger
String your white ribbon through the holes you made with the straw.
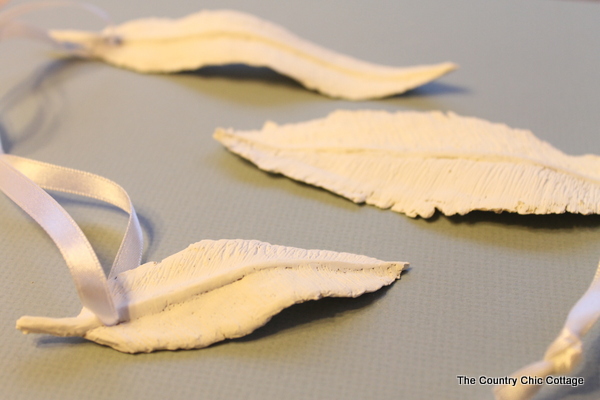
Please note that these feathers will be delicate and breakable. Note that I had four feathers drying in the picture above, but only three turned out. It also seems that the skinnier you make the feathers, the more delicate they become.
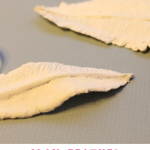
Now your feathers are ready to hang on the tree! What a wonderful and slightly modern addition to any Christmas tree.
So if you're ready to break out that clay and get to work, I've got some tips for you.
Tips and Tricks for Clay Feathers
Here are a few tips and tricks to help!
- Don't Have Air-Dry Clay? No Problem! – If you don't have air-dried clay, you can easily make this project with your favorite brand of oven-baked clay instead!
- Make Feathers A Bit Thicker – As I mentioned before, the thinner you make the feathers, the more likely they are to break. So, if you want your ornaments to last as long as possible, I would recommend making the feathers a bit thicker.
- Get Creative With Your Feathers – I was going for a white bisque look, but you can paint your feathers any color that you like! You can even add glitter or gold leaf if you want to get really fancy!
- Store Your Feathers In A Safe Place – You've spent all this time creating your feather ornaments; make sure to store them in a safe place. I recommend wrapping your feathers in bubble wrap and storing them in a separate container from your other ornaments, so they don't get damaged.
5 More Ornament Crafts
Did you love these clay feathers and are looking for more ornament crafts? Then check out the projects below!


I love them I made some a while ago but didn’t make holes to hang them I just used them as an ornament I wish I had done some like yours now there so pretty xxx
These are fantastic. Excellent job.
Very pretty! Love using the air dry clay for these, so easy to use.
Thanks for showing the how to do. Wonderful artwork!
Will they break/crumble over time? Would love to do for a wedding guest book tree rather than an original guest book. Guest could sign the leaf & then hang on the tree.
If the clay does not work for that purpose, do you think some kind of protective glaze would make them more permanent? Or, is there some other material than clay that would give the same results? Something baked, etc…
You leaves are so lovely! Can’t wait to give it a go! Thanks for sharing!
They do break/crumble with time. 🙁 Maybe try some different types of clay to see if that gives you more permanence? Also try not to make them not quite as thin so they won’t be as delicate.
Hey Angie…I made some of these for my tree this year, didn’t realize you had done them…they are beautiful…xo
Those are so pretty… too bad I think the kids have used all of the air dry clay in the house!