Whip up some of these utensil pouches for your Easter table decor! Let's get started dressing up your Easter table!
How To Make Easter Table Decor
Oh my goodness y'all….Easter is this weekend! Am I the only one this holiday is sneaking up on?
You can whip up some of these utensil pouches for your Easter table decor in no time flat. This one was originally posted over at the Buttons Galore blog, but I'm reposting it here because I want to make sure y'all didn't miss it. So, grab some cookie bags and your favorite embellishments, and let's get started dressing up your Easter table!
Supplies Needed To Make Easter Table Decor
- Pretty Girl Button Brads
- Small Oval Sliders
- Basket Weave Embossing Folder
- Nestabilities Die from Spellbinders
- Clearsnap Chalk Inkpad in Yellow Citrus
- Colorbox Ink in Moody Blue
- Flower stamps
- Cookie Bags
- Markers
- Card stock
- Baker’s Twine
- Mod Podge
- Hot Glue Gun and Glue Sticks
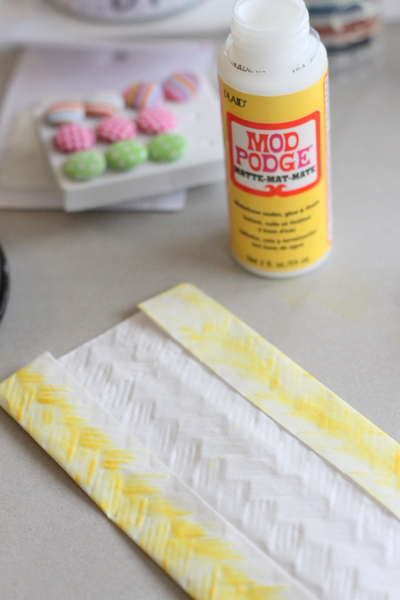
Step 1: Emboss Cookie Bag & Color It With Chalk Ink
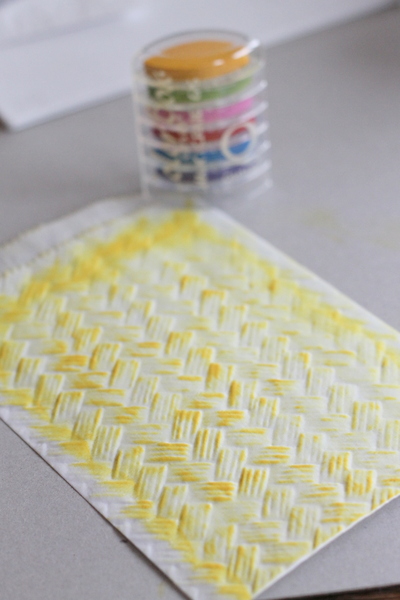
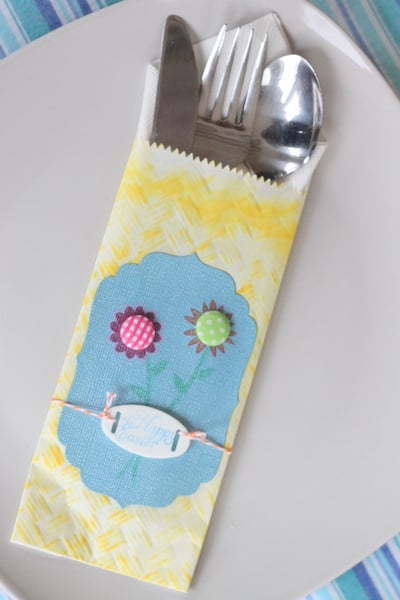
I used a cookie bag that I purchased in bulk for the base of my utensil pouch. You should be able to find something similar in a party supply store or online. I ran it through with the Spellbinders embossing folder and was happy to see that the embossing looked wonderful!
I then wanted a punch of color on the plain white bag, so I went over lightly with the chalk ink from Clearsnap in Yellow Citrus. Just allowing the embossing to really come to life.
Step 2: Adjust Size Of Cookie Bag (Optional)
The cookie bags are actually a little wide to be used for a utensil pouch. So, to fix this, I used the utensils as a guide and then folded over the excess on both sides. I then used Mod Podge to adhere the excess to the back of the pouch, as shown below.
Step 3: Decorate The Front Of The Cookie Bag
Now, let’s work on the decoration for the front of the utensil pouch!
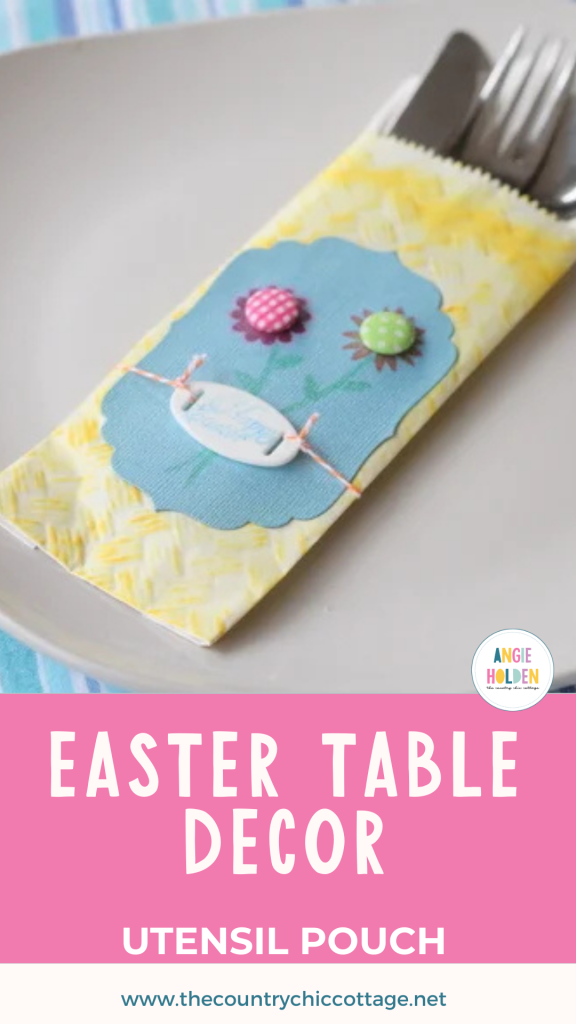
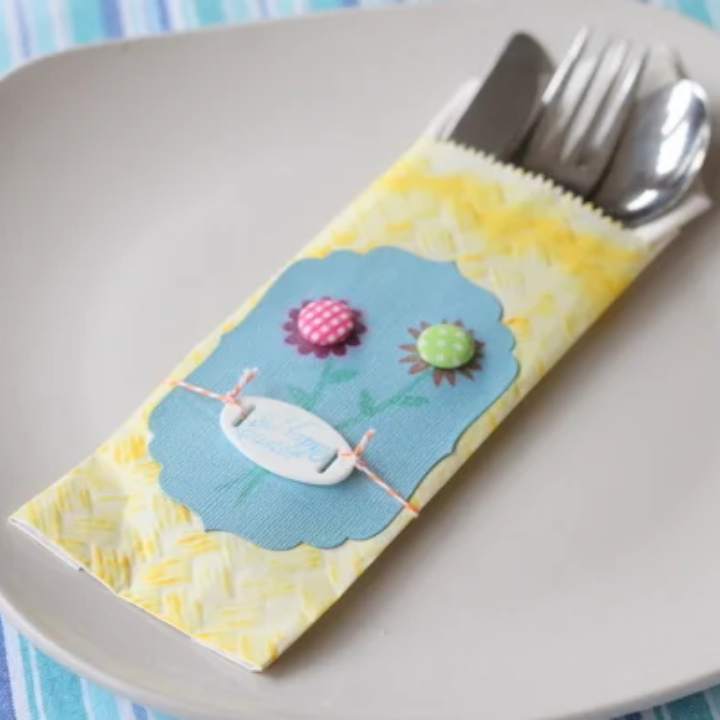
First, I cut a shape from cardstock using the Spellbinders dies, and used some flower stamps to add two flowers. Then, I used fine-line craft markers to color in the stamps, and added the button brads to the center of both flowers.
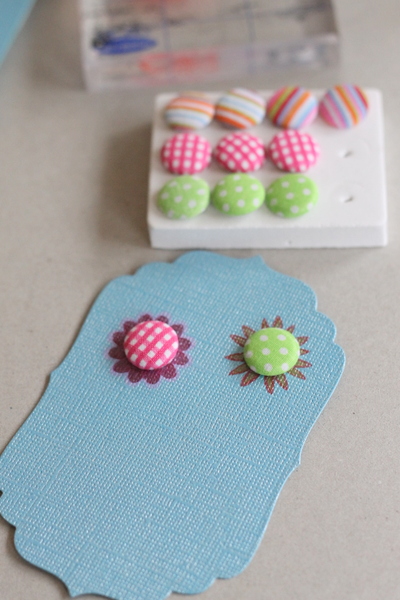
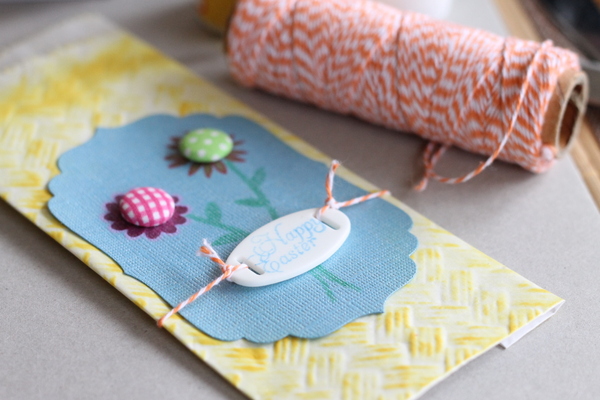
Once everything was dry, I drew stems and leaves on my flowers using the same set of fine-line craft markers. Then, I stamped “Happy Easter” onto a small oval slider using the Colorbox Ink.
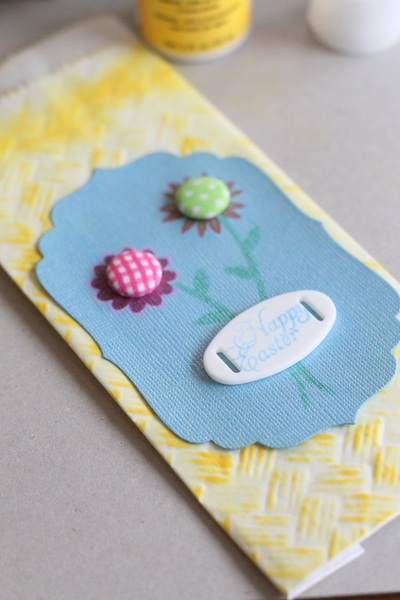
The cardstock shape was applied to the bag using Mod Podge. Then I used hot glue to attach the slider to the front. After everything had dried, I tied baker’s twine to one side of the slider, ran it around the back, and tied the other end to the opposite side of the slider. – Make the twine tight, but not so tight that it would damage the pouch.
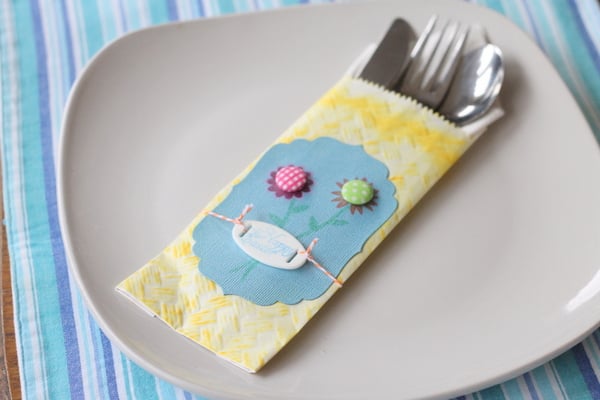
Step 4: Add Nakpin & Utensils To Cookie Bag
Add a napkin and your utensils for a festive addition to your Easter table!
I think the basket weave emboss is perfect for spring, but you could incorporate other emboss folders you have to put your own unique spin on this idea. You could even personalize that shape on the front with your guests' names or initials. Then these great utensil pouches would double as place cards!
Also, don't love the flowers? You can change up the decor on the front as well. This technique is super easy to personalize and can be used for any occasion. So, use it to dress up your Easter table this week and your Sunday dinner table next!
FAQs About Easter Table Decor
Here are a few common questions that I often see readers asking about this Easter table decor. If you have a question, please check if I’ve already addressed it below. If you don’t see your question listed, please leave it in the comments!
Do I Have To Emboss The Cookie Bag?
No, you don't. I like the look of the embossing because it adds more interest to the utensil pouch, but you can skip that step if you wish.
Can I Use My Cricut Machine For This Easter Table Decor?
Absolutely! If you don't have the Nestabilities Die from Spellbinders or the other embellishments I used, you could use your Cricut machine instead to make the decorations for the front of your utensil pouch!
What Other Embellishments Could I Use For This Utensil Pouch?
You could use anything that you have on hand! However, if you are looking for more ideas, you could use the following:
- Buttons
- Stickers
- Chipboard Pieces
- Paper Ephemera
- Scrapbook Paper
- Ribbon
- Embroidery Floss
Can I Use Liquid Glue For This Project?
Yes, you can. However, just keep in mind that if you use liquid glue over hot glue, you will have to wait longer for everything to dry.
5 More Easter Decor Crafts
If you loved this Easter table decor and are looking for more Easter decor crafts, then check out the projects below!
- DIY Easter Table Runner with a Cricut Machine
- Dollar Tree Easter Decor: Easy Bunny Topiary Craft
- Easter Peeps Centerpiece Made From Mason Jar
- DIY Easter Jars: Bunny and Chick
- How to Make Easter Jars They Will Love