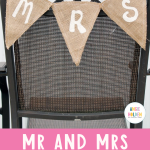
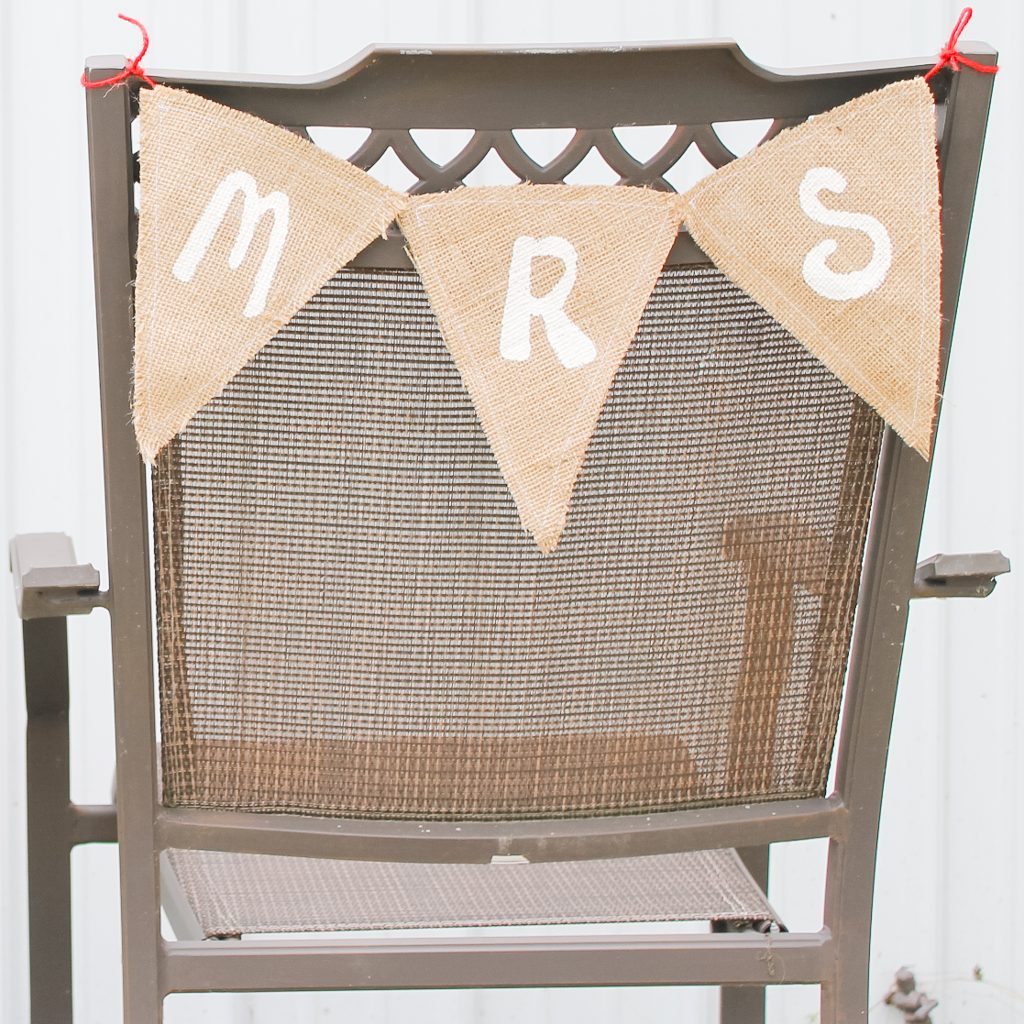
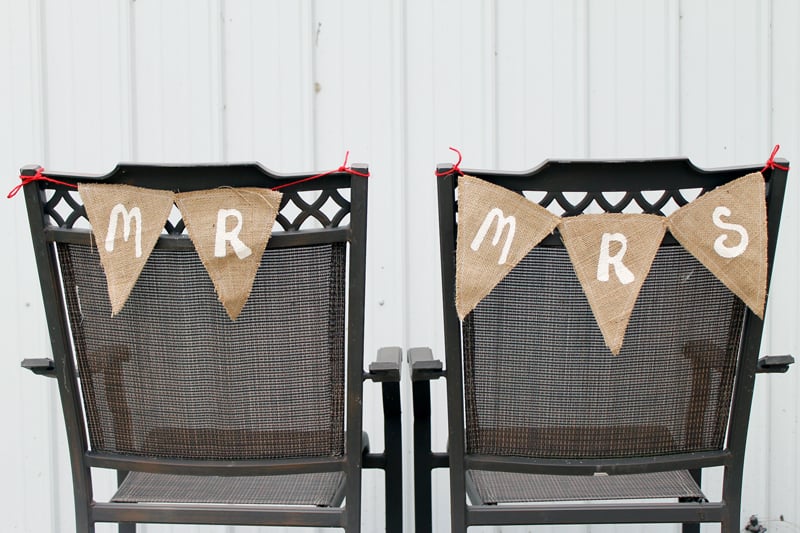
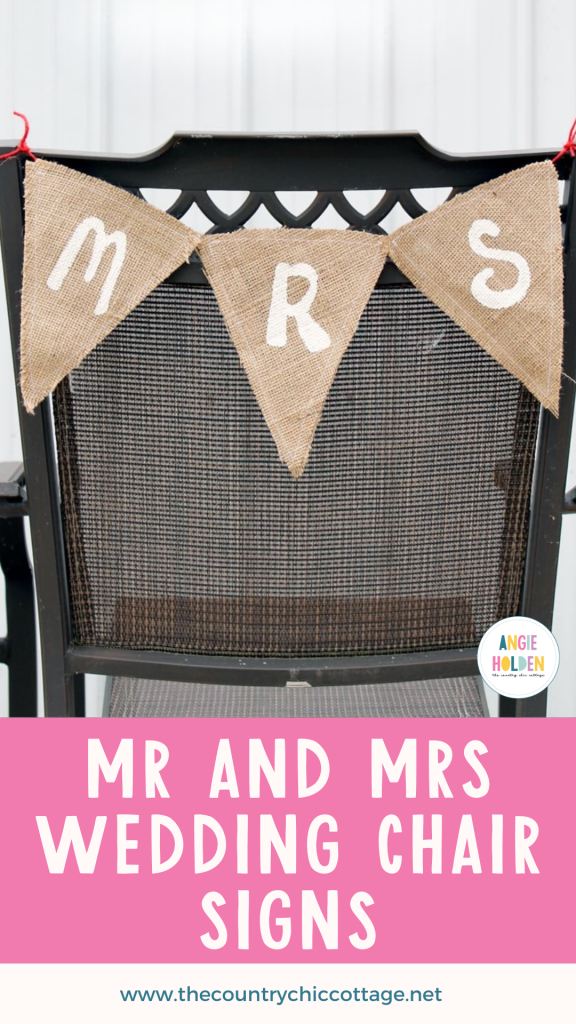
I'm excited to share a charming “Mr” and “Mrs” chair sign that adds a lovely rustic touch to any wedding reception! I created these several years ago for my daughter's big day, and I'm still thrilled with how they turned out. If you're looking for more creative wedding ideas, be sure to check out my series of DIY wedding projects.
How To Make Mr And Mrs Chair Signs
These custom wedding chair signs are so darn simple, but I have some fun tips and tricks that you don't want to miss! Make the perfect DIY wedding chair signs by following the tutorial below.
Supplies Needed To Make Mr And Mrs Chair Signs
- Burlap Fabric or Premade Banner Flags
- Ribbon to match the wedding color scheme
- Adhesive Vinyl
- Transfer Tape
- Acrylic or Fabric Paint
- Brayer
- Stencil Brush or Pouncer Brush
- Cricut Maker 3 (or other Cricut Machine)
- Glue gun or Needle and Thread
If making your own burlap banner:
- Fabric Grip Mat – If cutting your own banners
- Rotary or Bonded Fabric Blade
Step 1: Design Your Banner
If you are cutting your own banner flags, search Cricut Design Space for the flag shapes, then create your “Mr. and Mrs.” letters in a font you love. Since you will be stenciling the letters, try to pick a font that has thicker lines so the paint has some space to fill. (The font shown below is different from the final project photos.) Size your design to work with your chairs.
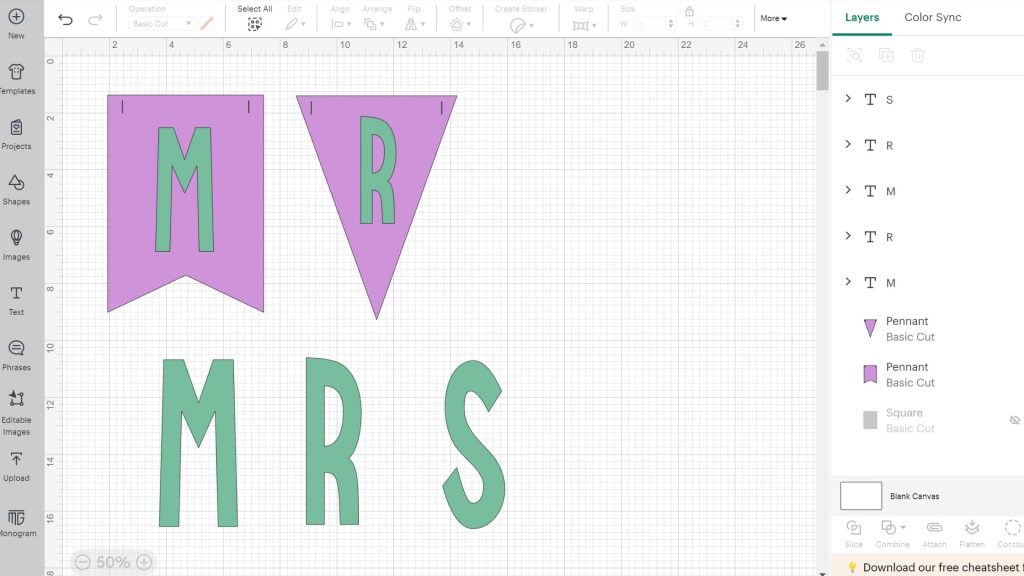
Step 2: Create A Weeding Box
Since the letters you chose are to be stenciled, you can create a weeding box around the letters. To do this, add a square or rectangle to the canvas and line it up with the letter, then select both the box and letter and click “subtract” or “exclude” to create your stencil.
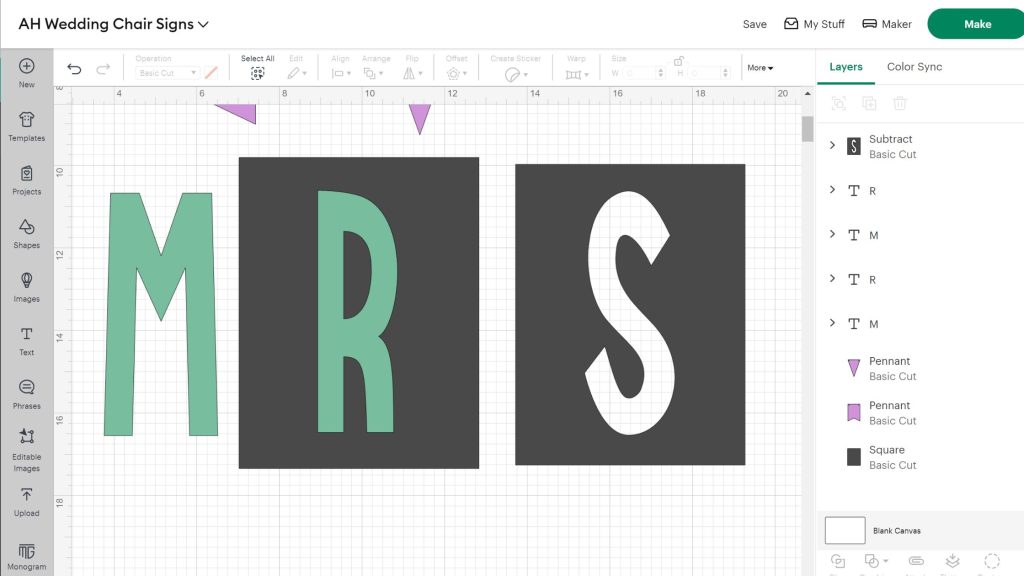
Step 3: Cut Your Banner Flags And Stencil
If you are cutting your own banner flags using your Cricut, follow the prompts in Design Space to cut your burlap. You can find tips about cutting burlap in this post. To cut your stencil, use adhesive vinyl and then weed out the letters. The beauty of using vinyl for a stencil is that you can use absolutely any color that you happen to have on hand.
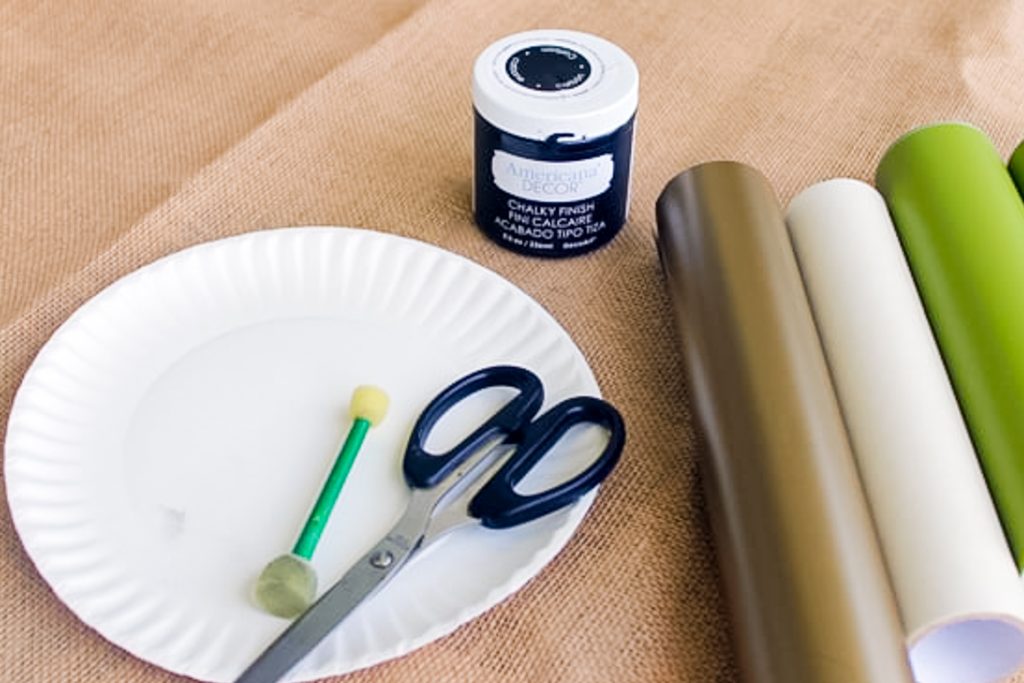
Step 4: Paint Your Banner
After weeding out your design, use transfer tape and place the vinyl on the banner, and press down or use a brayer to adhere the vinyl firmly to the burlap. Then, add a bit of paint to your brush (less is more!) and dab the brush on the burlap going straight up and down over the vinyl. This results in minimal seepage of paint under the vinyl.
Step 5: Remove Stencil
After painting, carefully remove the vinyl from the banner. Do this while the paint is wet to prevent peeling of dried paint. Once the paint is dry, you can sew or use hot glue to attach your ribbon to finish your wedding chair signs.
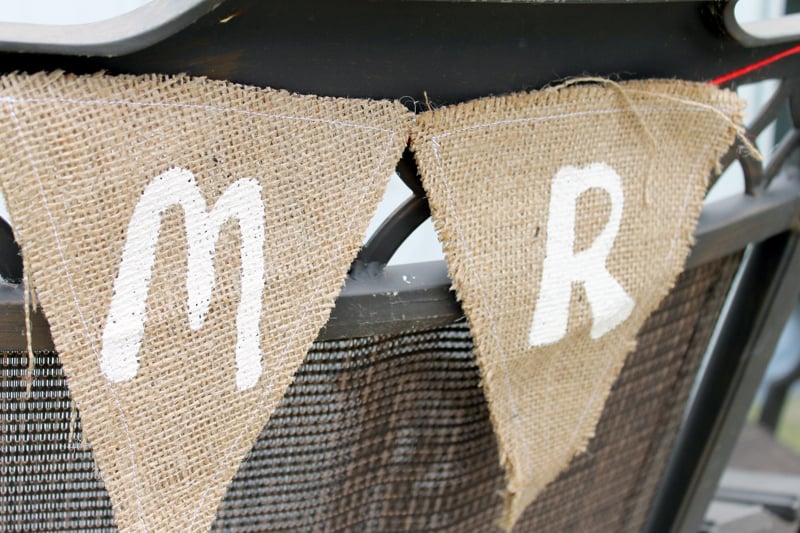
These Mr and Mrs chair signs are the perfect way to reserve seats for the bride and groom at the reception. Add this simple yet cute DIY wedding craft to your wedding to-do list. You will love how easy they are to make and how great they look!
FAQs About Mr And Mrs Chair Signs
If you have questions about making these Mr and Mrs Chair Signs, I have answers for you! Please leave your question for me in the comments if you don’t see it already answered below.
Can I Use A Different Color Of Burlap?
Yes, you can! I chose to go with classic brown burlap, but you can choose any color that fits your wedding theme.
Can I Change The Size Of These Chair Signs?
Absolutely! You can make these Mr and Mrs chair signs as big or as small as you would like! – The only thing to keep in mind is that you may need to adjust your stencil size so it fits in the middle of your burlap banner pieces.
What Cricut Machine Can I Use For This Project?
I recommend the Cricut Maker or Cricut Maker 3 for cutting burlap for this project. However, if you are using a premade burlap banner, you can use any Cricut machine available to you for cutting the vinyl stencil.
Can I Change The Shape Of The Banners?
Yes, you can! If you use your Cricut machine, you can cut out your burlap in any shape that you like. For example, you could make a heart, hexagon, rectangle, etc., shaped banner.
5 More Wedding Crafts
Did you love these Mr and Mrs Chair Signs and want even more wedding crafts? Then check out the ideas below!