
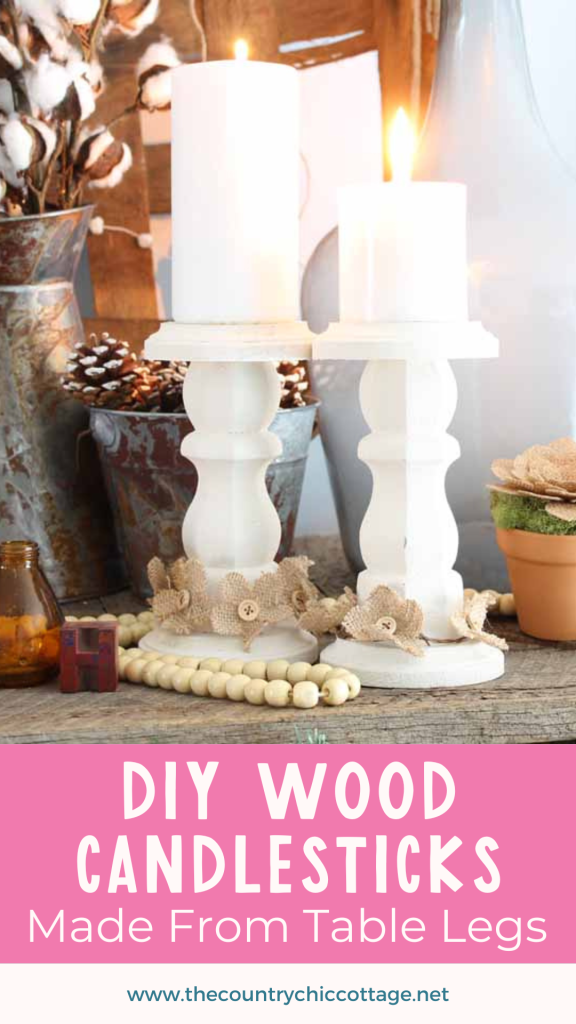
Do you want to give your living space a unique and stylish look? If so, consider making DIY wood candlesticks from table legs. These DIY candlesticks are an attractive way to add warmth and charm to any room in the house. They can be used for both decorative and functional purposes, providing light and ambiance while also enhancing the overall look and style of a space. With just a few simple materials, you can create beautiful wood candlesticks that will last for years to come!
How To Make DIY Wood Candlesticks
I'm constantly on the lookout for ways to up my home decor… while keeping my money in my pocket. That's why I am always coming up with new DIY crafts to match the style I want in my home.
Getting the farmhouse look throughout my home has been my goal for a long time, and in one particular area, I wanted to add a rustic touch with candle holders. The problem was, I couldn't find any that were just right. Too expensive or too small… until I realized I could make my own!
Making wooden candlesticks from table legs is an easy, inexpensive way to achieve the look I wanted. With just a few supplies and an afternoon of work, you can create chic wood candlesticks that will make your living space warm and inviting!
Here's how you can do it!
Supplies Needed To Make DIY Wood Candlesticks
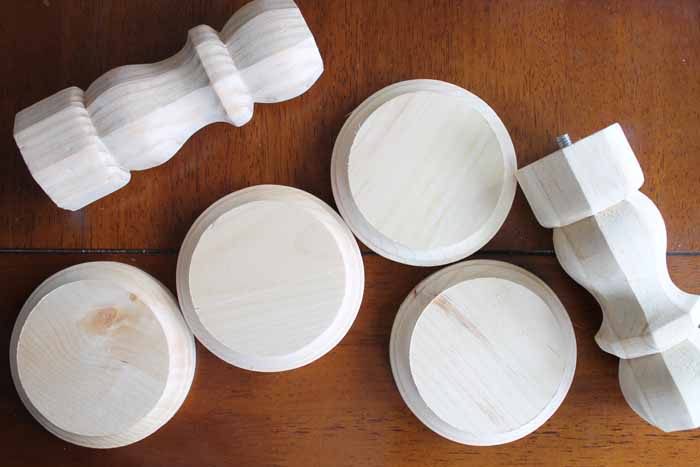
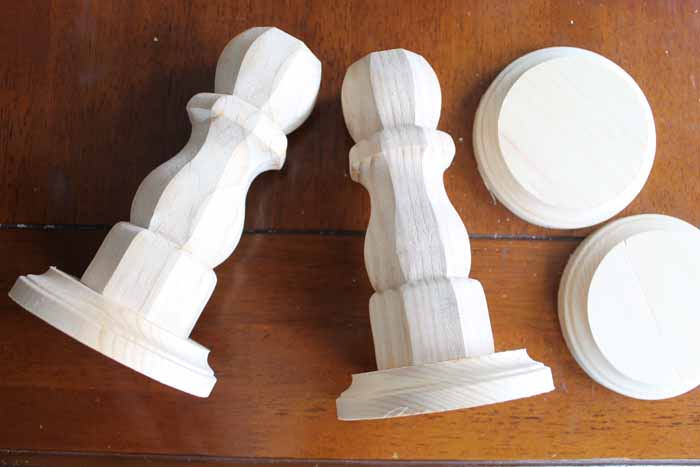
- Table legs (from the home improvement store or thrift shop)
- Wood circles (from the craft store)
- Wood glue
- Finish nails
- Drill
- Ruler
- Pencil
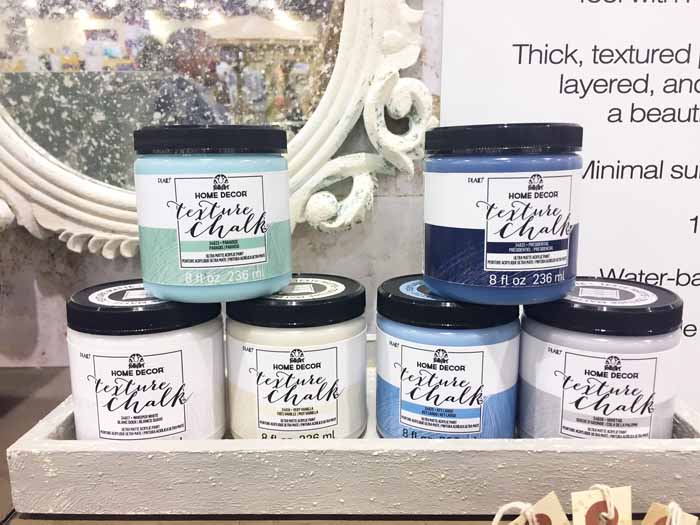
- Texture chalk paint (from FolkArt)
- Pouncer brush
Step 1: Draw Two Lines On Wooden Circle
Find the center of the circle to add the table leg. Draw on two lines that are the same length and touch the outer edges of the circle.
Step 2: Connect Lines With An ”X”
Connect these two lines from end to end, as shown below. The center of that “X” is the center of your circle.
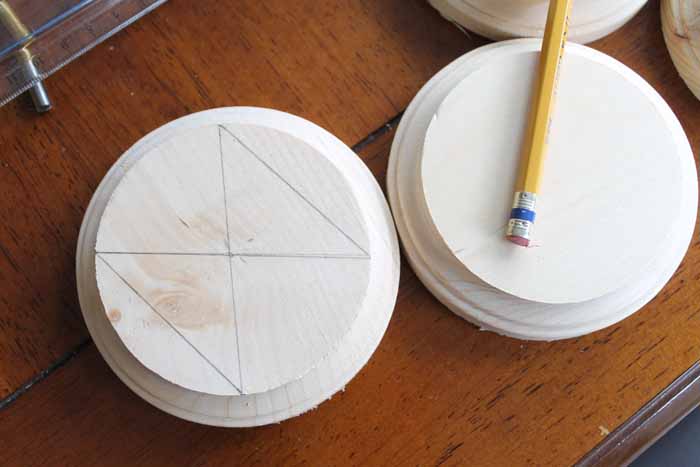
Step 3: Drill Hole In The Middle Of The Wooden Circle
Drill a hole large enough to accommodate the screw on the table leg in the center of your circle piece.
Step 4: Screw The Table Leg To The Wooden Circle & Add A Wood Circle To The Top
Then, screw in your table leg. Add wood glue to the top of the table leg and add the other circle.
Step 5: Secure With Finishing Nails
Secure with finishing nails to hold everything together until the glue dries.
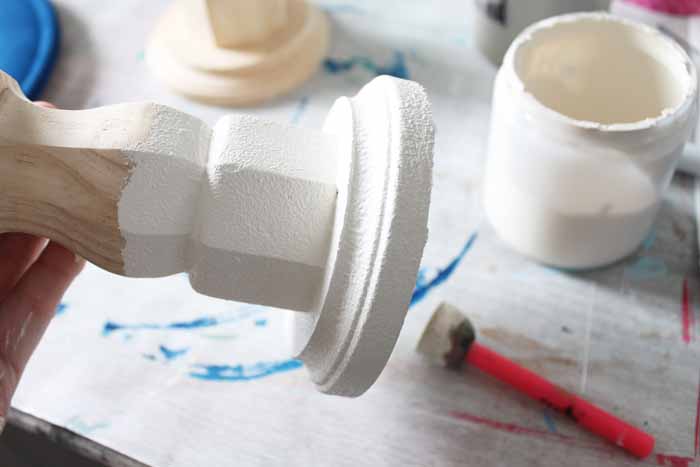
Step 6: Paint DIY Wood Candlesticks
Once the glue is completely dry, it's time to paint! Use FolkArt's texture chalk paint to give your DIY wooden candlesticks an extra bit of character.
Start by applying the paint with the pouncer brush in long strokes across the wood, making sure you get all the areas. Then, use a damp cloth to smooth out any brush strokes for an even finish.
NOTE: FolkArt chalk paint is perfect for those who want a rustic, worn, layered look for their projects in just one coat. You can sand it back to reveal part of the wood if you like.
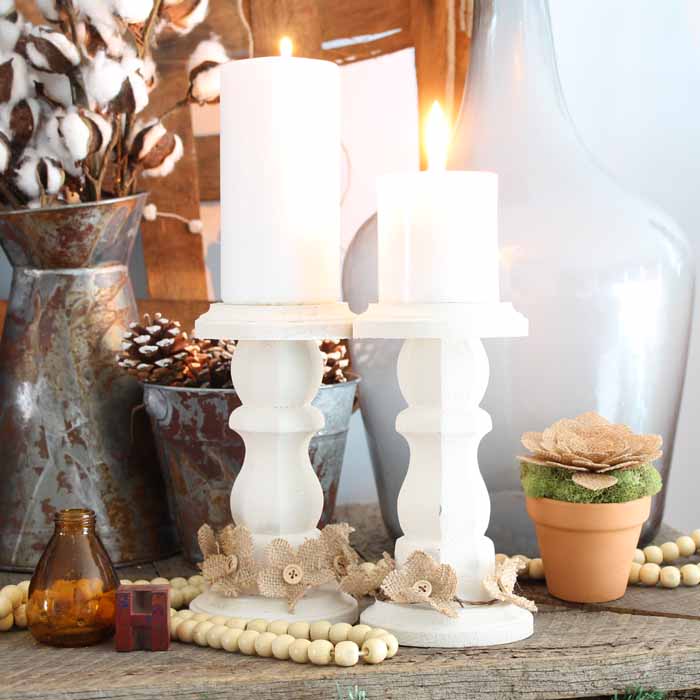
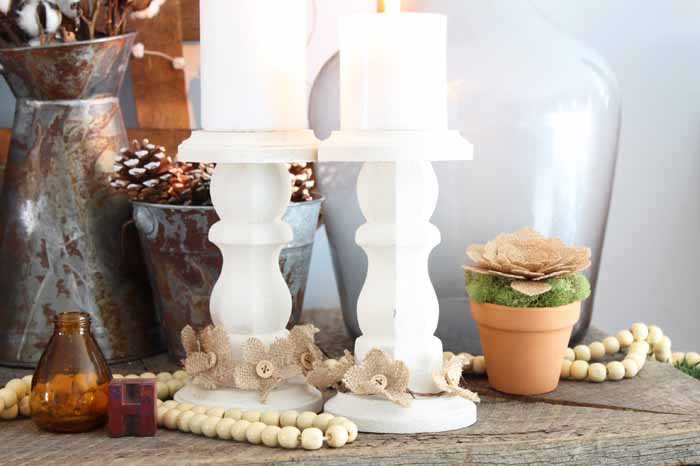
Step 7: Add Candles
Once your DIY wooden candlesticks have completely dried, you're ready to light up your home with style.
Place them on mantles, shelves, or anywhere else that needs a bit of charm and extra light. Have fun!
Making these wooden candlesticks is quick, easy, and fun! With just a few supplies and some creativity, you can make your own set of candlesticks to light up your home with style. I hope you have fun making these and enjoy the process!
FAQs About DIY Wood Candlesticks
Here are answers to some of the most frequently asked questions I receive about making these DIY wood candlesticks. If your question isn’t listed, feel free to drop it in the comments, and I’ll be happy to help!
Can I Use Any Type Of Table Leg?
Yes, you can use any type of table leg. Just make sure that the screws on the legs securely hold the two wood circles together.
Where Can You Find Table Legs?
You can find table legs at your local home improvement store, hardware store, or online or even a furniture thrift shop.
Can I Use A Different Type Of Paint For These DIY Wood Candlesticks?
Yes, you can use other paints besides chalk paint. However, if you want a worn, layered look for your project in just one coat, I recommend using FolkArt texture chalk paint.
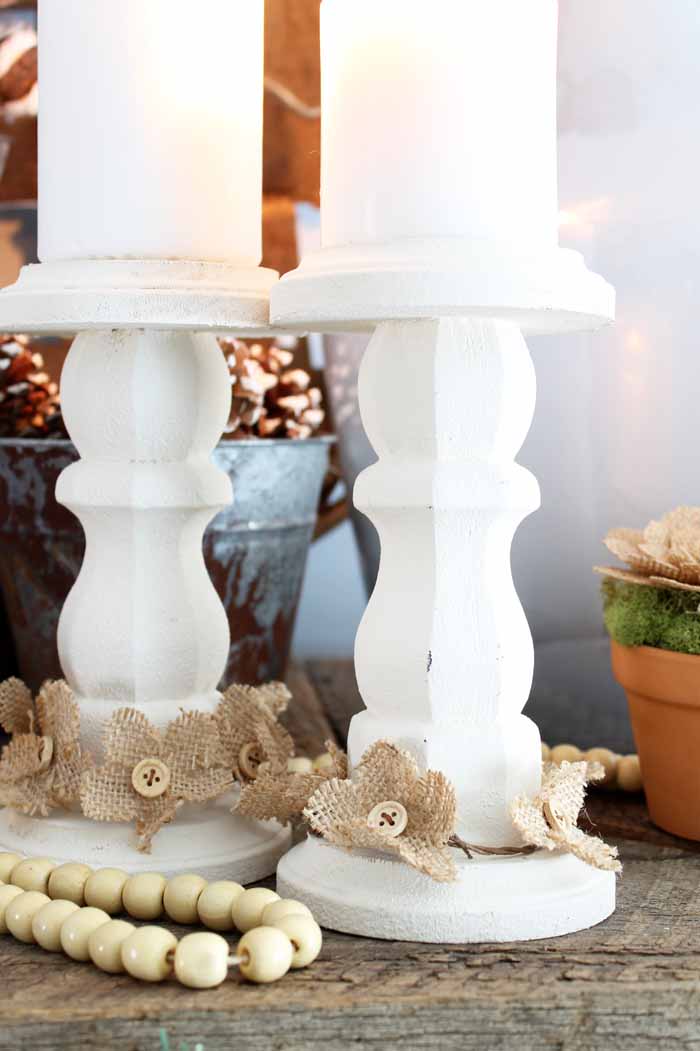
Did You Glue The Burlap Flowers To The Base Of The Candlesticks?
No, the burlap flowers are actually a wire ”burlap garland” that I cut and wrapped around the base of the candlestick.
5 More Candle Crafts
If you loved these DIY wood candlesticks, here are some other candle crafts that you won’t want to miss!
- DIY Paper Candle Wraps
- Glitterific Candle Holders
- How To Make Doily Candle Holders
- Lavender Candles
- Beeswax Candles In A Jar


These are so charming. The candlesticks are going to be a great accessory to use around the house.
The are beautiful. Such a great idea.
Those are so cute! I’ve been wanting to make some, and now I can’t wait to try out the new Folk Art paint!
Now this we can do, think we have some table legs out in shed somebody gave us few years ago. Have been wanting some new candle stands, won’t have to spend any money (if we can find them that is.) Was looking at some new candle sticks online at Walmart but beyond my budget.
Do you ever find when you want something and wait a bit, then something comes up to help you get what you want?
I enjoy getting things that way much more. How wonderfully timely your table leg project is, thanks.
Happy Sunday Angie
Love seeing these repurposed and not wasted.
Oh I like the texture! Hard to believe it’s just one coat. I’ll be on the lookout for this paint! Thank you for sharing on Merry Monday! Hope to see ya next week!
Kim
WOW!! These candlesticks are just amazing!! I love them, and thank you so much for telling us how you made them.
With real candles or faux ones, what wonderful gifts they will be.