

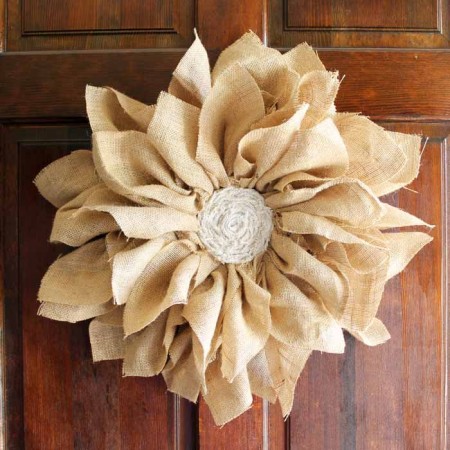
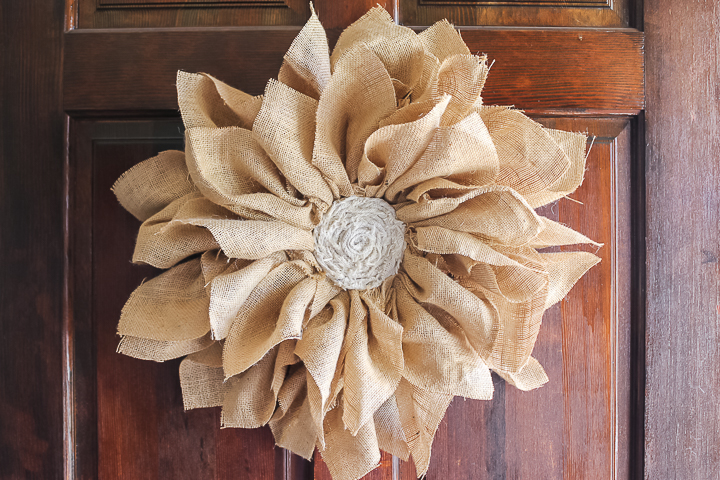
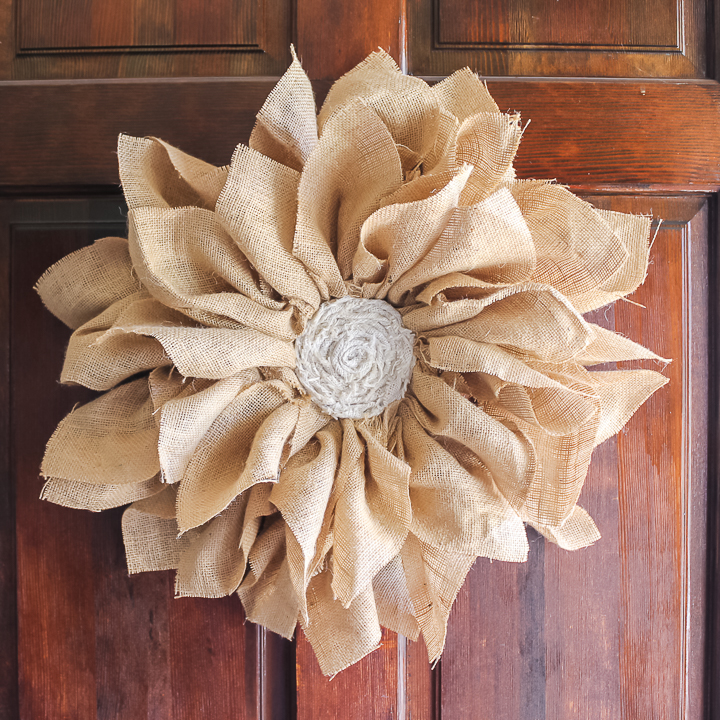
A DIY flower wreath is perfect for your door this spring. Make it from burlap and it will fit right in with any rustic farmhouse style. I wanted something for my door that would last through a few seasons and also reflect a rustic style. Burlap to the rescue! I made this easy-to-make wreath that you can make as well! Grab your supplies and make this for your door or to hang on the wall in your home.
This was first published March 6, 2017, however, I am republishing with more information.
I walk step by step through just how to make this for your rustic home below! Trust me…this one is super easy to make and perfect for anyone from the beginner to the expert crafter. Break out your hot glue gun and burlap. You won't believe what I use for base of this wreath!
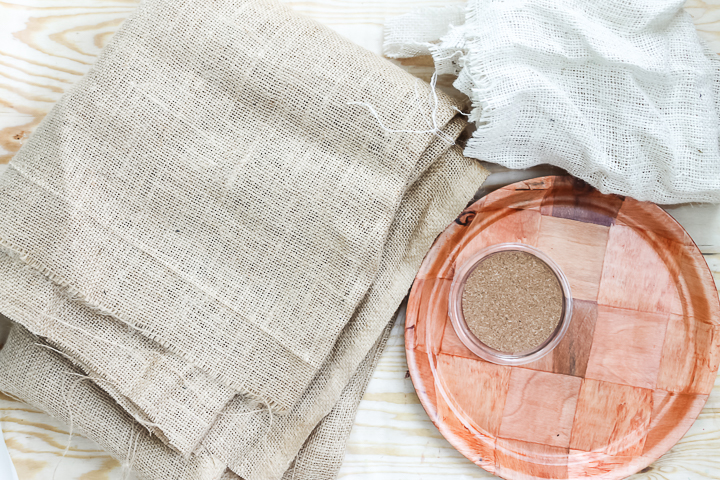
Supplies to make a DIY flower wreath:
Yes, I used an old plate and a coaster to make a wreath! Are you ready to see how?
How to Make a Wreath from Burlap:
You can follow along with the instructions in the card below for making your own version of this wreath. Be sure to pin or print this for use later if you don't have the supplies right now.
Instructions
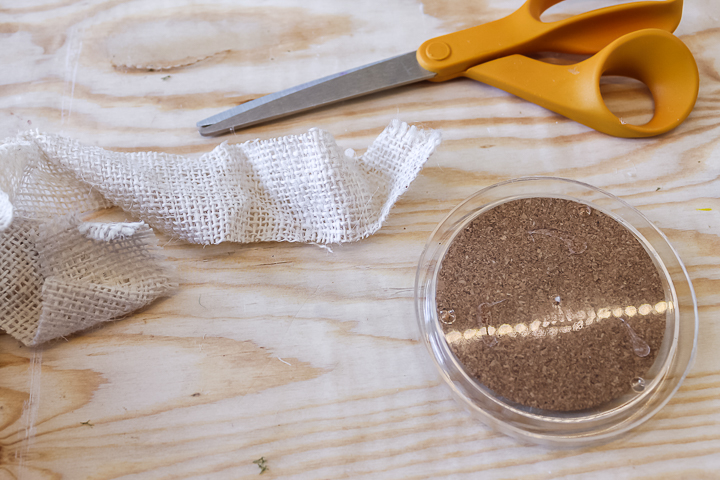
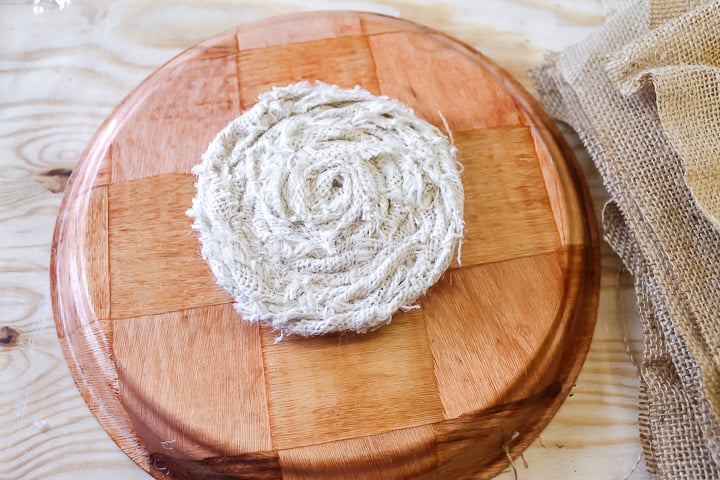
- Start by cutting the white burlap into approximately 1 1/2 inch wide strips.

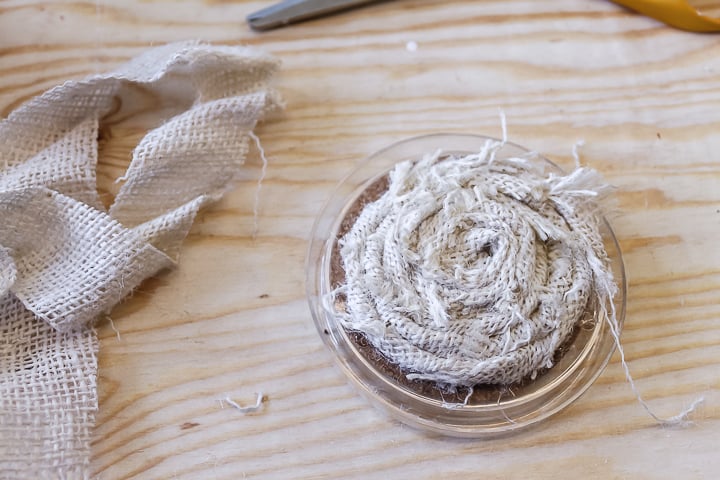
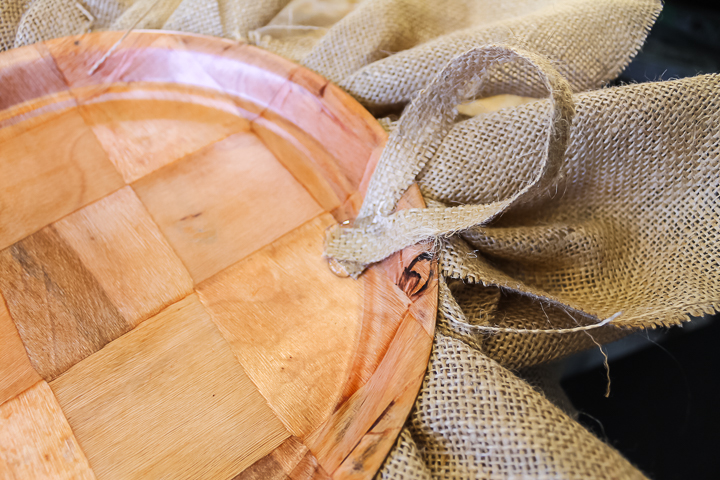
- Start in the center of the back of the coaster and apply the write burlap with some hot glue. Twist the burlap strips and wrap around in a circle. Apply hot glue as needed to secure.
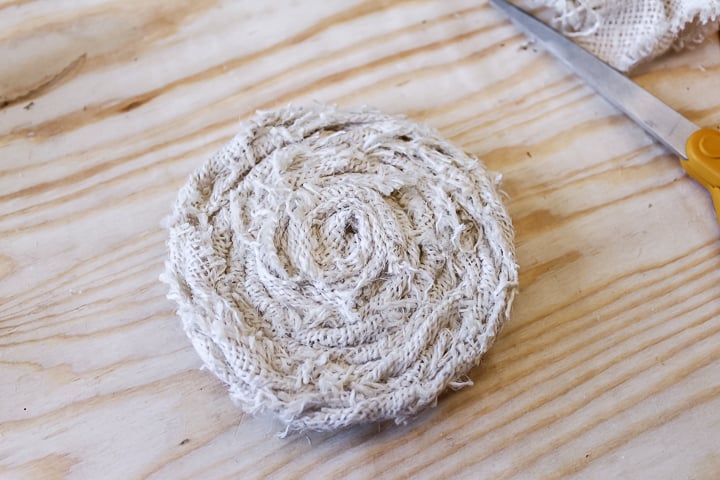
- Continue until entire coaster is covered as shown below.
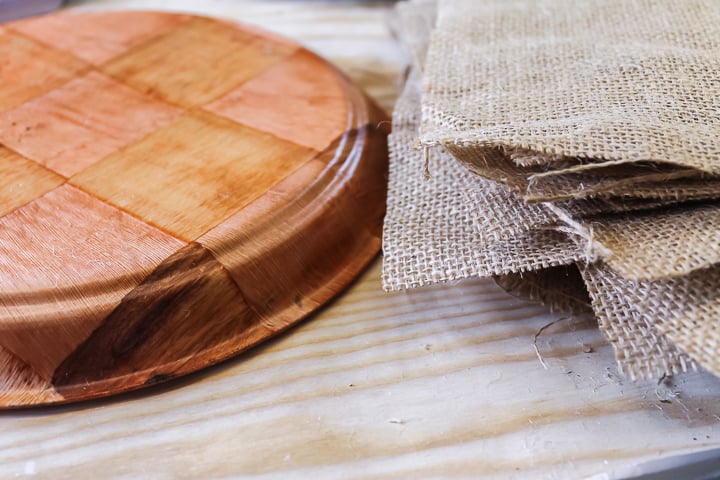
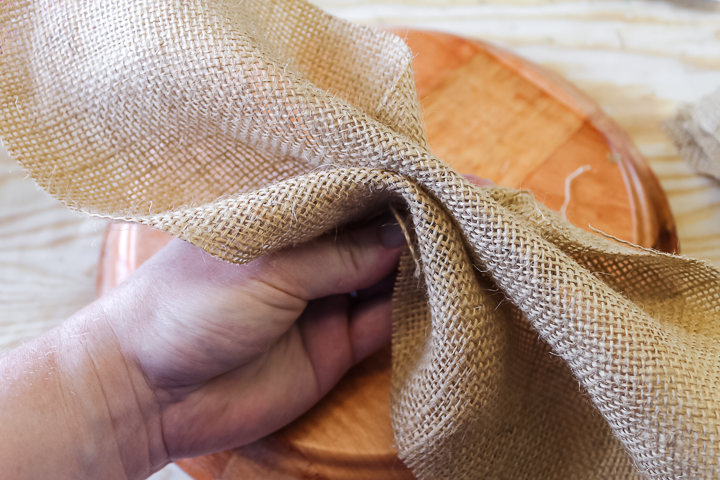
- Cut the burlap into 10 inch by 10 inch squares. I used about 18 squares for my burlap flower wreath.
- Secure the coaster in the center of the back of the plate with hot glue.
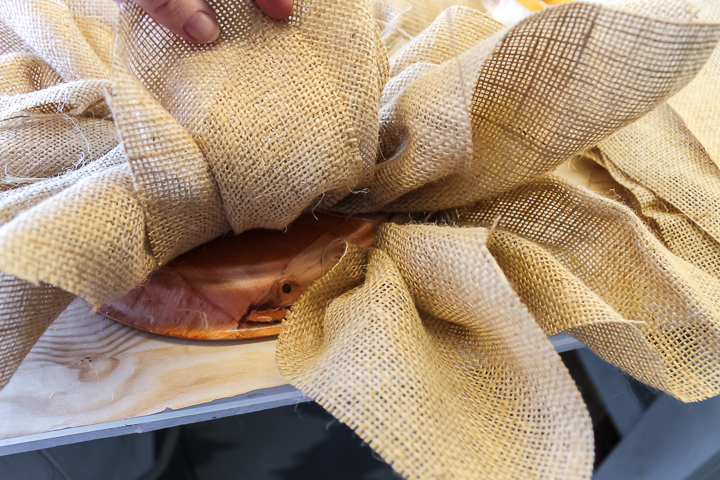
- Gather the burlap squares from one corner to another as shown below.
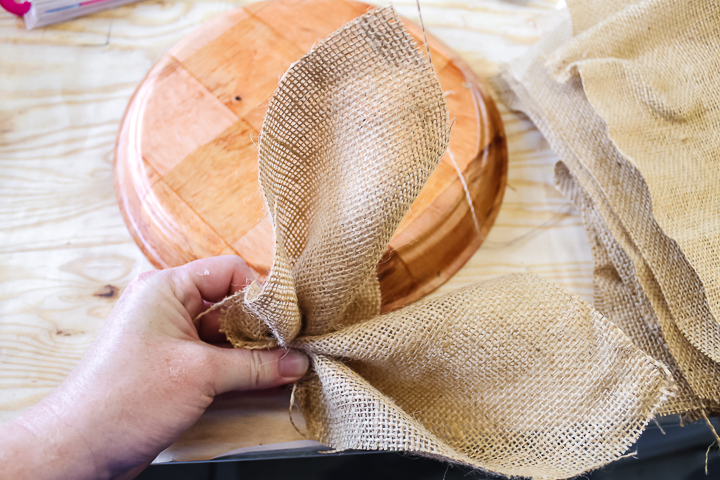
- Twist until both points are in the same direction.
- Hot glue the folded squares around the coaster as shown below.
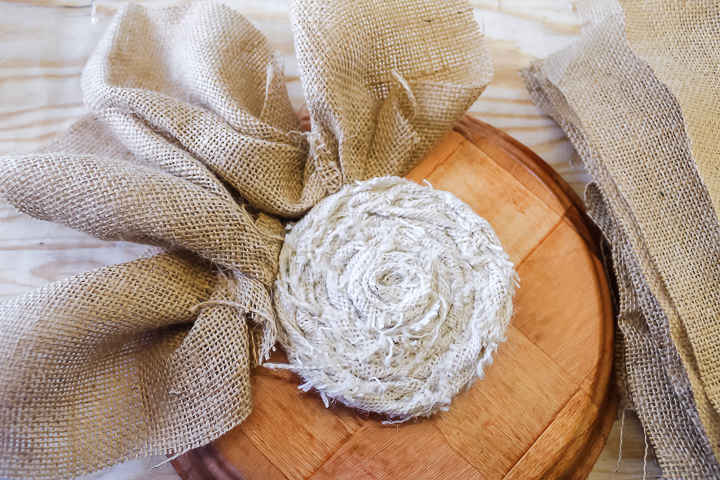
- Continue all the way around the coaster as shown below.
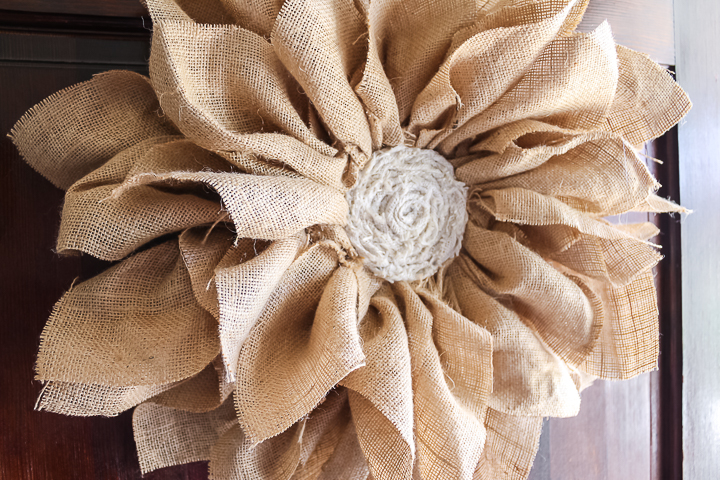
- Add a second layer of burlap squares around the outer edge of the plate.
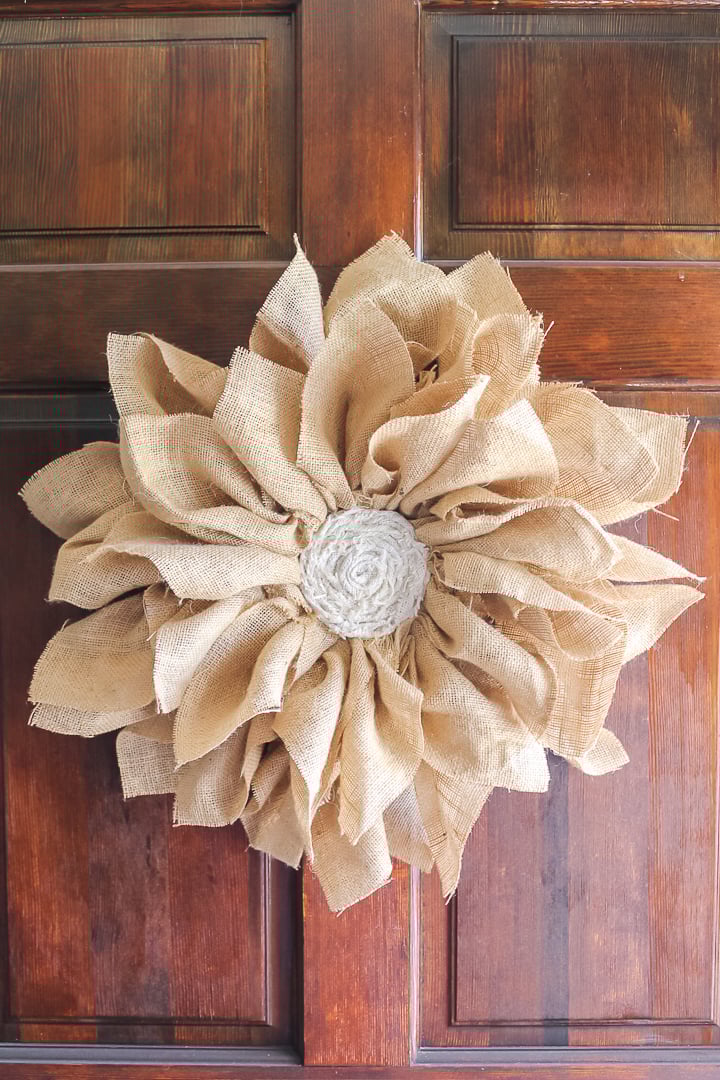
- Flip over and use a scrap piece of burlap as a hanger.
- Add this burlap flower wreath to your front door.

I use this wreath during spring but for so many more holidays. I even have it above my mantel a lot. Yes, I seriously love this wreath that much.
So, if you are struggling with something to make this spring and have some burlap around, you just might have found your solution. A DIY flower wreath like this one will look great in your space.
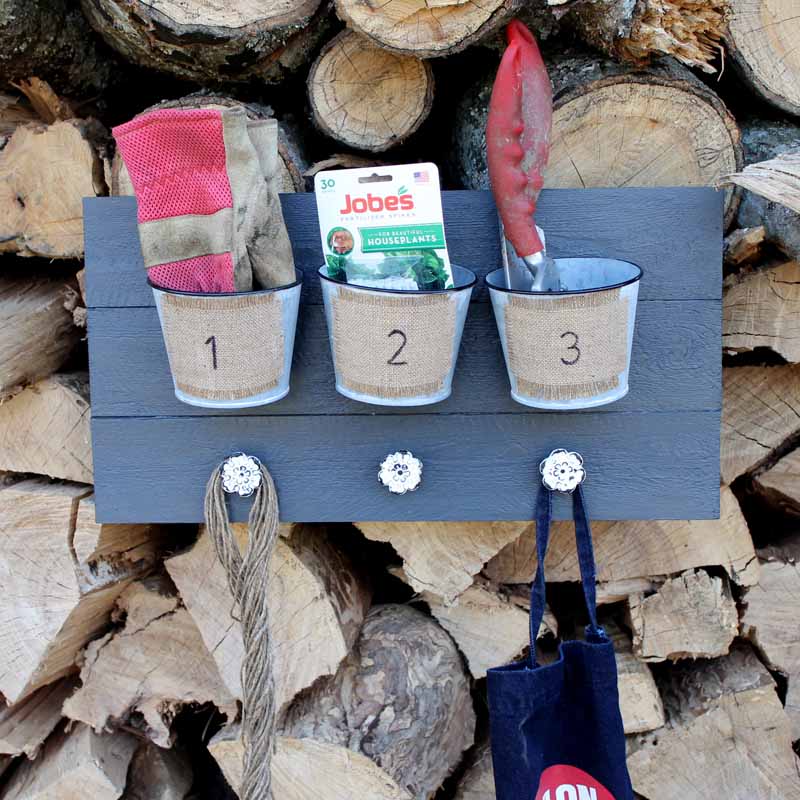
Love this and looking for more projects that use burlap? We have those for you as well! Click here to see how to make this garden supply organizer. Again this is perfect for spring and getting organized in preparation for gardening season.
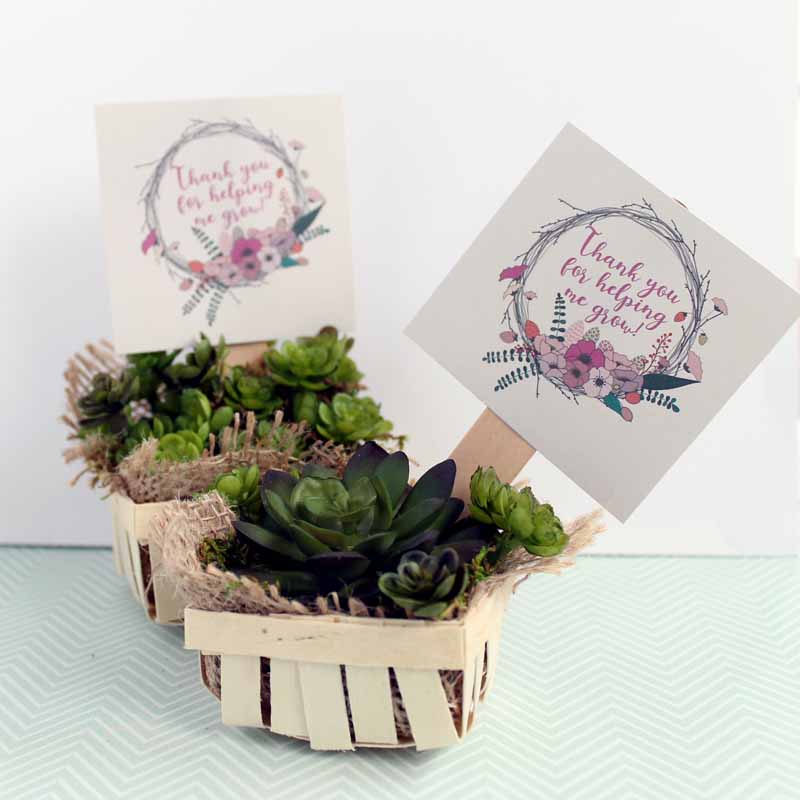
Use those small burlap scraps to make a fun gift idea! Click here to print the tags and see how to make this succulent gift idea. This one is perfect for Mother's Day and Teacher Appreciation Day. Plus they are just adorable!
Make this DIY flower wreath or give one of these other burlap projects a try. I love burlap for adding some rustic texture to my home. If you love farmhouse style, you will love the look and feel of burlap in your home. Y'all enjoy and be sure to add a burlap wreath to your front door.


Thanks for sharing all of your great ideas!!
Your directions are a little sketchy on the burlap wreath, on the flower part…couldn’t find a video on that…
Sorry I only have pictures and did the best I could.
I adore this wreath. I can see it hanging inside my big picture frame in my living room or on a door, or on one (or more) of my bedroom walls. Easy to make and super pretty. Thanks for giving such a clear-cut tutorial! Keep on inspiring us!
This would look great if you could use yellow burlap or fabric, spray the center brown and make it a sunflower. I haven’t bought burlap in years. Don’t know if it comes in colors.
You can find it in colors!
How much burlap do you need? A yard, 2/2 yard???
My squares are 10″ by 10″ and I used I believe 18. It will depend on how wide your burlap is. If it’s 52″ wide you could get 5 across and then would need 40″ in length. If your burlap is wider you wouldn’t need as long of a piece.