

Here are some Cricut wedding ideas if you’re planning a wedding or helping someone decorate for one! These DIY projects combine Dollar Store supplies with your Cricut machine to create beautiful decorations that the couple will love. I have a suggestion for wedding advice cards as an alternative to a traditional guest book, along with a display to showcase the cards on the table. Let’s get started on transforming Dollar Store supplies into something amazing! This post is sponsored by Cricut; however, all projects and opinions are my own.

Cricut Wedding Ideas Video
Want to watch how to make all of the projects in one video? Click the play button below to do just that!
Can't watch the video or missed some of the steps? You can also follow along below with step-by-step instructions on how to make each of the projects shown.
How To Make Cricut Wedding Ideas
I love incorporating unexpected elements into weddings and parties! Advice cards are a wonderful option for events like weddings, graduation parties, and anniversary celebrations. They serve as a great alternative to traditional guest books, turning into cherished keepsakes long after the event has passed. Using your Cricut machine can make this project even more special!
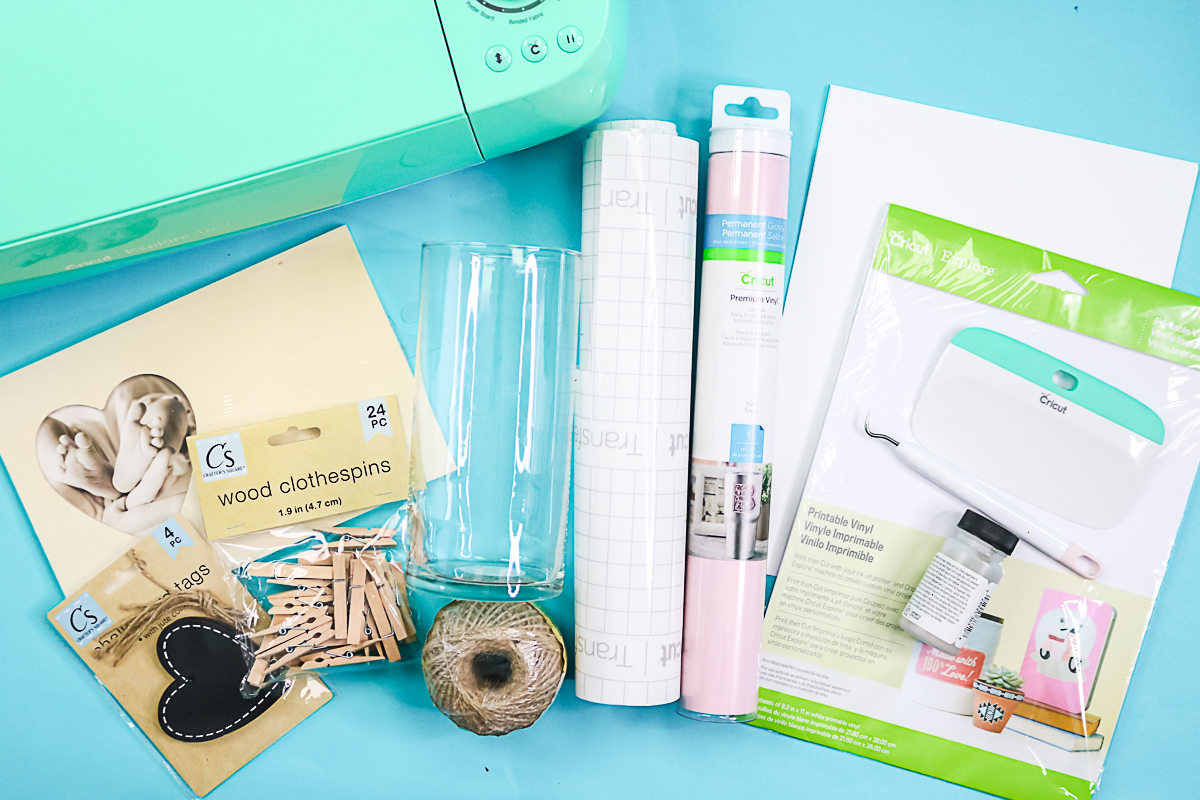
Supplies Needed For All Cricut Wedding Ideas
- Cricut designs
- Cricut machine
- Printable vinyl
- Cricut vinyl – tulip color
- White cardstock (8 1/2 x 11 size is best)
- Transfer tape
- Printer (see which printer I like here)
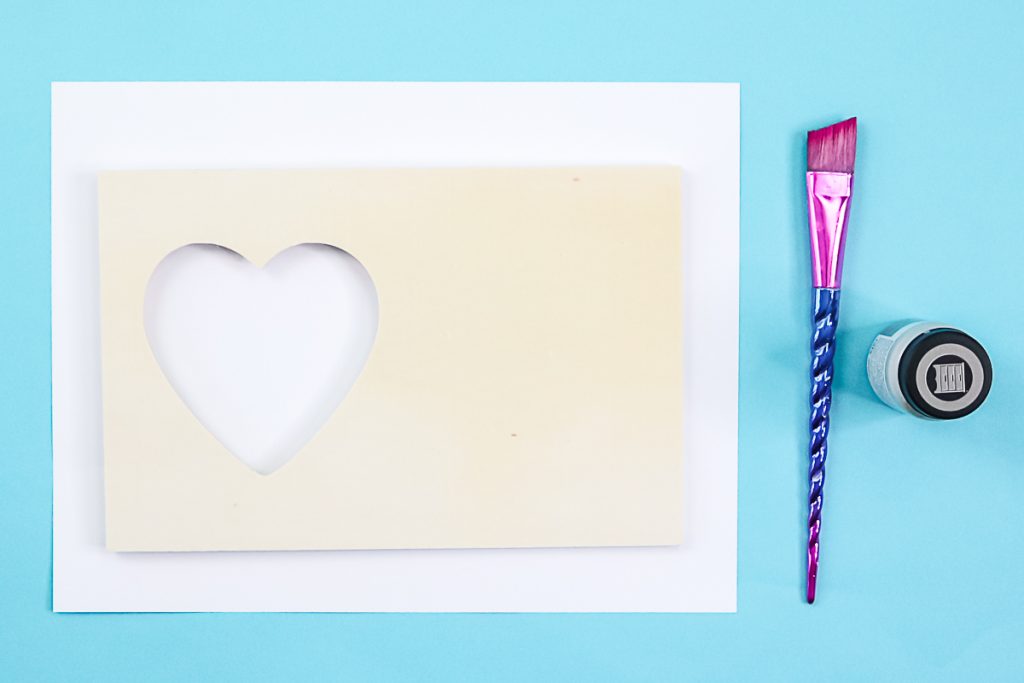
- Wood frame (from the Dollar Store)
- Wood heart (from the Dollar Store)
- Twine (from the Dollar Store)
- Glass vase (from the Dollar store)
- Paint (I like chalk paint)
- Paintbrush
- Clothespin (from the Dollar Store)
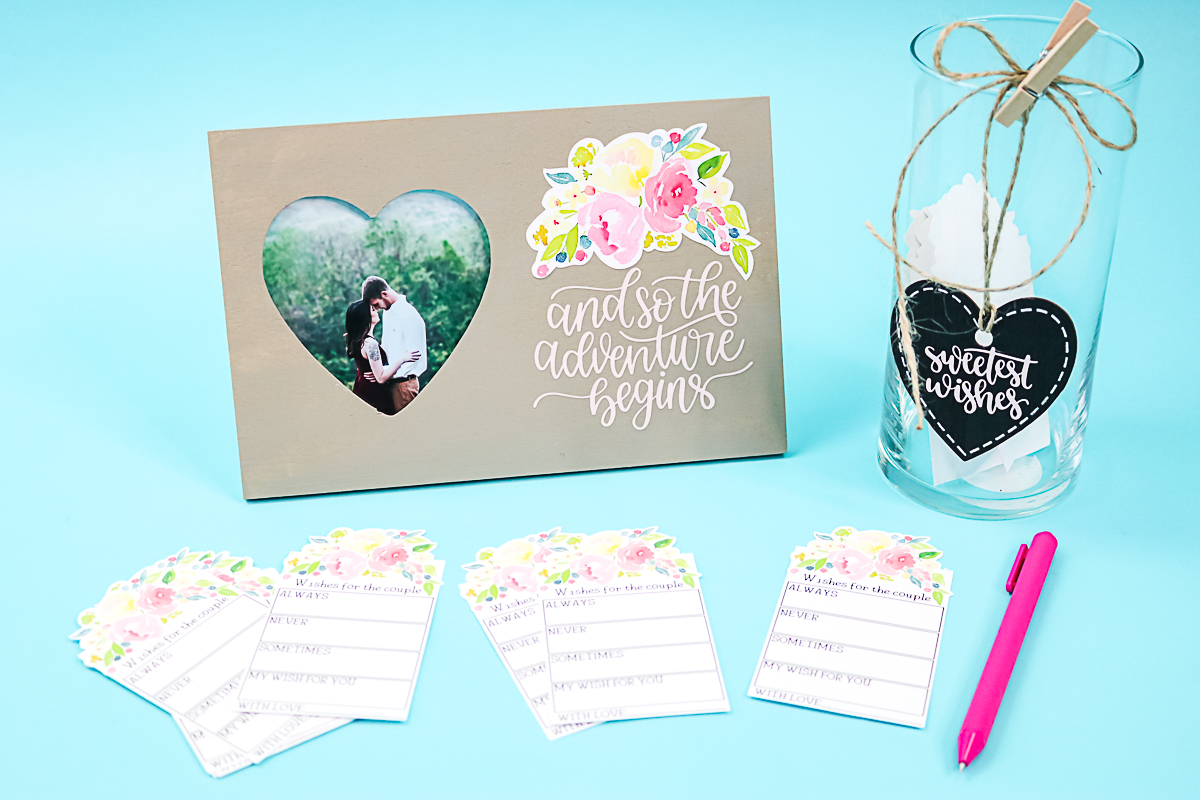
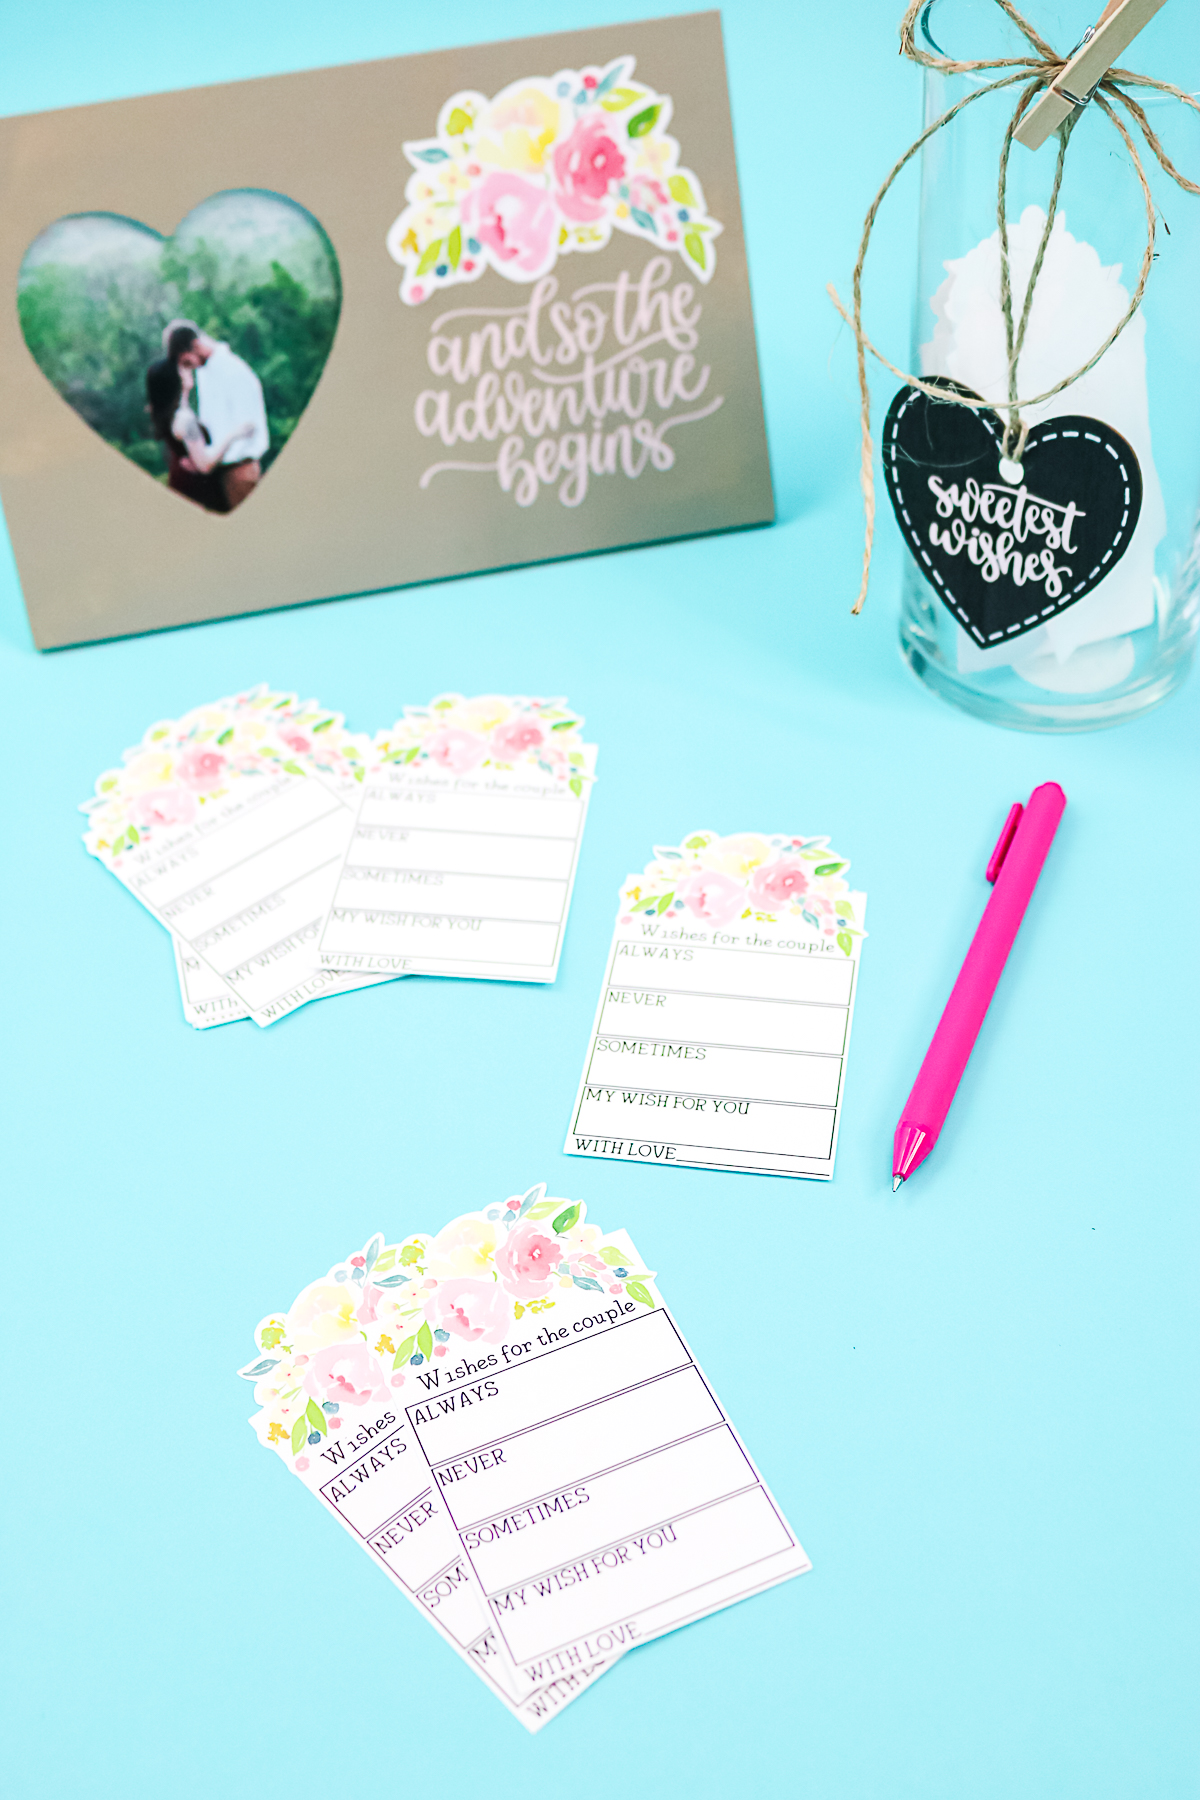
How to Make Wedding Advice Cards
First, let’s discuss how to create wedding advice cards using your Cricut and the Print Then Cut function. To do this, you will need one of the following models: Cricut Maker series, Explore series, Venture, or Joy Xtra. These models are capable of using the Print Then Cut feature.
Supplies Needed
- Cricut designs
- Cricut machine
- White cardstock 8 1/2 x 11 size is best
- Printer
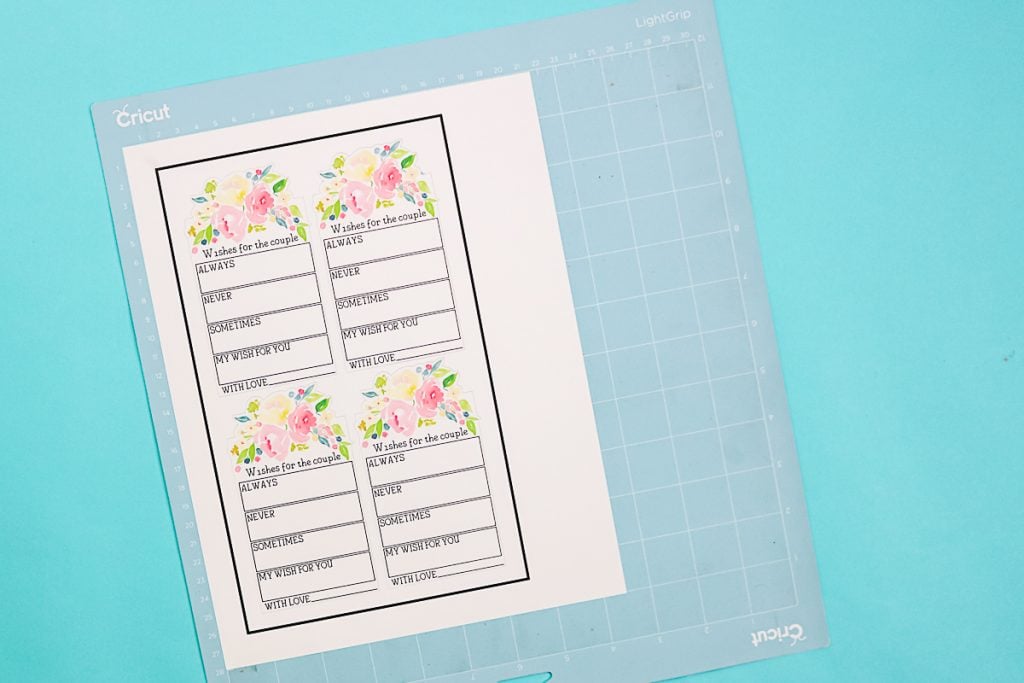
Step 1: Print Then Cut Wedding Advice Cards
Print the wedding advice cards on white cardstock using Cricut Design Space. This will print a box around them, and they will print four to a page. The black outline box is for your Cricut to see the edges and know where to cut.

Step 2: Remove Cards From Cricut Mat
After the Cricut has finished cutting, you will want to turn your mat OVER in order to remove the cards. This will prevent them from curling. Peel the mat back from the material with it upside down.
Step 3: Repeat Steps 1-2
Repeat the above steps for as many cards as you anticipate needing at your wedding.
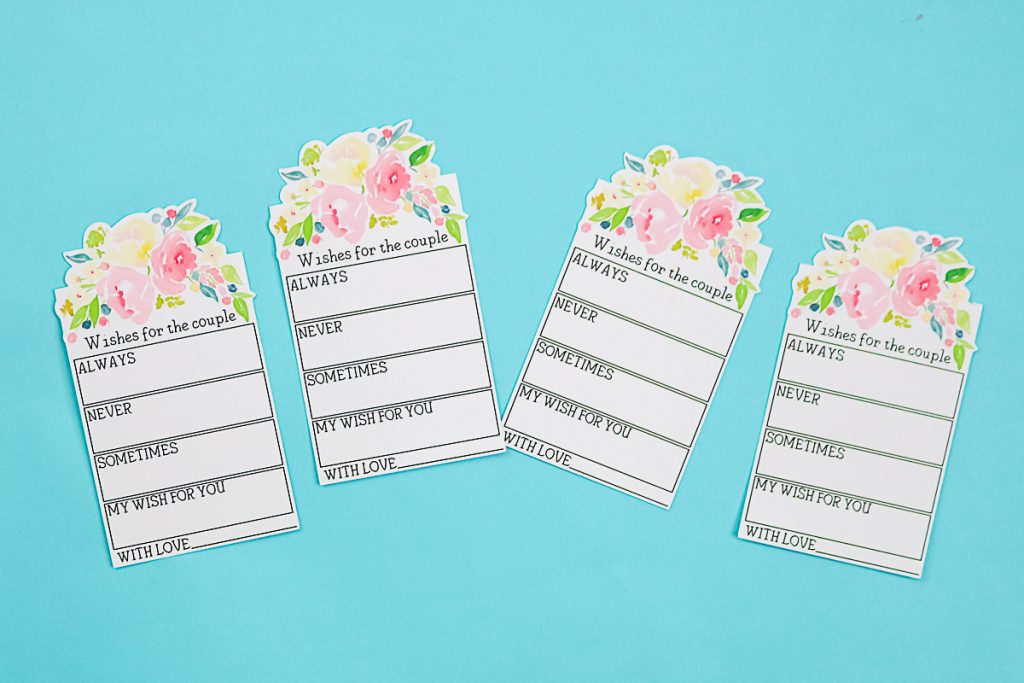
I love the way the Cricut cuts around the top of the floral design on these cards! It really makes this project something special, and those intricate cuts are almost impossible to do by hand. Thank goodness for the print then cut function on my Cricut!
How To Make Sweet Wishes Decorated Vase
Turn a Dollar Store vase into something special in just a few minutes! For this one, I did a decoration that can be removed after the wedding. I like to do this with wedding crafts so that the vase can be reused by the couple after the event is over.
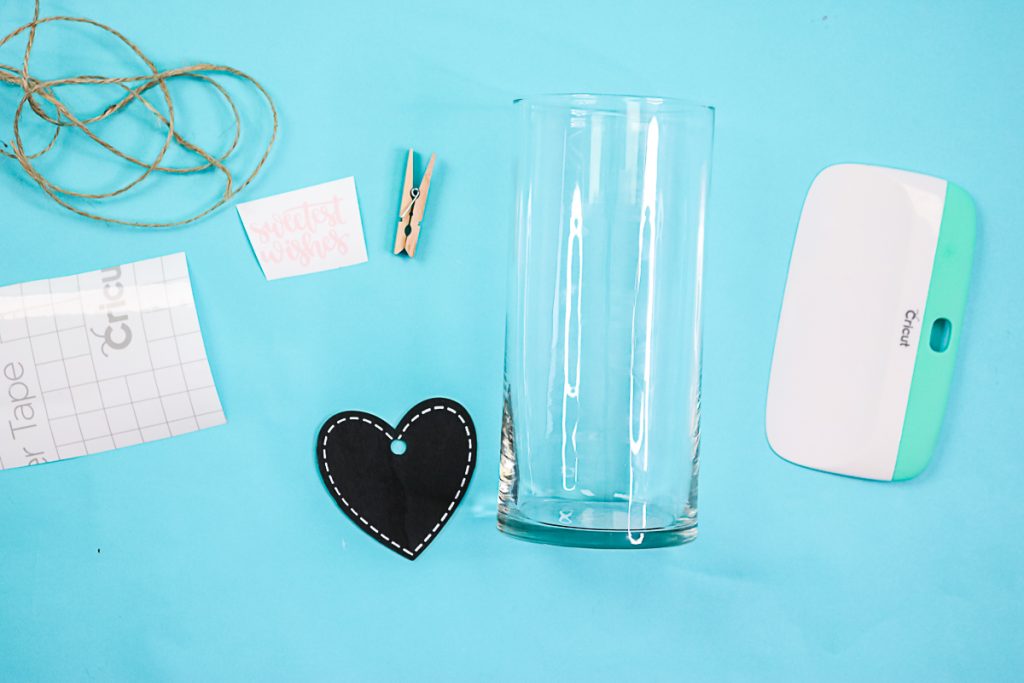
Supplies Needed
- Cricut canvas for designs shown
- Cricut machine
- Cricut vinyl – tulip color
- Transfer tape
- Wood heart
- Twine
- Glass vase
- Clothespin
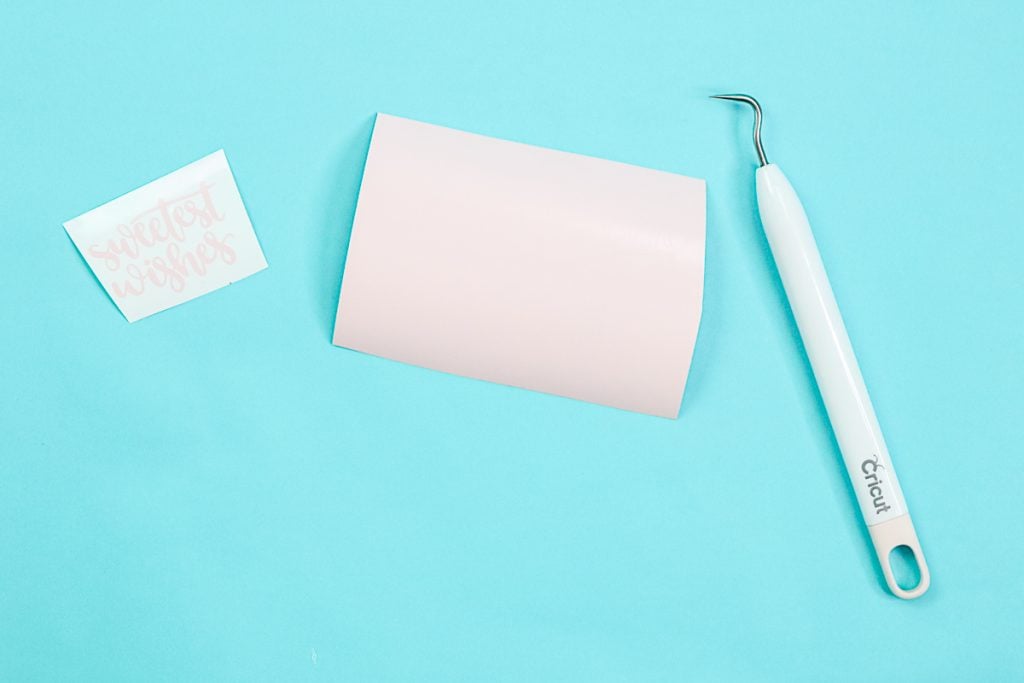
Step 1: Cut And Weed Vinyl
Start by cutting and weeding the vinyl that will be applied to your wood heart. I created words that say “sweetest wishes,” but you can design whatever you like.
Step 2: Gather Supplies
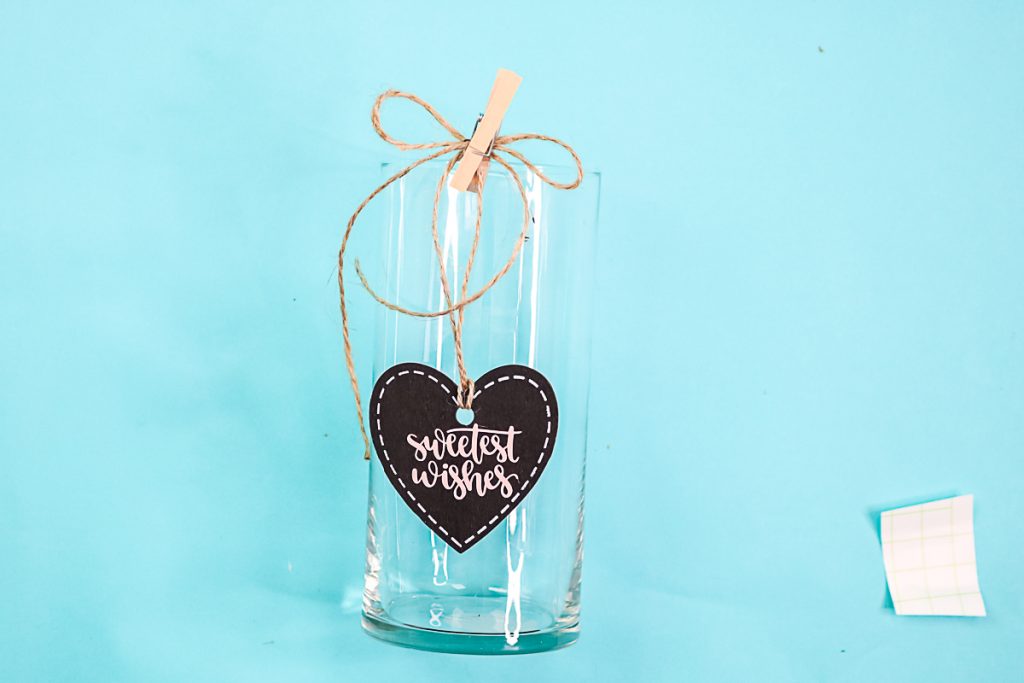
Gather your Dollar Store supplies to complete the vase. Add the vinyl to the chalkboard heart using transfer tape.
Step 3: Add Vinyl Chalkboard Tag To Vase
To create a container for your advice cards, start by applying transfer tape to the vinyl and burnishing it well. Next, peel away the backing. Position the vinyl in the center of the heart and burnish again to ensure it adheres properly. Once that's done, carefully remove the transfer tape. Now, tie the heart to a piece of twine and attach the twine to your vase using a clothespin.
That’s all you need to do to make this easy & memorable vase.
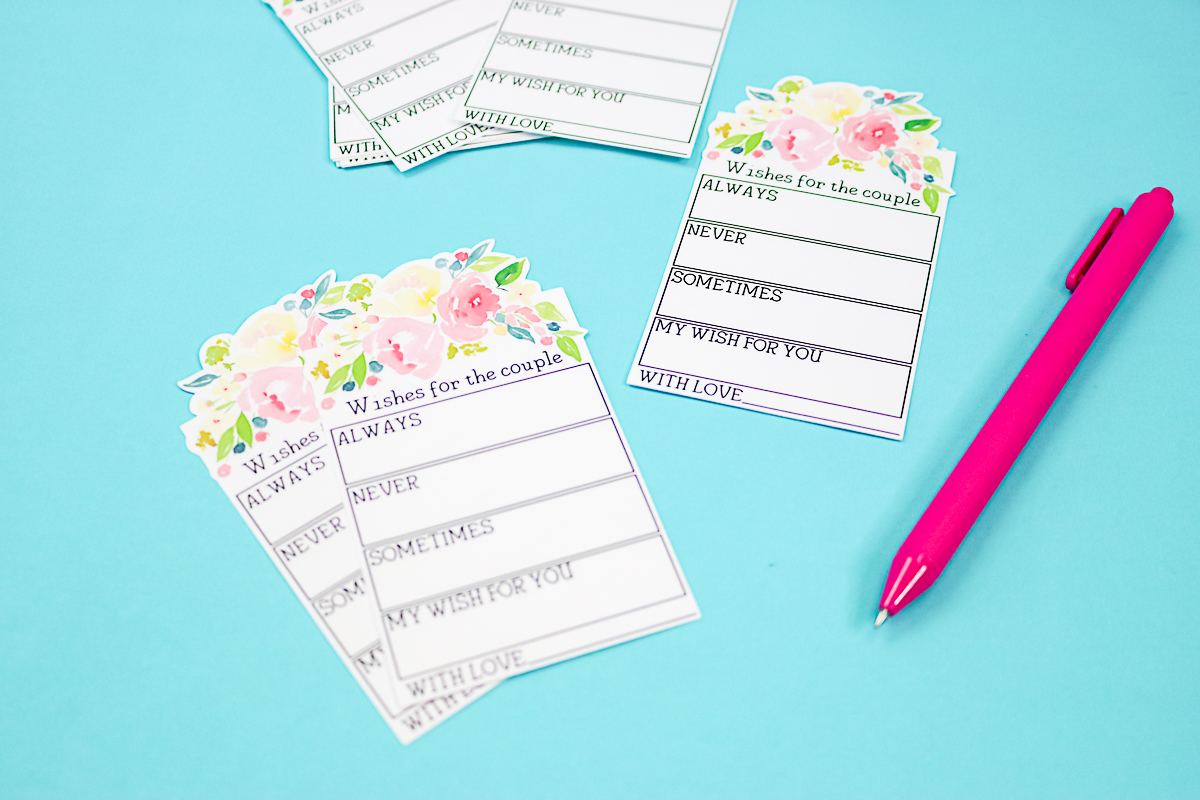
This vase is simple to make, and it makes a great container for guests to drop in their advice cards once completed. I recommend filling out a few advice cards ahead of time and dropping them in the vase. That way, guests know exactly what to do when they arrive at this table.
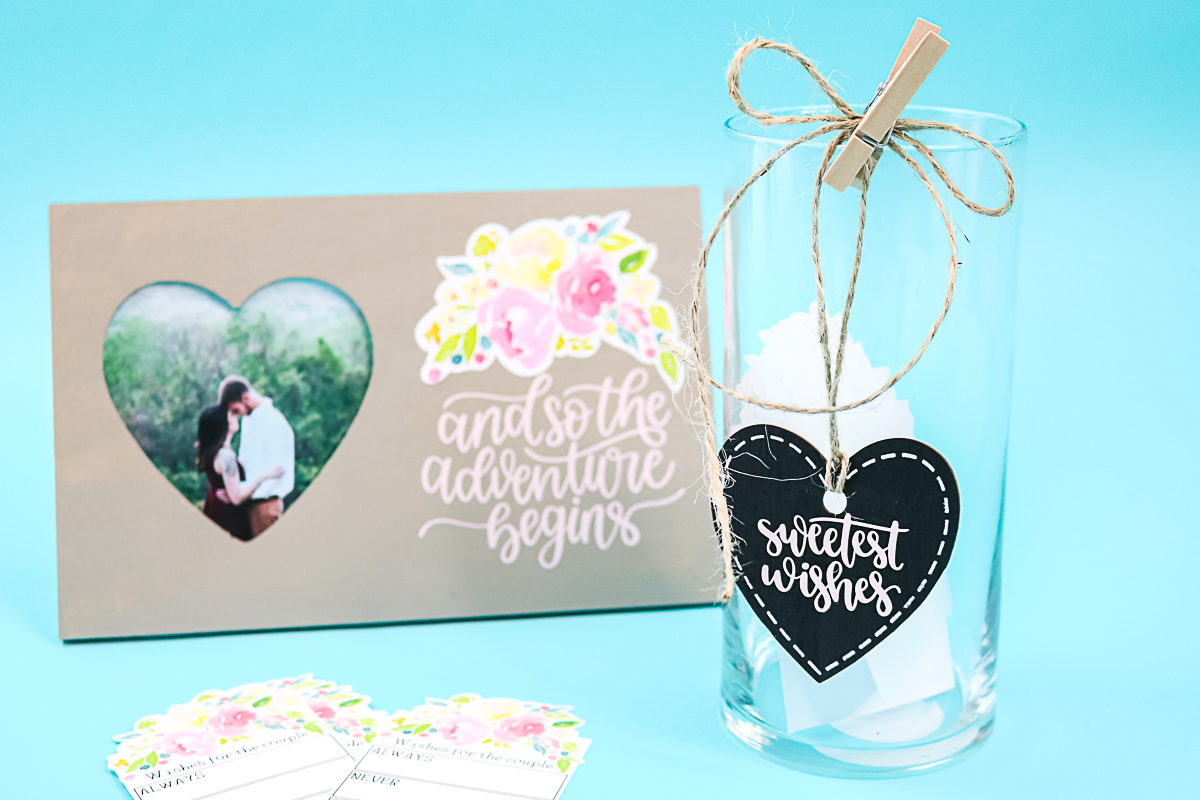
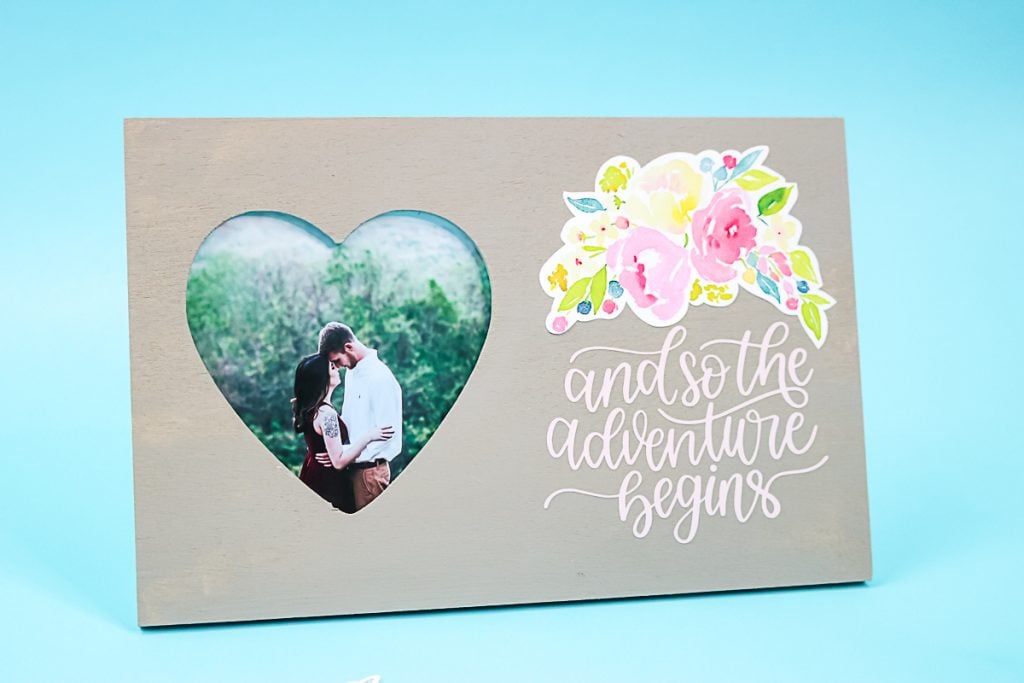
How To Make DIY Wedding Picture Frame with a Cricut
Now we just need to complete the display for the wedding! I love adding pictures of the couple all over the reception. A framed picture is a great way to do that. A simple Dollar Store frame can be transformed into something fabulous in just a few minutes with your Cricut machine!
Supplies Needed
- Cricut designs
- Cricut machine
- Printable vinyl
- Cricut vinyl
- Transfer tape
- Printer
- Wood frame
- Paint, I like chalk paint
- Paintbrush
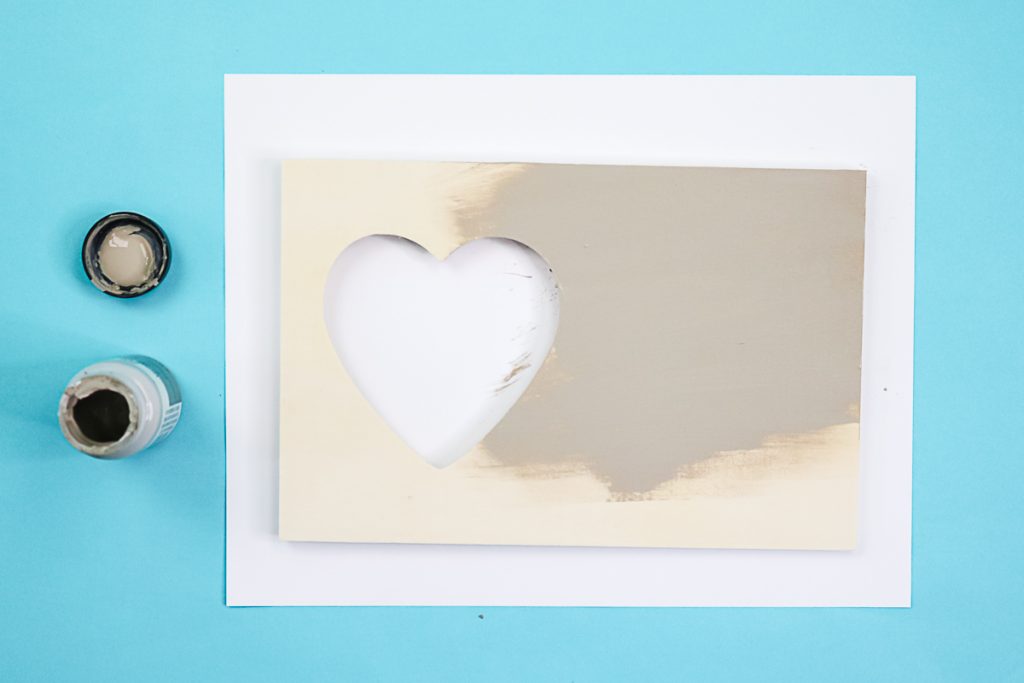
Step 1: Paint Picture Frame
First, you will want to paint the picture frame. I like using chalk paint for this. However, you can use any type of paint you prefer.
Paint the entire frame including the sides and allow it to dry completely. You may need two coats for complete coverage.
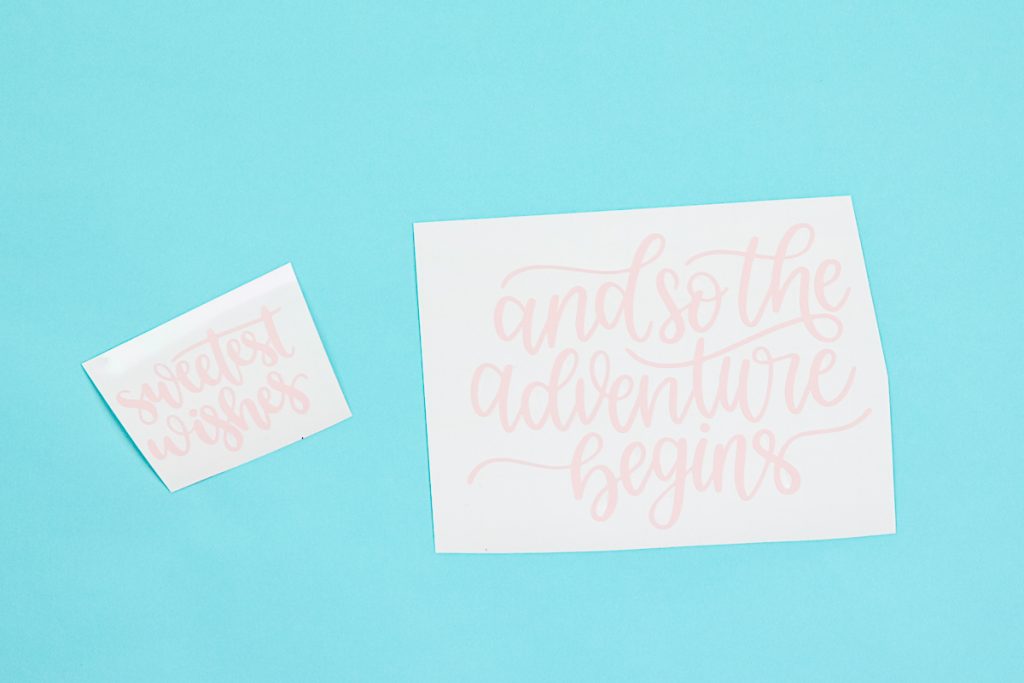
Step 2: Cut And Weed Vinyl
In the meantime, you can cut and weed the vinyl words on your Cricut machine.
Step 3: Print Then Cut Floral Design
You will also want to use the print then cut feature to get the floral decoration above the words. I am using the same watercolor floral design as on the advice cards.
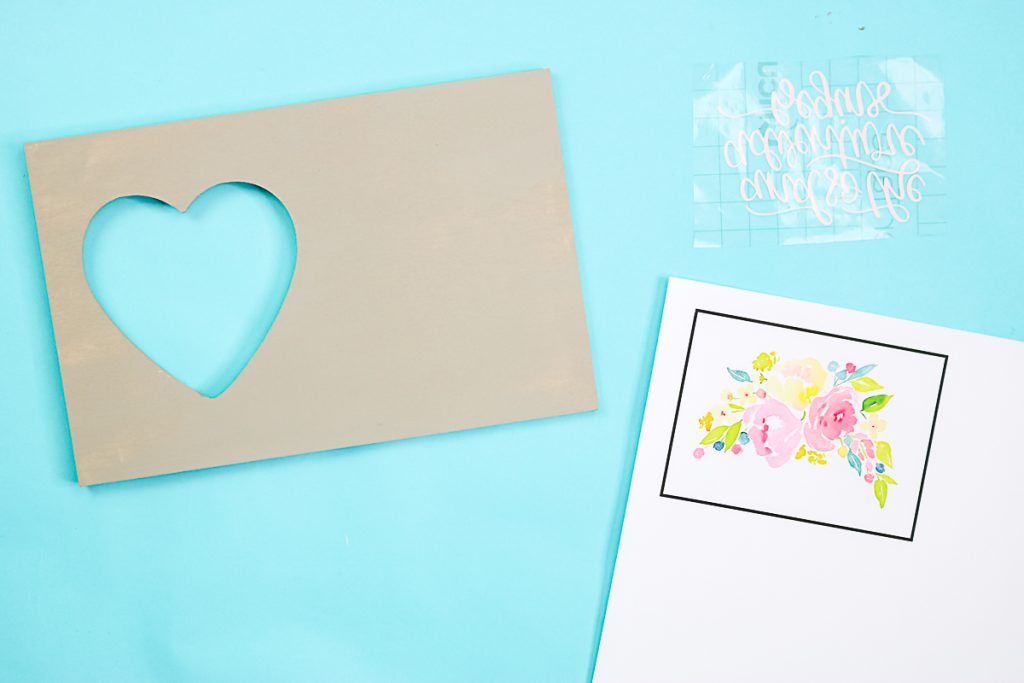
Step 4: Add Vinyl And Floral Design To Frame
Once the paint is dry, use transfer tape to move the vinyl words from the backing paper to your frame. You will want to account for the printed design when considering placement. Peel and stick the printed design into place as well.

Step 5: Burnish Designs Down
Be sure to burnish everything down well and add a picture of the couple, then this one is ready for the big day!
Combine these three DIY wedding crafts to create a charming display where guests can sign in and offer their advice to the newlyweds!
Cricut wedding crafts offer a wonderful opportunity to add a personal touch to your special day. If you have a Cricut machine, be sure to use it for your wedding projects. You’ll be amazed at the beautiful creations you can make!
I love that the frame can be used by the couple for years to come! It serves as both a wedding decoration and a gift all in one, which I truly appreciate. So, head over to the Dollar Store to gather your supplies and start creating your own version of these Cricut wedding ideas!
FAQs About Cricut Wedding Ideas
Here are a few common questions that I often see readers asking about making these Cricut wedding ideas. If you have a question, please check if I’ve already addressed it below. If you don’t see your question listed, please leave it in the comments
What Cricut Machine Can I Use For These Projects?
The Cricut machines that you can use for this project are the Cricut Maker, or Cricut Explore series, Cricut Venture, and Cricut Joy Xtra. This is because these Cricut models can utilize the print then cut feature in Design Space.
Can I Print These Advice Cards On Regular Computer Paper?
Yes, you can. However, for this project, I think that cardstock works the best because it’s thicker and peels off the Cricut mat more easily. Plus, if you plan to keep the advice cards as a wedding memento, the cardstock will hold up better over time.
How Did You Cut Around The Flowers On The Advice Cards Using Your Cricut?
I flatten the image. To do this, pick the image in Design Space and click the Flatten button. That is it!
My Cards Curled Up When I Removed Them From The Cricut Mat? Do You Know How To Fix That?
If your advice cards curled up when you removed them from the Cricut mat, you could set some books on the cards to help flatten them.
However, if you have more paper and time, I would reprint them and then cut them again. The key is to pull your mat away from your project, instead of pulling your project off the mat. To see how this is done, scroll back up to the video and jump to the 3:35 timestamp.
3 More Cricut Wedding Crafts
If you loved these Cricut wedding ideas and want more Cricut wedding crafts, check out the projects below!


Which font did you use for the words ?
It was designs already in Design Space.
Okay thank you – ill look for it ! Just found your site – love all your crafts , I cant wait to make some of them 🙂
Hi Angie,
I had an issue. I designed and made the cards and they look so good. I set it up for printing, everything looked great in Cricut Design. But when I sent it to the printer the only thing that printed was the graphic at the top. The rest of the card was blank. I’m stumped. Any ideas?
Thanks – Yvonne
Try picking everything including the text and click flatten. Maybe everything wasn’t picked?
I tried that and it took away the boxes. But this time it left the text!
Did it cut correctly though? You may not be able to see the box but it may cut right.
I would love to make these wedding wishes cards for my sister’s bridal shower. Is this something you designed yourself or did you get it from somewhere else?
I did update the post with the correct link to the cut file. Thanks so much.
I am trying to locate the wedding wishes cards but the link above takes me to a graduation wishes card. Is there any way I can get the link to the wedding wishes cards? Thx
Did you click the link in the supplies list? I clicked it and it took me right to the canvas in Design Space. I can’t add a link here in the comments but the link at the top of the supplies list should get you there 🙂