
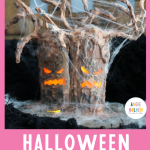
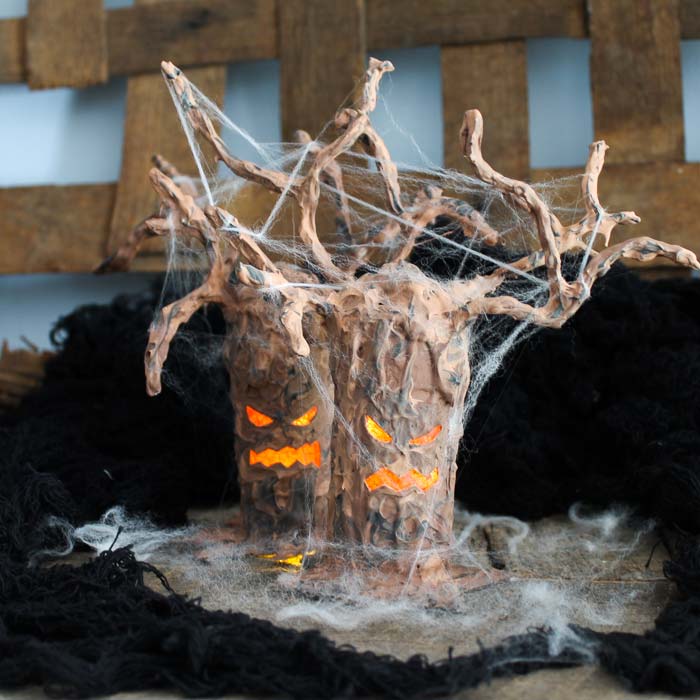
Today's Craft Lightning project is a fun Halloween tree that makes great spooky decor in your home. You will love how easy this project is to make and how great they look once complete. The secret is a new product that I am thrilled to introduce to you! This is a sponsored post by Testors Crafternoons, however, all projects and opinions are my own. Read on to find out more about that and catch up with the Craft Lightning posts from day 1 and day 2 if you missed any of the fun.
Halloween Tree Video Tutorial
Want to see me make a Halloween tree in a video? Just watch below!
Can't watch the video or missed some of the steps? No problem! Just follow along with the instructions below.
How To Make A Halloween Tree
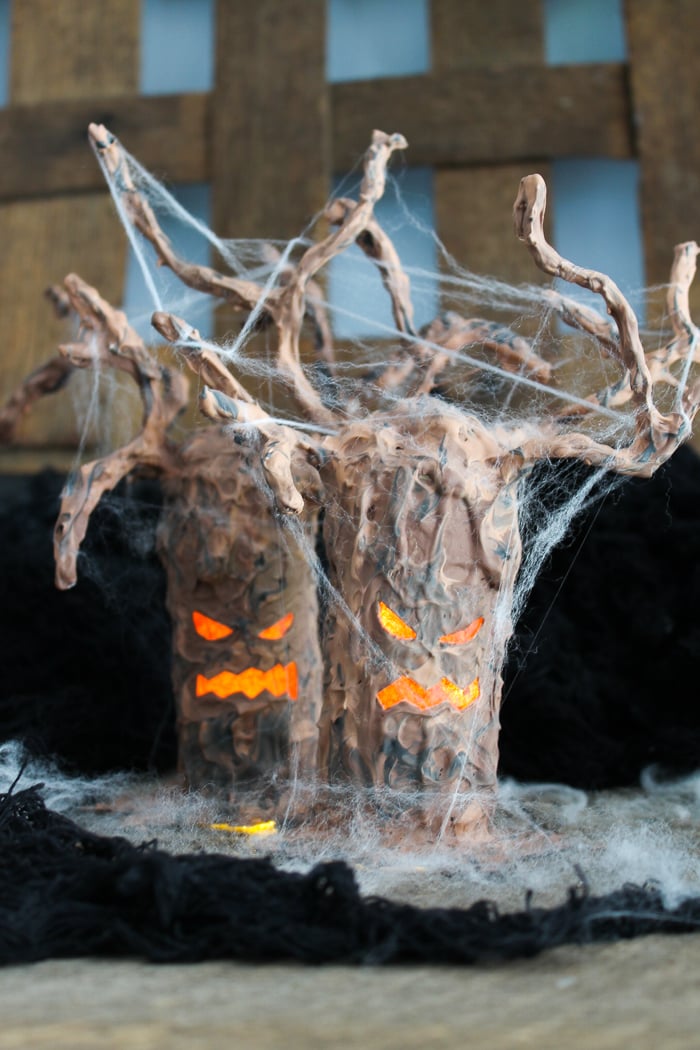
This spooky DIY Halloween tree is the perfect Halloween craft! You just need a few supplies to make this fun and easy project.
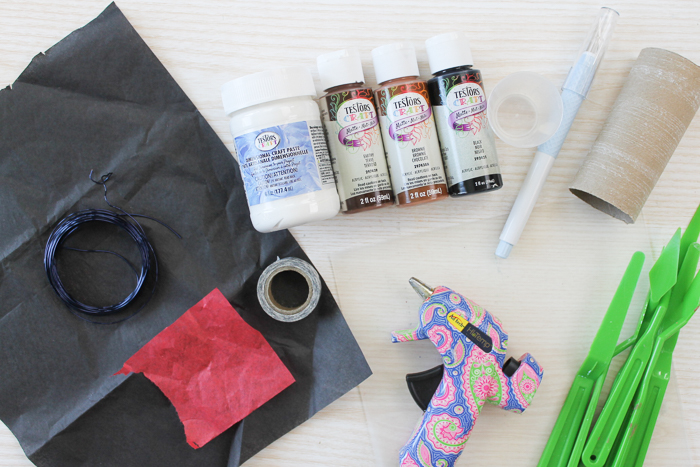
Supplies Needed To Make A Halloween Tree
- Dimensional Craft Paste (the secret ingredient!)
- Testors Craft Paint (I used two shades of brown and black.)
- Toilet paper roll
- Small cups
- Craft knife
- Pallet knives or small plastic knives
- Hot glue gun and glue sticks
- Non-stick mat
- Tape
- Small piece of red tissue paper
- Black tissue paper
- 20-gauge wire
- Pliers
- Wire cutters
- Small LED light or battery-operated candle
- Fake spider webbing
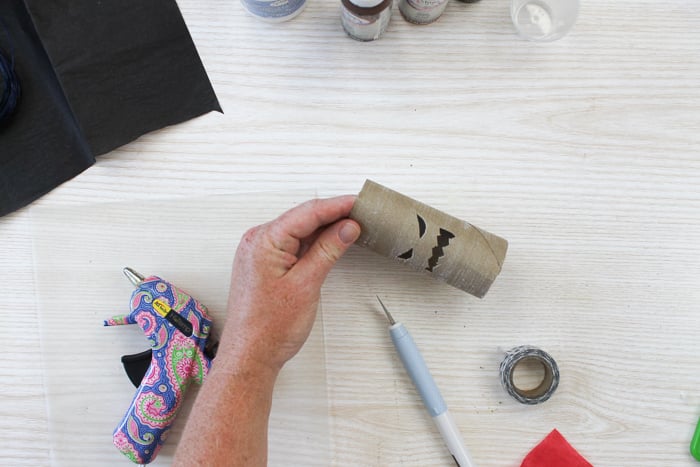
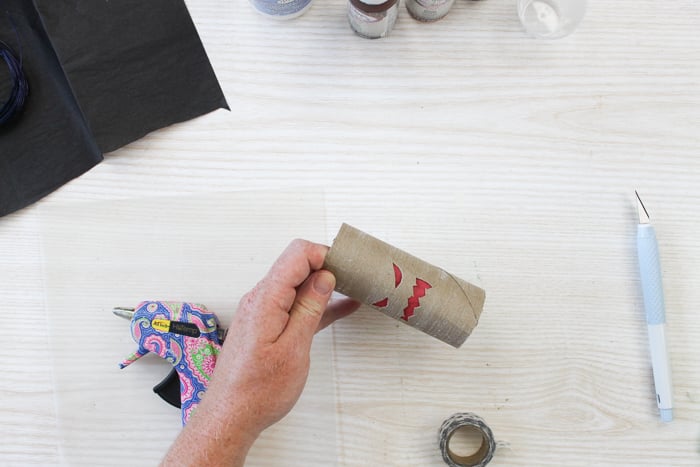
Step 1: Cut Out Face On Toilet Paper Roll
Use a craft knife to cut a spooky face from the toilet paper roll as shown below. Always use caution when using a craft knife to avoid cutting your fingers.
Step 2: Place Red Tissue Paper Inside Of Toilet Paper Roll
Place a small piece of red tissue paper over the face inside the toilet paper roll. Use tape to secure in place.
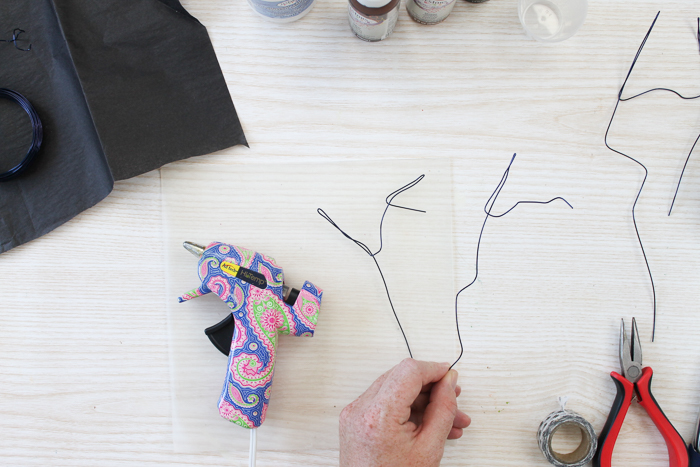
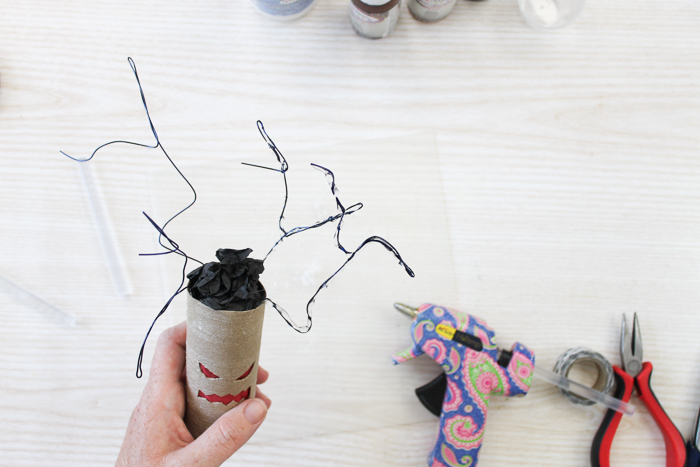
Step 3: Cut Wire & Form Into Branches
Then cut lengths of wire and form them into branch-like shapes. A pair of pliers is useful here, but not required.
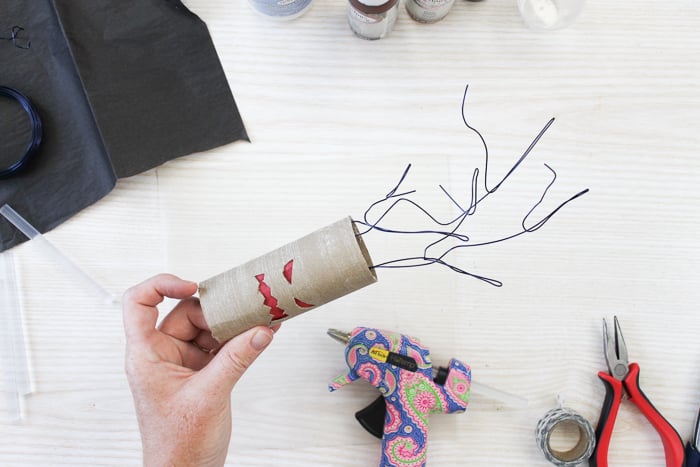
Step 4: Glue Wire Inside Of Toilet Paper Tube
Use hot glue to secure those wires inside your toilet paper roll. I used four branches per tree. You also want to make sure that your wires or glue do not get onto your face, as you want the light to be able to shine through.
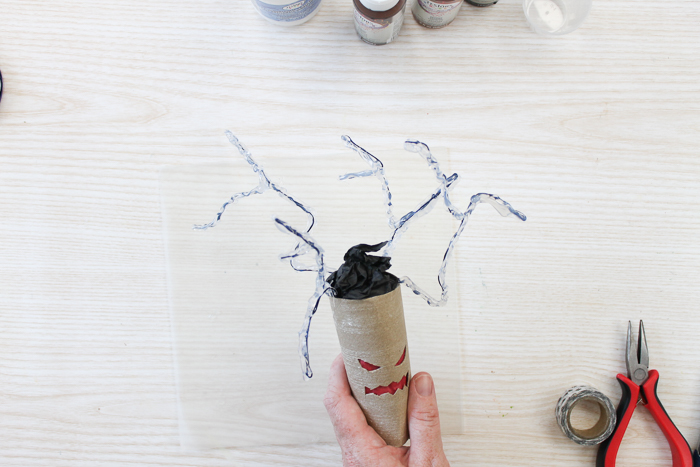
Step 5: Cover Hole At The Top With Black Tissue Paper
Wad up some black tissue paper and put it in the top to cover the hole.
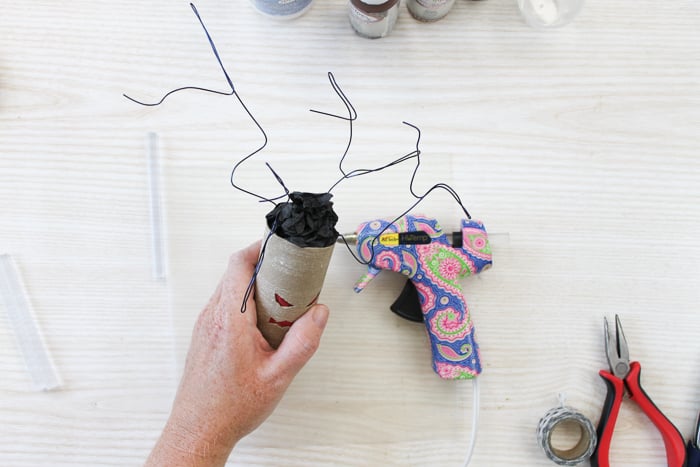
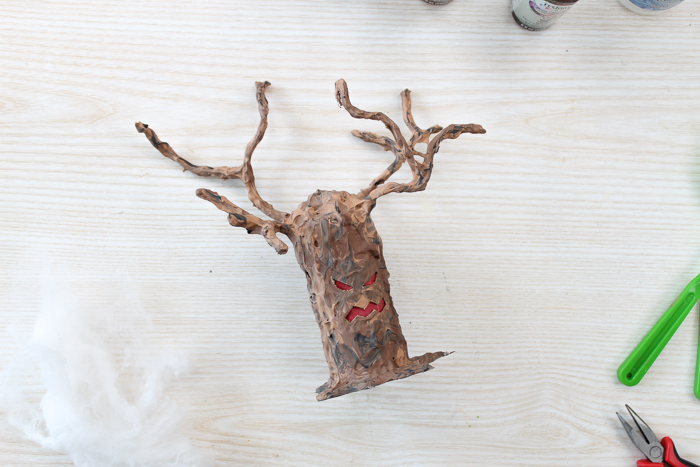
Step 6: Add Hot Glue To Branches
Now the branches are a little thin for a tree. Start adding hot glue to them to add some bulk. I went over the branches three times with hot glue, building it up each time. Keep turning your project to avoid drips and use caution not to burn yourself.
When complete, you will have something that looks like the image below.
Step 7: Add Large Amounts Of Glue To The Tree
Then, start adding a large amount of glue to the top of your tree to cover the tissue paper.
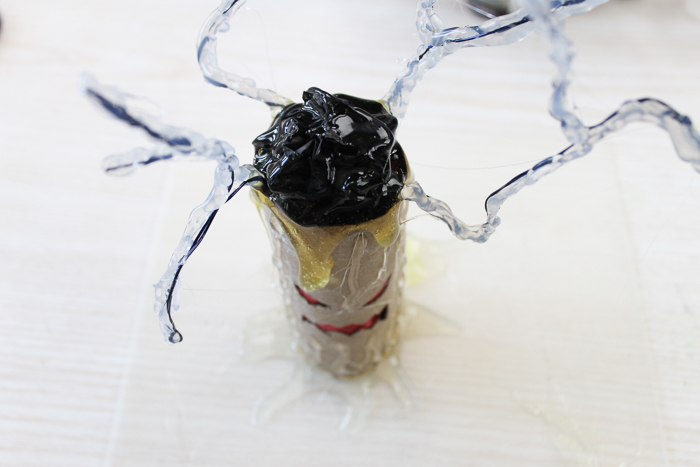
It may drip down, but that is okay! We are also adding some lines on the toilet paper roll with hot glue for additional texture. Again, you do not want to cover the face with anything.
Step 8: Make Legs For The Tree
Your tree will also need something to stand on so it is not top-heavy. Place the tree on the non-stick mat and make “legs” with hot glue. Then just allow to cool completely and lift up.

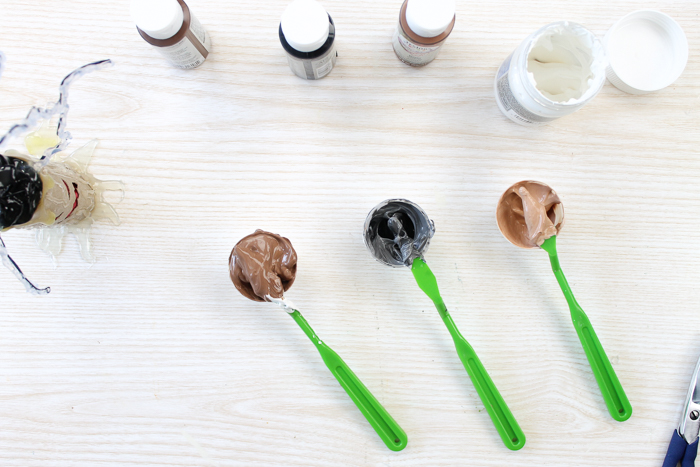
Step 9: Mix Paint With Dimensional Craft Paste
Now for the magic! Testors Dimensional Craft Paste is perfect for adding dimension to projects like these. When the paste is wet, it can be mixed 1:1 with an acrylic paint to give that paint a special thickening effect. The paste is lightweight, flexible, non-cracking, and non-peeling. It is almost the texture of Cool Whip when it comes out of the jar. Mix it in small cups with as much or as little craft paint as you would like.
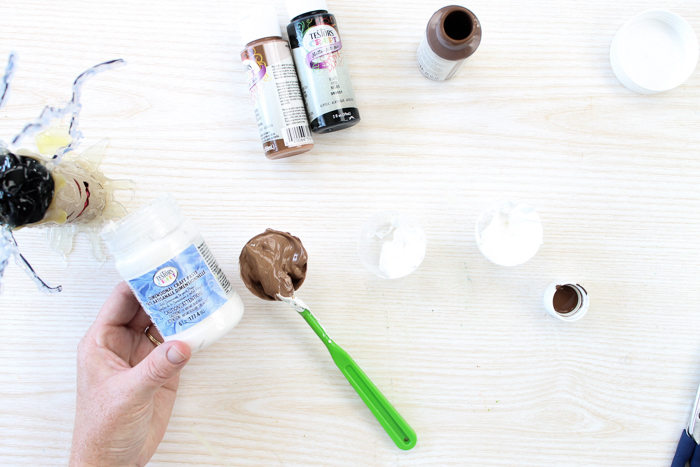
I went with a dark brown, light brown, and dark grey.
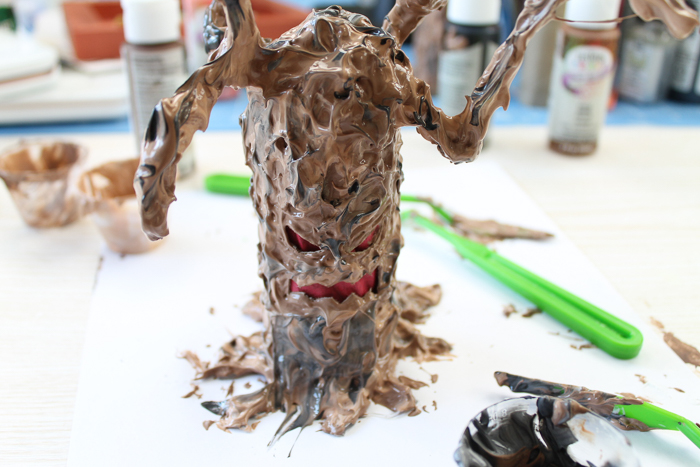
Step 10: Add Dimensional Craft Paste Mixture To Tree
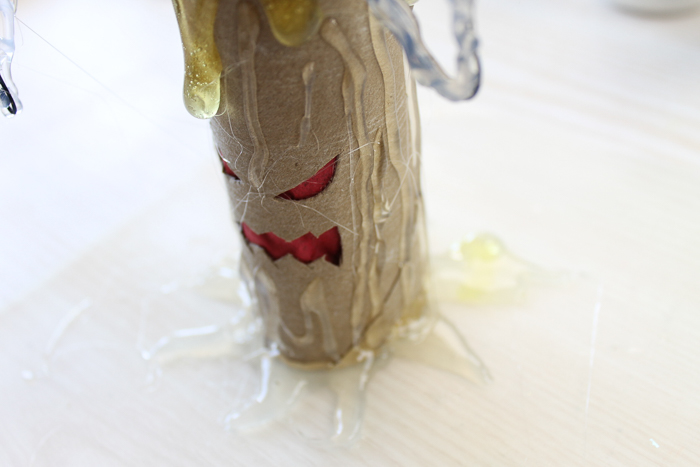
Then literally start slapping it on with a craft knife. You want TEXTURE! So it is okay to be messy with this step. If you are hosting a Testors Crafternoon, be sure to have the work surface well protected and small boxes for your attendees to add their projects to after this step. The product does need to dry for 24 hours, so you want them to be able to take home their Halloween tree even though it is still wet.
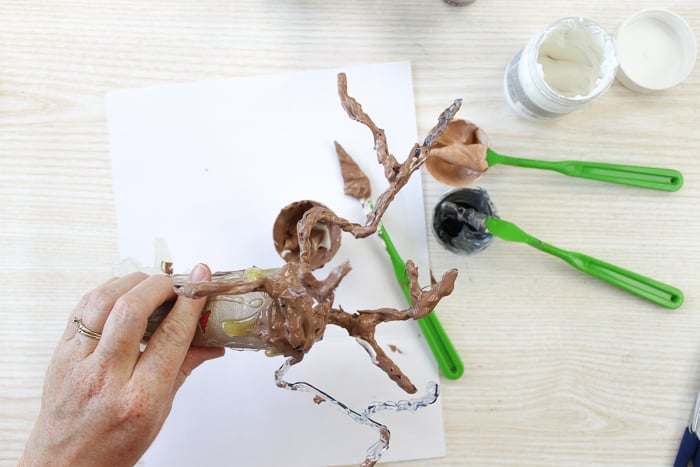
Apply the dark brown first and cover all exposed areas, but use caution not to cover the face.
Then just add highlights of the light brown and grey. Pull up with your pallet knife as you apply to create even more texture.
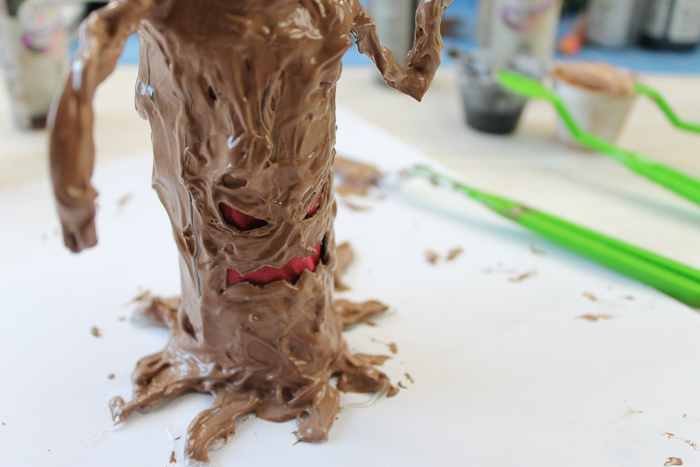
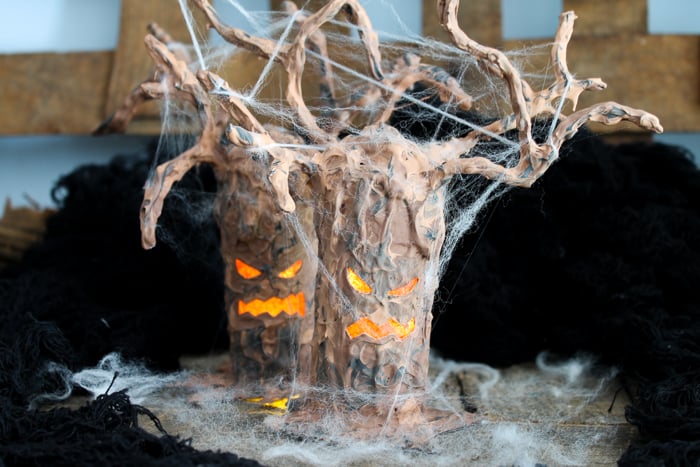
Allow to dry for 24 hours, and you are left with something similar to the image below.
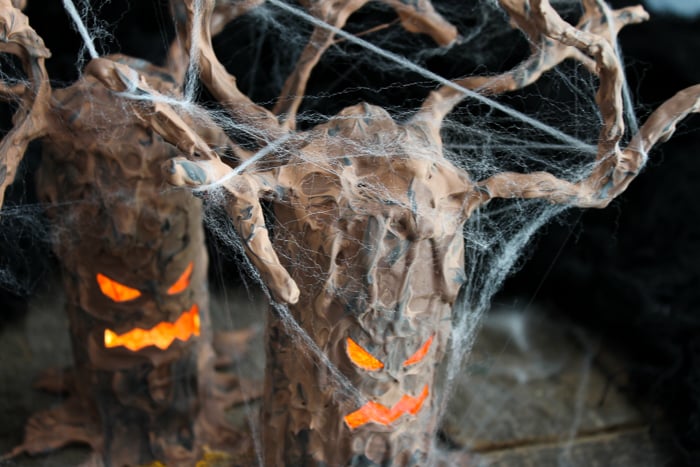
Step 11: Add Fake Spiders' Webs & Lights
You can add on some fake spider webs if you want to add to the spooky. Then add in your lights, and you are ready to display your Halloween tree anywhere in your home.
What Are Testors Crafternoons?
Getting together with family and friends to craft can be a great time as well as a stress reliever. Testors Crafternoons aspire to do just that! Pull together your crew for a fun afternoon of crafting fun. Want to make a Halloween-themed crafting date? Be sure to check out our Halloween lanterns as well as our pumpkin magnets that can also be made with Testors products. Then order your supplies and let the crafting fun begin.
You will want to order plenty of the Testors Dimensional Craft Paste because just look at that texture! You definitely can't get that any other way!
So, be sure to schedule a date to make a Halloween tree as well as some other crafts with your friends this year!
FAQs About Halloween Tree
Here are a couple of questions that I see readers ask about this Halloween tree. If you have a question, please check to see if I’ve already answered it below. Don’t see your question? Leave it for me in the comments!
Can I Use A Paper Towel Roll For This Halloween Tree?
Yes, you can! Actually, if you use a paper towel roll for this project, you can make your trees any size that you like, since you have more height to work with (compared to a toilet paper roll).
Did You Pre-draw The Face On Your Halloween Tree?
No, I just cut it out freehand. However, you can pre-draw your face, then cut it out if you prefer.
Can This Paste Be Sanded And Painted Afterwards?
I have not tried sanding it…sorry!
How Much Paste Does It Take To Make A Halloween Tree?
To make one tree, it takes about half a jar of Dimensional Craft Paste.
What Type Of Light Did You Use?
I used a small flashing LED light, but you could use a battery-operated tea light instead.
5 More Halloween Crafts
Did you love this Halloween tree, and are looking for more Halloween crafts? Then check out the projects below!
- How to Use Glow in the Dark Paint to Make Halloween Projects
- Halloween Jack O’ Lantern Ping Pong Ball Lights
- Make Your Own Halloween Lanterns
- Halloween Terrarium
- DIY Haunted House That Lights Up


The spooky trees turned out GREAT – would LOVE to have you come share at Reader Tip Tuesday: http://www.jodiefitz.com/2018/10/02/reader-tip-tuesday-weeks-craft-recipe-party-14-2-2-2-2-2-2-2-2-2-2-2-2-2-2-2-2-2-2-2-2-2-2-2-2-2-2-2-2-2-2-2-2-2-2
-2-2-2-2-2-2-2/
We’re open and growing all week long.
This is so cool! I would’ve never guessed these creepy trees began as cardboard rolls! Thanks for sharing at Merry Monday. I’ll be including these in my DIY Halloween Decorations Features at our next party. Have a great weekend!