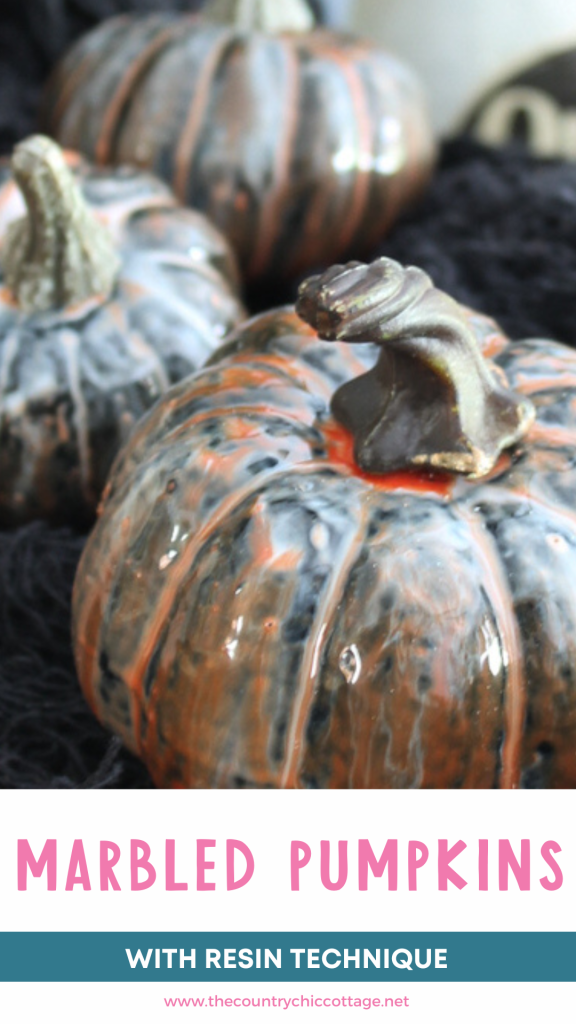
If you love pumpkins, this craft is for you! Using a marbling technique, you can turn cheap foam pumpkins into beautiful fall decorations for your home. These marbling pumpkins use Halloween-themed colors, but you can use any colors you like for this project!
How To Make Marbled Pumpkins With Resin
This time of year, I love making marbled pumpkins. I’ve used this marbling technique on so many different surfaces and in so many different colors! You can marble almost anything…candles, wood, jewelry, and even foam!
I thought I would try the same marbling technique with resin this time! Let me tell you, that glossy opaque finish makes for some gorgeous pumpkins!
I have plenty of pumpkin crafts on this site, so check those out, too. There is everything from burlap and buttons to scrap wood, sweater pumpkins, and twine! Be sure to check out my full gallery of pumpkin-themed crafts here!
Supplies Needed For Marbling Pumpkins
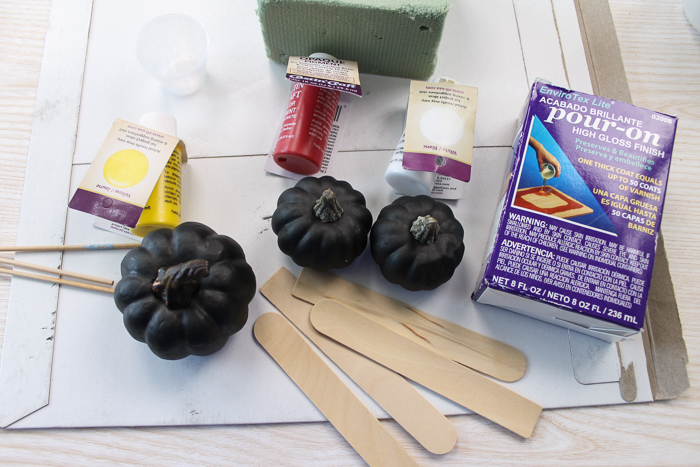
- EnviroTex Lite Pour-On High Gloss Finish
- Plastic Pumpkins (buy black ones or paint existing ones)
- Castin’Craft Opaque Pigments (in the colors of your choice)
- Skewer and Toothpicks
- Foam Block
- Stir Sticks
- Measuring Cups
- Mixing Cups
- Cardboard
- Protective gloves
- Craft knife
Step 1: Prepare Pumpkins
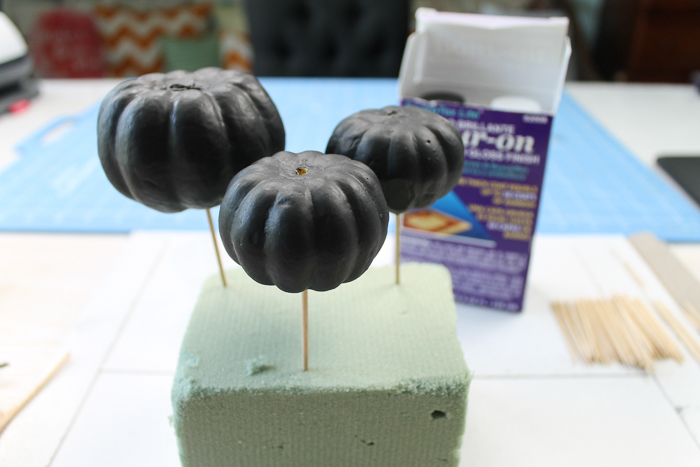
I made my marbled pumpkins from black foam pumpkins, which I painted black. You can either find some in the color of your choice or paint some. Just be sure to allow them to dry completely before continuing.
When the pumpkins are ready to use, add wood dowels or skewers to the bottom of each pumpkin, as shown below. Add these dowels to a foam block. This will keep everything still while you are marbling.
Remove the stems from the tops of your pumpkins, and protect your work surface.
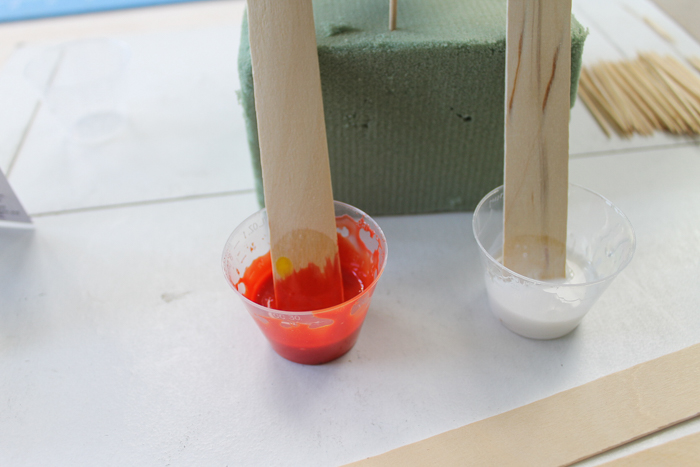
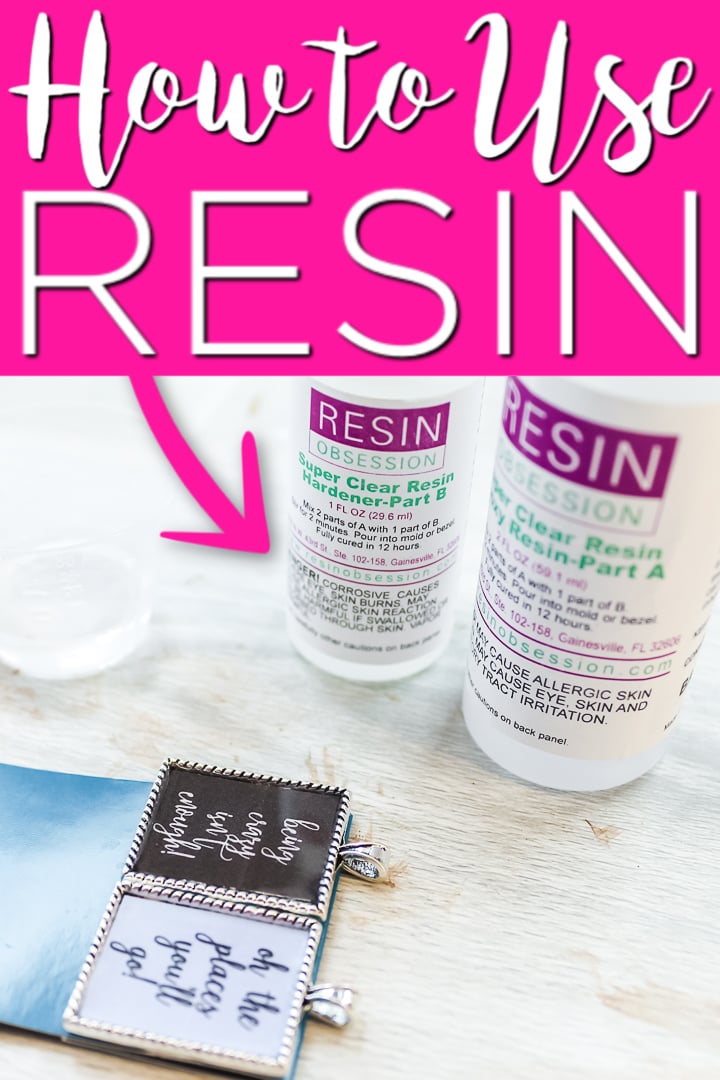
Step 2: Mix Resin
Mix your resin according to the package instructions. Wear protective gloves and follow all instructions on your packaging. Then, tint your resin with a little bit of orange and white, as shown below.
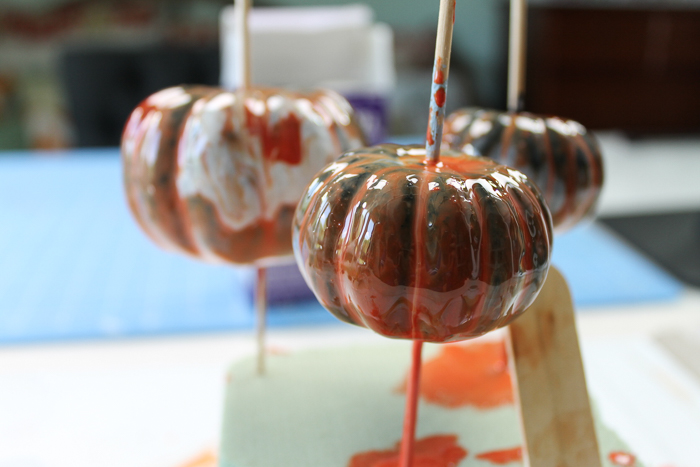
Step 3: Poor Resin Over Pumpkin
You will also want to protect the hole in the top of your pumpkin for the stem. I added another dowel or skewer to the top, as shown below. Then, start dripping on the mixed resin.
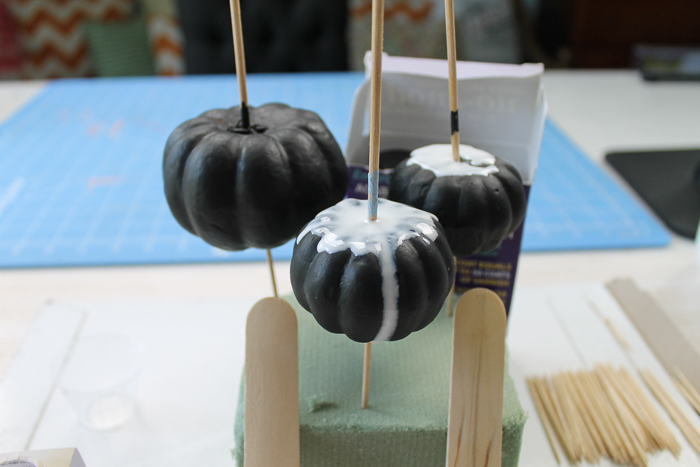
Add as many colors as you would like.
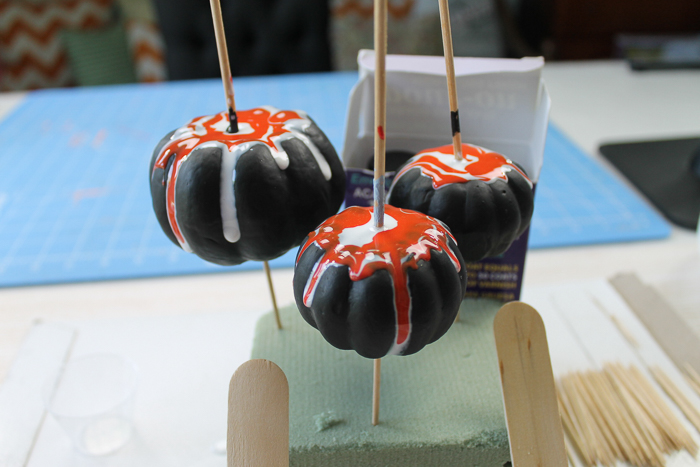
You can use the two skewers to pick up the pumpkin and tilt it for good coverage. If needed, you can use a stir stick to push the resin around.
Once you are happy with your marbled pumpkins, allow them to cure overnight, then remove the two skewers. You may need a craft knife to cut away the cured resin to remove it.
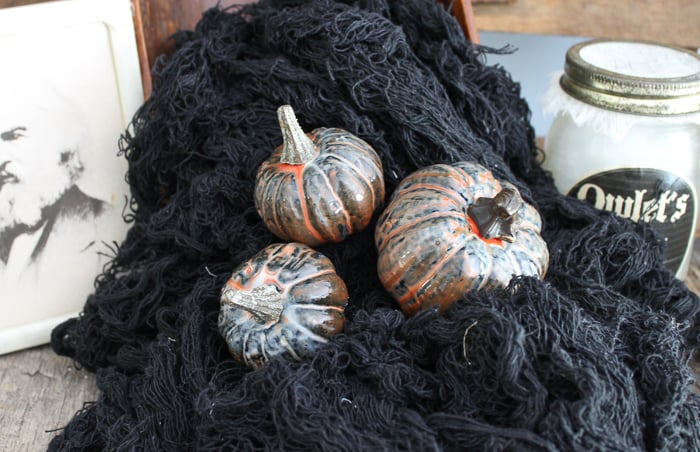
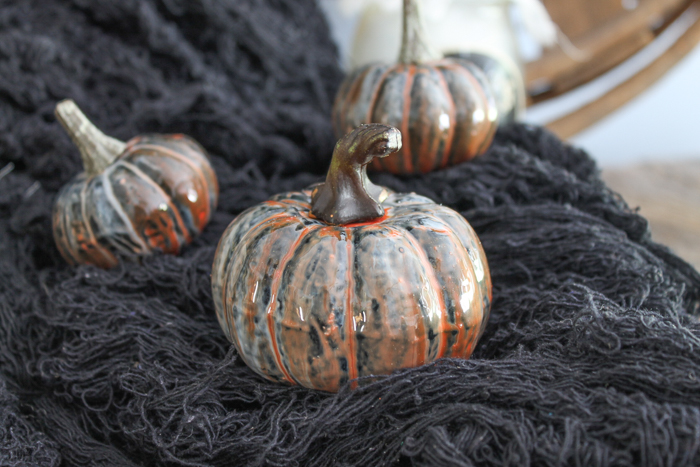
Step 4: Add Stem
Add your stem back to your pumpkins, and they are ready for a fun and spooky display!
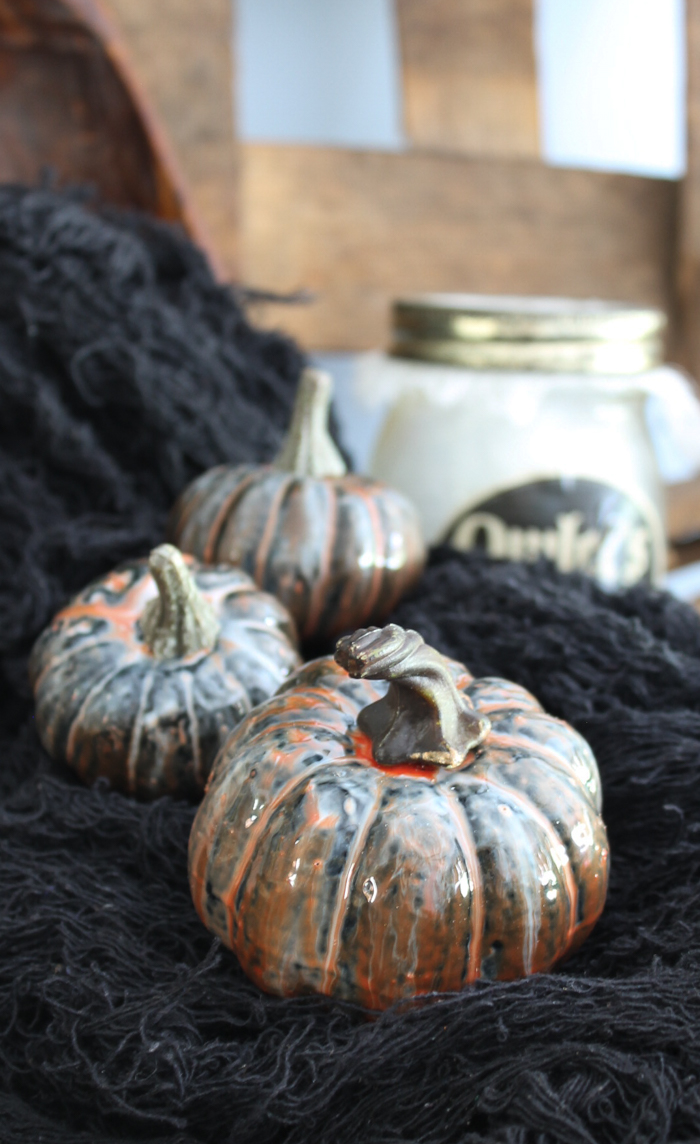
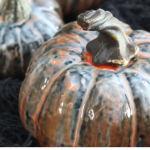
That glossy finish is just perfect for me! These would look great on my Halloween mantle, and I love that super spooky look.
Imagine using this same technique to make marbled pumpkins in other colors, too! I can see them in cheerful and bright colors for a fun fall display.
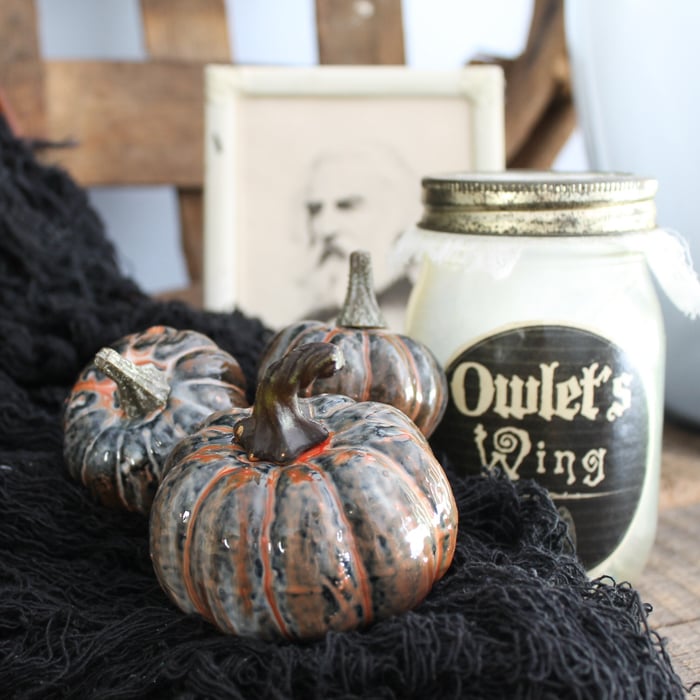
For me, I added my marbled pumpkins to my Macbeth Halloween decor for some extra fright! I can't wait for Halloween to get here already! It is one of my favorite holidays!
Tips and Tricks For Marbling Pumpkins
Now that you’ve seen these marbling pumpkins, are you ready to make your own? Here are a few tips and tricks to ensure your project goes smoothly!
- Play With Pumpkin Sizes—For this project, I chose to use small pumpkins, but you can use any size pumpkin that you like! The only thing to remember is that if you make a large pumpkin, you will need more resin.
- Cover Your Work Surface—Since we are using resin, you should cover your work surface with paper, a mat, or maybe a Dollar Tree tablecloth that you can throw away later!
- Don't Skip The Bamboo Skewers Or Foam Block—These items might not seem like a big deal, but they help tremendously when doing this project. They provide stability for your pumpkins and allow you to cover the entire pumpkin surface with ease. So, don't skip them!
- Have Fun Picking ”Marbling Colors” – When marbling, have fun picking your colors! I chose Halloween colors, but you could choose traditional fall colors or bright, bold colors. You could also choose colors within the same color family to make your marbling a bit easier.
- Follow the Instructions On Your Resin—Resin can be tricky to use! I highly recommend that you take your time when mixing your resin and read all the instructions for the product you are using. Also, if you are brand new to resin or are having trouble using it, check out the course below!
Struggling with resin and need help?
I know that a ton of you are intimidated by resin. Don't be! You just need to know the basics and gain some experience with the medium. I have a course that will help you master epoxy resin and give you the confidence you need to tackle this project and so much more.
With unique insights drawn from more than a decade of creating and selling resin jewelry worldwide, this course is from an Amazon best-selling author on the topic. This class goes beyond making a few projects. You get thirty video lessons to give you clear directions on how to make resin jewelry you can confidently share and sell. Want to see more?
5 More Pumpkin Projects
Do you love our marbling pumpkins and are looking for more pumpkin projects? Then check out the ideas below!
- How to Paint Pumpkins and Add Texture
- Vinyl on Felt Pumpkin
- How to Make Sweater Pumpkins — NO SEWING!!
- 3D Pumpkin Lantern for Halloween – With Only Paper!
- DIY Wooden Pallet Pumpkins in Minutes (No Tools Needed)!