
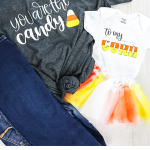
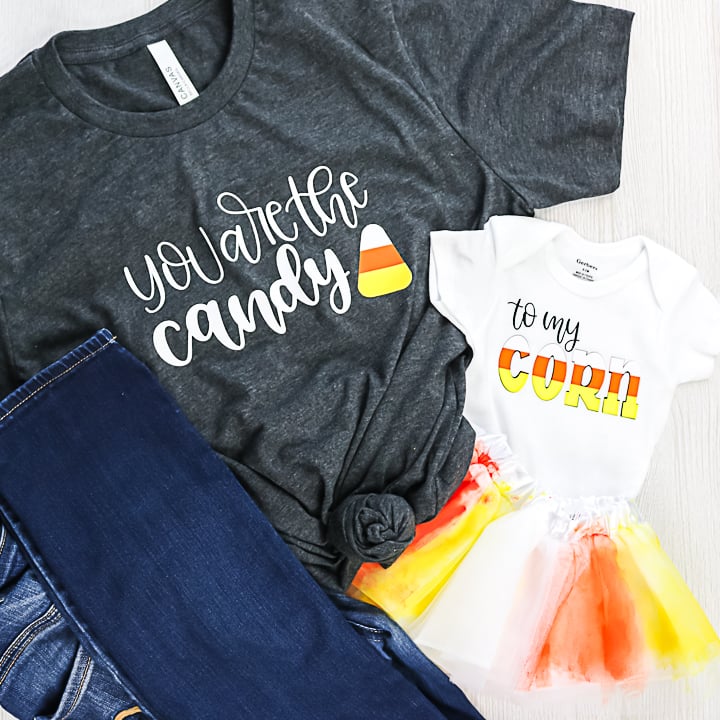
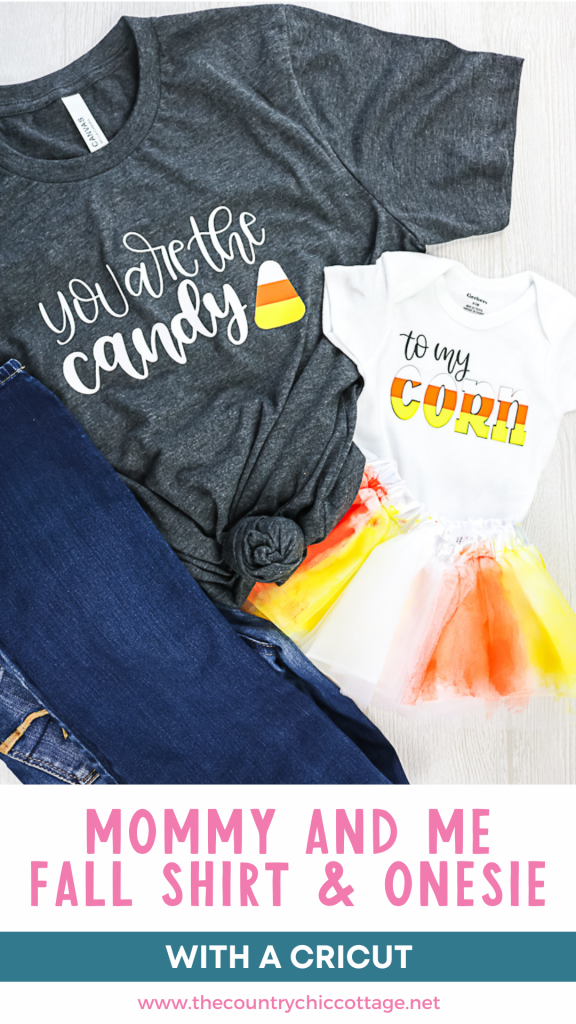
Mommy and me crafts are some of the best — and they’re even more fun during fall and Halloween! Dressing up together makes the season extra special, and this cute design is perfect for you and your little one. It works just as well for a daddy-and-me look, too! Want to take it up a notch? Add some glow-in-the-dark HTV for an extra spooky touch your kids will love.
Mommy And Me Crafts Fall Shirt Video Tutorial
Want to watch a video on just how to make these shirts with your Cricut? Just click play below!
Can't watch the video or missed some of the steps? I am also breaking down how to make these shirts below.
How To Make Mommy And Me Fall Shirts
Are you ready to add some cuteness to a shirt and a onesie for mom and baby? It is so easy to make your own custom shirts with your Cricut machine. Just think of your own matching design for mom and her little one, or use our candy corn design to get started. Either way, you are sure to love the way this one turns out!
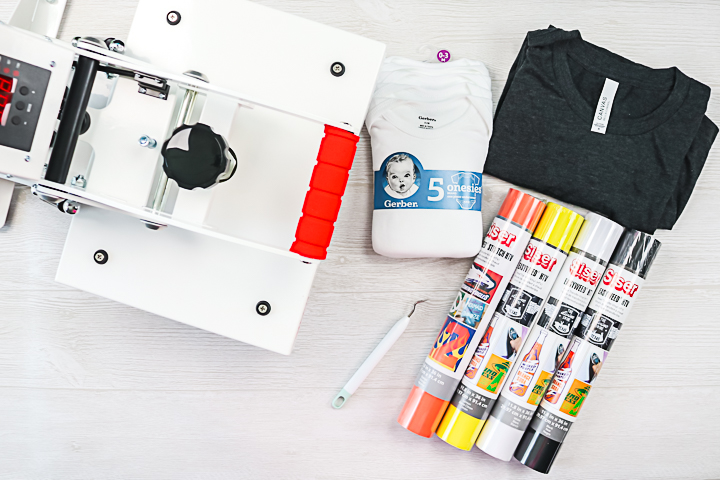
Supplies Needed For Mommy And Me Crafts Fall Shirts
- Siser heat press (you can see more about this press here)
- Siser HTV
- Onesie
- Shirt
- Weeding tool
- Cricut machine
- This project is made with Design Space files. Click here for my profile. Once on my profile, find the image of the project you want to create, click it to open it up, and then you can make it yourself.
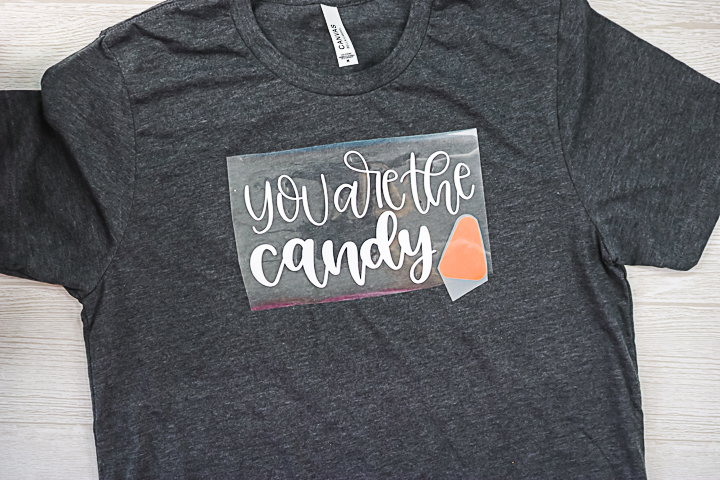
Step 1: Cut Out Design
Cut all of your heat transfer vinyl pieces using your Cricut machine. Be sure to place the material shiny side down on the mat and mirror your image before cutting. You can see more about how to use HTV here.
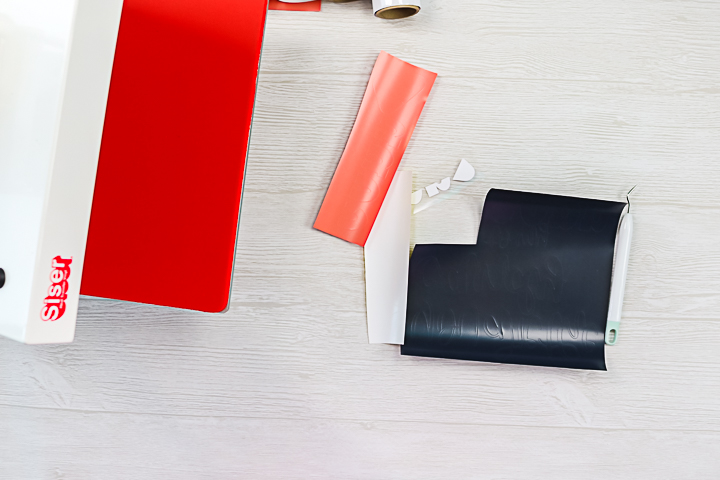
Step 2: Weed Design
Weed away all of the excess around the outside of your design, as well as things like the centers of letters.
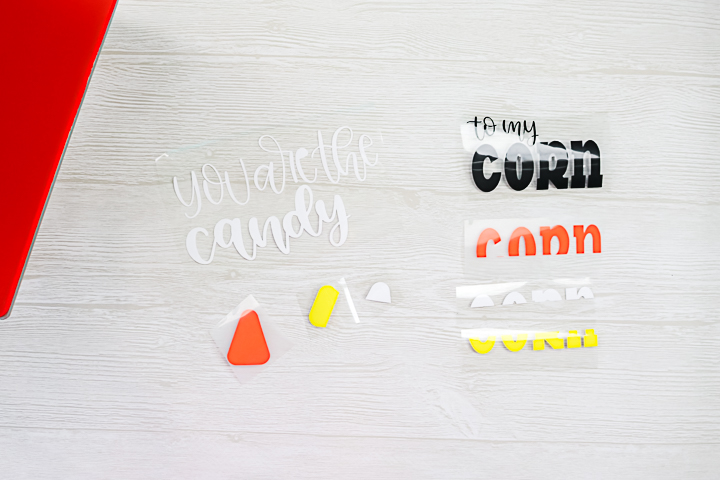
Step 3: Stack HTV Pieces
I like to stack my pieces and make sure everything looks okay before pressing my shirts.
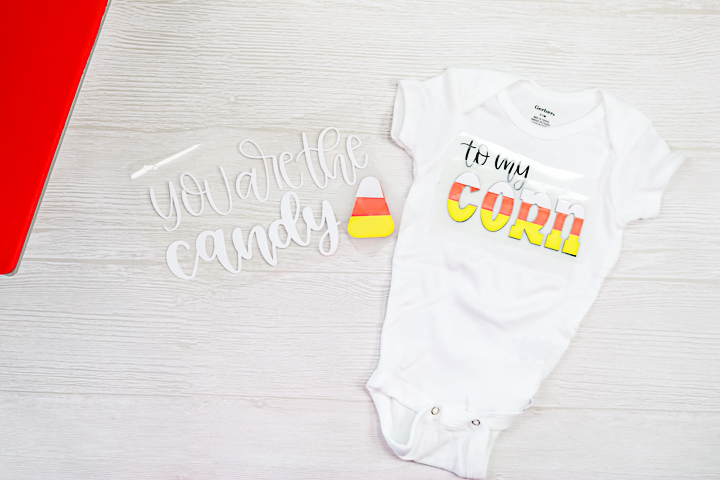
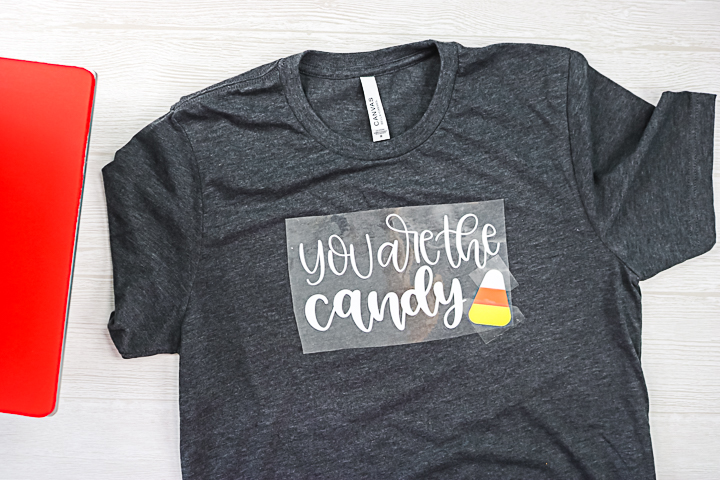
Step 4: Add Black HTV Layer To Onesie
Start by pressing the bottom-most layer onto your shirt. Be sure to follow all time and temperature recommendations from the manufacturer. I printed a guide from the Siser website.

Step 5: Add Orange HTV Layer To Onesie
Peel back the carrier sheet from the first color and add the second. Be sure to cover the first with a carrier sheet before pressing to protect it from the heat. Then press again to adhere to your second color.

Step 6: Add White and Yellow HTV Layer To Onesie
Repeat the same steps for any additional colors. In this case, this onesie has four colors and all three were pressed in the same way.
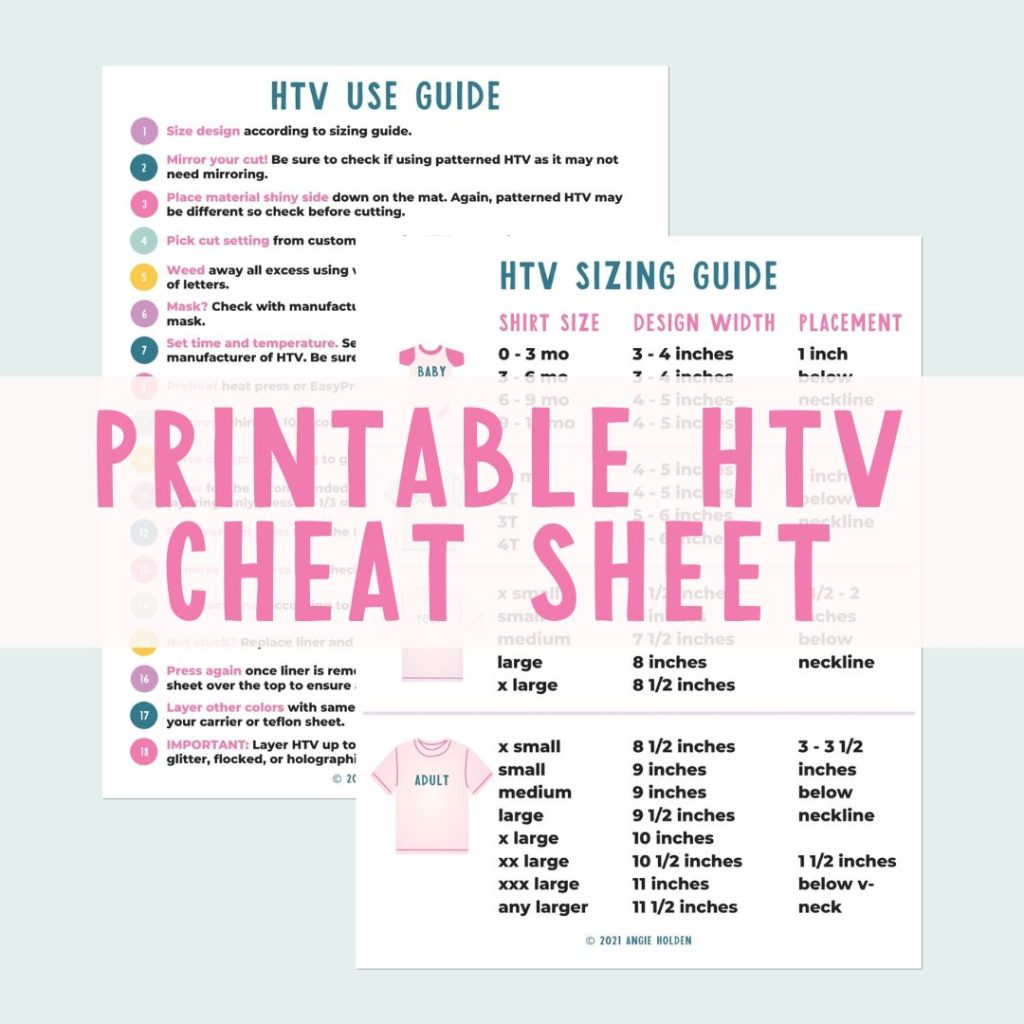
Free HTV Cheat Sheet
Get your FREE Printable HTV Cheat Sheet now! This guide has sizing and position recommendations for infant through adult shirts as well as a handy HTV use guide. Print this double sided guide and put it by any heat press you own!
Step 7: Repeat Steps 1-6 For T-Shirt
You will then need to repeat the same procedure for the adult-sized shirt.
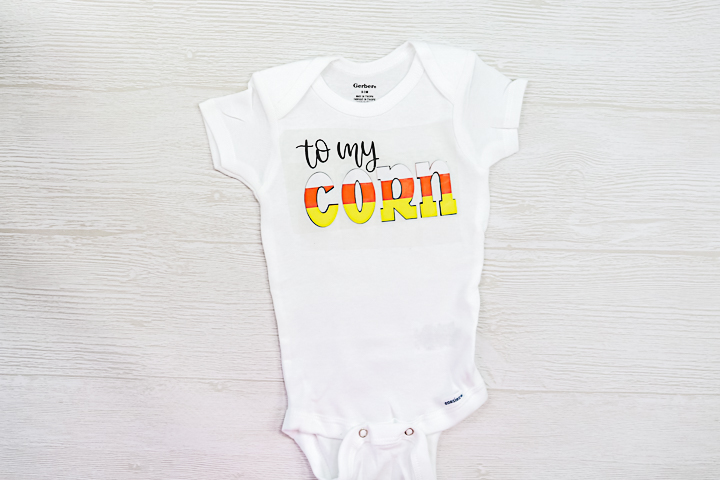
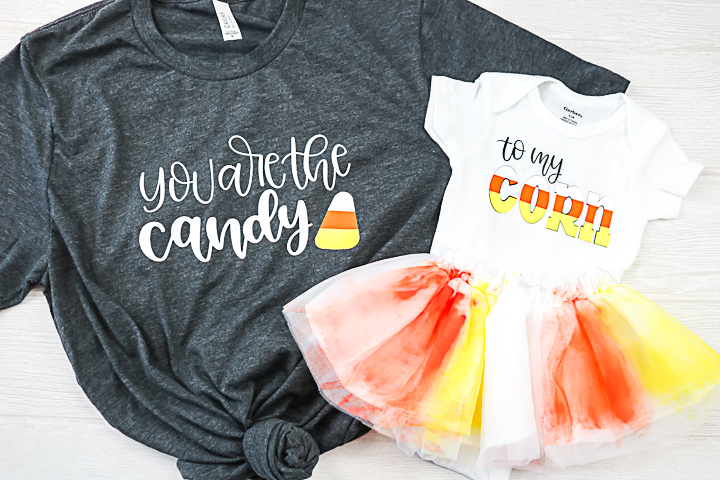
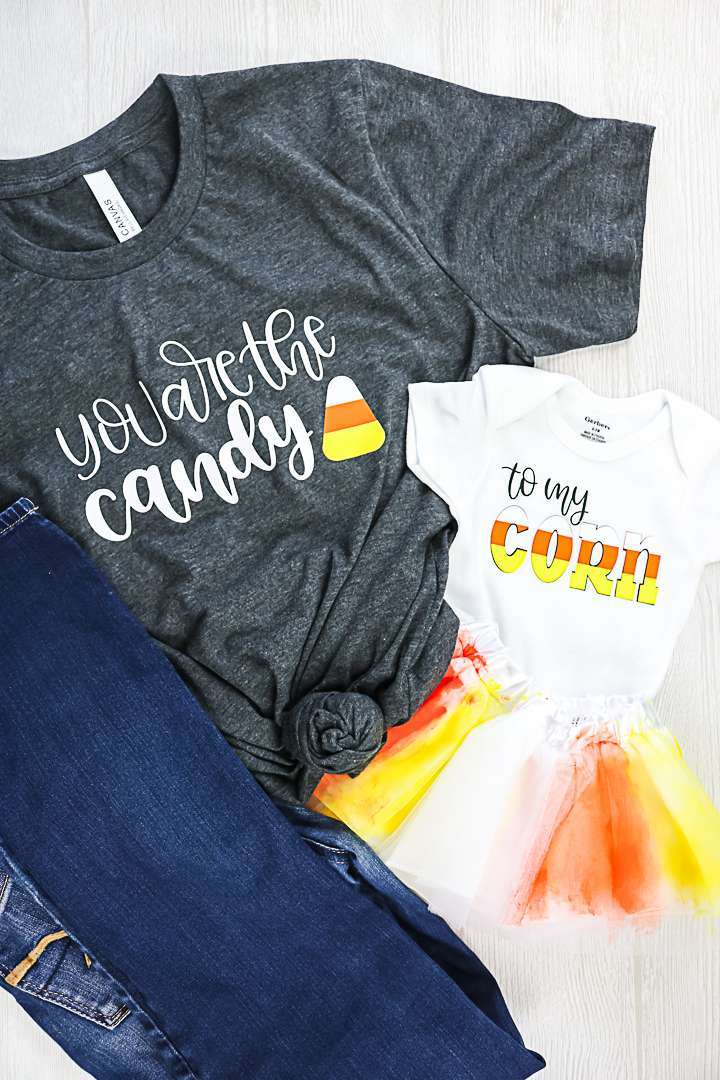
Step 8: Remove Carrier Sheet
Remember that if a design is too large for the press you are using, you can always press once, move over, and press again to cover the entire design. Once you remove your final carrier sheet, your shirts are done and ready to wear!
These shirts are adorable and perfect for Fall parties, pictures, or even trick-or-treating around the neighborhood. It is hard to find a good baby costume, so make these shirts, then make a candy cane tutu to go with the whole thing!
How To Make The Candy Corn Tutu
I just used yellow and orange fabric paint to add streaks to a tutu I picked up at Michaels. Allow it to dry, and you have a cute addition to these mommy-and-me shirts! You can pair this with a set of leggings or even change the shirts to long sleeves, depending on where you live. Now, you are ready for autumn with these matching shirts for mom and baby!
More Shirt Designs To Consider
Now that you know how easy it is to make mommy-and-me shirts, what other designs can you make? Here are a few ideas to get you started!
- Mommy and Me Volume 1 Bundle
- Mommy and Me Volume 2 Bundle
- Shirt Duo Bundle
- Mommy and Me Bundle
- Chaos Coordinator/Chaos Creator
You will be matching every day of the week before you know it. So, grab your cut files and make some mommy-and-me shirts before your little one is too old. You will cherish these memories forever!
FAQs About Mommy And Me Crafts
Here are answers to some of the most frequently asked questions I receive about creating mommy and me crafts. If your question isn’t listed, feel free to drop it in the comments, and I’ll be happy to help!
What Cricut Machine Can I Use For This Project?
All of them! The Cricut Maker, Cricut Explore series, Cricut Joy, Cricut Joy Xtra, and Cricut Venture can all cut vinyl!
Should I Press My Items Before Adding The Vinyl?
Yes! I recommend pressing both your onesie and t-shirt BEFORE you add your vinyl to help remove any moisture or wrinkles.
Is This Vinyl A Warm Or Cold Peel?
For both the onesie and the t-shirt, it is a warm peel!
I’m Tempted To Buy This Heat Press. How Do You Like The 9×12 Size? Do You Recommend It?
I do really like it, and the size is perfect for me! If you want to learn more about the heat press, check out my video called How to Use the Siser Heat Press where I discuss it in more detail.
Do You Have A Tutorial For Making A Tutu?
Unfortunately, no, not at this time. However, making over a premade tutu is really easy because all you are doing is painting it with fabric paint.
6 Halloween Crafts
Did you love these candy corn-themed mommy-and-me crafts and want more Halloween crafts? Then check out the projects below!
- Glow in the Dark Trick or Treat Bag
- How to Make a Peek-a-Boo Sublimation Shirt
- Halloween Craft Stick: Frankenstein and Mummy Kids Crafts
- Monster Cookie Kit + 18 Halloween Printables
- DIY Halloween Treats with Witch Legs
- DIY Halloween Pillow with a Spider


Where is the svg for this?
There is a link above. It is a Cricut file!