
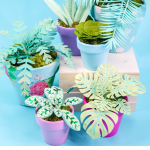
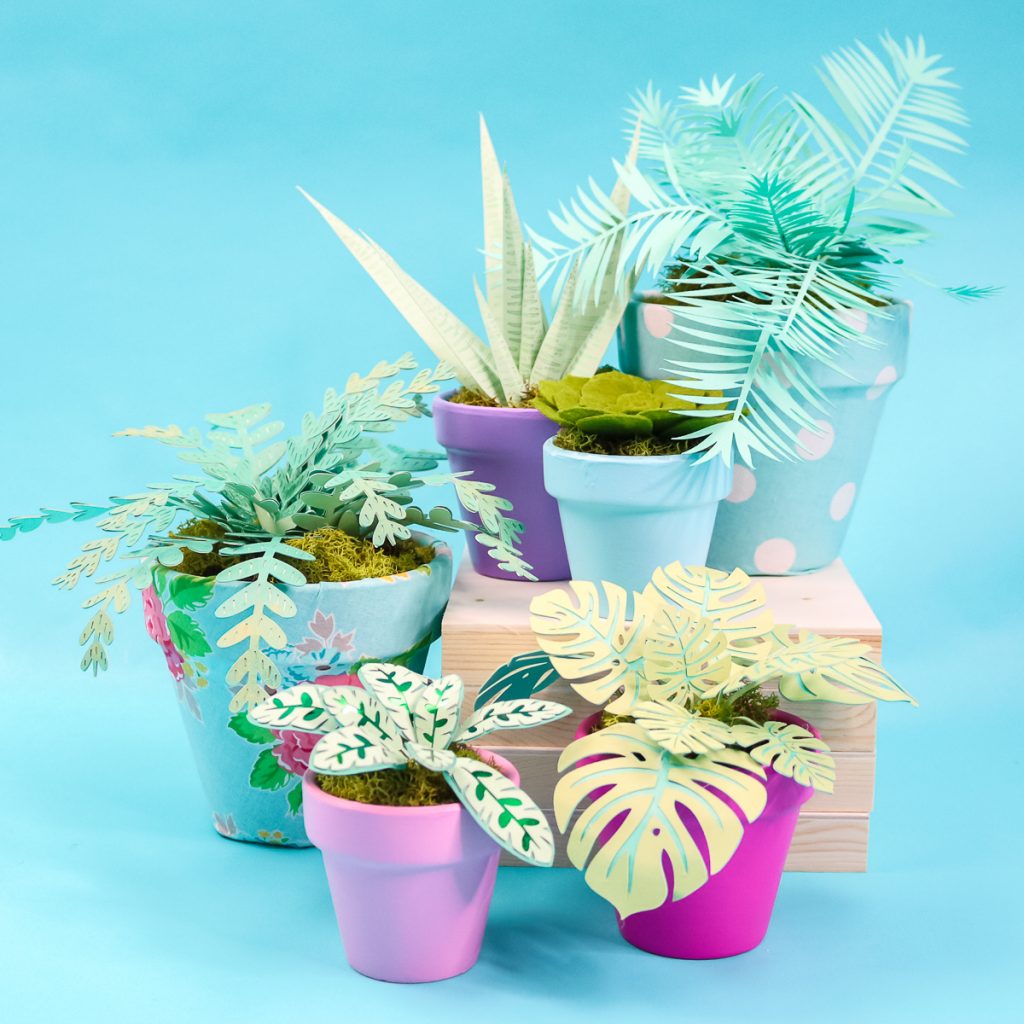
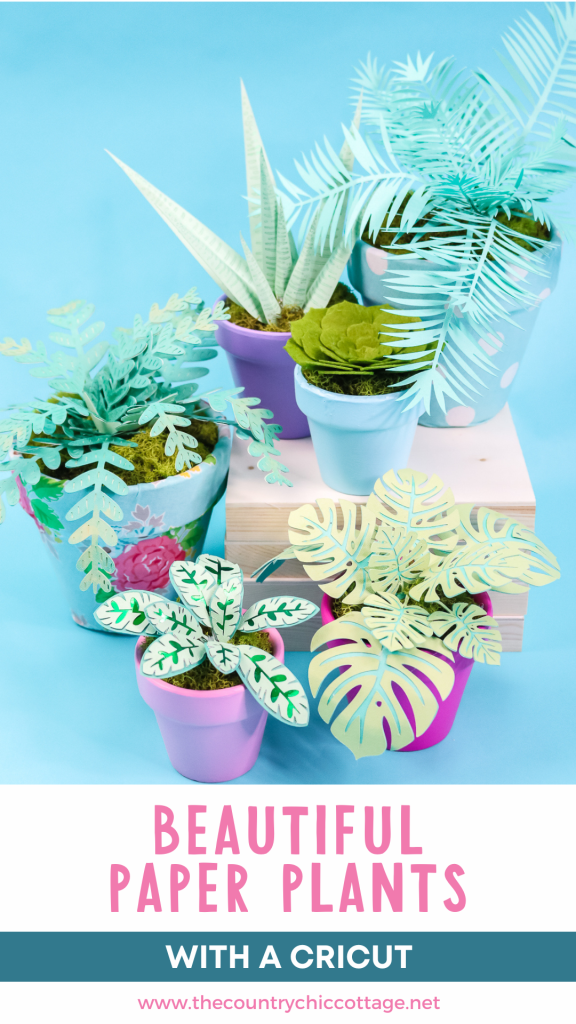
Want plants without the watering, wilting, or worrying? You’re going to love this! Using your Cricut, you can make beautiful paper plants in five different styles — plus I’ve included a bonus felt plant because it’s just too good to leave out. These DIY plants are perfect for adding a little greenery to your home, even if you don’t have a green thumb. They’re also adorable for spring garden parties, centerpieces, or party favors… and yes, they pair perfectly with my giant paper flowers too!
This post is sponsored by Cricut; however, all projects and opinions are my own.
How To Make Paper Plants Video Tutorial
Are you ready to watch me make these paper plants? You can watch me design the plants in Design Space, cut the pieces, and assemble each one. Just click the play button below!
Can't watch the video or missed some of the steps? You can also follow along below as I walk you through making the plants.
How To Make Paper Plants
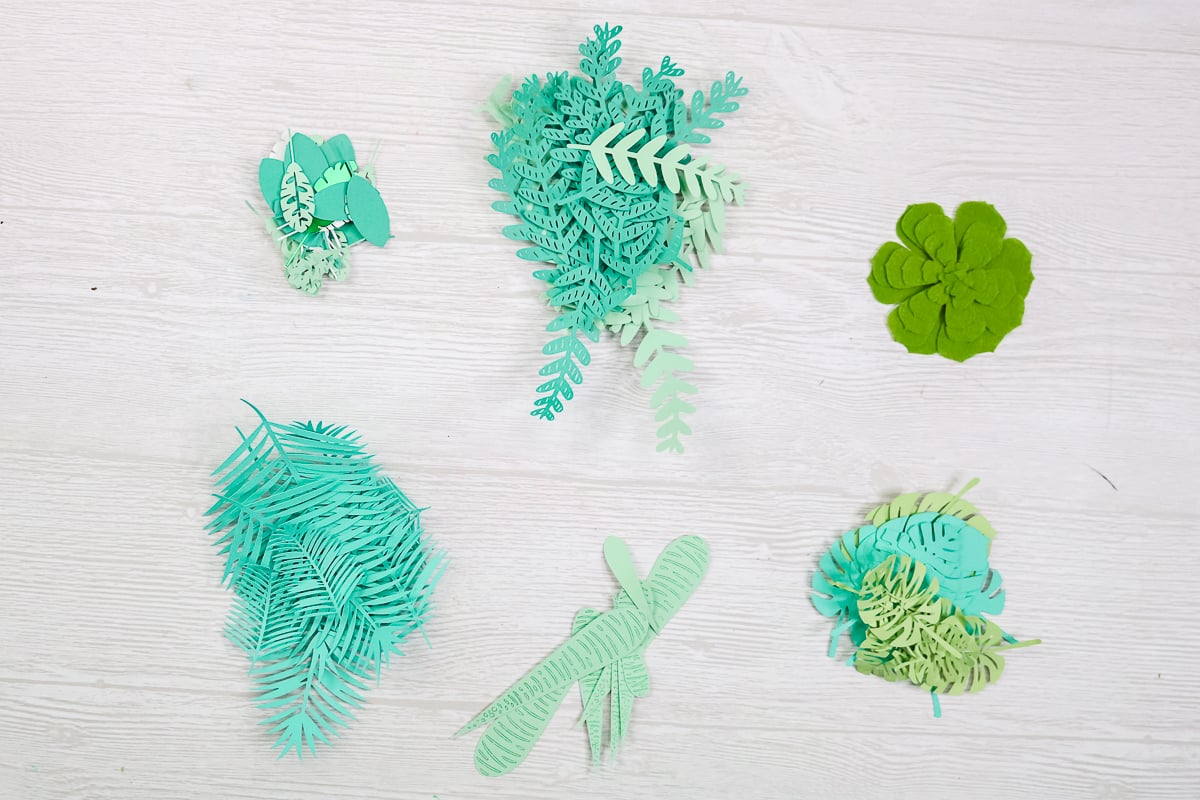
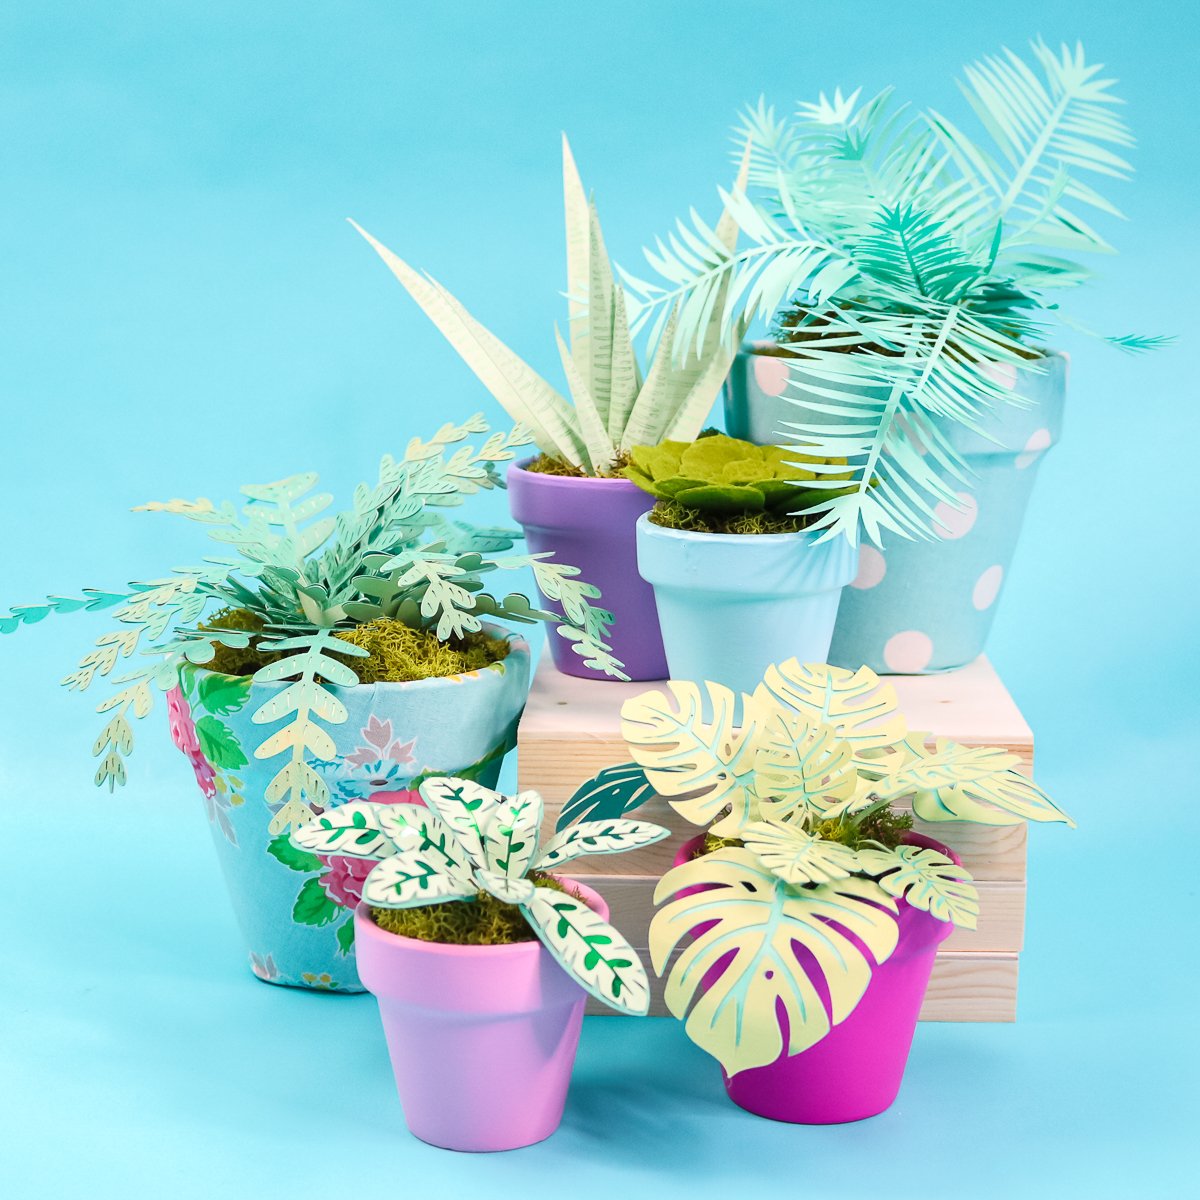
I’ll be creating several paper plant designs in this post, including aloe, palm, fern, monstera, lily, and succulent. For each one, I’ll walk you through using your Cricut to cut the pieces and assembling everything step by step. Each plant teaches a unique technique you can use for other projects, too. You can make these with any Cricut machine, although a few methods may work best with certain models — and I’ll cover that as we go.

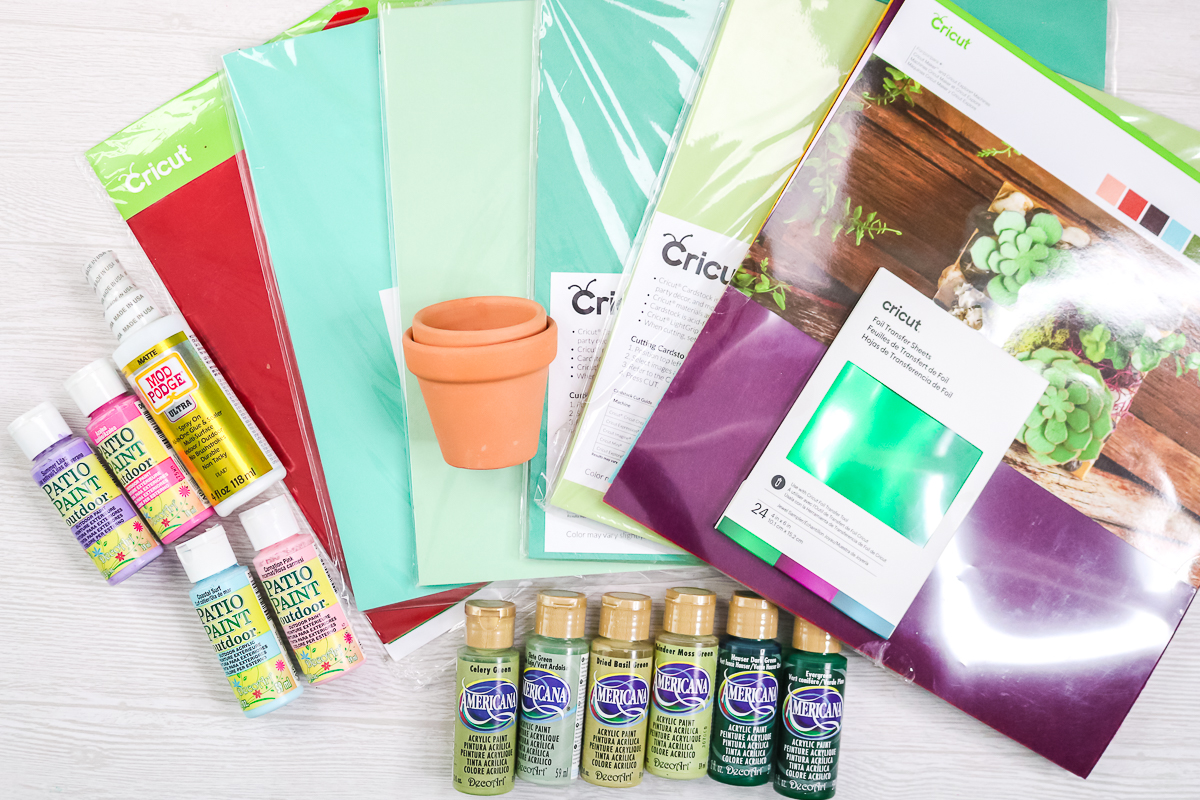
Supplies Needed To Make Paper Plants
I am listing all the supplies I used below, but remember that not all will be used to make all the plants. Choose the supplies based on the plant you will be making.
- Cricut machine (The Cricut Explore will make everything shown here, but I will discuss options for using other machines below.)
- LightGrip Cutting Mat
- Paper (I am using 4 shades of green cardstock plus green foil poster board.)
- Felt (The Cricut felt I used is no longer available)
- Floral wire
- Cricut Foil Tool
- Cricut Foil
- Scoring stylus
- Hot glue gun and hot glue
- Glue with a precision tip for paper (I like the Bearly Art Glue, but any you love will work here).
- Clay pots
- Styrofoam
- Serrated Knife
- Moss (Reindeer moss is my favorite!)
- Paint for clay
- Craft paint
- Mod Podge
- Fabric
- Hot glue fingertips
- Brayer
- Scissors
- Paintbrushes
- Cricut cut file
Designing Faux Plants In Cricut Design Space
The first thing you will want to do is to access my Cricut Design Space profile and scroll to the project you want to make. This will give you a starting point for the six plants that I made. You can delete any of these you don't want to keep by clicking the plant and selecting the X. You will also want to change any colors if the ones I used don't work for you. Don't love the plants I have chosen? Click on images and search the Cricut library for even more options. Then size everything to fit your pots and click “Make”.
NOTE: The aloe plant is set to use the foil tool. If you don't have this tool or if you have the Joy machine, you can click the foil lines and change to draw lines instead. You can then use a pen in your chosen color to achieve a similar look.
Rearranging Mats
After you click “Make” you may notice that some of your mats need to be rearranged. I am using the foil tool and want to make sure that all my foil leaves are together on the mat, for instance. You can right-click on the items right on the mat and move them around. You can also combine items from different mats if you would like. Just click the three dots that appear when an item is selected, then choose the option to move to a different mat. In this case, I moved everything around so I was using only one sheet of paper, and my foiled leaves were in the upper-left and lower-right corners. If you want to watch the steps for moving items around, be sure to click play on the video above.
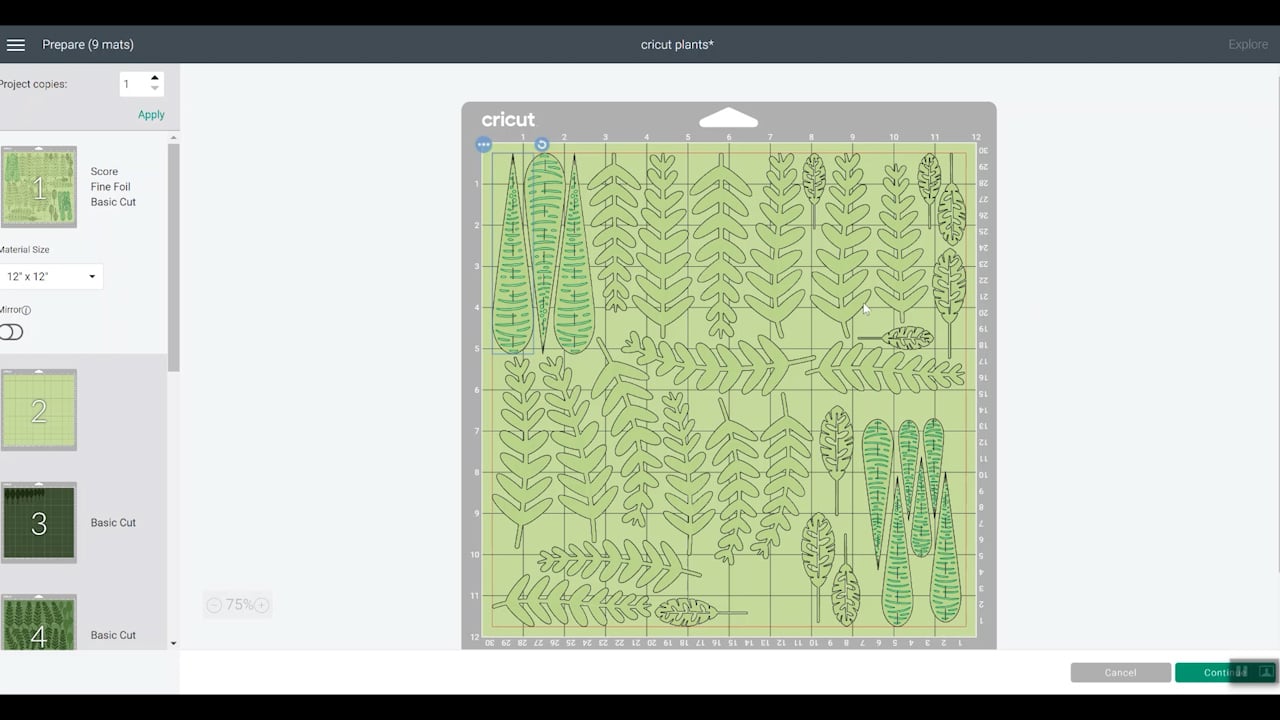
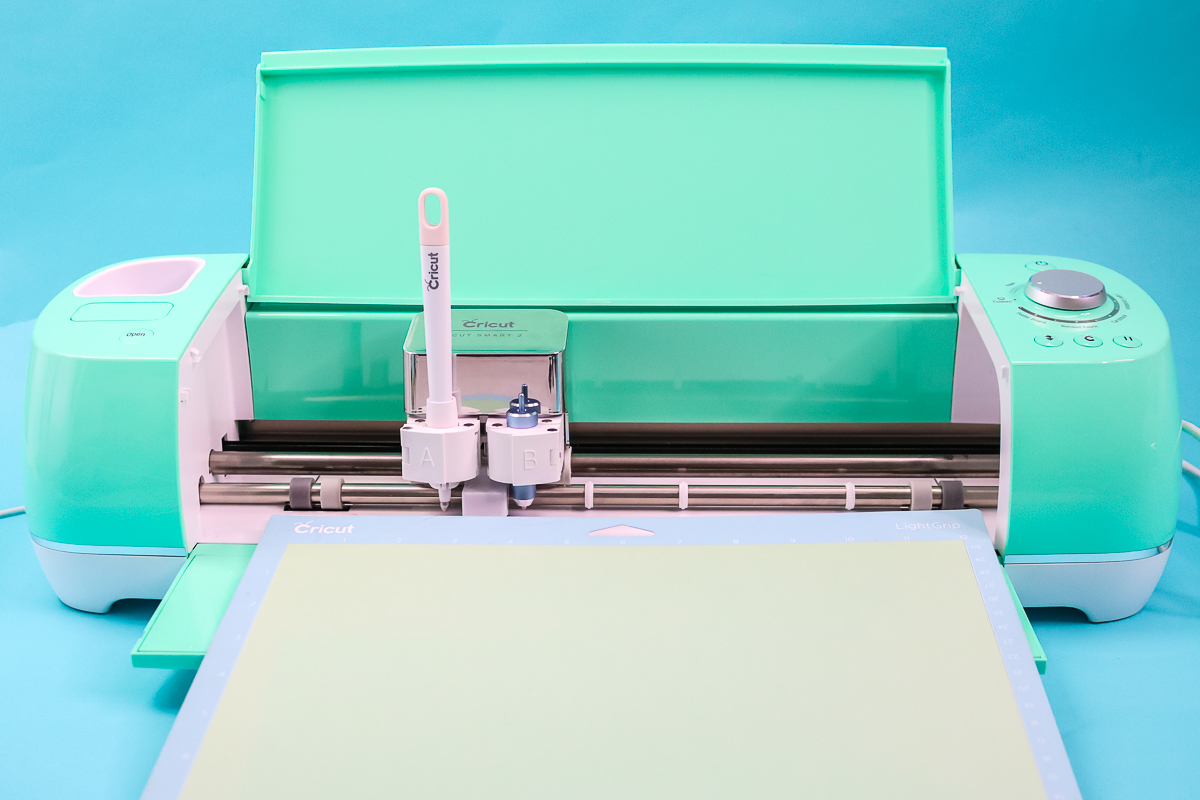
Cutting Paper Plants On A Cricut Explore Air 2
Once you are happy with your mat arrangement, it is time to cut your pieces using your machine. You can use any Cricut machine to cut the paper plants, but I am using my Cricut Explore Air 2. The first mat had some score lines, so I added in my scoring stylus first, as prompted in Cricut Design Space.
Once the scoring was complete, the machine ejected the mat almost all the way and moved the carriage to the right. This was to give me room to add foil sheets to those corners.
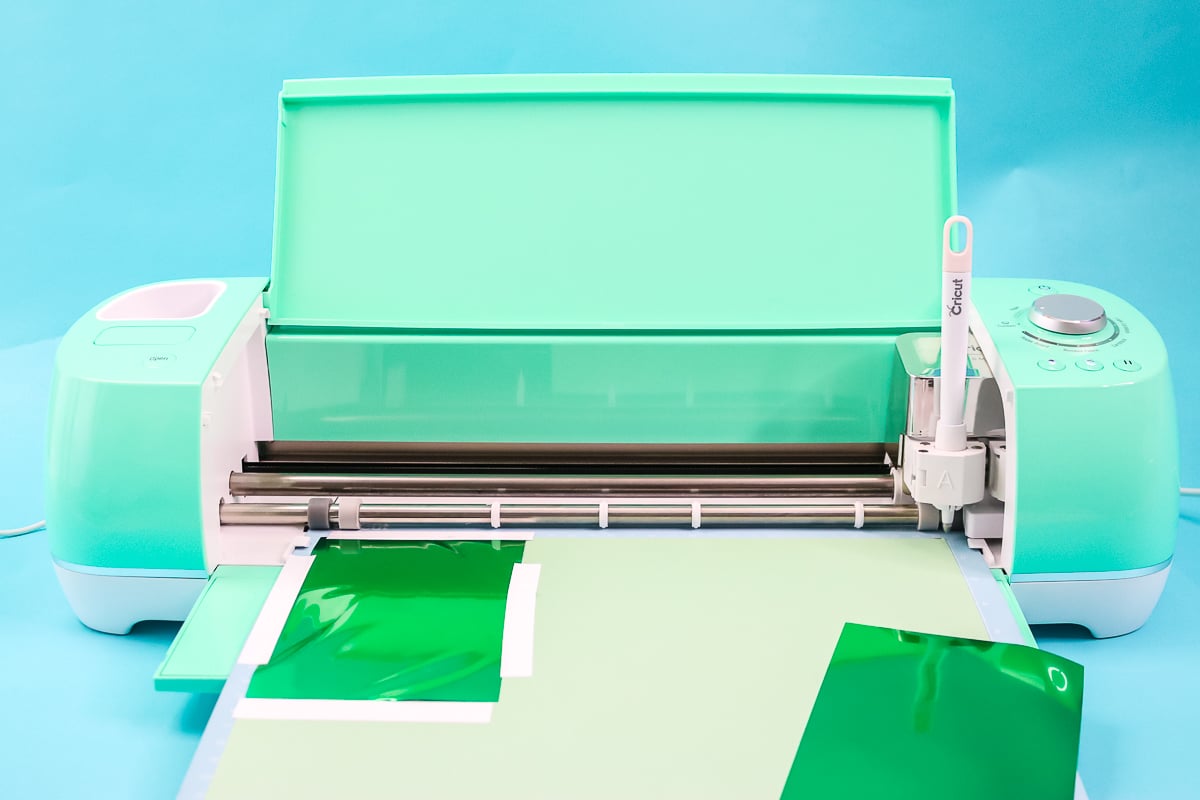
Then I taped down all four sides of the foil sheet and pulled it tight, and installed the foil tool in clamp B before pressing the C button once again to add the foil lines.
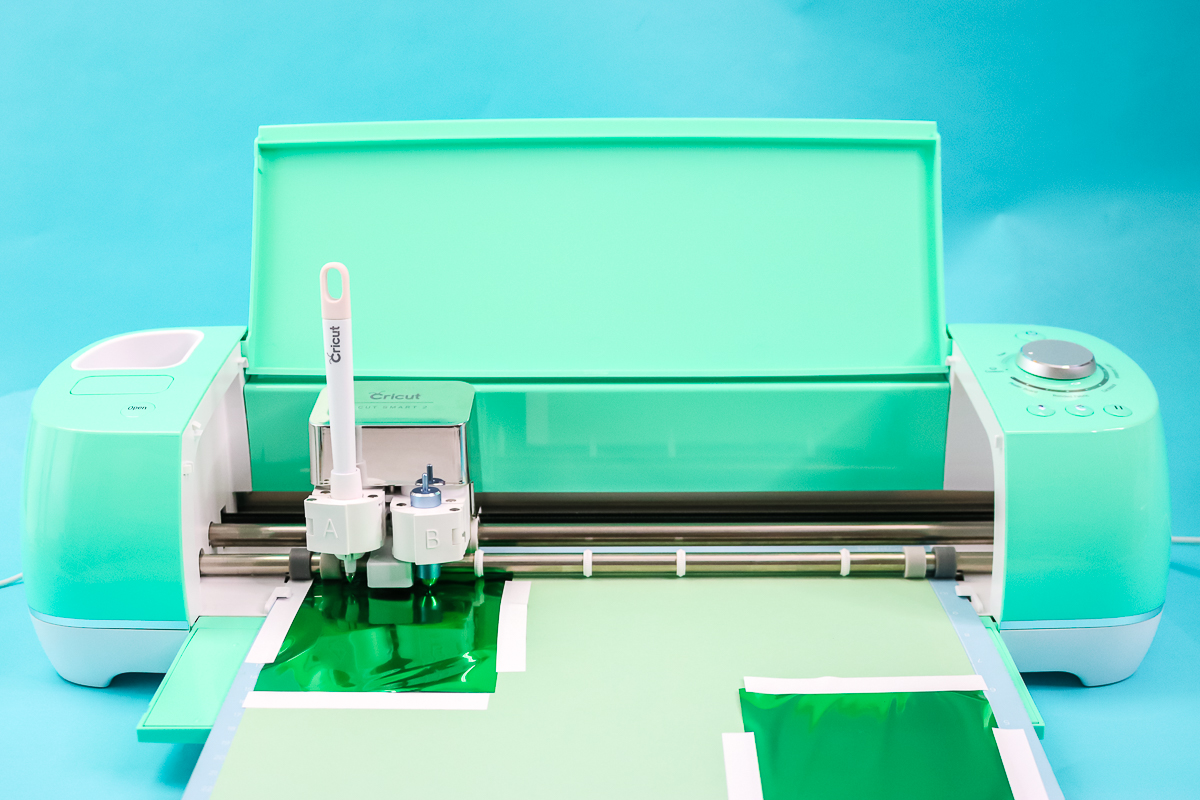
Once the foil lines were completed, the machine ejected the mat almost all the way again, and Design Space prompted me to remove the foil sheets. and change the foil tool for the fine-point blade.
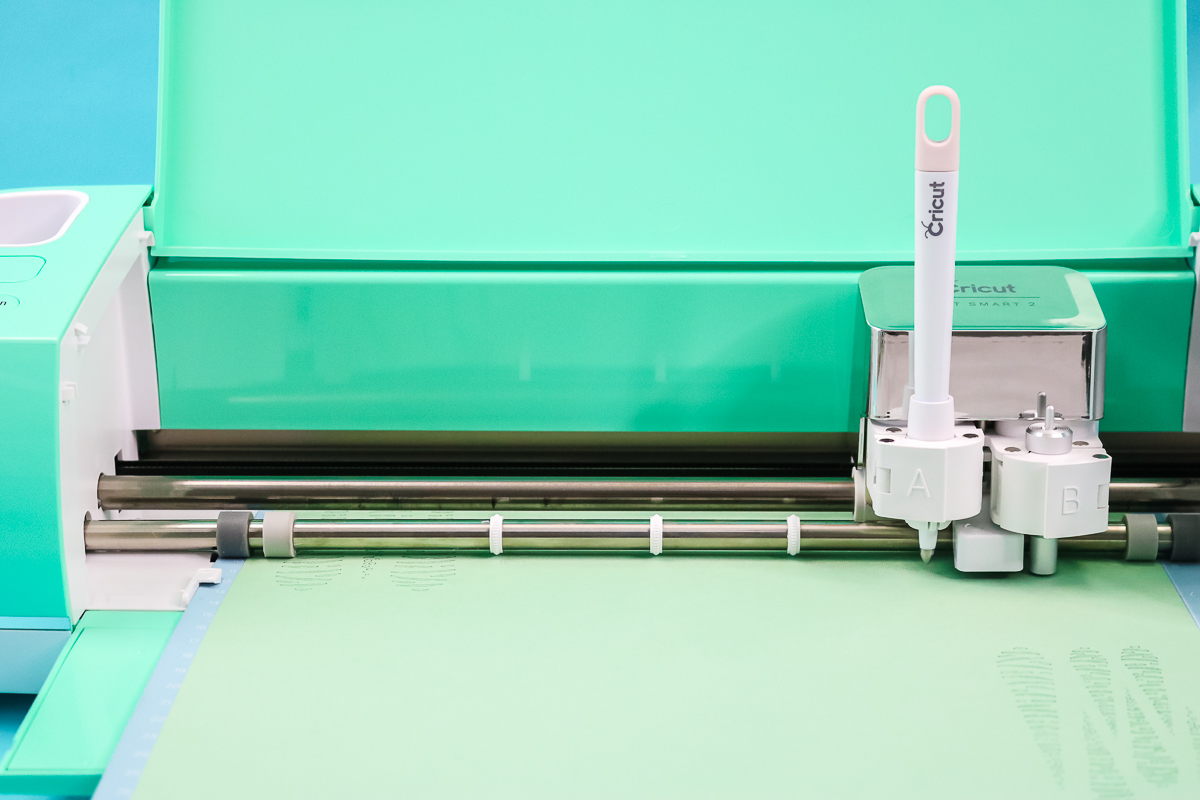
From there, the machine cut all the leaf shapes. I only had one sheet with the foil lines, so the rest of the paper sheets were a bit simpler, as I just needed the fine-point blade in my machine. I prefer the medium cardstock setting for all Cricut cardstock, and I changed to the foil poster board setting when cutting that mat. Then I removed all of the pieces from the mat and sorted them into piles for each plant.
Notes For Cricut Joy And Maker Users
For Cricut Joy users, you will want to change the foil lines to pen lines and remove the score lines. Otherwise, you should be fine cutting all of the paper plants. The Joy may have trouble cutting the felt, however.
For Cricut Maker users, the machine will work similarly to the Explore above. You can choose to use the scoring wheel instead of the scoring stylus. Either will work in this case.
Cutting Cricut Felt
For the succulent, I chose to use felt. You can also make this same plant with paper instead. The Cricut Felt I used is no longer available, but a stiffer felt will cut with either the Explore or the Maker. I have used both machines. I ended up cutting this one with my Maker, as some of the details were really small. If you only have the Explore, I would recommend either making the project larger or deleting some of the smaller pieces before cutting.
A tip when cutting felt is to use an old mat of any color. I have this purple mat that's seen better days and is already really dirty. That is actually perfect! The felt will usually get all over the mat, so I would rather have a well-worn mat than a new one. Just be sure to use a brayer to press the material down onto the mat evenly.
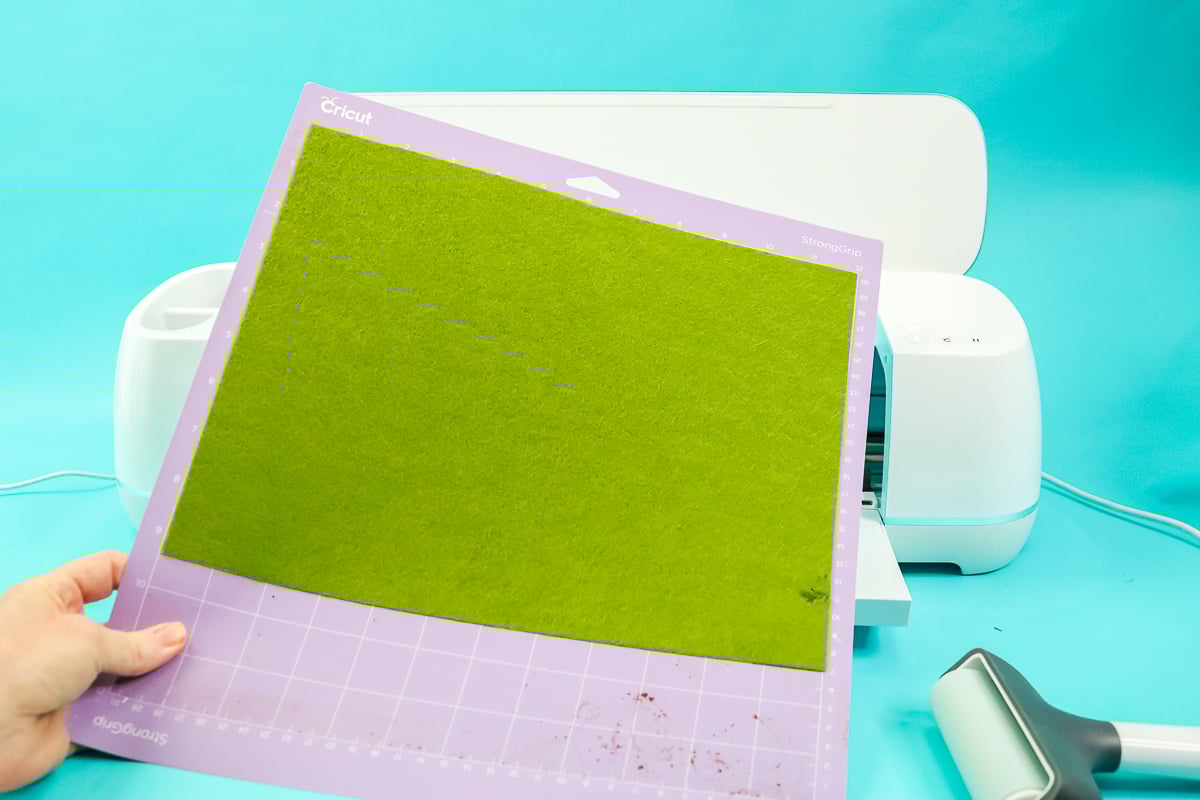
I used the Cricut felt setting and my rotary blade for these cuts.

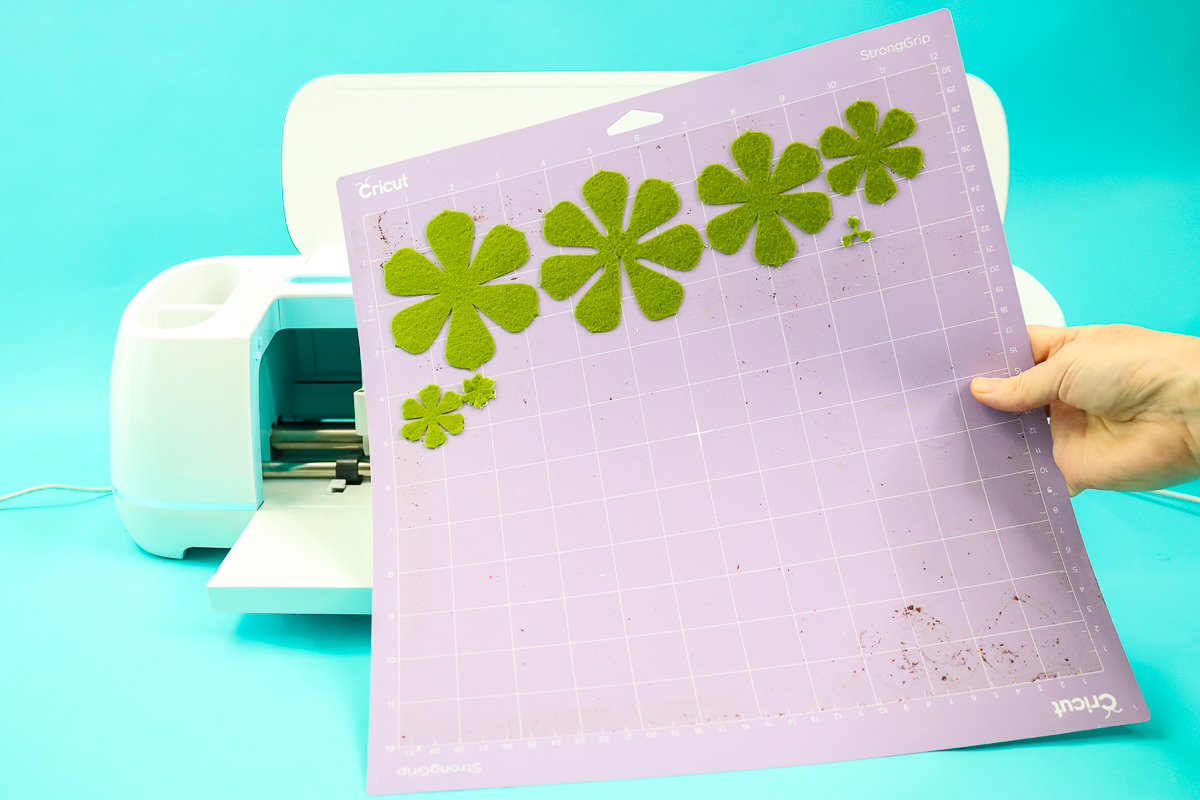
Then I removed the excess around the outside and carefully removed the pieces from the mat.
Preparing Your Pots
Below, I'll show you how I decorated my pots as well as what you will need for the inside to secure your plant in the pot.
Pot Decoration Ideas
I actually decorated my pots a few different ways, so I'll share both those methods. First, you can use Mod Podge Ultra to cover your pots with fabric. You can get a full set of instructions for doing that here. Second, you can paint your pots with any clay-friendly paint. My pots needed two coats of paint, and I also painted a bit of the inside so the finished project looks complete. Then, I allowed everything to dry before continuing with assembly.
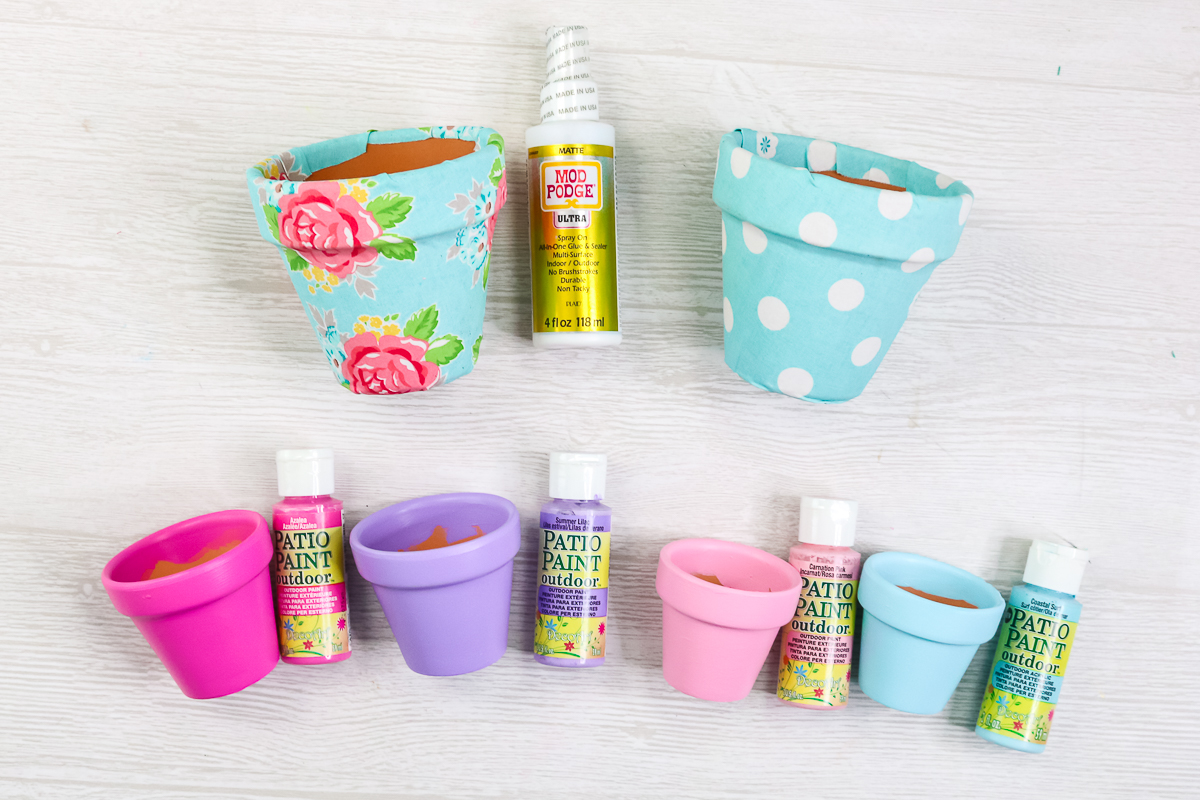
What To Add Inside Pots
Once your pots are dry, I filled the insides, so I had something to glue my paper plants to. I like using styrofoam balls, but you could also try small foam discs. Any shape that fits inside the pot will work fine.
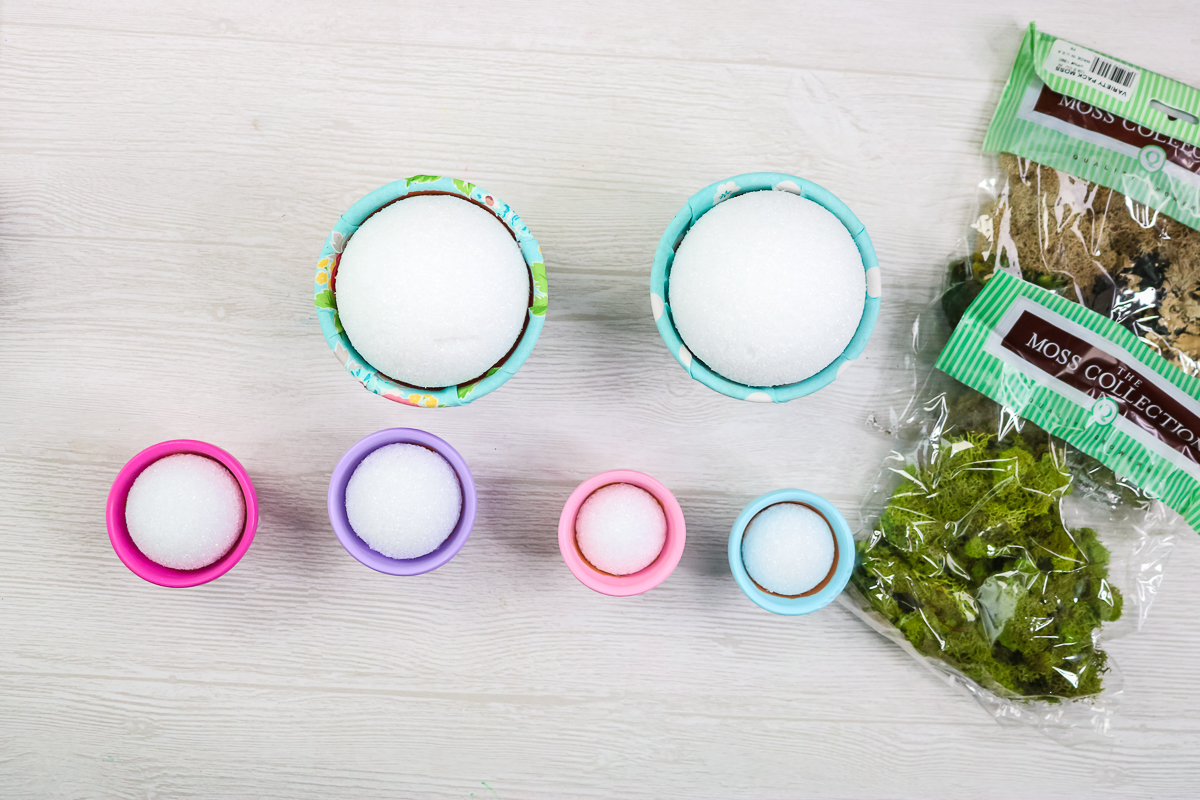
The foam should rest just below the edge of the pot. If your foam is too tall, you can cut it with a serrated knife. Remember, this does not have to be perfect, as it will be covered up. I cut the foam and pressed it into each pot.
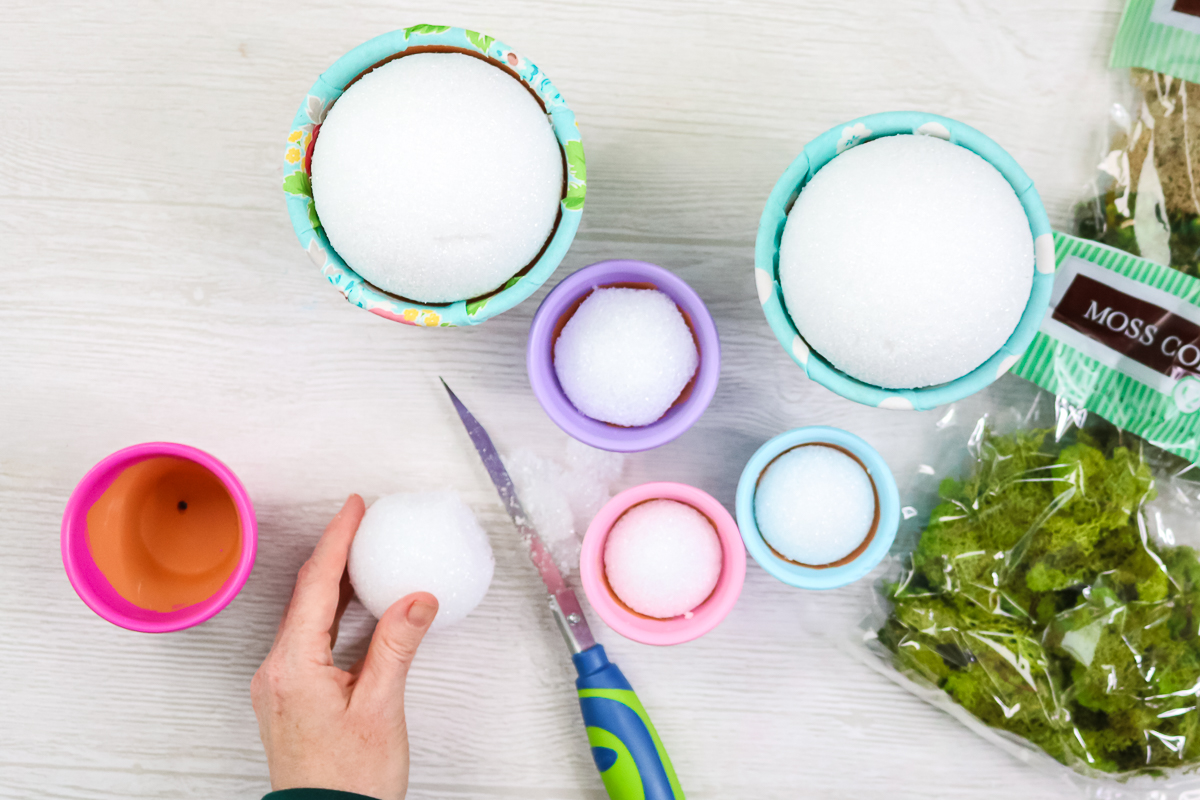
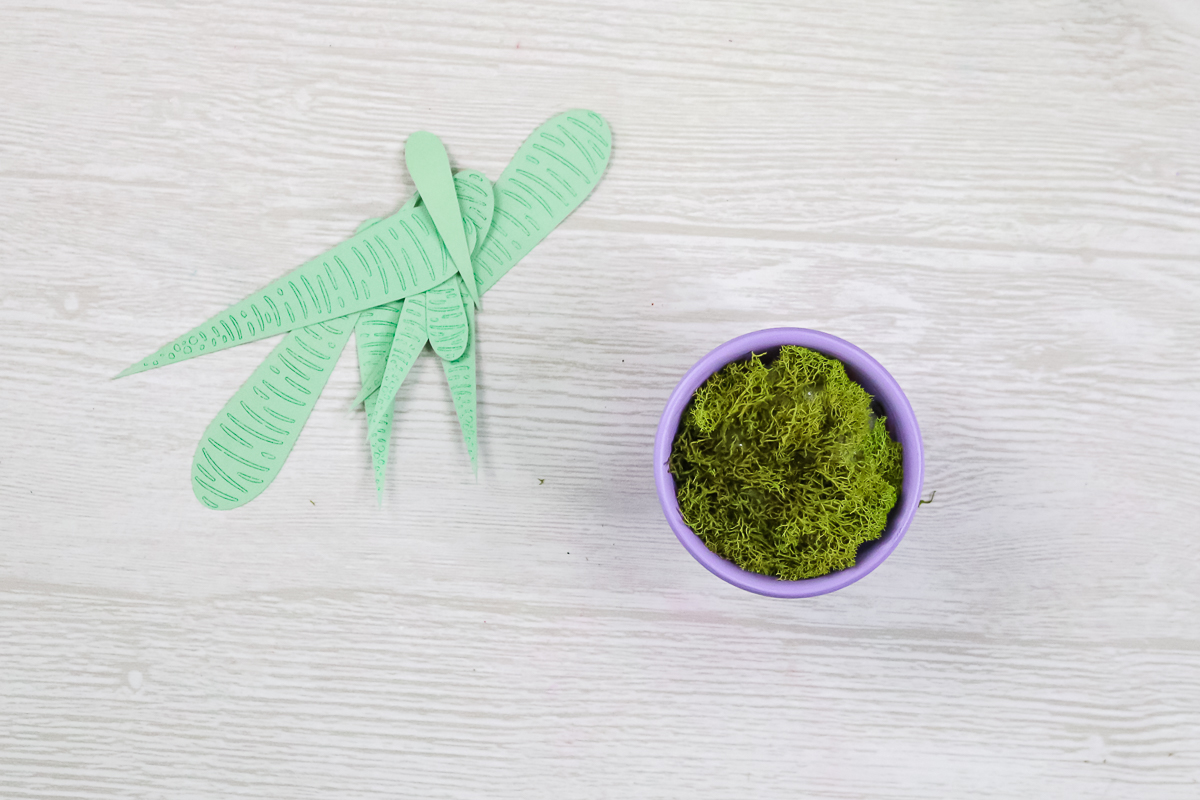
Then you will want to cover that foam with a layer of moss. I don't even glue this down. I just spread the moss evenly over the top in a thin layer.
Assembling Plants Using A Single Layer Of Paper
Now we are finally ready to make some plants! Start simple with a single layer of paper. Just one sheet of paper can make something amazing.
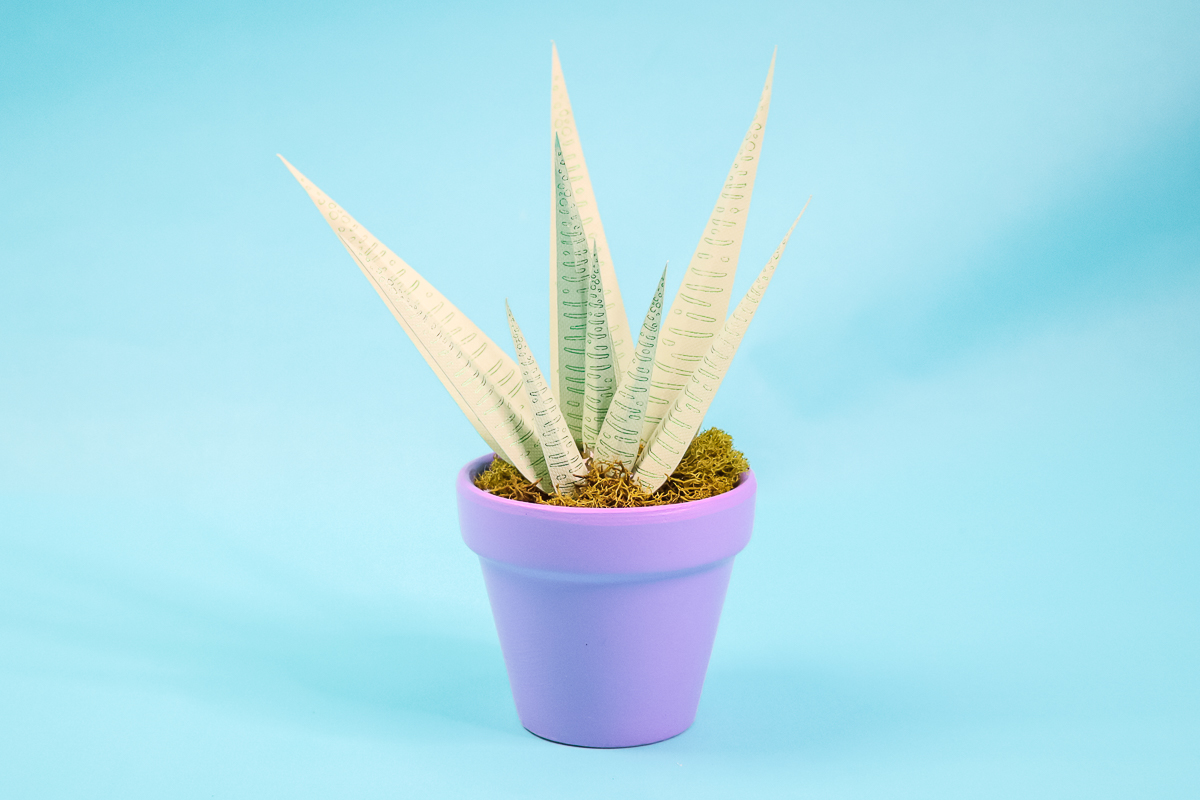
Aloe Plant
I slightly folded these leaves along the score line. You are looking for a slightly bent leaf that looks real.
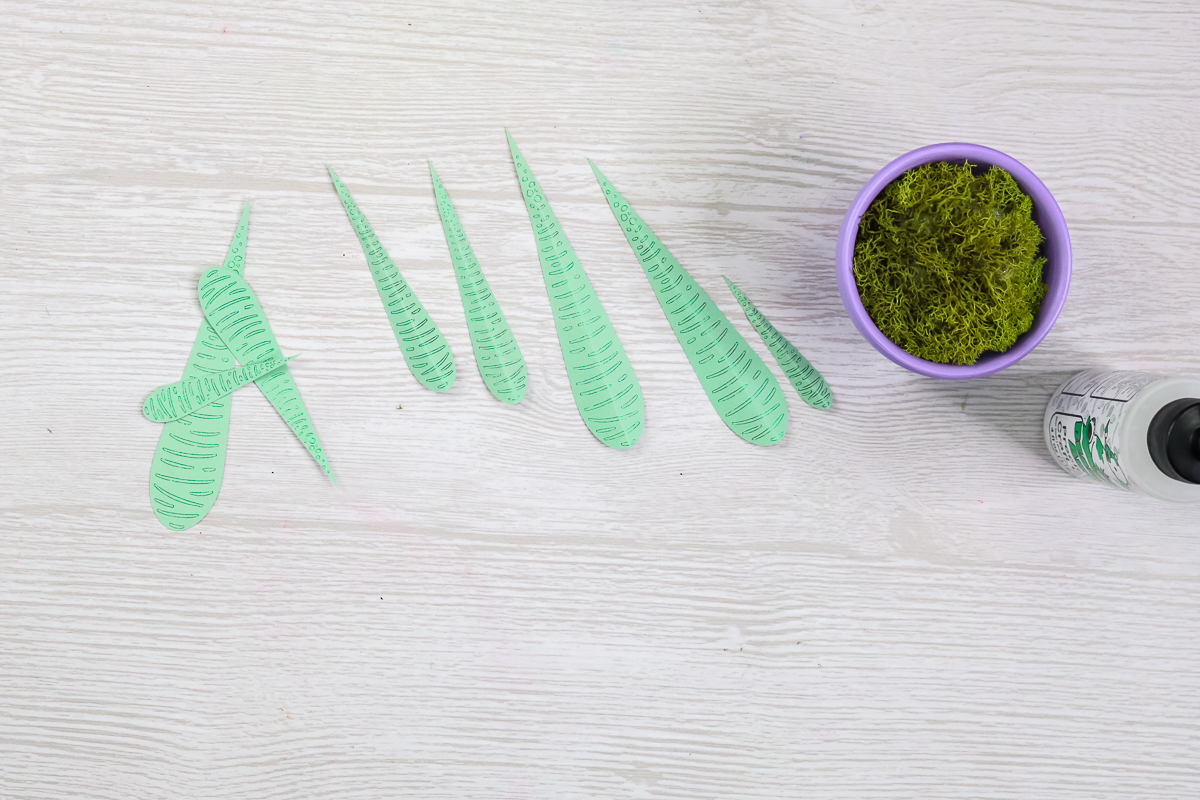
Then I added hot glue to the bottom of each leaf and held it onto the styrofoam until the glue cooled.
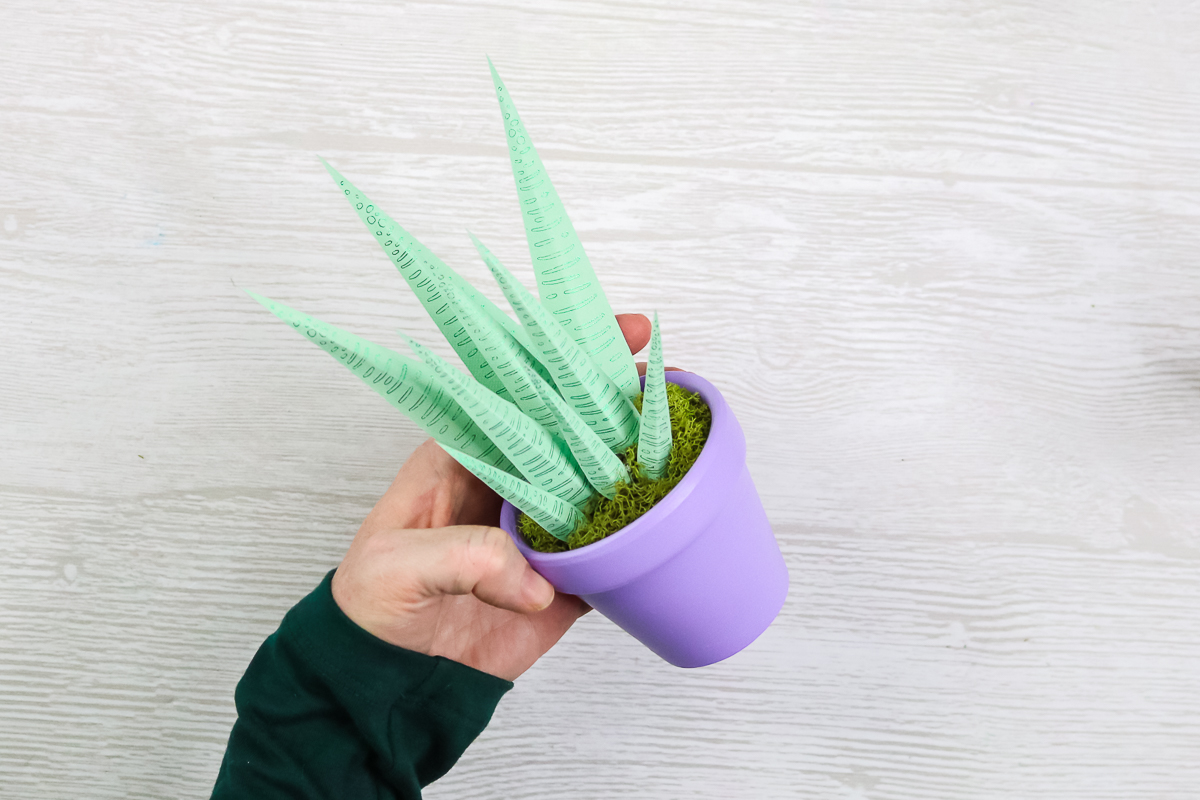
I repeat that step until all of my leaves are in the pot and I'm happy with the look. That is it! One plant down!
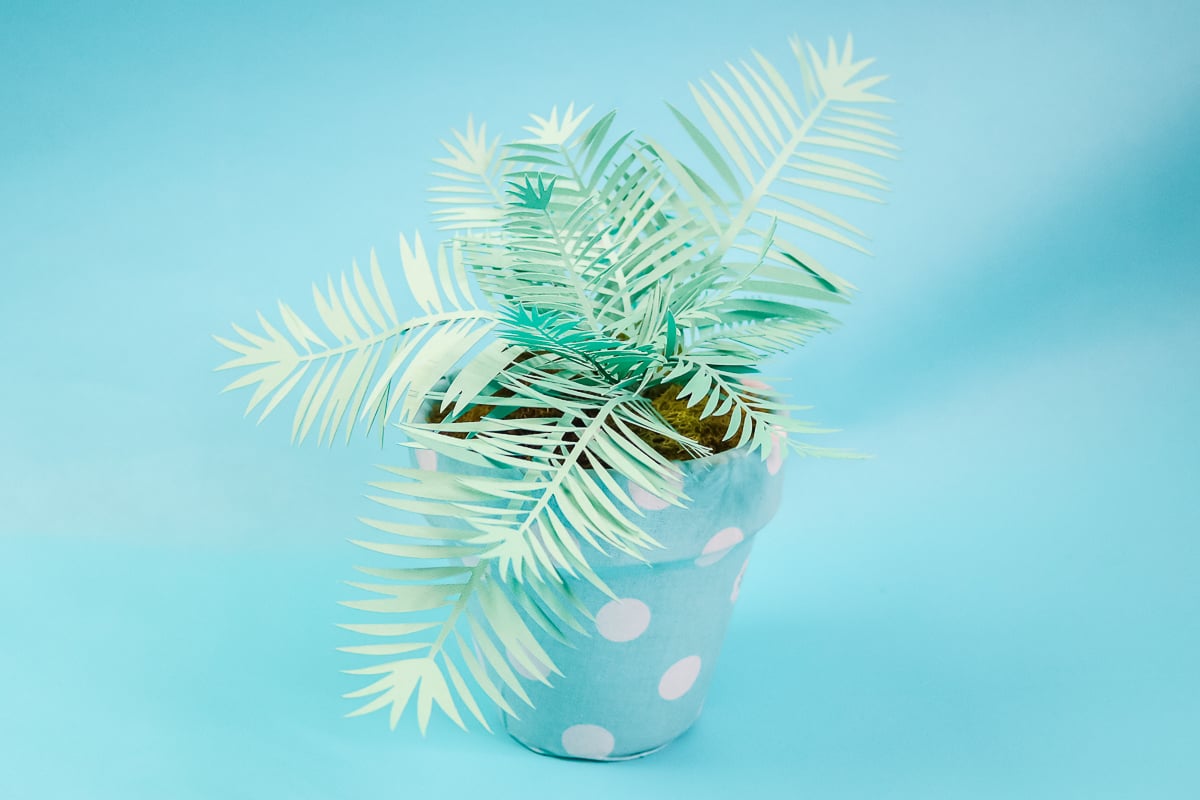
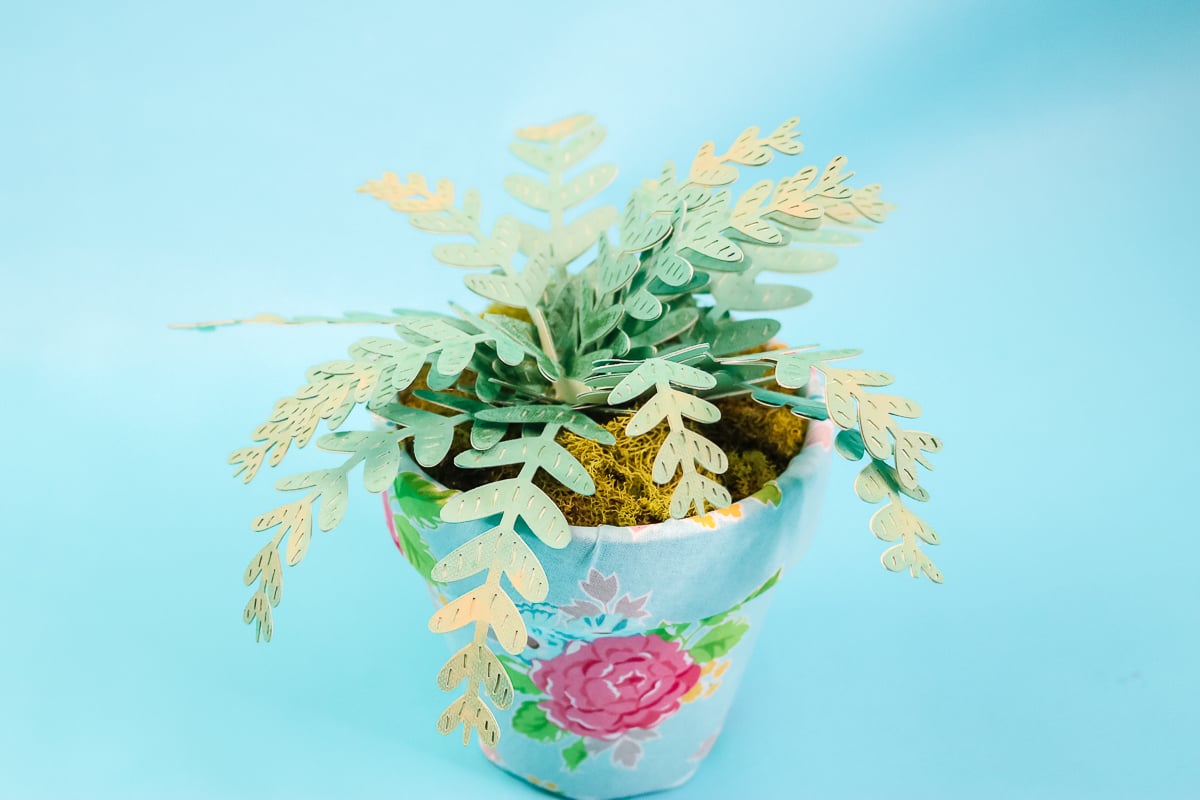
Palm Plant
For this one, the single layer of paper makes the leaves really floppy, so we are going to fix that with a bit of floral wire. Cut the floral wire so that it goes about halfway up each leaf, and leave some length to insert into your styrofoam. I left enough length to double up the end for easier insertion into the foam.
Then I added hot glue to the leaf and placed the floral wire on top. I recommend holding it in place for a few seconds with a hot glue fingertip to protect your fingers.
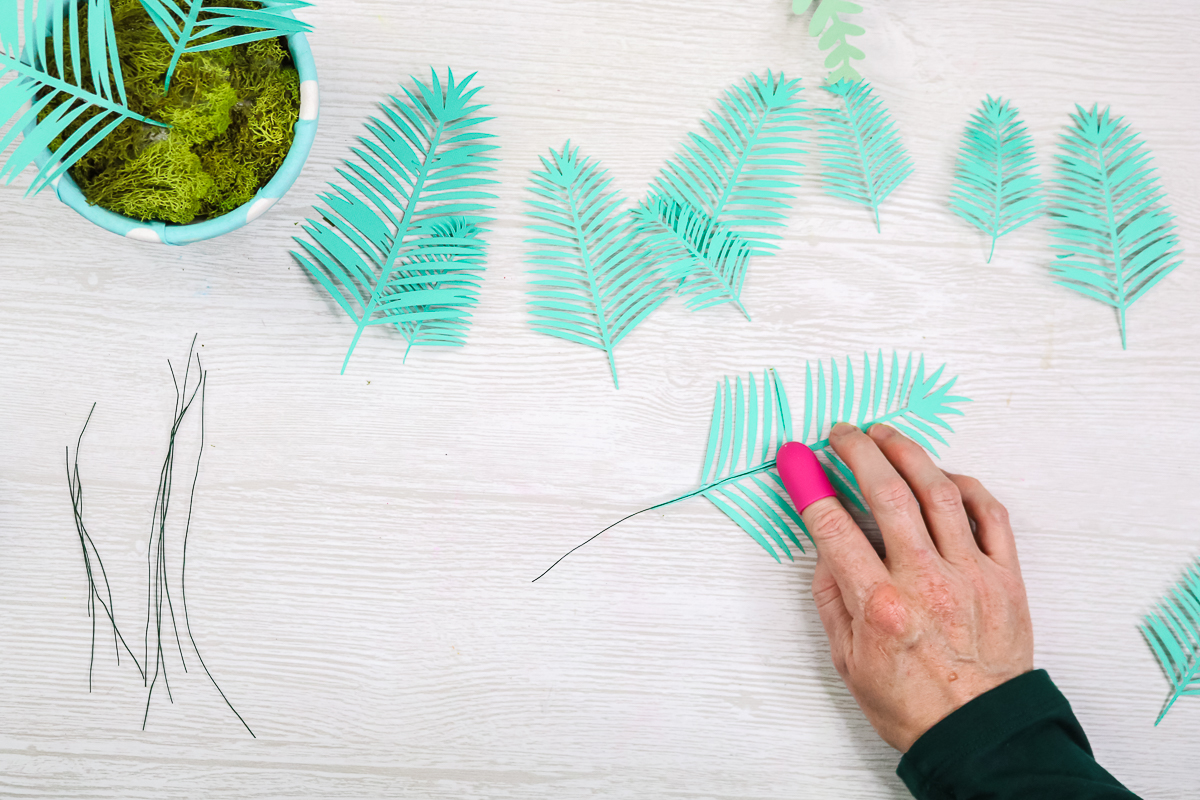
Then fold the end of the wire over.
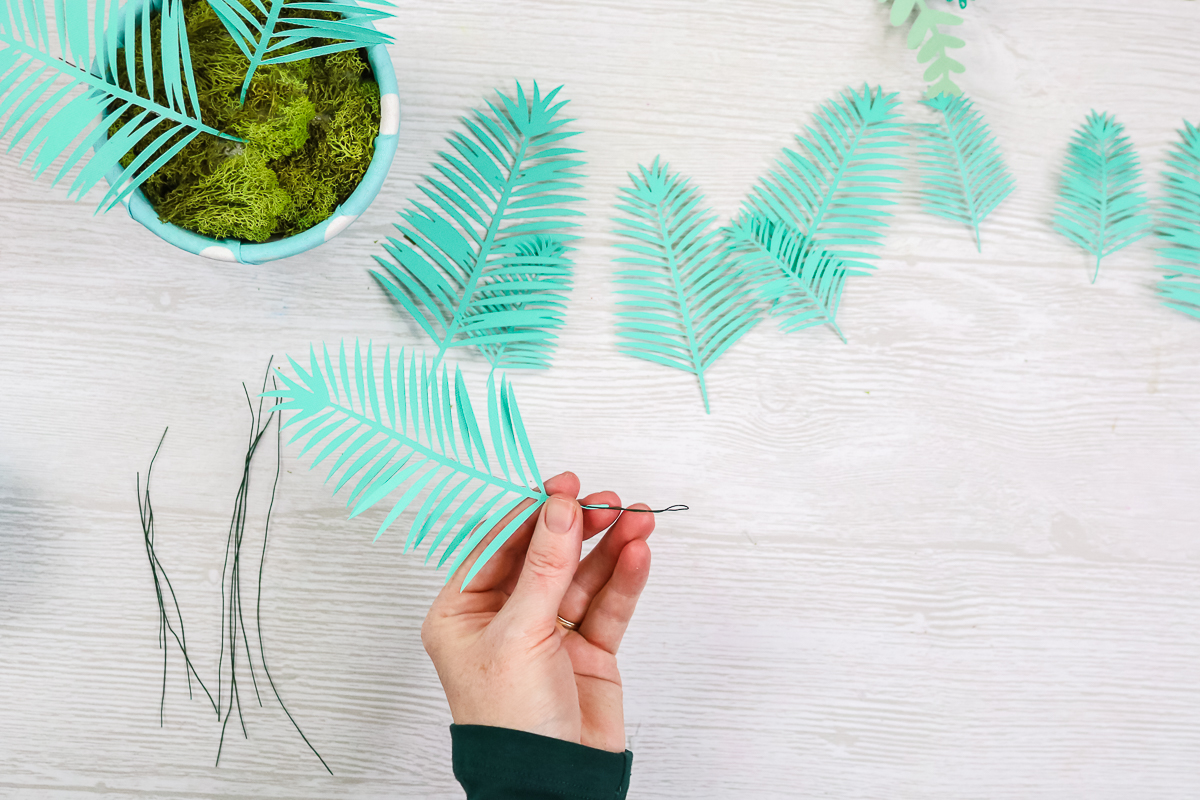
Start inserting them into the foam, and use the wire to shape each leaf for a lifelike look.
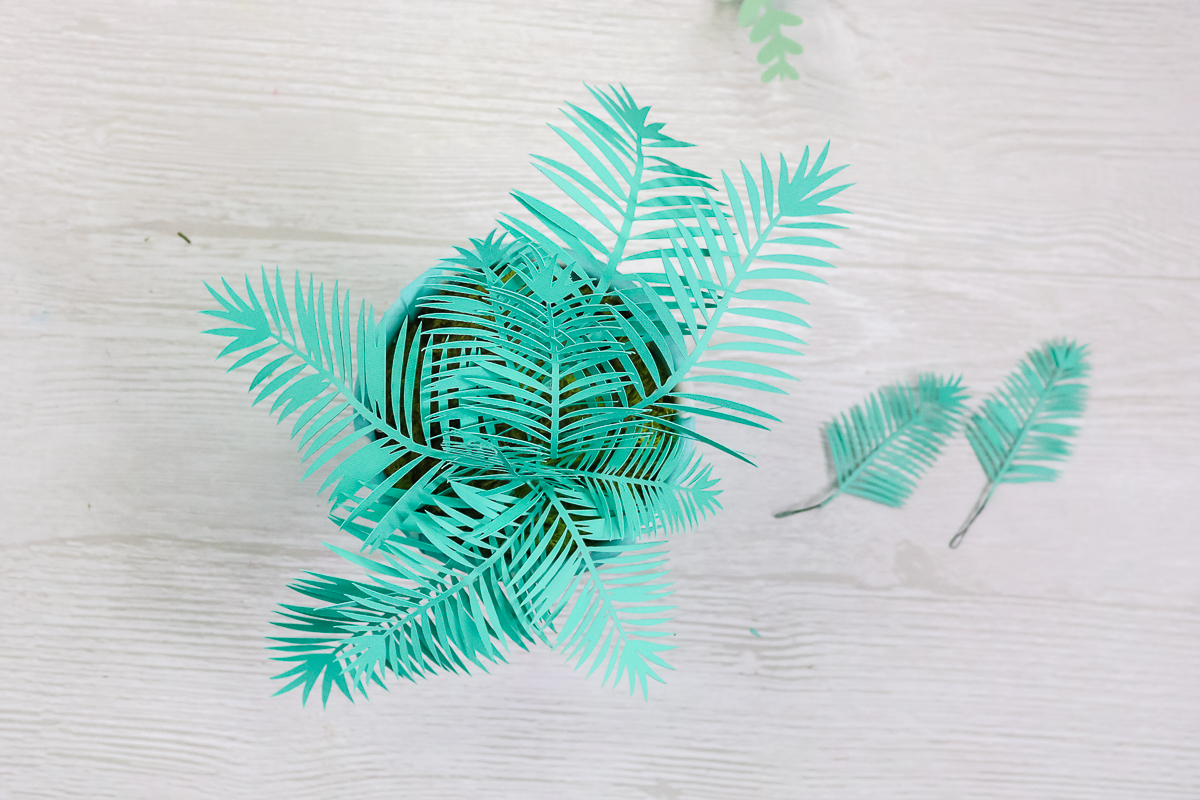
Once done, fluff the plant if needed or add more moss to your base. This one is so simple yet so gorgeous!
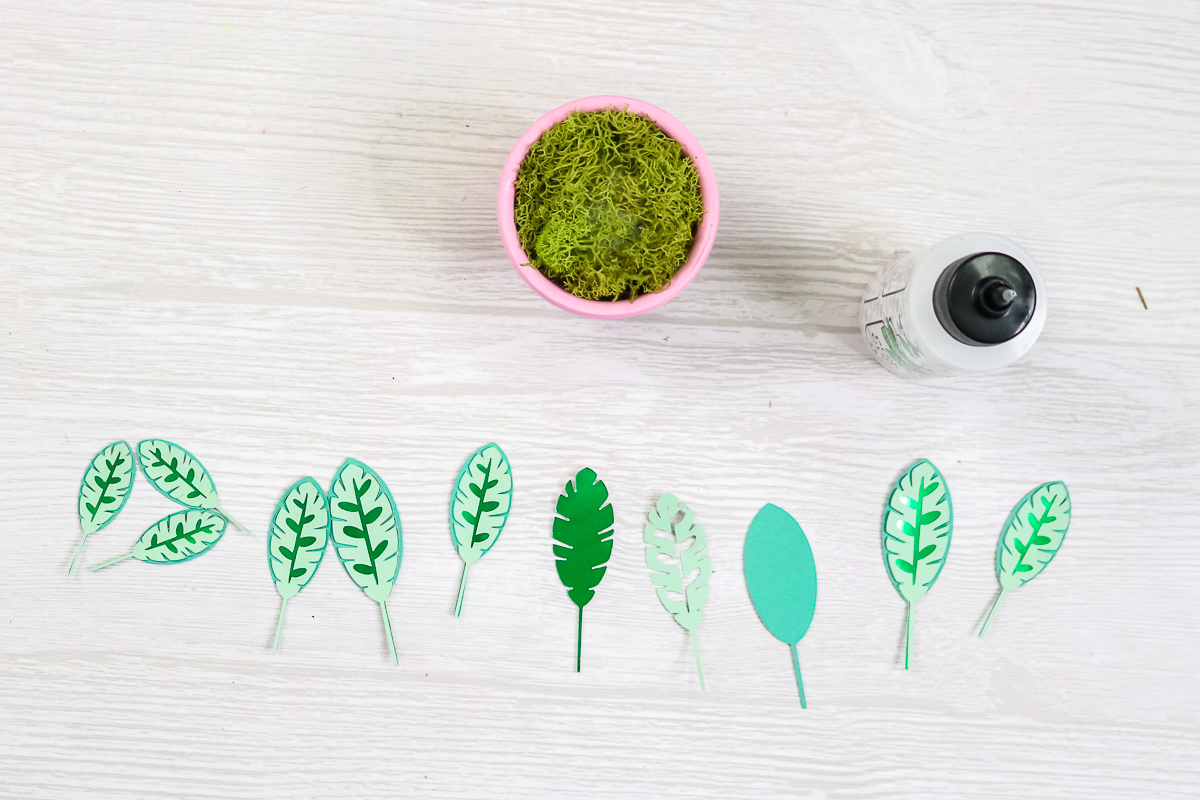
Assembling Plants Using Two Layers Of Paper
Now, let's make it a little more complicated and use two layers of paper to assemble our plants. I like to use a good-quality paper glue to assemble the leaves first. Just line them up by size and shape. Then add glue to one of the pieces and press the two together. Repeat for all of your leaves and allow to dry, then follow along with me below for how to assemble each one!
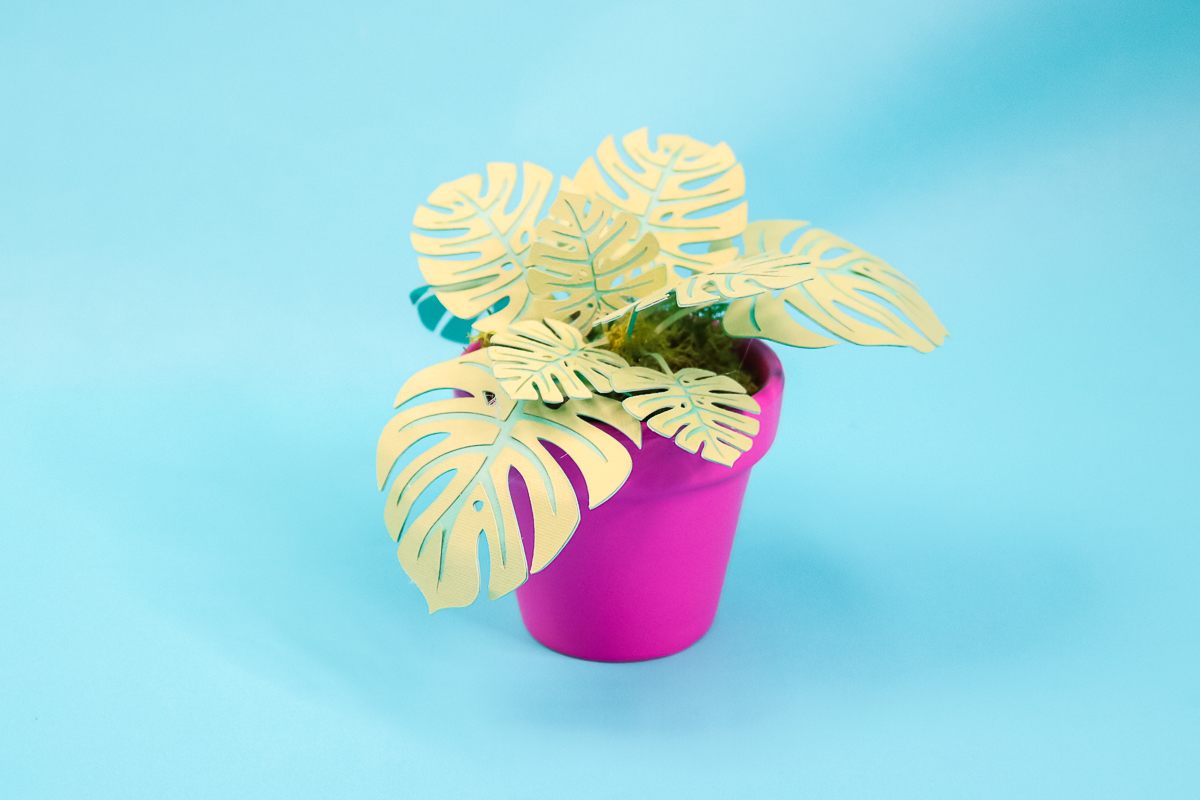
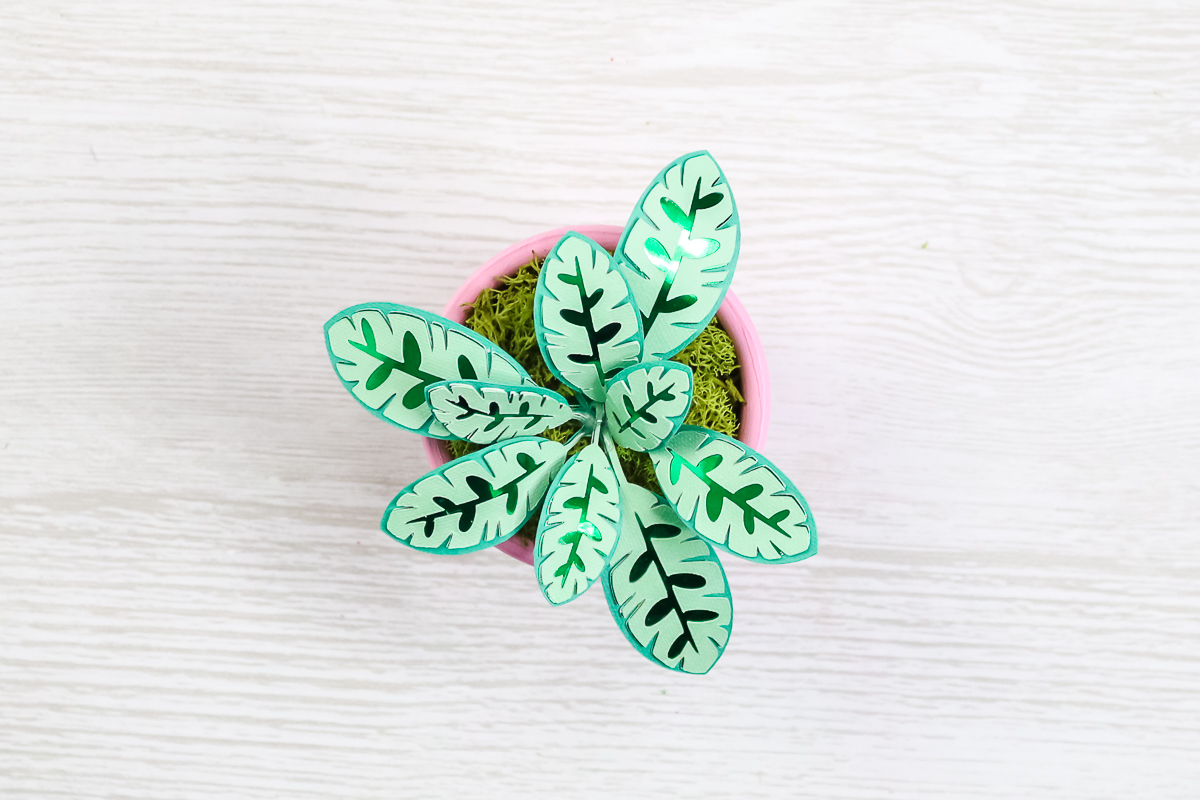
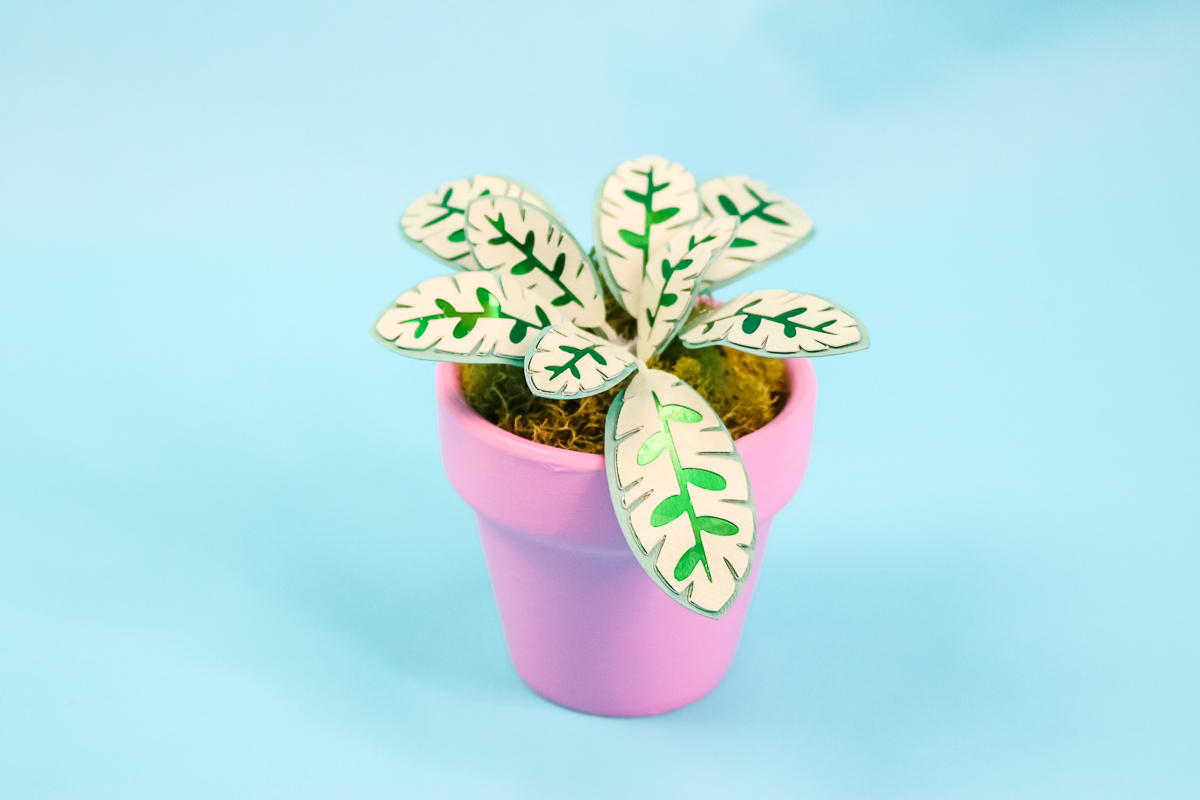
Monstera Plant
Once your leaves are dry, it is easy to put these plants together. With two layers of paper, these easily stand up on their own. So, all you have to do is slightly bend each leaf to shape it, then glue the ends onto your styrofoam.
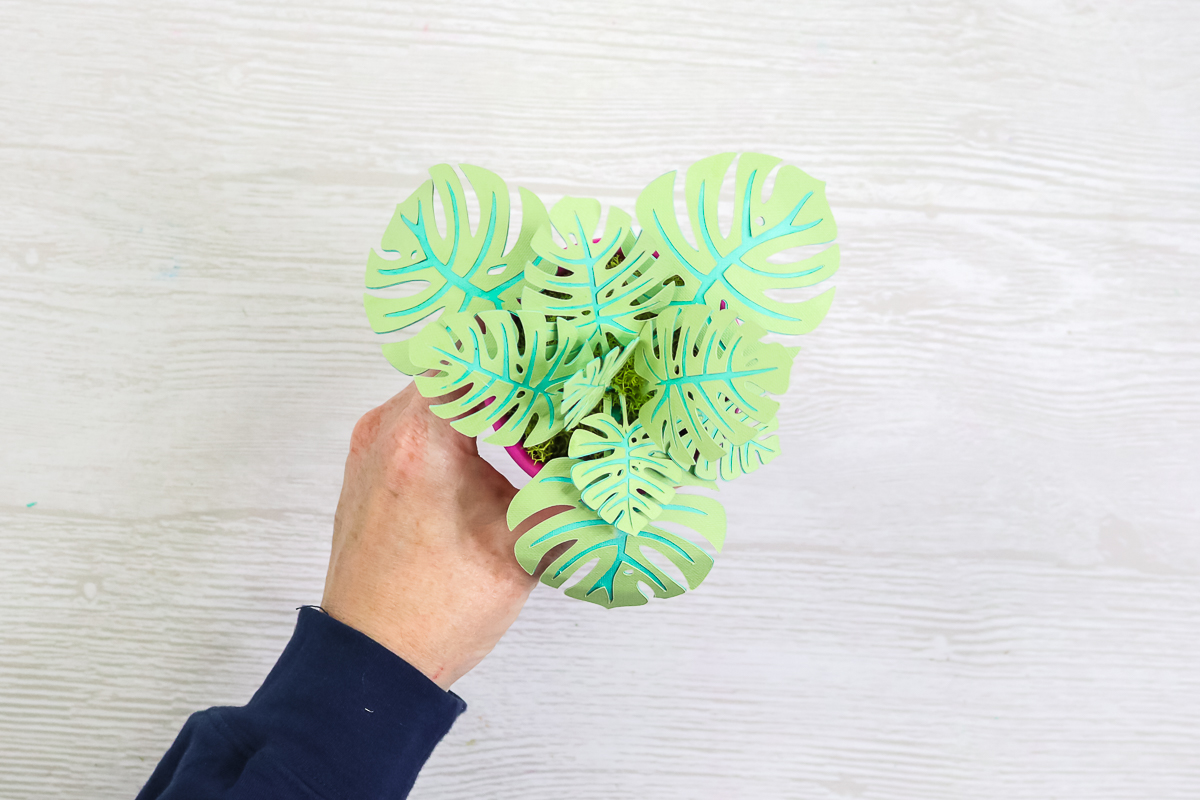
I do like to bend the ends of each of the leaves to give myself enough area for the hot glue. Otherwise, just arrange your leaves and enjoy your new plant!
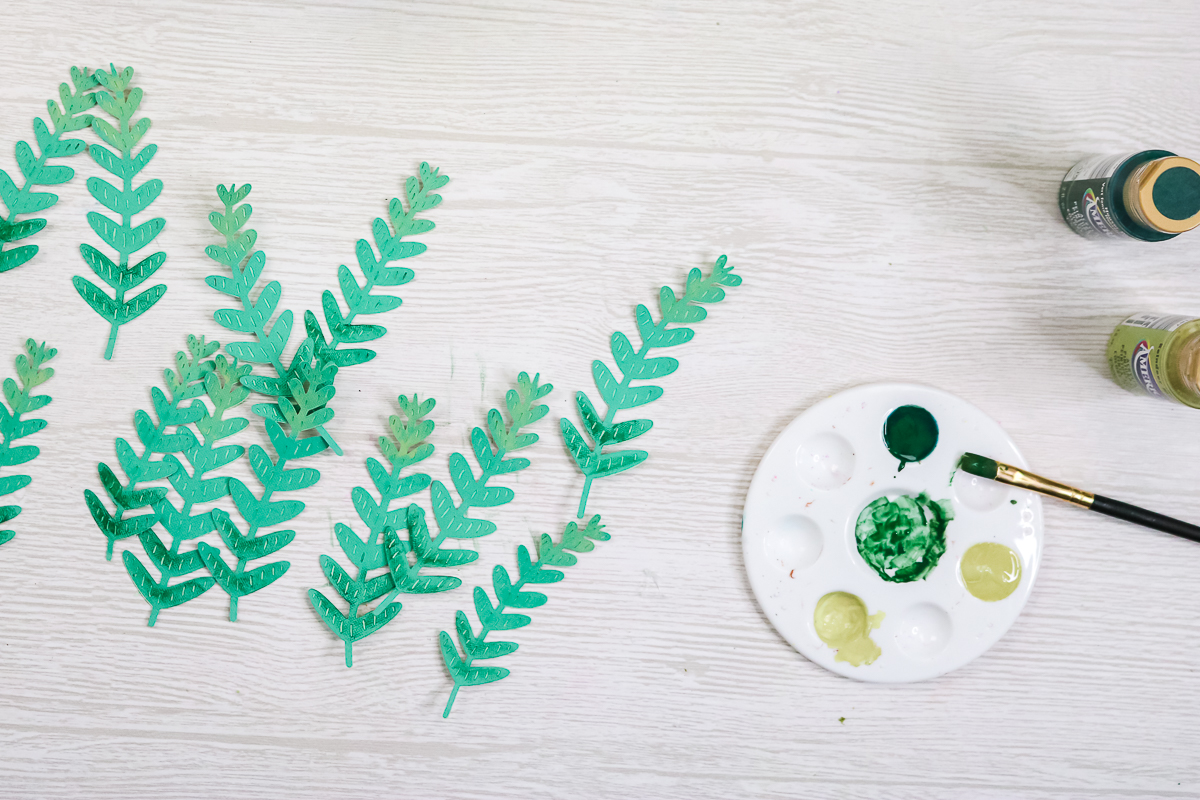
Adding Paint Accents To Paper Plants
Want to add a little something to any of the plants that we are making? You can do that with a little bit of paint! Just use a lighter or darker green and a small paintbrush to add accents and highlights.
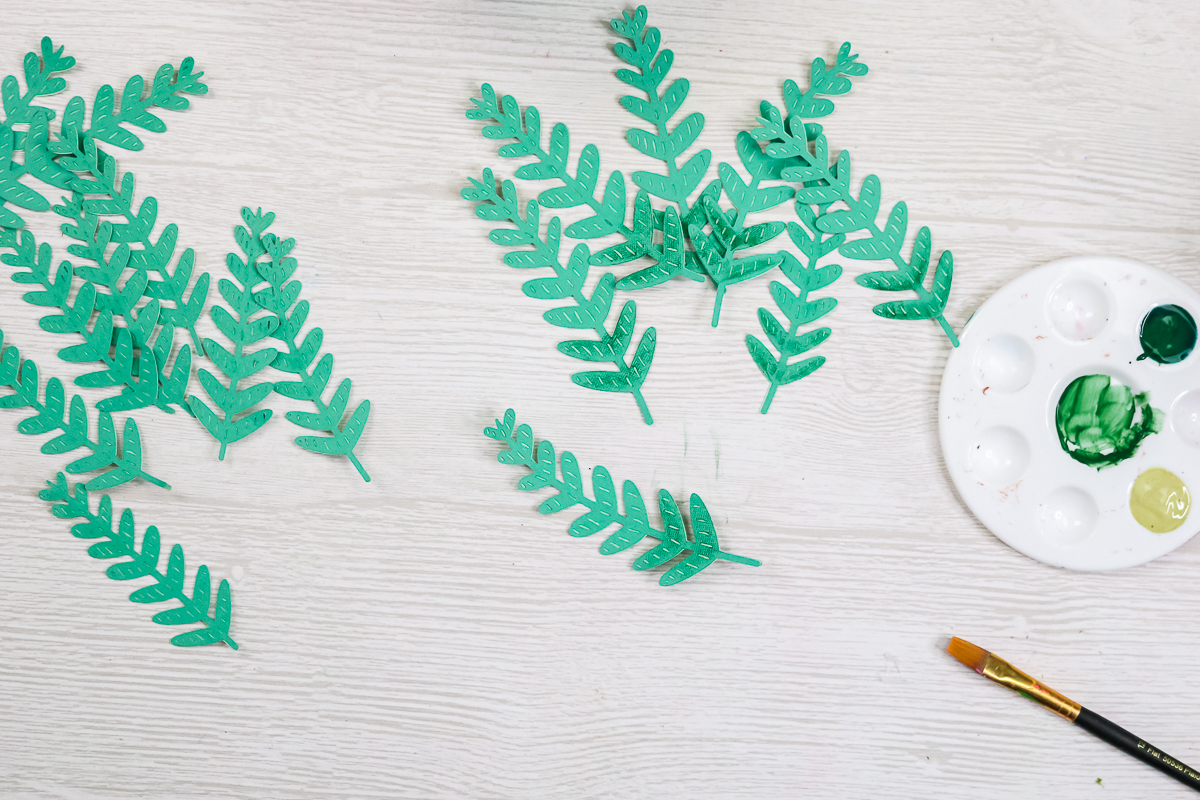
I used a minimal amount of paint on the brush and dry-brushed the paint onto the leaves. You can wipe away excess with a rag if needed. These should dry really fast, as you are just barely adding a little color.
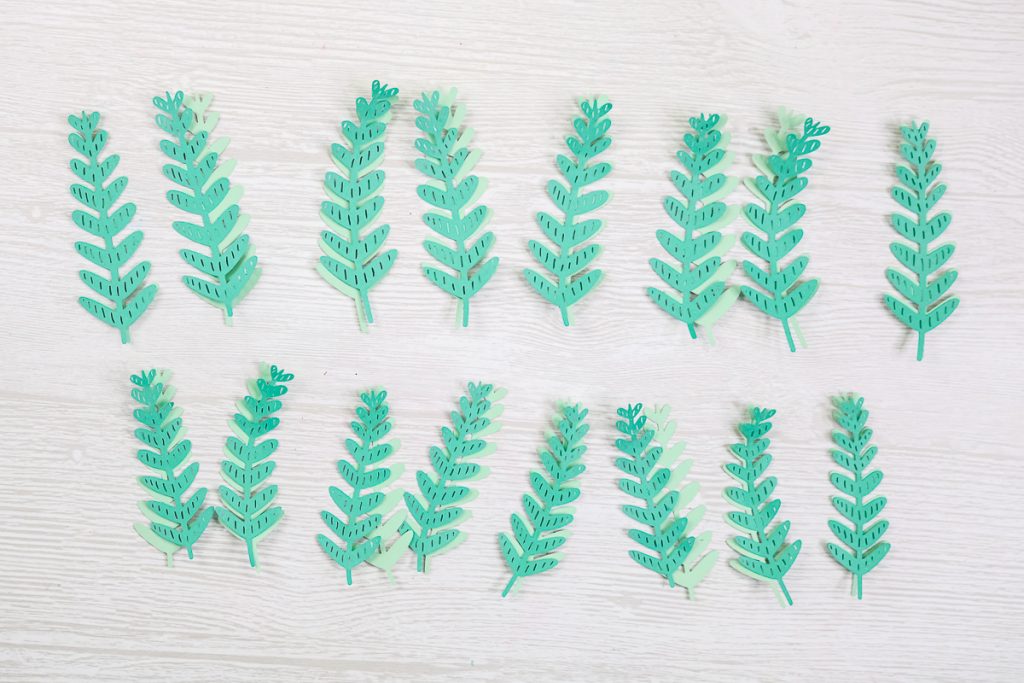
Fern Plant
Once you have your fern leaves, it is time to assemble your plant. Just like before, these have two layers, so they will stand up on their own. Add hot glue to the stems of each, place them on the foam, then shape the leaves by bending them slightly. Again, you can bend the stem a bit to create a spot for the glue.
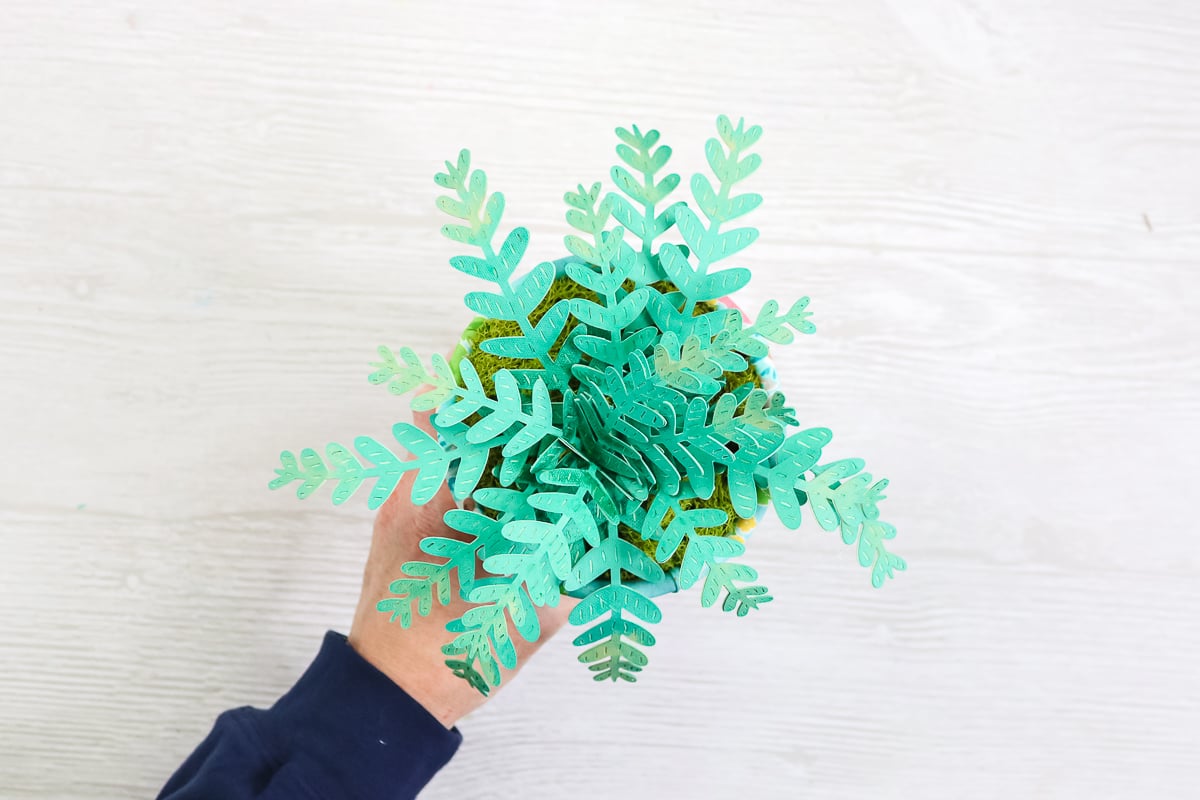
Repeat for all of your leaves, then step back to admire the paper plants you have made so far!
Assembling Plants Using Three Layers of Paper
Let's go a little further and use three layers of paper to create a really cool effect. On this one, I used foil poster board, so it gives the same foil effect, but you can make it with any Cricut machine.
Lily Plant
Start with your leaves and glue them together with your paper glue. For leaves like this with a ton of holes, I like to apply glue to the back of the paper and then place it on the layer below. Assemble each leaf and allow it to dry.
You can then assemble the plant in the same manner as we did the others above. Fold over the stem, add a bit of hot glue, and stick each leaf into place on the styrofoam.
This is one of my favorites as I love that foil accent peeking through on each leaf!
Assembling Plants Made From Felt
I just had to make one of these Cricut plant ideas with felt. I love felt for crafting, and it makes amazing succulent plants. You can, however, use paper for this same plant.
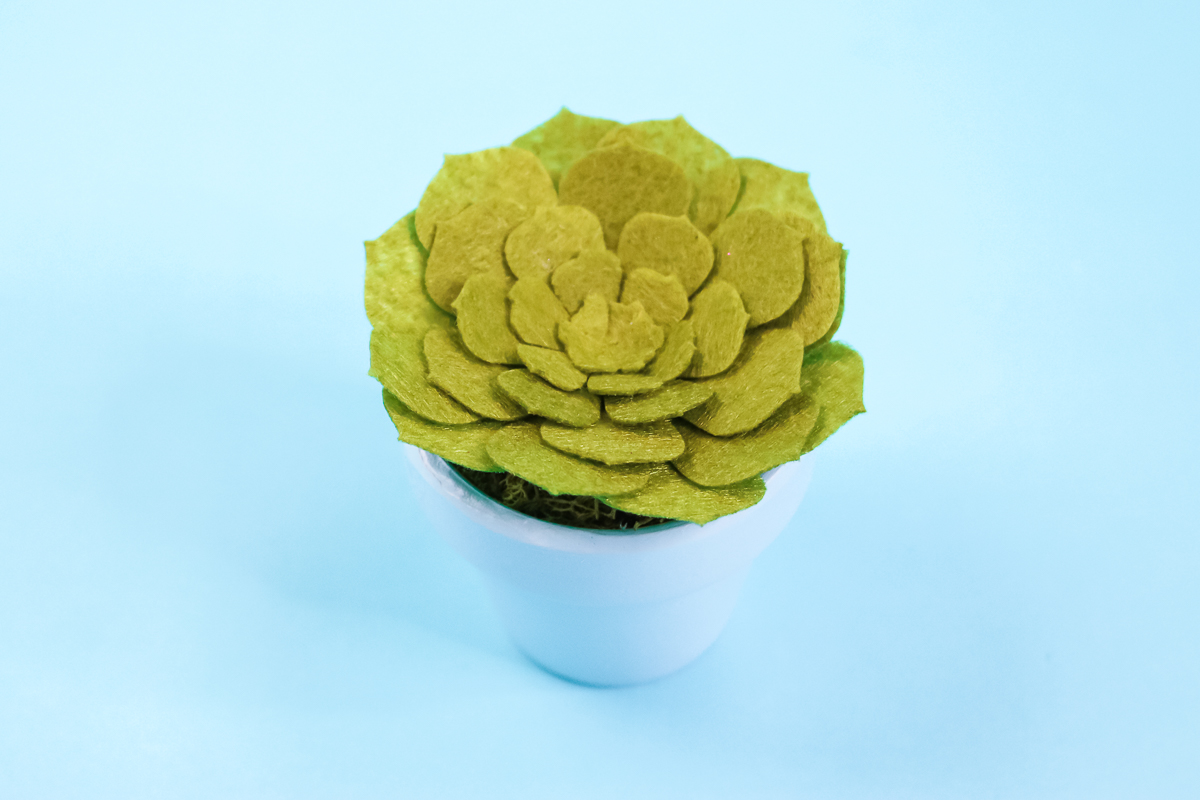
Succulent Plant
Lay out your leaves in order from largest to smallest. I will note here that my smallest leaf didn't do very well during cutting, so I didn't use it. You could still glue it into place if you wanted, even if it is in pieces.
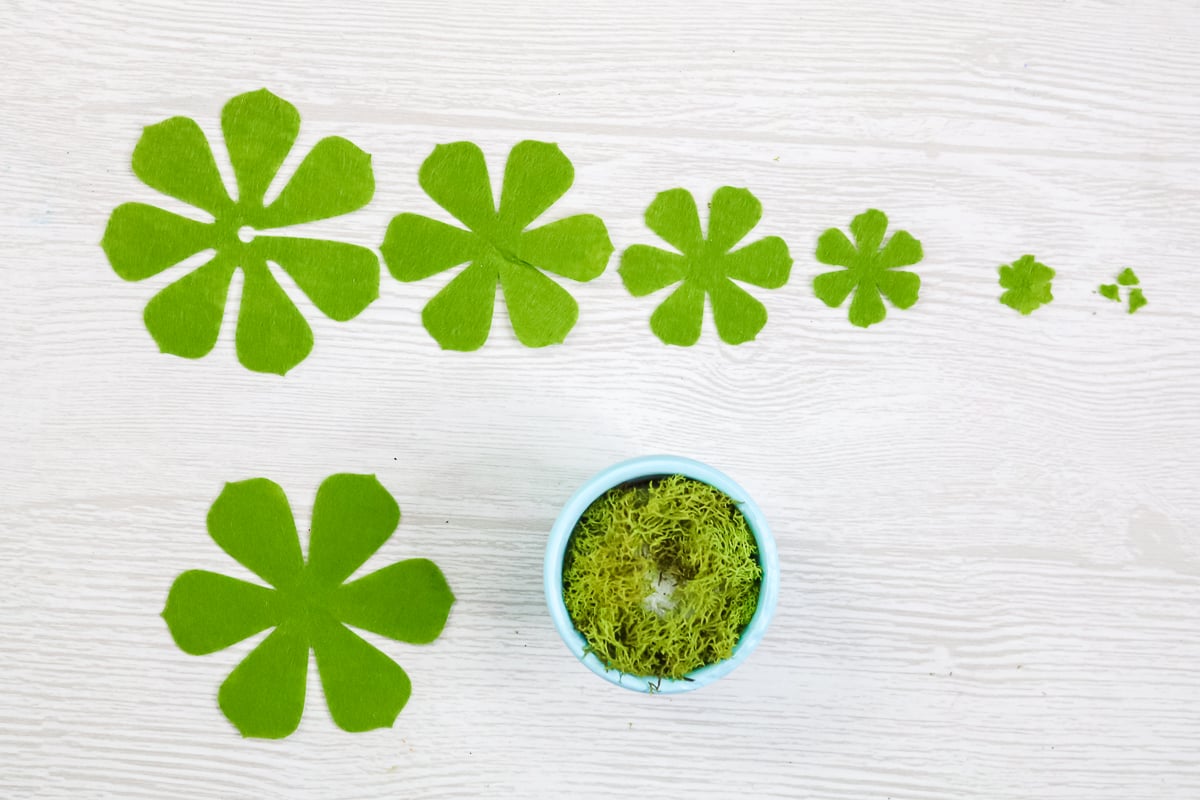
Start in the center with a large dollop of hot glue. Hold your first leaf in place in the center and push down. This will bring the edges up, making a cup shape. Hold until the glue cools. The second cut has a cutout. Place the leaves on either side of the cutout, overlapping them, and glue them together. Then place onto the succulent in the same manner as the first section. Repeat with each section, adding each and pressing down as your glue cools. Be sure to alternate the location of your leaves so that each one is in between the gaps of the one below it. Once you get your last layer into place, you should have something that looks like a cute succulent plant!
So, which of these paper plants is your favorite? Are you going to add this craft to your must-make list? If you were not planning on hosting a garden party this spring, you might want to reconsider. These are the perfect decorations for a cute garden-themed party. Plus the smaller plants would make great party favors.
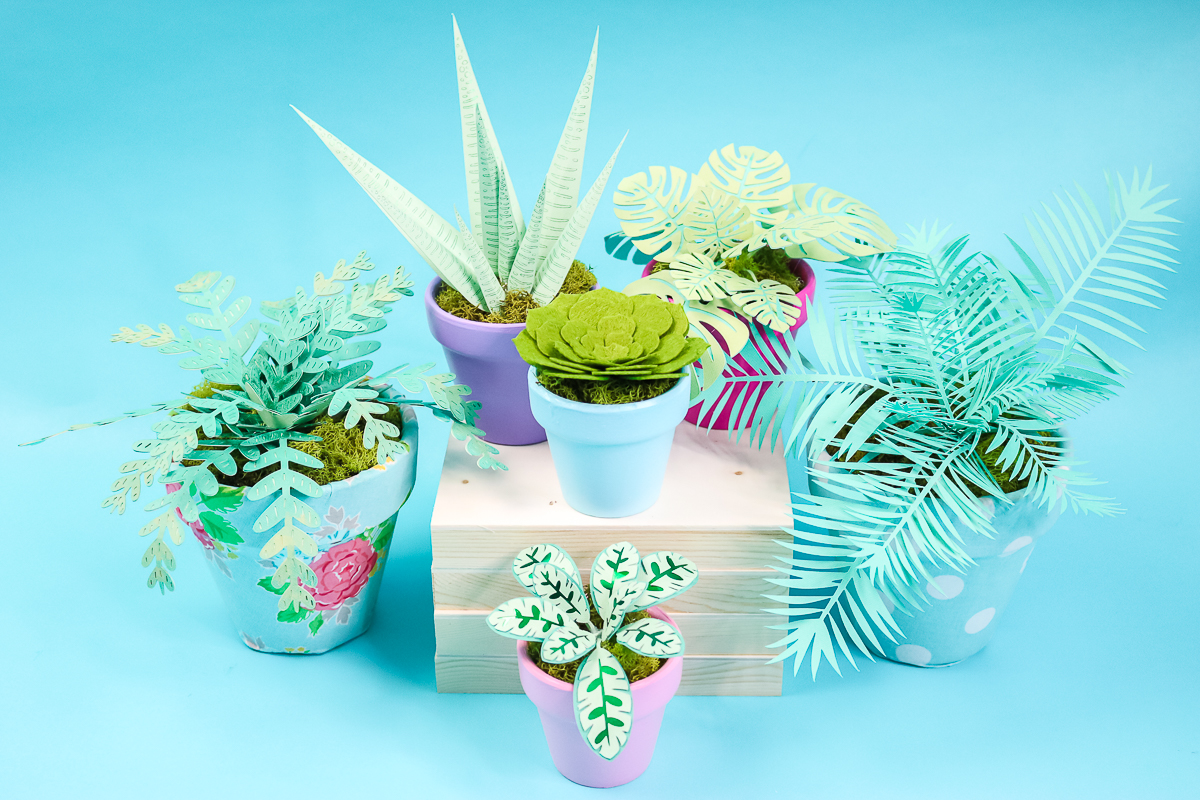
Even if you lack a green thumb, you can still have some cute plants around your home using your Cricut and a little imagination. So, make some paper plants today. I know you will love how they turn out!
FAQs About Paper Plants
Here are answers to some of the most frequently asked questions I receive about making paper plants with your Cricut. If your question isn’t listed, feel free to drop it in the comments, and I’ll be happy to help!
Can I Make Other Types Of Plants?
Of course! There are tons of options right in Cricut Design Space. Pick images and try searching for leaves.
How Large (Or Small) Can I Make My Plants?
You can make them as large or small as you would like! Be sure to keep the size of your paper in mind. However, if you can source the colors you like in 12×24 paper, those will be some really big plants!
What Type Of Paper Is Best?
I love the Cricut cardstock for these paper plants. It worked great and was the perfect weight.
What Other Plants Can I Make From Felt?
You can really make most plants from felt. I am not sure if the palm would work well with the skinny leaves. Also, for any plant where you want to bend the leaves, you would need to add a wire, as the felt would not bend like paper.
What Other Materials Are Good For Making Plants?
I like making plants from crepe paper, leather, glitter paper, and even wood in some cases. HTV and vinyl are also great for adding accents to paper crafts and would work great here.
5 Cricut Flower Crafts
Did you love these paper plants and want more Cricut flower crafts? Check out the projects below!
- Paper Flower Shadowbox with a Cricut Machine
- Cricut Infusible Ink Flower Coasters
- How to Make Felt Flowers with a Cricut
- DIY Cake Topper: Paper Flowers
- How To Make Giant Paper Flowers with Your Cricut


WOW! Those turned out beautifully!! They look real. And the pots are so pretty. Thank you for all of the instructions!!!
❣🌿🌾🌵☘🌱❣🌿🌾🌵☘🌱❣
hi Angie,
these looks amazing! quick questions. Have you tried to use Joy to cut felt or fabric before? is it possible? thank you
I have! Try this post: https://www.thecountrychiccottage.net/cricut-joy-versus-cricut-explore/
Do you have any files for these plants that are png or pdf for people without a cutting machine?
I don’t. Sorry!
I love these! They would be great at the daycare where I work. The link to get acces to the project isn’t working. Can you fix that? Thank you!