
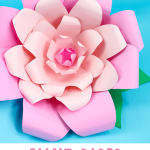
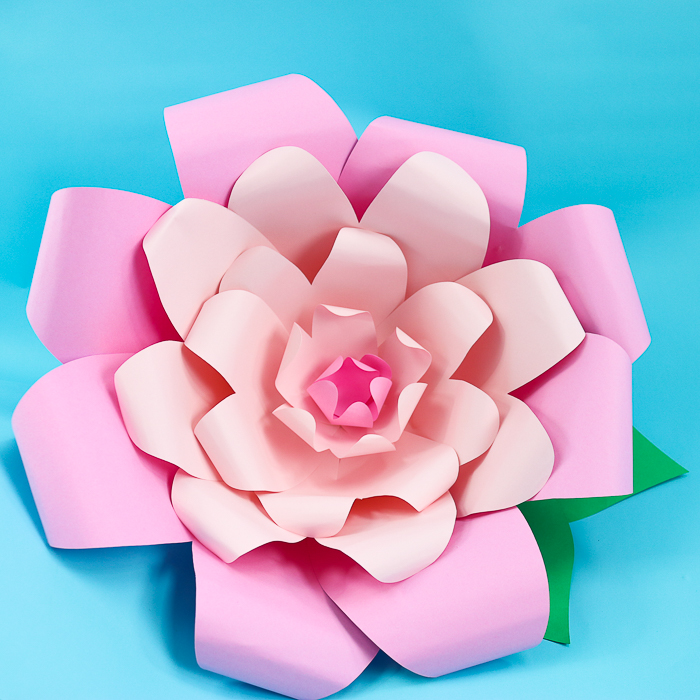
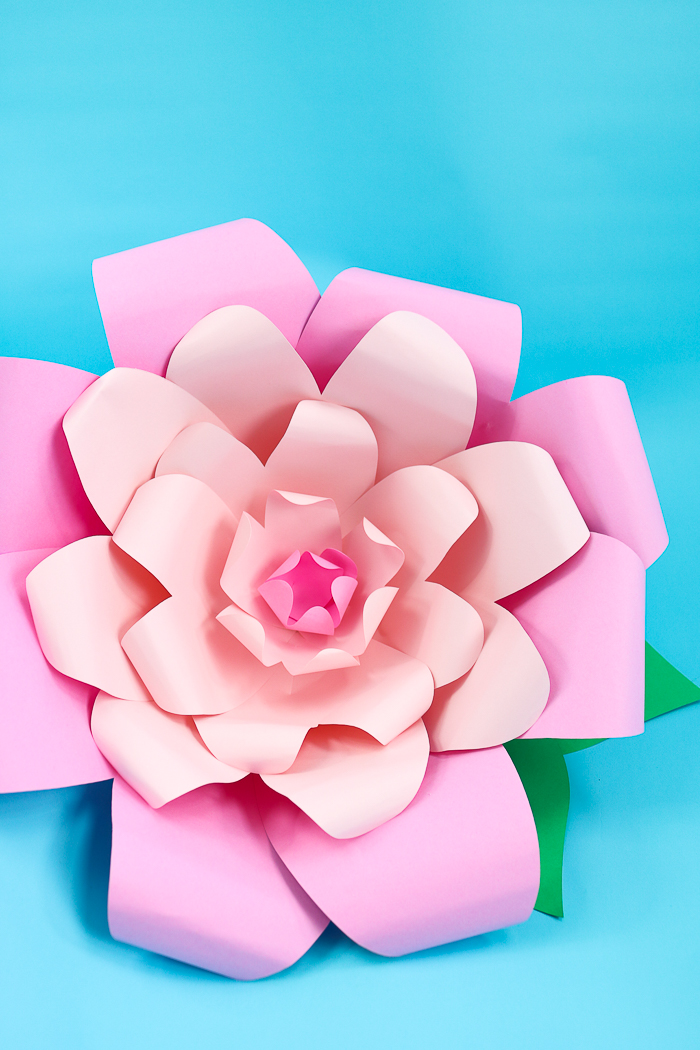
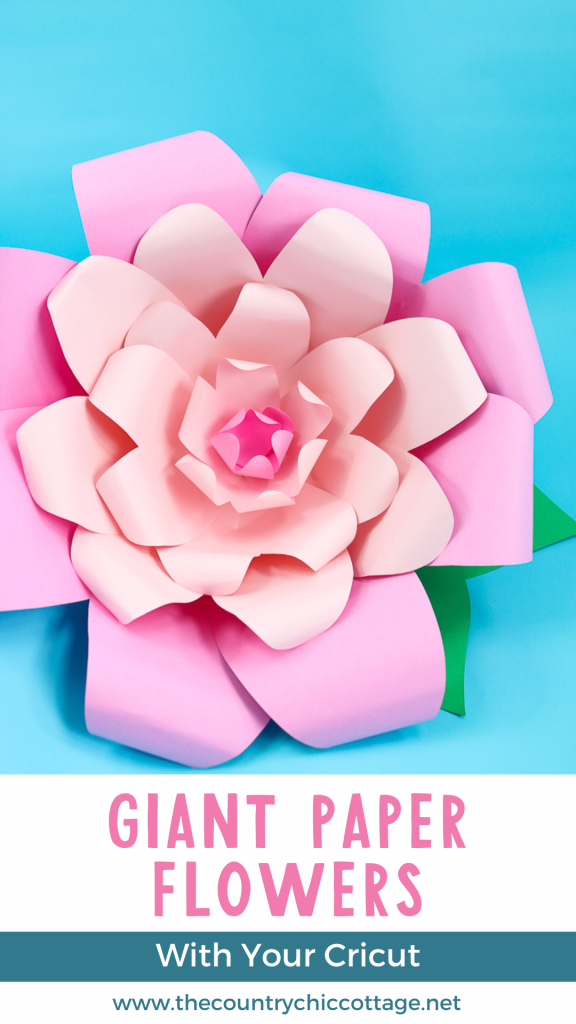
Did you know that you can make giant paper flowers with your Cricut? I have one version below, but you can use this same method to make a huge variety of large paper flowers. So, are you ready to learn how to make giant paper flowers with your Cricut? I thought so! Want even more fun flower crafts with your Cricut? You can see more great Cricut flower ideas here.
How To Make Giant Paper Flowers Video
Want to see just how to make DIY paper flowers? Just follow along with the video below.
Can't watch the video or missed some of the steps? We have the tutorial below for you as well.
How To Make Giant Paper Flowers With A Cricut Machine
Are you ready to dive into making paper flowers? Watch the video above or see our step-by-step instructions below for making flowers you will love.
Supplies Needed To Make Giant Cricut Paper Flowers
- 12×12 cardstock (8 sheets for flower and one for leaves)
- Cricut machine (you can see which is my favorite here)
- Hot glue and a glue gun
- Flower cut file (click here to access)
- Scissors
- Pencil
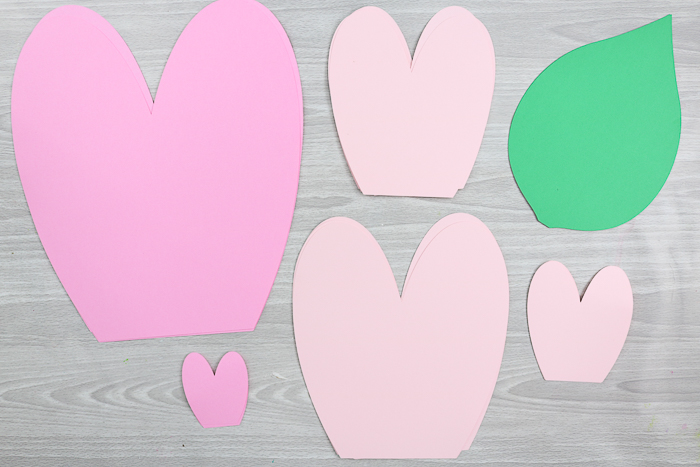
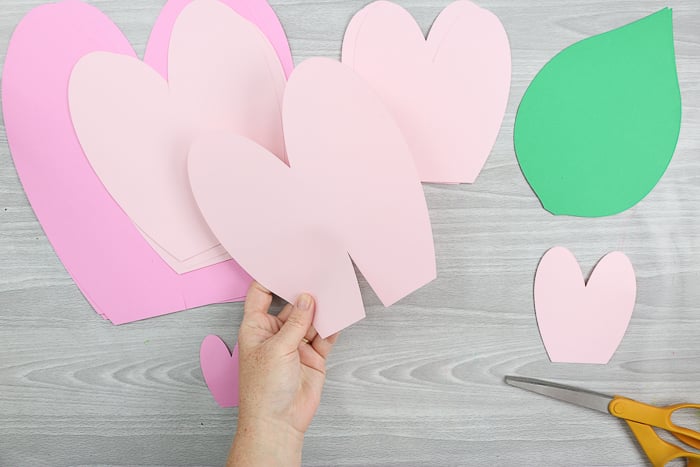
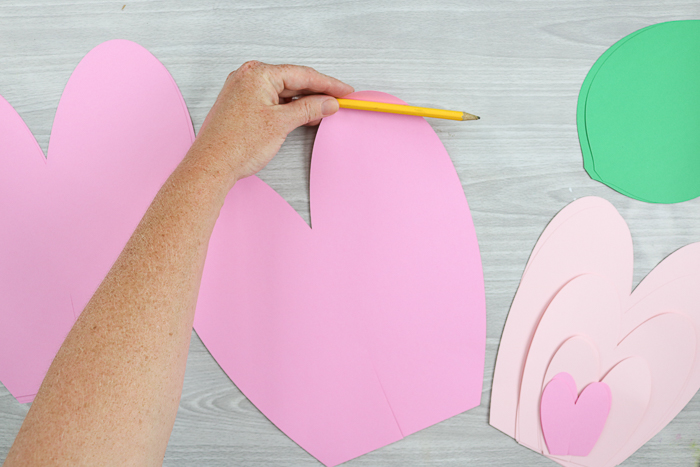
Step 1: Cut Out Petals & Leaves
Start by cutting all of your pieces with your Cricut machine. I have the cut file for you here. You will need to rearrange the mats to make the best use of your card stock. However, just move and flip the pieces until they fit the best. Then make a small slit in the bottom of each petal, as shown below.

The larger the petal, the longer the slit should be. Repeat for all of your petal pieces.
Step 2: Curl Petals
Then you want to curl all of the petals. Just wrap the card stock ends around a pencil, as shown below.
You will get curled ends on your paper, as shown below. Repeat for all of the flower petal pieces.
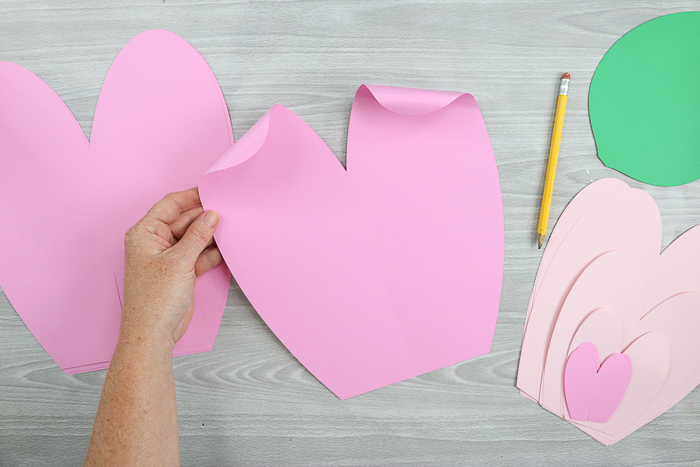
NOTE: The largest three sizes get formed with the curls going OUT. The smallest two sizes get formed with the curls going in. I put them in two different stacks to avoid getting messed up when making giant paper flowers like these.
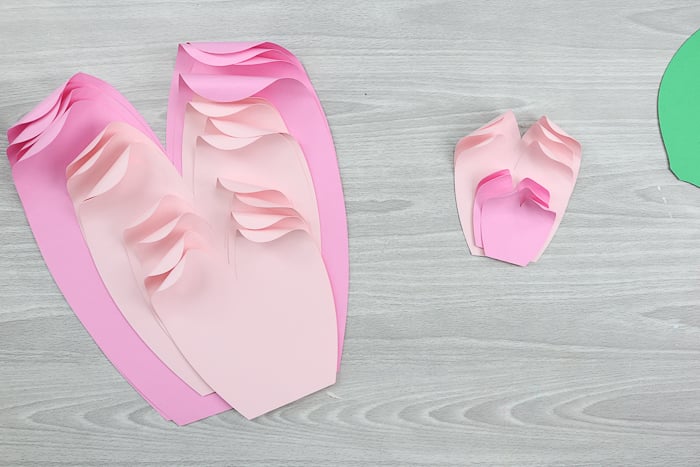
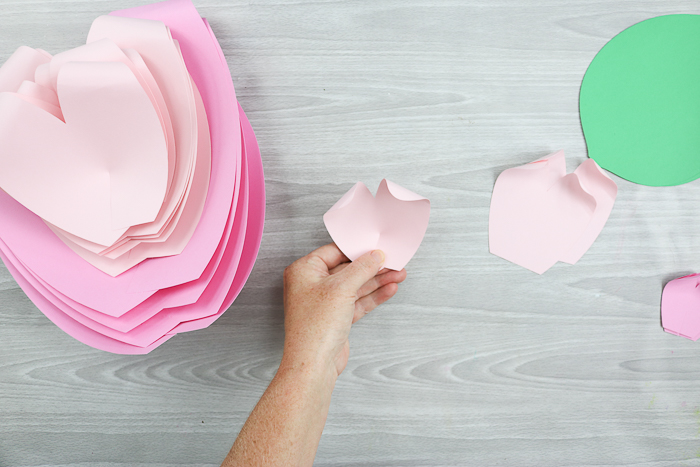
Step 3: Hot Glue Ends Of Petals Together
Add hot glue to one of the ends and fold over the petal, as shown below. Repeat this process for all petals.
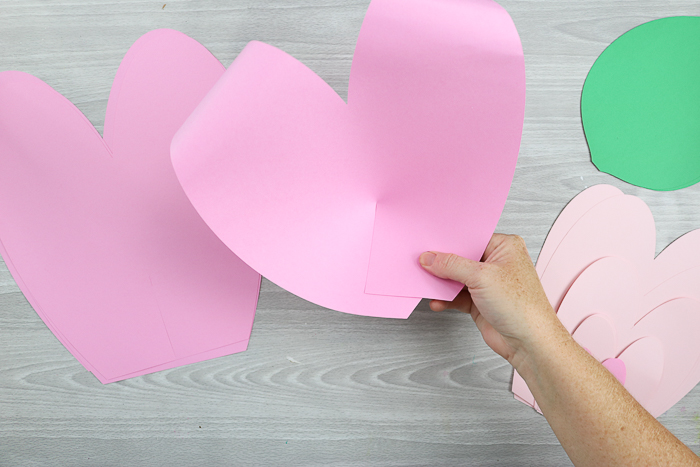
I did the first three sizes, as shown above. The smallest two sizes were done in the opposite direction but using the same method.
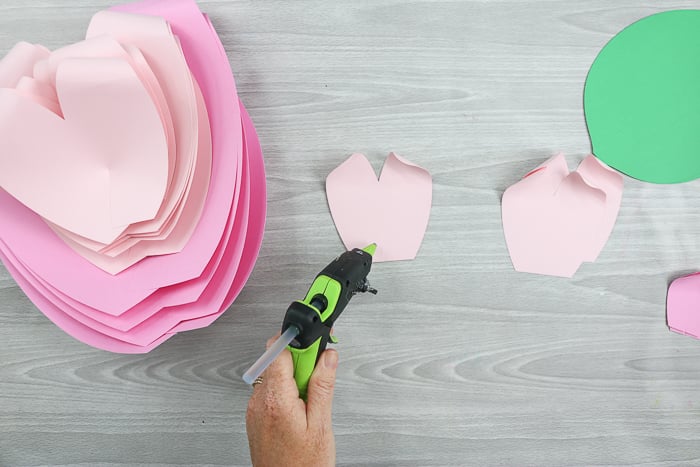
Just add hot glue to one of the sides and fold over. Hold with your hand until the hot glue cools enough to be secure.
Step 4: Assemble Large Paper Flowers
Now, we can begin forming our large paper flowers with the petals. Start with the largest size and use hot glue to secure the petals together at the bottom.
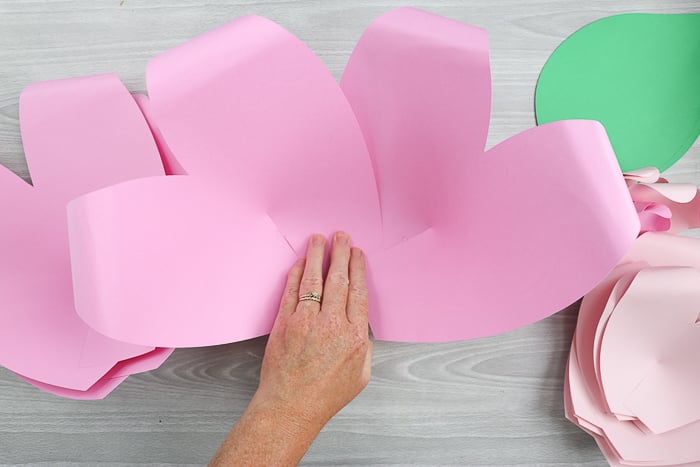
There are eight petals, so they should look like four corners, slightly overlapping when complete.
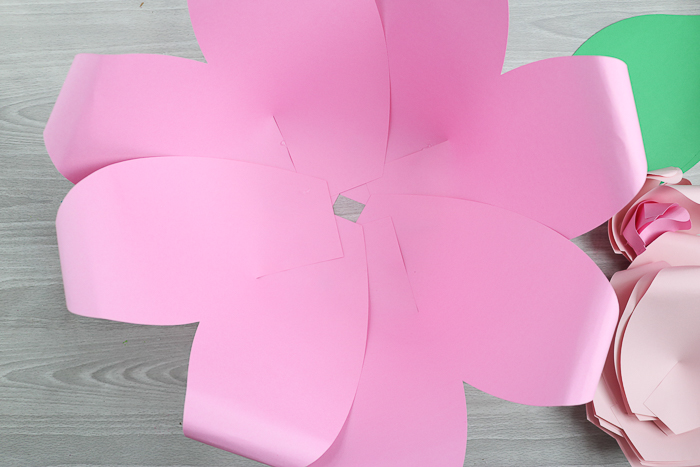
Then, keep layering on the sizes with additional hot glue.
Once you complete all three of the largest sizes, set that aside.
Step 5: Assemble Small Paper Flowers
Assemble the two smallest sizes similarly but off to the side. Start with the three smallest petals and hot glue them together.
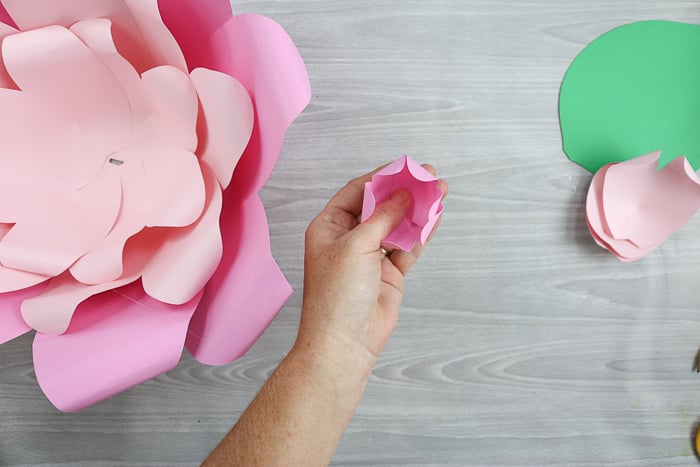
Then, do the next size and add the smallest to the center.

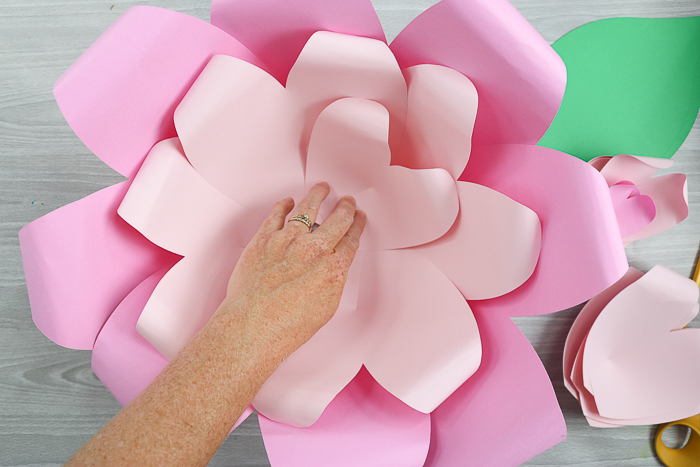
Step 6: Add Smaller Flower Stack To Larger Flower Stack
Glue smaller flower stack to larger flower stack.
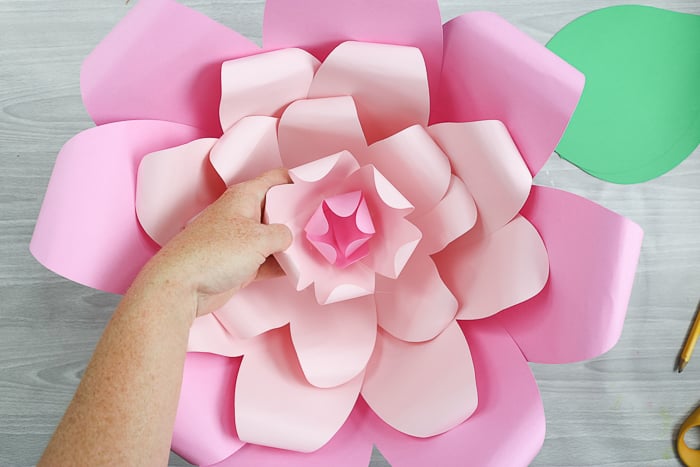
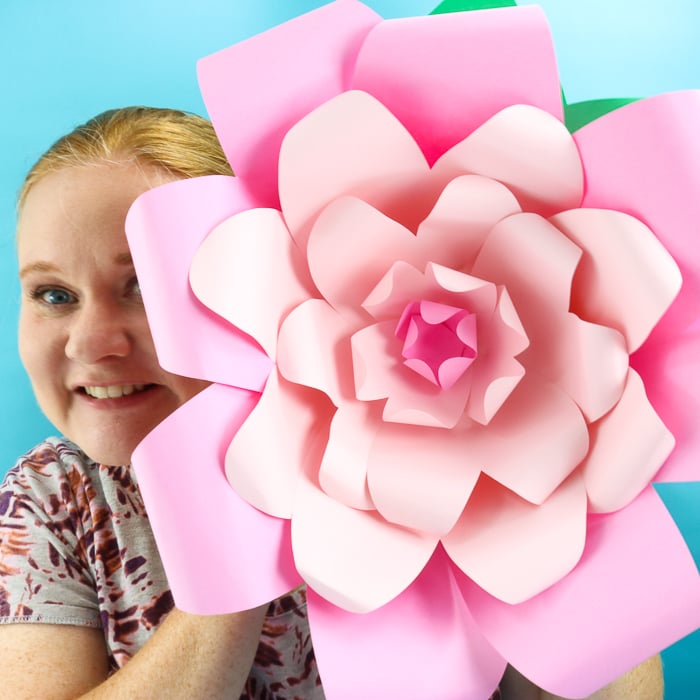
Your DIY paper flowers are complete! You can add the leaves to the side now with hot glue or wait until you put them in place.
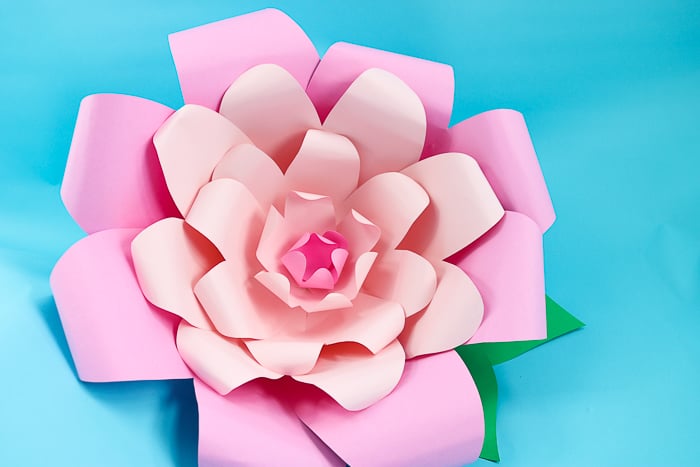
Giant paper flowers are a great addition to a party or even an entire wall in a bedroom. Whatever you decide, you will surely love how easy these are to make!
Now that you know how to make giant paper flowers, will you make some for your next event? I mean look at how big they are!
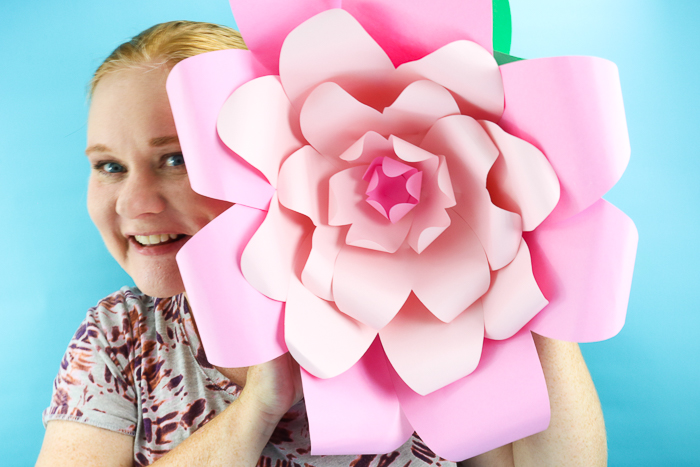
These fun large paper flowers are the perfect way to amp up any party!
Grab your supplies and your Cricut machine and make your own version. You can use the cut file I provided or create another one in a different shape. There are so many possibilities and so little time!
FAQs About How To Make Giant Paper Flowers
Here are a few common questions that I often see readers asking about making giant paper flowers. If you have a question, please check if I’ve already addressed it below. If you don’t see your question listed, please leave it in the comments!
What Cricut Machine Do You Recommend For This Project?
For this project, I recommend that you use the Cricut Maker, Cricut Explore series, or Cricut Venture. This is because all these machines can cut 12×12 cardstock.
Do I Need To Use Different Colors Of Cardstock?
No, you can use the same cardstock color for each paper flower layer.
How Can I Use These Giant Paper Flowers?
You can use these giant paper flowers in so many ways! They are perfect for parties, weddings, graduations, baby showers, and so much more! If you are looking for a few ideas on using them, below are some of my favorites.
- Backdrops
- Table Decor
- Centerpieces
- Wall Decor
- Door Decor
- Arches
How Can You Hang These Paper Flowers?
Depending on how you are using your paper flowers, you can hang them in various ways. Below are just a few ideas that you can use.
- Command Strips
- String – Hot glue a loop string to the back to hang.
- Attached them to wire structures – For example, a write arch, wreath, etc.
5 More Cricut Crafts
Did you love learning to make giant paper flowers and want more Cricut crafts? Then check out the projects below!


I just graduated college and am wanting to start an Etsy shop on the side, always looking for inspiration!
I would like to make some items for my daughter’s upcoming wedding.
I would like to make some tote bags! I’m in college and would like to have a little shop on the side!