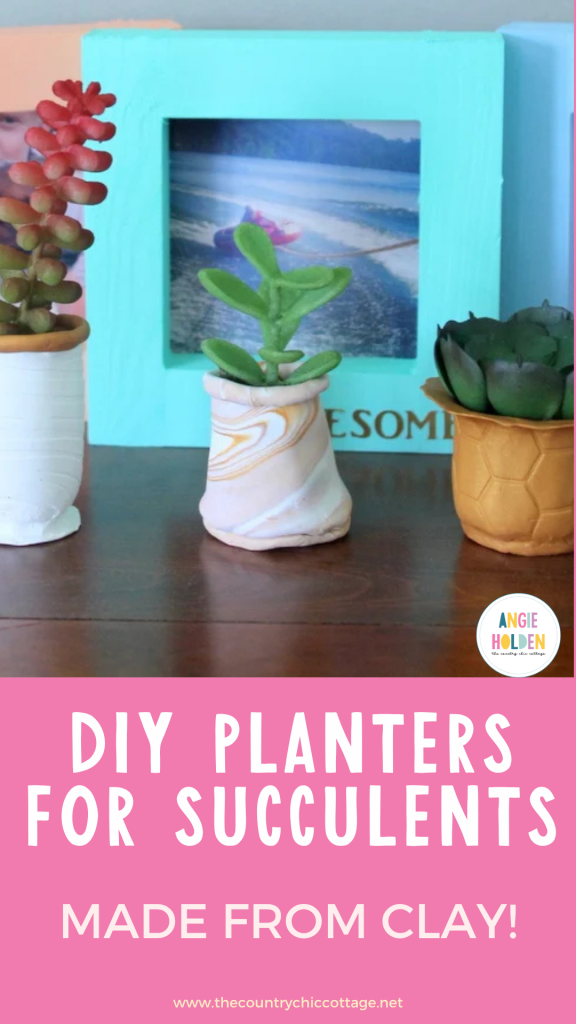
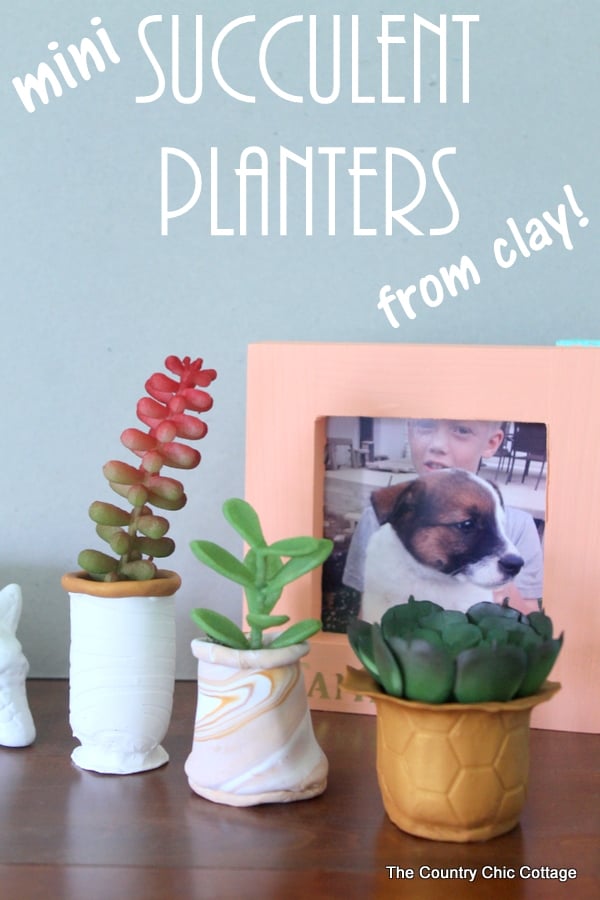
Add a bit of life into your home with these DIY planters for succulents! They’re easy to make and come together in just minutes.
Today’s project is super cute – DIY planters for succulents!
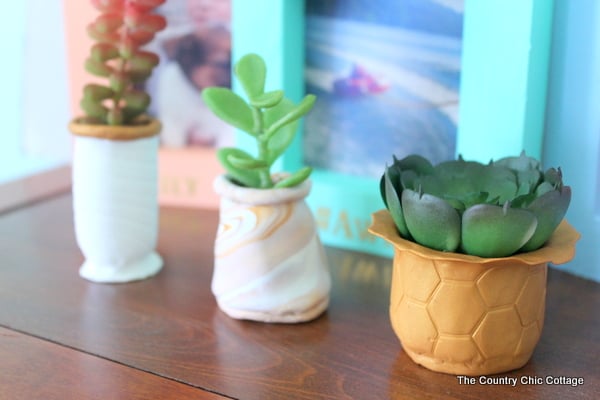
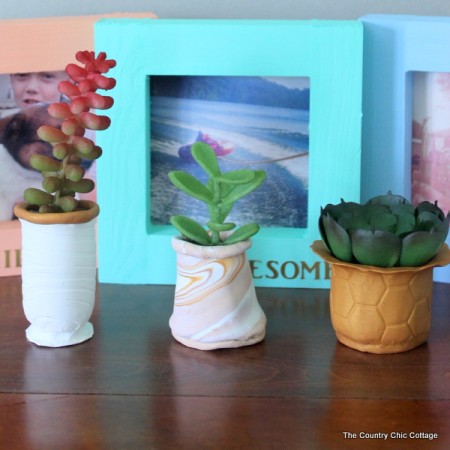
These clay planters can be displayed anywhere in your home, from bookshelves to side tables (I have them next to my Instagram picture frames).
Plus, they’re so fun to make, shaping forms with just the warmth of your hands.
Clay is one of my favorite crafting mediums because it is just so easy to use and extremely forgiving. Bake your project at the end, and you will have something that lasts for years in your home.
Ready to get started? Grab some clay and experiment with the project below. You will love it!
How to Make DIY Planters for Succulents
Making these clay planters is quick, easy, and fun!
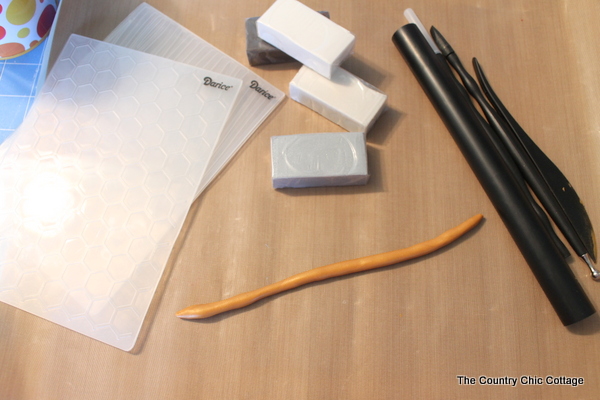
Supplies Needed
Here’s everything you’ll need to make your own clay planters:
- Sculpey III Polymer Clay Color Sampler (I used two of the bricks from a multi-pack to make all three planters)
- Sculpey Essential Tool Kit
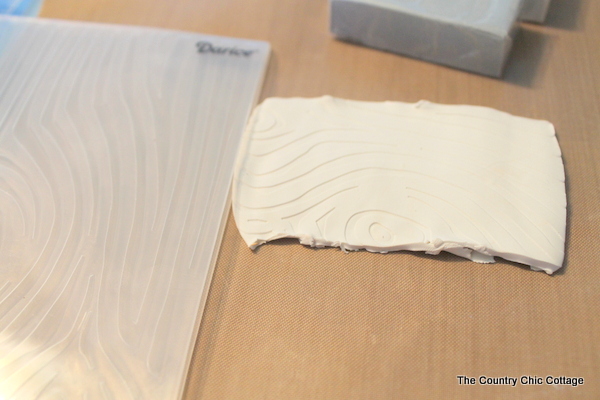
- Embossing folders (I used the wood grain and a honeycomb design)
- Ranger Inkssentials non-stick craft sheet
- Oven
- Artificial succulents (or real if you desire)
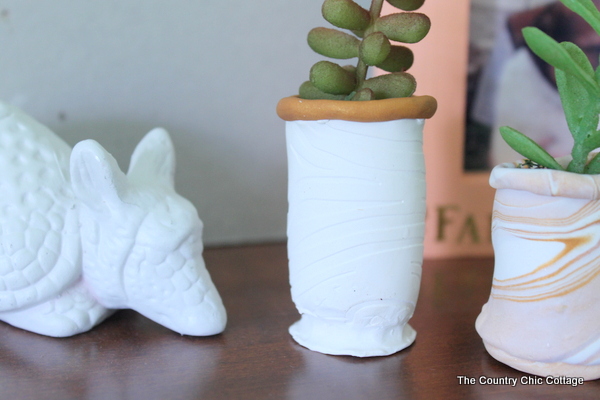
DIY Planters for Succulents Instructions: White Planter
The white and gold versions of these succulent planters were made using the same methods. The step-by-step instructions for the white version are below.
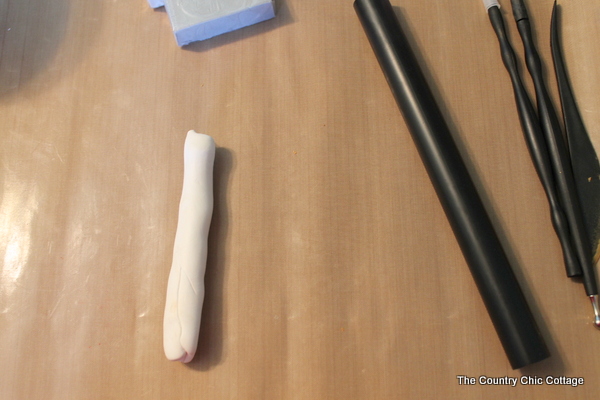
Step 1: Soften Clay
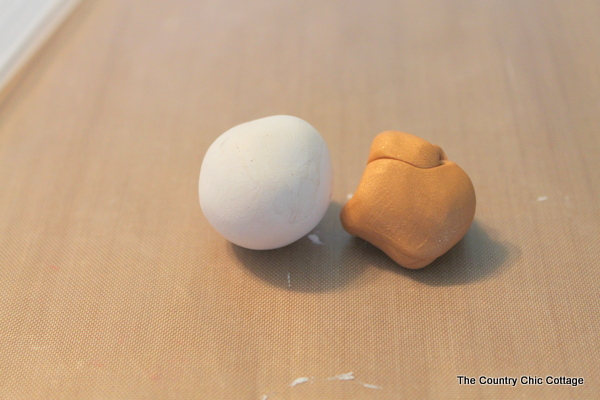
Start with the white clay. Work the clay between your hands for a few minutes to get it soft and ready to roll out.
NOTE: Always start by rolling the clay in your hands to get it warm and ready to work.
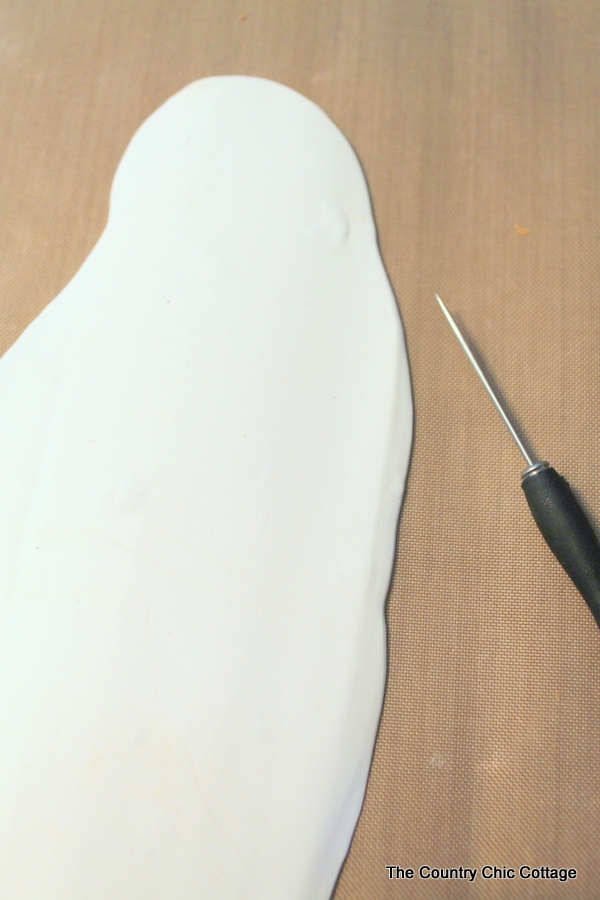
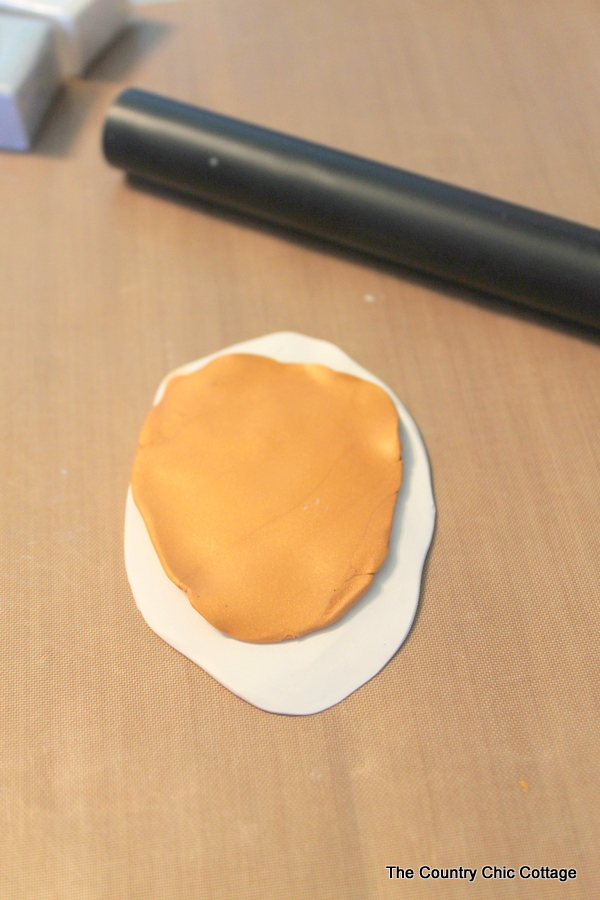
Step 2: Roll Flat
Roll flat with a roller or press with your hands. A roller will make the surface smoother. You can also press flat with your hands and then flip to reveal a smooth surface.
If you notice air bubbles in your clay, you can use a sharp tool to poke a hole in those then roll again to flatten.
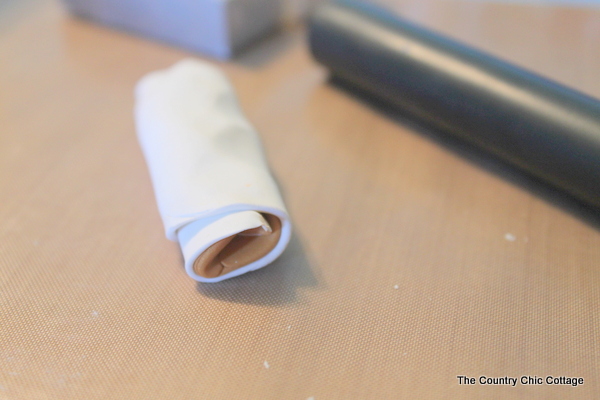
Step 3: Cut and Press
Cut the clay into a rectangle and press it onto the embossing folder to get that pattern onto your clay. If needed, use a flat tool to remove the clay from the mat.
Form the rectangle into a cylinder and seal where the edges join. Place on top of a separate piece of white clay that has been rolled flat.
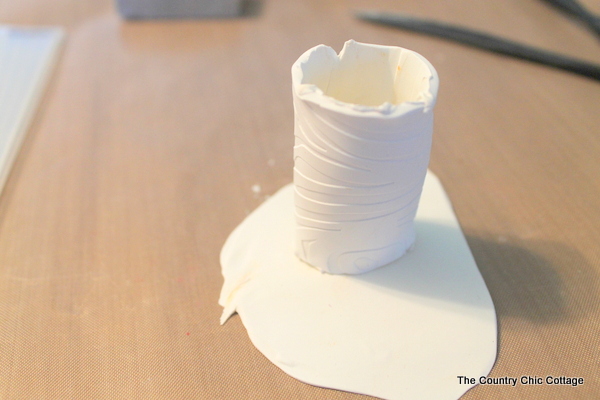
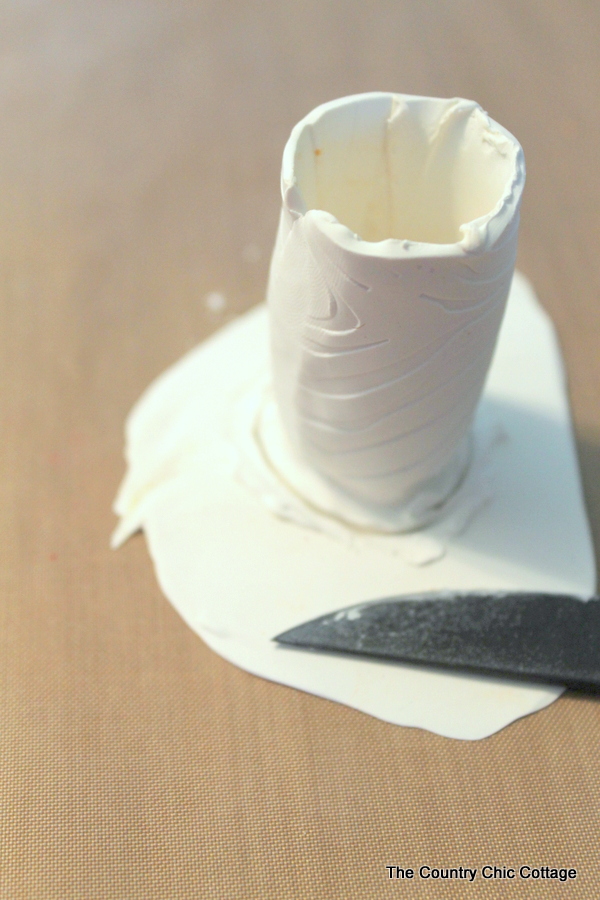
Step 4: Join and Smooth
Work the bottom of the cylinder into the flat piece of clay. I like a tool with a rounded end to work these two together and make the joint look smooth.
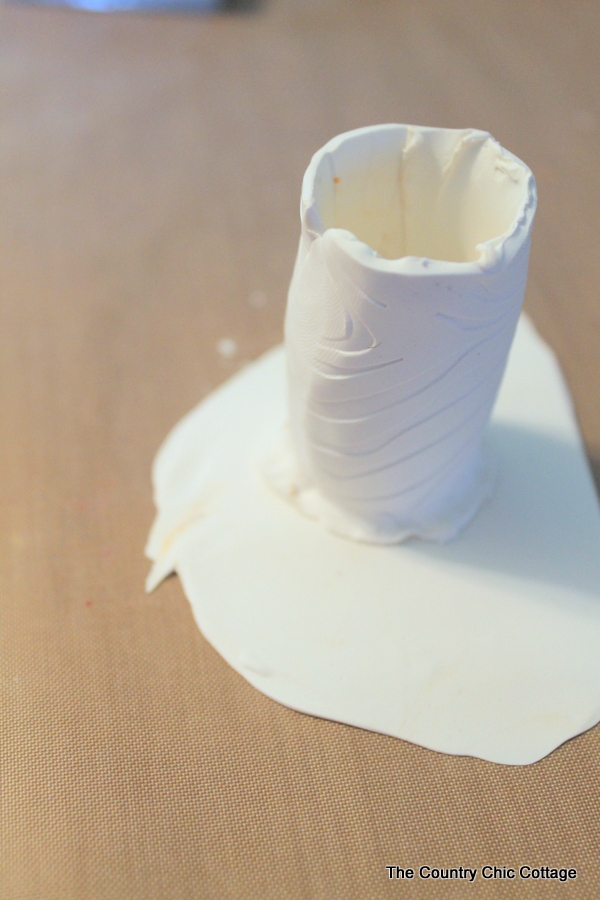
Cut around the bottom of your planter. Smooth the clay as desired with your fingers.
Step 5: Finish and Bake DIY Planters for Succulents
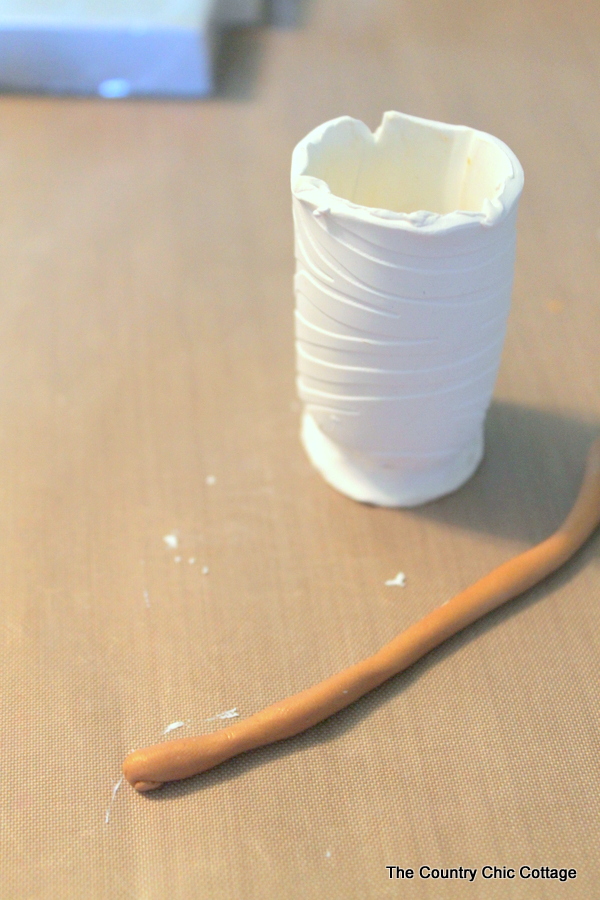
Roll out a small amount of gold clay into a snake.
This snake is then added to the top of the white pot to finish this one off. Before baking according to the package directions, be sure to poke holes in the bottom of the pot if you are going to use real succulents.
NOTE: When working with two different colors of clay, be sure to clean your tools, work surface, and hands before touching the other color!
All-Gold Alternative
The gold planter, pictured on the far right, is made the same way without mixing two colors.
Follow the steps above for this gold planter.
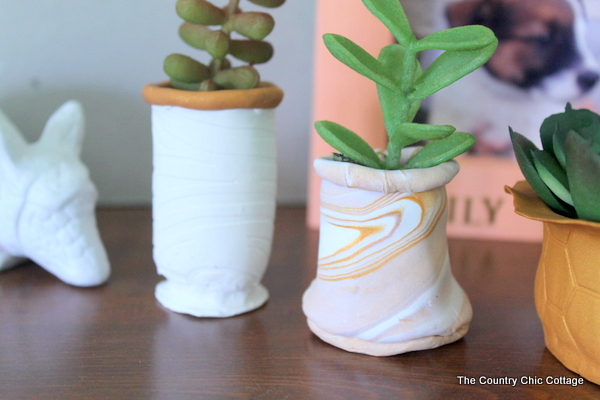
White and Gold Marbled Alternative
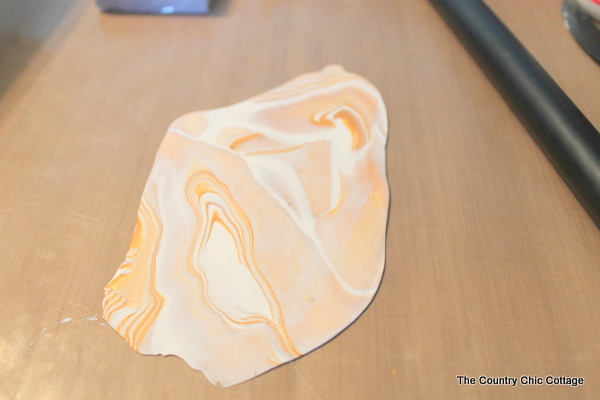
The middle planter, however, is a marbling process that needs different instructions! I used my leftover pieces of white and gold clay for this third pot.
Step 1: Make Marbled Clay
Roll both pieces flat and lay them on top of one another.
Roll up and then flatten again.
Cut that piece into strips and stack those strips on top of one another.
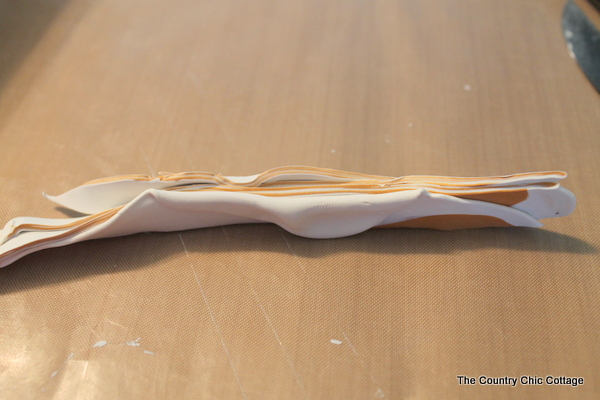
Flatten one more time, and you are left with a piece of marbled clay for any project.
Step 2: Cut and Assemble
Again, I cut a rectangle and formed it into a cylinder then joined that with another flat piece (see the instructions for the white succulent planter above for more details).
Step 3: Finish and Bake
Before baking, poke holes in the bottom of each pot with a sharp tool. Bake your mini succulent planters according to the package directions. Mine took about 10 minutes.
FAQs
Have questions? I’ve got answers! Here are more helpful tips for making these DIY planters for succulents:
What kind of clay is best to use for planters?
The best kind of clay for planters totally depends on your skill level, the time you want to put into the project. and the desired longevity of the pot.
Stoneware or terracotta clay are both great choices if you have access to a kiln. For home projects, however, air-dry clay is the way to go! It’s simple to use and requires just a basic oven to bake.
How do you waterproof clay planters?
Acrylic sealer is a good option to make your air-dry clay planters water-resistant.
Because the clay is still fairly porous, however, making it completely waterproof is a tricky task! If you’re up for it, an epoxy resin coating will provide a hard, waterproof shell.

How can you customize these planters?
These DIY planters for succulents are practically BEGGING for some customization! With air dry clay, the possibilities are endless.
Try experimenting with:
Shape – Form your planters tall or short, straight or curved, bulbous or thin.
Texture – Use different embossing folders for unique textures.
Color – Play with different color combinations, making interesting marbling or color block effects.
Special touches – Add engravings, rim accents, and more.
More Crafts
- DIY Concrete Planters (With Mason Jars)
- 7 Ways to Customize Your Planters
- Fabric Plant Pots with Mod Podge Ultra
- DIY Lantern Planter in Just Minutes
- DIY Tiered Planter with a Simple Paint Technique
Equipment
- Oven
- Clay tool kit
- Embossing folders Woodgrain and Honeycomb
Supplies
- 1 Nonstick craft sheet
- 2 blocks Polymer clay White and gold
- Artificial succulents
Instructions
- Start with the white clay. Work the clay between your hands for a few minutes to get it soft and ready to roll out.
- Roll flat with a roller or press with your hands. A roller will make the surface smoother. You can also press flat with your hands and then flip to reveal a smooth surface. If you notice air bubbles in your clay, you can use a sharp tool to poke a hole in those then roll again to flatten.
- Cut the clay into a rectangle and press it onto the embossing folder to get that pattern onto your clay. If needed, use a flat tool to remove the clay from the mat.
- Form the rectangle into a cylinder and seal where the edges join. Place on top of a separate piece of white clay that has been rolled flat.
- Work the bottom of the cylinder into the flat piece of clay. I like a tool with a rounded end to work these two together and make the joint look smooth.
- Cut around the bottom of your planter. Smooth the clay as desired with your fingers.
- Roll out a small amount of gold clay into a snake. This snake is then added to the top of the white pot to finish this one off.
- Before baking, be sure to poke holes in the bottom of the pot if you're using real succulents.
- Bake according to air dry package instructions.
Notes