
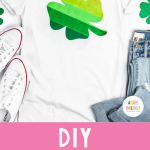
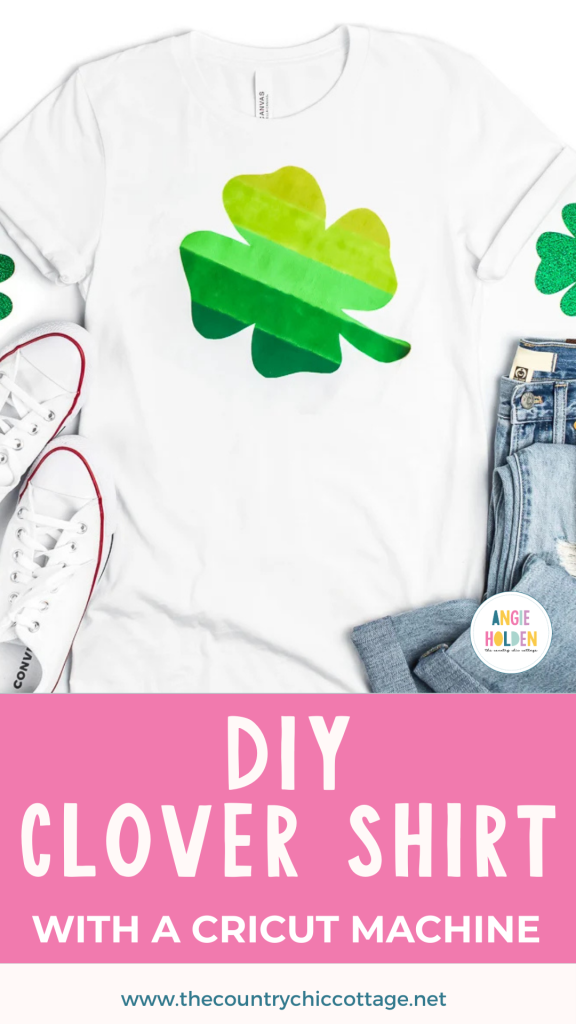
Get ready for St. Patrick's Day by making this cute DIY clover shirt. Adding an ombre clover shape to a shirt is easy with your Cricut machine and some paint. I am going to show you how to use fabric medium to turn any acrylic paint into fabric paint in seconds. Then you can make a stencil with your Cricut machine to use this same technique for craft projects all year long. So simple yet so cute. Plus it will keep your kids (or you) from getting pinched. Perfect right? So let's get started!
This one was first published on March 4, 2013, however, I am republishing it with more information.

Clover Shirt
I am using the freezer paper stenciling method for this project. I love using freezer paper as a stencil on fabric crafts. It is inexpensive, easy to use, and I get great results every single time. I would encourage you to give it a try as well, however, you can also use vinyl as a stencil for this project if you would like.
Supplies needed:
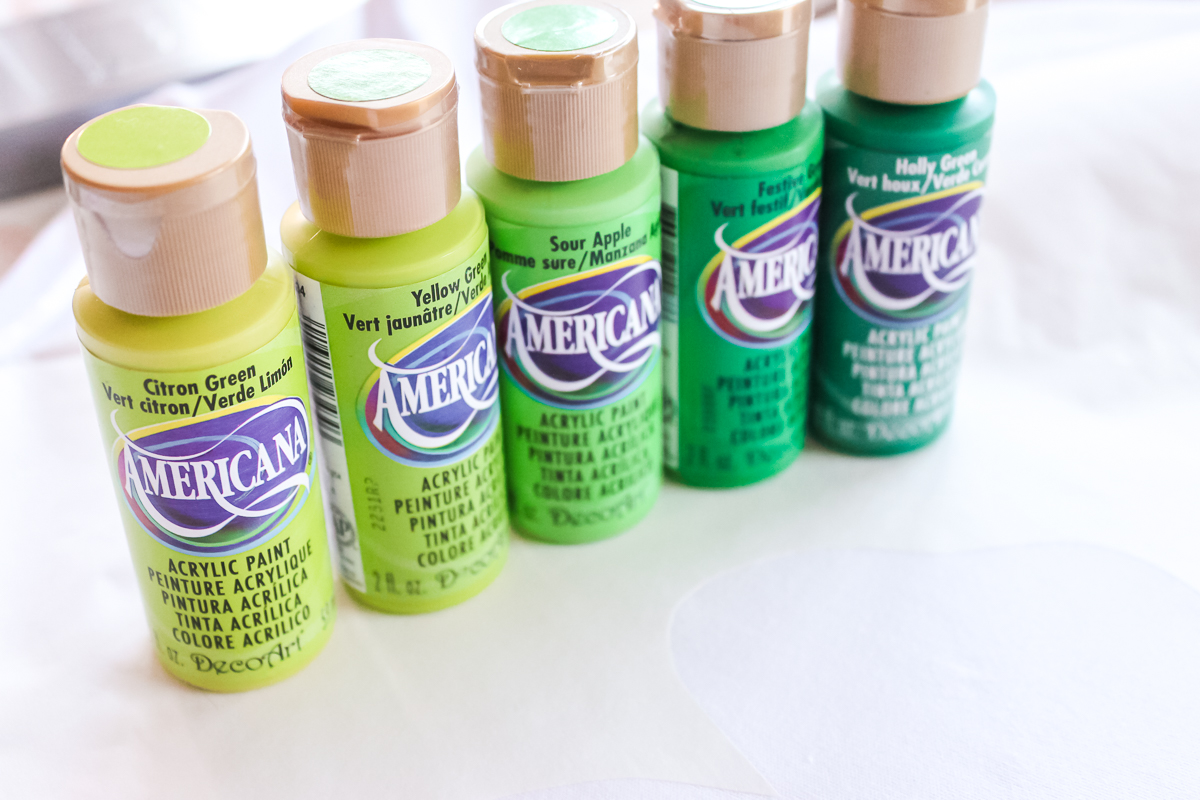
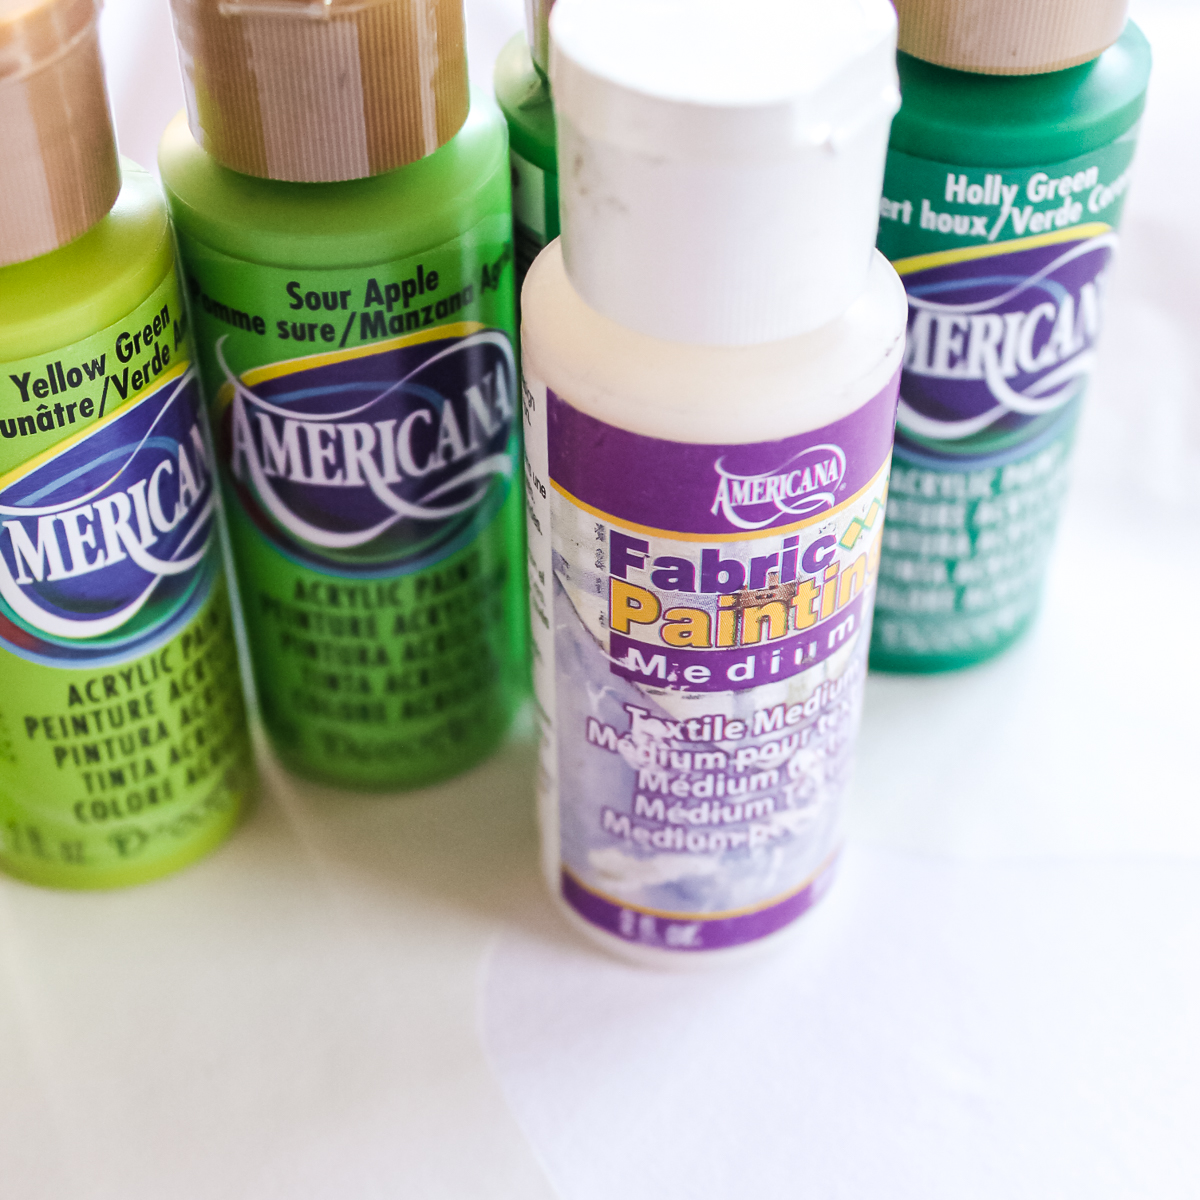
- Americana Paint in Holly Green, Festive Green, Sour Apple, Yellow Green, and Citron Green
- Fabric Painting Medium
- White t-shirt
- Stencil brush
- Freezer paper
- Ruler
- Iron
- Cricut machine
- Clover SVG file
NOTE: I used the paint colors listed above. You can of course pick other greens just make sure they have a gradient effect.
How to Make a DIY Clover Shirt
Now that you have your supplies, it is time to put them to work making a St. Patrick's Day shirt that is all your own!
Cutting the Freezer Paper
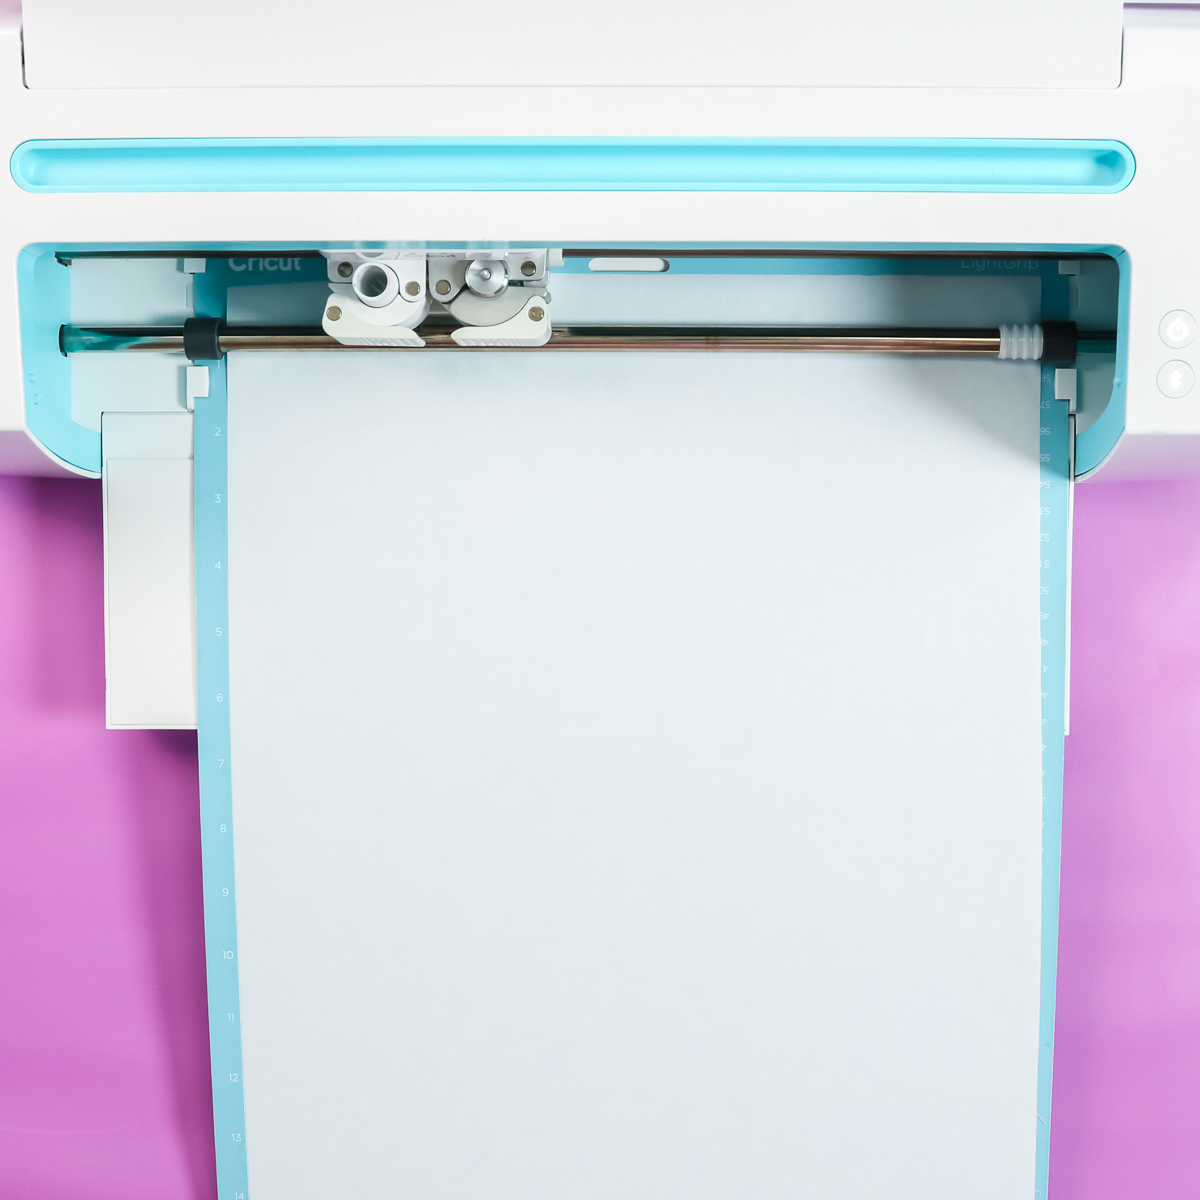
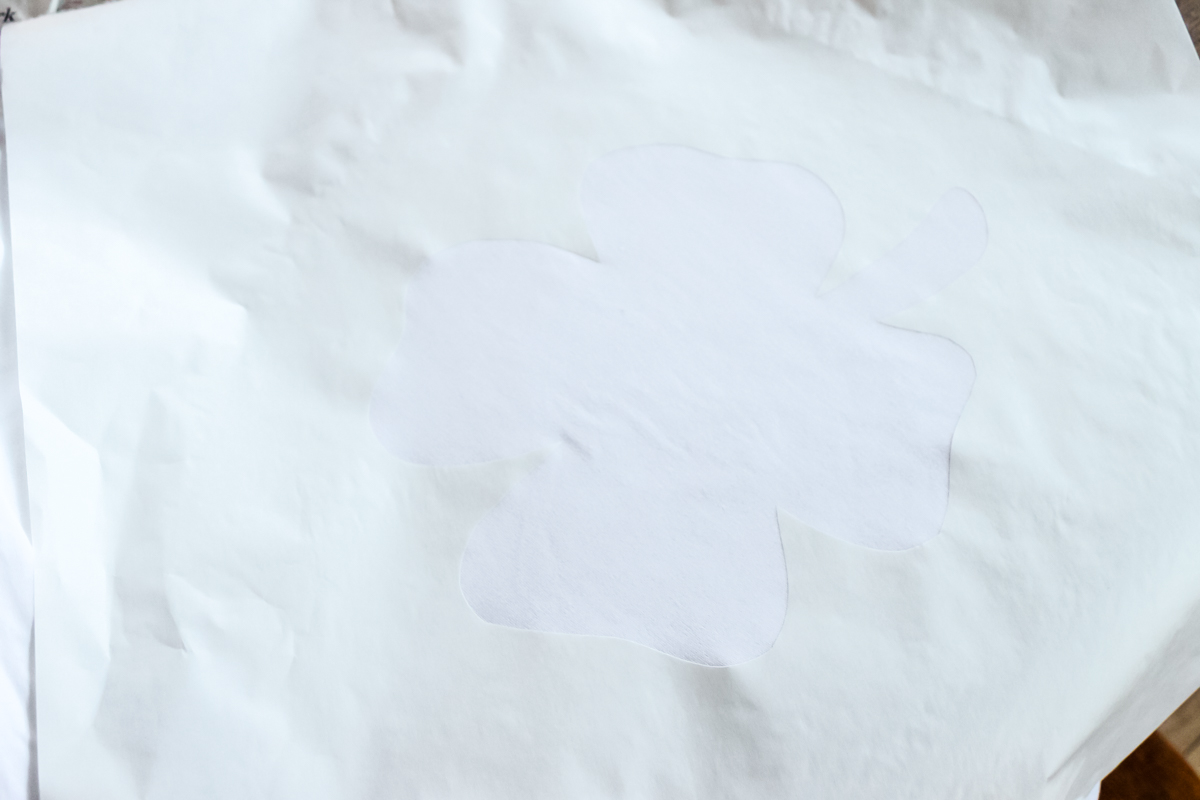
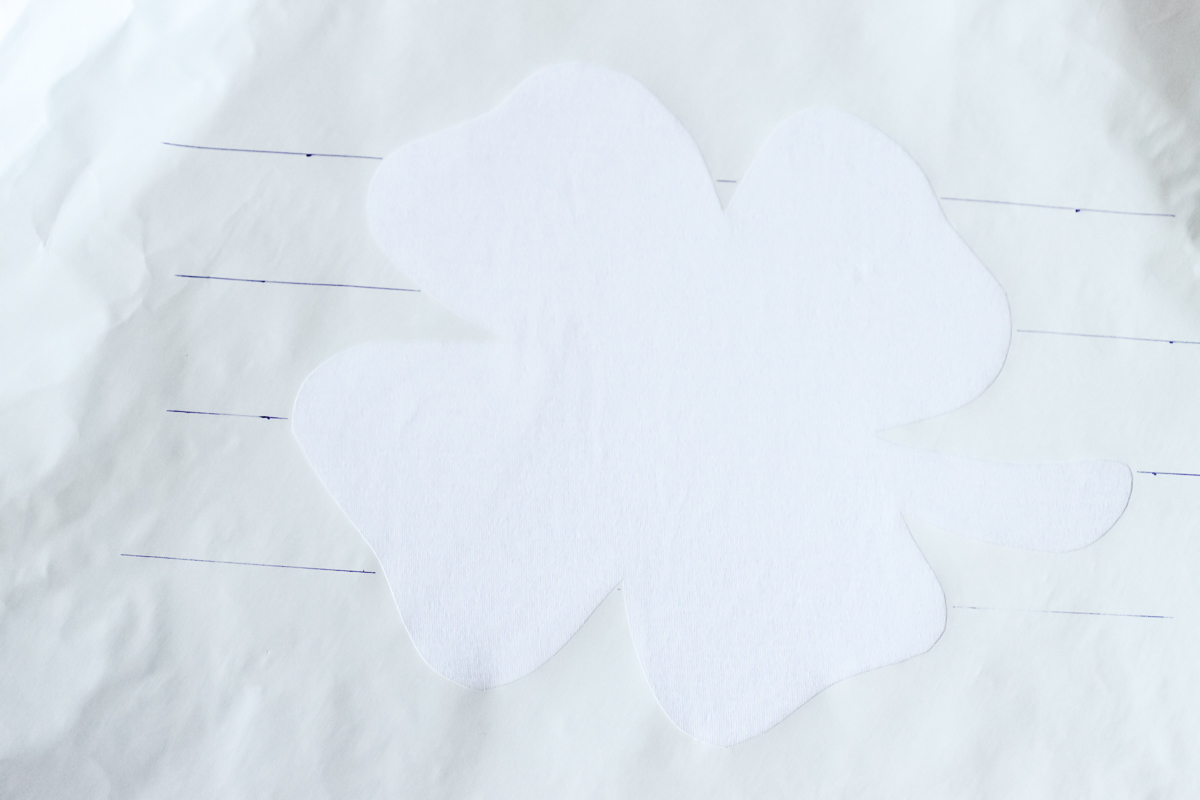
First, you will want to cut your freezer paper into a clover shape. I used my Cricut machine to do this along with a clover SVG file. You can see more about cutting freezer paper with a Cricut machine here. Freezer paper can be cut on any Cricut machine with a fine point blade. Be sure to put the shiny side down on the mat and DO NOT mirror your design. Then use the copy paper setting to cut.
Add Freezer Paper to Your Shirt
Remove the cut freezer paper from the mat and locate your design on your shirt. Put the paper with the shiny side down onto the shirt. Once the design is in place, use an iron to go over the freezer paper for a few seconds. The freezer paper coating will melt and bond it temporarily to the shirt.
Painting Your Clover Shirt
Mix each of your paint colors 2 to 1 with the fabric painting medium. Be sure to follow all instructions on your bottle of fabric medium in order for the product to work correctly.
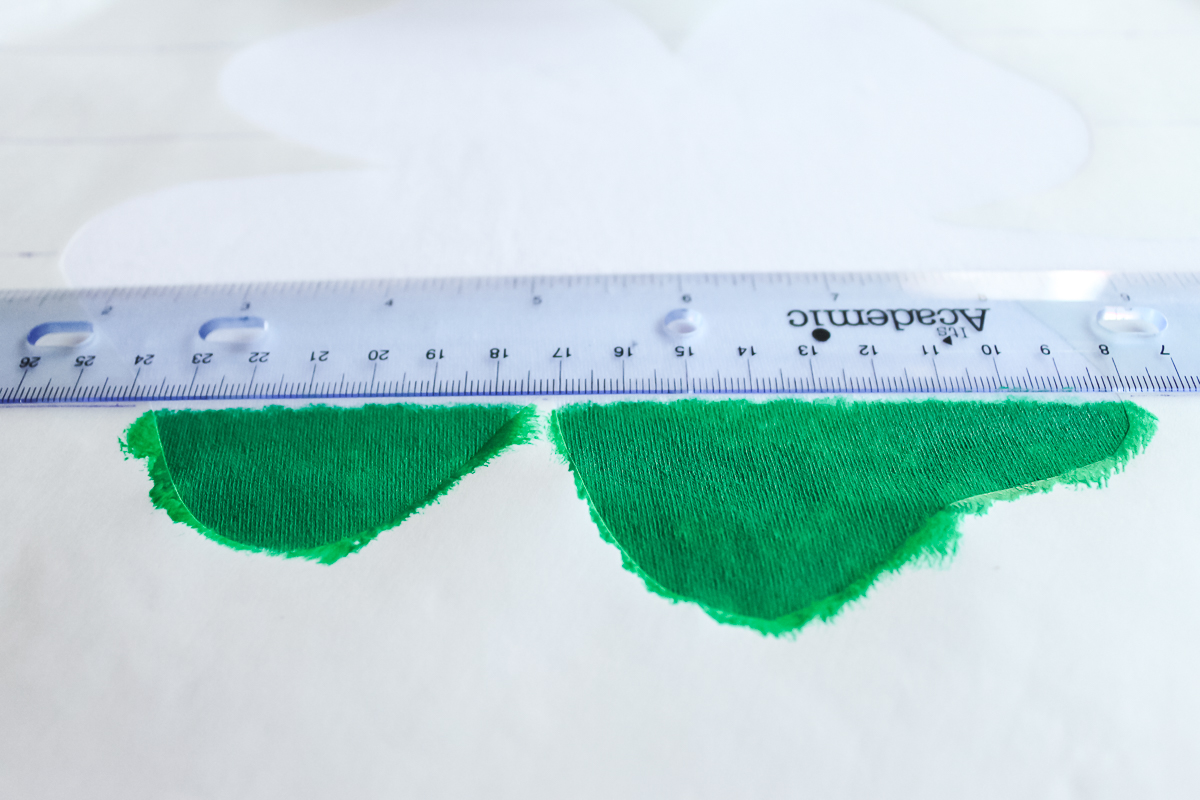
I wanted my colors evenly spaced on my shirt. Here I used a ruler to draw lines on the freezer paper only with a pencil. That will give me a guide for each stripe when painting.
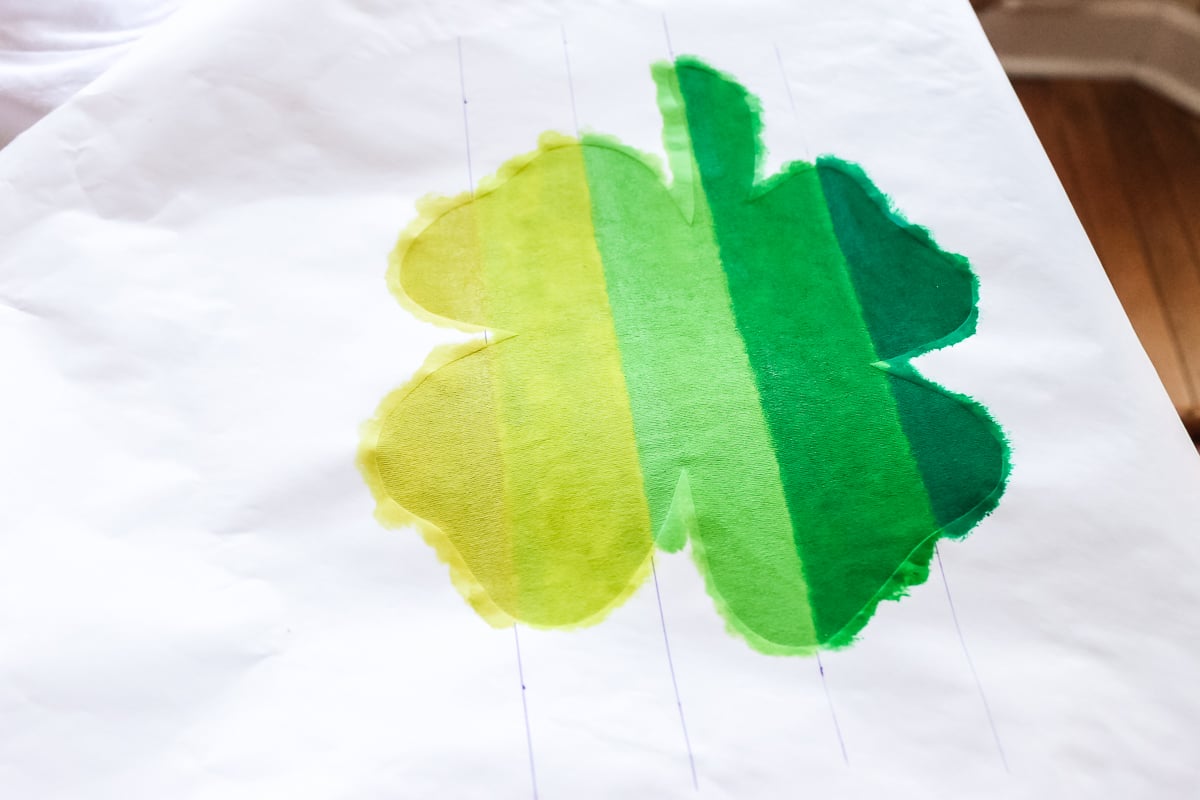
Be sure to add scrap cardboard or card stock between the front and the back of your shirt. Then start painting with each color. I used the darkest at the bottom and worked my way to the lightest color. I just used the ruler as a guide for each stripe as I painted.
The lines between your colors should slightly overlap. I found that my shirt took 2 coats of paint. Just allow to dry in between coats.
Heat Setting and Care Guide
Once your final coat is dry, you can remove the freezer paper stencil by just pulling it away from the shirt. It will pull up easily. You will want to air dry your shirt for 24 – 48 hours before heat setting the paint with an iron for 30 seconds. Remember that the shirt should be washed inside out on a gentle cycle.
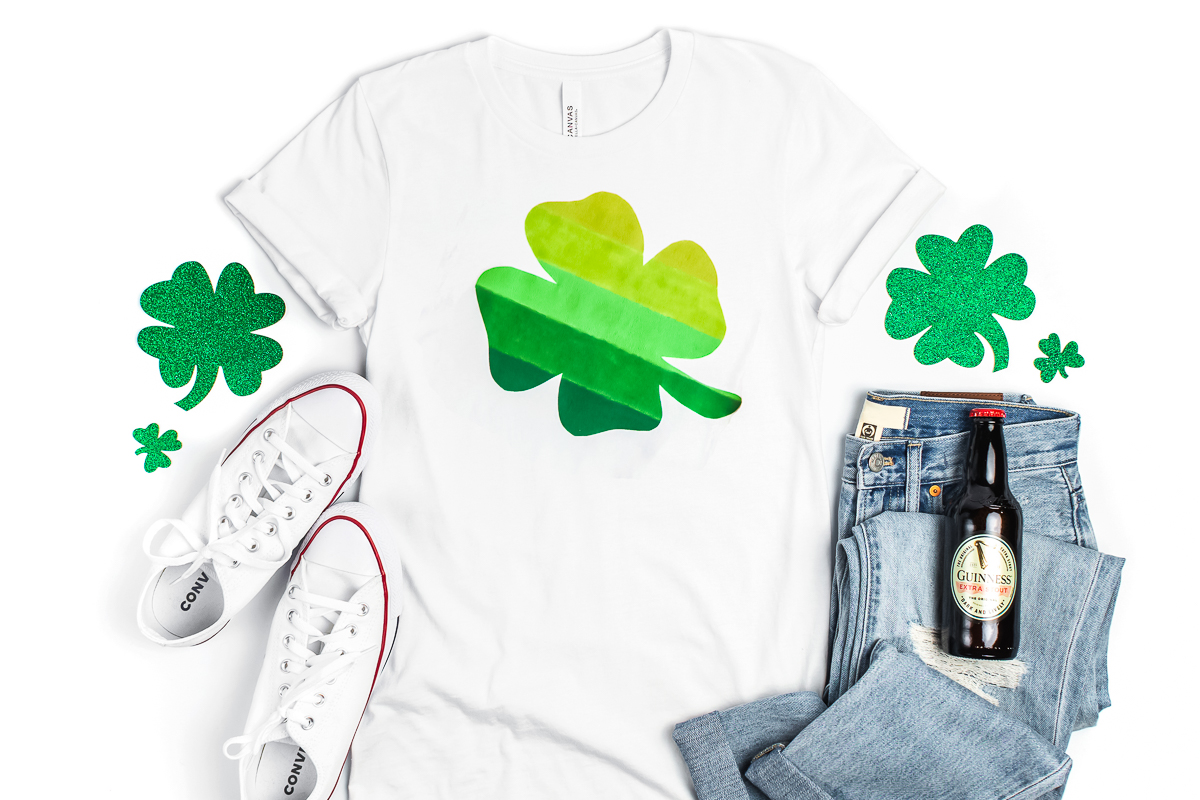
Now you can use this method to create an easy painted shirt for your kids or yourself. Plus you can say you made it yourself. This clover shirt is both simple and stylish. Make your own St. Patrick's Day shirt this year. I know you will love the results!

You can also use these same techniques to make a shirt for any occasion. Freezer paper stenciling is easy with a Cricut machine and you can use fabric medium to turn any paint into fabric paint. Just think of all of the options! You can paint so much more than just a clover shirt.
Love this clover shirt and want more ideas? Try the links below as well!

You may also want to print the instructions for making this St. Patrick's Day shirt. Use the card below to do just that!

Supplies
- Americana Paint in Holly Green, Festive Green, Sour Apple, Yellow Green, and Citron Green
- Fabric Painting Medium
- White t-shirt
- Stencil brush
- Freezer paper
- Ruler
- Iron
- Cricut machine
- Clover SVG file
Instructions
Cutting the Freezer Paper
- First, you will want to cut your freezer paper into a clover shape. I used my Cricut machine to do this along with a clover SVG file. You can see more about cutting freezer paper with a Cricut machine here. Freezer paper can be cut on any Cricut machine with a fine point blade. Be sure to put the shiny side down on the mat and DO NOT mirror your design. Then use the copy paper setting to cut.
Add Freezer Paper to Your Shirt
- Remove the cut freezer paper from the mat and locate your design on your shirt. Put the paper with the shiny side down onto the shirt. Once the design is in place, use an iron to go over the freezer paper for a few seconds. The freezer paper coating will melt and bond it temporarily to the shirt.
Painting Your Clover Shirt
- Mix each of your paint colors 2 to 1 with the fabric painting medium. Be sure to follow all instructions on your bottle of fabric medium in order for the product to work correctly.
- I wanted my colors evenly spaced on my shirt. Here I used a ruler to draw lines on the freezer paper only with a pencil. That will give me a guide for each stripe when painting.
- Be sure to add scrap cardboard or card stock between the front and the back of your shirt. Then start painting with each color. I used the darkest at the bottom and worked my way to the lightest color. I just used the ruler as a guide for each stripe as I painted.
- The lines between your colors should slightly overlap. I found that my shirt took 2 coats of paint. Just allow to dry in between coats.
Heat Setting and Care Guide
- Once your final coat is dry, you can remove the freezer paper stencil by just pulling it away from the shirt. It will pull up easily. You will want to air dry your shirt for 24 – 48 hours before heat setting the paint with an iron for 30 seconds. Remember that the shirt should be washed inside out on a gentle cycle.


So CUTE!! This turned out really great…love the Ombre effect!
Ombre Shamrock?? So smart! Love it!!