
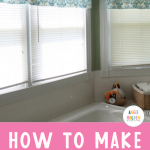
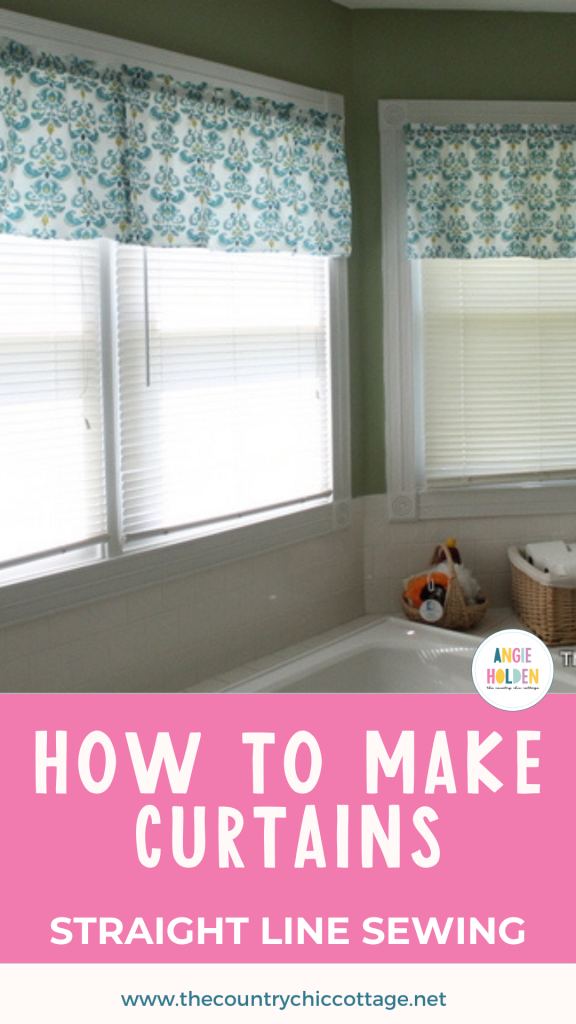
I thought I would show y'all today how to make curtains with a super simple tutorial. If you can sew a few straight lines you can make a valance that looks just like the one pictured. This quick and easy tutorial is for the beginner to the more accomplished seamstress that just wants new curtains. Come see how I make these fully lined curtains for the windows in my bathroom.
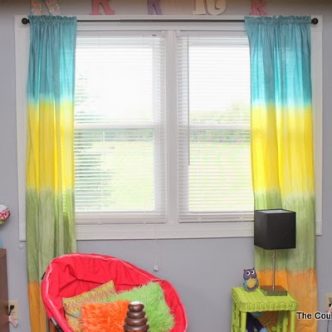
Want longer curtains instead? Try this tutorial!

Supplies needed:
- Patterned fabric (you can see where to buy fabric online here)
- Lining fabric (you can even use blackout lining like this)
- Scissors
- Sewing machine (here is my recommendation for beginners)
- Thread
- Tape measure
- Straight pins

How to Make Curtains:
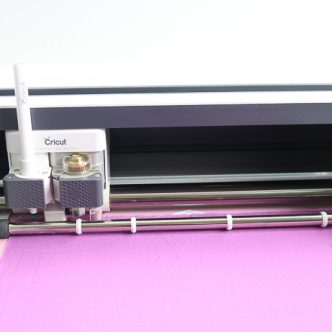
Step 1: Cut your fabric
Start with a patterned fabric you love and lining fabric in white. (ALWAYS wash your fabric before beginning any sewing of these curtains!) I used the width of my fabric as the width of my curtain. The patterned fabric was not as wide as the white so I cut the white fabric to the same width. I then needed the height of my curtain. I wanted the final valance to be about 16 1/2 inches from the very top to the bottom. In order to do that you cut 16 1/2 inches of your white material and add 2 inches to your patterned material (or 18 1/2 inches in this case).
NOTE: What if you need a curtain for a wide window that is wider than your fabric? You can make a series of these smaller curtains and hang them all on one rod. In my final picture at the bottom of this post, I used two of these smaller curtains on one set of windows.
Step 2: Sew the top and bottom seams
Begin with the right sides together and sew across the top and bottom. Yes you will have those 2 inches of excess pattern material but we will be ironing that in just a second. Use a 1/4 inch seam allowance when sewing. What does that mean? Run your material along the edge of your foot and your needle in the center of the foot.

Step 3: Iron
The ironing is a very important step in any sewing tutorial and especially this one. You will need to press your bottom seam flat and then pull up into that top seam to get your excess to fold over the top. I have given you a brief ironing demo in the video below. Why have the excess? I have made curtains before and not cut my fabric exactly right or sewn completely straight. Then you are left with a portion of the liner peeking out on the front of your curtain. This method is fool proof. No matter if you make a minor mistake on sewing — this curtain will look great from the front….trust me!
Now that you have ironed along with my demo above you have this excess folded over to the back and a nice crisp folded pressed edge…right?

Step 4: Sew the sides
It is time to sew up those sides. Turn your sides in about 1/2 an inch all along the edge. Use straight pins to hold in the edge until we sew it closed.

Note how my pins are placed. This is a fancy trick to make removing your pins easier when you sew so remember to place them horizontally. You can also see more tips for using sewing pins here. Second tip place one pin about 1 inch down from the top and another pin about 2 1/4 inches down from the top. I will show you what those are for in just a second. Remember the top is where you folded over all of that excess material when ironing.

Now begin sewing at the top and stop at the first pin that is 1 inch down from the top. Start sewing again at that second pin that is 2 1/4 inches from the top. Why did we just leave a gap in the seam? That is where our rod pocket will be in just a minute. Again I am sewing about 1/4 inch from the edge by allowing my material to run along the edge of my machine foot.

Step 5: Finish it off
After you have finished sewing both sides, go back to that unfinished pocket and open it up. Sew both sides a bit just to keep it from turning out when you put the finished product on the curtain rod.

We are now going to finish that rod pocket and I have a super quick and easy trick for you. Take tape and measure 1 inch from your needle. Lay your tape down so that the left edge is on that 1-inch mark. Do the same for a 2 1/4 inch mark. These will be your guides for sewing your rod pocket. This is a lifesaver, especially when sewing more than one curtain.

Run the top edge of your curtain through your machine running that top edge along your 1-inch tape edge. Then do the same while running the edge along your 2 1/4 inch tape. You have now made a rod pocket to hang your curtain.

The best part? You are done with one curtain! Hang it up and admire your handy work. Then if you are anything like me….get started on more for even more windows. Stay tuned as tomorrow I am showing off my entire home in a home tour that you won't want to miss! In the meantime get started on some super simple curtains today.

Love this tutorial and want more ideas? Try the links below as well!


I’m bookmarking this to add to things I want to do in my room. Thanks for the great tutorial!
Great job Angie! Very good tutorial!
I love this! Looks super easy even for the sewing illiterate like me. Question: Where did you get that gorgeous fabric?
Question: When you finish the sides by turning in a half inch and stitching – do you turn it in twice or do the two raw edges on inside not matter? I am making these and not sure about this part. Thanks for the instructions!
Raw edges on the inside do not matter….or at least they never have on anything I have made! 🙂
Great tutorial! Just wondering what kind of rods you are using to hang the curtains. Thanks!
Just those super cheap white rods that you can get anywhere!
Thank you so much. I would have tripled my work without this tutorial. I made four valences, all for different size windows. You do an easy to understand explanation. Looking forward to the rest of your blog!
Thank you for this great tutorial. I made several of these today and they came out great. Easy to follow instructions. I saved myself a ton of money by making my own!!
Hi,
I am trying to make some window valances by following your instructions but I’m confused. I thought the reason you leave the excess fabric along the one edge was so that when the curtains are hanging, you would not see the white lining at the bottom edge. I thought the excess fabric would be the “hem”. I am not able to hear what you are saying in your video but it looks like you have turned the fabric right side out after you sew the print fabric to the lining. Why do you have the excess fabric at the top of the valance and not at the bottom?
Thank you.
Iron all of that excess towards the top Dawn. So iron the bottom along the hem. Then let your excess fold over the top. Basically the part that is over the top of your curtain will be lined in the curtain fabric and not the white.
Can you tell me wehre i can get this nice cotton?
Sorry! Not sure where it came from as it has been some time since I made those.
I have saved this pattern for a while and today is project day! Thanks for the tutorial! I do have a question, though. In your instructions you talk about sewing up the top and bottom 1/4″ seam but later in the photos it looks like the longer edge is not sewn during the ironing and when you sew up the edges 1/2″. So my question is are we just sewing two edges together-just to top or just the bottom edge, not both?
I sewed just the top and just the bottom edge. Not the sides but both long edges. Does that make sense?
I am very confused with where the 2 extra inches come into play. I laid my fabric and lining right sides together with the 2 inch excess at the top. I then sewed the bottom and then the top along the lining where it meets the fabric. My final does not look at all like what yours does. Help please. Thank you so much.
Wrap that extra 2 inches OVER the top.
Hello,
I’m super excited about this tutorial, it seems pretty easy and straight forward except for one thing. Initially when you start sewing you say to sew right sides together, but I don’t see where it says to turn them so the patterned fabric is on the outside again. Would you be able to help me understand this step?
Turn it right side out after sewing that step. I think you can see in the video that it is right side out.
I was just thinking when you turn it right side out after that step the excess that we need to fold over the top would be on the inside, wouldn’t it?
No it is on the outside. The front is longer than the back.
Hi, I need some clarification on Step 4 – sewing the sides. You said to turn the sides in 1/2 inch and “use straight pins to hold in the edge until it is sewed.” Does this mean you turn the “raw” edge in the 1/2 inch, then kind of tuck just enough of the raw edge inward (within the 1/2 inch allowance) so that after sewing the sides you have a “finished” inside edge?
Also, I agree with another commenter, that the video where you demonstrate the way to iron the valance, is unclear about turning the valance right sides out, and it’s kind of hard to understand what you are saying in the video. It might be helpful to others to perhaps edit your video to include stating the valance should be turned right sides out, speak a little louder, and perhaps aim the camera from a higher angle to show viewers just how the method results in the excess patterned fabric folding over the top. Just trying to help others who might use this very helpful tutorial to make lined valances. I appreciate your efforts!
Yes raw edge in. And this video and post are very old. I did the best I could at the time.