
DIY paper Christmas ornaments and decorations are so easy to make! I actually did a post yesterday with an ornament that was made from scored mat board. With the Cricut scoring wheel, you have so many lovely options when it comes to project-making!
Want more festive Christmas Cricut ideas this year for the holidays? Check out this list of Cricut Christmas ideas!
How To Make DIY Paper Christmas Ornaments
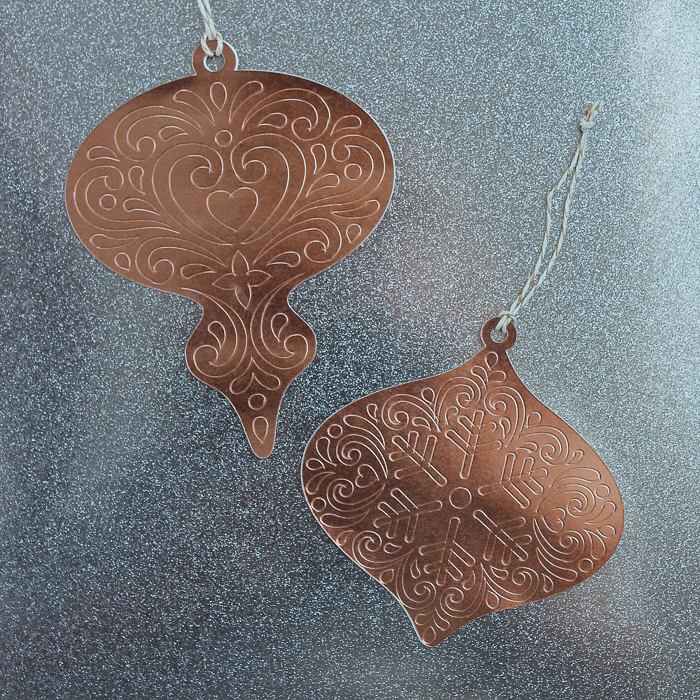
It's that time of the year again when all I want to do is make fun Christmas crafts for the Christmas tree and house. These easy DIY paper Christmas ornaments are fun and festive–just for the holidays!
These paper ornaments are super easy to make and perfect for whenever you want to make your own decorations for the Christmas tree. If you've been wanting to use your new scoring wheel with your Cricut Machine, then I will teach you everything you need to know about it.
Supplies Needed To Make DIY Paper Christmas Ornaments
- Cricut Machine: Either the Maker or Explore will work. Click here to see which one I prefer!
- Scoring Wheel: Click here to learn more. Scoring wheels are used to create creases in materials like cardstock and other types of thin paper. Perfect for whenever you want to create designs on paper!
- Metallic Paper: Metallic paper can be found at most craft stores and comes in a variety of colors. You can use bronze, silver, gold–you name it!
- Twine: You will need twine to hang the decorations up! Twine can be found at craft stores or online. If you cannot find twine, then you can use any kind of string.
- Tape Runner: A tape runner is used to stick the two pieces of paper together to make sure the ornaments are durable enough to hang.
- Cricut Cut File: Click here to access! Just click download, and you should be good to go!
NOTE: You will want to make sure you download the cut file to cut the ornaments into different shapes. The file for the design is just below!
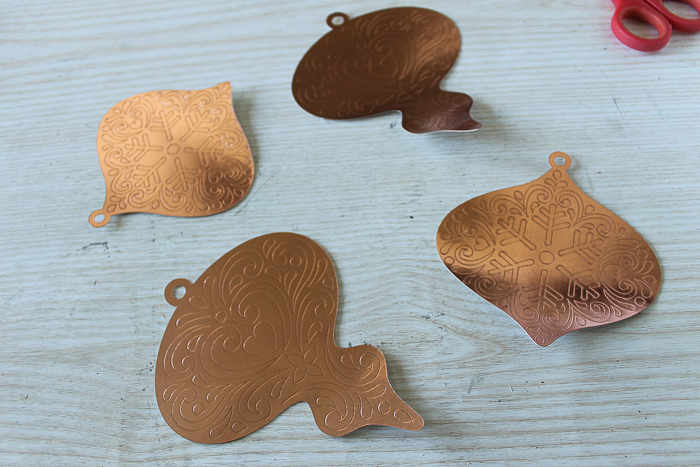
Step 1: Cut Ornaments
Start by clicking here to access the cut file and cutting your ornaments with your Cricut machine. Use either the scoring wheel or stylus to make the score lines. I used the scoring wheel, but I was inspired by these cute boxes over at Simply Crafted Life, and she used the stylus. So, it should work with either tool. Carefully remove the mat from the back of your ornament pieces to minimize curling.
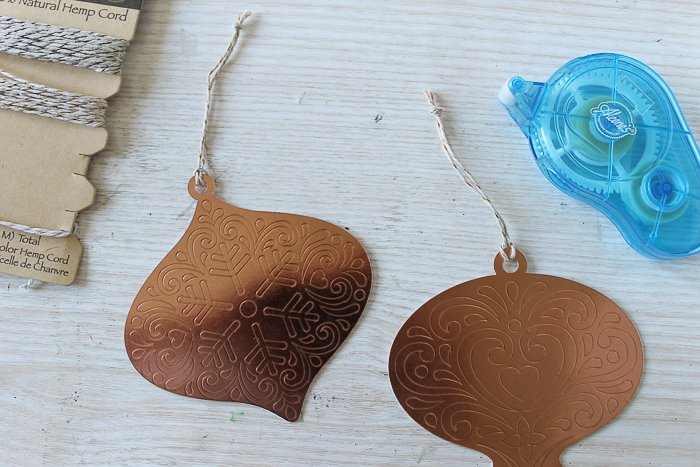
Step 2: Glue Two Pieces Together
Then use a tape runner to put two of the pieces back-to-back.
Step 3: Add Twine Hanger
Add a piece of twine for hanging.
That's it! The Christmas tree ornaments are ready to be used!

How To Use DIY Paper Christmas Ornaments
Add these paper decorations to any Christmas tree in your house. You can also suspend these DIY decorations from the ceiling for a Christmas-themed party.
These easy paper ornaments are also perfect for gifting to loved ones and family members. This craft is also great for gifting to teachers!
They look so elegant, and no one will ever guess how easy they are to make. These ornaments are perfect for the Christmas tree and for making it look fully decorated for the holidays!

Grab some metallic paper and get started creating these gorgeous paper Christmas ornaments for your tree and holiday decor.

I must say that scoring all the things has become an obsession for me. I keep thinking of new things to try!

So, y'all stay tuned, as there is no telling what I will score next!

Tips and Tricks for DIY Paper Christmas Ornaments
Now that you’ve seen these fun DIY paper Christmas ornaments, are you ready to make your own? Here are a few tips and tricks to help!
- Adjust The Size Of The Ornaments – I made my ornaments more on the smaller side, but you could make yours bigger!
- Change The Color Of The Ornaments – Depending on the look you are going for, you can make these ornaments in any metallic color that you like! Imagine how gorgeous these would be in metallic red, green, and white!
- Use A Glue Stick – Don't have a taper runner? No problem! Grab a glue stick and use it for this project instead.
- Skip The Twine – For this project, I used twine. However, you can use ribbon, string, or even embroidery thread.
40 + Christmas Crafts
Did you love these DIY paper Christmas ornaments, and want more Christmas crafts? Then check out the projects below!
- 40 Christmas Crafts
- Free Christmas Story SVG + 16 Christmas Cut Files
- Felt Christmas Tree for Toddlers with a Cricut
- How To Make Magic Santa Key With Free SVG File
- Making Vinyl Christmas Ornaments with a Cricut
Stay tuned as we have more projects like these paper Christmas ornaments coming up tomorrow! Happy crafting!


I love that the scoring wheel can do such intricate designs!
Love how beautiful and detailed these are! Gorgeous! Thank you for sharng at Celebrate It!
When I try to get the files it is taking me to CD to download. I already am on Cricut design what am I doing wrong
These are only on Design Space. I don’t have a download. The link should just open it up for you.
The link is not active.
I’ve fixed that link 🙂 thanks for letting me know!