Easter means it’s handcrafting time! Learn how to make these adorable paper mache Easter baskets that your kids can help make with you. It’s a fun and quirky project that everyone in the family will love.
My family and I love Easter. I also love making every holiday exceptional for everyone at home, and I want to give my little ones the full experience while they’re still young. This time around, I settled for an easy easter basket that we’ll be amused with.
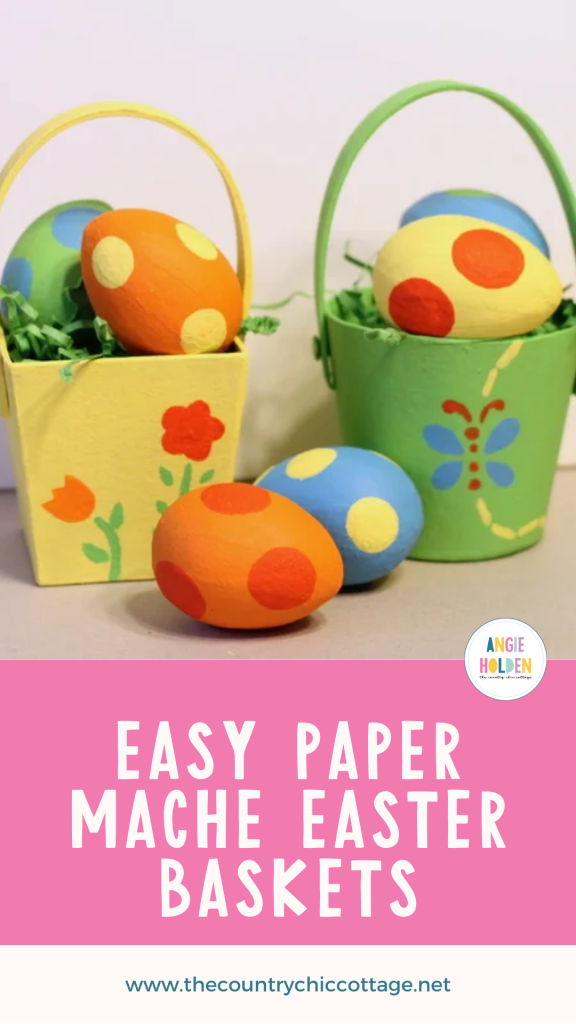
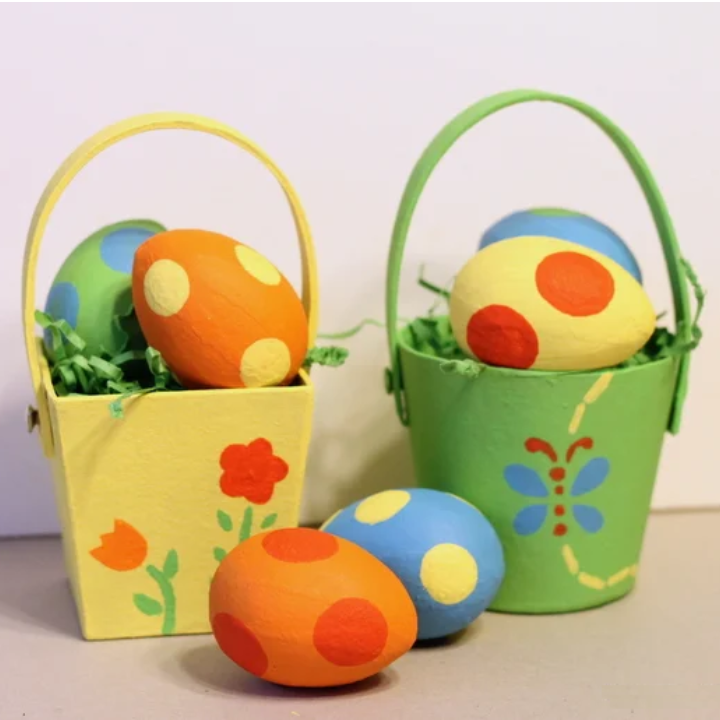
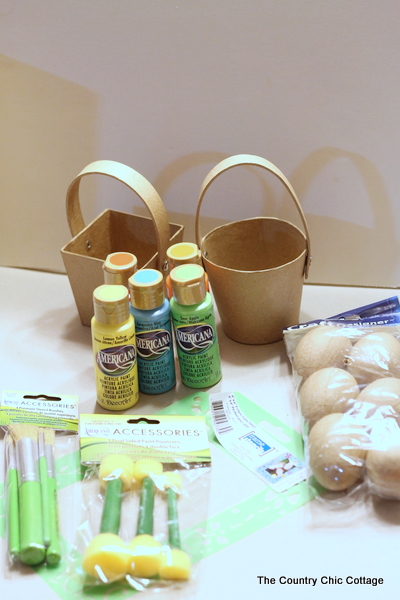
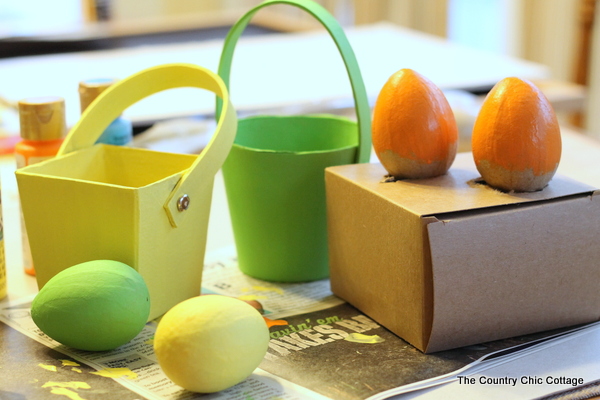
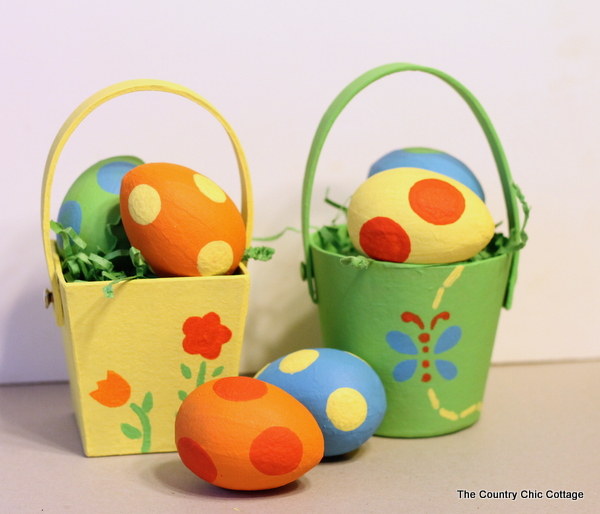
I found some mini Easter baskets in the paper mache section of my local craft store and knew that I needed to do something with them. I grabbed two different-shaped baskets and some paper mache eggs and got to work. This project is perfect to decorate for Easter or spring. Grab your Decoart paints and let's get started!
How To Make Paper Mache Easter Baskets
This homemade paper mache Easter egg basket is the ultimate way for your kids to rack up all the goodies the Easter bunny will send their way during their egg hunting session.
If you need a last-minute treat idea for friends and family, I’ve got you completely covered! You can make these cuties with collections that are obtainable at any craft store.
The selection of designs and colors to make this is extremely copious; if you’re making them for a girl or a boy, there’s always something for them! And for any cynics reading this, don’t worry, because this is surprisingly strong and won’t break immediately.
Supplies Needed To Make Paper Mache Easter Baskets:
- Paper mache basket and eggs
- Friends Frame Stencil from Decoart (this would be found in the wood frame area of your craft store)
- Stencil brush
- Dual-Sided Paint Pouncers
- Americana Paint in the following colors: Turquoise Blue, Sour Apple, Lemon Yellow, Cadmium Orange, and Bright Orange
- Green Paper Shred (optional)
Step 1: Paint Your Baskets & Eggs
Start with a base coat of paint on your baskets and eggs. I used 3 or more coats of paint on each of my surfaces for a great base. As you can see, I improvised an egg drying rack to keep them from rolling around.
Step 2: Tape Stencil Onto Easter Basket
The frame stencil is intended to be used with a wood frame. I just wanted to use portions of it on my baskets. So I picked the area I wanted to use and applied it to my basket. Then, tape over any areas of the stencil that I would not be using.
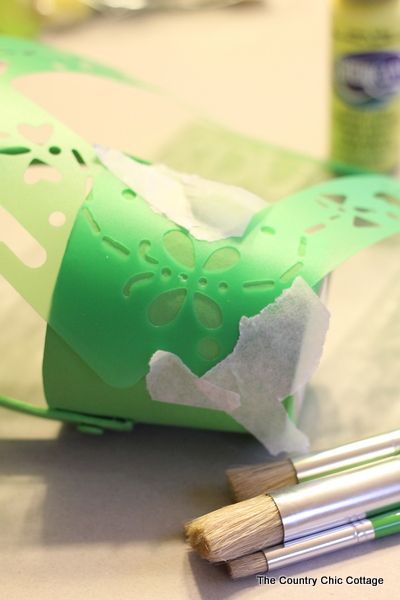
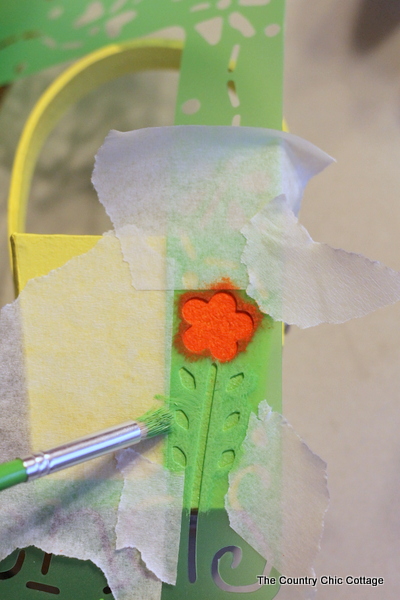
Step 3: Stencil Onto Easter Basket
Then use your stencil brushes to apply a light coat of acrylic paint to your project. I found that two light coats were better than one heavy coat when using a stencil.
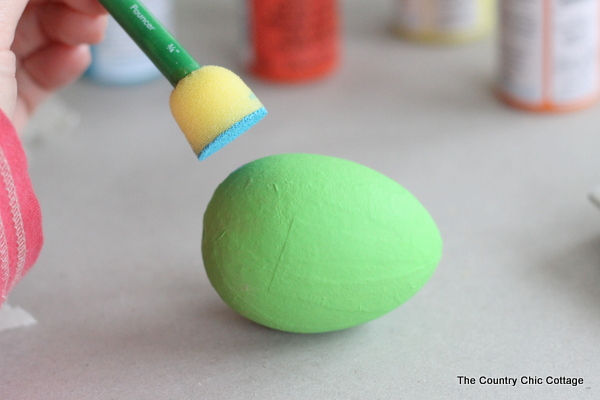
Step 4: Paint Polka Dots Onto Eggs
Now for the eggs, I made polka dots with my pouncer brushes. Just apply the pouncer to the egg. Again, a couple of light coats turn out better than one heavy application.
Once you are happy with the look of your Easter eggs, set them aside to dry.
Step 5: Assemble Easter Baskets
When your baskets and eggs are completely dry, you are ready to assemble your Easter baskets!
I mixed and matched the colors in my project and love the results. They are bright, fun, and perfect for spring. I even added in some green paper shred to get that perfect Easter basket look!
Grab these paper mache Easter baskets and eggs at your local craft store and get to painting today!
Did you enjoy this post? Let me know in the comments!
Tips and Tricks for Paper Mache Easter Baskets
Now that you’ve seen this fun paper mache Easter baskets, are you ready to make your own? Here are a few tips and tricks to ensure your project goes as smoothly as possible!
- Adjust The Size – For this project, I chose to go with small baskets, but you can use bigger baskets to have a more traditional-sized Easter basket!
- Break Out Your Cricut Machine – If you want to skip store-bought stencils, you can make your own instead! All you need is your Cricut machine, and you can have your own custom stencils in minutes. Learn how to make your own by following our ”How To Make A Stencil With A Cricut” tutorial!
- Take Your Time – With simple projects like these paper mache Easter baskets, it's easy to want to rush through them. However, I highly recommend that you take your time painting and stenciling. Doing so will help you to get a clean, finished look and hopefully help you to avoid any paint bleeding with your stencil.
- Use Stencil Brushes – As tempting as it might be to use regular paintbrushes, you will want to use stencil brushes instead to get the best look!
34 More Easter Crafts
If you love these paper mache Easter baskets, here are some other Easter crafts that you won’t want to miss!
- Coloring Page Decoupage Easter Eggs
- Printable Easter Pennants
- 30+ Handmade Easter Ideas for Kids’ Baskets
- Dollar Tree Easter Craft: Easy Carrot Wreath DIY
- Easter Jar Centerpiece from Recycled Pickle Jars