Learn about your Cricut machine, sublimation printer, or any other craft you can imagine! Angie Holden shares her crafting tips so you can craft like a pro!
This post and photos may contain Amazon or other affiliate links. If you purchase something through any link, I may receive a small commission at no extra charge to you. Any supplies used may be given to me free of charge, however, all projects and opinions are my own.
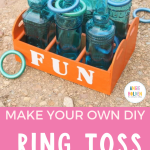
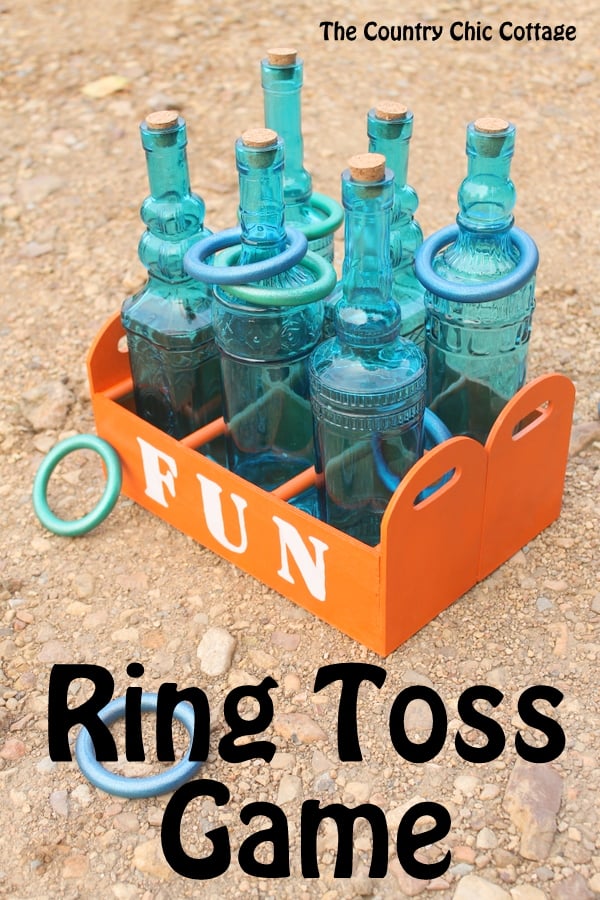
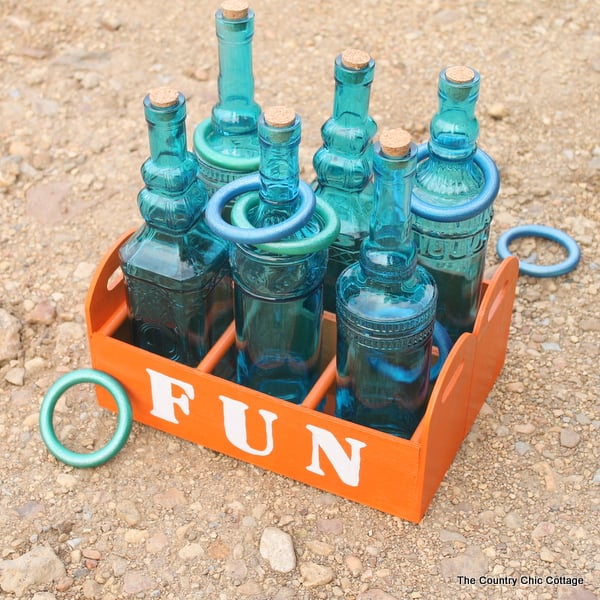
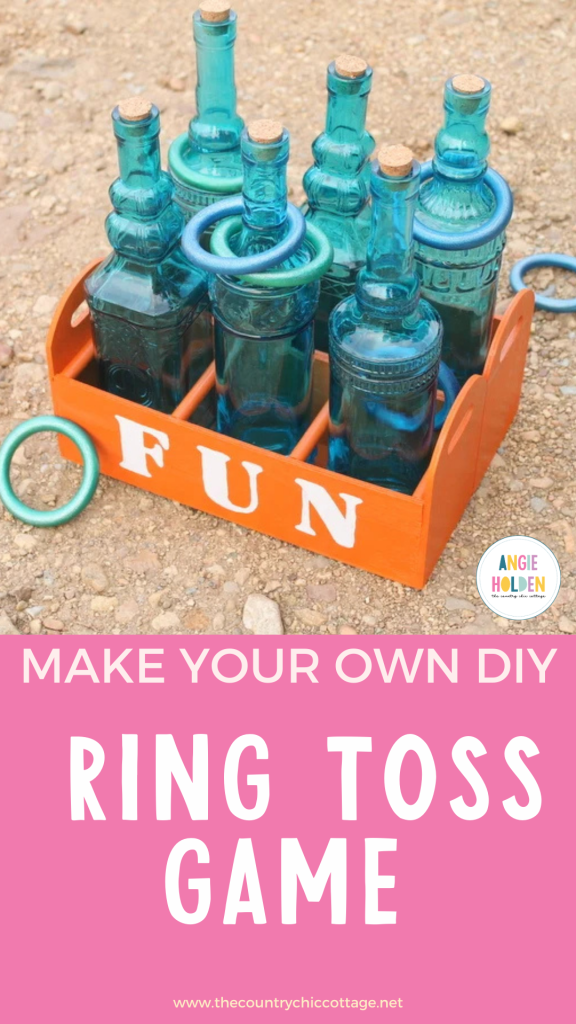
You can make your own ring toss game for fun with adults and kids. Grab some wood trays and decorative bottles to make this fun game at home. This one can be played indoors or out so be sure to make your own today as those dreary days of winter are ahead. You can make this and our other DIY backyard game for tons of fun!
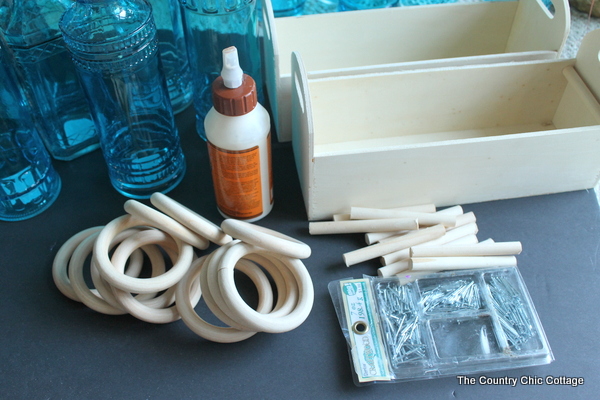
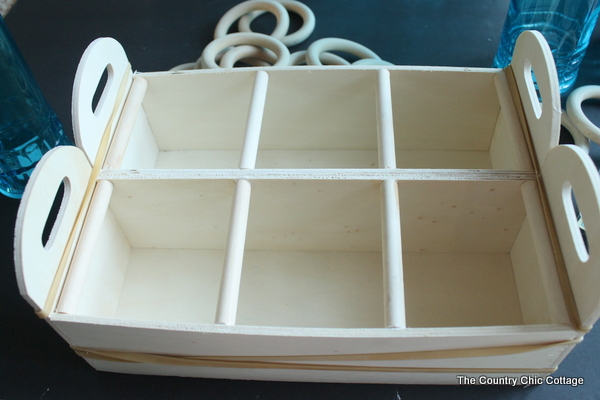
Start by cutting your dowel rod to fit inside the wood trays. Cut to length then sand the ends. I used a sander but you can sand by hand. Put those cut dowel rods in place as shown below. These should be placed so that your bottles will fit in easily. Do a dry fit before continuing.
Use wood glue to hold dowel rods, as well as the two trays together. Clamp or use rubber bands in a pinch. Add nails to help secure everything into place.
Pin
Allow the glue to dry overnight then paint the entire thing with a coat of orange Krylon. It may take a few light coats inside and out to get yours looking like the image below.
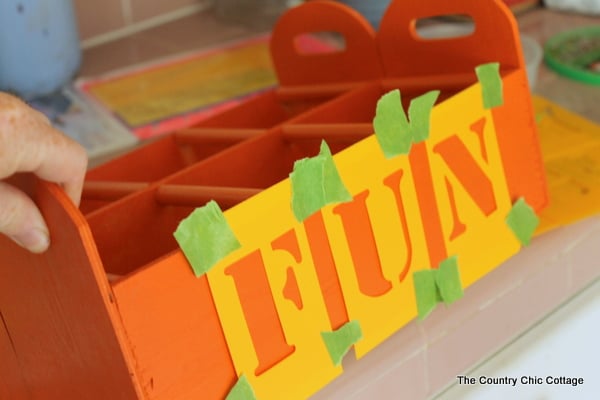
Allow the spray paint to dry and cure overnight especially if you are making this in the south during the summer! Add whatever word you like to the front using the stencils, craft paint, and a stencil brush. See more tips for stenciling here.
Pin
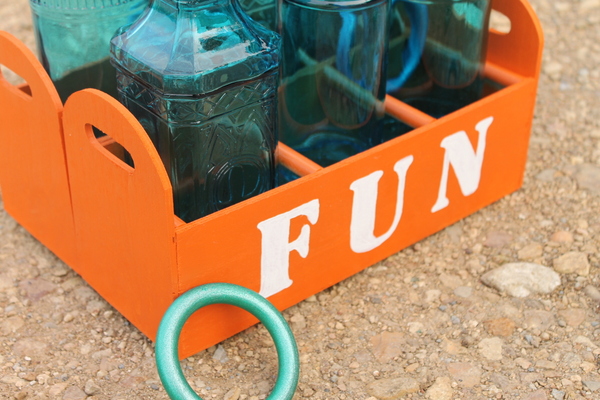
Use a fine line paintbrush with the same craft paint to fill in any gaps left by the stencil. Compare the image above with the image below to see what I am talking about.
Pin
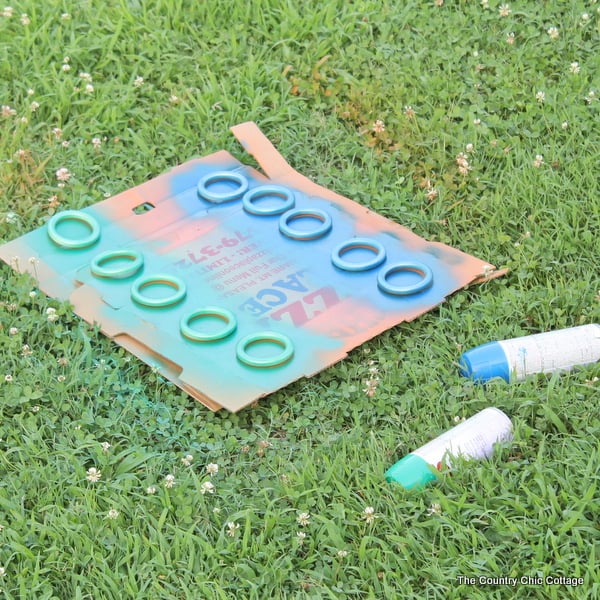
I wanted my rings two different colors for a little ring toss competition! I used Krylon in blue and green to paint the rings outside. Paint one side, allow to dry, then paint the opposite side.
Pin
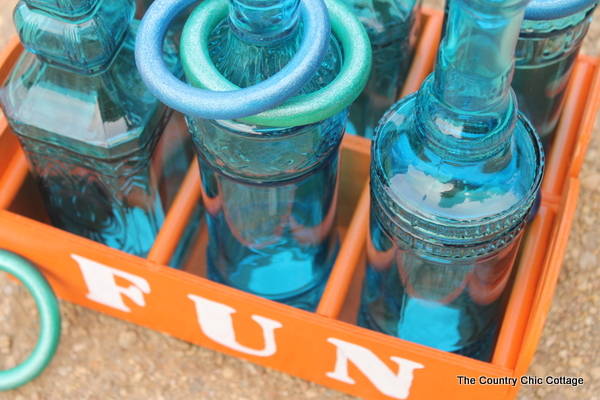
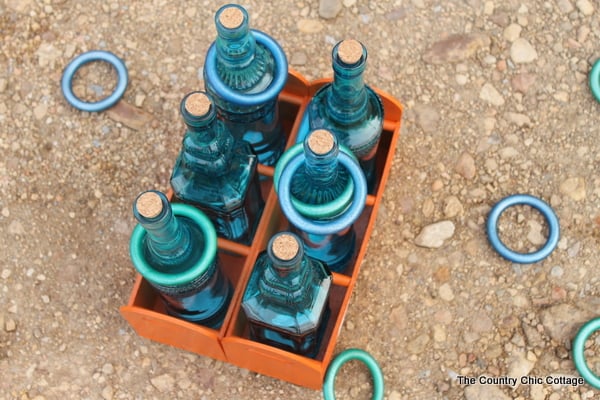
Add your bottles to the crate and you are ready for a friendly family ring toss competition.
Pin
I obviously need to work on my ring toss skills. I actually had to put some of the rings on the bottles by hand to take these pictures. Sigh.
Be sure to gather the supplies to make your own ring toss game for your home. The kids (and adults) will love it!
Pin
Benefits of Ring Toss Game for Kids:
This game is fun and it actually has some other benefits as well! Use this simple activity to develop skills in your child while they are having a great time!
Hand-Eye Coordination:
Actually any game that requires throwing, catching, or hitting helps to develop hand-eye coordination. With ring toss, you will also help with distance and power when throwing.
Balance:
Kids are experts at falling down. Balance is a significant component of child development. However, balance exercises don’t always require standing on one foot. Playing ring toss can also help develop balance in children as they need to do a proper form when throwing the ring.
Social Skills:
My version of this ring toss game is best played with two or more players. This in turn encourages social interaction with peers and even adults.
What are you waiting for? Create your own ring toss game DIY and start playing today!
Pin
Ready to make your own? Use the card below to print the instructions!
Pin
Total Time 3 hourshours
Make a Ring Toss Game
Use these instructions to make a cute ring toss game that the entire family will love.
Glass Bottle with Cork Vintage Blueneed 6 (think of bottles that you can recycle for this project)
Wooden rings (need 10)
Krylon Spray Paint (I used orange, blue, and green)
White craft paint
Poster Stencils Alphabet
FrogTape painter’s tape
Stencil brush
Fine line paintbrush
Instructions
Start by cutting your dowel rod to fit inside the wood trays. Cut to length then sand the ends. I used a sander but you can sand by hand. Put those cut dowel rods in place as shown below. These should be placed so that your bottles will fit in easily. Do a dry fit before continuing.
Use wood glue to hold dowel rods, as well as the two trays together. Clamp or use rubber bands in a pinch. Add nails to help secure everything into place.
Allow the glue to dry overnight then paint the entire thing with a coat of orange Krylon. It may take a few light coats inside and out to get yours looking like the image below.
Allow the spray paint to dry and cure overnight especially if you are making this in the south during the summer! Add whatever word you like to the front using the stencils, craft paint, and a stencil brush. See more tips for stenciling here.
Use a fine line paintbrush with the same craft paint to fill in any gaps left by the stencil. Compare the image above with the image below to see what I am talking about.
I wanted my rings two different colors for a little ring toss competition! I used Krylon in blue and green to paint the rings outside. Paint one side, allow to dry, then paint the opposite side.
Add your bottles to the crate and you are ready for a friendly family ring toss competition.
For over a decade, I have been sharing Cricut tutorials and craft ideas here as well as on my YouTube channel. My passions include teaching others to be creative and learning as many new things as possible about crafting technology! Click here to read more about me!