
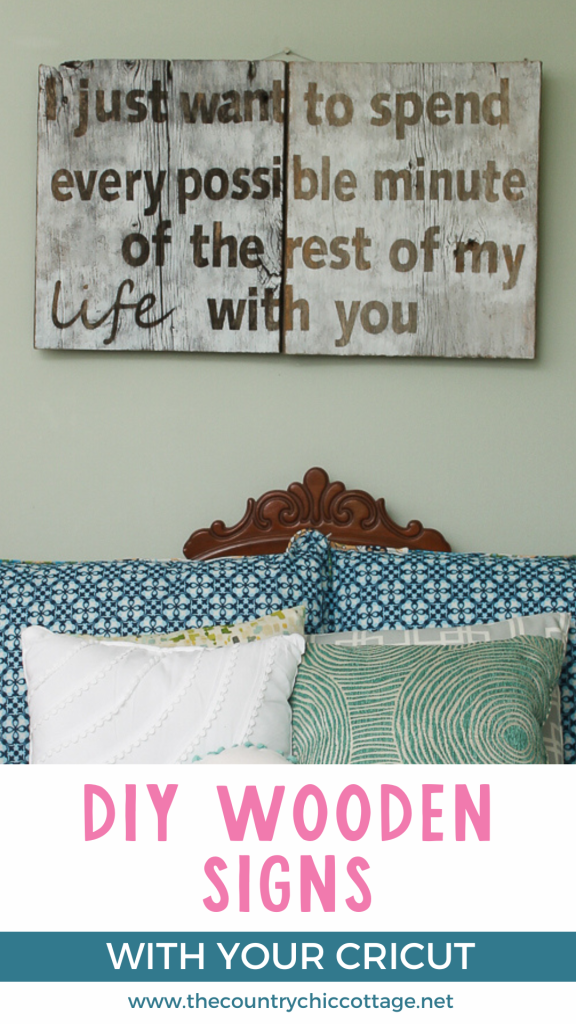
Have you ever wanted to make those beautiful DIY wooden signs with sayings using your Cricut machine, but you don't know where to start? If the answer is yes, then you are in the right place! Today, I’ll walk you through the simple steps to make a stunning custom wooden sign featuring your favorite quote!
How To Make DIY Wooden Signs With Sayings
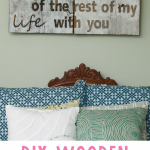
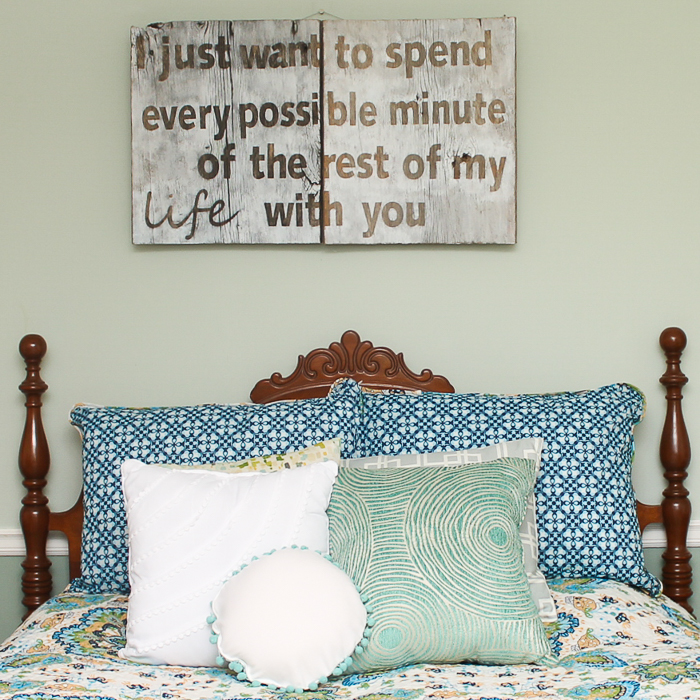
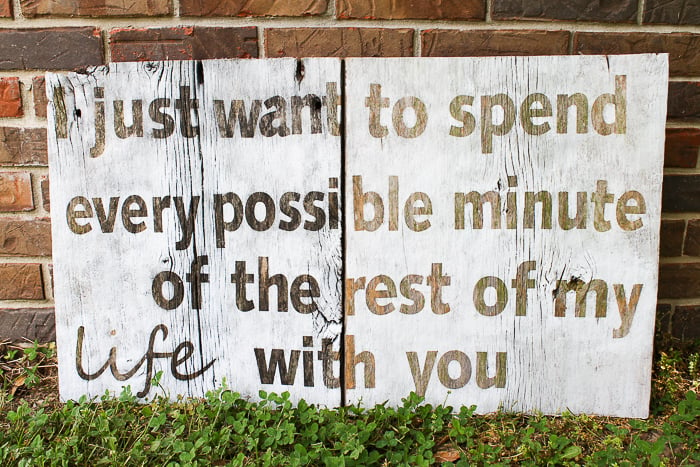
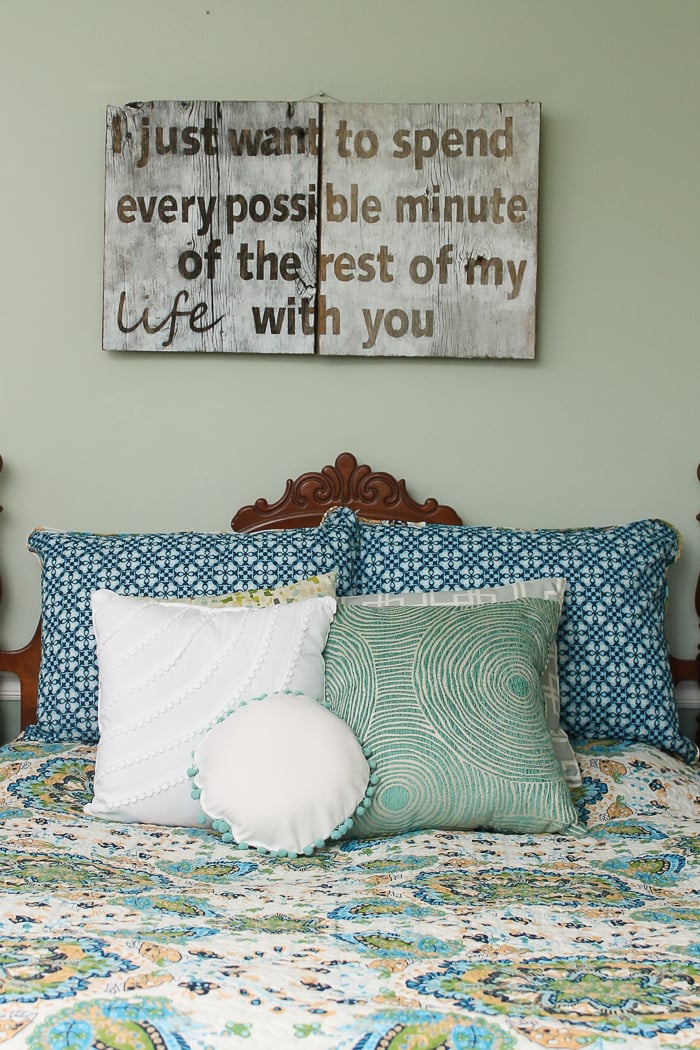
Do you recognize the quote I used for my wooden sign?
Well, if you don't, let me just tell you how hard I have fallen for the Hunger Games! Yes, I have read all the books and watched all the movies. Then I saw a sign on Lolly Jane and fell in love with the quote. But I had to put my own spin on it…of course.
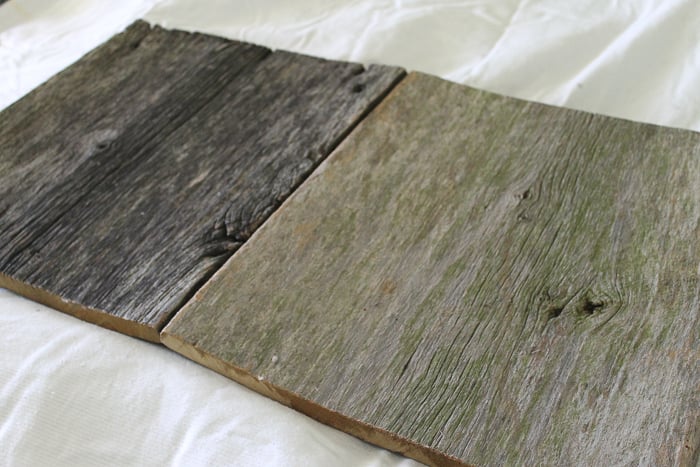
So, I am making my Hunger Games love quote sign on barn wood!
I just want to spend every possible minute of the rest of my life with you. Don’t you just LOVE that quote?! Yes, even if you are not a Hunger Games fan… the quote is beyond amazing and perfect for a DIY wooden sign!
Supplies Needed For DIY Wooden Signs With Sayings
- Some type of wood to make a sign (I am using old barn wood)
- Vinyl (any kind will work, as it is just used as a mask)
- Cricut machine (you can see which one I like here)
- Ruler
- Paint
- Paintbrush
- Nails
Step 1: Build Sign
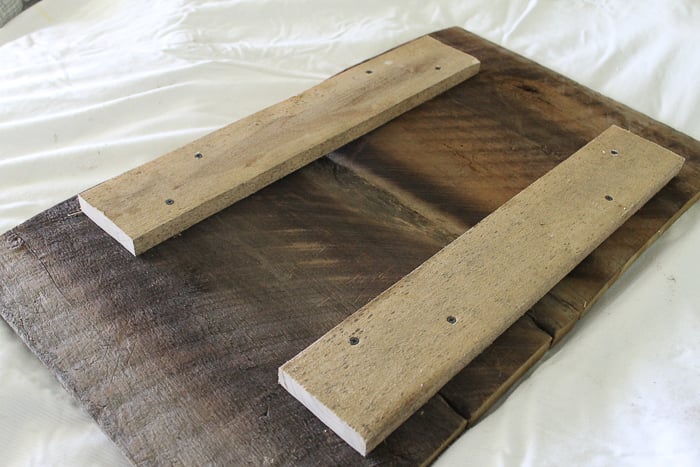
Start by making the actual sign. My hubby helped me piece together two pieces of barn wood scraps.
It is assembled similarly to a pallet, as pictured below. Just saw your pieces to size and nail them together. You can actually make your quote sign whatever size you would like. However, I would recommend designing your quote in Cricut Design Space to ensure the size is correct when building.
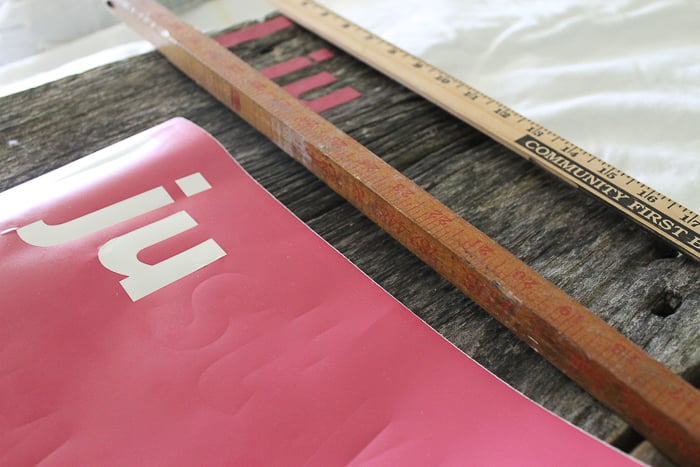
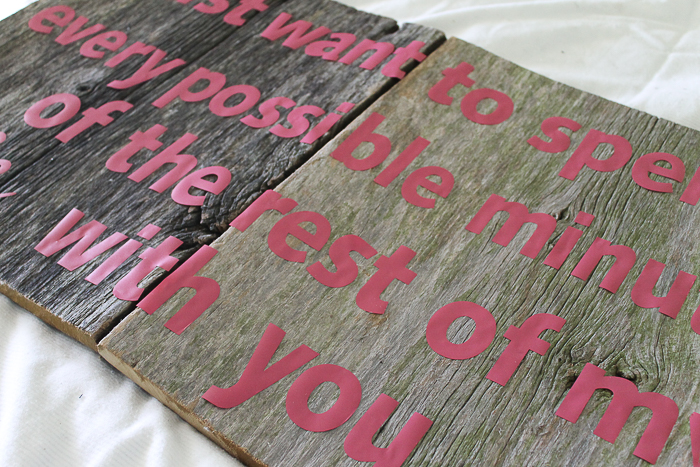
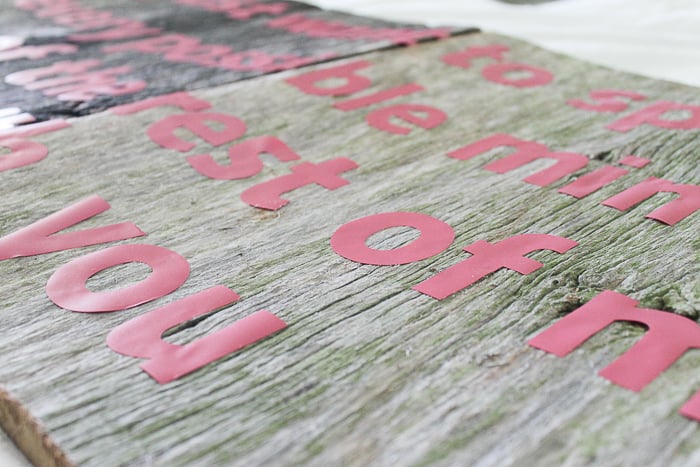
Step 2: Cut Vinyl & Lay It On Sign
I cut vinyl using my Cricut. Then I used rulers to lay it out straight on the sign. For the design, type your quote out in Cricut Design Space. You can see more about using text within the program here.
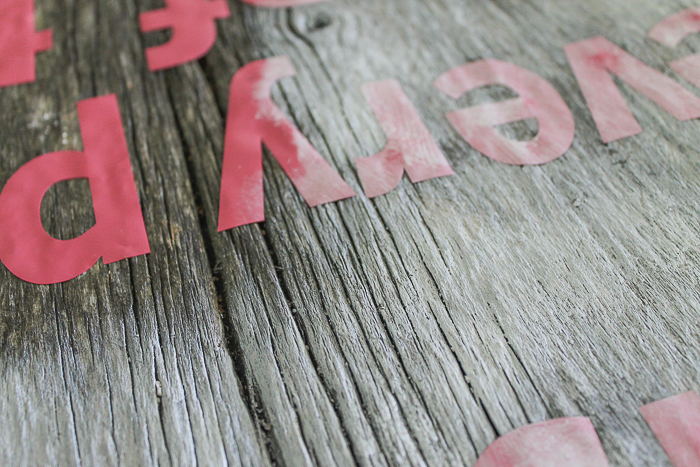
After the letters were laid out, I went over each one, making sure it was firmly adhered to the wood. You can do this with your fingers or even a scraper.
Step 3: Dry Brush Wood Sign
I wanted a rustic, worn look, so I used a dry brush technique. Due to my desired effect, I didn’t do anything else with my letters. However, you may want to add Mod Podge around the letters to prevent the paint from bleeding under them.
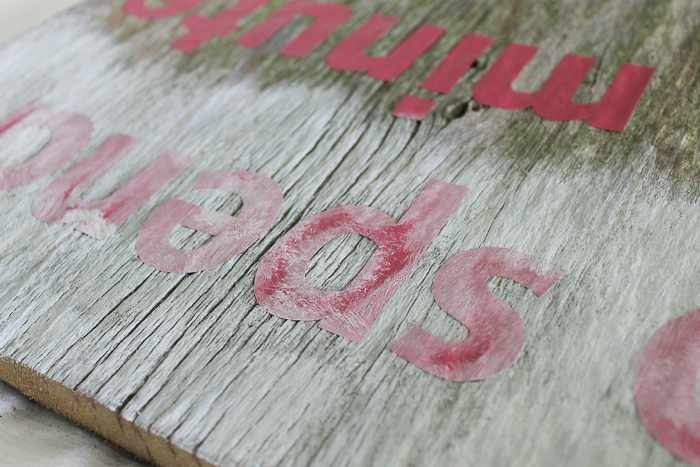
What is a dry brush technique, you ask? Well, it's where you get a small amount of paint on a dry brush for your painting application. To do that, first get a minimum amount of paint on your dry brush, then tap some off.
This is my brush BEFORE I start painting. Notice how you don’t see ANY globs of paint.
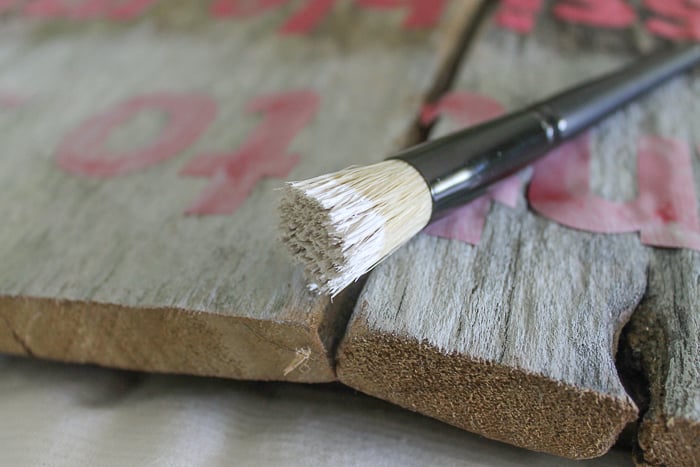
Then start away from the letters, and once that is done, start in the middle of each letter and go out.
I actually went over each letter twice, with VERY, VERY light coats. This is after the second coat.
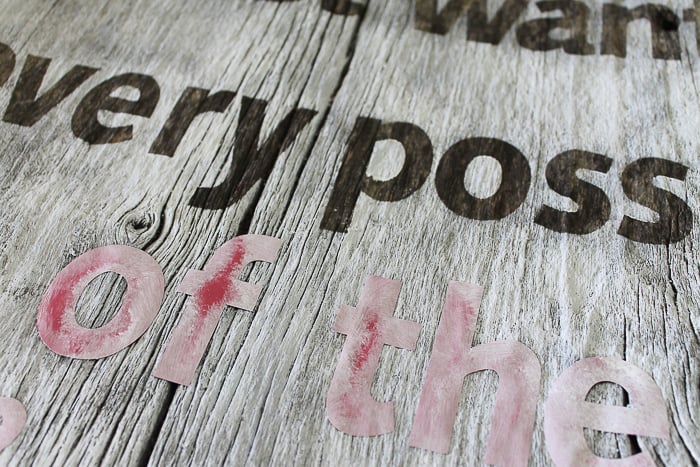
Step 4: Peel Back Letters
Then came the moment of truth. I started peeling my letters back very carefully. It almost took my breath away. I loved it immediately.
This one will go above my bed, but frankly, I could not wait to share it with y’all! Now that you know how to make wooden signs with quotes, you might just need one in every room of your home.
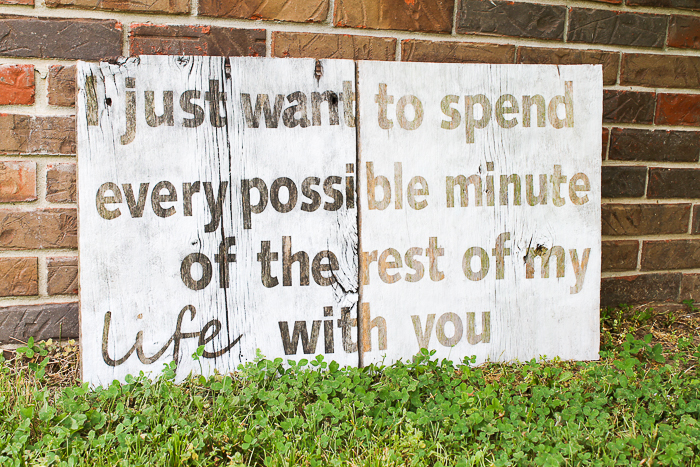
I am in love with this sign and its meaning. It may well be my favorite project to date.
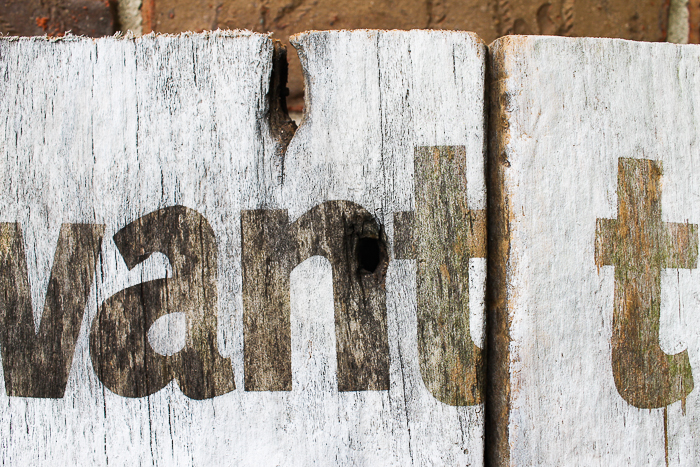
A few letter close-ups so you can see just how great they came out with this method.

Making wood signs with sayings is oh-so-easy to do, and you will love the result!
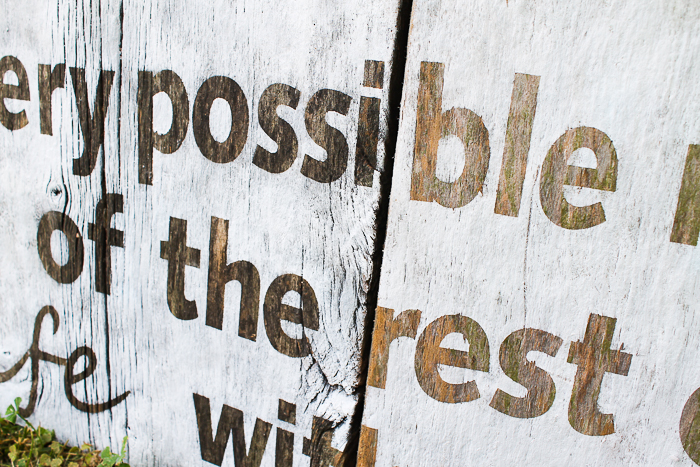
I let the letters and words go over the seam in the middle. Frankly, I love the seams too!
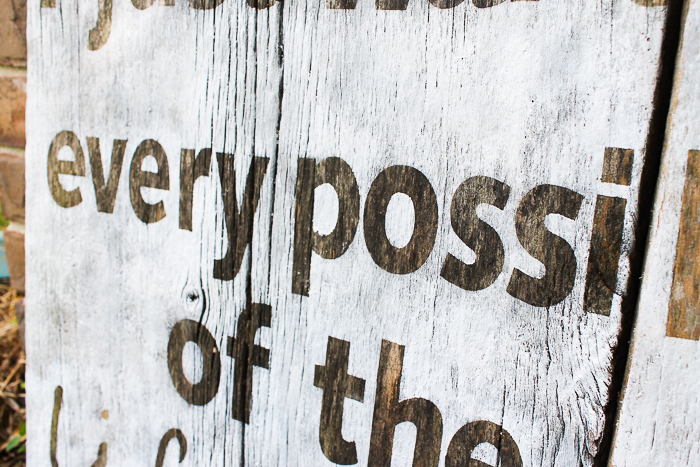
A bonus with using actual barn wood is the imperfections. Look at those gorgeous imperfections!
Are you inspired to make a sign of your own (whether that is a Hunger Games quote or another quote you love)? Here is a picture of where my sign ended up, too.
So, now that you know how to make DIY wooden signs with sayings, what will you put on your sign?
Tips and Tricks for DIY Wooden Signs with Sayings
Now that you’ve seen how to make DIY wooden signs with sayings, are you ready to create your own? Here are a few tips and tricks to ensure your project goes as smoothly!
- Start With Your Quote – Before you make this project, I recommend picking a quote and designing it in Design Space. This is because the length of your quote helps determine the size of your sign and the amount of vinyl you will need.
- Use One Piece Of Wood – If you don't like the look of a pallet sign, you can use one piece of wood for this project instead!
- Use The Ugly Vinyl – We all have that roll of vinyl that we bought and now don't like! Well, that roll of ugly vinyl is perfect for the letters of this project since you will only be using it as a mask!
- Add Your Choice Of Hanger – Depending on how heavy your wood sign is, you can use a variety of methods for hanging your sign. I used a wire hanger, but you could use a sawtooth hook or possibly Command Strips (if you are using a lightweight piece of wood).
6 More Wood Sign Crafts
Did you love learning how to make these DIY wooden signs with sayings, and want more wood sign crafts? Then check out the projects below!
- Marbling Paint Technique Used on Wood
- Cricut Basics- How To Make DIY Wood Signs With Vinyl and HTV
- Geometric Wood Pumpkin
- DIY Halloween Wood Sign With Testors
- Wooden Christmas Sign with Cricut Maker
- How to Make Reversible Wooden Signs with Sayings


I love it!! I’m a big Hunger Games fan. This is fun, sweet, and stylish. 🙂
Love the quote. Love the movie. Love the sign.
🙂
Inspired! What a lovely way to turn your passion into something so beautiful of a piece. 🙂
Love the quote. Beautiful sign!
This is so many kinds of awesome! I loved the books and the movie!
I. Love. It. So gorgeous. I am a hunger games fan as well :), and i love that quote!
It turned out so well! Where do you find barnwood?
I’m a recent Hunger Games fan, so not only do I love the quote, but I love how you made the sign. I think I’ll have to give this a try. Thanks for the inspiration!
Oh wow, this is awesome!! Love The Hunger Games too. 🙂
-Lauren
That’s such an awesome idea! I love how it turned out & I love the quote! :]
I love it 🙂
Debbie
I love your blog! I’m your newest follower and I just featured this on my blog.
Angie! I love it! And curse you, where did you find barn wood? Am I going to have to start pulling over and picking up wood off the side of the road?!
Thanks so much for joining the DIY Talent Parade.
This is wonderful!!! I’m your newest follower!
http://the-junktion.blogspot.com
Love it!! I’m so going to do this!! How big is the sign?
Beautiful !!! How did you stick the letters down to the board? I have to get myself a silhouette !! What type of vinyl did you use?
Thanks so much…so many idea’s floating around in my head!!
The vinyl is self adhesive. Like contact paper. 🙂