
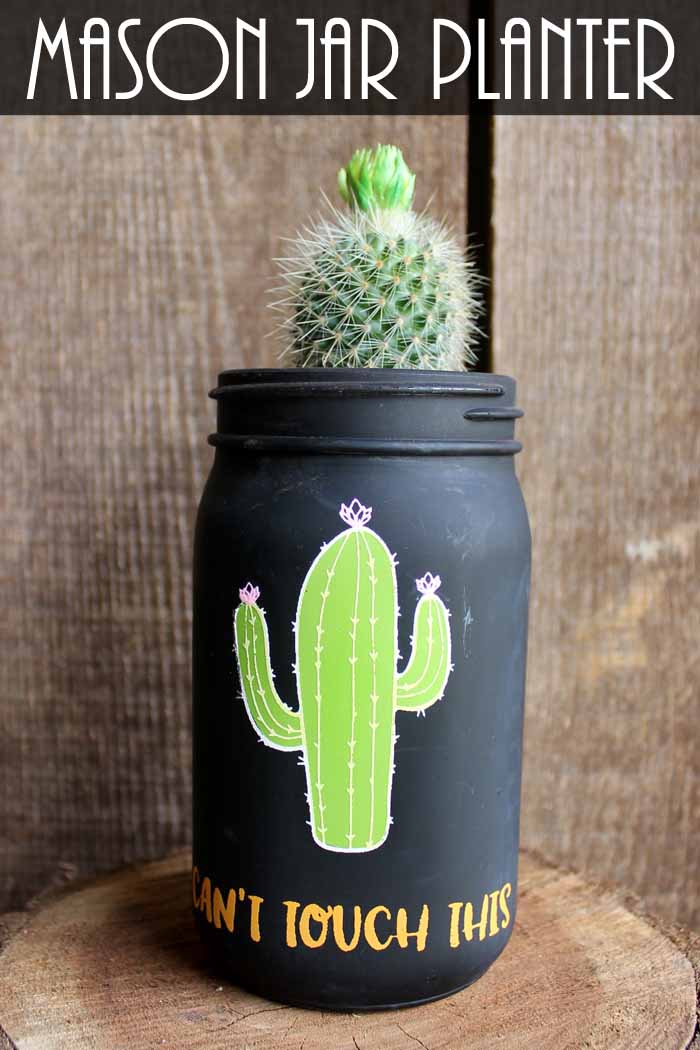
You can make this cactus planter pot in minutes from a mason jar. I have a thing for all things cactus. I mean they are so cute right? If you love them too, you might just want to grab your Chalk Couture supplies and get started on this project. You can use the transfer over and over again so these would make great gifts as well! Just so you know, I am an independent designer with Chalk Couture.
This is also a part of mason jar week around here. You can catch up with the posts from day 1 and day 2. You might also want to scroll to the bottom of this post to see what the other bloggers have for you today!
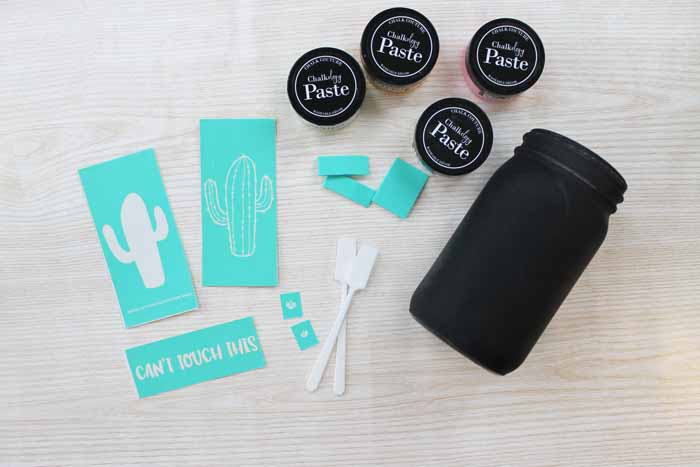
Supplies needed to make this cactus planter pot:
Some links below may be affiliate links which means that you do not pay anymore, however, a portion of your purchase will go to support this site.
- Chalkboard mason jar
- Can’t Touch This Transfer
- Chalkology Paste in the colors of your choice
- Squeegee
- Stir Sticks
- Clorox Wipes
With Chalk Couture, it is often easier to show you how to make a project in a video rather than with text. So you can watch the video below to see just how to make this cactus planter pot.
Confused by the steps? Download our beginner’s guide here!
Can’t watch the video or missed some of the steps? Just follow along below!
How to make this cactus planter pot:
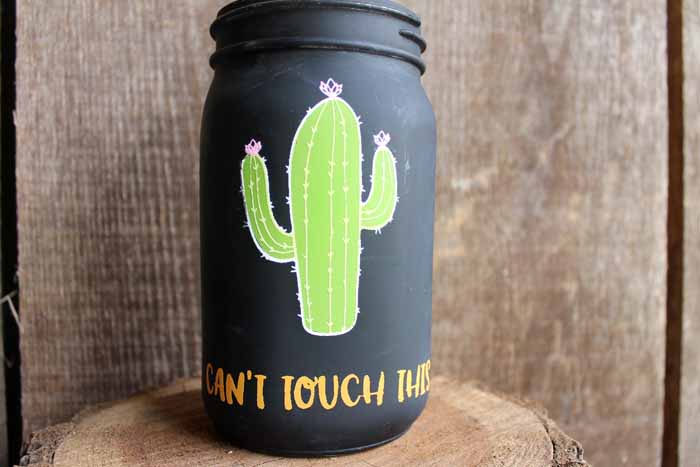
- Start by cutting your transfer into the individual pieces on the cut lines.
- Adhere the first transfer into place on the jar and press down well. Remove all air bubbles. TIP: Stick the transfer to a bath towel and pick up a little fuzz first to avoid it sticking too harshly.
- Add some Chalkology paste to the transfer and then run your squeegee across to get it into all of the areas.
- Remove all excess paste and return to the jar.
- Then pull up the transfer to reveal your design.
- Repeat with all of the other transfers to make this cactus planter pot. Remember to let each section dry before adding on layers. You can see our tips for layering with Chalk Couture by clicking here.
- Remember to wash your transfer and tools immediately and do not let the paste dry on them. Clorox wipes are great for this. Clean the front and back and then allow to dry sticky side up before returning to the backing paper.
- You can leave your design as is or seal with a spray sealer to make it last forever!
Confused by the steps? Download our beginner’s guide here!
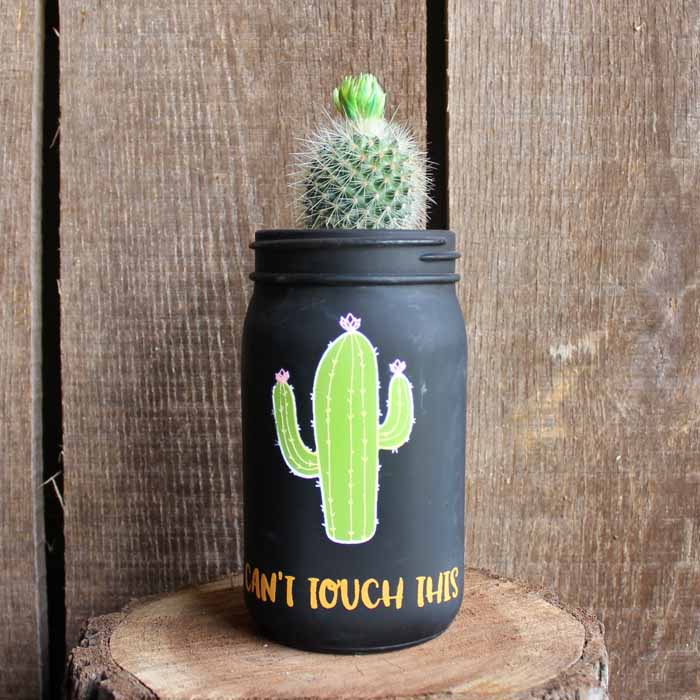
Then just add in a cactus and this project is done! I love how this cactus planter pot turned out. And you know…I love how easy this one is as well! Chalk Couture makes projects like this super simple. Give it a try today because I guarantee you will be hooked after just one project!
Want some more idea for crafts with jars? Try the bloggers joining in our series below!
Chalk Couture Beginner's Guide

Getting started with Chalk Couture? Sign up for our email list and then use our handy free printable guide to start creating chalkboard art in minutes!


ADORABLE!!! : ) Hugs…
That is so stinkin’ cute!
Hi Angie! Love your super creative cactus planter and featured it on Sunday Features this weekend! Have a blessed Sunday. 🙂 – Andrea, Tabler Party of Two
Great idea! Funny, too!