
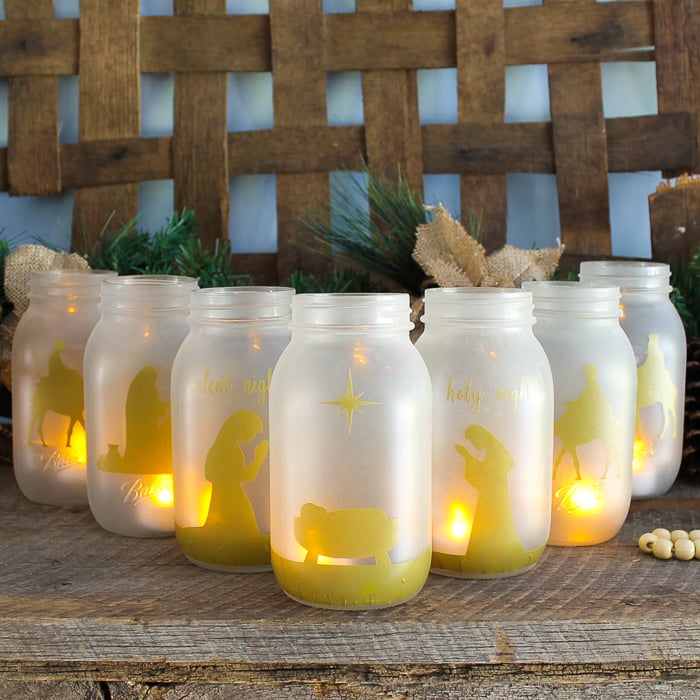
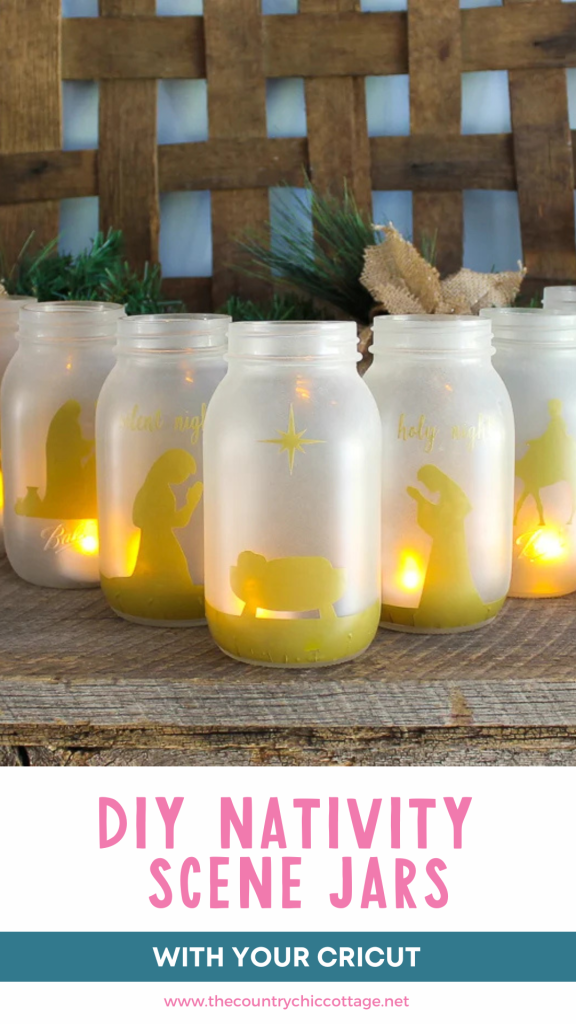
A nativity scene holds a special place in my holiday decor, and they can be crafted in many different styles and designs. Try making this unique DIY nativity scene out of Christmas mason jars!
From wood to felt to ceramic (and many more!), you can find beautiful nativity scenes in almost any material and style. But I might have a project to create one you've never seen before.
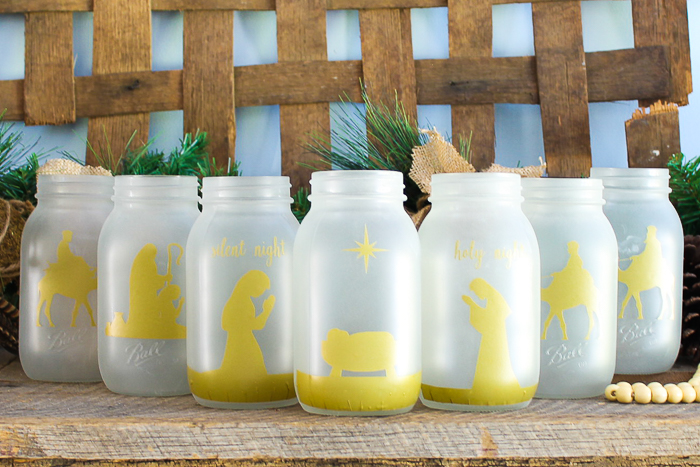
Today, I am turning a group of jars into a glowing nativity scene perfect for your mantel or anywhere else you may want to display it in your home. When you look at the entire scene, the project might seem complicated. Lucky for you, creating beautiful Christmas jars to turn into a DIY nativity scene is much easier than you may think!
Grab your own mason jars and get started creating your version of a homemade nativity scene today! After all, it is the most wonderful time of the year, and what better way to celebrate than with mason jars?
If you love Christmas crafting, be sure to check out my Cinnamon Applesauce Ornaments Recipe, Burlap Christmas Trees, and Wooden Christmas Tree ideas!
How To Make DIY Nativity Scene With Jars
Your local Michaels store will have everything you need to do this project. Then, it's time to get creative! This mason jar nativity scene will look great on a mantle!
Also, making these DIY Christmas jars is very easy. The project uses a process similar to that of my frosted Christmas jar candles. Just follow the instructions below!
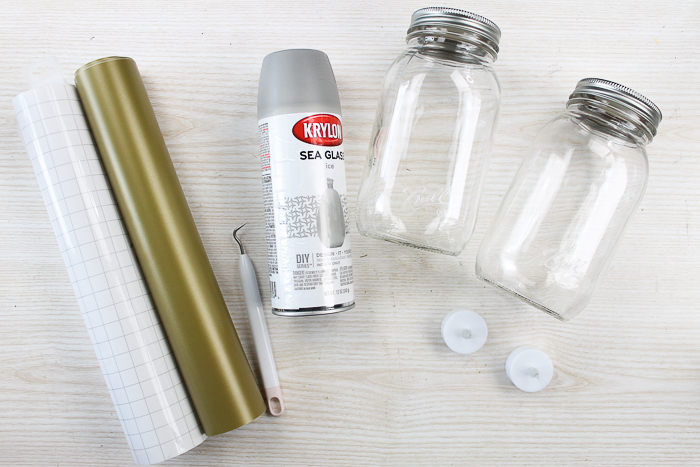
Supplies Needed To Make DIY Nativity Scene With Jars
- Ball Quart Jars with smooth sides
- Krylon Sea Glass Paint in ice
- Battery-operated tea lights
- Gold vinyl
- Transfer tape
- Weeding tools
- Cricut machine
- Nativity scene cut file (see how to download below)
- Scissors
Download The Nativity Cut File
Sign up for the newsletter in the box below to receive your nativity scene cut file. If you have already receive the newsletter, just input your information again. Don't worry – you won't unknowingly sign yourself up for anything you didn't intend to or get buried in emails!
Next, check your email for the file so you can upload it to your Cricut machine for cutting.
Please note that this file is for personal use only. Please get in touch with me if you have any issues with your download or want to purchase a commercial license.
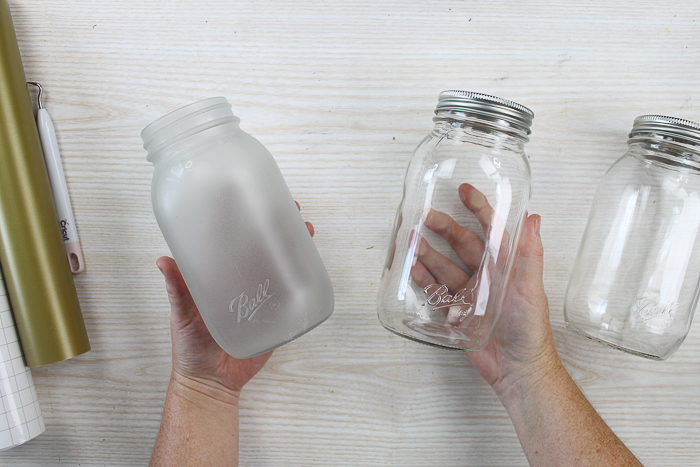
Step 1: Clean Jars
Clean and dry your jars. Once they're dry, gather your painting supplies and paint them.

Step 2: Spray Paint Jars
Spray all sides with a couple of coats of Sea Glass paint and allow them to dry completely. This paint gives your mason jars a frosted look that is perfect for adding candles. Doesn't it look amazing?
Pro Tip: I recommend spray painting outside to minimize the smell and mess.
Step 3: Download & Upload Nativity File To Cricut Design Space
If you haven't already done so, download the nativity file. Then, upload this file to Cricut Design Space and resize it to fit your jars.
If you need help, you can learn more about uploading images here. All of your images will fit on one 12×12 sheet of vinyl.
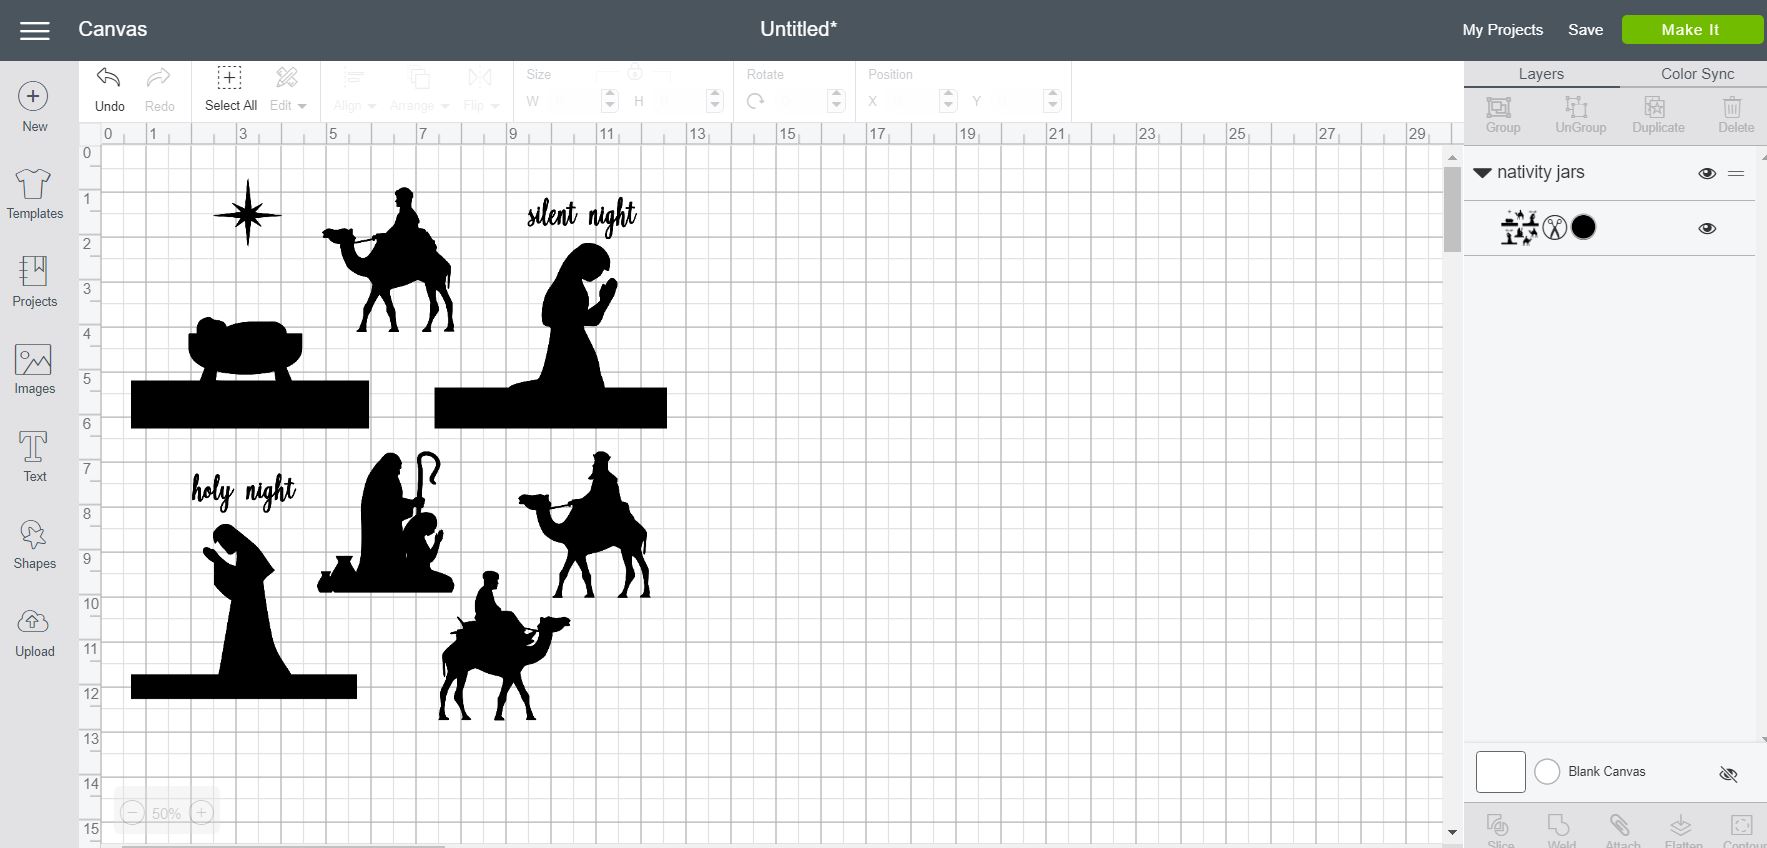
Step 4: Cut & Weed Vinyl Pieces
Using your Cricut, cut your images from the vinyl. Remove any excess pieces with the weeding tools.
Continue until you have removed all of your excess vinyl.
Don't forget to remove easy-to-forget items like the centers of the letter as well!
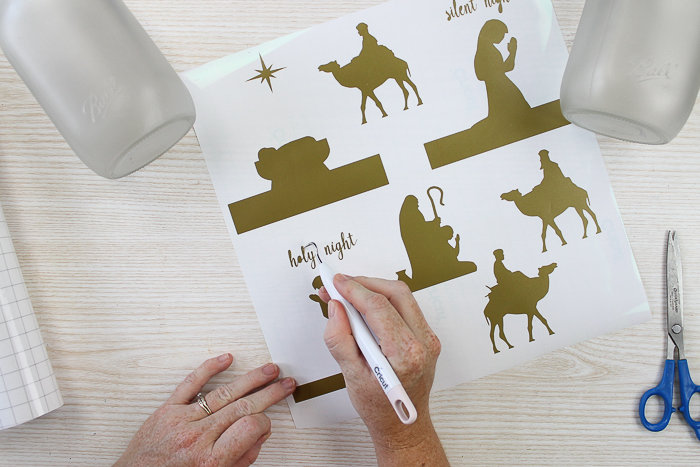
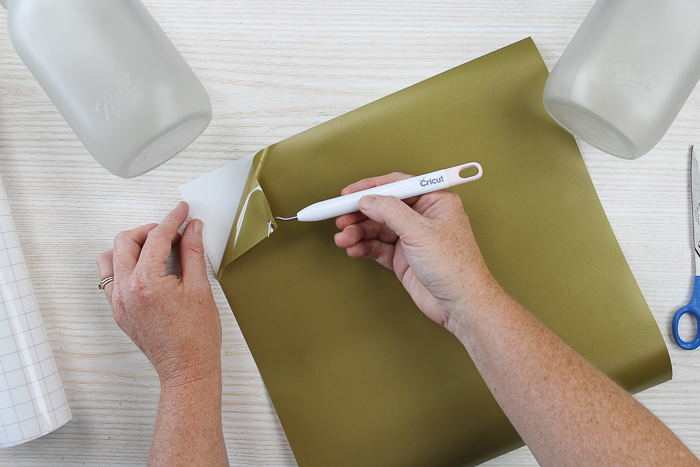
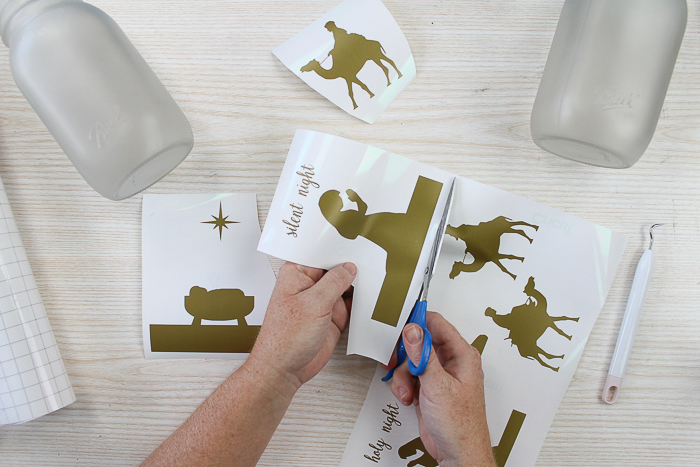
Step 5: Cut Images Apart
Next, use scissors to cut the images away from each other.
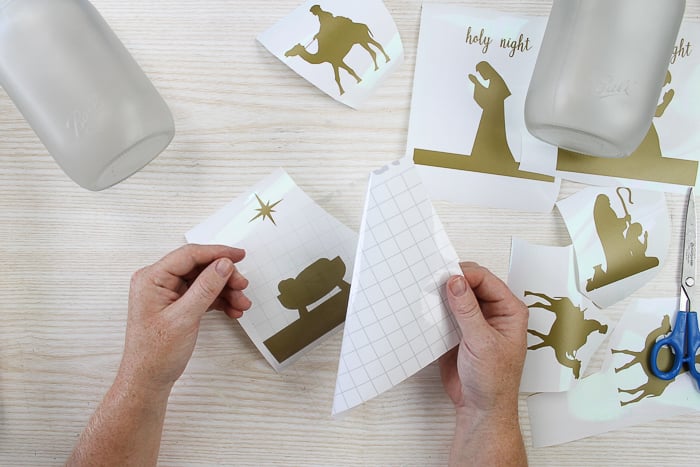
Step 6: Cut Transfer Tape To Fit Images
Now it's time to get your transfer tape and cut it to about the same size as your images.
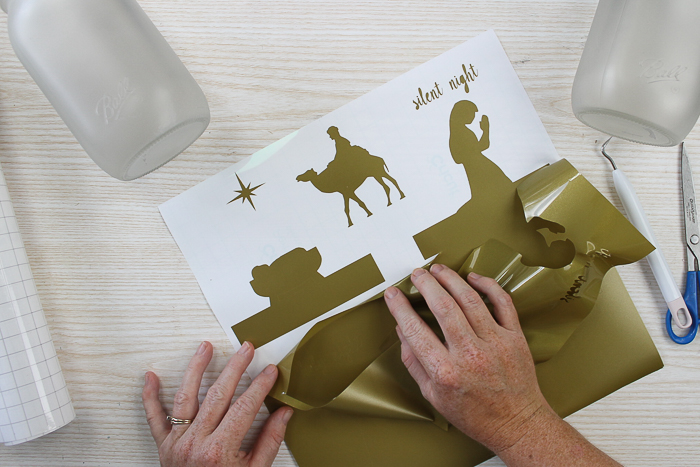
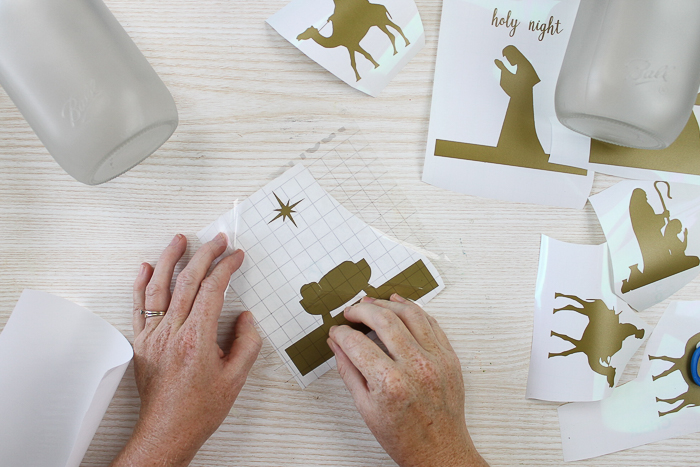
Step 7: Add Transfer Tape To Images
Carefully lay the transfer tape over the top of your image and press down firmly.
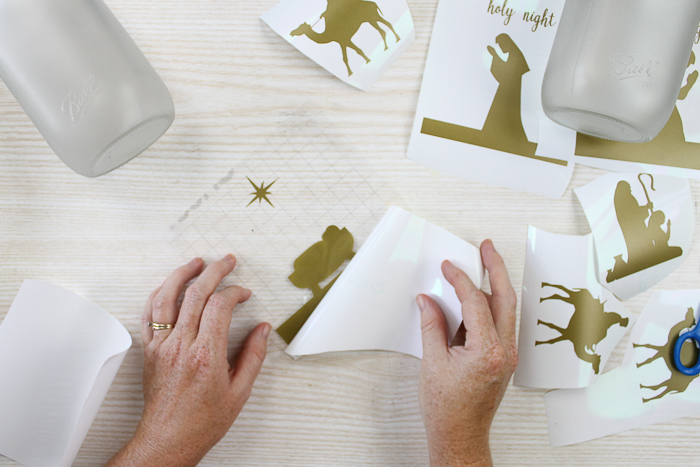
Step 8: Remove Backing From Transfer Tape
Remove the backing from your transfer tape. The vinyl should remain on the transfer tape.
Step 9: Add Vinyl To Jars
Place your vinyl on the painted jars, being careful to position them slowly so the image is where you want it.
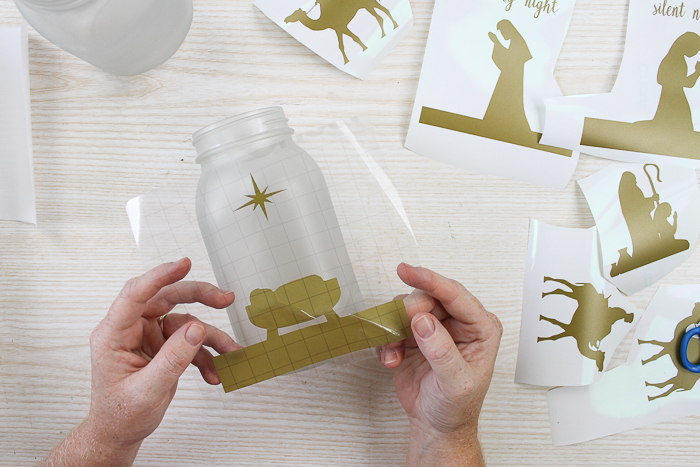
Step 10: Press Vinyl Onto Jar
Press down firmly and smooth out any bubbles in the vinyl.
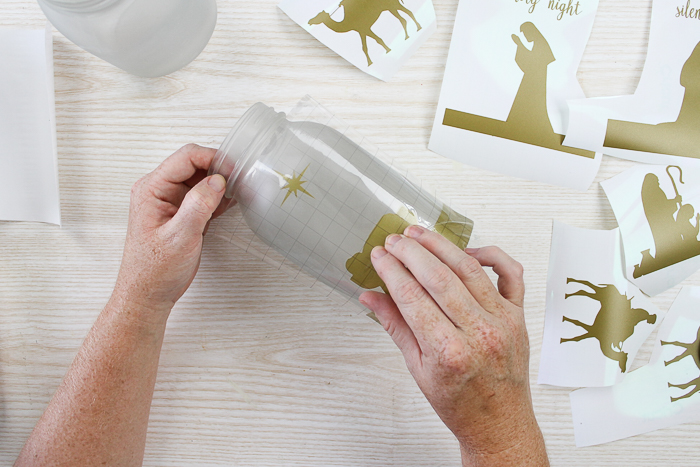
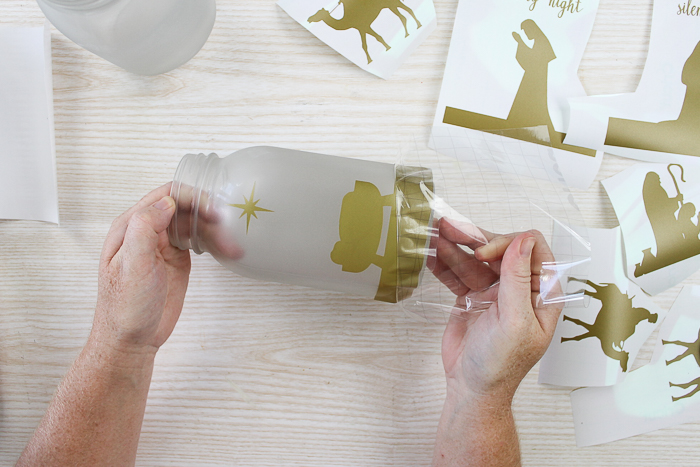
Step 11: Peel Off Transfer Tape
Peel back your transfer tape.
DIY Nativity Scene Jars Project Notes
If you desire, you can peel and stick the images that are just one piece instead of using transfer tape.
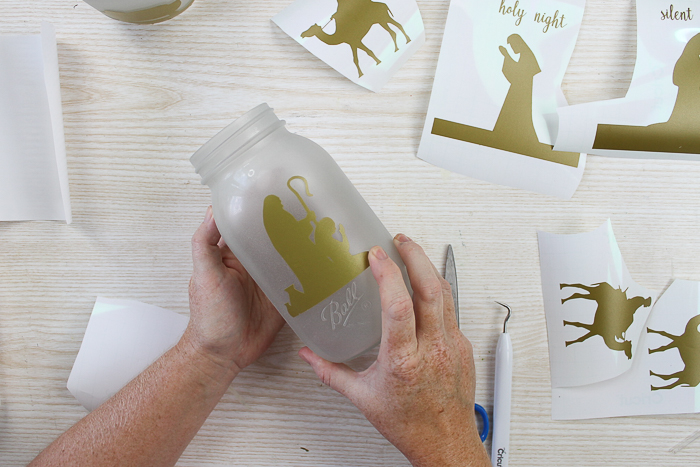
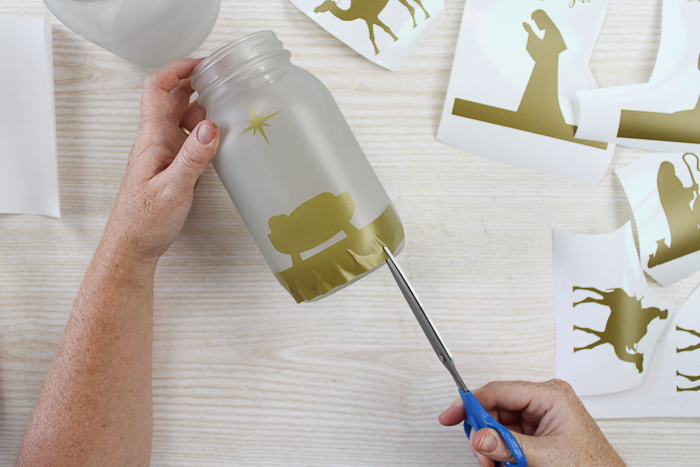
Step 12: Clip Vinyl
Clip the bottom of your vinyl, if you need to, to make it flat.
Step 13: Add Tea Light To Jar
Then add a tea light to each of your Christmas jars!

Display DIY Nativity Scene
Set them on a mantel or anywhere to spread a little holiday cheer.
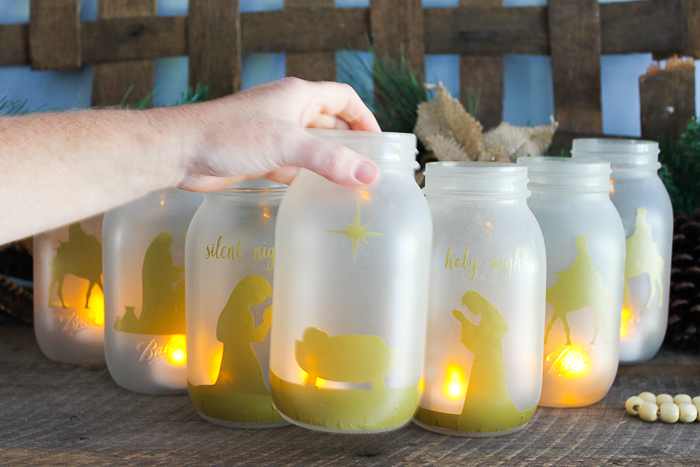
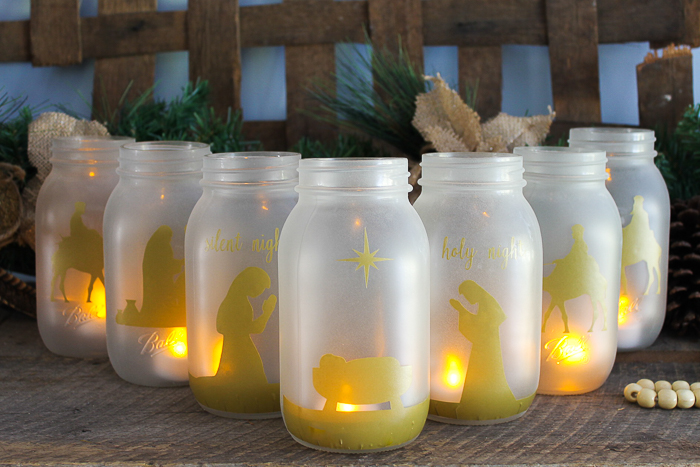
These DIY nativity scene Christmas jars will also look gorgeous with the candles off during the day!
But they look especially stunning at night when you flip on the candles and watch the holiday magic happen!
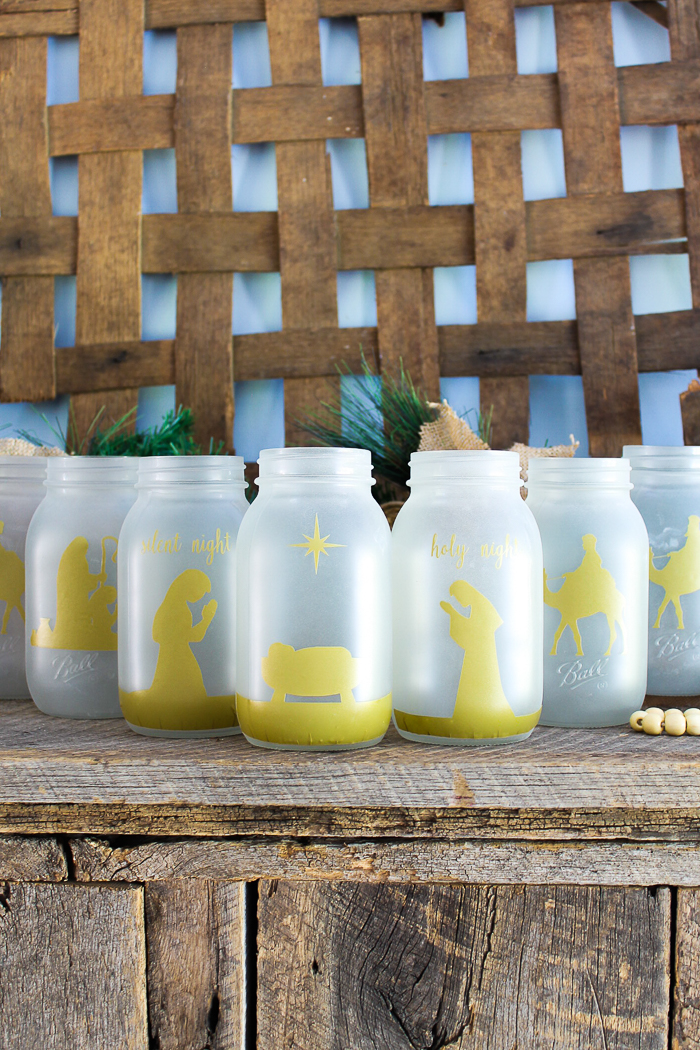
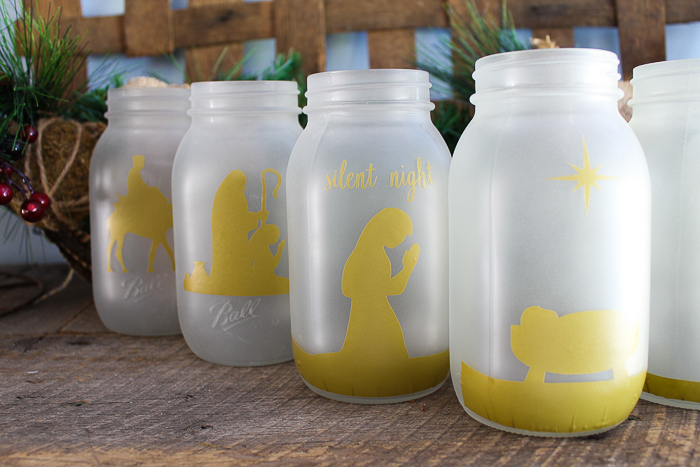
You can see the detail on each jar and how great they look in the following images.
I love crafts that are super simple to make, don't you?
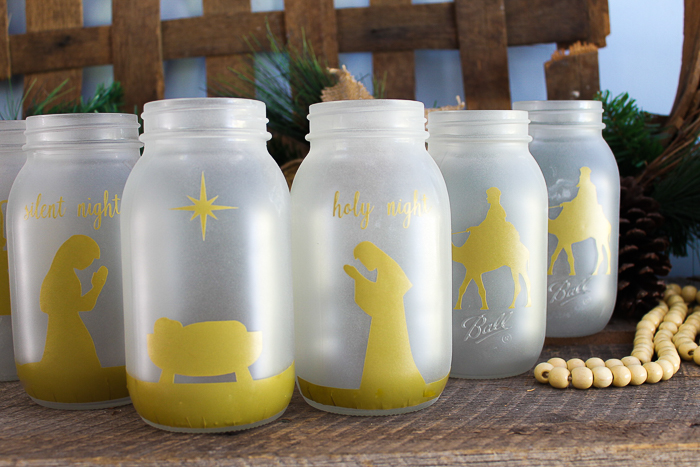
Why not get crafty this season and transform some ordinary Ball mason jars into an eye-catching DIY nativity scene? This project will add a special touch to your Christmas home decor.

Everyone who sees your set will love this unique spin on a nativity scene, so you might as well go ahead and make an extra set as a holiday gift because (of course) the best gifts come wrapped in jars!
Grab your Ball mason jars and get started on this amazing craft today! I'm a firm believer that everyone needs some festive Christmas jars this holiday season. And with this project, their festive jars will all work together to create a lovely scene.
FAQs About DIY Nativity Scene
If you have questions about making this DIY nativity scene, I have answers! If you don’t see your question answered below, please leave it in the comments.
Can I Adjust The Size Of The Mason Jars?
Yes, you can! For this project, you can use any size mason jars you like. The only thing to remember is that you may need to adjust the size of your images in Cricut Design Space to fit your mason jar.
What Cricut Machine Can I Use For This Project?
All of them! The Cricut Maker, Cricut Explore series, Cricut Joy, Cricut Joy Xtra, and Cricut Venture can all cut SVG files!
The only thing to remember is that each Cricut machine is different in terms of project size capabilities and the materials it can cut. So, depending on your project, you might need to resize the SVG file or cut it out in a different material.
Can You Frost Glass With Mod Podge?
You can create a frosted glass effect with Mod Podge, but it takes longer because you have to paint multiple coats and wait for them to dry, and the final effect isn't as good as the Sea Glass paint produces. I recommend the Sea Glass paint, but it's good to know there's another option in case you can't find the right stuff.
What Can I Put My Nativity Scene On?
I love to have my Christmas jars front and center on my mantle, but there are lots of places in your home that would make terrific display spots! Some ideas are a shelf, table, or even a special place on your counter!
5 More Christmas Crafts
Did you love learning how to make this DIY Nativity Scene and want more Christmas crafts? Then check out the projects below!


This is BEAUTIFUL!! I do not have a cricut machine. Can this be made without a cricut?
Sure! Just print the images and cut them with a craft knife out of vinyl! It shouldn’t be too hard!
Angie, this is such a sweet DIY Christmas project. I love anything that I can do with my Cricut. Thank you for sharing at Happiness is Homemade Link Party. I’m choosing you as one of our features for this week.