
Decorative wooden spoons make amazing kitchen decor or terrific DIY gifts for many people in your life! Follow this tutorial to learn how to make decorated wooden spoons.
I love the look and feel of wooden spoons. They just project a sense of history and timelessness that few other items can match. Plus, they're extremely versatile since they can be used or displayed anywhere and look right at home!
Not too long ago, I was inspired to make a DIY gift set of decorated wooden spoons for a friend of mine. I could have totally given her plain spoons and she would have loved them, but I wanted to make them stand out by decorating them a little.
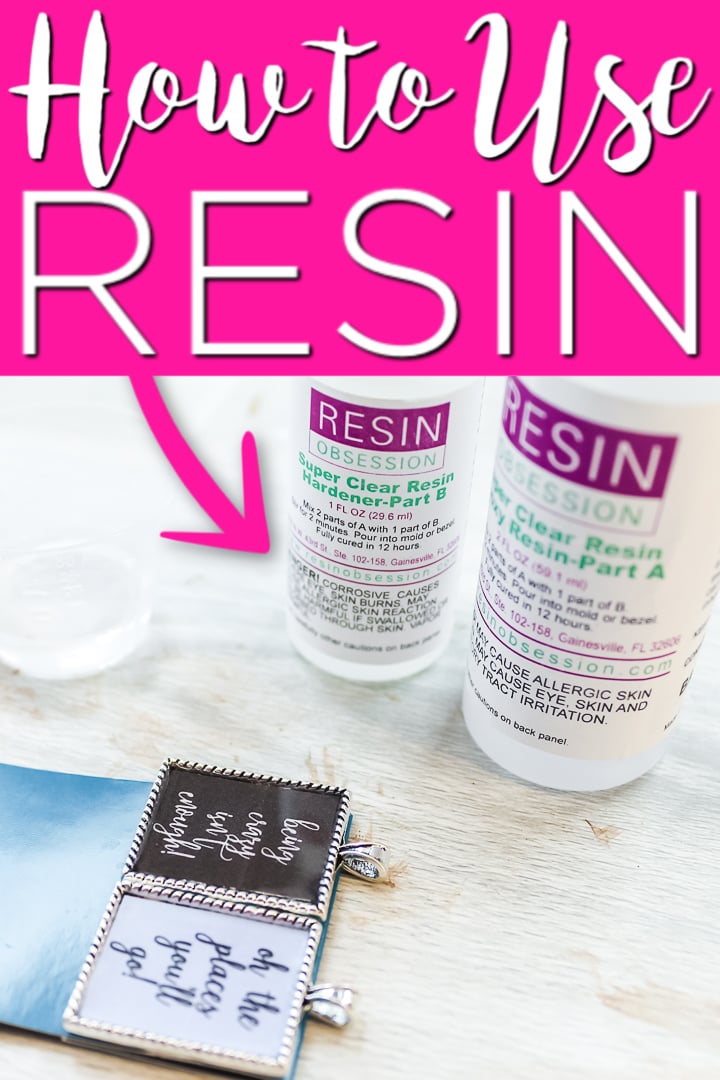
I decided to use a 2-part resin epoxy to decorate the handles. This is a material that I think many people are afraid to use in their crafting because they think it's not safe. However, epoxy resin is a product that can give incredible professional-looking results, so it's worth learning how to use it!
And it just so happens that this tutorial will show you how easy this product can be to use!
Although the process I used here is different from the DIY Painted Wooden Spoons with Chalk Paint I've made in the past, these decorated wooden spoons will look terrific in your own kitchen or make a gift idea for mom.
You can also give decorative wooden spoons as a DIY gift for that special cook in your life, and they make great housewarming gifts for new neighbors or friends who buy a new home!
NOTE: If you're looking for more inspiration in making kitchen decor you'll love, check out our Personalize Cutting Boards With Wood Burning, Cooking Conversion Chart with Your Cricut, and Kitchen Chalkboard Art ideas!
How To Decorate Wooden Spoons
Ok, let's dive in and check out how to use epoxy resin to create gorgeous decorative wooden spoons that you'll delight in gifting (or displaying)!
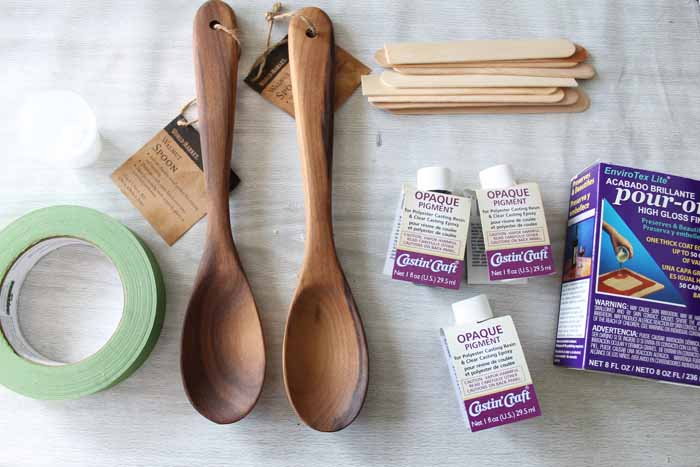
Supplies Needed
Here's what you'll need for this project. I've included a few helpful links to help you find certain items more easily.
- Wood spoons (choose ones with a flat handle surface)
- Stir sticks
- EnviroTex Lite Pour-On High Gloss Finish
- Castin’ Crafts Opaque Pigment (in the colors of your choice – I used white, green, and blue)
- Masking tape
- Measuring and mixing cups
- Toothpicks
- Rags
Instructions
Trust me, working with epoxy resin is easier than you may think! Just follow these step-by-step instructions. If you have any questions about using resin, always refer to the instructions that come with your product.
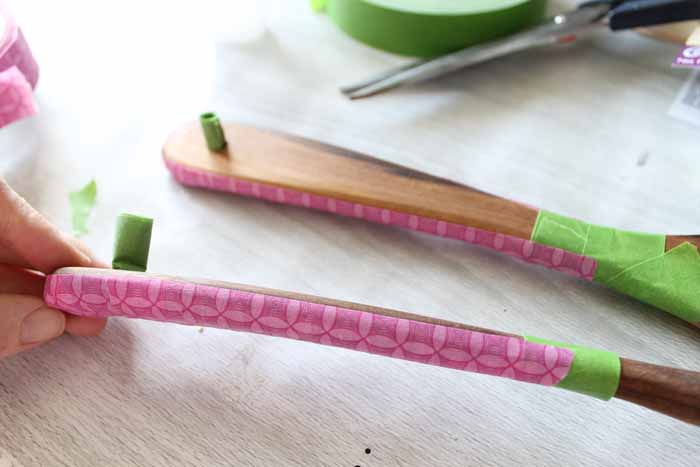
Step 1
You will want to start by covering the sides of your handle with masking tape. See below how I cut the edges to help the tape wrap around the spoon.
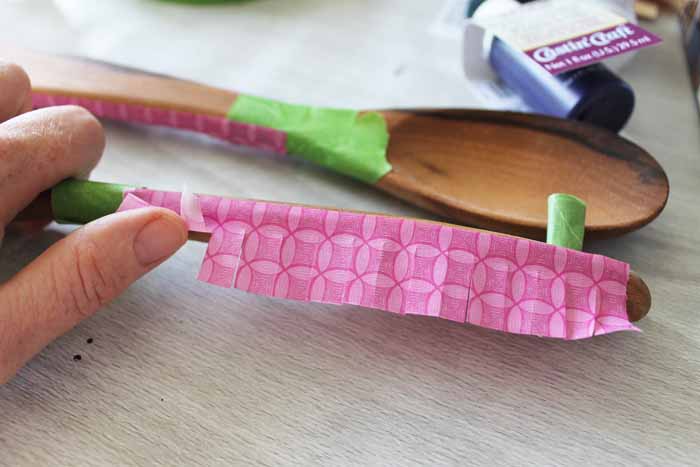
Note: Don't forget to also mask any holes that may be in your spoon!
Step 2
Then lay your spoon down on a flat surface. You may have to prop up the end to make the handle flat.
Note: Take care to protect your work surface because the product may spill over the edges and would ruin your table.

Step 3
Start by mixing the EnviroTex Lite Pour-On High Gloss Finish according to the package directions. It is very important to follow the directions when mixing this product.
Step 4
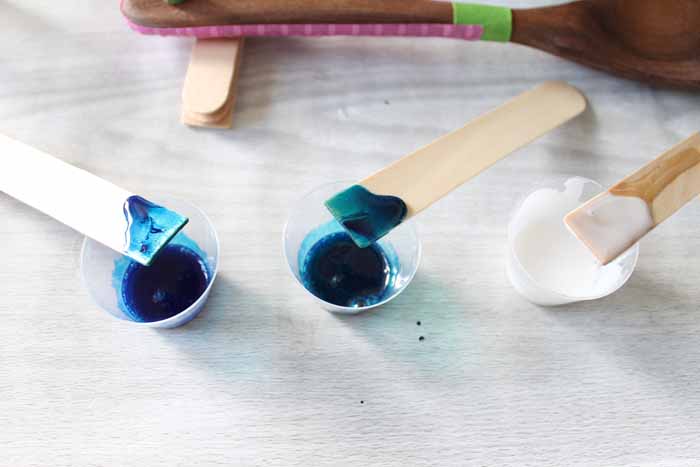
Pour small amounts into three different measuring cups.
Add some of the Castin’ Crafts Opaque Pigment into each of these cups and stir well. From left to right (in the image below), I used blue, a mixture of blue and green, and white.
Note: I used more white than the other colors.
Step 5
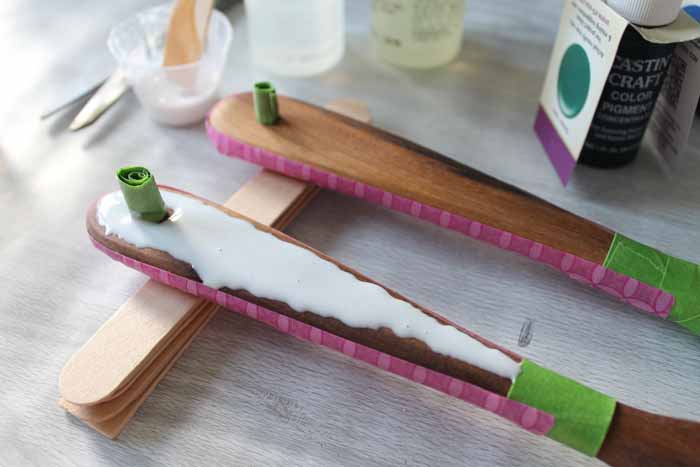
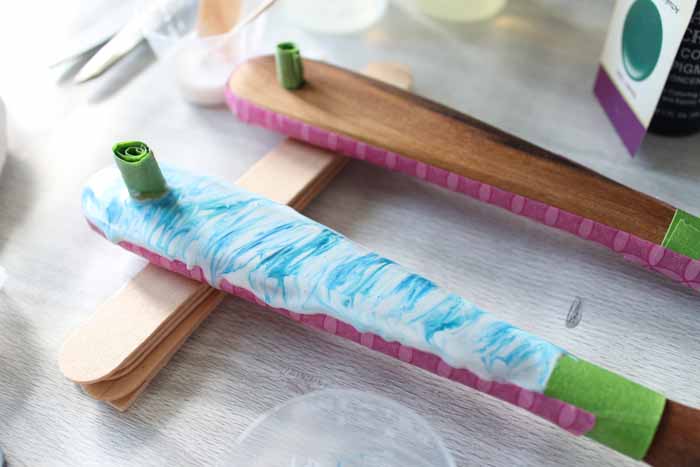
Begin by adding the white to the handle of one of the wooden spoons.
I found it easier to control if I dripped on the resin with the stir stick. Use less than you think you will need because it will spread out and fall over the edges.
Note: You can also use a toothpick to drip the product in even smaller amounts.
Step 6
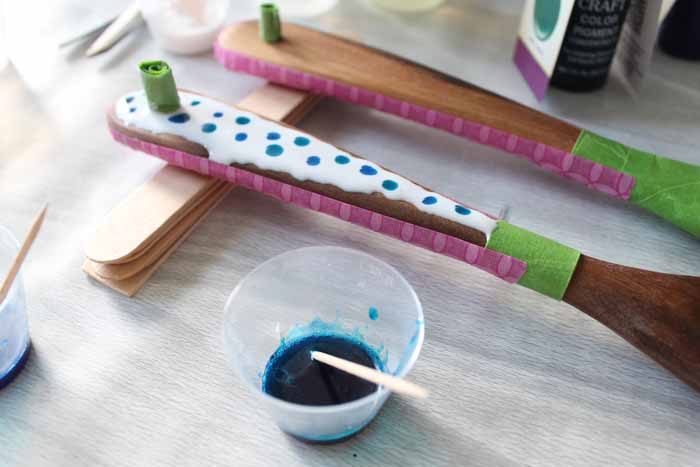
Then start randomly dripping on your colors with toothpicks.
Step 7
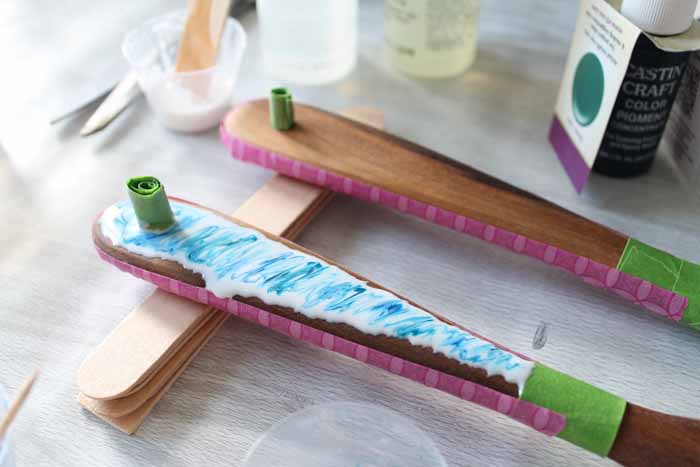
Run a clean toothpick through the resin to start creating that gorgeous marbled effect on your decorated wooden spoons.
Step 7
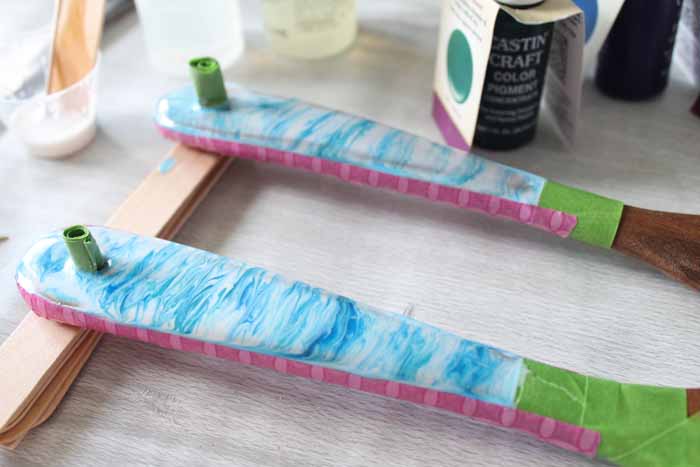
Let your decorative spoons sit – the material will run off the sides. You can add more white to areas if needed.
Note: If you notice any bubbles come to the surface, follow the package instructions for popping them.
Step 8
Repeat this process for decorating wooden spoons to create as many as you want. Check on your spoons occasionally and use a damp rag to wipe away any excess resin.
Step 9
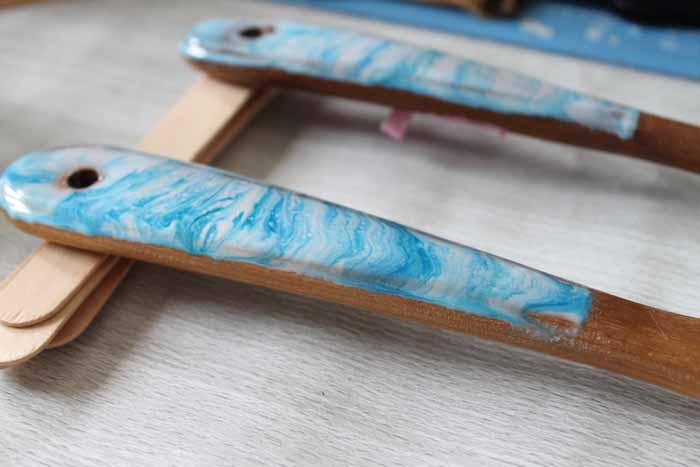
Allow the resin on your decorated wooden spoons to set up for a few hours, then carefully remove the tape. The resin will still be wet.
Test any leftover resin in your mixing cup to ensure that it is set up enough not to run. Use your rag to wipe away any excess resin on your spoons that may have seeped under your tape.
Step 10
Check on your decorated wooden spoons a few more times to ensure that no additional resin drips over the edges.
At this point, allow the entire project to cure for about 24 hours.
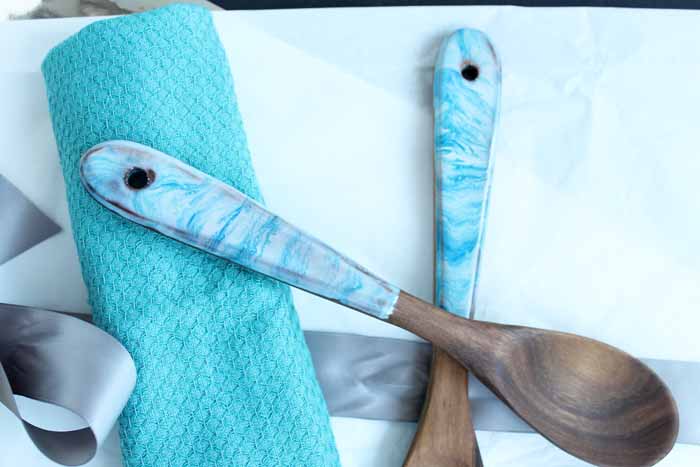
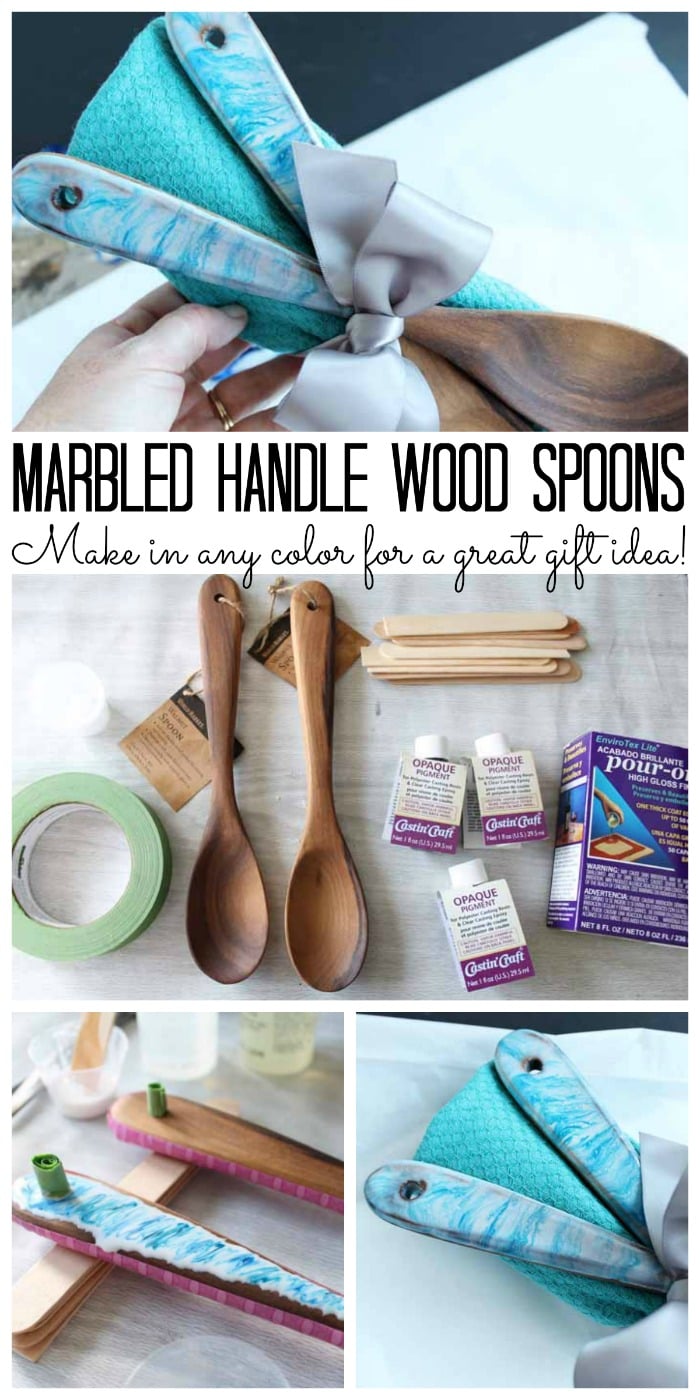
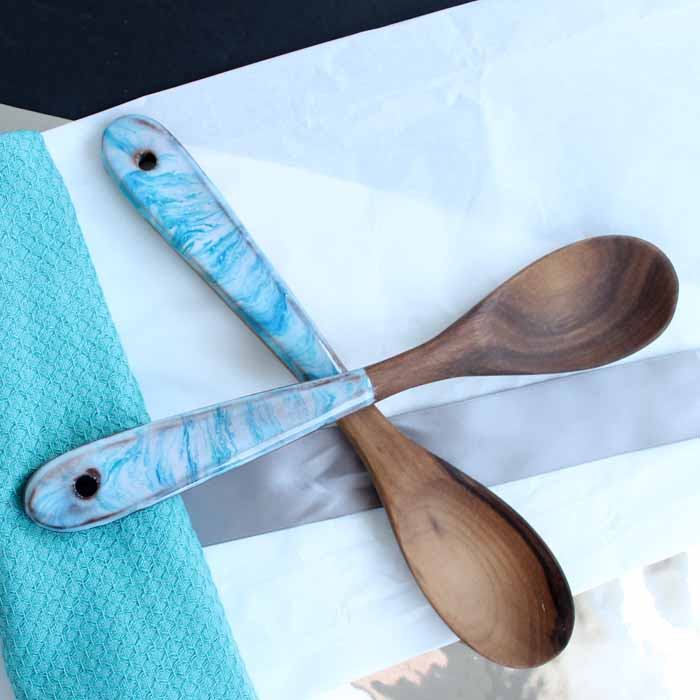
The final product looks amazing!
FAQs
I know people have a lot of questions about working with resin. Here are some that I see over and over.
Are these spoons purely decorative, or can they be used for cooking?
Although they can be displayed for decoration, they can also be used for cooking! I only decorated the handles so that the bottom part of the spoons could still stir and serve food.
Note: I wouldn't recommend using these spoons if the resin part of the handle will come in contact with the food (for example: stirring a deep pot of soup).
How do I care for decorative wooden spoons?
First, always hand wash these because the dishwasher will use water at temperatures that are too high for the epoxy resin. Also they also should never be left in contact with a hot pan over long periods of time.
Do you need to seal the wood before using epoxy resin?
Many people recommend sealing wood when you plan to use resin on it because wood is porous, which can cause more bubbles than you'll likely get when crafting with other surfaces. However, since these spoons can be used in cooking, I did not seal them first. I don't recommend doing so because most sealants are not food-safe.
For this project, I recommend leaving the wood unsealed and addressing any bubbles that may form. You'll need to keep a close eye on the spoons as the resin sets and release any bubbles that arise.
This is a great project for using resin as a beginner. It's easy enough that it will remove any intimidation you may feel about working with this product, and the final product adds something fun to the kitchen!
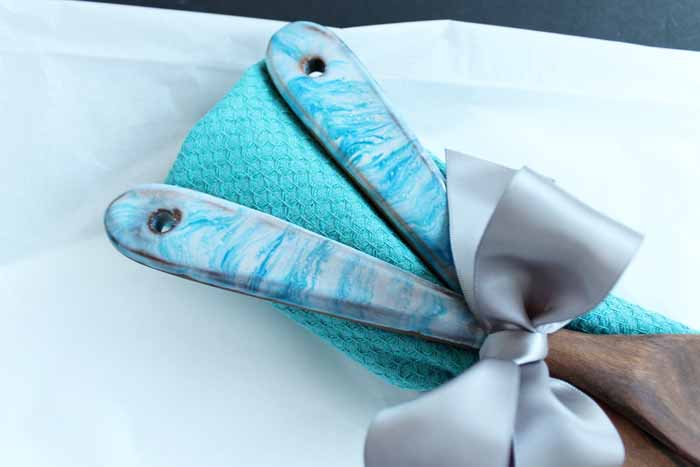
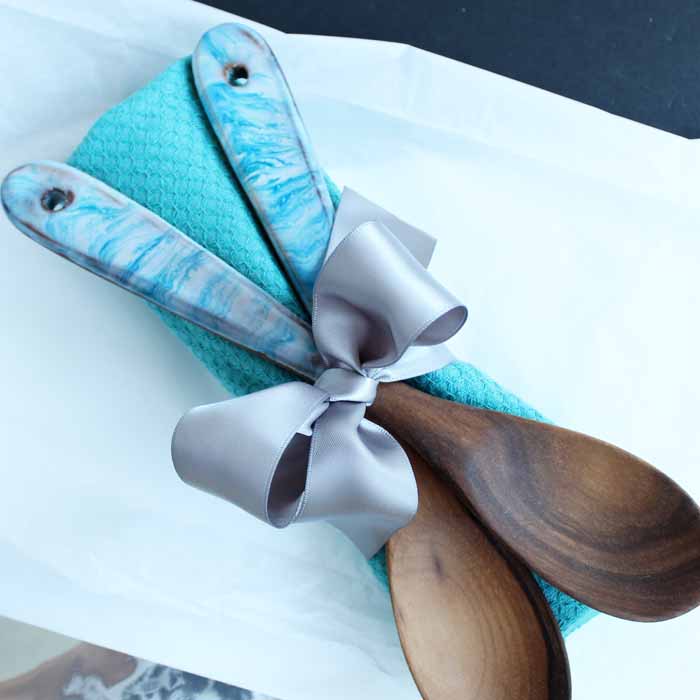
Decorative wooden spoons make terrific kitchen decor and DIY gift ideas. To package them for gifting, simply pair them with a cute matching towel and wrap everything up with a matching bow, as you can see in the image below.
More Homemade Gift Inspiration
Love these and want more handmade gift ideas? Try the links below!

Struggling with resin and need help?
I know that a ton of you are intimidated by resin. Don't be! You just need to know the basics and gain some experience with the medium. I have a course that will help you master epoxy resin and give you the confidence you need to tackle this project and so much more.
With unique insights drawn from more than a decade of creating and selling resin jewelry worldwide, this course is from an Amazon best-selling author on the topic. This class goes beyond making a few projects. You get thirty video lessons to give you clear directions on how to make resin jewelry you can confidently share and sell. Want to see more?

Supplies
- Wooden spoons choose ones with a flat handle surface
- Stir Sticks
- EnviroTex Lite Pour-On High Gloss Finish
- Castin’ Crafts Opaque Pigment in the colors of your choice – I used white, green, and blue
- Masking tape
- Mixing cups
- Toothpicks
- Rag
Instructions
- Cover the sides and any holes in your handle with masking tape. You may need to cut the edges to help the tape wrap around the spoon (or roll up a piece of tape to slide into the hole).
- Protect your work surface and then lay your spoon down on a flat surface. If it tilts, prop up the end to make the handle flat.
- Mix the EnviroTex Lite Pour-On High Gloss Finish according to the package directions. Take care to follow the directions when mixing this product.
- Pour small amounts into three different mixing cups.Add some of the Castin’ Crafts Opaque Pigment into each of these cups and stir well. I used, blue, a mix of blue and green, and white.
- Add the white to the handle of one of the wooden spoons using a stir stick.Use less than you think you will need because it will slowly spread out and fall over the edges.
- Randomly drip your colored resin onto the handles with toothpicks.
- Take a clean toothpick and run it through the resin to start creating that gorgeous marbled effect.
- Let your decorative spoons sit so the resin can set. The material will run off the sides. Note: if you notice any bubbles come to the surface, pop them according to the package instructions.
- Check on your spoons occasionally and use a damp rag to wipe away any excess resin.
- Allow the resin on your decorated wooden spoons to set up for a few hours then carefully remove the tape. The resin will still be wet but it shouldn't run.Use your rag to wipe away any excess resin on your spoons that may have seeped under your tape.
- Check on your decorated wooden spoons a few more times to ensure that no additional bubbles appear or resin drips over the edges.Allow the spoons to cure for about 24 hours.


