
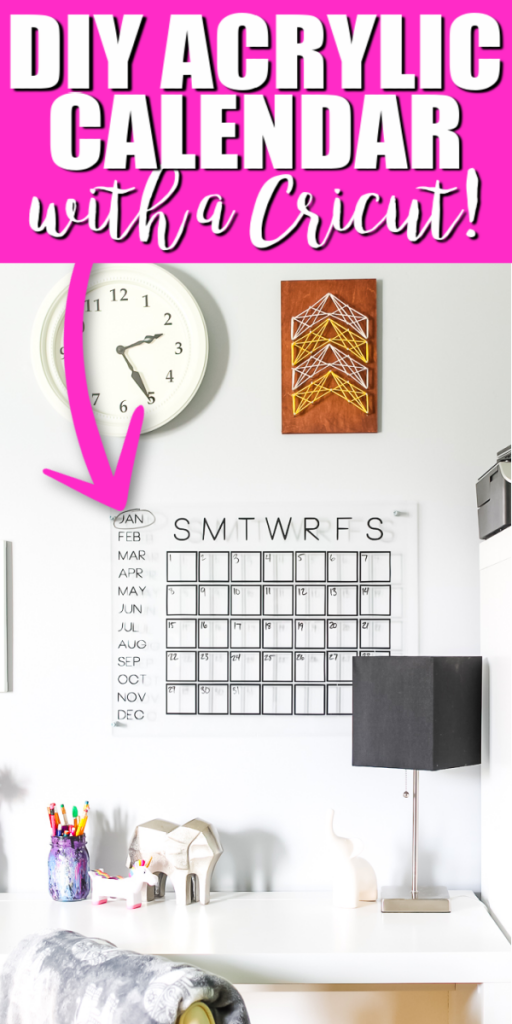
I made this DIY acrylic calendar for organizing my daughter’s room. It turned out really great and I love the results. I thought I would share with y’all how to make your own version! The process is fairly simple but you will need your Cricut machine to make things easier.
Want to see where this one ended up? You can see the full desk area here!
How To Make DIY Acrylic Calendar Video Tutorial
See how easy it is to make a DIY acrylic calendar in our quick video below! Just click play!
Can’t watch the video or missed some of the steps? Follow along with my instructions below.
Download Free Calendar SVG File
Get the SVG file for the calendar shown by signing up for the newsletter below. NOTE: I am sharing the file for the “R” and “T” as Thursday when you sign up below. I use an R to designate Thursday but I do realize many people do not do that. Once you add your information below, a zip file containing all file types will be sent to your email. If you already get our newsletter, just sign up again as you will not be added to anything additional. You want to look for a sign up box below that has a picture of the file you wish to download.
Please note that this file is for personal use only. You can contact me if you have any issues with your download.
Don’t love the file I used? There is another free calendar file here that you may like!
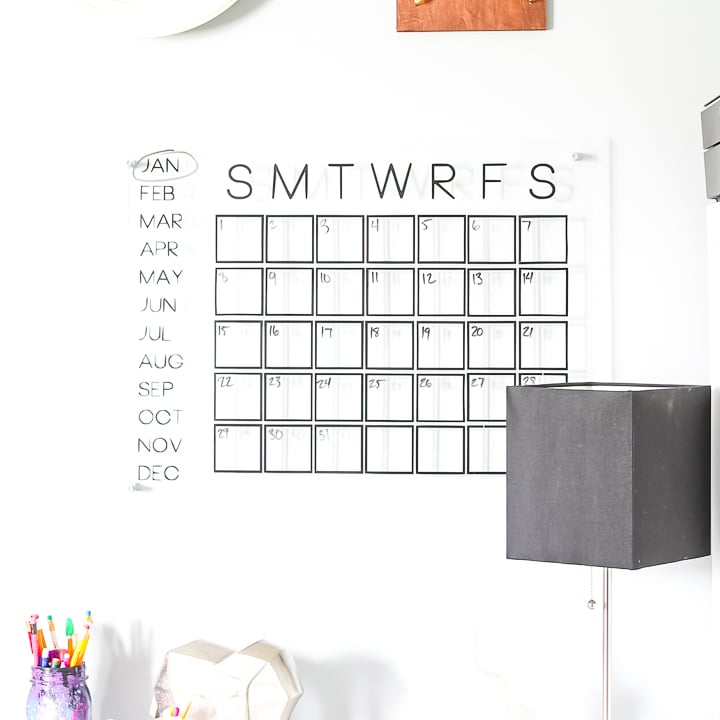
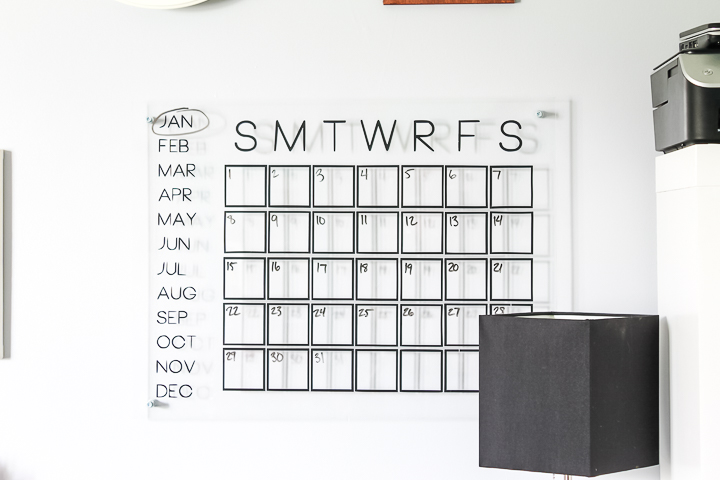
How To Make An Acrylic Wall Calendar
You will need to start by cutting the vinyl with the calendar image. I am going to give you instructions on how to do so with your Cricut below. Before you get started, download the calendar image using the form above. An email will be sent with instructions for downloading to your computer.
Supplies Needed To Make DIY Acrylic Calendar
- Plexiglass sheet (I used an 18″ x 24″)
- Cricut machine (or another electronic craft cutter)
- Black vinyl (or another color of your choice)
- Weeding tool
- Transfer tape
- Drill and drill bit
- Ruler
- Screws
- Metal spacers (optional)
- Metal washers (optional)
- Dry erase markers
- Calendar image file (see below for how to download for free)
Using The Calendar SVG With A Cricut
Step 1: Upload SVG
You can see how to upload the SVG to Cricut Design Space here. Once it is uploaded, you will want to size it to fit the plexiglass piece that you are using.
Step 2: Adjust Size
If the size you want is larger than the mat you have, you will need to break it up into sections. You can see how to make larger than the mat projects here.
Step 3: Cut Vinyl
Then cut your pieces from vinyl using your Cricut machine.
Adding The Vinyl To Plexiglass
Step 1: Remove Excess Vinyl
Remove excess around cut vinyl. Use your weeding tool as needed. Be sure to remove centers of letters.
Step 2: Apply Transfer Tape
Apply transfer tape to pieces and lift off.
Step 3: Join Vinyl Pieces Together
Splice the pieces of your calendar together by joining the pieces of transfer tape.
Step 4: Remove Protective Film From Front Of Plexiglass
Remove protective film from plexiglass.
Step 5: Apply Vinyl To Plexiglass
Apply vinyl to piece.
Step 6: Remove Transfer Tape
Press firmly then slowly remove transfer tape.
Step 7: Remove Protective Film From Back Of Plexiglass
Remove protective film from back of plexiglass.
Step 8: Mark Holes
Measure and mark for four holes in the corners.
Step 9: Drill Holes
Use a drill and drill bit to slowly drill the holes.
Note: The Use of R Versus T for Thursday
I did not realize when I published this post that this topic would be such a hot debate! I think maybe in college as an engineering major, I started using R to designate Thursday. Then that habit stuck and I have used that ever since! I didn’t even think of any other way to do it when I made the calendar and file the first time. However, I do now realize that most people do not do it that way. I have provided both files as an SVG above so you can pick and choose which version you like best!
Mounting Your DIY Dry Erase Calendar
Now it is time to mount your DIY acrylic calendar!
Step 1: Add Calendar To Wall
I did not want mine flush to the wall so I used metal spacers and washers behind the calendar and put my screw through those and into the wall. This is completely optional but does give a cool effect.
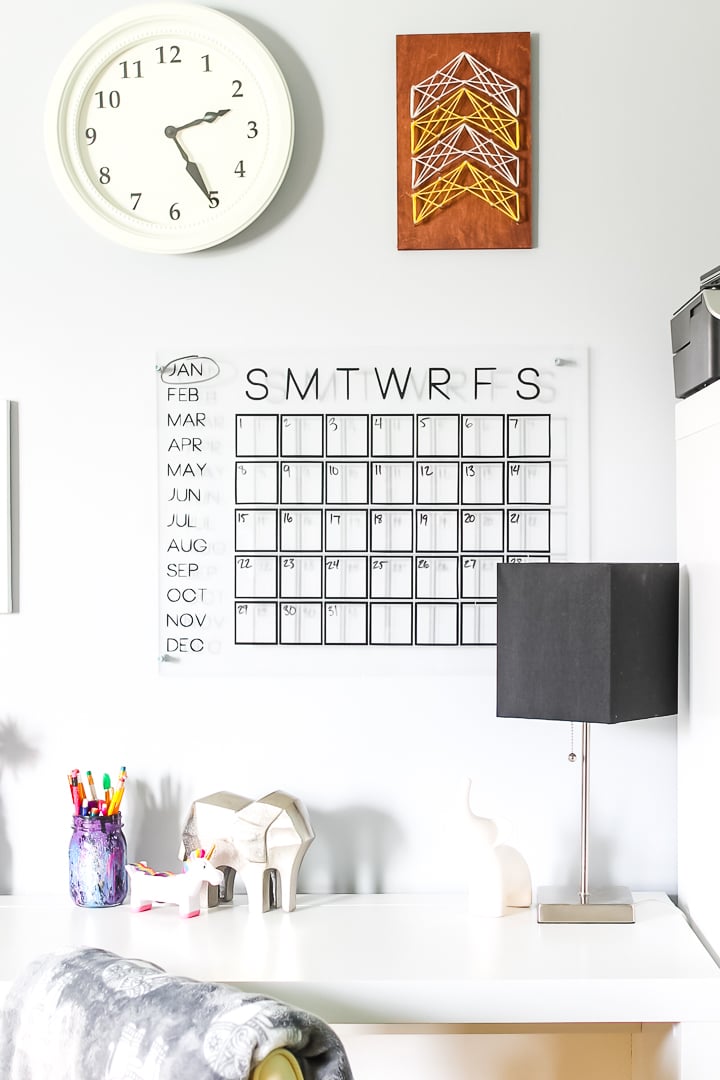
How To Use A Perpetual Calendar
Now you can use your dry erase markers to write in the details for the month and keep track of appointments. If you don’t know how to use a perpetual calendar, just circle the month you are on and write the dates in on the appropriate boxes. When the next month arrives, erase it off and start all over again!
I just love the final project and I know you will as well. Get your supplies and make your own DIY acrylic calendar.
Tips and Tricks for DIY Acrylic Calendar
Now that you’ve seen this DIY acrylic calendar, are you ready to make your own? Here are a few tips and tricks to ensure your project goes as smoothly as possible!
- Adjust Calendar Size – For my calendar, I used a piece of plexiglass that was 18″ x 24″. However, you can use a plexiglass piece that is smaller or bigger, depending on where you are adding the calendar in your space!
- Use Colored Vinyl! – Get creative and use your favorite color of vinyl! How cute would this calendar be in navy, gold, or even hot pink?
- Change Up The Hardware – To hang this calendar, you can use a variety of hardware to give it a different look! So, have fun and try different metals or colors like silver, gold, or black. – The possibilities are endless!
4 More Desk Organizers
Did you love this DIY Acrylic Calendar, and are now looking for more desk organizers? Then check out the projects below!


Love the calendar but I have never seen Thursday represented by an R on a calendar. Have I missed something?
That is how I always do it! It can be done either way however.
You always abbreviate Thursday with an R? Wondering why?
Actually it is a common way to do it. In this case I asked my daughter which one she preferred and went with that since it is in her room. You can definitely change it if you want to make one for yourself!
Hello! I’d like to apply the vinyl to on the backside of the plexiglass so I don’t have to wipe over it. Any tips? Maybe printing things from R to L instead of R to L would be easier?
You would have to cut it in mirror to do that. You might want to try just a small letter first to see if you are happy with the look. I am not wild about that vinyl on the back side.
Hi
I would like to know what’s your font ?
Sorry for my language :p
I think BONNIE but not sure.
What is the thickness of the plexiglass? I have to order my plexiglass online. What is the thinnest you would recommend for a calendar that is away from the wall using spacers?
Maybe 1/8 inch thick?
Thank you for the video tutorial. how is the vinyl holding up with monthly wiping? I was thinking of doing the back side also so it lasts longer.
So far so good and it has been over a year!
Love this! Does it go drilled into the wall? If so, is there another way to do it without making holes in the wall?
I did four holes that attach it to the wall. You could just put the vinyl right on the wall I guess? Maybe paint the wall with some sort of dry erase paint.
I don’t have a Cricut so this does not help me any. But a great idea.