
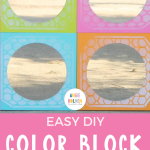
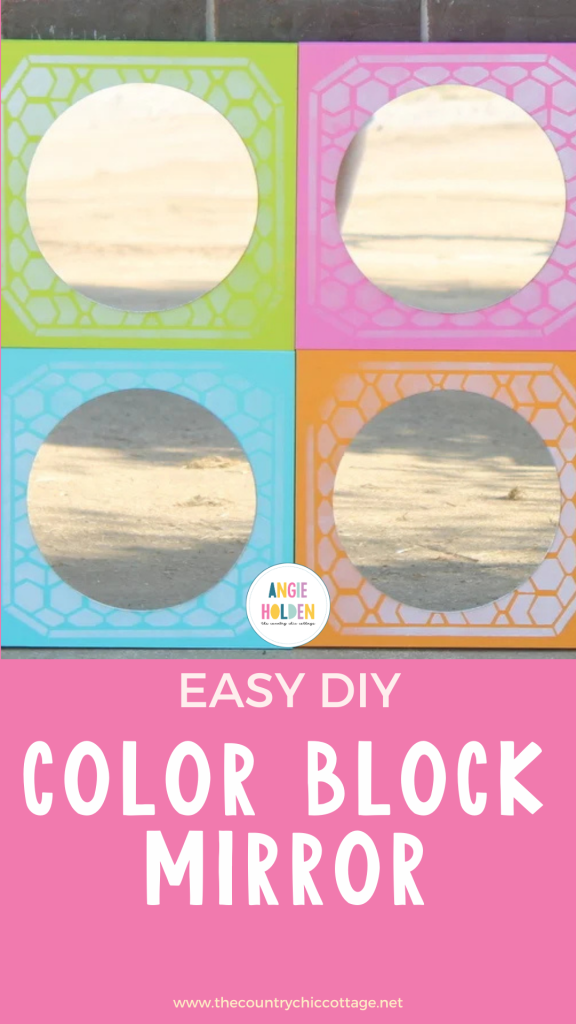
Make your own color block mirror! This project looks far more complicated than it is, and you can easily personalize it to fit your design style and home decor. Follow along with this tutorial to create your fun color block mirror.
Mirrors are a staple in almost every household. Of course, you find them in the bathrooms above the vanities. However, many people use them as decorative pieces around the house, too.
For several years now, mirrors with various color-blocking designs have been very popular, and I personally love the pop of color they provide!
After a recent shopping trip, I was inspired to create my own DIY color block mirror. I love the final results, so I decided to share this project with you.

How To Make A DIY Color Block Mirror
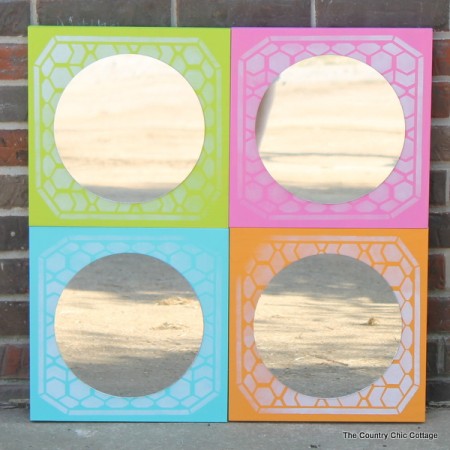
This craft is super simple to make! My final version is 24″ by 24″, but you can use this easy tutorial to keep adding blocks to make your version as large as you would like.
Supplies Needed
Here's what you'll need to gather
- Americana Multi-Surface Satin paint in colors of your choice – I used Coastal Waters, Flamingo, Orange Sherbet, Chartreuse, and Cottonball.
- 12-inch wood squares – I used four, but you could use as many as you want!
- 9-inch mirrors – I used four (you want the same number of mirrors as wood squares)
- Easy-Tack stencil adhesive
- Stencil brush
- 12-inch Americana stencil
- Pipe strapping
- Screws
- Wood glue
- E-6000


DIY Color Block Mirror Instructions
The good news is that the pieces are all pre-purchased, so creating this fun mirror is just a matter of painting and assembling them.
Step 1: Paint The Wood Squares
Begin by painting your wood squares with two coats of Americana Multi-Surface Satin. Seriously, two coats on raw wood is all you need.
Step 2: Apply The Stencils
Once your boards are completely dry, grab an Americana stencil. They make some large 12-inch x 12-inch stencils now that fit these wood squares exactly. I used my stencil adhesive on one and applied it to the board.

Then, I started with a stencil brush full of paint in the upper right-hand corner and slowly worked my way to the lower left-hand corner. I DID NOT refill my brush the entire time.
With this method, you'll get a gradient or ombre look across each panel on your DIY color block mirror. I followed this same process for each panel.

Step 3: Remove Stencils
Remove your stencil as soon as you are done painting, and allow all four stenciled panels to dry.
Step 4: Glue Wood Squares Together
Use wood glue, some pipe strapping, and screws to attach the wood panels together. Allow to dry before moving so your glue can set.
It took me a while and a few mistakes before I figured out the best way to attach these together (check out the image below) to create your color block mirror base.

Step 5: Attach Mirrors To The Wood Squares
Now, flip your project over and attach your mirrors to the center of each block using E-6000. Allow the glue to dry for the recommended amount of time (generally 24 hours).
Pro Tip: Make sure there's equal space on all four sides of your mirror (1.5 inches, in this case).

Then you are ready to take crazy pictures of yourself in the mirror, rocking a mom bun (ha!). No?? Well, your color block mirror is done, and you can hang it up.

DIY Color Block Mirror FAQs
If you have questions about making this DIY mirror project, I have answers for you! Please leave your question for me in the comments if you don’t see it already answered below.
Could I just hot glue the wood panels together?
Hot glue is an impressive and strong crafting tool. Unfortunately, it's not enough to hold these wood panels together. The metal braces are necessary (and very effective!).
How can I personalize this project?
Personalizing your color block mirror is even more fun than putting your mirror together. To make this project fit your personality and your decor, simply choose the colors and stencil designs you want to add to your wood squares.

More Craft Ideas
If you love this color block mirror project, here are more fun ideas for inspiration!
- DIY Distressed Starburst Mirror
- Quick and Easy Woven Mirror Knock Off in 15 Minutes or Less
- Sunburst Mirror with Paper Ephemera
- Broken Glass Mosaic Frame with Mod Podge Ultra
- How To Make A DIY Clock With A Button Frame
Supplies
- Americana Multi-Surface Satin paint in the colors of your choice
- 12-inch wood squares
- 9-inch circle mirrors
- Easy-Tack stencil adhesive
- Stencil brush
- 12-inch Americana stencil
- Pipe strapping
- Screws
- Wood glue
- E6000 glue
Instructions
- Apply two coats of Americana Multi-Surface Satin to your wood squares.
- Once your boards are completely dry, grab an Americana stencil and use the stencil adhesive to apply it to the wood square.Start at the top-right corner and work your way down to the bottom-left corner. Do not add more paint to your brush.
- When you finish painting, remove the stencil. Allow all the wood squares dry.
- Attach the wood panels together with wood glue, pipe strapping, and screws. Allow the glue to dry before moving to the next step.
- Finally, use E6000 to attach a circle mirror to the center of each wood square. Allow the adhesive to dry completely (usually around 24 hours).


I love those stencils!
So cute, Angie! I love the colors, and I can’t wait to see how it looks in her room!
Angie, this mirror is fantastic, and I bet it will look fantastic in your daughter’s room! Great colors you chose too! Pinning!
Love how you stuck 4 of them together–very cute!