
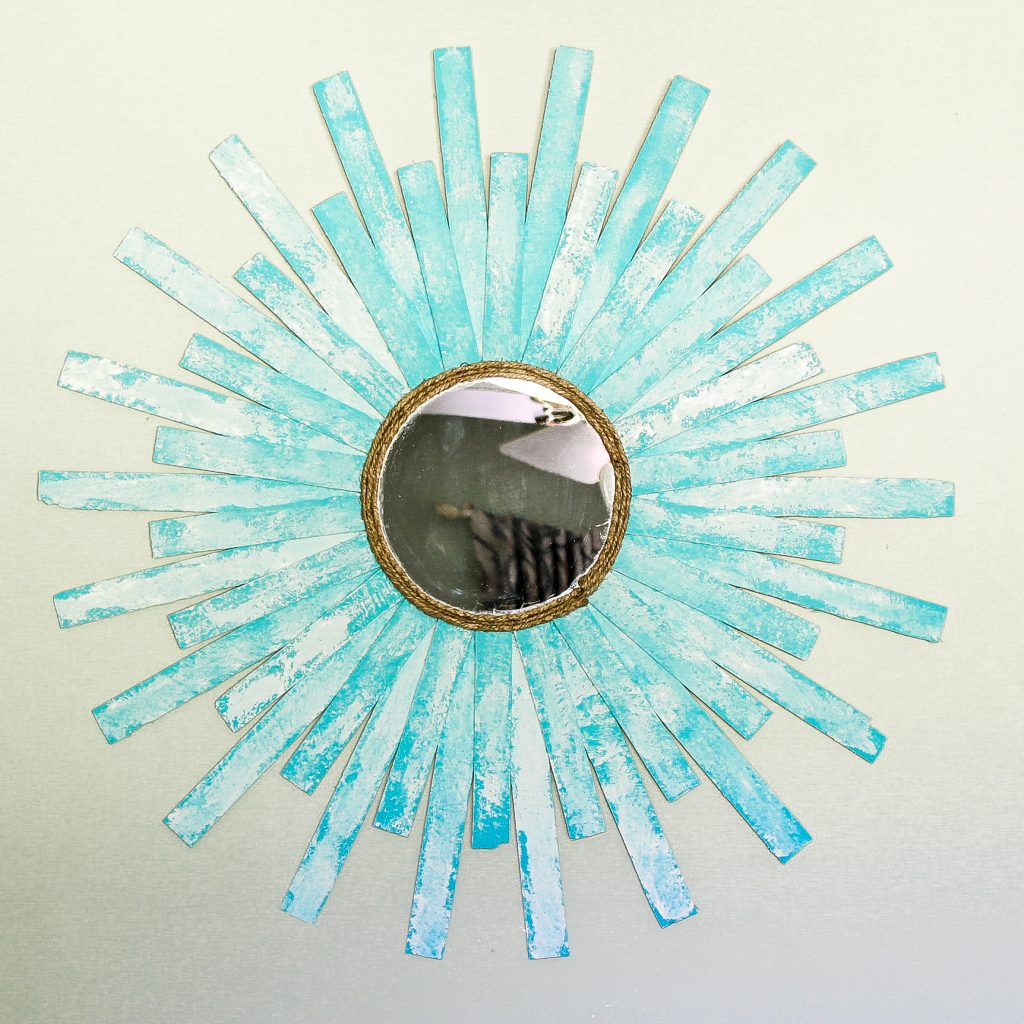
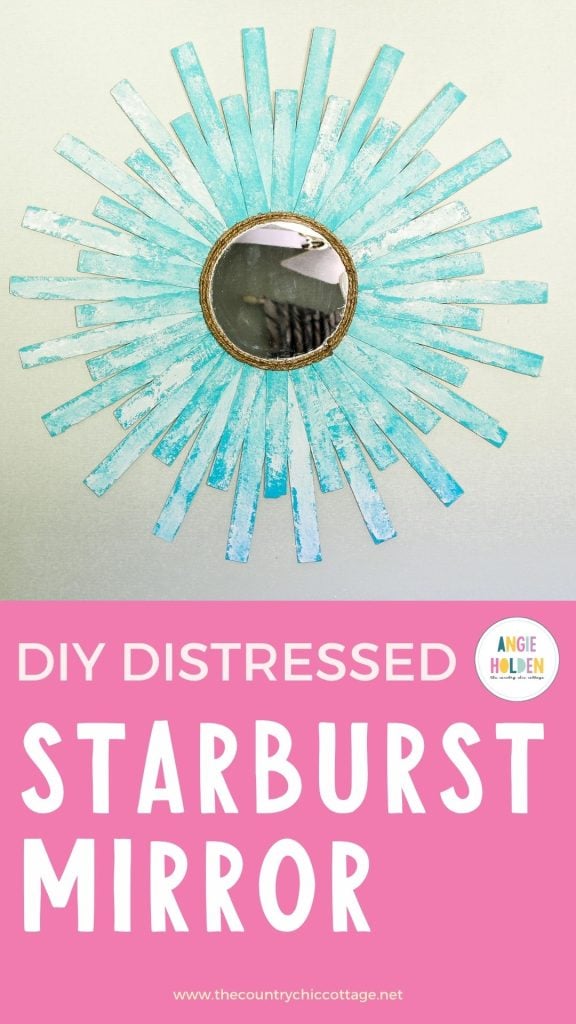
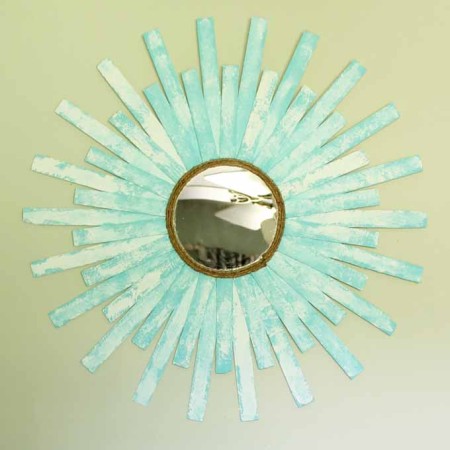
Are you looking for a unique way to spruce up your home décor? Check out this starburst mirror! This timeless piece is sure to add a touch of elegance and charm to any room. With its distinctive, radiating design, the starburst mirror can be used as both an accent piece and as a focal point in your living space. And with just a few simple materials and steps, you can create your own stunning version of this classic item.
To create a relaxing, beach-themed feel in your home, there are so many things you can do!
You can start by burning your favorite sea-scented candle in this DIY sea shell candle holder and then brightening up your walls with a DIY shiplap wall. But one of the quickest and easiest ways to add an ocean-inspired touch to any room is by creating beachy home decor pieces!
Using wood shims, put together this beach-inspired starburst mirror using distressed beach paint. Distressed paint adds texture and character to any piece, giving it that vintage feel.
Depending on the colors you choose, you can make your starburst mirror look fun and cheerful with bright colors like blues and yellows or more subtle and sophisticated with neutrals.
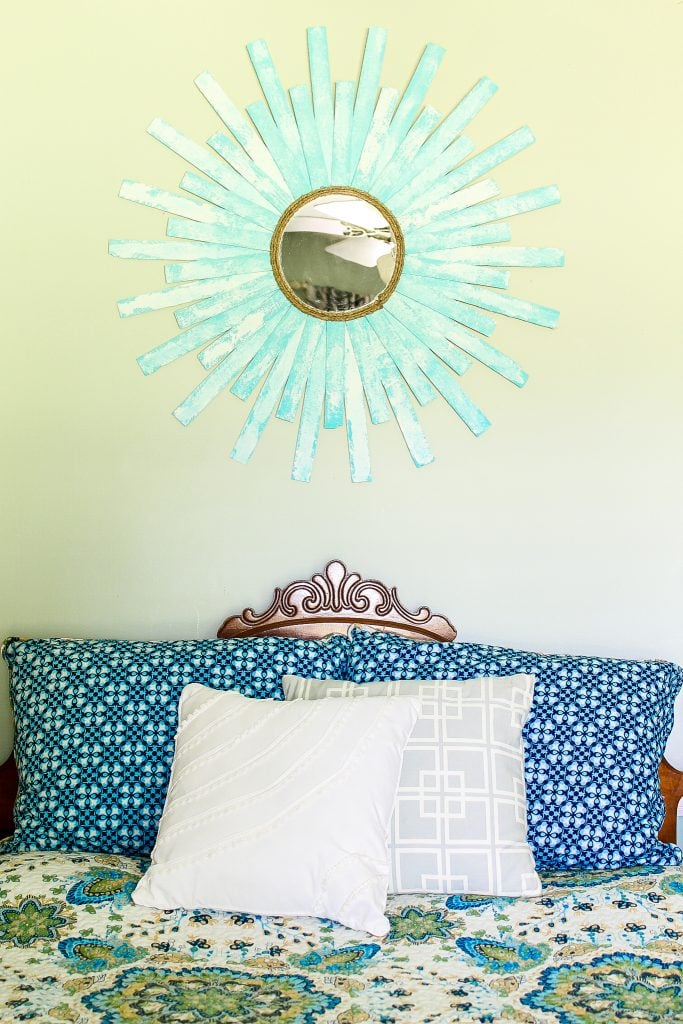
Hang this mirror up on the wall or prop it up against the wall as a unique décor piece. Either way, you can be sure that your one-of-a-kind starburst mirror will become an eye-catching conversation starter in your living space.
How To Make Starburst Mirror
Making this beach-themed mirror is easy and fun! In this blog post, you’ll learn how to make a distressed Starburst Mirror that looks stunningly beautiful. This DIY project requires only a few supplies, and in no time at all, you can have something unique to hang in your home or office.
So let’s get started!
Supplies Needed
Here's what you'll need to gather:
- Wood shims in two lengths (available at your local home improvement store)
- Mirror
- Wood plate (approximately the size of your mirror)
- Coastal Paint
- Palette knives
- Rope
- Hot glue and glue gun
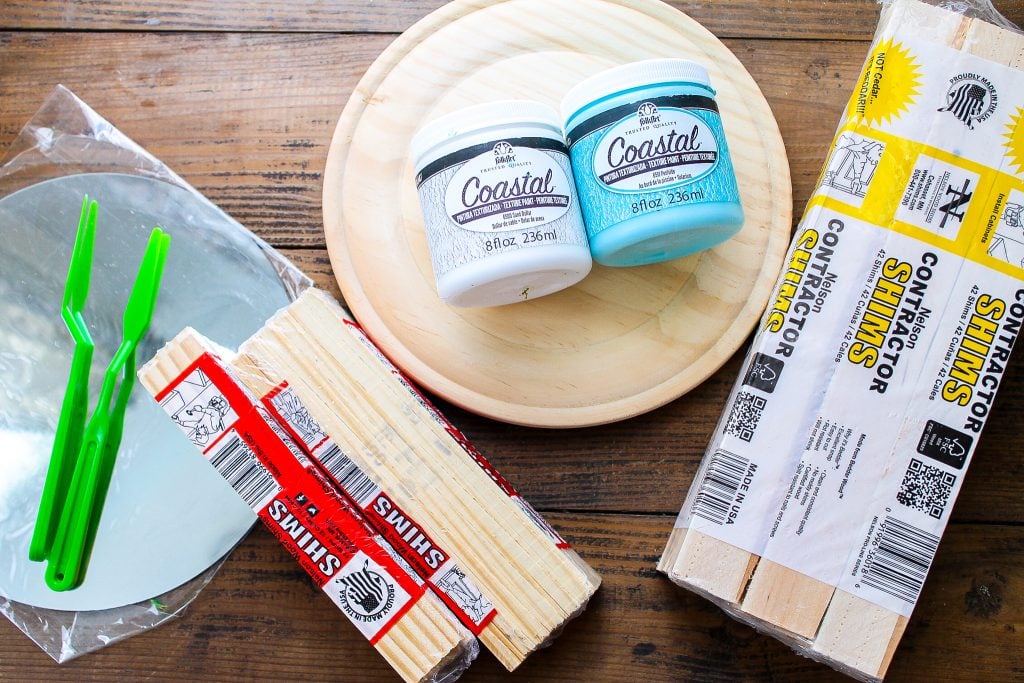
The secret to that worn beach paint is a product called Coastal Paint. This thick paint will give you a rustic and worn look in just minutes. You can actually see me painting some of these shims live in the video above.
DIY Starburst Mirror Instructions
Can't watch the video or missed some of the steps? Follow these step-by-step instructions on how to make a handmade starburst mirror.
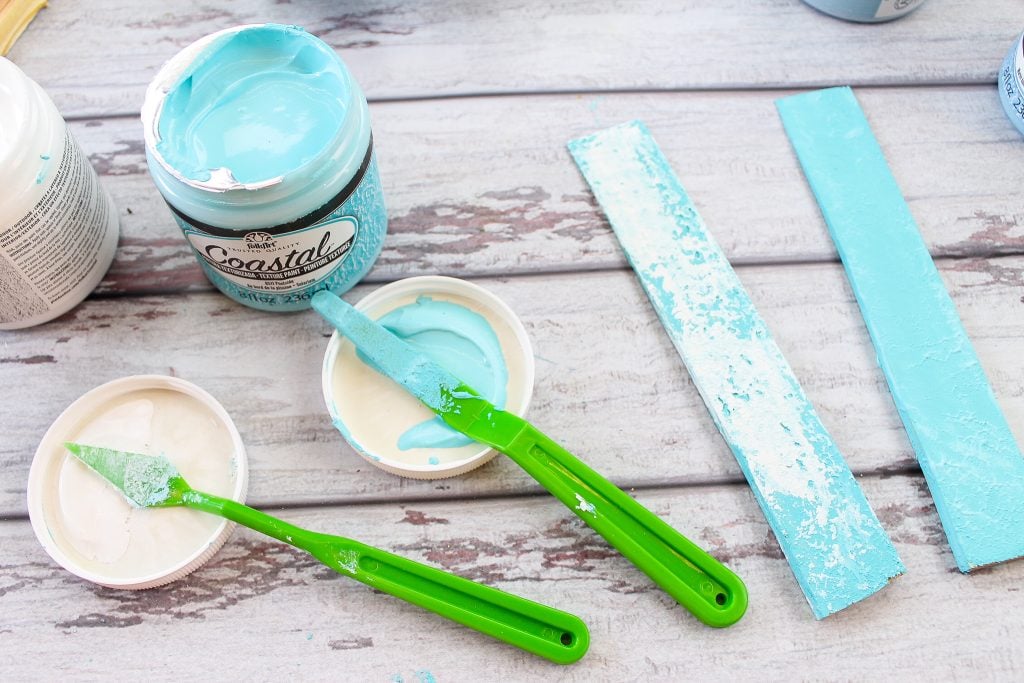
Step 1
Apply the teal color first with a palette knife on one of the shims.
Tip: Lift slightly with the back of your knife on the surface to create peaks and valleys.
Then set aside and allow to dry!
Step 2
Once almost dry, smear on white paint with a palette knife. Do not cover all of the teal with white paint!
Note: Leave gaps in the paint. Again, you will want to lift with the back of the palette knife to create those peaks and valleys.
Step 3
Set aside and allow to dry completely.
Step 4
You will need to repeat this entire process on every single shim. Each one will be different, but that adds to the look of this DIY starburst mirror!
Step 5
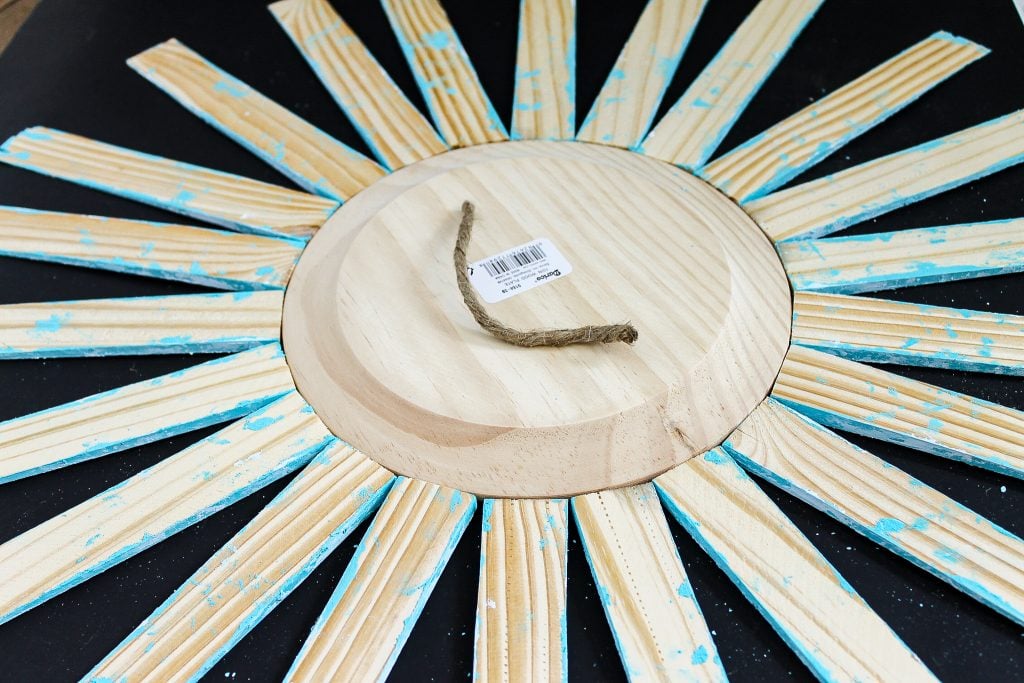
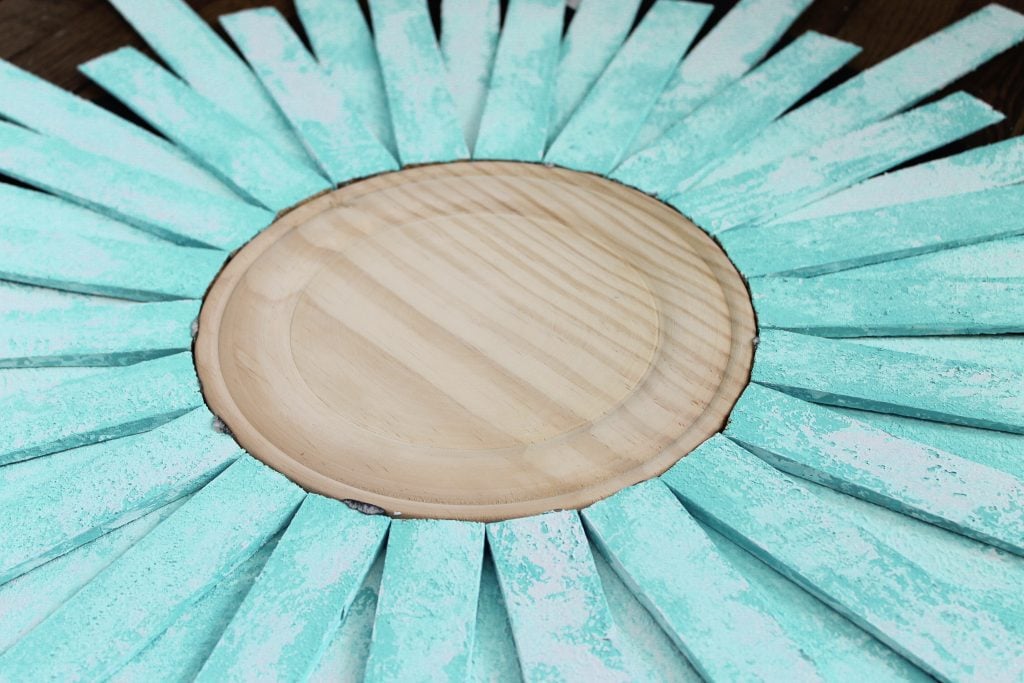
Once everything is dry, start laying out the shims to see how they are going to fit around your mirror. You will also need to make sure you have enough.
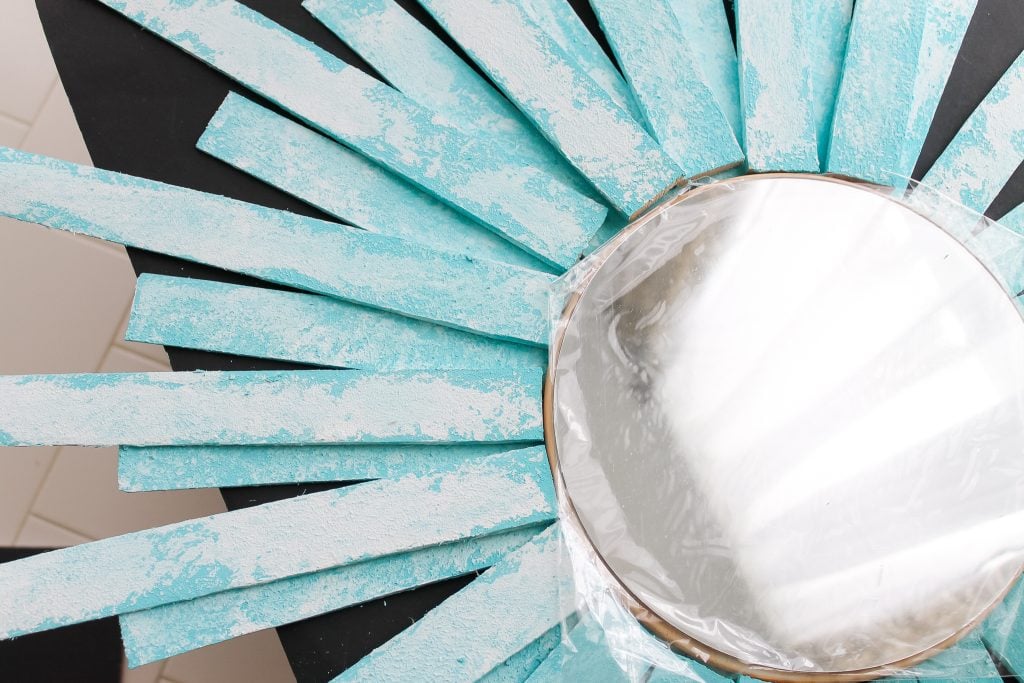
Step 6
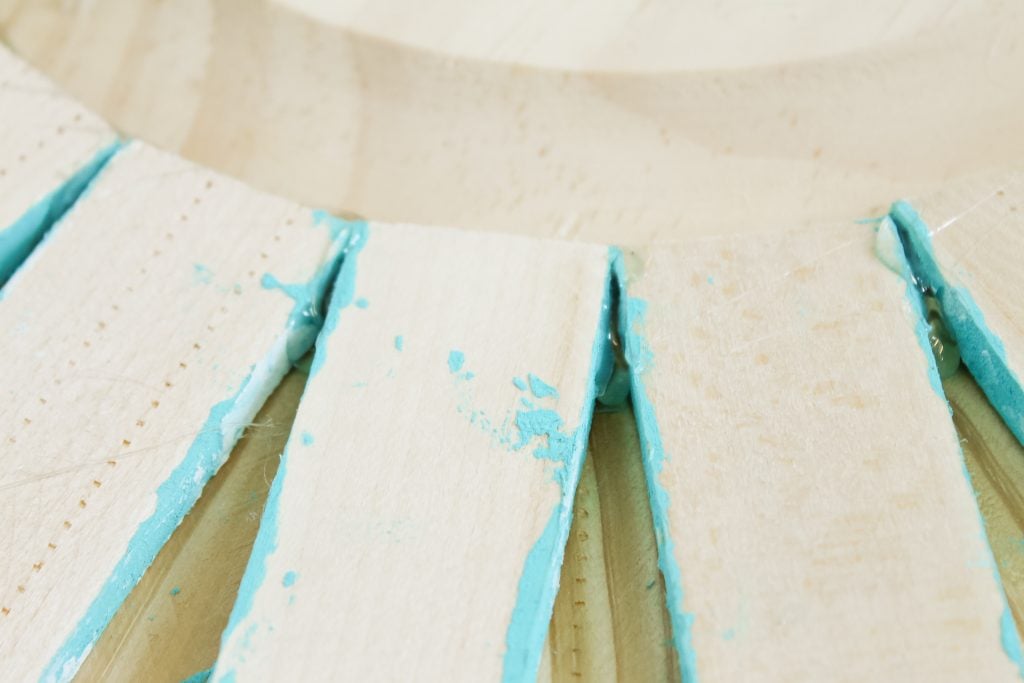
Once everything is completely dry, start with the shorter shims and turn everything over to the backside. Use hot glue to secure the shims around the outer edge of the plate.
Step 7
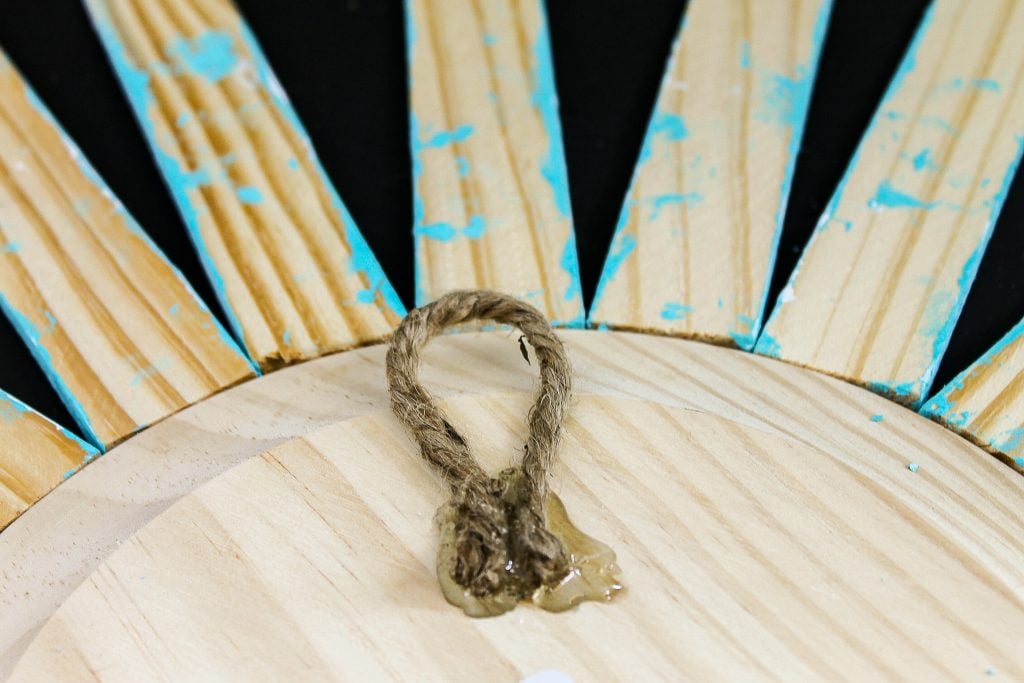
Use additional hot glue to add a short piece of rope to the back of your project for hanging.
Step 8
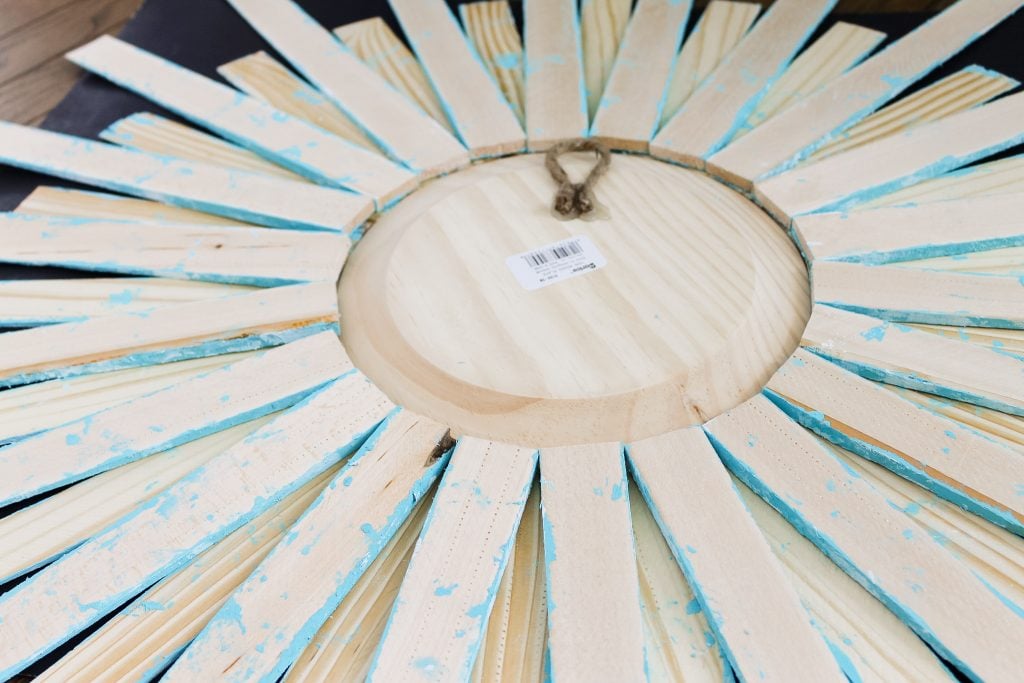
Add the longer shims to the mirror in the gap that is created by the shorter shims. Again use hot glue to secure it!
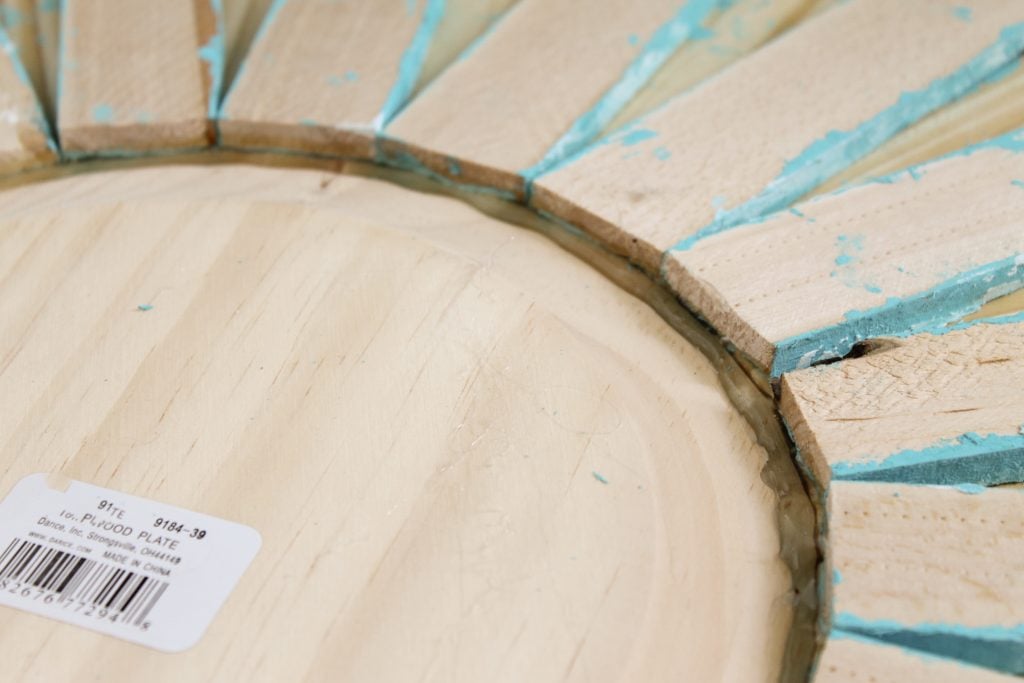
Note: Yes, you are going to use a BUNCH of hot glue, but it will all be worth it in the end. I even added some between each shim, as shown below.
Step 9
Let the glue cool completely, and then flip the project over to the front.
Step 10
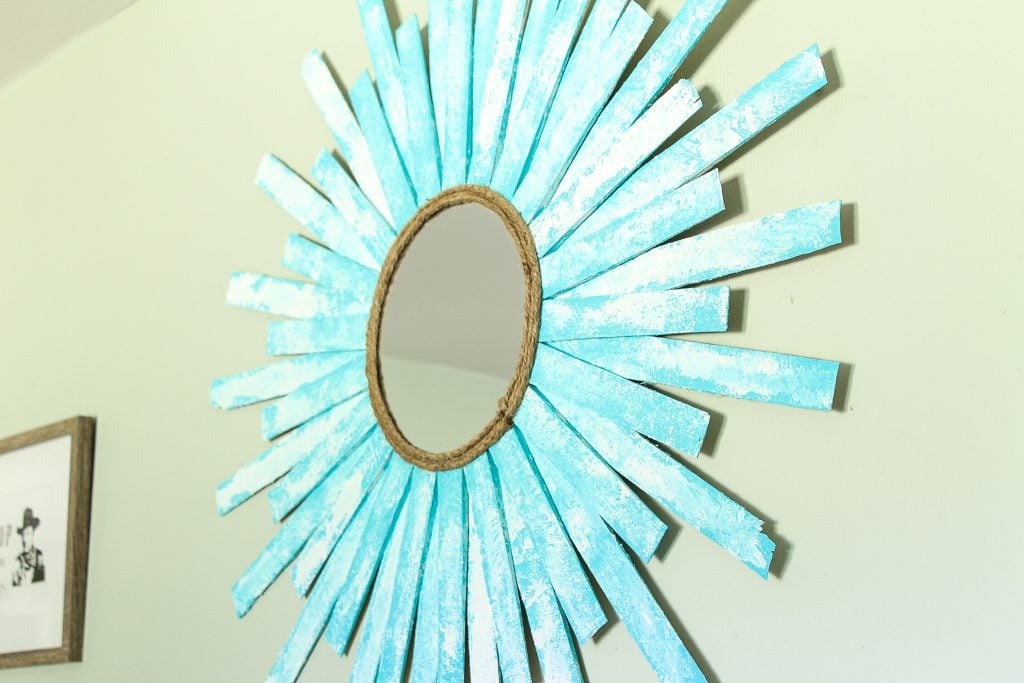
Add your mirror into place with hot glue. Then, cover up the edges with some rope and more hot glue!
Step 11
Continue adding rope until you are happy with the way it looks.

Hang it up and enjoy your new starburst mirror!
FAQs
If you have questions about making this beachy starburst mirror, I have answers for you! Please leave your question for me in the comments if you don’t see it already answered below.
Can I use a different type of adhesive?
Yes! You could use wood glue or another type of strong adhesives, such as E6000. Just be sure to read the instructions and follow whatever safety protocols are specified.
Can I make this with a different type of paint?
Absolutely! In fact, you can use any type of acrylic craft paint for this project. Use your imagination and create something that looks great in your home. You can even change the shade of color to match the rest of your decor.
Can I use a different shape mirror?
Yes! You could use any type of round, oval, or square mirror. Just be sure to adjust the size and number of shims needed for the project accordingly.
More craft ideas
If you love this project and want to make more beach home decor, we have those for you! Just follow the links below.
- Driftwood Wall Art
- Starfish Craft Wall Art
- Beach Mason Jars
- Make Your Own Sailboat
- DIY Beach Decor With Rope
Supplies
- Wood shims in two lengths available at your local home improvement store
- Mirror
- Wood plate approximately the size of your mirror
- Coastal Paint
- Palette knives
- Rope
- Hot glue and glue gun
Instructions
- Apply the teal color first with a palette knife on one of the shims.
- Then set aside and allow to dry!
- Once almost dry, smear on white paint with a palette knife. Do not cover all of the teal with white paint!
- Set aside and allow to dry completely.
- You will need to repeat this entire process on every single shim. Each one will be different, but that adds to the look of this DIY starburst mirror!
- Once everything is dry, start laying out the shims to see how they are going to fit around your mirror. You will also need to make sure you have enough.
- Once everything is completely dry, start with the shorter shims and turn everything over to the backside. Use hot glue to secure the shims around the outer edge of the plate.
- Use additional hot glue to add a short piece of rope to the back of your project for hanging.
- Add the longer shims to the mirror in the gap that is created by the shorter shims. Again use hot glue to secure it!
- Let the glue cool completely, and then flip the project over to the front.
- Add your mirror into place with hot glue. Then, cover up the edges with some rope and more hot glue!
- Continue adding rope until you are happy with the way it looks.
- Hang it up and enjoy your new starburst mirror!
Notes
- Lift slightly with the back of your knife on the surface to create peaks and valleys.
- Leave gaps in the paint. Again, you will want to lift with the back of the palette knife to create those peaks and valleys.
- Yes, you are going to use a BUNCH of hot glue, but it will all be worth it in the end. I even added some between each shim, as shown below.


love it reminds me of a previous era when the starburst mirrors and clocks were quite popular
come see us at http://shopannies.blogspot.com
Such an easy project for a great beachy look. And to use the paint on the shims for a beachy mirror is a can’t miss idea.
That looks like such a fun and easy project to try. Love how it turned out Angie
Love this project Angie – thanks for sharing at Inspire Me Monday at Create With Joy – we’re happy to feature you at this week’s party!
this is so cute and bright!!! wondering if you could use popsicle sticks(in different lengths) instead of the shins…
I am sure that would work you would just need more!