
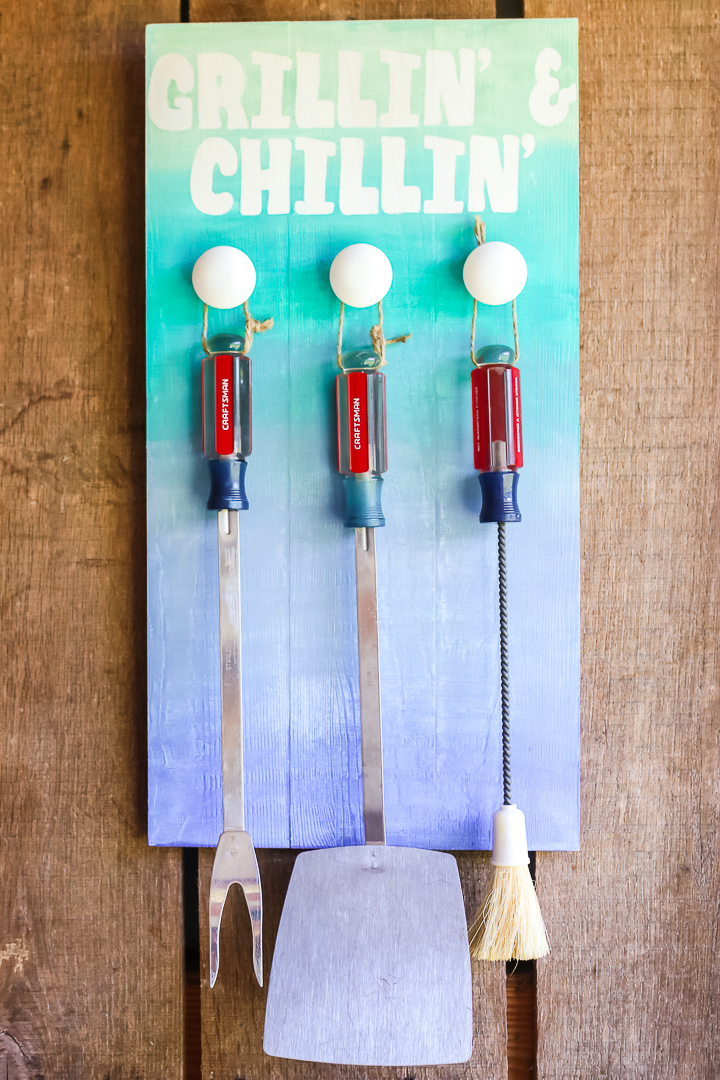
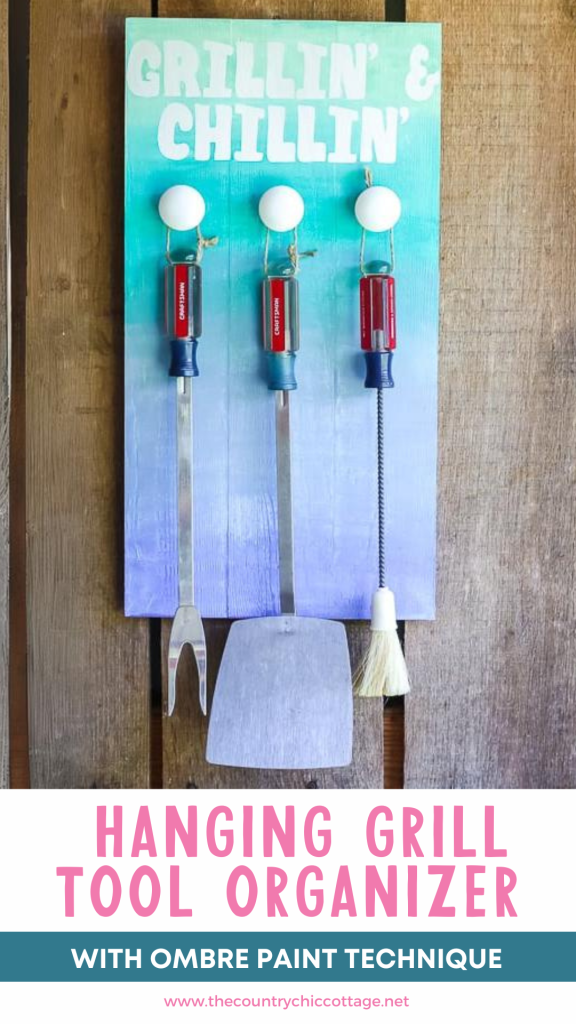
Hanging grill tools storage is a great idea for Dads for Father's Day or just a way to organize your outdoor space. Plus, with this ombre paint technique, you are sure to love the way it brightens up your space. Pick the Testors paint colors that will work best in your space and get started on this creative organization project for your deck or patio. Be sure to add these flower pots to your outdoor decor as well.
This post is sponsored by Testors; however, all projects and opinions are my own.
DIY Hanging Grill Tools Storage Video
Want to see the entire process in a quick video? Just watch below!
Can’t watch or want more information on some of the steps? Just follow along below!
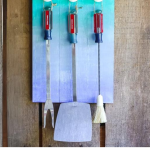
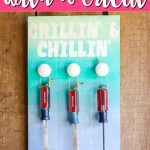
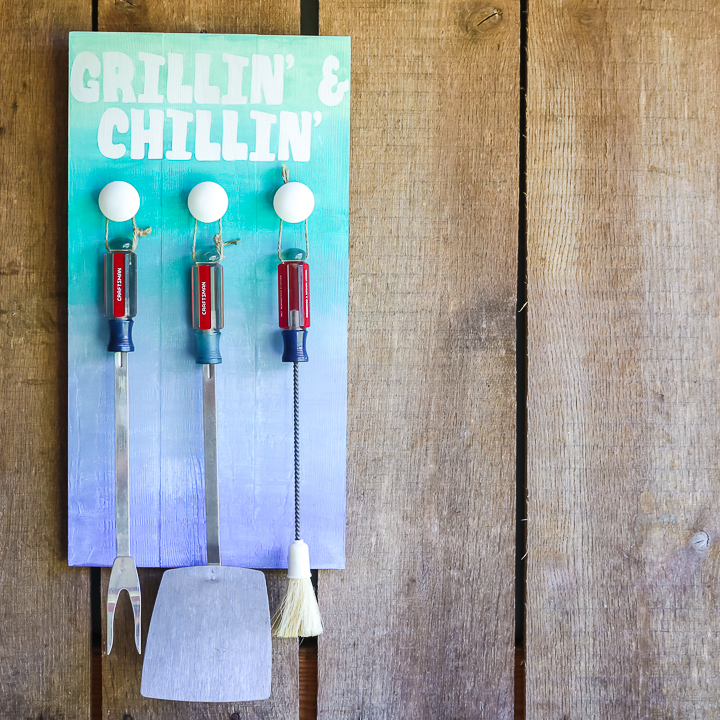
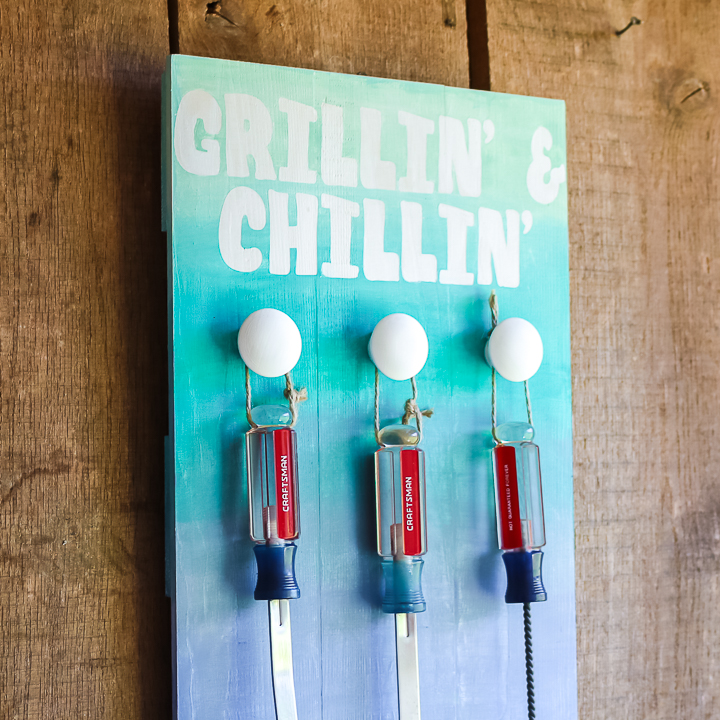
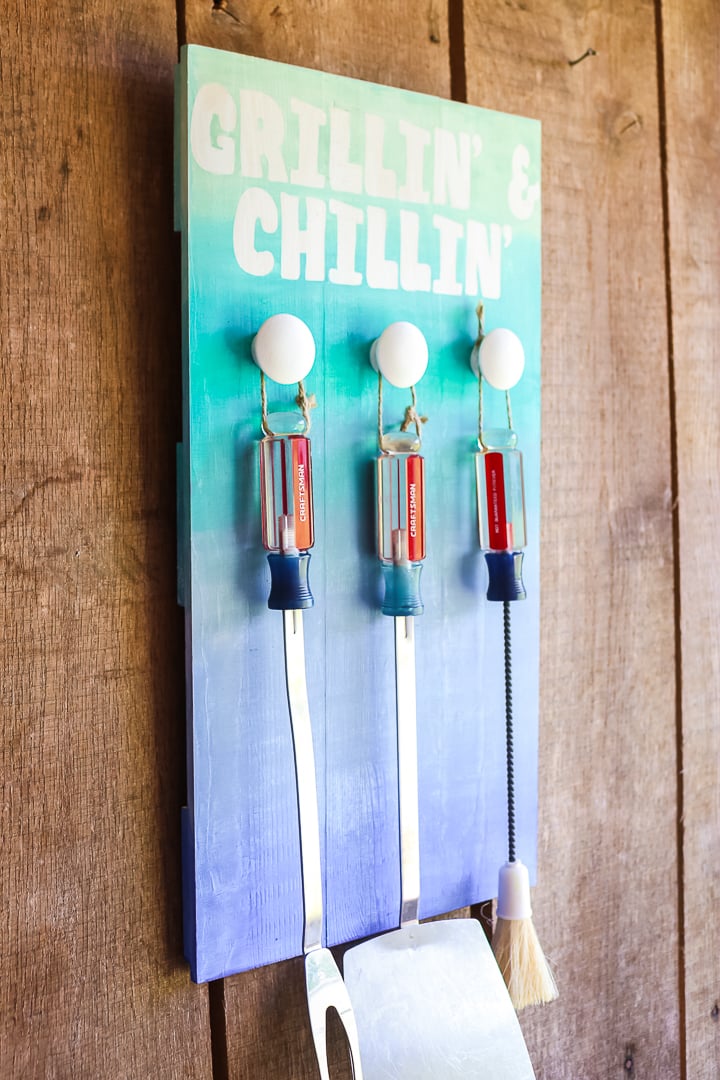
Hanging Grill Tools Storage
There's nothing like summertime to make you organize your outdoor space. This is the perfect gift item for Father's Day! You can even assemble a basket full of goodies like a personalized “Grill Skillz” apron, stenciled dish towel, or homemade BBQ rub!
Looking for more Father’s Day gift ideas? Try this DIY Grill Trophy, or make your own Father’s Day Gift Bag!
Ombre is an easy painting technique that adds a little something extra to the board. Plus, the cute saying pulls it all together. Feel free to use your own file or use our pre-made one below.
Free Grillin and Chillin File
If you want to add “Grillin' and Chillin'” to your board like I did, just sign up for our newsletter below, and the free file will be sent to you. From there, you can print or upload it to your cutting machine.
Please remember that this file is for personal use only. Once you receive the email, click the button to download the zip file. You will need to unzip the file in order to use it.
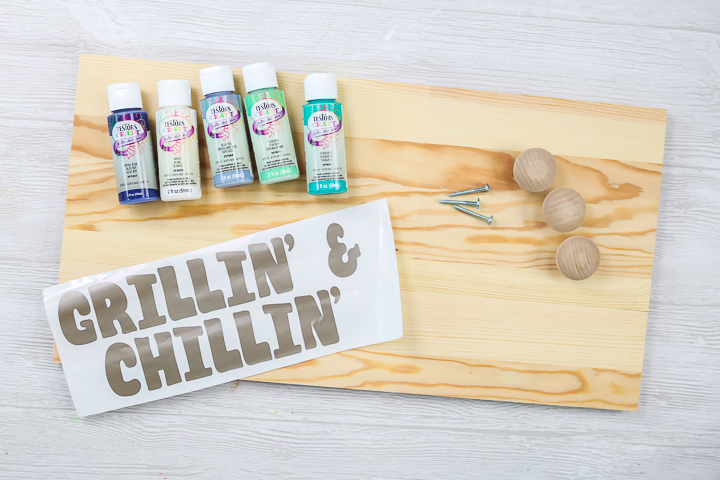
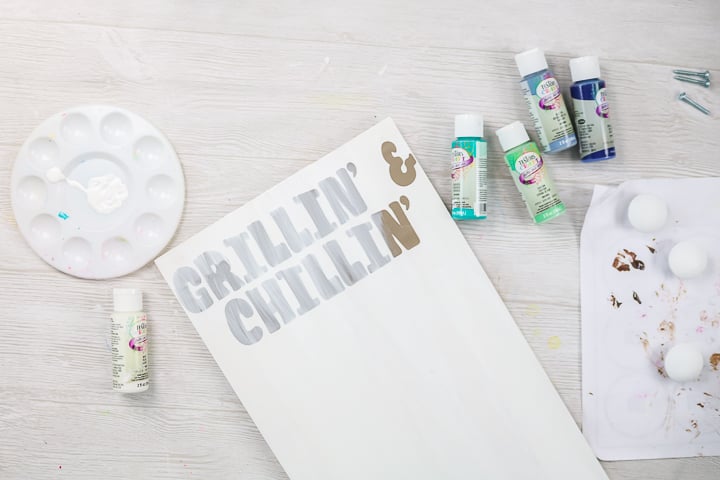
Supplies Needed To Make DIY Hanging Grill Tools Storage:
- Board or sign (any size that will work for your grill tools)
- Testors craft paints (you will need white and four or more coordinating colors)
- Paintbrush
- Stencil (I have the file below that you can use to trace onto your board or cut vinyl with a Cricut machine)
- Knobs
How to Make DIY Hanging Grill Tools Storage
You can find my inspiration for the ombre portion of this project over on A Girl and Her Glitter. She did an entire wall, but I thought I could do the same technique on a much smaller scale. And I love how this turned out!
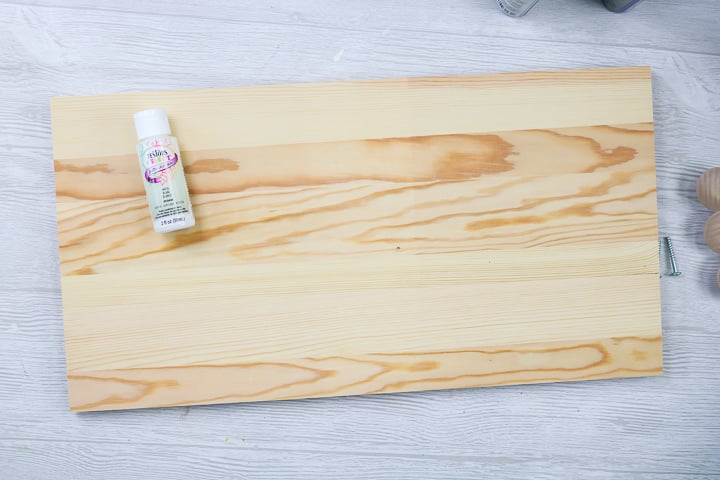
Step 1: Pick Your Wood Board
You will want to start with a board that works for your grilling tools. Be sure to account for the words we are going to put at the top as well as the knobs. You can make this project any size that you would like.
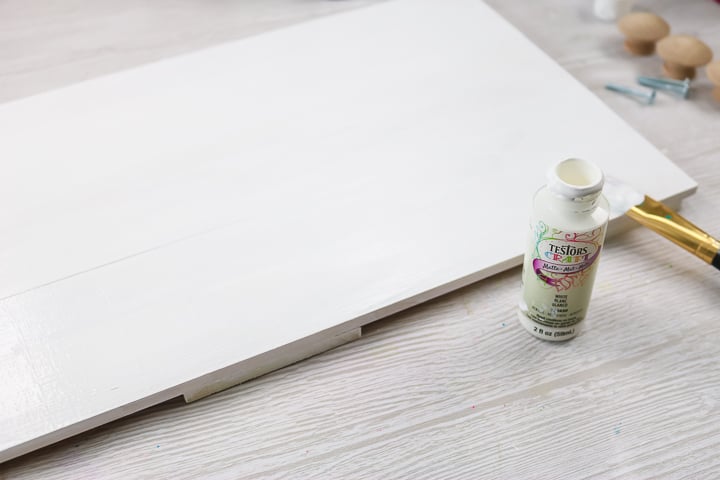
Step 2: Paint Wood Board
Then, coat both the top and sides with white paint. Please note that if you are using this outdoors, it is best to coat all surfaces.

Step 3: Add More Coats Of Paint If Needed
I found that I needed two coats of paint on my board, but you may only need one. To make multiple coats, make sure to allow each coat to dry before moving on to the next coat.
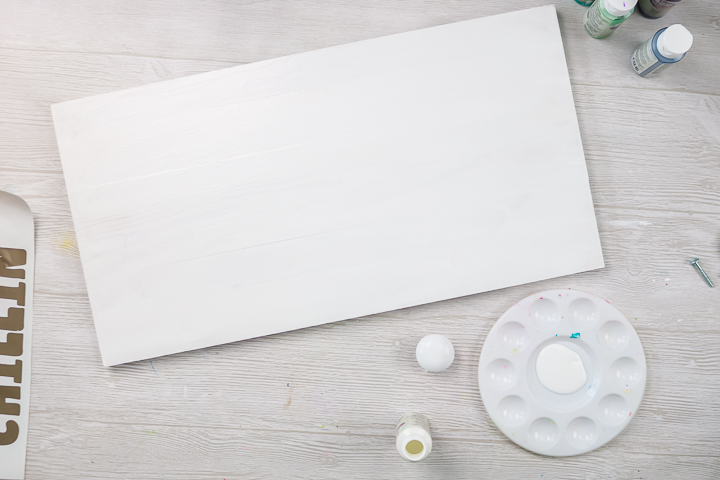
Step 4: Paint Wood Knobs
You will also want to give the wood knobs a few coats of white paint.
NOTE: If you are not using unfinished wood knobs, you can skip this step.
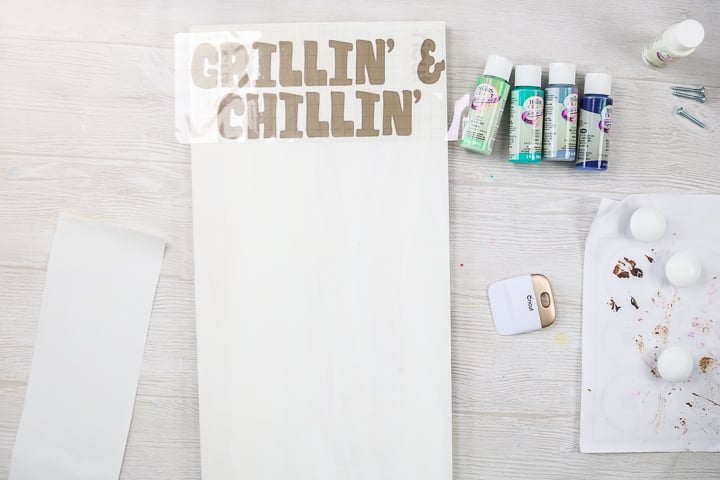
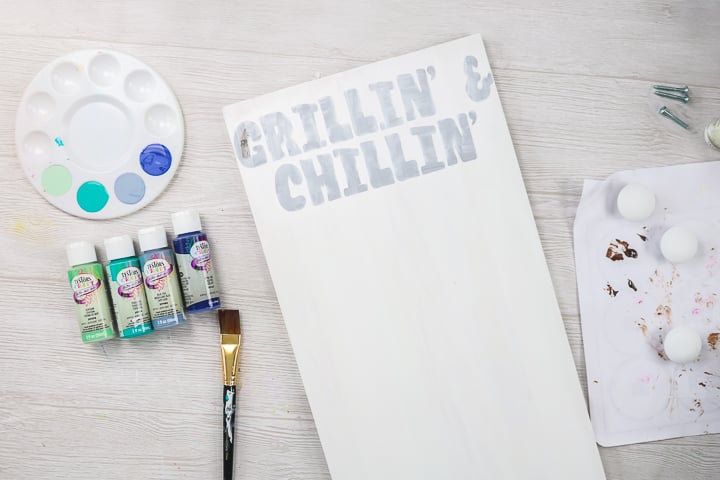
Step 5: Add Vinyl To Wood Board
While your knobs are drying, you can start adding your masking to the board. Cut the design with your Cricut machine on any color vinyl, then transfer it to your design using transfer tape. Be sure to size the design to fit your board.
If you have never used Cricut vinyl before and are looking for tips and tricks, check out my How To Use Cricut Vinyl blog post.
Also, if you don't want to use vinyl, continue to the painting portion of the tutorial here and you can add your letters by tracing at the end.
Step 6: Paint Over Vinyl Letters
Add a thin coat of white paint over the top of your letters. This will help with any bleeding and keep it to a minimum. Allow this to dry.
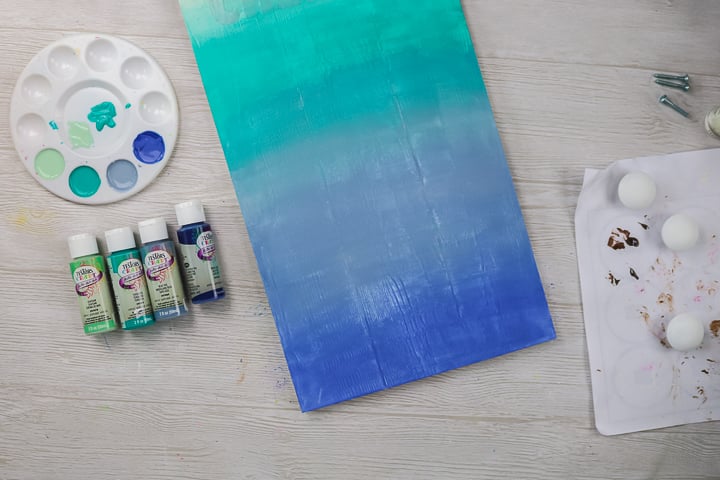
Step 7: Gather Your Ombre Paint Supplies
Now, it is time for that ombre paint technique! Pour out each color, as you will want to work fast. I am using two shades of green and two shades of blue. You can use whatever colors and as many or as few as you would like.
Step 8: Paint Your Ombre Pattern
I have four colors, so I mentally divided my board into four sections. Paint the first section. Then, paint a small strip just below that of another color WHILE THE FIRST IS STILL WET. Go between the two with an up-and-down motion to blend the first into the second. Then, go over the area with horizontal strokes to finish blending. You can add more of the first or second color if you find this too dark or too light.
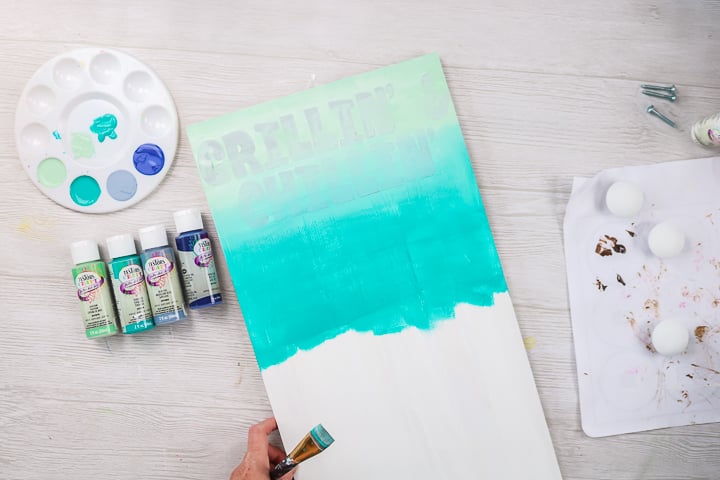
Step 9: Keep Painting Your Ombre Pattern
Continue this all the way down your wood board with all of your colors.
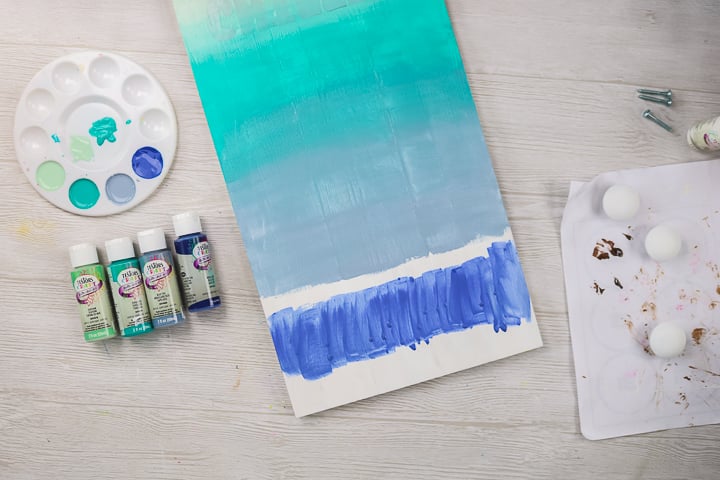
Step 10: Blend Each Section Together
Blend each one into the previous one until you are happy with the look. I used one paintbrush for this entire project. There is no need to wash your brush or switch brushes.
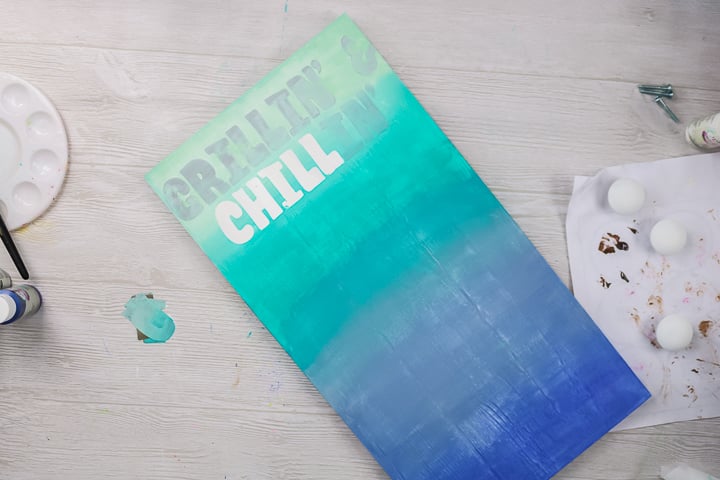
Step 11: Remove Vinyl Letters
While the paint is still wet, you can lift up the vinyl letters and discard them. I like using something pointy for this, like a weeding tool. You can do any touch-up to the paint for any bleed-through that happened while painting as well. Then, let your entire sign dry.
Now, if you don't have a cutting machine, you can still make this project! Just print the picture of the letters and trace them onto your dry and painted sign. Fill in your pencil lines with the white paint then allow to dry.
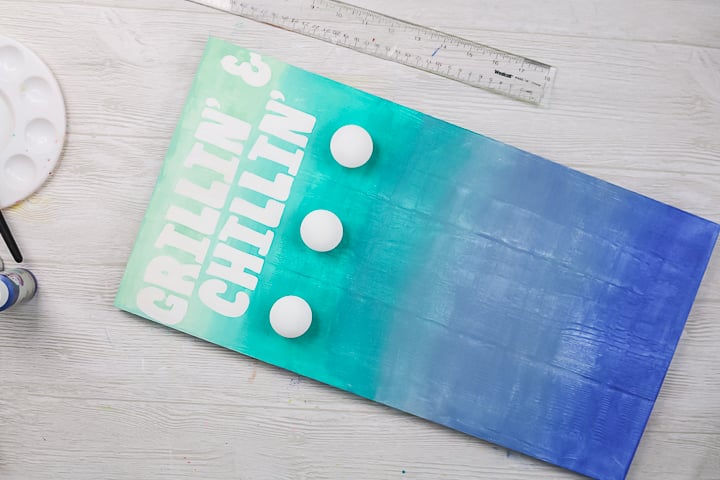
Once everything is dry, measure and mark for the location of your knobs.
Step 12: Add Knobs
Drill your holes, then add the knobs with your screws. All that is left is to add some sort of hanger to the back and hang up your tool organizer.
So, will you make some DIY hanging grill tool storage for your home this summer? Once the weather gets warm, there is nothing better than grilling and chilling.
You could also change the text at the top with your own words. So, be sure to personalize this project however you would like.
Then pick your colors and use the ombre paint technique with your Testors craft paints to make this even more special.
If you choose to give this one for Father's Day, I know that he will love this! Be sure to get a new set of BBQ tools to go along with it.
Now, pick your Testors craft paint colors and start on your own version of this cute grill organizer!
FAQs About DIY Hanging Grill Tools Storage
Here are the answers to some common questions I often get about this project.
Where Did You Get Your Wood Board?
I got my pallet sign (aka wood board) at the craft store. However, you could use a wood board that you have around your house or purchase one from the hardware store.
How Do I Pick My Paint Colors For The Ombre Technique?
When picking paint colors for the ombre technique, the sky is the limit! You can choose a particular color family or a rainbow of colors.
As you can see above, I chose to go with two shades of blues and two shades of greens. You could use this same method either with your favorite colors or with two colors that complement each other.
Now, if you are still struggling with picking colors, you could also go to Google Images, type in ”ombre color palette”, and see many examples of ombre color options.
What Cricut Machine Can I Use For This Project?
All of them! The Cricut Maker, Cricut Explore series, Cricut Joy, Cricut Joy Xtra, and Cricut Venture can all work for this project.
The only thing to keep in mind is that each Cricut machine is different regarding project size capabilities. So, depending on how big you are making your DIY hanging grill tools storage, you might need to resize your design.
Do You Have Other Options For The Letters Beside Vinyl?
Yes! If you don't have a Cricut machine or simply don't want to use vinyl, you do have other options.
In the tutorial, I mentioned stenciling, but if you don't want to go this route, below are a few more lettering ideas!
- Alphabet Stickers
- Wooden Letters
- Rub-On Transfer
- Writing your phrase by hand
How Did You Hang Your Wood Board?
I used a sawtooth hanger, but you could do a variety of things depending on the look you are going for and where you are hanging your wood board. Below are a few more wall-hanging options.
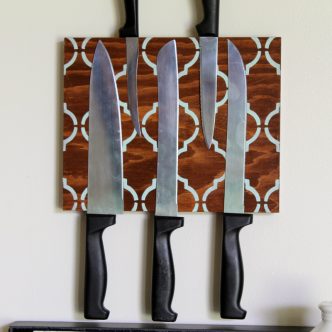
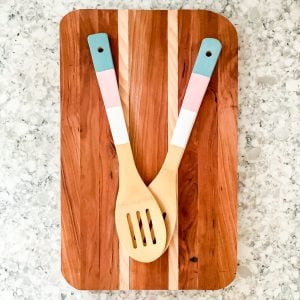
5 More Kitchen-Themed Projects
So, do you love this DIY hanging grill tools storage but are looking for even more kitchen projects? Then check out the projects below!


Super cute and fun project to get us at least thinking about enjoying warmer weather (it hasn’t really arrived here yet). Love the paint technique and a great way to use up scrap wood and other ‘odds and ends’ we may have laying around!